Project Title: RainBrella
Project Statement:
“This raincoat is made of 100% old and used umbrellas that I either found it in the trash or from lost and found. I wanted to emphasize on the positive aspect of plastic which is their ability of being waterproof. I wanted to use umbrellas to showcase that they do in fact have a second life and there really is no need to just toss them away after they are broken.”
Research:
For this project, I research mostly on how to put together a raincoat. Previously, I have learned how to used the sewing machine in a workshop with Marcela so I knew I could put together textiles but I wasn’t sure if plastics would work the same way. I’ve research a bit on plastic durability with sewing machines and it is actually possible to use a sewing machine with plastic. I first tested with some plastics bags that were ironed together and I stitched them together which worked well. I also looked up online of how to sew and make a raincoat out of plastics. I saw there were people making a raincoat out of Ikea bags which looked amazing. I wanted to recreate something like that but I didn’t want to just directly copy it so I tried to use other materials instead of Ikea bags. Then, I looked up how to make a raincoat out of plastic bags since we have an abundant amount of them in our classroom and they are great resources. I saw a Youtube video of a person using plastic bags and actually attaching each part of the coat with an iron! I was very intrigued by this technique and I never thought about it either. The only part that I think of when I use iron was just to make the plastic materials thicker but I forgot that it actually acts as a glue. So I thought about how I would actually go about attaching my pieces of umbrellas into a coat and I actually tried both of the methods and realized I liked the iron technique more. So I actually looked up and even easier way to put together a raincoat with plastics and saw this website that taught an easy way of cutting up the plastic material.
Ikea bag link: https://www.instructables.com/id/Make-an-Ikea-Raincoat/
Google link for plastic bags to raincoat: how to make a raincoat out of plastic bags
Easier way to cut and attach a raincoat: https://www.prettyprudent.com/2013/01/baby-kid/how-to-sew-a-raincoat/
Significance:
The significance of this project is to demonstrate that when a plastic product or wearable to broken or “useless” it does not necessarily mean it cannot have a second life. I wanted to reuse and give a second chance for umbrellas and also continue to let them serve their purpose as a rain/water blocker. More importantly, most household who own an iron or a sewing kit are able to do this as well. All they need to do is cut up the umbrella material and attach them. This project’s significance works both as an art statement and an actual feasible product.
Design and Production:
For the design of RainBrella, I used a total of four umbrellas to produce my product. One umbrella for the base which is the coat itself, two for two sleeves and another one for the hood. Now a days the umbrellas are more for personal use than to share with others therefore the material itself is less therefore the raincoat turned out to be quite small.
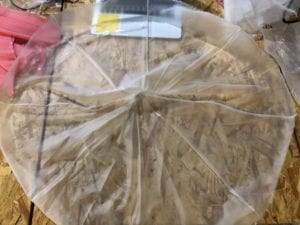
This image above the one of the umbrellas that were flatten out and I had to fold it in half in order to make the sleeves. I tried to follow the order that I saw on the website step by step.
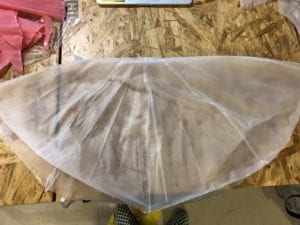
Then I began to measure each sleeve by using my own sleeves from my hoodie so I could try fitting it in myself (that’s was what I was going for initially).
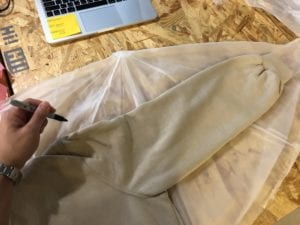
Then, I cut out the sleeves accordingly and used two umbrellas for it. Then I needed to make the body or the “coat” itself. I folded another umbrella that I had broken apart into a half and cut a half circle on top of it and cut a line in the middle of the half circle. So when I would open up this umbrella, the half circle becomes the hole for the neck and hoodie attachment and the line would break the umbrella apart so you could wear it like a raincoat instead of a poncho.
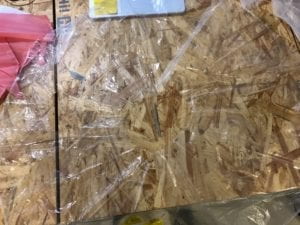
then, I began attaching the sleeves together by ironing them and it actually takes about less than one second to iron the umbrella materials together so I had to be pretty quick and precise. I had a video for it but the upload size is too large for this website so I won’t be able to show it. But what I did was that I used baking paper to put underneath and on top of my sleeves and used an iron to go around the sleeve edges to connect them and I did that for attaching them to the coat as well. Overall, the process went fairly fast and easy but the RainBrella turned out to be a little small.
Conclusions:
In conclusion, I really enjoyed doing this project because I felt like I was really making a statement by using old or broken umbrellas to re-create it into a raincoat. Though one thing that I would like to focus more on next time is the production of the raincoat. I had no prior experience with putting clothes together or even in fashion studies itself. Therefore it was actually quite a challenge for me when I heard we had to create a wearable for this project. Something that I would focus a bit more on would be measuring the actual size of the model and try to make it possible for everyone to wear. Moreover, the ironing skills were also a bit rough and I actually didn’t do a test try for the iron since I had a limited amount of umbrellas. There were a lot of things that I would focus on again if I had another try and more time to do it but I am happy with what I have created and through this process I really enjoyed the real process of “recycling” plastic waste.
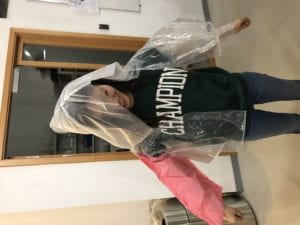
Here is a picture of my model wearing my project!
Leave a Reply