Documentation of Project 2:
For Project 1: New Bodies, Rainee, Alan, and I were inspired by sea life and the feelings of entrapment – creating a dress with a light-up spine made of wire overlaid on top that doubled as a tail as well. For our kinetic prototype, we wanted to follow the same theme, thus, we decided to create the foundation for moving fish scales at an attempt of biomimicry.
In order to better understand the movement of the scales, we decided to experiment with how to mimic it best using cardboard, paper/various fabrics, and fishing wire. We made different placements for where the wire would go and shapes for the base frame.
Here is the photo of the different prototypes we made:
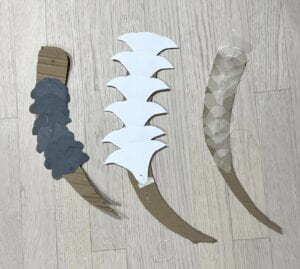
The middle is the initial draft, and the left photo is made from the fabric cutouts I made for the scales, which we were originally planning to use but realised that there were better materials that were more scale-like yet provided flexibility to showcase the motion, like the TPU on the right that Rainee and Alan used the laser cutter for.
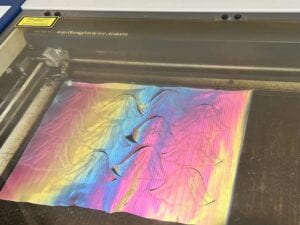
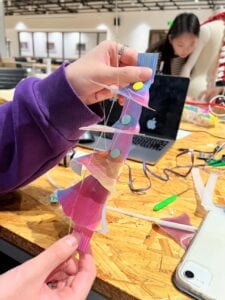
For the actual fabric, Professor Marcela provided us with a fabric that was what we were looking for. Here is the photo of the fabric and what the laser-cut scales look like:

For the movement of the scales themselves, we originally tried to use a joint mechanism. However, the joint was not smooth enough, so we pivoted to using buttons and the fabric strip as a connector.
For the sensor, we initially tried to use the DC motor; however, we could not figure out how to program the speed of the rotation and control it. We decided to use the stepper motor combined with the ultrasonic sensor, with a base that Alan 3D printed, because it is the most accurate and controllable, allowing the strings to go in the right direction.
Here is a video of the motor attached to the scales:
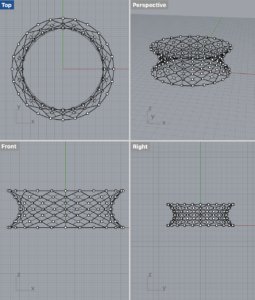
After I made the base for the dress, we needed to make the frame. To make the frame for each row of scales to put on the actual mannequin, we 3D printed sticks with holes lining them, and put screws in the top and bottom to secure the two parallel sticks together. Then, the sticks were tied together with the fishing wire looped through the remaining holes to allow a strip of fabric with the scales attached to stay rigid on the frame. Three pairs were connected and put as a sort of tail, using the same pulling mechanism as the fish scales but with no motor (therefore, the motion was manual).
Here is the final prototype:
Improvements for future consideration:
- Placement of the strings through the scales: It seems that the movement worked best when the strings were placed closer to, but not directly above, the base of the scale as compared to when it was placed at the tip of the scale. We should try to continue with that placement on a larger scale and see if it holds out.
- Motors: The stepper motor we used is really heavy – thus if we want multiple rows of scales, we may need to find a lighter alternative and experiment with fixing all the lines to a singular motor.
- Joints: The initial joint prototype did not work – thus we used buttons. The buttons are quite bulky/noticeable and do not blend well with the fabric at all. However, for the final project, we will explore different methods in order to have a more seamless connection.
- Teamwork and communication: I will improve on managing time better in order to be able to work on the group project and contribute more, as there were a lot of prior obligations during the times. I also feel that the group could do better in terms of communicating with me, as I felt like I was kept out of the loop for a majority of the time even when I was able to make it to meetings.
Overall, I look forward to seeing how this will progress into the final.