6.2 Object Oriented Programming

This week, we learned more about Object Oriented Programming (OOP) and particle systems as well as constructors. To be honest, I still struggle a lot with these concepts and fully understanding how they work. 

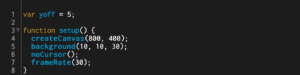
For this project, I used Moon’s original example code as the foundation of my code, and started to change different attributes such as color and shape. 

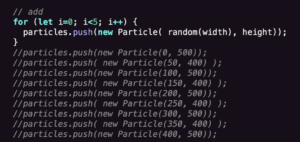
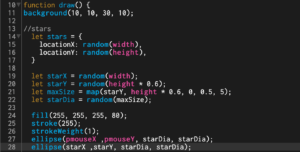
The first part of the code is adding the particles initially. To do this, we used a for() loop function and particles.push() to generate particles from a random point on the canvas. I originally had the code individually push the particles from each point on the canvas, but the process was made shorter with the new Particle() function. 

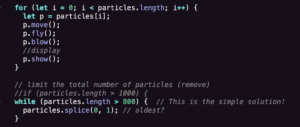
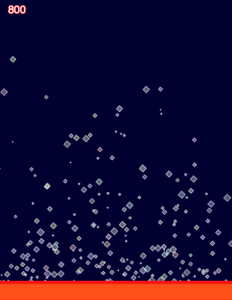
Next, we set the movement of the particles with the p.move(), p.fly(), and p.blow() functions. The p.show() function displays the actual particles. In order to limit the number of particles on the screen, we insert a while() function to set the cap at 800 particles, then pair it with the particles.splice() to make the oldest particles disappear first. 

Adding the mousePressed() function allows for user interaction. When the mouse is clicked, the existing particles on the screen will explode outwards towards the edges of the screen. 

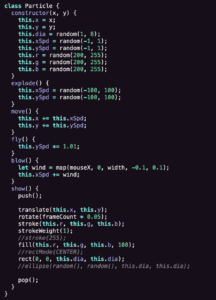
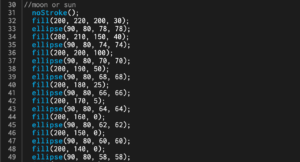
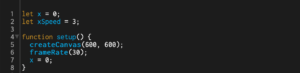
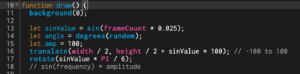
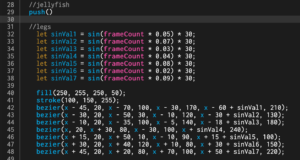
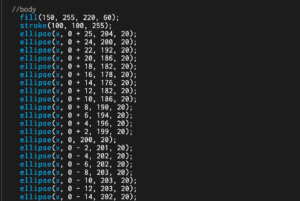
Now we set the constructor and particle class. This basically controls how the particles appear and move on the screen. By setting the values for this.x, this.y,  this.dia, this.xSpd, etc., we allow for the randomization of the appearance of the individual particles (not shown in my code screenshots, but I set the particles as squares). Setting the RGB values at restricted randoms will create diversity within the coloring of each particle. For the explode(), move(), fly(), and blow() functions, we assigned the this() attributes accordingly. Specifically for the blow() function, the map() function allows the particles to be “blown” towards the direction of the mouse on the screen. The show() just controls how it appears on the screen rather than the actual movement. 

I still don’t completely comprehend the code and each individual function, but I’m slowly working on it as I explore and put the pieces together. 

Here is my final code: ccl06-oop-yaz

Project 1: Generative Visuals

While my original plan was to do something along the lines of a particle system, I decided to create a generative landscape instead, utilizing Perlin Noise waves and adding vertexes to create the illusion of a mountain illuminated by waves. I was also partly inspired by the Northern Lights (aurora borealis), so I decided to put it into the project. 

The first part is the setup, which is the usual, except for an adjusted frameRate (for the later waves). I also added a noCursor() command for the stars, which I’ll go into below, and set a yoff variable, which will be used to control the y-dimensions of the wave.

Just adding the stars in was pretty doable, however, I struggled with getting the stars to stop showing up in the actual mountains (the code for which will be shown later). Originally, I had set up a constructor system, however, it didn’t produce the effect that I wanted (I also hadn’t fully grasped the concept), so I tried to set another for loop, basing it off of this example that I found. That still didn’t produce the blinking and fading effect that I wanted. I later (with Professor Moon’s help) added specific variables such as starX, starY, locationX, locationY, and starDia in order to set random locations for the stars and by using the map() function, it avoids the places that have other shapes already, like the mountains and the moon. The starDia variable controls the size of the stars appearing, randomizing them as well. I also implemented pmouseX and pmouseY to create trails of stars when the mouse is detected on the screen. 

To create an ombre effect on the moon, I simply started with the smallest initial size and added layers of ellipses expanding outwards and changed the color to fade from red to yellow and later white. 

This is the core and the most important of the entire generative piece: the waves. Both the mountains and the waves were actually controlled by the same function, which I found pretty interesting. After seeing the example of the Noise Wave on the p5.js examples website, I decided to see if I could layer it to create not just one visualized wave, but multiple in order to gain the effect of light moving. I also found another project similar to the wave effect I wanted, and used that for reference when creating my own. The xoff values set the x-dimensions for the wave, and for loops and var y = map(noise(xoff, yoff)) basically maps out where specifically the wave height and x-values will be at (curve attributes) and allows the waves to continuously run in a random manner. 

To be honest, the mountains were an accident. I decided to see what happened if I added more vertex points, and discovered that I had created a peak instead of just a simple baseline for the waves. I then added more vertex points to imitate the progression of a mountain’s outline. 

Overall, I learned a lot about the map() function from this project. In the future, I hope to add more to it and make an even more realistic depiction of an alternate dimension where light is seen in waves and flows through mountain scapes. Here are my final code and screenshots: 

Imaginary Creature

For the assignment “Imaginary Creature”, I decided to recreate the movement of a jellyfish. 

For the setup, I set x = 0, xSpeed = 3 (which will partly control how fast my jellyfish will move), and set the frameRate. 

In order to set the conditions of how the jellyfish will move and where it is located, I set sinValue = sin(frameCount * 0.025). I then set the angle as random so the position won’t be as easily “predicted”,  and translated the entire model by the width/2 and height/2 + sinValue * 100, which makes the jellyfish’s x-coordinates in the middle while allowing the y-coordinates to follow the sin curve. I also set the rotate factor by sinValue * PI/6, which will allow the jellyfish to tilt accordingly. 

However, how did I get it to stay on the screen and essentially “bounce” off the edges of the canvas? 

That’s where this if() conditional statement comes in. Originally, I had a really complicated “direction false === true” statement, so setting the x and xSpeed simplified it. The xSpeed controls the speed of the jellyfish at certain x-values, and the conditional statement also sets the bounds for how much the jellyfish can move. Because I wanted the jellyfish to bounce the other way when it hit the right or left of the screen, multiplying xSpeed by -1 makes it go the opposite direction. 

The bezier is the shape of the legs. By assigning different sinValues (sinVal1, sinVal2, sinVal3, etc.) and adding it to the x-coordinate of the second anchor point, I am able to basically randomize/mix the movement of each individual leg to mimic the movement of an actual jellyfish. 

This is only part of the body’s code, but to sum it up I achieved the 3D effect of the body/head of the jellyfish by layering lots of ellipses and changing the values accordingly to create the perfect curve. 

Here’s my final product: moving jellyfish