[Video Project] Visual Metaphor
Concept & Story
Concept & Story
In 2020, Chinese scientists have started building the Empire System (Chinese name: 帝俊系统) which was meant to help with the organization of cities and the simplification of people’s life. However, one security hole was neglected which turned the system uncontrollable when it was launched in 2045.
When Empire has gained enough power, it started building its own world — a world with machines. Just in 5 years, human all around the world are captured by the system, their memory are copied to a new machine, but their body are disposed.
In our video, we will follow the last human on this planet, from his escape to his failure. And the world to come, will not be the one in which human exists.
Inspiration
Keywords: Cyberpunk, Artificial Intelligence, Doomsday
With the rapid development of computer science and data science, along with Artificial Intelligence, people’s live is changing rapidly. However, without regulation and carefulness, the double-edged sword of technology can also lead to the life with high-tech but low-quality, which is precisely the definition of cyberpunk.
Ideation Process
In this short film, we want to express our thoughts of the fast-changing world, reminding people of the potential risk of technology, especially in the area of computer science and AI. To dramatize the consequences brought by the use of technology, we designed in the story that human’s carelessness have finally lead them to the end of their lives.
Why Topic
Living in this modern world, technology is something that has already permeated into our lives and becomes indispensable to everybody. In recent years, there is also heated attention on the concepts “Cyberpunk” and “Artificial Intelligence”. We chose this topic because we are interested in these concepts and it is related to everyone who uses technology.
Creation Process & Execution
Storyboard
Having a detailed storyboard really helped us a lot during our shooting process.
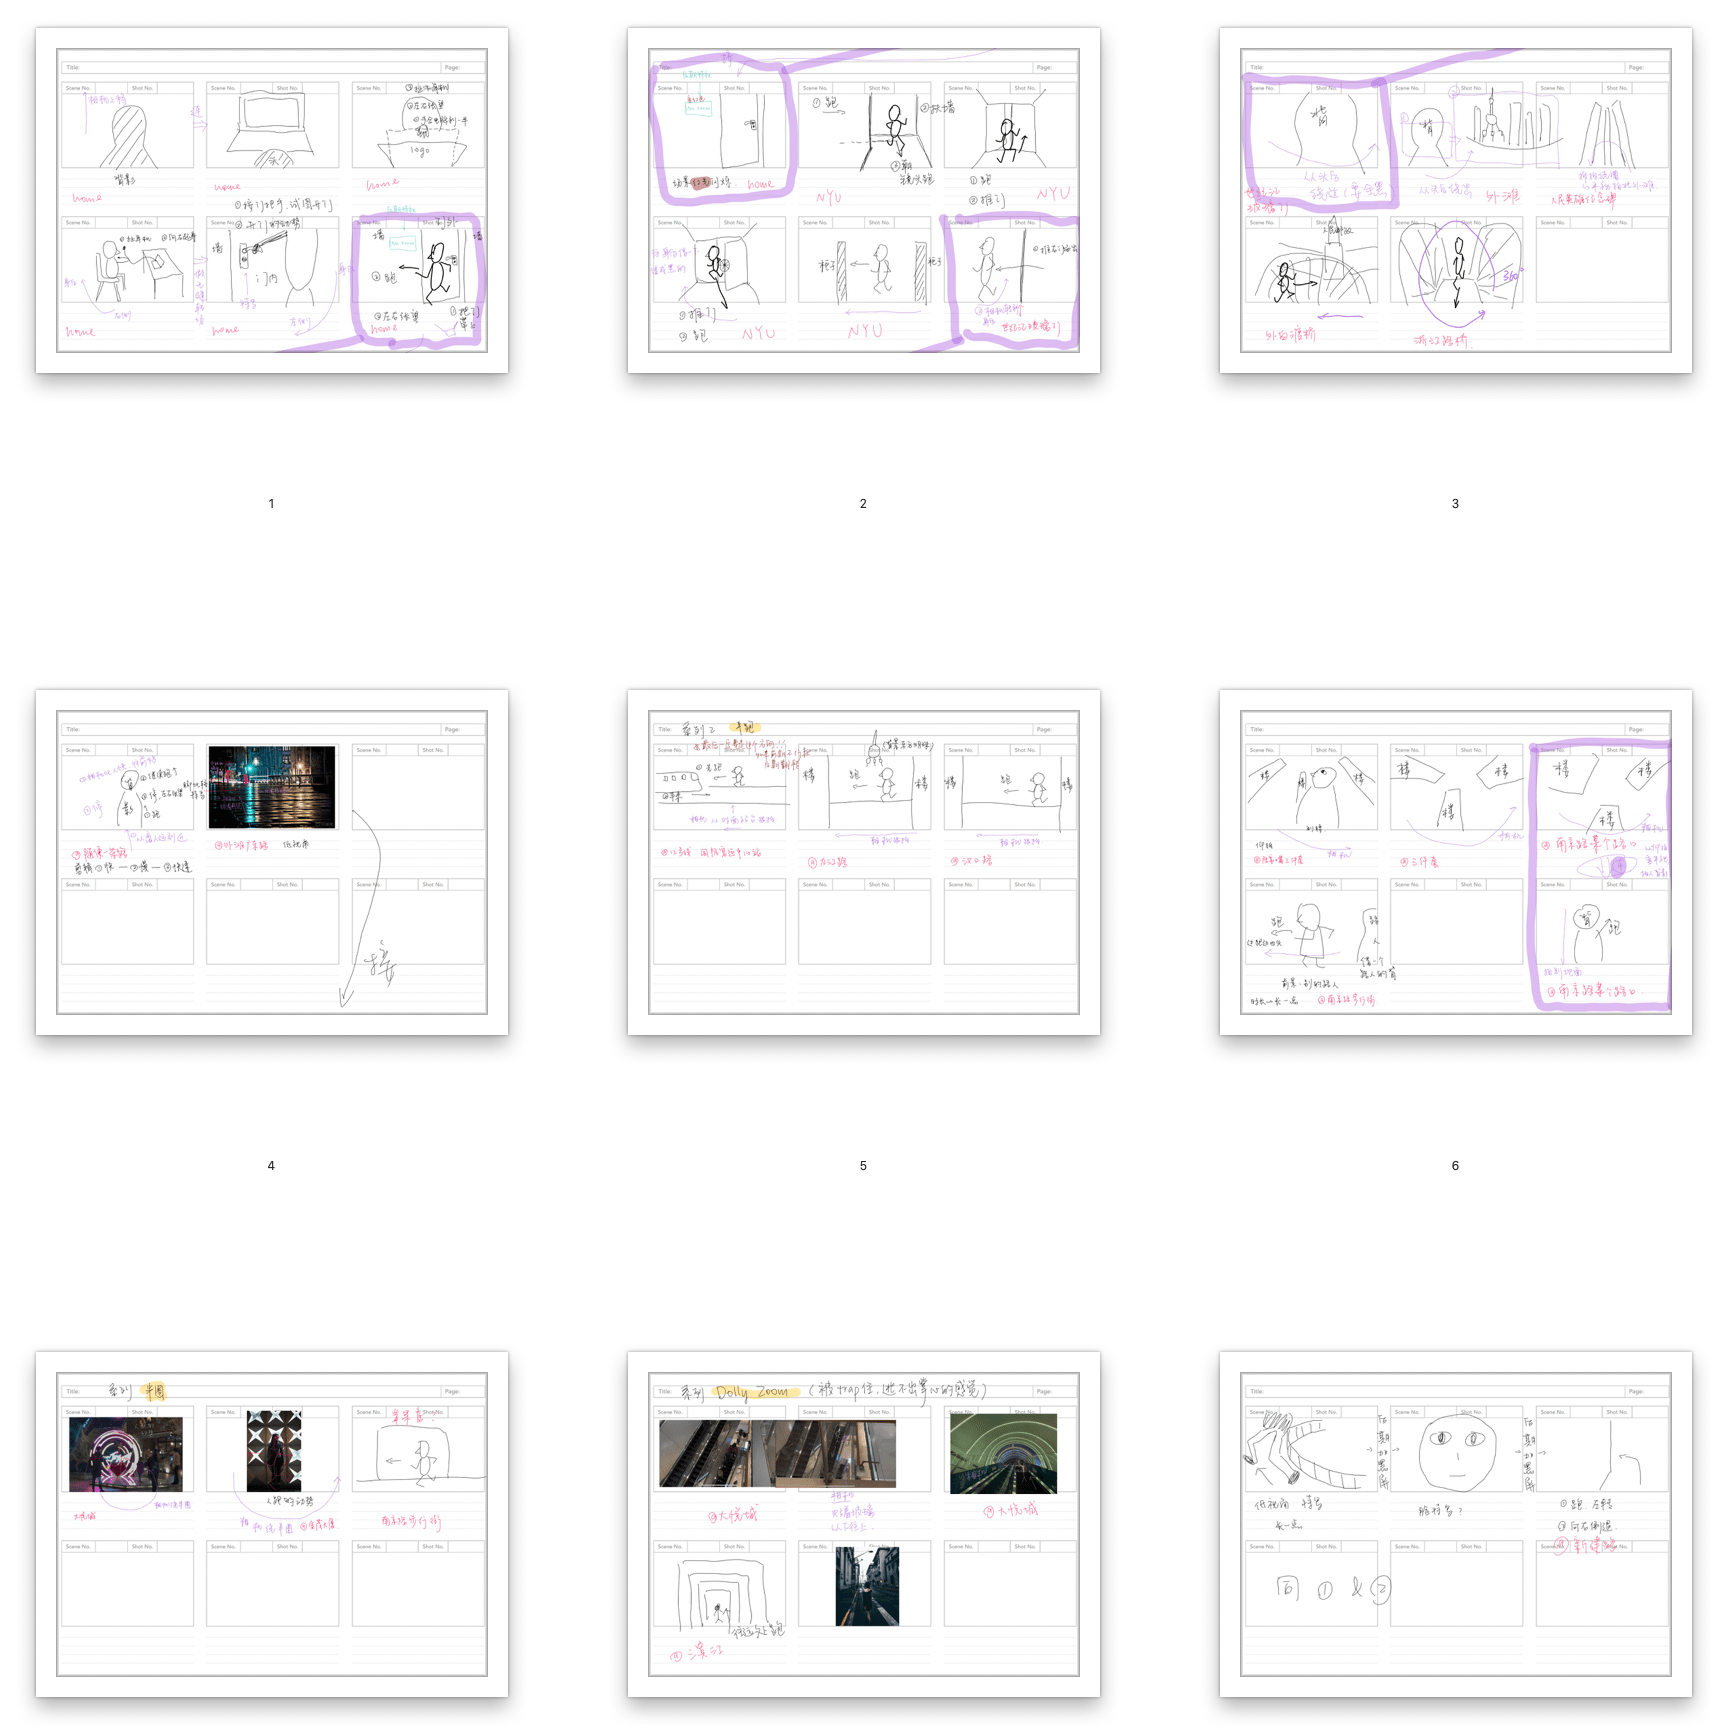
In Scene 1, we only had one clean desk along one clean white wall. This means we could only face the camera towards the wall because if we face the camera to other directions, the audience would see the messy environment. However, in the video, we wanted to fake that all four sides of the room have while walls. As a result, we needed to finish shooting all the shots with the same direction, then turned the desk around to shoot other shots with same other directions. In the process, storyboard was very helpful because we could easily see from the storyboard which shots had the same direction, and shoot them together.
Process
References
We first found some references videos to inspire us. We also set deadlines of finishing watching the videos for ourselves, so that we could discuss about the inspirations we got efficiently.

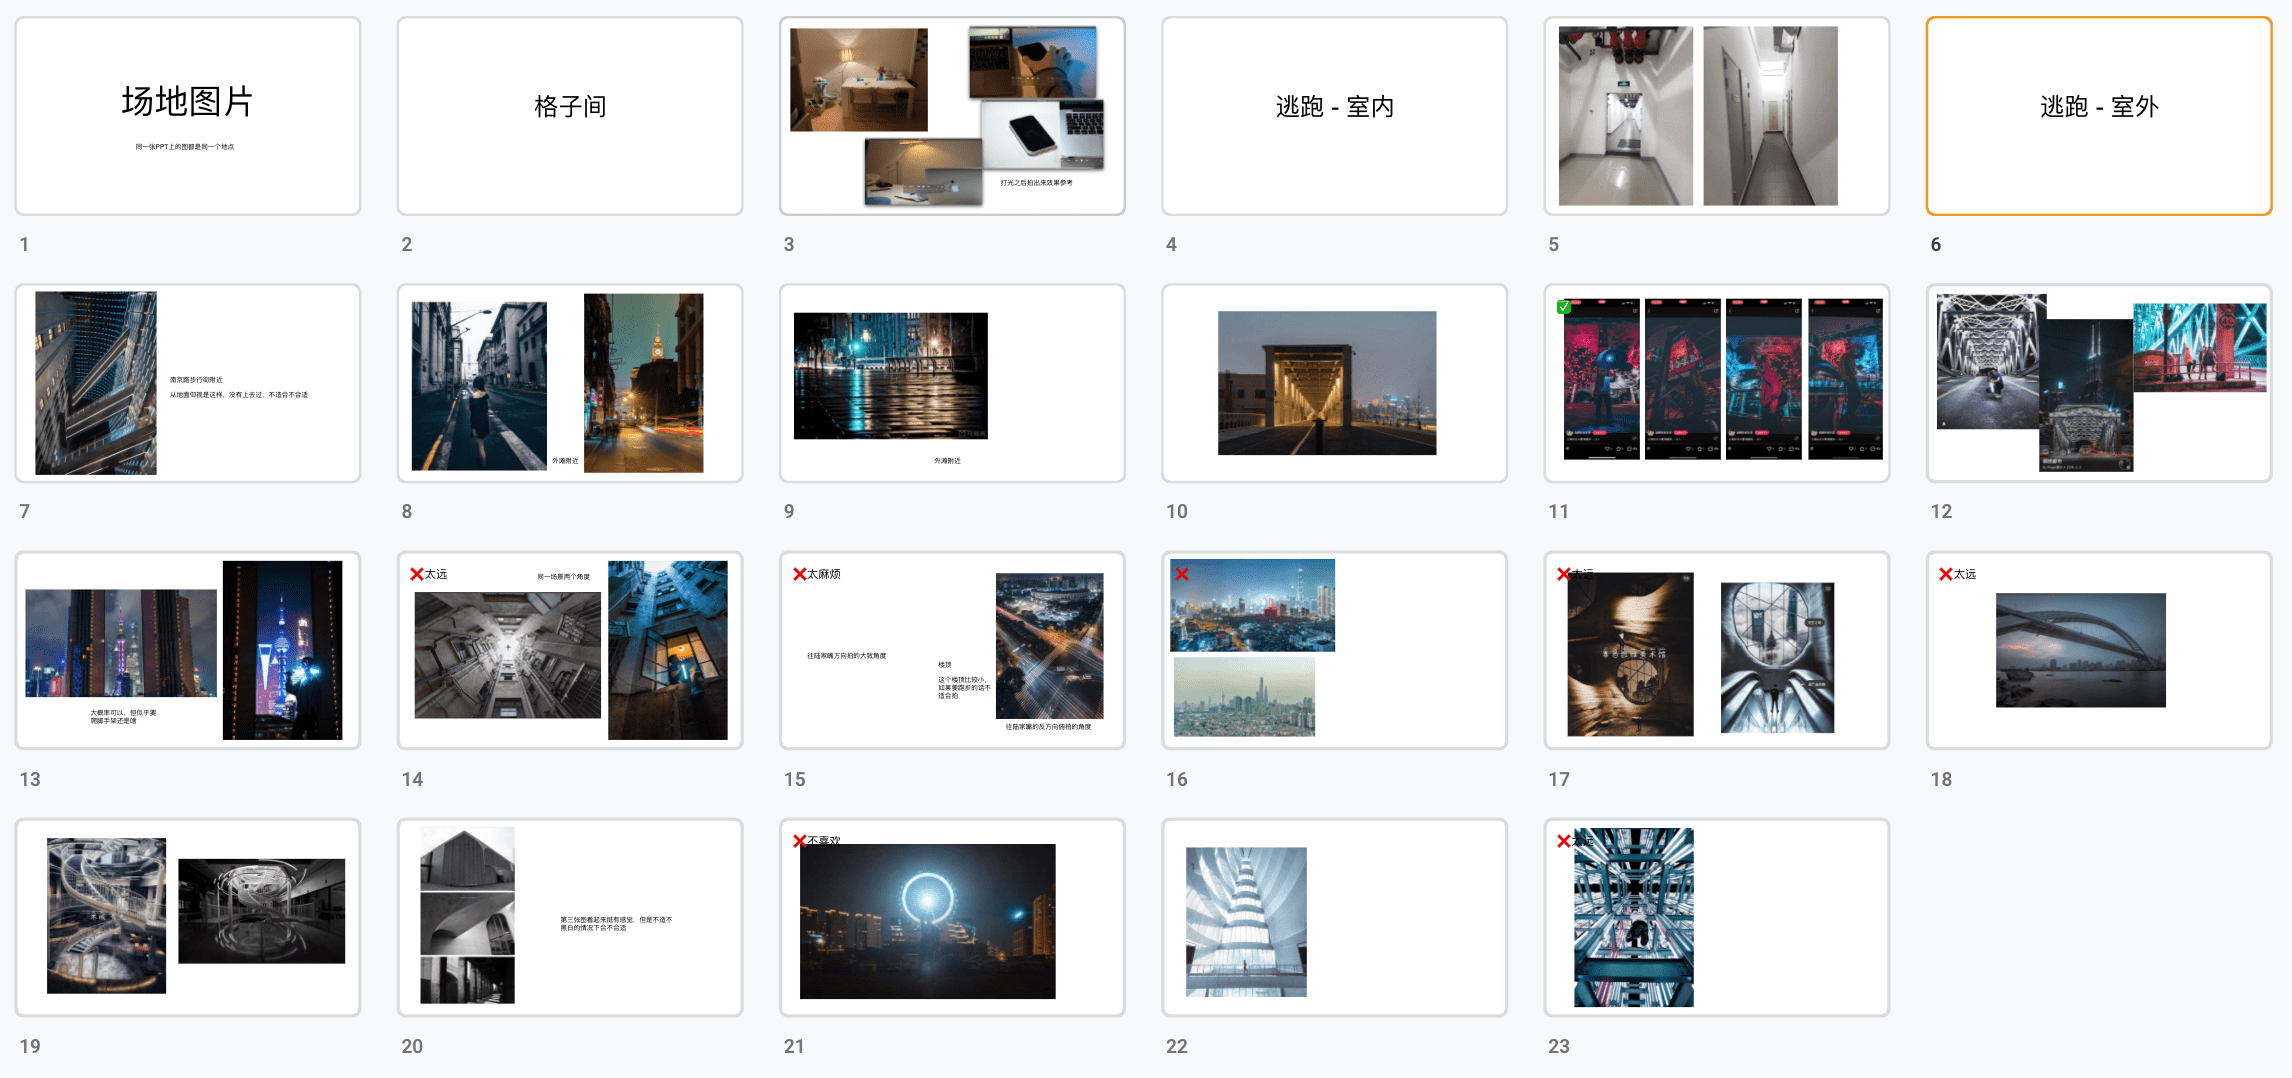
Location Scout
We found the shooting locations by asking friends, searching on Internet, and even going to some places by ourselves. After gathering enough information, we made a PPT, then went through the slides one by one to discuss about the feasibilities of each location. In the end, we confirmed several locations out of the various options.
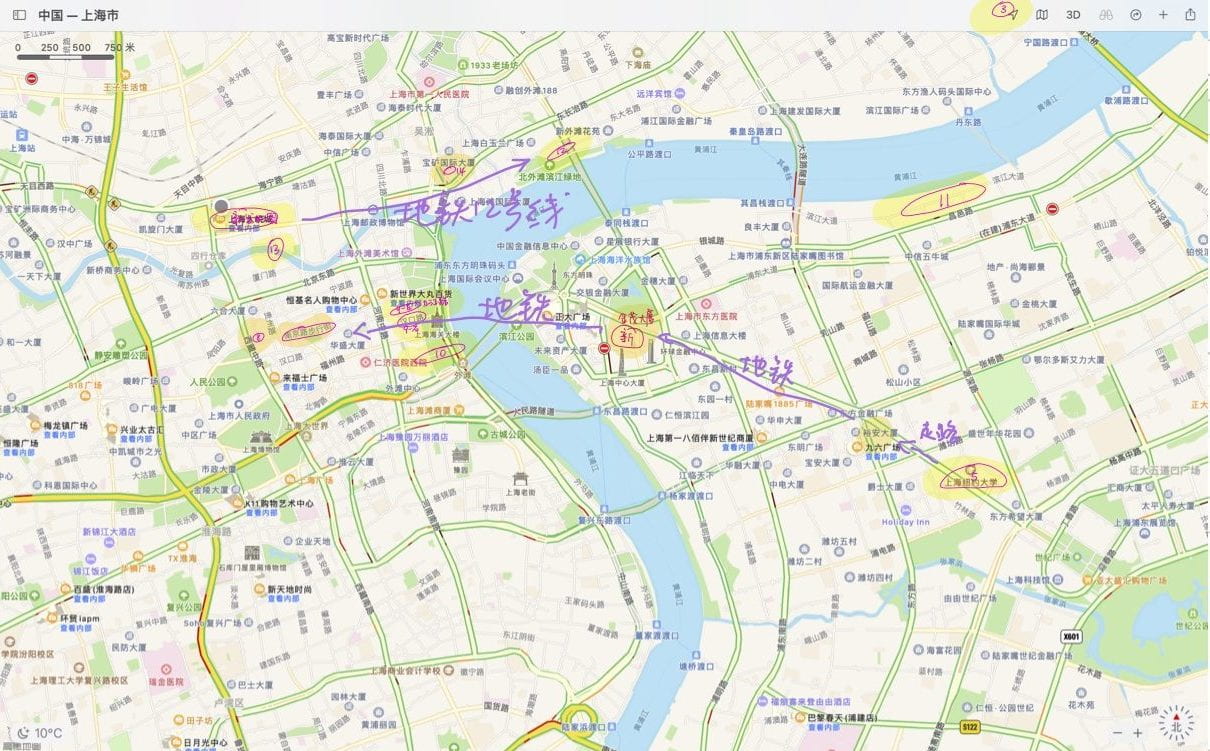
Planning – Route & Equipment List
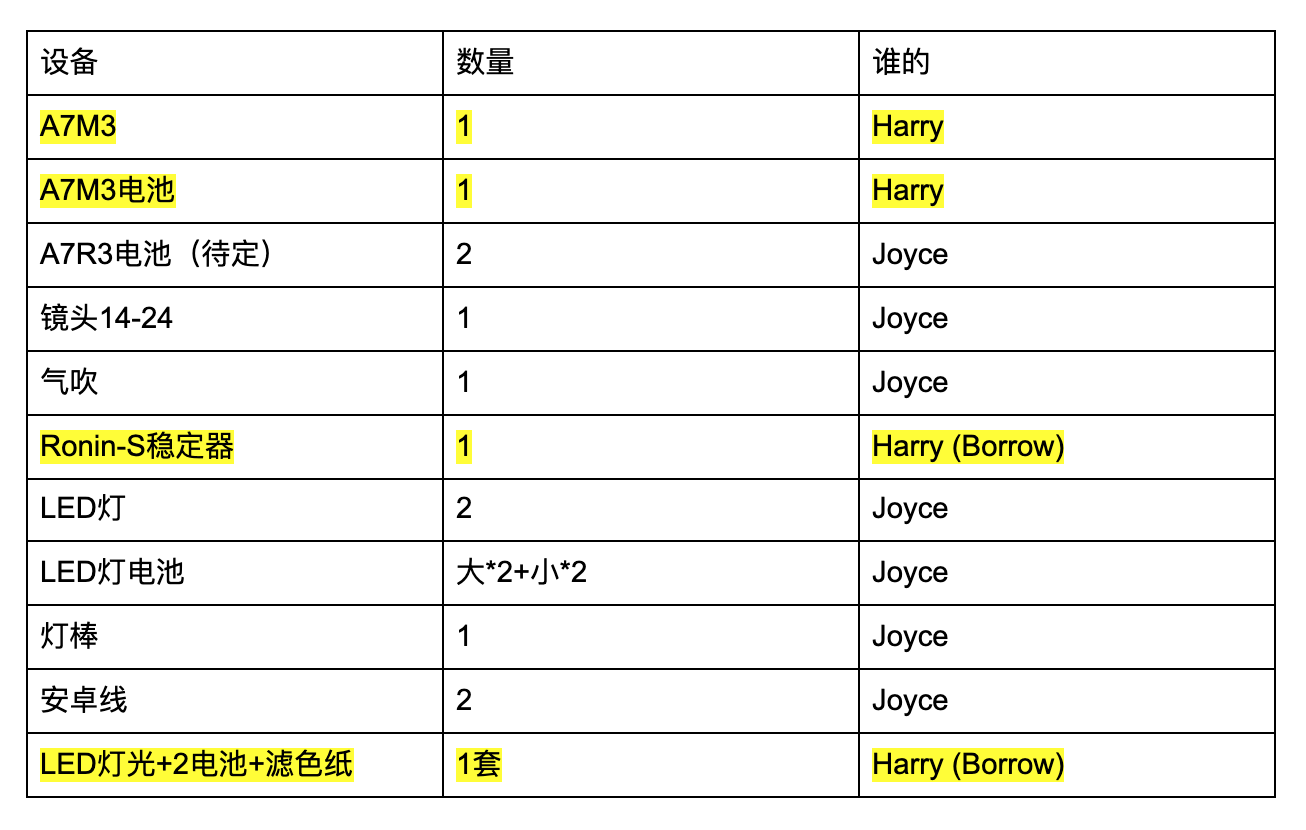
We planned about the route of shooting as well as the equipments we needed to bring.
After confirming the shooting locations, we marked out all the shooting locations on a map and planned a suitable and efficient route for the shooting process.
Besides, we also made an equipment list. Since most of our scenes were outdoor, based on our previous experience, it is very possible to forget something when transferring from one location to another. As we didn’t want to lost anything, we made the equipment list as detailed as possible — for example, how many batteries to bring or who was responsible for which equipment.
Lighting
In Scene 1 (which was shot indoor in my home) we wanted the character to be locked in a small room with nothing but a computer and pure white. To create the setting, we cleaned up a white desk in my home and moved everything apart to get a clean white wall as the background. We also used 3 to 4 LED lights to light up the environment. However, when we turned the lights brighter, very ugly shadows appeared, but when we turned the lights darker, the setting became so dark that it didn’t meet our expectation. As a result, we turned the lights brighter, then carefully adjusted the direction of the lights to make the shadows invisible to the camera.
Challenges
Time
At first, we scheduled two nights (from 6 p.m. to 10 p.m.) for the shooting. However in reality, we spent way more time on shooting than our expectation. I found that scheduling and time management was a big challenge for us because we always underestimate the time we needed to finish each shot. And since both Harry and I had other classes and other assignments to do, we made efforts to find out time periods that both of us were free for the shooting.
Security Guards
When shooting at the underground station, we tried to hide from the security guard to shoot. When we took out the camera and stabilizer at the station, the security guard saw us. Later when we started shooting, the guard was always walking around to watch us shoot.
When shooting at another location, the security saw us from the CCTV and just came towards us, asked us to leave the place because the site was the property of their company and we were not allowed to shoot anything. We tried to persuade him into allowing us to shoot, but we failed. In the end we just pretend we would leave and restarted shooting when the security left.
Post-production Process
Raw clips organization
I recently learned that file organization is actually an important part in the editing process, especially when you are doing team editing. In the past, I usually exported only the best take of each shot into Premier and started editing. However a better way is to export all original clips into Pr, then do the file organization in Pr, so that everyone in the editing team can trace back to see which exact take I am using for each shot and can easily replace one take with another take when adjustments are needed.
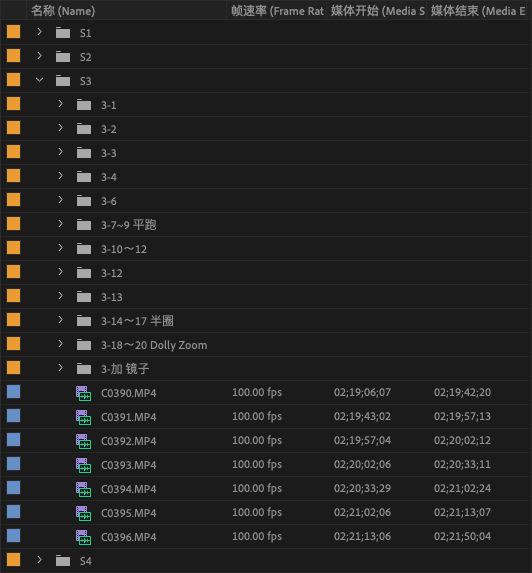
Speed adjustment
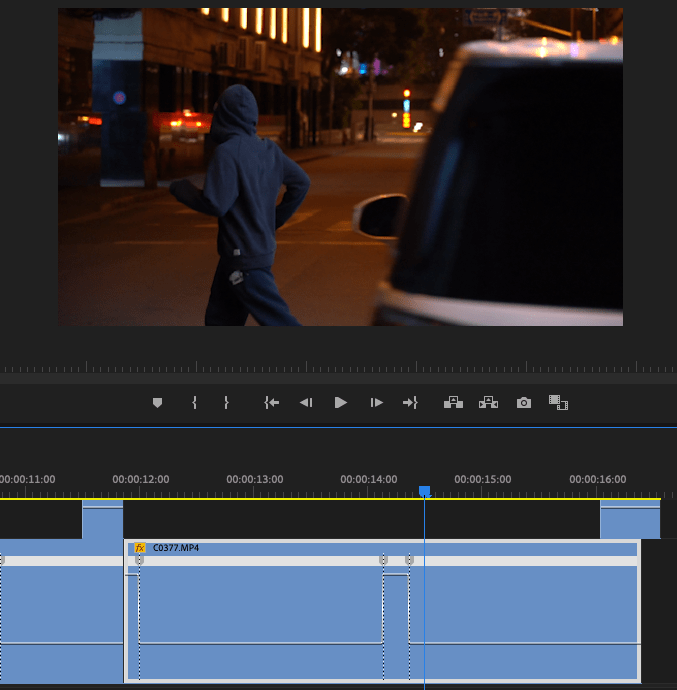
I applied speed adjustment to almost every clip to give the video a fluent flow. Basically, I increase the speed at the beginning and end of each clip, and lower the speed in the middle. The process seems easy, but the choice of which parts to lower speed and which parts to increase speed still requires intensional designs.
For example, in a couple of shots I wanted the character to run parallel to the camera. As the camera is running together with the actor, he is sometimes blocked by the buildings in the foreground while sometimes can be seen in the middle ground, so as to create a sense that the character has run a long way. When editing one of the shots, I increase the speed when the character is blocked by a building — then lower the speed when the character appeared — increased speed when he is blocked by a car — lower speed when he appeared again — finally increase speed when he is blocked by a building again.
Mask transition
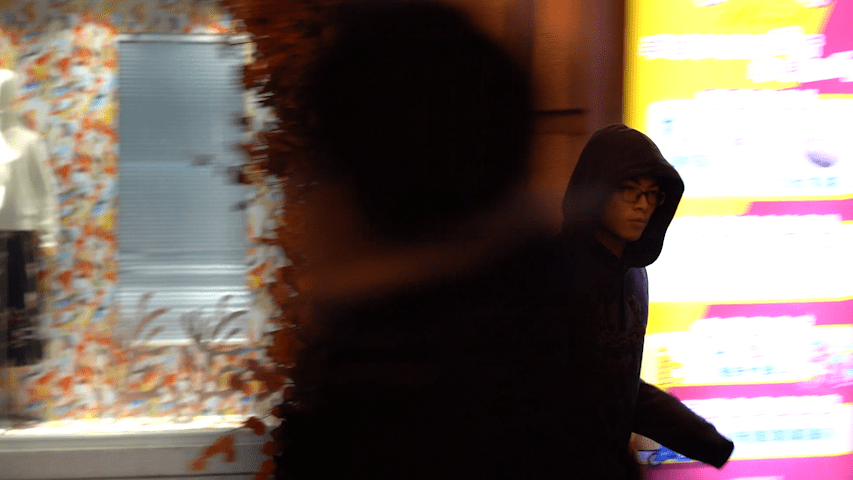
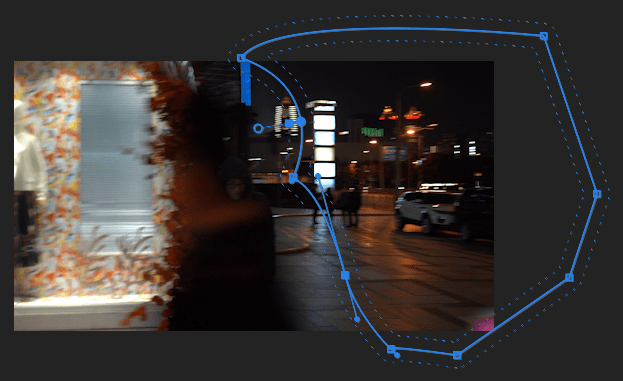
For some parts in the video, I used mask transitions. As the following picture shows, I hoped that when the shadow of a person has moved from left to right, a new clip appears at the left of this person. To achieve this, I made a mask at the left of the person, and applied key frame to ensure that the mask follows the shadow. In this way, the left part becomes transparent, so that when I add another video clip below the half-transparent clip, I got the result I wanted to have.
Color correction
I put a lot of efforts on doing the color adjustment. I first learned about the cyberpunk style, which basically uses the colors pink and cyan, then I started adjusting the color. However Premier Pro is not a professional color correction software, when I tried to adjust the hue of every color separately, Pr is not an effective tool. Therefore I turned to Lightroom for the stylistic color adjustment. I exported several frames as JPEG from Pr, imported them into Lightroom, used mostly the HSL function to do color adjustments, then exported my adjustments as LUTs (which can be understood as filters), and applied the LUTs back to the clips in Pr. In Pr, I made further adjustment to the light and shadow by referring to the Lumetri Scopes window to make sure that no clip is too bright or too dark.
Collaboration
Generally, I think Harry and I collaborated very well. We both have some basic knowledge about shooting a video, so when we were sharing ideas with each other, we communicated very fluently. I never needed to worry that when I was talking about a technique, he had no idea about it. He was also very supportive, sometimes when I was not sure about an idea, we discussed about it together and found out a good solution.
In terms of our work distribution, I did most of the pre-production part, and Harry did lots of post-production part. In pre-production, I did the location scout and most of the planning, while Harry did the scheduling and deadline setting. For storyboard, he drew the first and last scenes (the indoor scenes), I drew all the other scenes (the outdoor scenes). While I was responsible for combining and revising the storyboard, he wrote the narration. Then I did the rough cut and color correction, he did the sound editing and special effects.
Although we had a clear work distribution, we still had some conflicts during our collaboration. For example, since both of us had very strong ideas about our own works, we sometimes couldn’t decide on whose idea to follow because we both wanted to persuade the other to follow our own ideas. In the end, we usually both went a step back and built a consensus by using half of Harry’s idea and half of my idea.
Another example was that one day we found we had different definitions about “collaboration”. Although we had a clear work distribution, I thought we should still pay attention to each other’s work and feel free to help, while Harry thought we shouldn’t interrupt unless the other asked for help. I think both of our thoughts were not wrong, they were just different collaboration modes. However at first we were unhappy with each other because we didn’t spot the difference. Later we expressed our unhappiness to each other and realized the key conflict was the different expectations of our collaboration mode. In the end the conflict was solved.
Aesthetics & Results
Camera Language
We wanted the video to have very fluent transitions from one shot to another shot. Therefore from storyboard drawing to actual shooting, we focused a lot on camera movement. Basically we tried to make the objects in a following shot move the same direction as the objects in a previous shot. For example, when the camera is turning clock-wisely in the previous shot, we tried to make the following shot begin with camera turning clock-wisely. I believe the result was very effective because the turnings are very fluent, and for some shots you might not even realize the transition.
Color Adjustment
As early as in our inspiration stage, we wanted to pursue a cyberpunk style, because the “high tech, low life” concept of cyberpunk coincides with our storyline. Therefore in the color adjustment stage I tried to turn all warm colors in the clips into pink, and turn all cold colors into cyan. Despite that we didn’t have the equipment to shoot RAW videos, so the capability for color adjustment was limited, I was satisfied with the result because it had a clear style.
