Part 1: Media controller
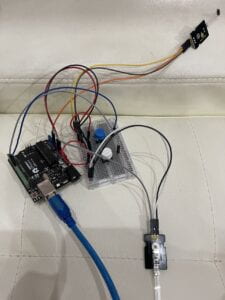
Since I have installed circuits for the final project already, I decided to continue using the force sensors to control the size and the rotation of the photo. I tried ‘scale’ in the beginning, but made the images very unclear. Therefore, I turned to LA Coco and she told me that I can first map the photo size based on the sensor value, and resize the image. I also tried to change the translation and the image location to make it work more properly.
However, because I called out the image respectively under the two if statements, when I pressed the fsr to make the image rotate, there was also another image on the background. To solve the problem, I booked an appointment with fellow Skye. She helped me change the order of the code, such as moving ‘imageMode(CENTER);’ to the setup.

Arduino code:
// IMA NYU Shanghai
// Interaction Lab
// For sending multiple values from Arduino to Processing
//
//int fsr1 = A0;
//int fsr2 = A5;
void setup() {
  Serial.begin(9600);
}

void loop() {
  // to send values to Processing assign the values you want to send
  //this is an example
  int fsr1 = analogRead(A0);
  int fsr2 = analogRead(A1);

  // send the values keeping this format
  Serial.print(fsr1);
  Serial.print(",");  // put comma between sensor values
  Serial.print(fsr2);
  //  Serial.print(",");  // put comma between sensor values
  //  Serial.print(sensor3);
  Serial.println(); // add linefeed after sending the last sensor value

  // too fast communication might cause some latency in Processing
  // this delay resolves the issue.
  delay(100);

  // end of example sending values
}
Processing code:
// IMA NYU Shanghai
// Interaction Lab
// For receiving multiple values from Arduino to Processing

/*
 * Based on the readStringUntil() example by Tom Igoe
 * https://processing.org/reference/libraries/serial/Serial_readStringUntil_.html
 */

import processing.serial.*;


int NUM_OF_VALUES_FROM_ARDUINO = 2;   /** YOU MUST CHANGE THIS ACCORDING TO YOUR PROJECT **/
int sensorValues[];      /** this array stores values from Arduino **/

float photeresize;

String myString = null;
Serial myPort;
PImage photo;


void setup() {
  background(0);
  photo = loadImage("pattern.png");
  size(600, 600);
  imageMode(CENTER);
  setupSerial();
}

void draw() {
  background(0);
  getSerialData();
  printArray(sensorValues);
  pushMatrix();
  translate(300, 300);

  if (sensorValues[0]>=500) {
    photeresize= map(sensorValues[0], 200, 1023, 0, 3);
    scale(photeresize);
  }
  if (sensorValues[1]>=500) {
    rotate(sensorValues[1]/25.0);
  }
  image(photo, 0, 0);
  popMatrix();
}

void setupSerial() {
  //printArray(Serial.list());
  myPort = new Serial(this, Serial.list()[2], 9600);
  // WARNING!
  // You will definitely get an error here.
  // Change the PORT_INDEX to 0 and try running it again.
  // And then, check the list of the ports,
  // find the port "/dev/cu.usbmodem----" or "/dev/tty.usbmodem----"
  // and replace PORT_INDEX above with the index number of the port.

  myPort.clear();
  // Throw out the first reading,
  // in case we started reading in the middle of a string from the sender.
  myString = myPort.readStringUntil( 10 );  // 10 = '\n'  Linefeed in ASCII
  myString = null;

  sensorValues = new int[NUM_OF_VALUES_FROM_ARDUINO];
}

void getSerialData() {
  while (myPort.available() > 0) {
    myString = myPort.readStringUntil( 10 ); // 10 = '\n'  Linefeed in ASCII
    if (myString != null) {
      String[] serialInArray = split(trim(myString), ",");
      if (serialInArray.length == NUM_OF_VALUES_FROM_ARDUINO) {
        for (int i=0; i<serialInArray.length; i++) {
          sensorValues[i] = int(serialInArray[i]);
        }
      }
    }
  }
}
Part 2: Musical Instrument
This part was difficult for me because I am not sure how to use the camera capture code. Luckily, Tuesday’s lecture taught about this. Hence, I referenced the PixelManipulation_example 11, the processing website, and class 23-25 slides to finish the code. Skye also helped me to debug.
import processing.video.*;
import processing.sound.*;

String[] cameras = Capture.list();
Capture cam;

TriOsc triOsc;
Env env;
float attackTime = 0.001;
float sustainTime = 0.004;
float sustainLevel = 0.3;
float releaseTime = 0.4;

float a, pa;
float s = 20;

void setup() {
  size(800, 800);
  cam = new Capture(this, 800, 800, cameras[0], 30);
  cam.start();
  // Create triangle wave
  triOsc = new TriOsc(this);
  // Create the envelope
  env = new Env(this);
}
void draw() {
  if (cam.available()) {
    cam.read();
  }
  color c = cam.get(width/2, height/2);
  a = green(c);
  float difference = abs(a-pa);
  sustainTime = map(difference,0,200,0.01,1);
  sustainTime = constrain(sustainTime, 0.01,1);

  for (int y = 0; y < width; y+=s) {
    for (int x = 0; x < height; x+=s) {
      float size = map(a, 0, 255, 5, 50);
      color all = cam.get(x, y);
      fill(all);
      noStroke();
      rect(x, y, size, size);
    }
  }
  //cam.updatePixels();

  if (difference > 5) {
    triOsc.play();
    triOsc.freq(map(a, 0, 255,0, 700));
    env.play(triOsc, attackTime, sustainTime, sustainLevel, releaseTime);
  }
  pa =a;
}
In this week’s recitation, I have learned more skills about processing images and how to use the capture function.
Leave a Reply