Working with Los Herederos and the Archive Urban Condors Collection

During the Spring 2021 semester, the RML project supported three interns from the NYU Moving Image Archiving and Preservation program. Each intern was hosted by an organization located on Long Island, which includes Suffolk, Nassau, Queens, and Kings counties. The following post is from Kayla Henry-Griffin, who interned at Los Herederos, a media arts non-profit organization.

For my Spring internship, I had the honor and opportunity to work with Los Herederos. Los Herederos (The Inheritors) is a media arts non-profit organization located in Queens committed to inheriting culture in the digital age and documenting the urban musical landscape in New York City. Los Herederos applies its mission by providing its production services to New York City immigrant communities and by preserving the myriad of cultures and traditions by making these documents accessible. In addition, Los Herederos have several ongoing projects which include the Sonicycle, Creative Masters, DREAMtellers Institute, and Inheritors (more information on these projects can be found at www.losherederos.org). Los Herederos also has an archive. I worked with the Urban Condors Collection, an archive of New York CIty’s Andean music scene.

I came into this internship with not much knowledge on Andean culture, let alone Andean music. However, I hoped to work with Los Herederos because I yearned to work with community archives that centered around BIPOC collections. What I have grown to understand about a collection like the Urban Condors Collection is that this collection is deeply rooted in the Andean community and communication with the community is essential to collect and preserve the heritage, whether that is preserving an Andean instrument, or preserving a born-digital MOV file of Inkarayku performing in a public space.

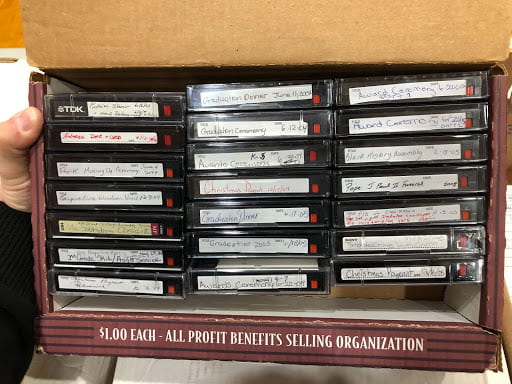
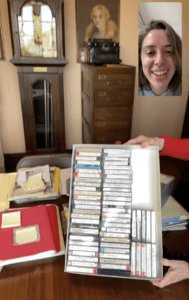
The Urban Condors Collection started as a graduate thesis research project conducted by Naomi Sturm during her time at Columbia University. Naomi studied Ethnomusicology during her time in Colombia and the Urban Condors Collection grew out of her thesis, “Urban Condors: Andean Music in NYC (1970-Present)”. Now, the Urban Condors Collection has a place within the non-profit organization. The collection represents the New York City Andean music scene, starting as early as the 1970s. The Urban Condors Collection includes the musical legacy of communities from Peru, Ecuador, Bolivia, Colombia, and Argentina. There are a few different  formats such as MiniDV tapes (a magnetic tape format), optical discs (both CDs and DVDs), and born-digital files (files originating from a digital form). The multiple formats has to do with the fact that the content has been shot and reformatted throughout the years. Many of the optical discs hold older content that originated from MiniDVs and VHS tapes. These transfer refers to the antiquity of the Andean music bands in New York City.

Optical and magnetic media items in the Los Herederos
Photo of the optical and magnetic media within the Urban Condors Collection.

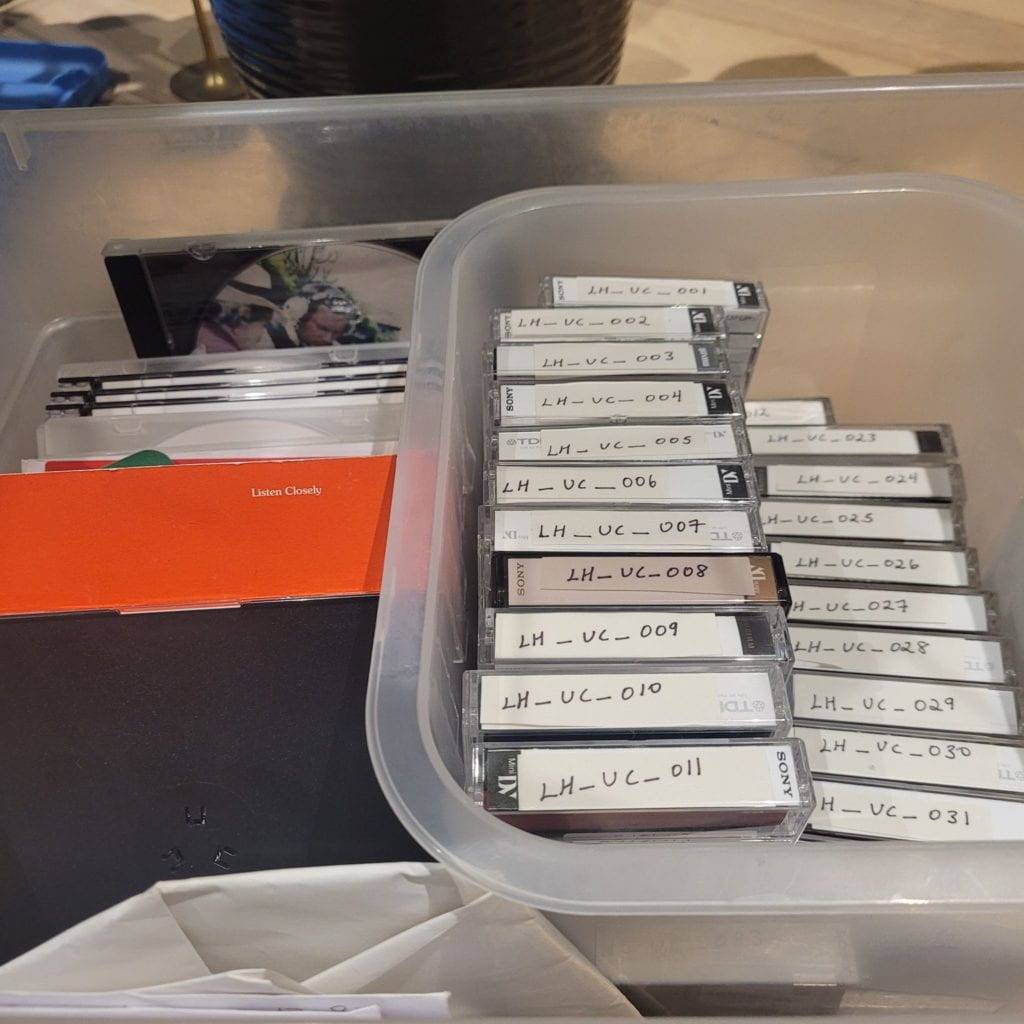
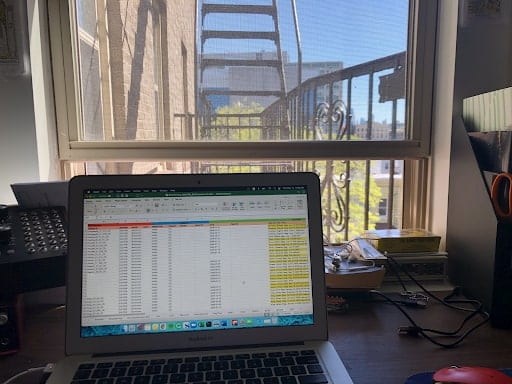
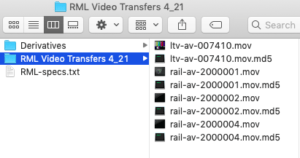
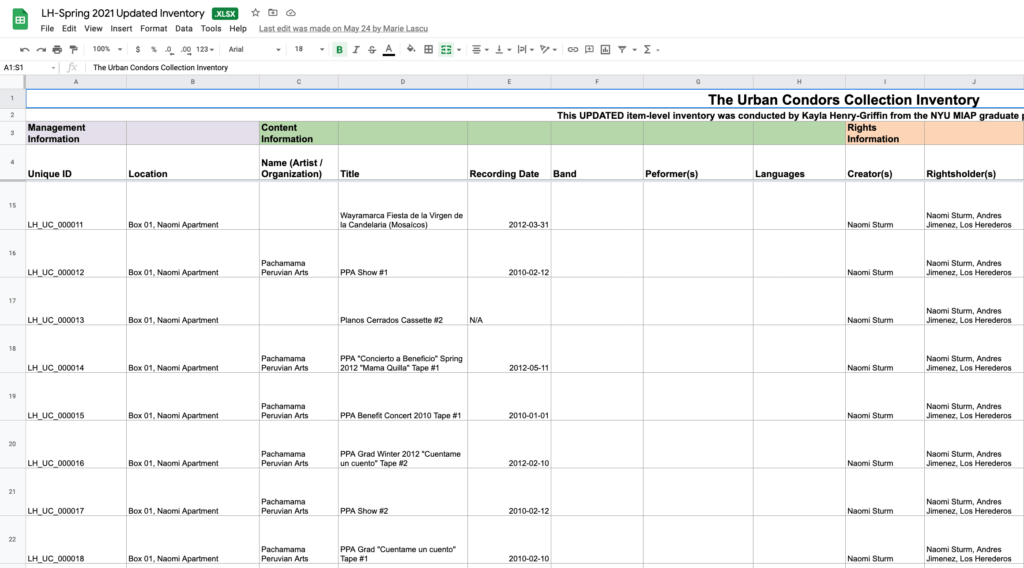
As a RML intern, my duties were to update the inventory spreadsheet and create a new collection assessment with new suggestions on how to preserve the Urban Condors Collection. The goal was to have a more updated and refined documentation of the collection for grant applications. Other than the name of the Andean band, dates and locations, I noticed that I could add more descriptive metadata fields that would refine the inventory. Descriptive metadata is considered descriptive information about specific content; an example of descriptive metadata is the recording date of the content. None of the labels or filenames described the band members or explained what the event was for. The process of updating the inventory led to a recognition and an awareness of how important it is to have a deep understanding of Andean music and Andean bands while cataloging such content. While adding new records to the inventory, I realized that I was lacking the knowledge of these Andean bands and I did not know anything about the band members. 

For instance, much of the Urban Condors Collection holds performances by the band, Inkarayku. I did have knowledge of the current members of Inkarayku, but my internship supervisor and Executive Director of Los Herederos Naomi Sturm reminded me that Inkarayku band members change throughout the years. When playing back the Inkarayku band content, I was aware that I did not know everyone who was performing. I went back to Naomi to schedule a meeting with her to go over the content I played back so that she could identify the band members performing. This was not only helpful, but this process was essential for me to get a better understanding of Inkarayku as a band; sometimes, there will be all the members in one event, and then the next event it would only be a few of the members performing. I found it was important to record the names of the band members not only for honoring the members, but also so that researchers of this collection could discover more about the band starting from its inception. I had multiple conversations with Naomi to discuss the fields I wanted to include in the inventory (fields such as band, performers, and language). I found the conversations also assisted me in finding other missing metadata in the inventory.

Image of inventory spreadsheet.
Screenshot of Los Herederos’ Urban Condors Collection Inventory Spreadsheet.

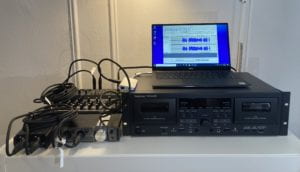
With this new knowledge, I was able to add more descriptive metadata that would be beneficial for those who wanted to access content in the Urban Condors Collection. I also found that having records of the band members would be honoring those band members who have contributed to Andean music in New York City. I was able to playback the optical discs and born-digital files in the collection. Playing back the content reminded me of the complexity of the process. My computer, like most computers these days, does not have a CD/DVD player, so getting access to an external player was necessary. Even with an external player, I had to be careful of what type I was using. Utilizing an external Mac DVD player, my computer was unable to read most optical discs in the collection. By switching the player to a more universal external player, I was able to play back all the optical discs in the collection. By playing back content, I was able to see the complexity of the band and I became more aware of the significance of these bands to Andean culture and music.

At the end of my internship, I reflected on all the work I had done. I completed a collection assessment and updated the inventory for the Urban Condors Collection. I also had the chance to create a key and a guide on how to add to the inventory as well. The key acts as a legend or a list of definitions that also holds controlled vocabularies that should be used for cataloging. But what I found to be equally important and essential is what knowledge I received from working with the collection and Los Herederos.

Working with a community archive has its challenges (such as the lack of equipment available to use), but there is so much rich information and content within the archive. The Urban Condors Collection holds very important performances from bands like Inkarayku and Wayra Marca and without documentation of these performances, future bands and artists may not see the brilliance of the Andean music scene in New York City.

What I took from this experience is a new philosophy and perspective on how to care for small archives, especially when they are primarily non-European cultures. I believe before working with a collection, I will commit to doing preliminary research on not only the collection, but the culture that it holds. I find that this practice not only expands my knowledge, but also this practice allows me to fully take care of the collection. I believe there is more to preservation than prioritizing the technical aspects of preservation. What is essential is the access to the collection, as well as knowing more about the culture and history of the collection. Without that knowledge, there will be missing pieces and the collection will not get the proper care and preservation that is needed.

Inside Looking Out: On a Remote Internship During the COVID-19 Pandemic

During the Spring 2021 semester, the RML project supported three interns from the NYU Moving Image Archiving and Preservation program. Each intern was hosted by an organization located on Long Island, which includes Suffolk, Nassau, Queens, and Kings counties. The following post is from Lindsay Miller, who interned at the Roman Catholic Diocese of Brooklyn.

Archival work can be daunting, yet rewarding. We pay attention to details, document everything thoroughly, and circle back on past work. At the heart of all of this work are the collections we care for.  We inspect audiovisual materials, inventory them, house them, and store them safely for future access.  Archival workflows are tailored to the specifics of these collections, so much so that the addition or subtraction of any one step could drastically shift how things are done. So what happens when an archivist starts working somewhere where they can’t physically access the collection? They have to get creative.  

Lindsay Miller's window-facing workspace.
My workspace for Spring 2021.

Working remotely during the COVID-19 pandemic has taught me a lot about creativity, patience, and the importance of asking questions. When I first started my internship at the R.C. Diocese of Brooklyn Archives in January, I was wary of remote work. I spent my first semester of graduate school in North Carolina, wholly isolated from the rest of my classmates and professors in New York City. It was really easy for me to hide behind a computer screen and fake confidence when in reality I had a million questions, especially during those first few months of the semester.  I especially missed those opportunities to form relationships with others, whether it be my mentors, peers, or even the collections I was working to inventory.  

What attracted me most to this internship was the opportunity to work with a diverse collection of audiovisual materials. Most of these items had never been inventoried or inspected before, so I was also excited to be the one to help establish the fundamental pieces. Prior to my start date, my supervisor shared a basic inventory template for me to work with but I quickly realized it didn’t quite capture all of the metadata we needed. Over time, I began to make changes to this template based on new information I learned in my Collection Management class and my conversations with others. I also picked up new tricks in Excel, such as creating drop-down lists for standardized data such as media formats. 

Let me take you through my workflow. My internship supervisor and I decided early on that our best option was to work with photographs of the materials, as I could then have a better understanding of an item’s housing and general condition. Every few weeks, he would upload a large batch of photos into a shared Google Drive and make sure they were separated by collection. From there, I would begin to organize the photos into separate folders dedicated to each item in the collection. Once a collection was fully organized, I would then move on to inventorying the items in an Excel spreadsheet. Every week I would upload a new version of the spreadsheet to Google Drive. Doing so allowed me to track my progress and provided the archive with additional copies.

Populating this inventory was not without its challenges, especially since I was relying on the photos my supervisor took. At times photos turned out blurry or only showed a small section of the tape. If I couldn’t quite make out what a label said, I would zoom in as far as possible and try to make sense of the squiggle on screen. Those materials that gave me the most trouble were highlighted so that I could come back later with fresh eyes. When I was finished documenting all of my observations, I would then type up an email to my supervisor with any remaining questions and a list of additional photos I needed.  

A box of tapes on-site at RC Diocese Archives.
*Hacker Voice* Enhance… (Photo used with permission from R.C. Diocese of Brooklyn)

On the surface, this seemed like a pretty simple workflow, but it took quite a while for me to get into the swing of things. It was also a far cry from how I thought I would be spending my time. To me, the process seemed almost too straightforward and incredibly impersonal. The hundreds of first and last names I worked to document remained just that – names. Who are these people? What are they doing on this VHS tape? How did this tape get here? It’s fun to contemplate these questions, but I wasn’t able to consult other collection papers to learn more information because they — like the tapes — had not yet been digitized. I found this disconnect to be frustrating and wondered if my work was suffering as a result. I got better at writing down my questions and made a point to email my supervisor every week with updates on my progress.  I shared numerous drafts of my inventory with others and even shared my screen in class, a task I have always found to be quite daunting. 

The pandemic may have taken away our ability to work together in person, but it did not take away our generosity. I am in constant awe of my colleagues’ patience and kindness despite these bizarre times. No question ever felt too small or stupid to be asked. My work greatly benefited from this and while I wish I’d known this sooner, I’m happy to have these new collaborative skills and trust in my colleagues as I continue to navigate graduate school and this new field.

I completed my internship at the Diocese back in May. My final deliverables consisted of the following: an inventory for 10 audiovisual collections, an inventory key, a brief collection assessment, and a summary that describes everything I completed over the course of the semester and where it could be found within Google Drive. Looking back, I am honestly amazed that I was able to accomplish so much given the current circumstances. And there is still much work to be done! The benefit of documenting my progress means that someone (maybe even another intern *wink wink*) can easily pick up where I have left off. And hey, maybe by then there will be some sense of normalcy in the world and they can truly explore the collections for themselves.

Working together to remediate mold on films at Queens Museum

A reel of film with mold, before remediation.
Film before performing mold remediation.
Reel of film that has been given mold remediation treatment.
Film after performing mold remediation.


During the Spring 2021 semester, the RML project supported three interns from the NYU Moving Image Archiving and Preservation program. Each intern was hosted by an organization located on Long Island, which includes Suffolk, Nassau, Queens, and Kings counties. The following post is from Ana Salas, who interned at Queens Museum.

For my first internship, I worked at Queens Museum as part of the Regional Media Legacies Project (RML) which is supported by the Robert David Lion Gardiner Foundation. My duties primarily included updating the inventory and performing inspections. To update the inventory, I opened every box and pulled out every item; this way I could ensure the item was still in the same location and appeared to be in good condition. 

While updating the inventory I found films with mold on them. 

I had learned about mold in my Conservation and Preservation class during my first semester in the Moving Image Archiving and Preservation program at NYU. We learned how mold can be detrimental and dangerous to both the items it affects and the archivists handling them. I had seen mold on media before on my grandma’s old photographs she kept stored in a cardboard box in her room. She lives in Costa Rica, where houses don’t typically have temperature control or humidity control. Due to the constant high relative humidity levels, the inactive mold on my grandma’s old photographs became active. Everything I had ever learned and seen about mold on media was terrifying. 

Naturally, I was startled when I saw the mold on the films at Queens Museum, and I wondered where and for how long the films had been stored. The labels dated the films between 1960 and 1965, so I assume in the sixty or so years it took for the films to come into my life, they probably lived in a moist basement with little ventilation. I knew the films needed to be cleaned right away before the mold could continue to grow and spread. But out of everything I had learned and seen about mold, I never learned how to get rid of it. I quickly began my research to find a solution. 

From my initial research, I learned that most sources will tell you to seek professional help when faced with mold, but they don’t really tell you what is considered a ‘professional’ or where to look for one. I assumed a film lab would be considered a ‘professional,’ but I quickly realized film labs and mold remediation can be expensive. I tried to look for organizations in the area that were willing to do the mold remediation at a lower cost. My internship supervisor thought if we could find an organization that could use this mold remediation to create documentation or teach a workshop, then in exchange, we wouldn’t have to pay full price for the procedure. 

I performed a series of Google searches but came up with nothing. I knew what I was looking for was probably out there and I simply wasn’t performing the right queries. I also knew this was a matter of urgency and I couldn’t spend more time rearranging the same set of words to see which combination would yield the results I wanted.  

Ana Salas inspects a film in preparation for mold remediation.
Performing mold remediation.

As a first-year student, my list of contacts is short but I decided to reach out for advice to those I know. Asking for help isn’t always my first response, not because I don’t think I need it but because I don’t want to bother people with questions that may seem like they have a simple answer. In my short time in the AV preservation field, I have realized that sometimes asking for help first is much more productive than trying to find the solution yourself. The term audiovisual encompasses a myriad of different formats, all with oddly specific needs; that means we can’t all be experts at everything! Everyone has different strengths and expertise they collect through their time as AV archivists and that means we often have to rely on each other to complete tasks and overcome challenges. 

I first consulted with the RML project team, specifically Claire Fox, who suggested I contact Rob Anen. Rob is also an RML fellow who has done mold remediation in the past. Without hesitation I drafted an email to Rob, attached pictures of the monstrous mold to the email and waited for a response.

As I mentioned above, everything I had learned so far about mold had been bad, so naturally, I expected a negative response. Anything from “there is nothing we can do”, to “the only solution is paying hundreds of dollars per film to salvage them”. Rob responded promptly, and to my surprise, he was incredibly calm about the situation. He said everything was going to be okay and said we just needed some nice weather and isopropyl alcohol; his confidence in being able to help with the issue let me know everything was going to be okay. 

We set up a time to do the mold remediation in April. When the time came we brought the film inspection bench outside, and together we cleaned the mold off the films. The materials required to perform a mold remediation include 99% isopropyl alcohol, and a non-abrasive cloth.  The process is simple, the film reel is mounted onto the film rewind, and the cloth is soaked in the isopropyl alcohol and used to clean the film as it is being wound onto the take-up reel. 

It’s important to note here that a specialist should always be consulted before attempting to remediate mold on your own since you may be dealing with different variables, such as different types of mold or a damaged film. Additionally, safety measures need to be taken such as performing the remediation in a well ventilated area, and wearing latex gloves and a face covering, preferably an N95 mask. After performing the mold remediation the films need to be housed in clean film reels and most importantly, the films must be stored in a temperature controlled environment to prevent the risk of mold in the future. 

After just a couple of emails, I had found a viable and relatively simple solution to what before seemed like a challenge I was not going to overcome. I learned not just how to remediate mold myself, but how important asking for help and being open to collaborating with others is. Of course, the answer won’t always be as straightforward, sometimes there may not even be an answer. As archivists, we face different challenges daily, some harder than others, but we are also part of a community that is not just ready, but eager to help each other in overcoming those challenges.

Getting Started With Digitization

Over the months we’ve been working with our Regional Media Legacies (RML) site partners, the RML team has encountered more analog audiovisual collections than digital collections. Analog materials include formats like 16mm films, VHS videotapes, and compact audio cassettes, all representing content created many years ago (in one case, one film from as early as 1915!). This focus on analog materials is unsurprising for us: our site partners are primarily historical societies with collections from the mid to late 20th century or earlier, and digital media wasn’t widely adopted until the mid-2000s. 

What this means is that all of our site partners have a shared need to migrate their analog collection materials to a digital media format to ensure their longevity. This migration practice is widely known as “digitization,” and is a common archival practice where transfers of analog materials are made in a digital format that can be preserved, accessed, and distributed. Digitization is just one part of the larger process of collection management (how we handle collections, preserve them, and prepare them for access), and works in tandem with digital preservation planning.

The RML Audio Digitization Kit.
The RML Audio Digitization Kit, which is used to create digital transfers of analog archival materials.

Digitization is important for analog media because of two primary concerns: obsolescence and degradation. Obsolescence refers to the fact that legacy audiovisual formats (16mm film, VHS videotape, etc.) always need a media player (like a projector or a VCR) in order to view the content they carry. As time passes and players are phased out of production, they become increasingly difficult to find, making it difficult to play back their associated media formats. Degradation refers to the fact that media items are vulnerable to chemical degradation, particularly when they’re not kept in climate-controlled environments.

Creating digital copies of analog media stabilizes content and brings audiovisual collections into the present. While some films and tapes may still be able to be played back on their original media, the creation of a digital transfers ensures that contemporary media players (like Quicktime, VLC Media Player, or Windows Media Player) can play back the content, and additionally provides a copy that can be made accessible to researchers or other community members without damaging the original films and tapes.

While the incentive to digitize audiovisual collection is clear, the process of digitization itself can be complex and expensive. A lack of budget is a major deterrent to any long-term preservation project, and the expense of digitization is a major barrier to preserving audiovisual collections. It makes sense that digitization is expensive: the process of digitization is a specialized skill, particularly when making high-quality digital copies (often referred to as “masters” or “preservation copies”) that can be used to make a variety of access copies (lower-quality or compressed digital files, including files that can be uploaded to platforms like YouTube).

While limited budgets are a major barrier, there are a few key strategies that can be used to ensure that your digitization project reaches its full potential, and can even pave the way for future digitization projects. Below, we outline a few strategies we’ve learned directly from working with our RML partners.

Tip #1: Create a storage plan before digitization

A NAS (Network Attached Storage) device.
An example of a Network Attached Storage (NAS) device, one storage solution pursued by an RML partners.

One of the most important parts of audiovisual archiving is providing a secure, long-term storage environment where digital files are kept. At a minimum, this means that you have a designated storage device (like an external hard drive or an internal hard drive of a reliable workstation) that is monitored by a staff member or volunteer where your new digital files can be saved. Even still, we encourage our RML site partners to strive for preservation-level storage.

Preservation-level digital storage at a minimum requires redundant backups; in other words, for every digital file you have, create one additional (ideally, two additional copies) of that file. At least one of these copies should additionally be stored in a different geographic location than the others, so if one set of files is damaged or lost, at least one copy will be safe. Files and the storage media (hard drives, etc.) they’re saved on can be impacted by a number of potential risks: natural disasters, device failure, and human error are three examples. With redundant backups and geographic separation, the potential for irreparable loss is immensely reduced.

Archival digitization is a necessary, if expensive, investment in your archival collections. Without creating a storage plan ahead of the digitization process, stewards risk losing access to that investment. Consulting with archivists to create a storage plan ahead of digitization is a key component of collections care, and is an important step toward preserving your collections for generations to come.

Tip #2: Choose a sample set of materials to digitize.

A screen grab of a collection assessment occurring over FaceTime
RML Fellow Claire Fox takes a look at a potential sample set of compact audio cassette tapes for digitization.

It’s logical to want to digitize a collection in its entirety. For some of our RML partners who only have 5-10 videotapes, this is a real possibility! Other RML partners have over 100, or even upwards of 10,000 items to digitize. These numbers represent a significant expense, and it can be discouraging to know how or where to begin.

One way to begin the process of digitizing your collections in a lower-cost way is to choose a sample set of materials that you’d like to prioritize for digitization. While choosing fewer items to digitize is an obvious way to reduce costs (fewer items = lower cost), it has incidental benefits, particularly for organizations that are just getting started with digitizing their collections. 

First, the process of prioritizing particular items allows stewards to re-familiarize themselves with their audiovisual collections. While it may be time-consuming, the process of going through your collections item by item could allow you to remove items that you may not want to digitize (like commercial titles or duplicate copies), which will reduce your digitization budget in the long run. 

Second, sending out a small set of items to digitize allows stewards to understand the digitization process on a smaller scale, both in terms of the steps involved and in terms of the deliverables received. Stewards may find that they have preferred methods of shipping or delivering items to vendors, or realize that timelines need to be articulated in a specific way. Stewards may also realize that they may or may not need access copies made for a variety of reasons. Might you need access copies that can be uploaded to YouTube, or that could be projected onto a large screen, or maybe you’re capable of creating your own access copies? Sometimes you won’t know what you need until you go through the digitization process for the first time, and doing so with fewer items means you learn those experiential lessons on a smaller scale.

Tip #3: Choose a vendor you trust.

Screen grab of a Finder window, showing deliverables from a trusted vendor.
This screen grab of a Finder window shows example file-based deliverables prepared by a trusted digitization vendor.

Our third and final tip is to work with a vendor that you trust. The RML project currently oversees some small digitization projects with vendors we have vetted and trust, and some of our site partners have their own vendors they trust to perform strong digitization work. Generally speaking, if collection stewards are embarking on digitization projects on their own, we highly recommend calling potential vendors, asking questions, requesting estimates, and talking about timelines. Taking some time to get to know your vendor provides you with an opportunity to put your mind at ease as you send your archival materials off-site. Ideally, stewards are sending materials to vendors that they trust to handle historical materials with care and respect!

Even if you’re working on small-scale or one-time projects, digitization is often a years-long process. With that in mind, it’s important to work toward finding a vendor you can see yourself working with for years to come. Vendors can be great allies as stewards work toward preserving archival collections, particularly as obsolescence and degradation become more severe issues over the coming years, and as technology continues to evolve. Even still, technology aside, RML always recommends finding people to work with who you trust, whether they’re digitization vendors, conservators, volunteer catalogers, interns, or otherwise. Building trust in archival work is key to long-term preservation, and no technology is more important than that.