Inspiration
My inspiration comes from this YouTube channel which was famous for its work on a technique called patterned plywood.
Basically, how this work is you would take some plywood, cut them into strips at different angles (usually 90,30,60,45 degrees), then form and glue them into a log which has the pattern of your choice on both ends, which then you can chop into pieces that has that pattern in the face.

As shown here, with proper technique, the edge of plywood which is usually considered less attractive and usually concealed in lots of projects actually becomes the main star of the show. This seemed a really fun topic to explore to me because I’m all about trash to treasure, so I decided to do it. I originally saw this technique about two years ago but didn’t have the project opportunity to actually do it so it has been in my bucket list since then.It’s nice to finally get to try it out.
Material selection
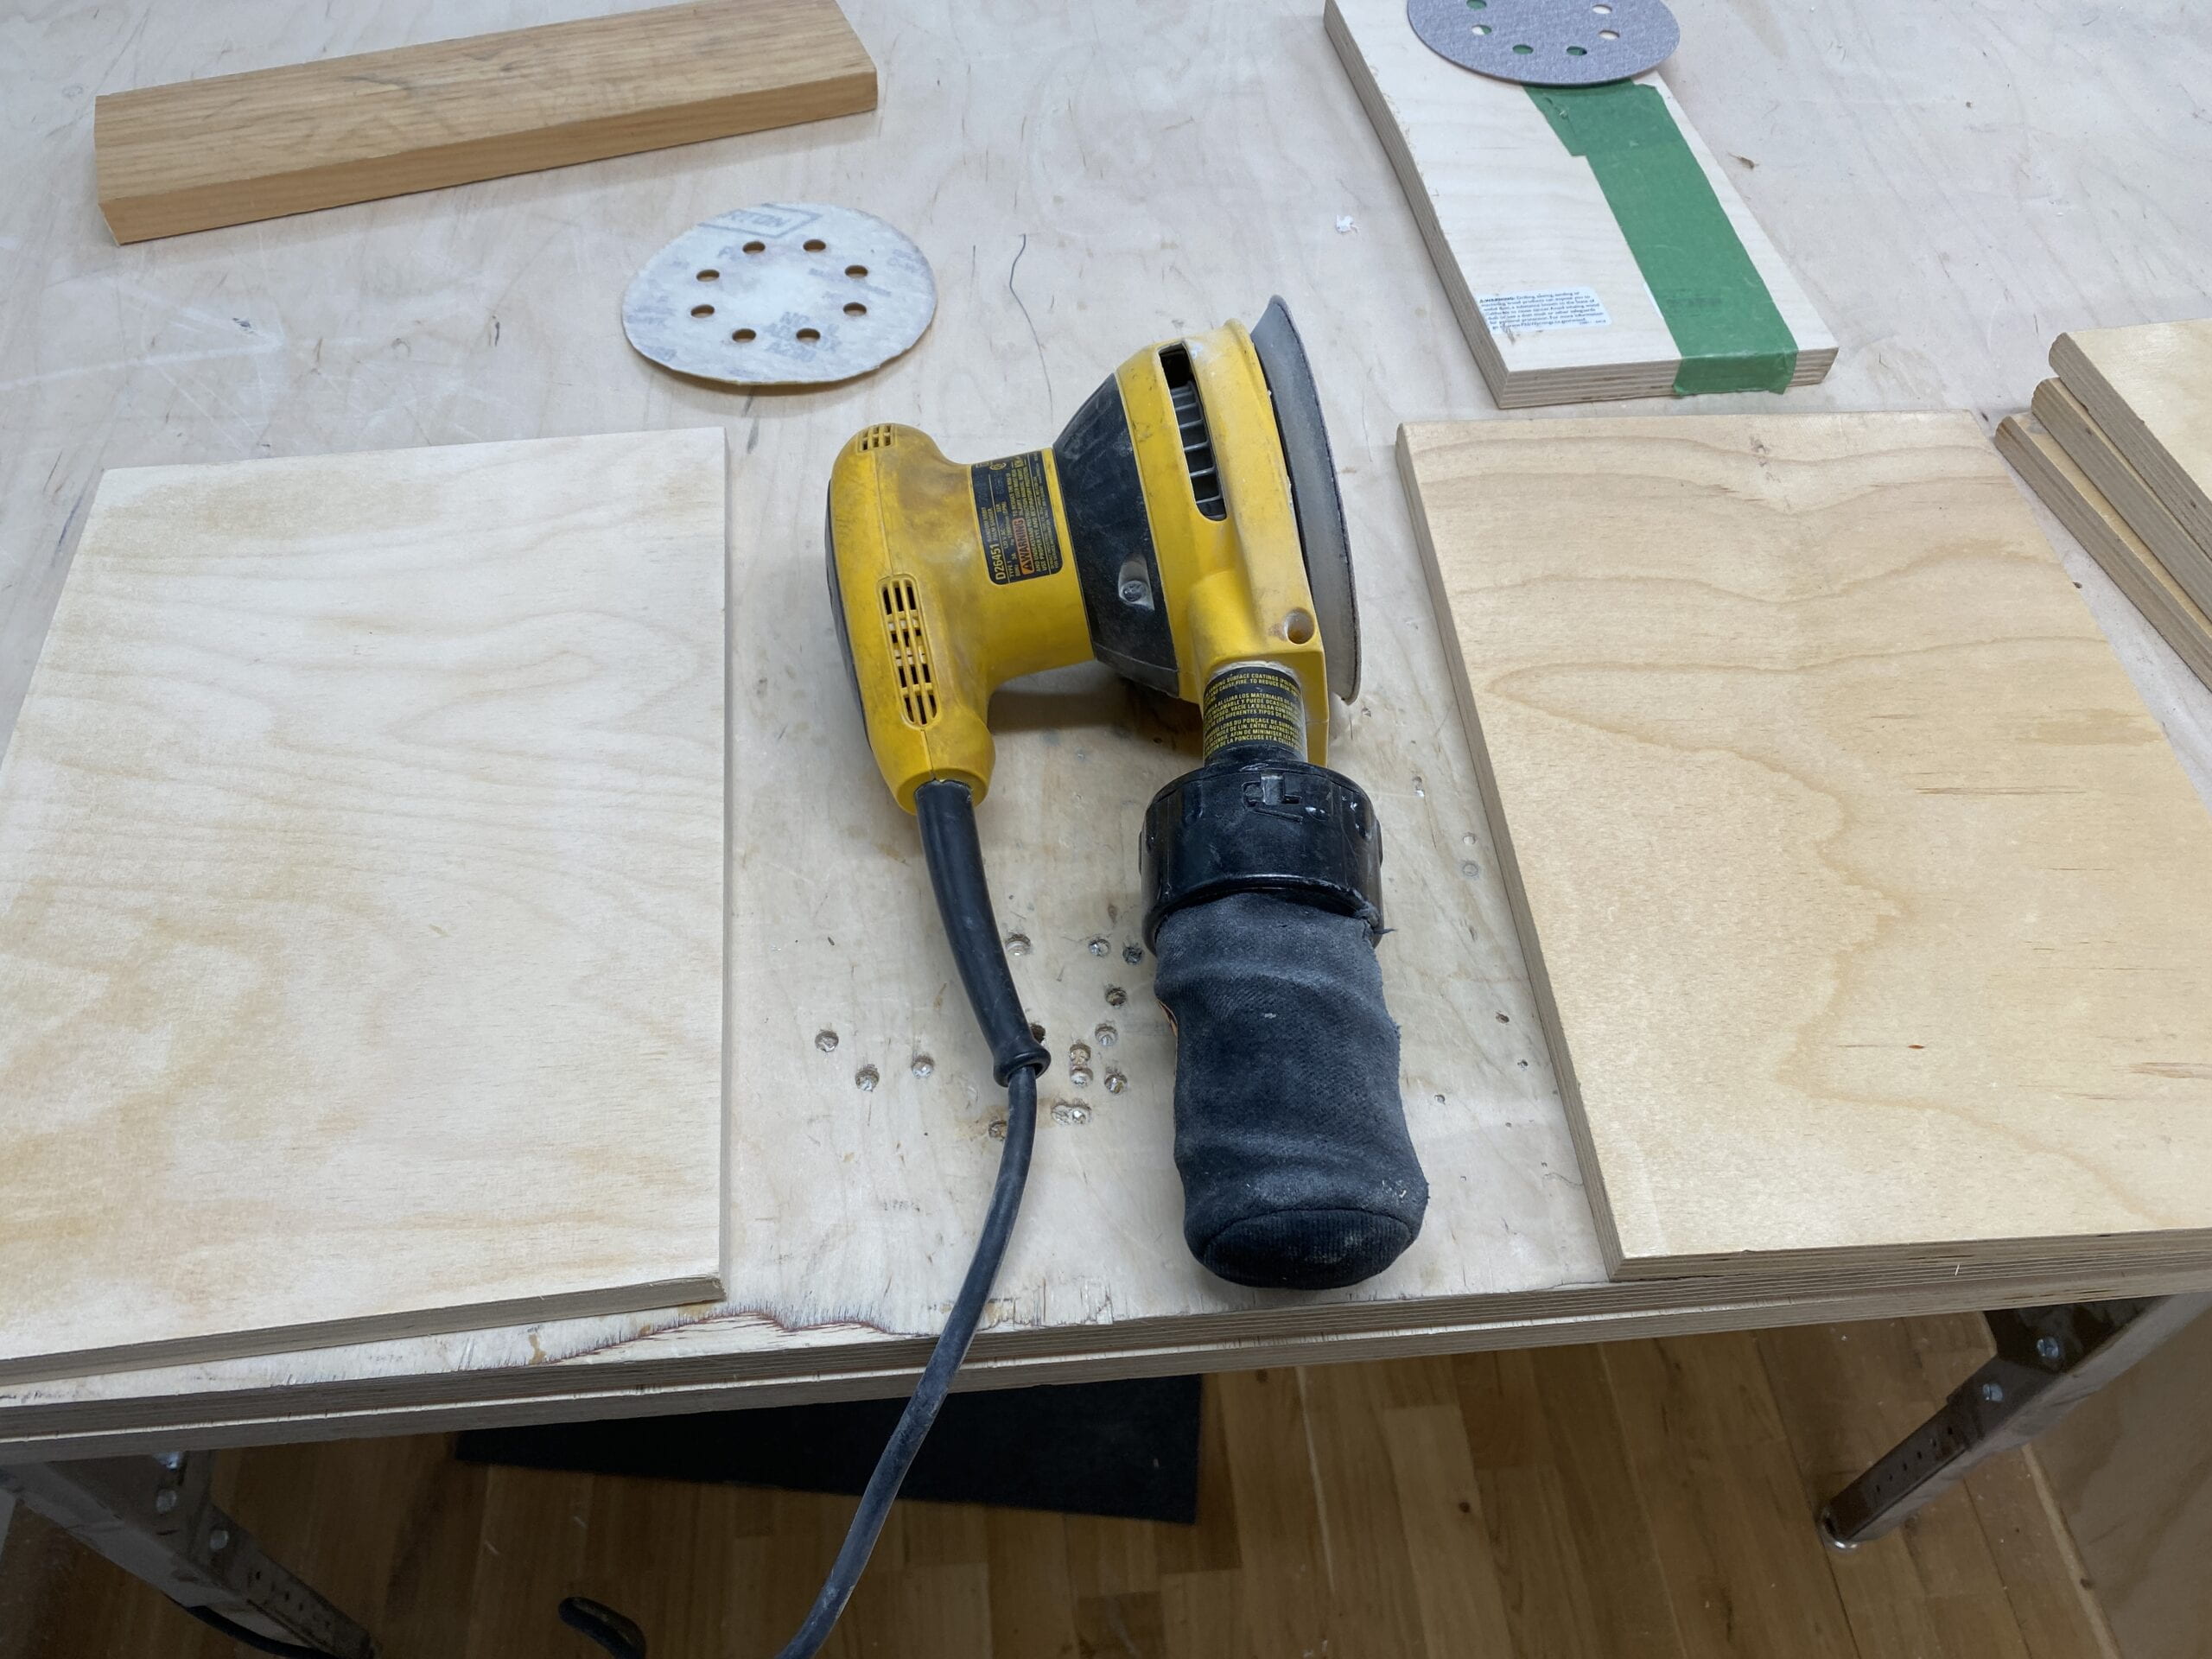
Super quick about the material here: what I wanted to make out of this technique are some coasters that are hexagons, and the size of it depends on the thickness of the initial material that I cut those strips from. So I found these very nice plywood pieces with what looks like lacquer finish on them (that might originally be a desk or something), sanded off the finish with an orbital sander, and glued every two pieces together.
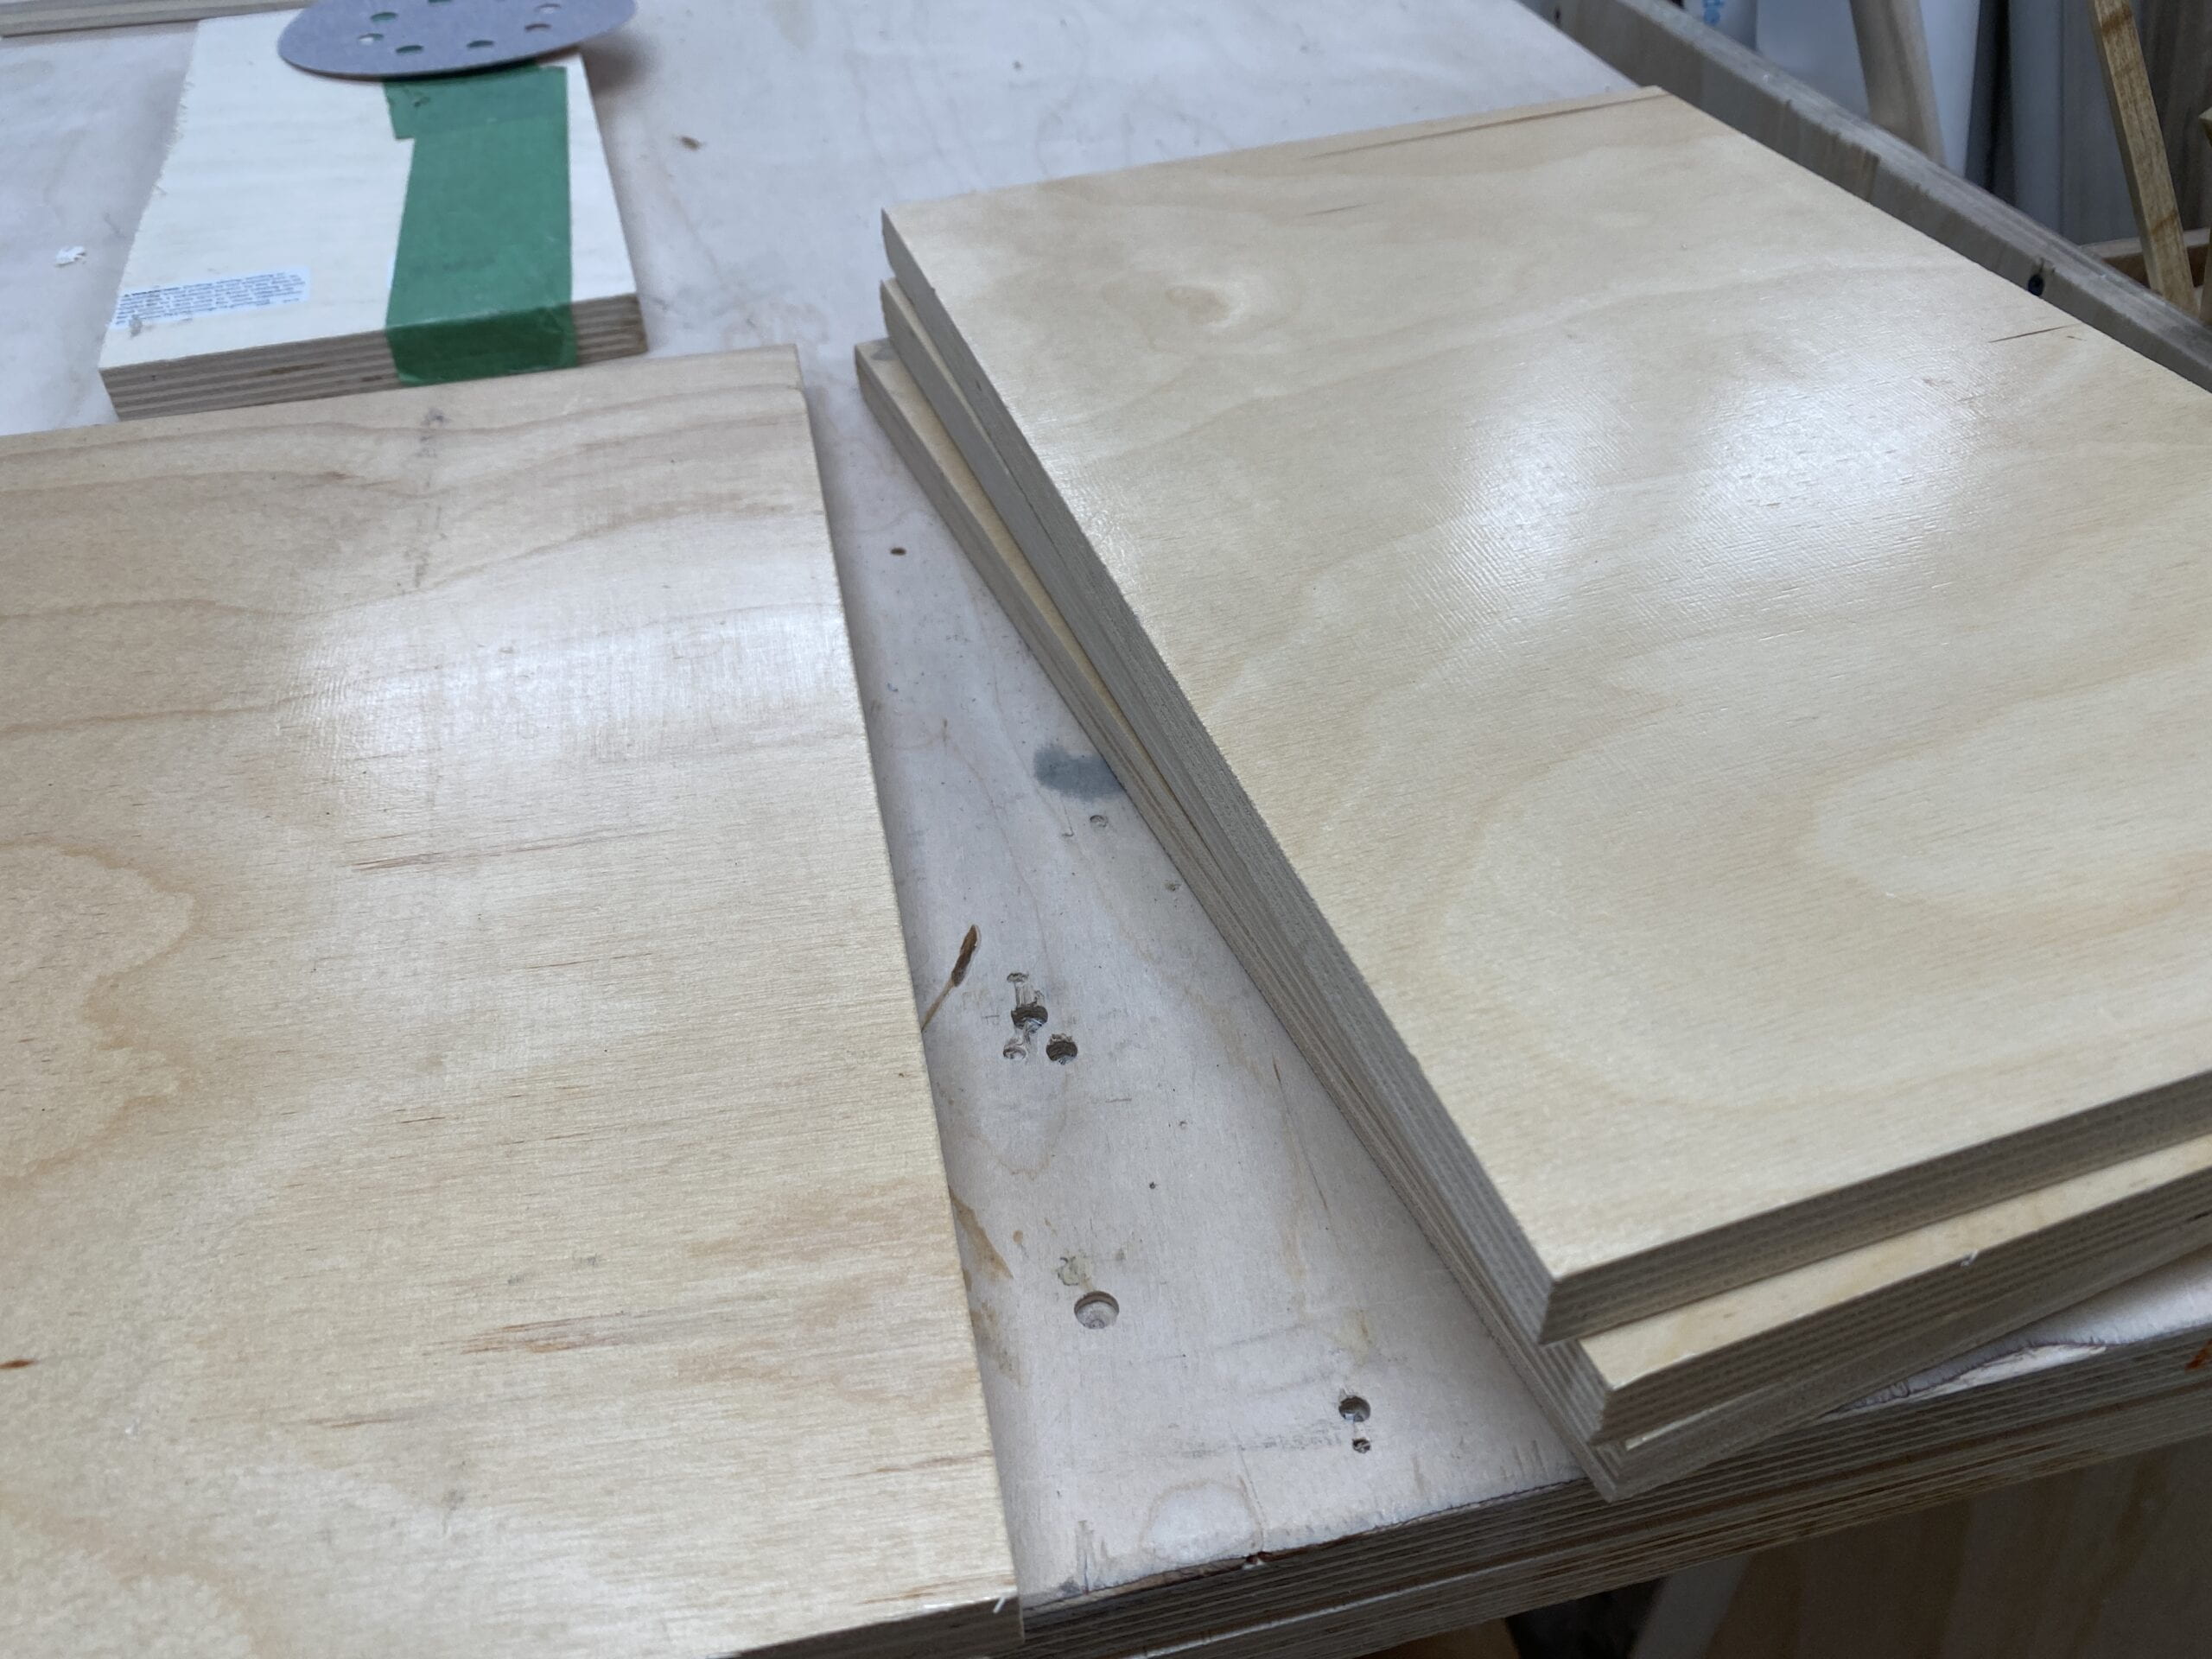
I waited for the glue to dry, then using a miter saw, I squared off the board and it was ready to work.
Making test pieces and gluing/clamping aids (?)
Before I go on and cut my actual piece, I thought it was necessary to make a test piece, just to go over the process once and also see if there were any problems (spoiler: there was a problem but I totally didn’t learn from it).
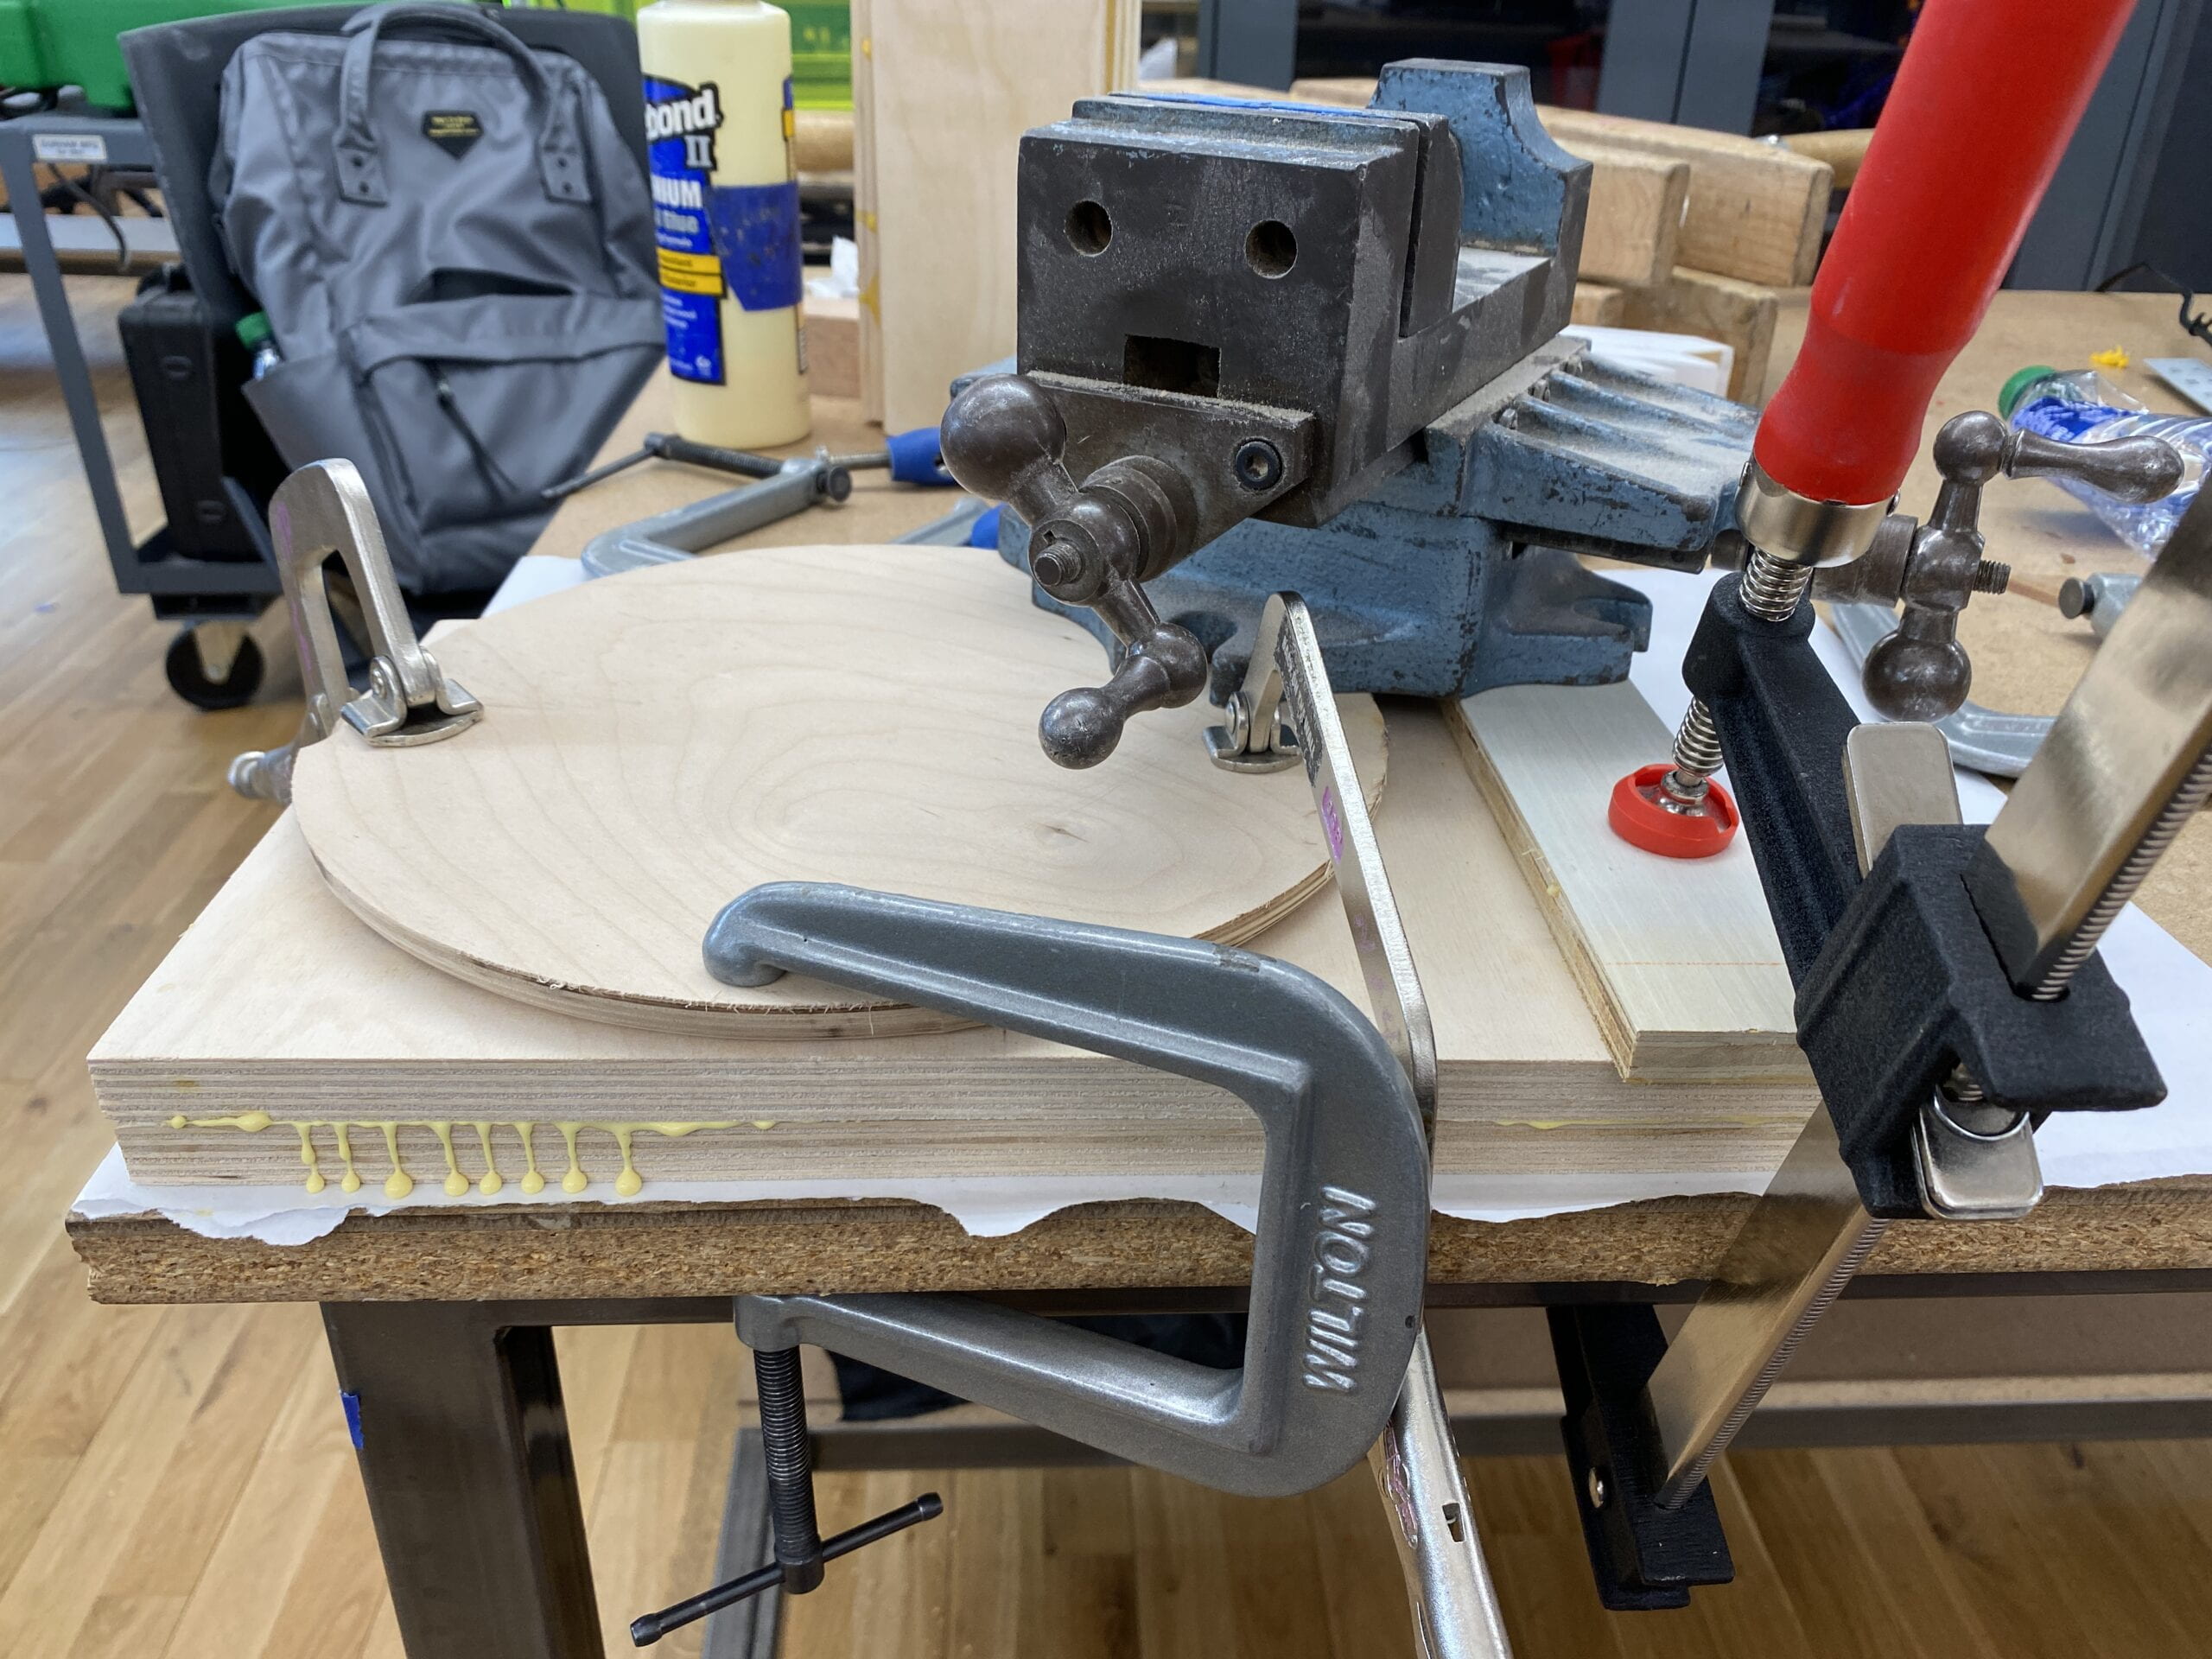
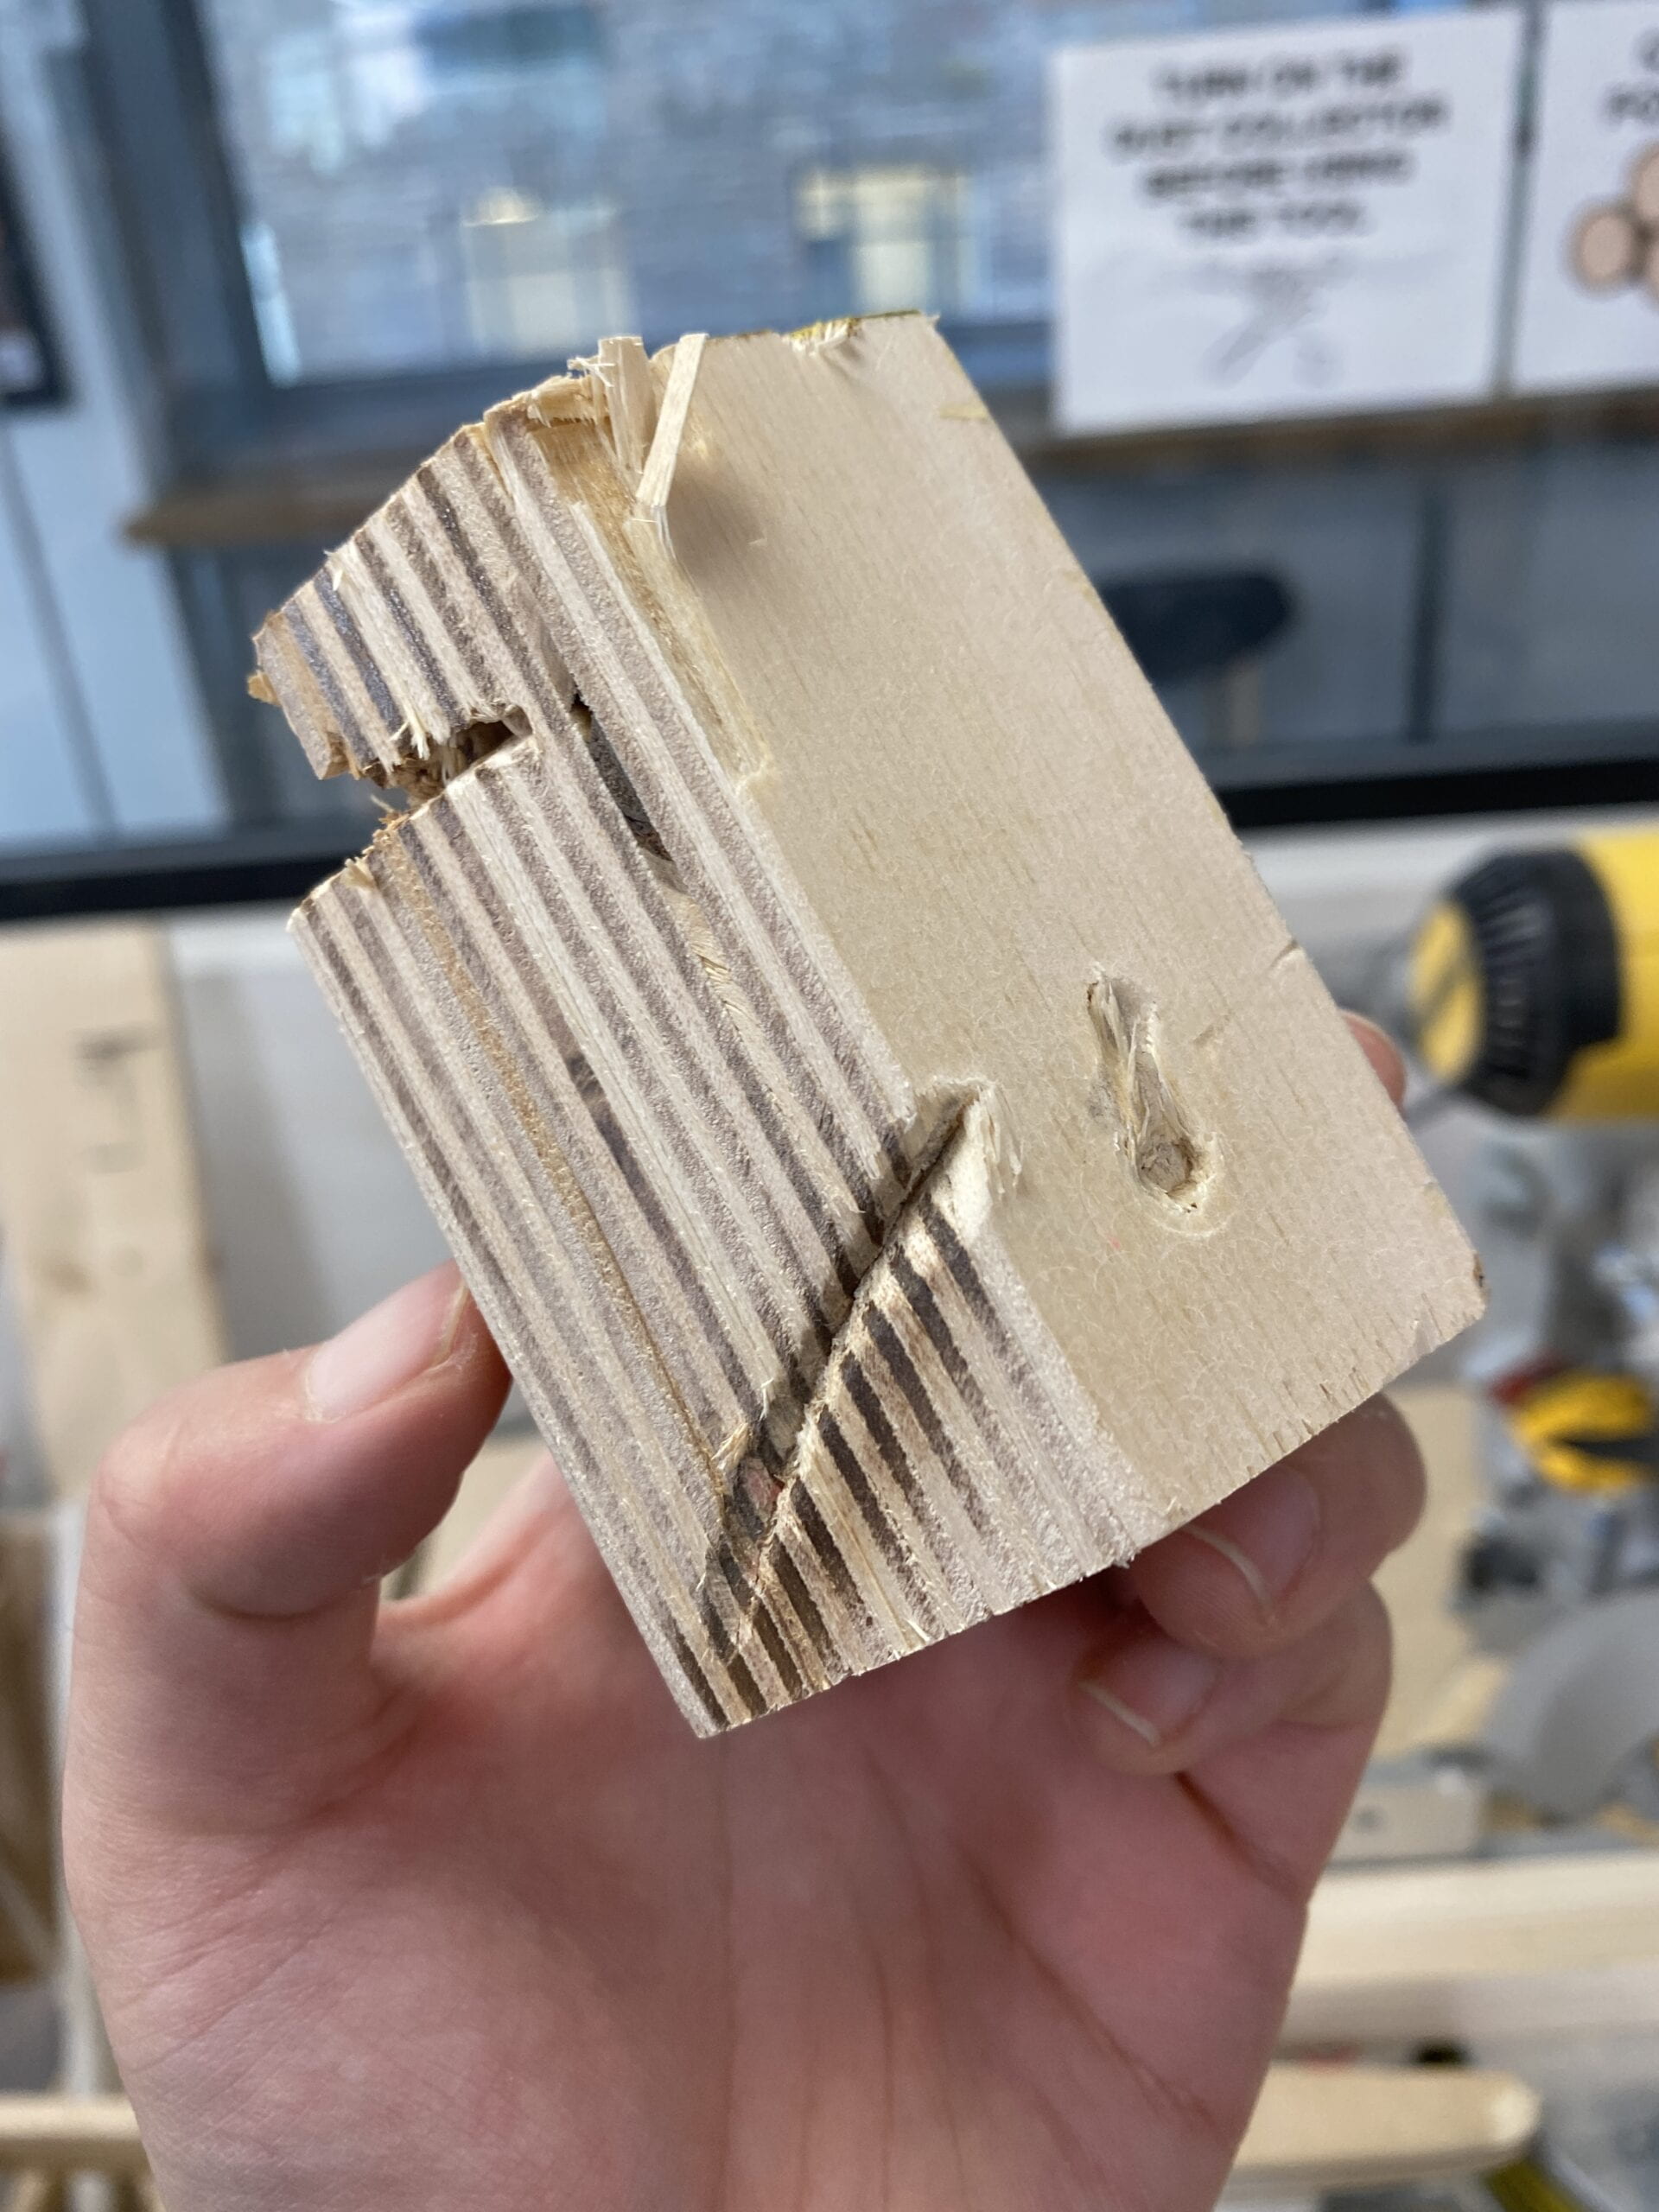
So I took a thinner piece of plywood and cut it at a 30-degree angle from the vertical position the miter saw was originally in. It was struggling since 1 plywood is fairly tough and 2 the blade is very beat-up and dull (which I didn’t find out after they actually changed the blade) and 3 the angle cut had the blade rubbing against more surface area of wood and also pressing harder when it cuts so there was a lot more friction. 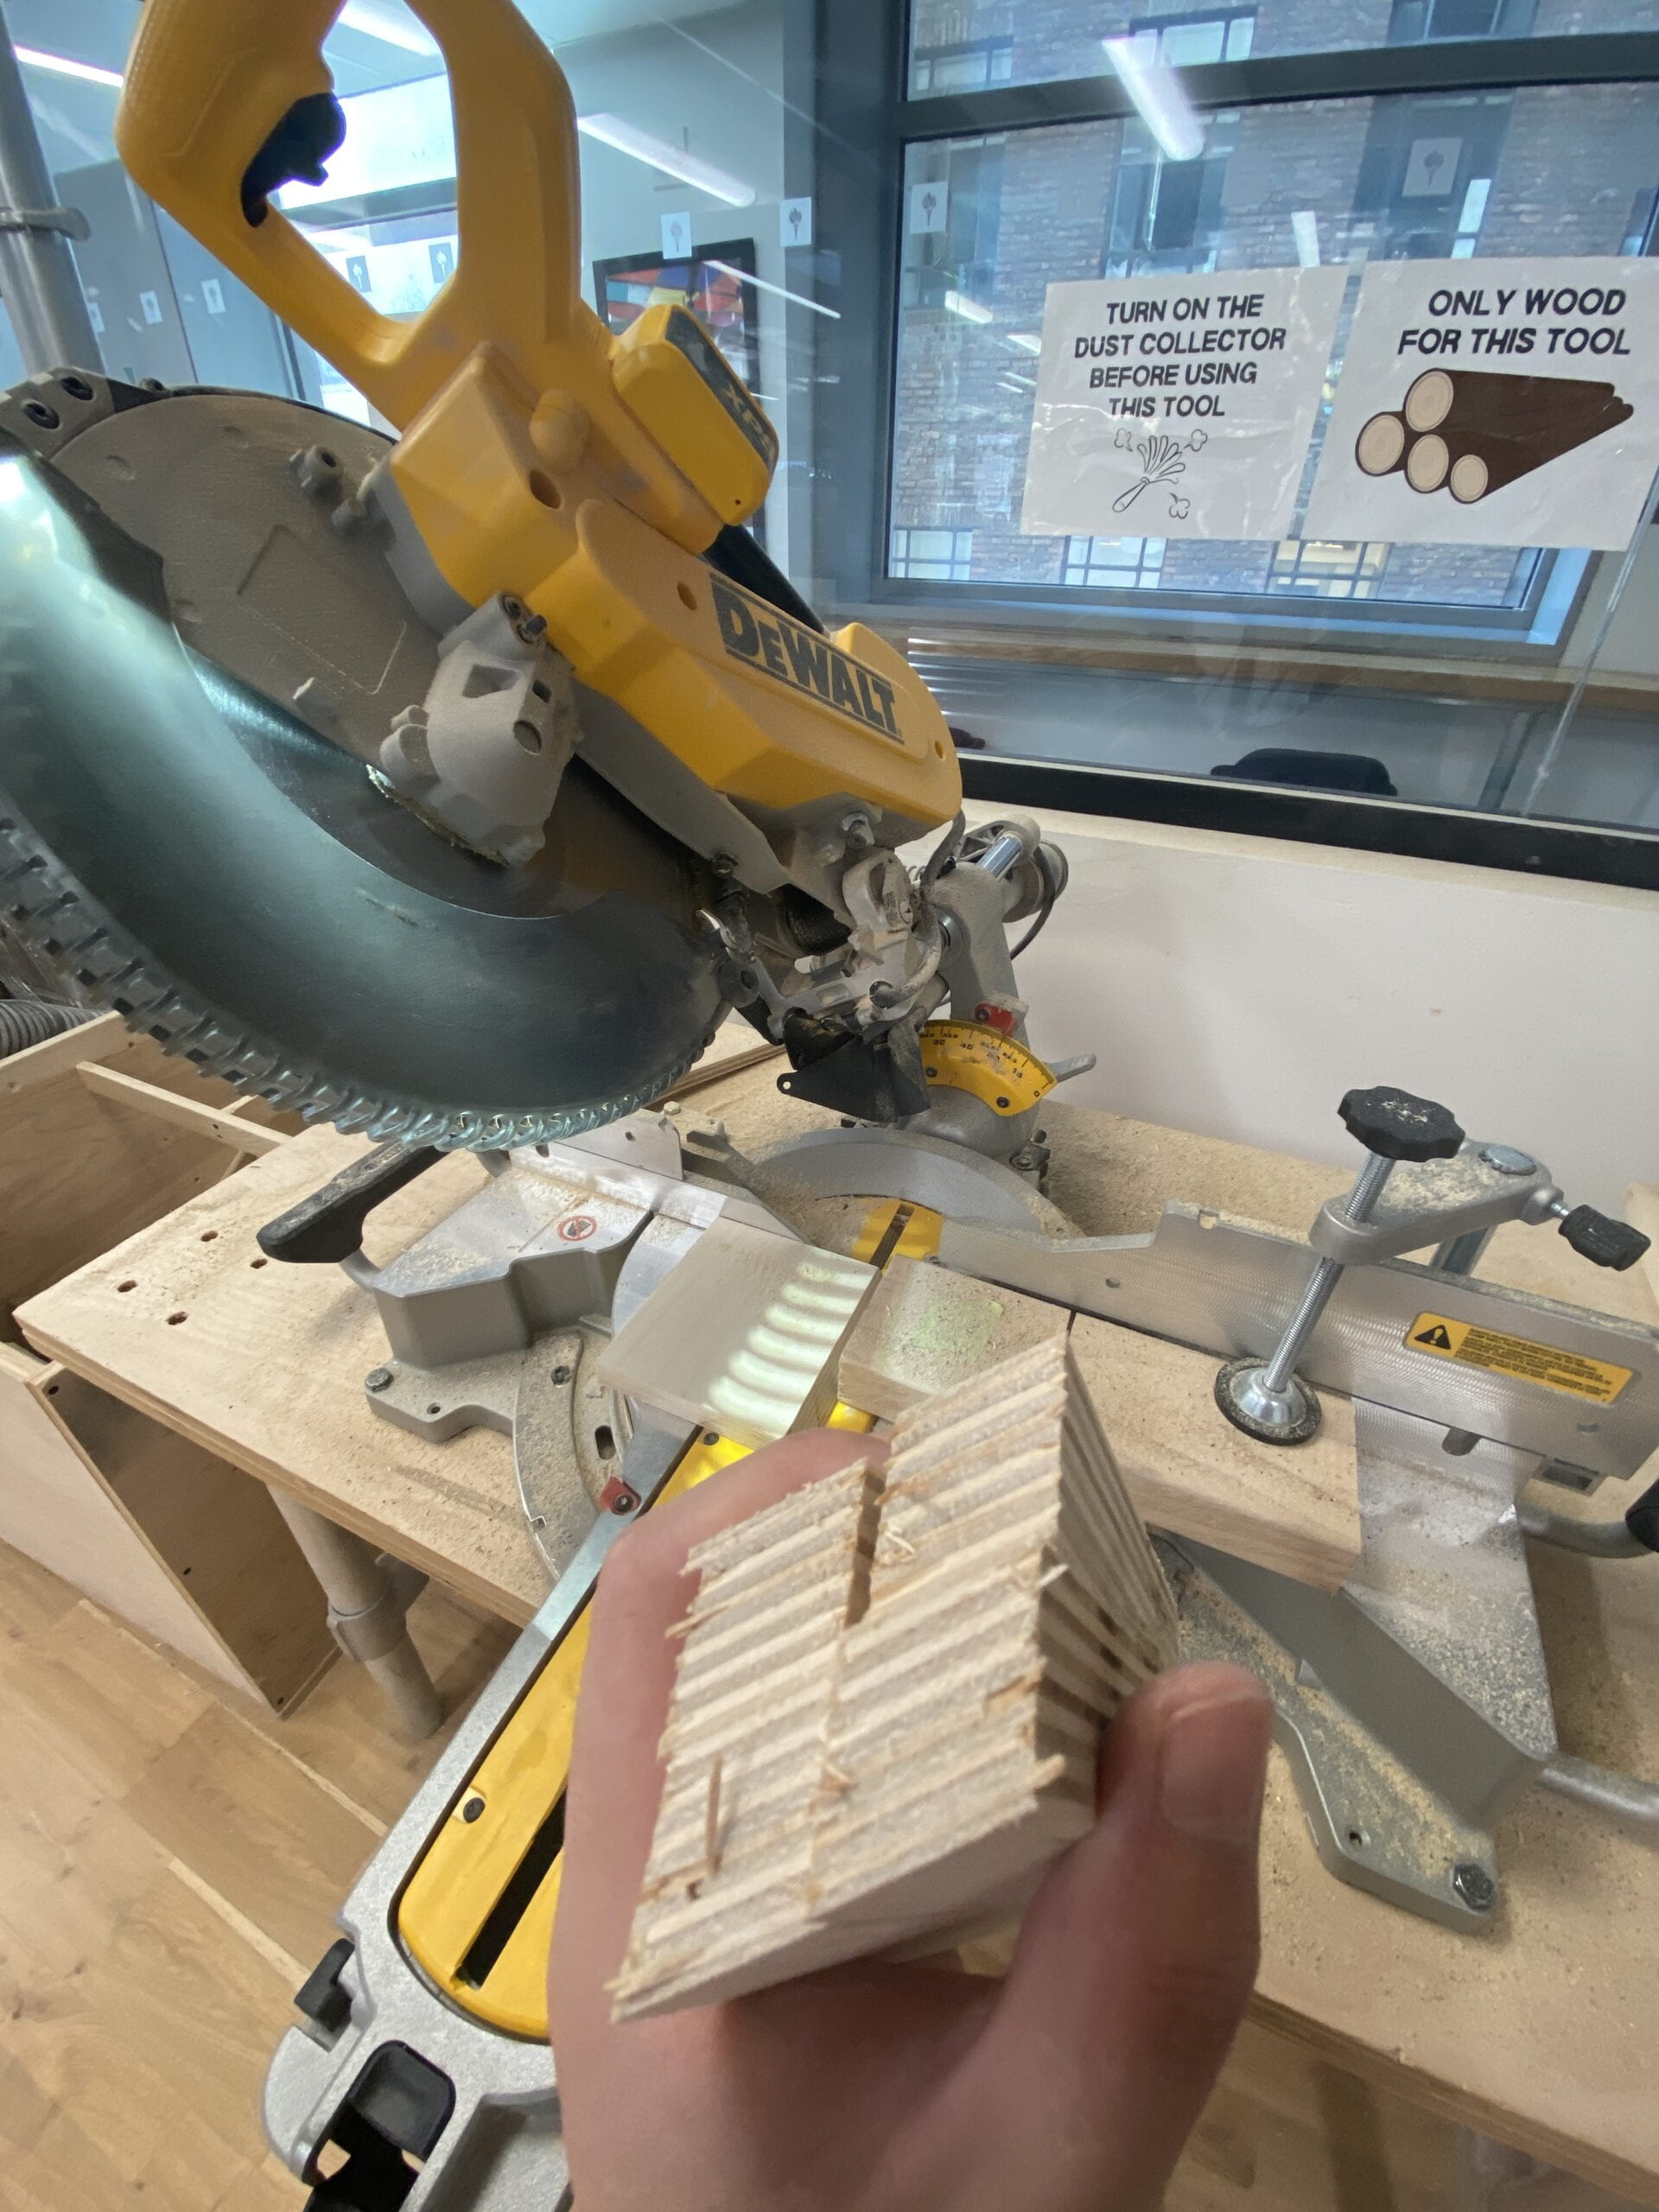 I cut as many of these diamond-shaped strips as I dared, then I glued every two of them together for easier clamping, but also, they can be my clamping aid for later when I need to glue the third piece on — I just need to flatten their tips so that they will stay put and not rotate in the clamp.
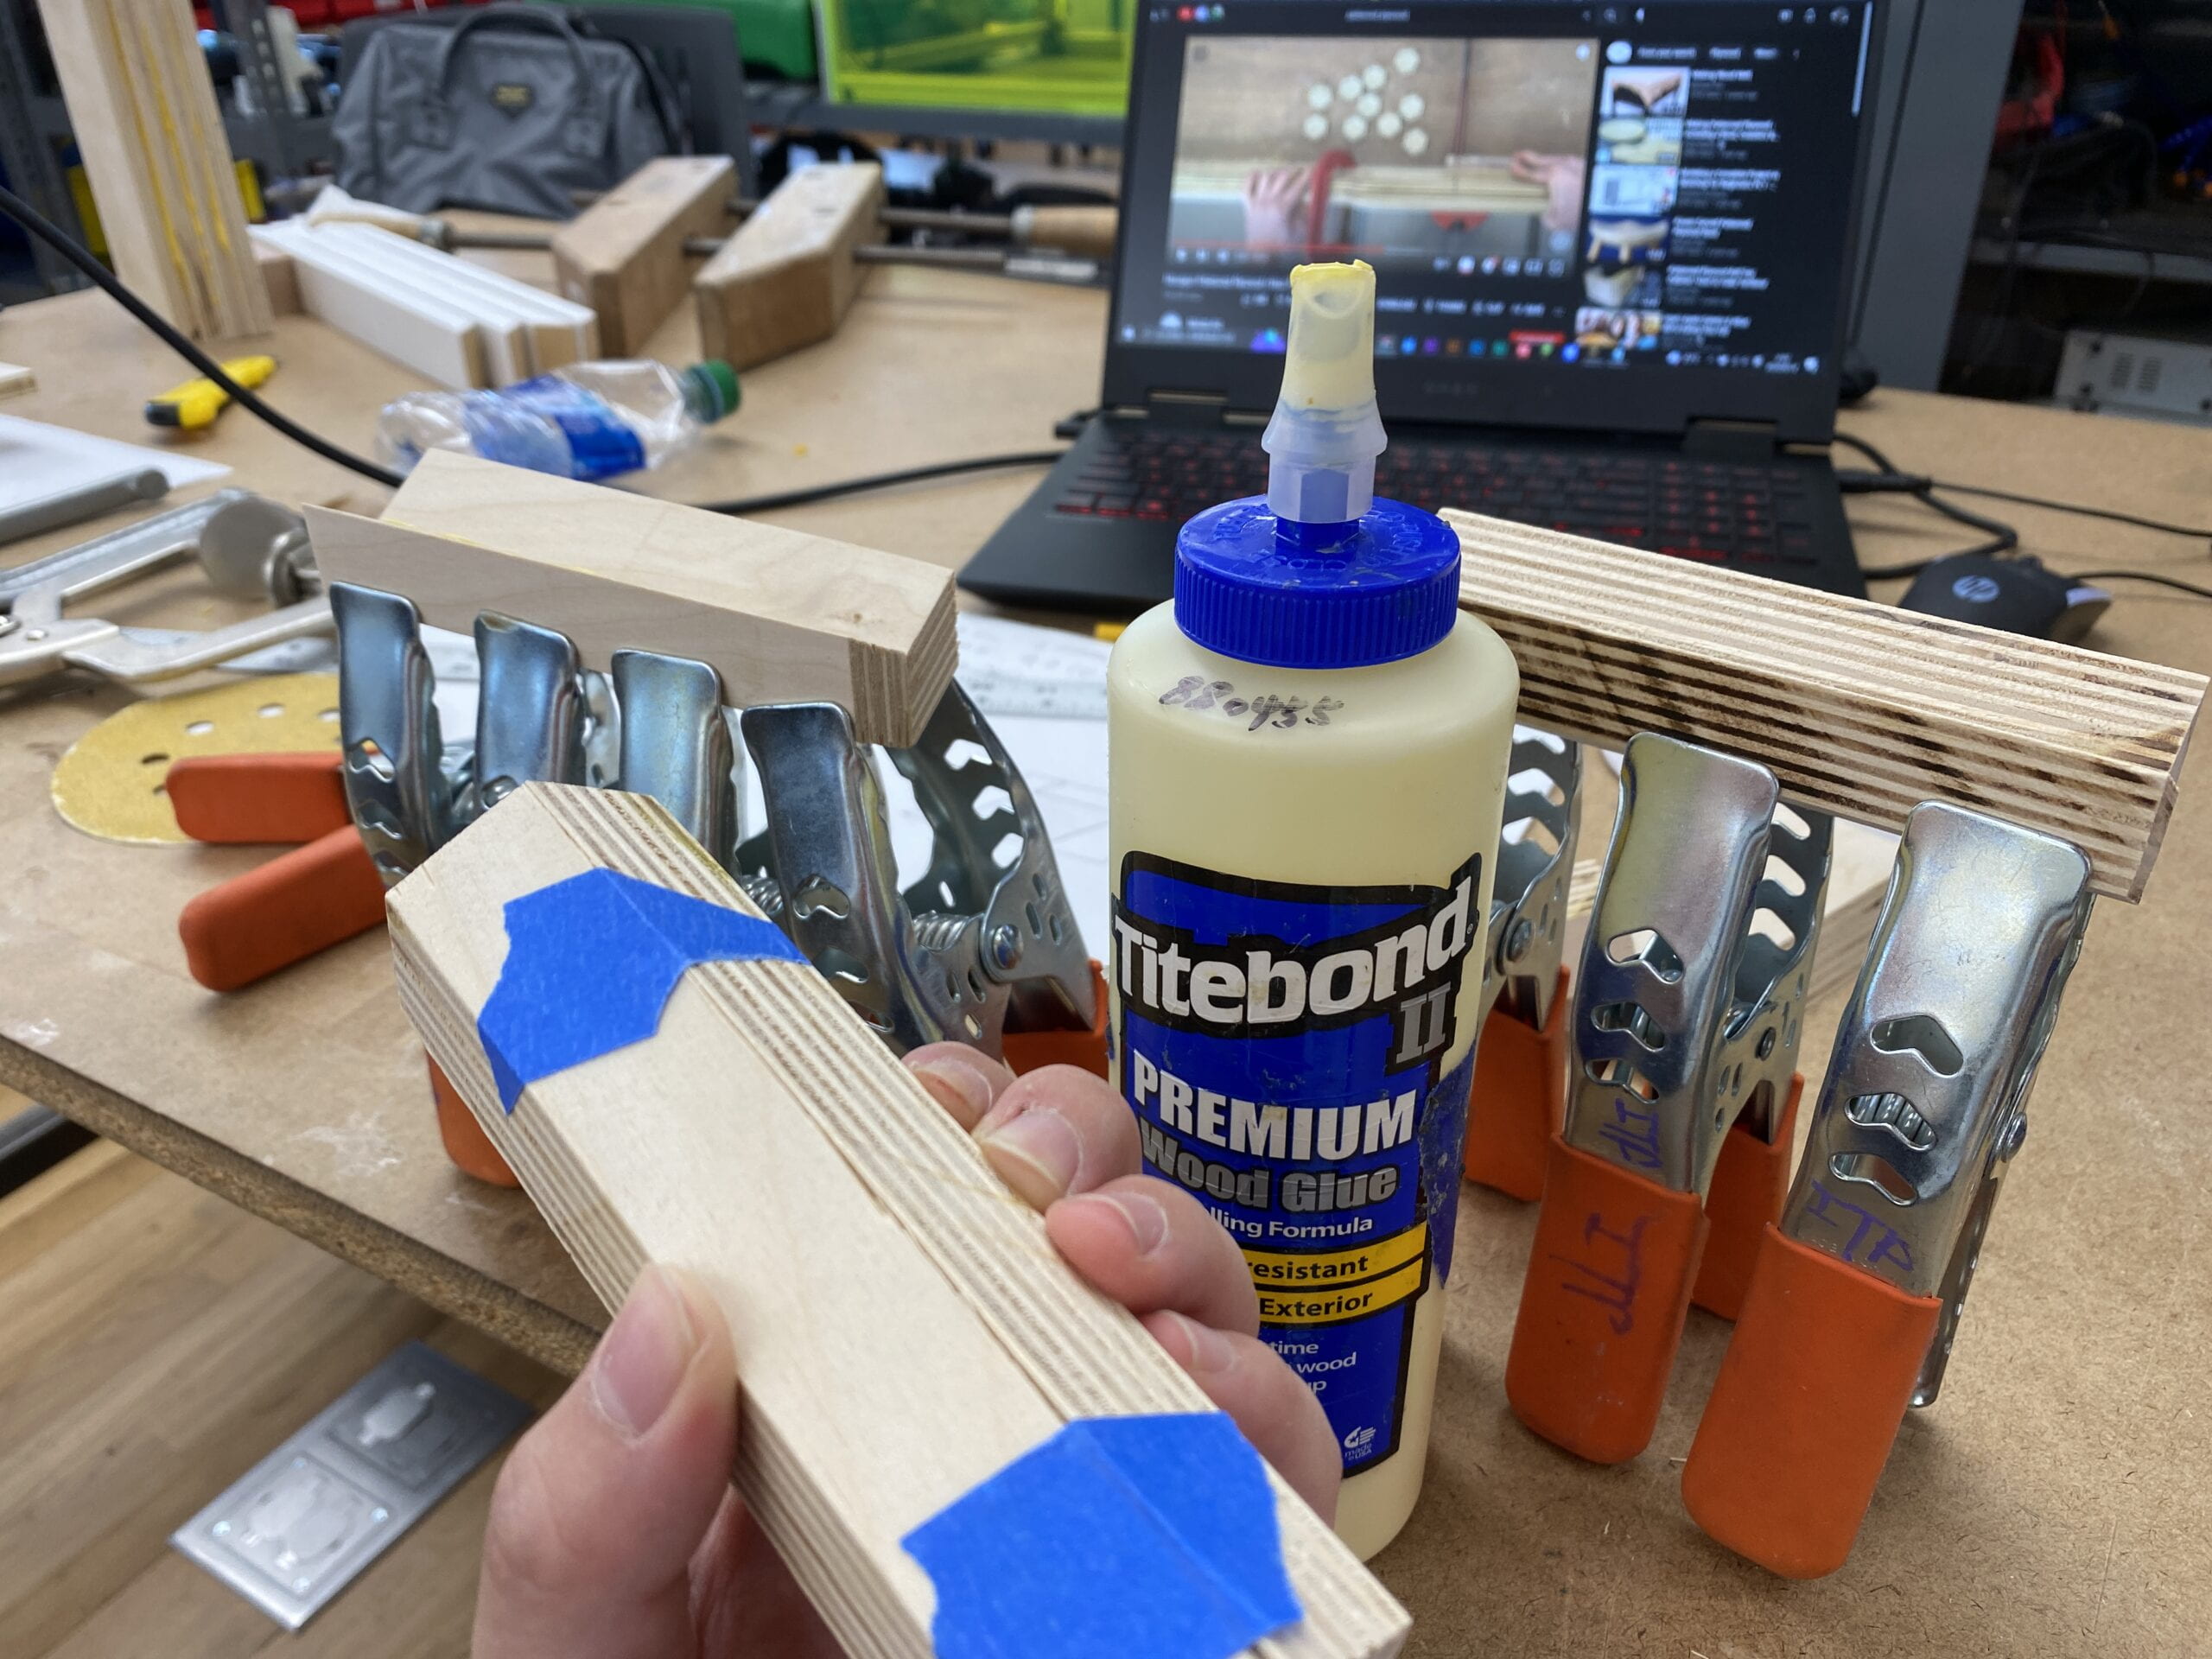
While these are drying, I cut the big board into diamond strips, and tested if they fit together. 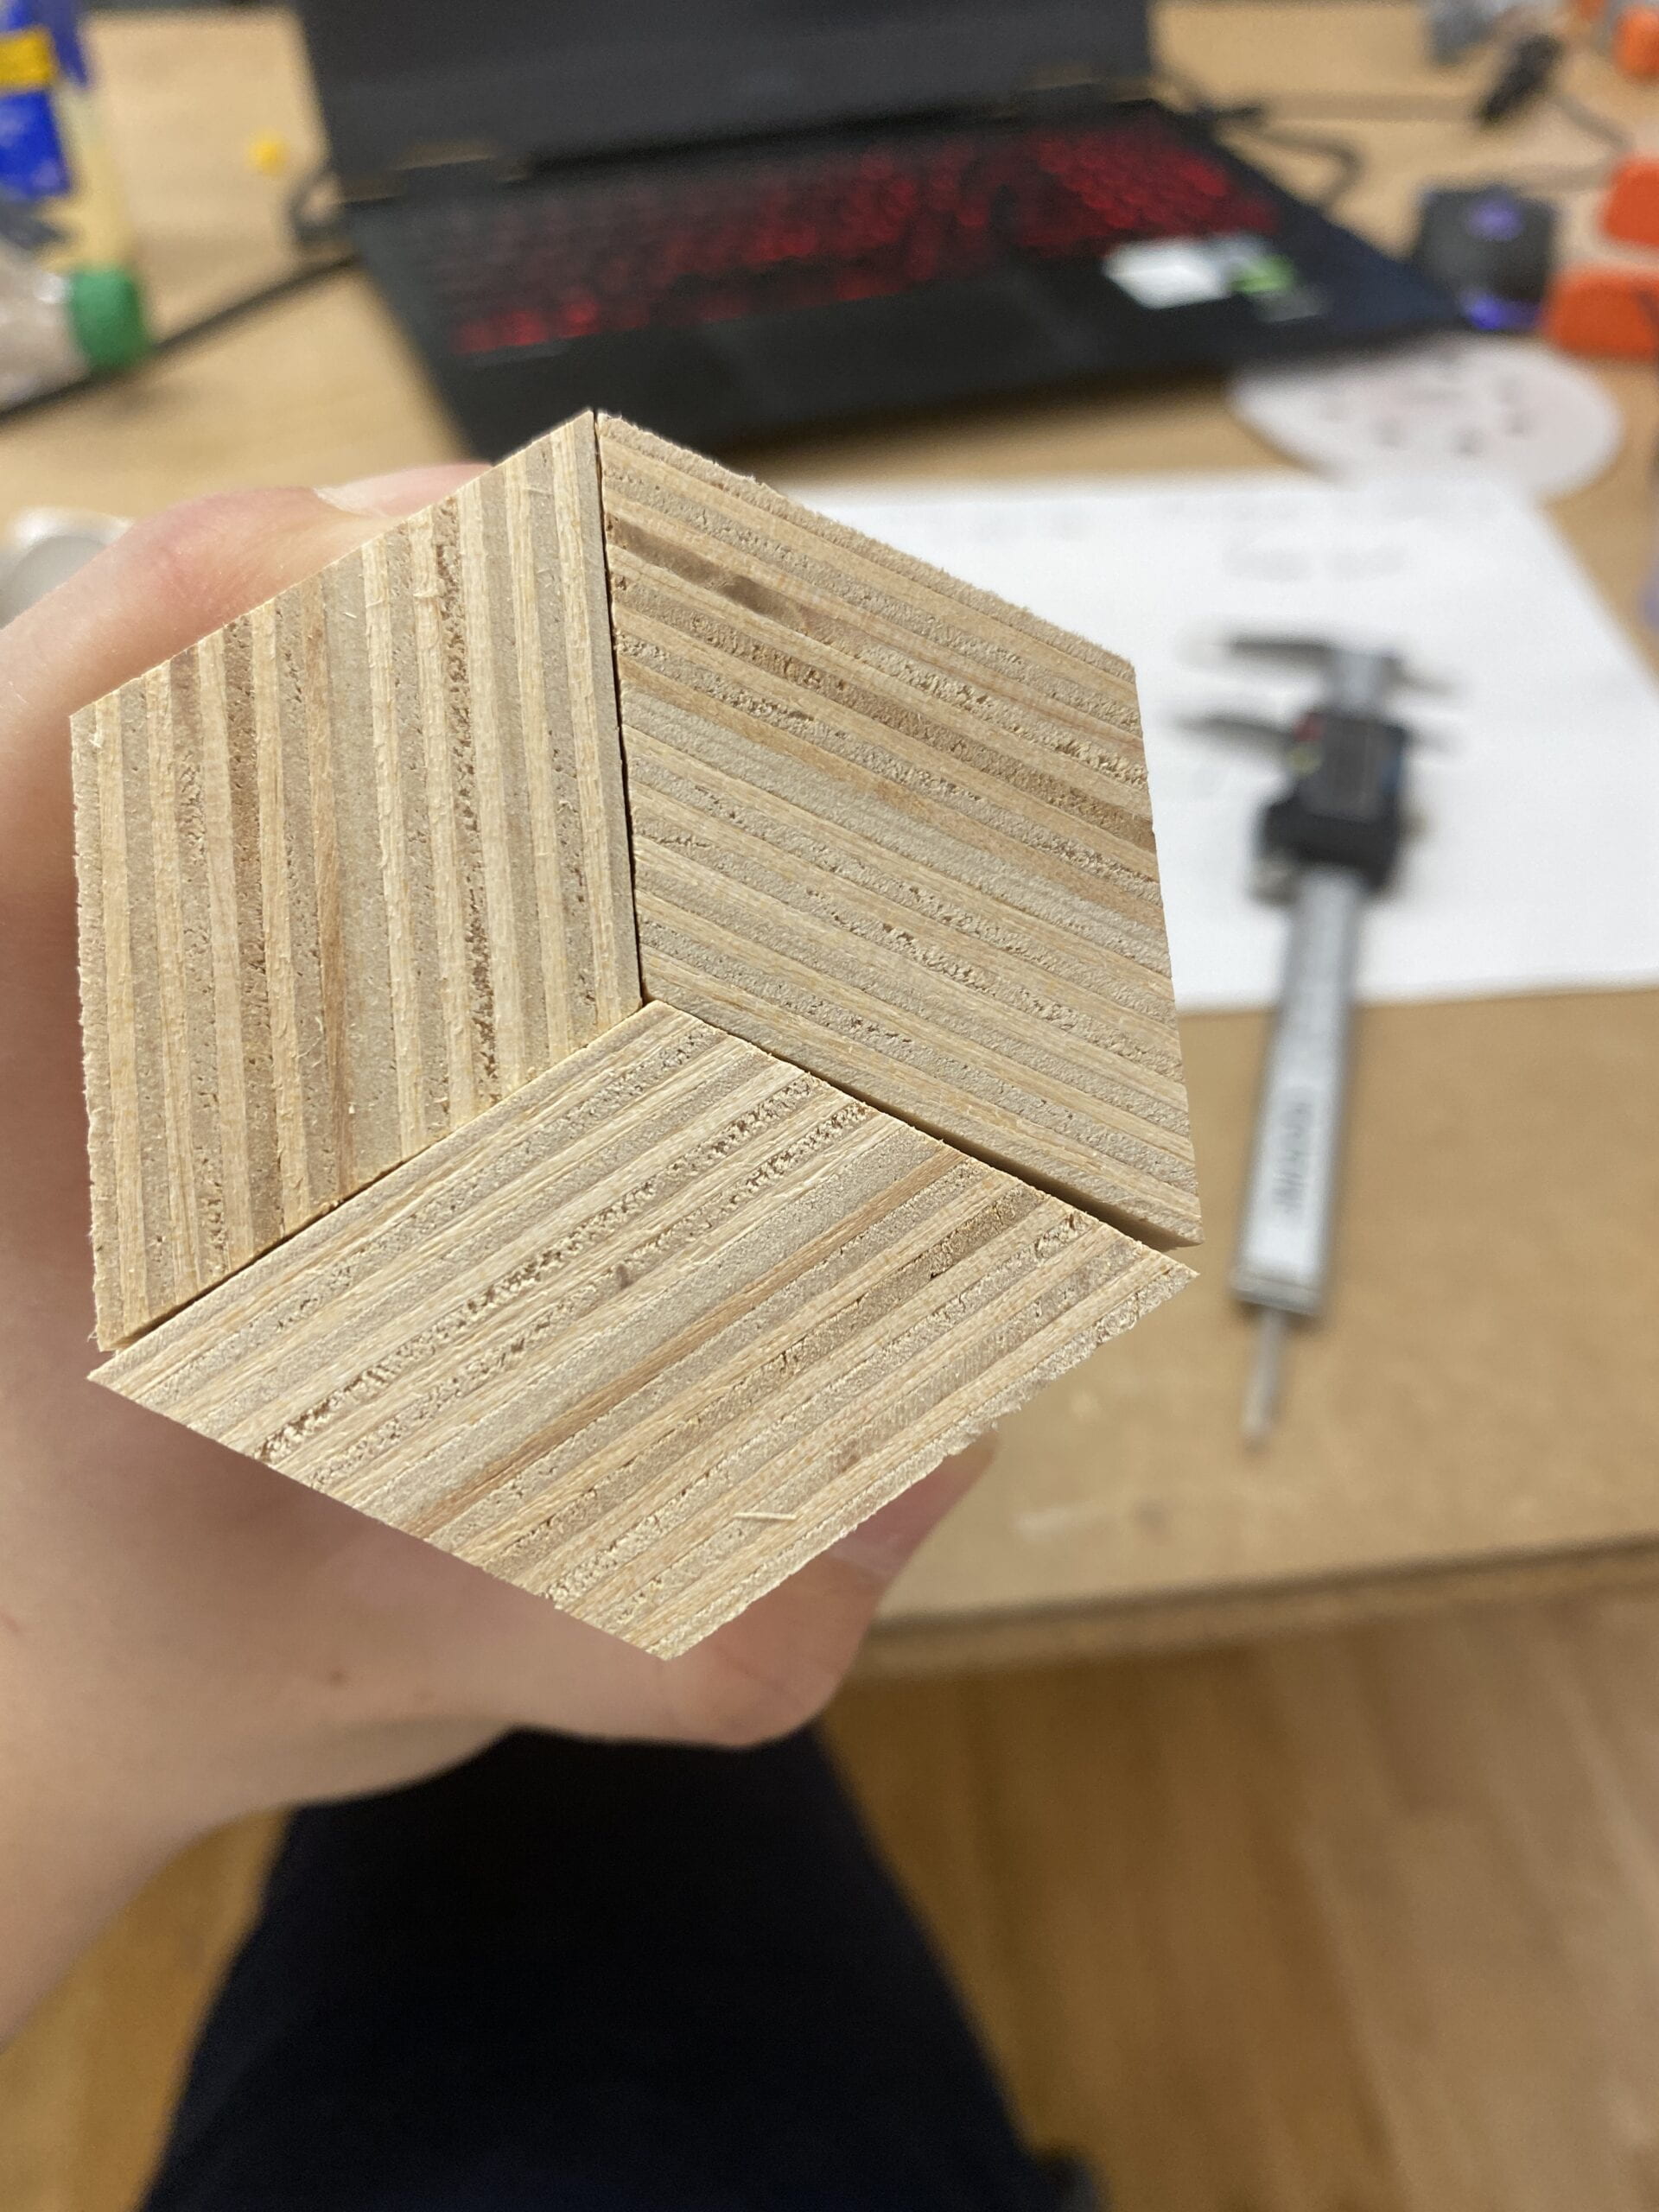
The result was kind of disappointing — as expected. It was not possible for the miter saw to cut an angle perfectly. HOWEVER, it didn’t matter as much as I thought it would, which I will explain later.
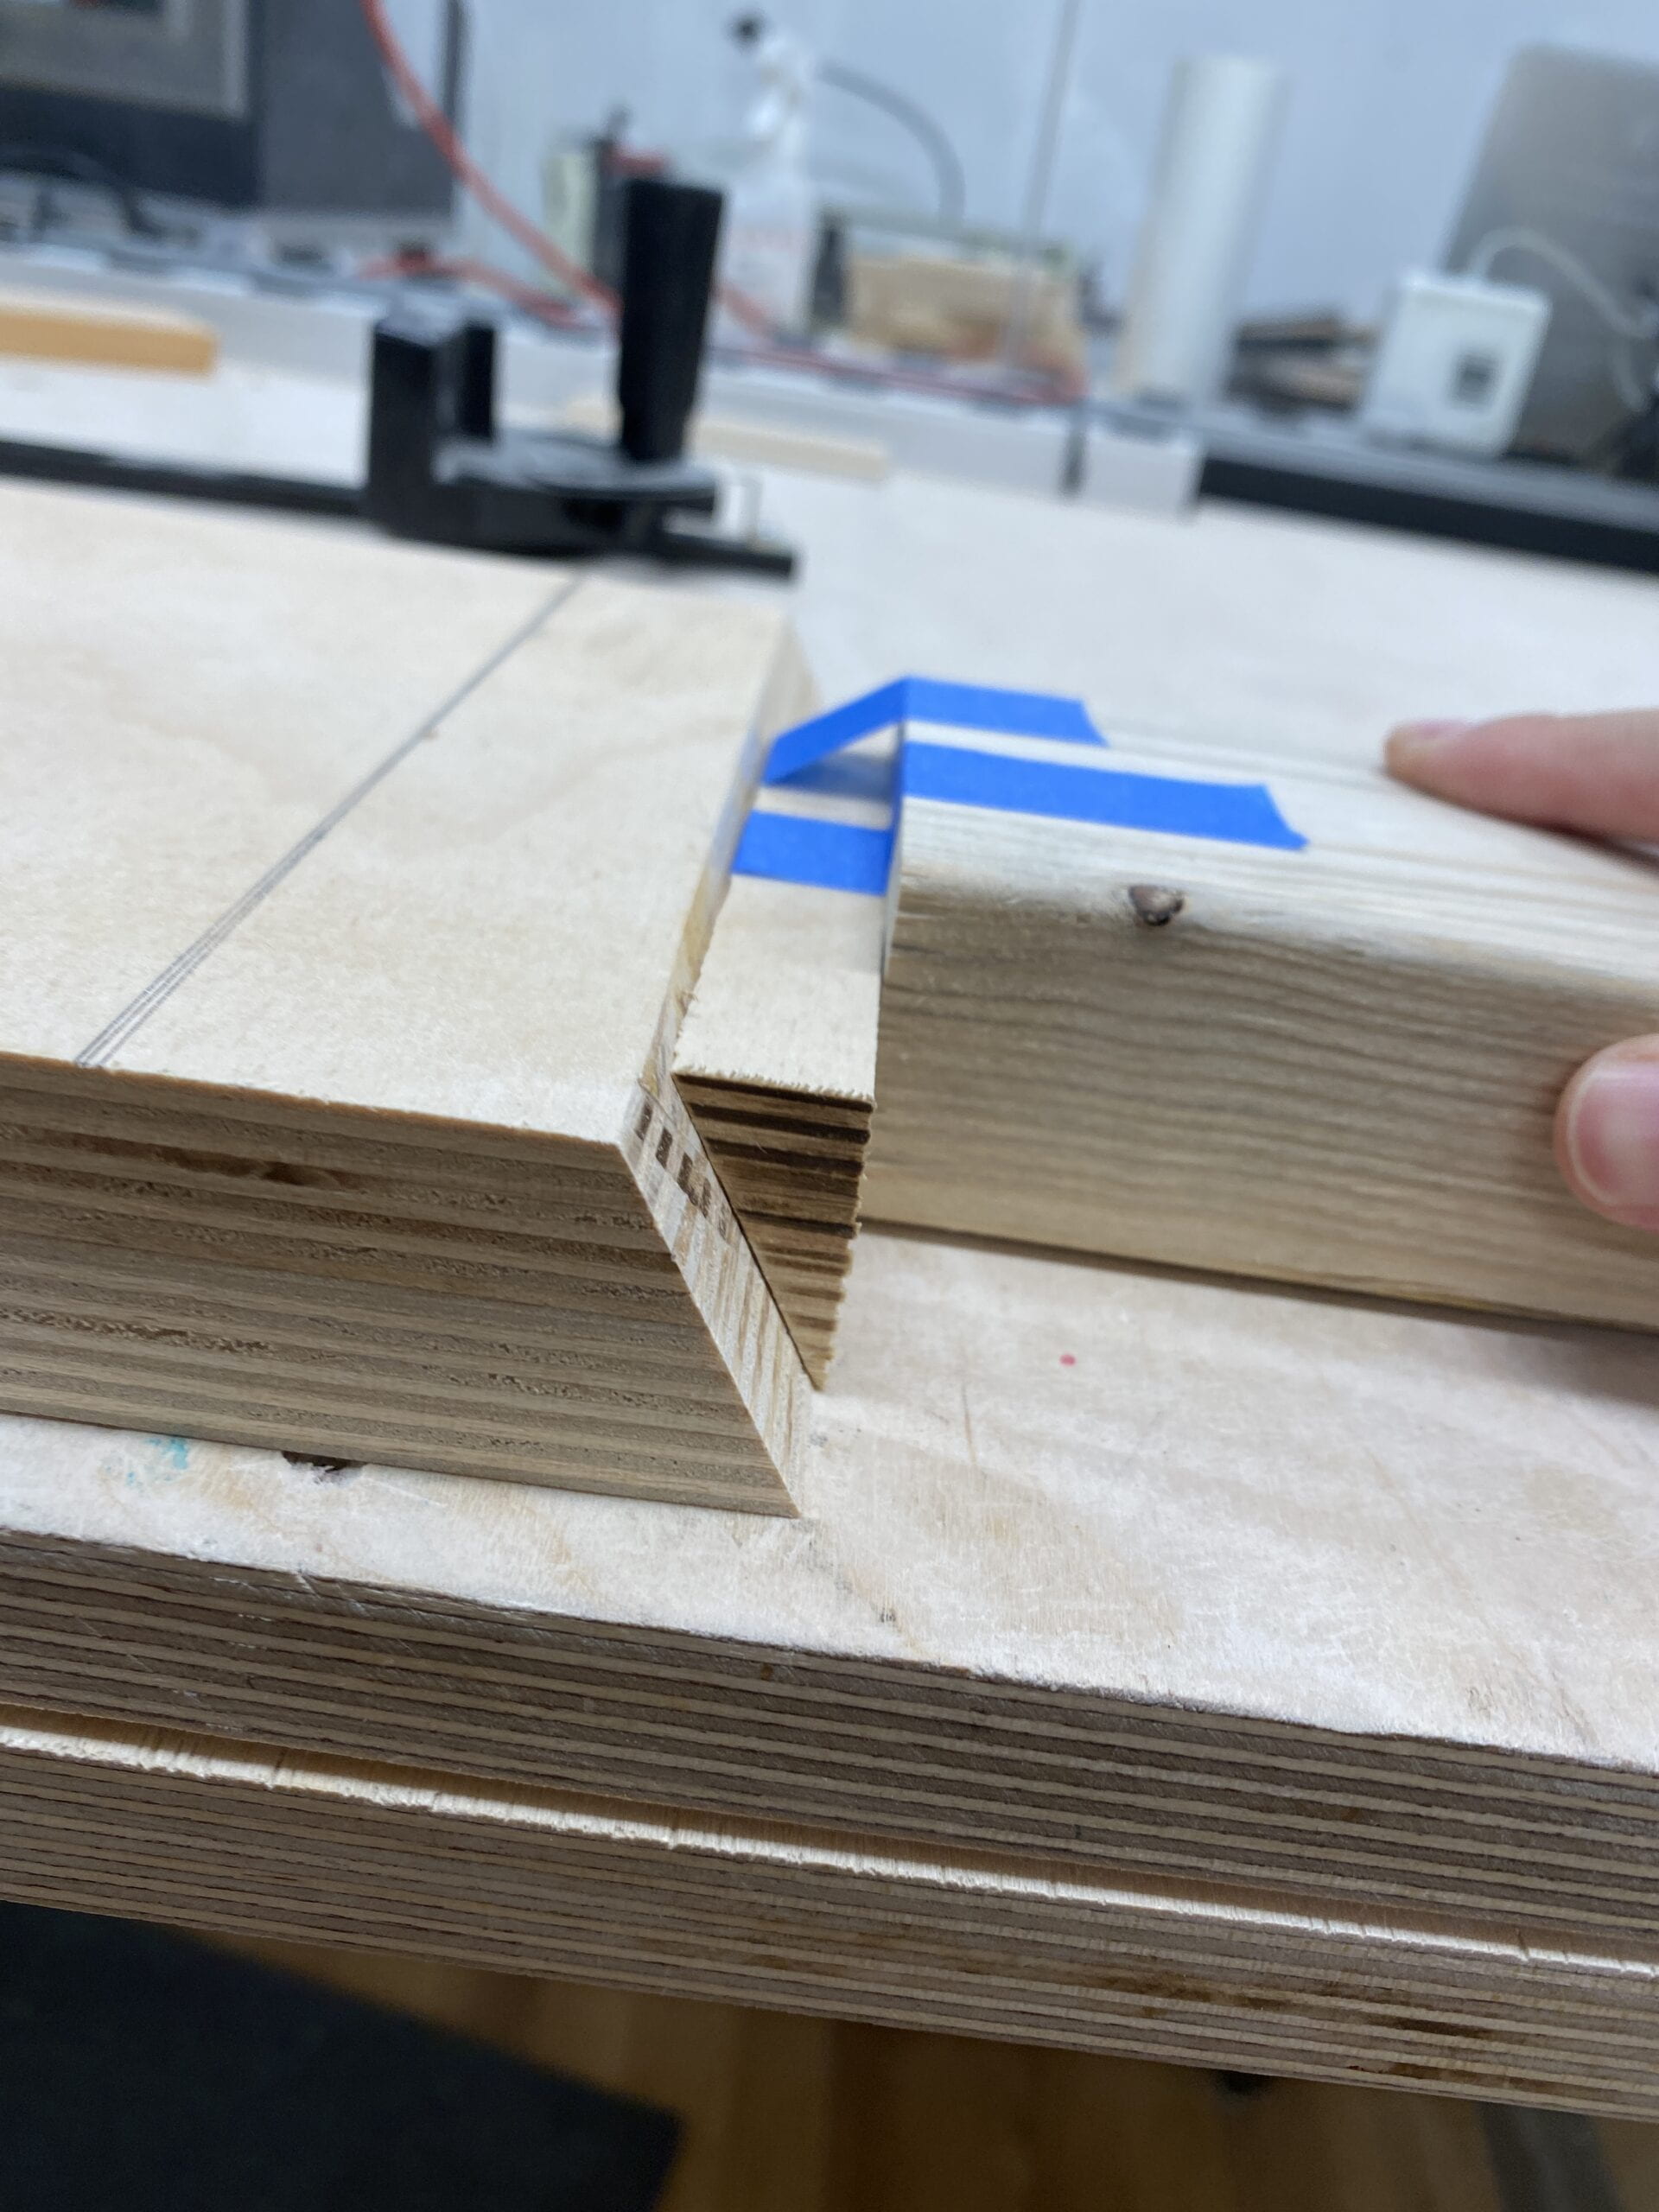
Also when cutting, I made this quick and dirty jig from my off-cuts earlier, to prevent my piece from sliding under the stop block and messing up the thickness I’m cutting (which in the original videos the creators had a very nice way of measuring that is only possible on the table saw – more on that later).
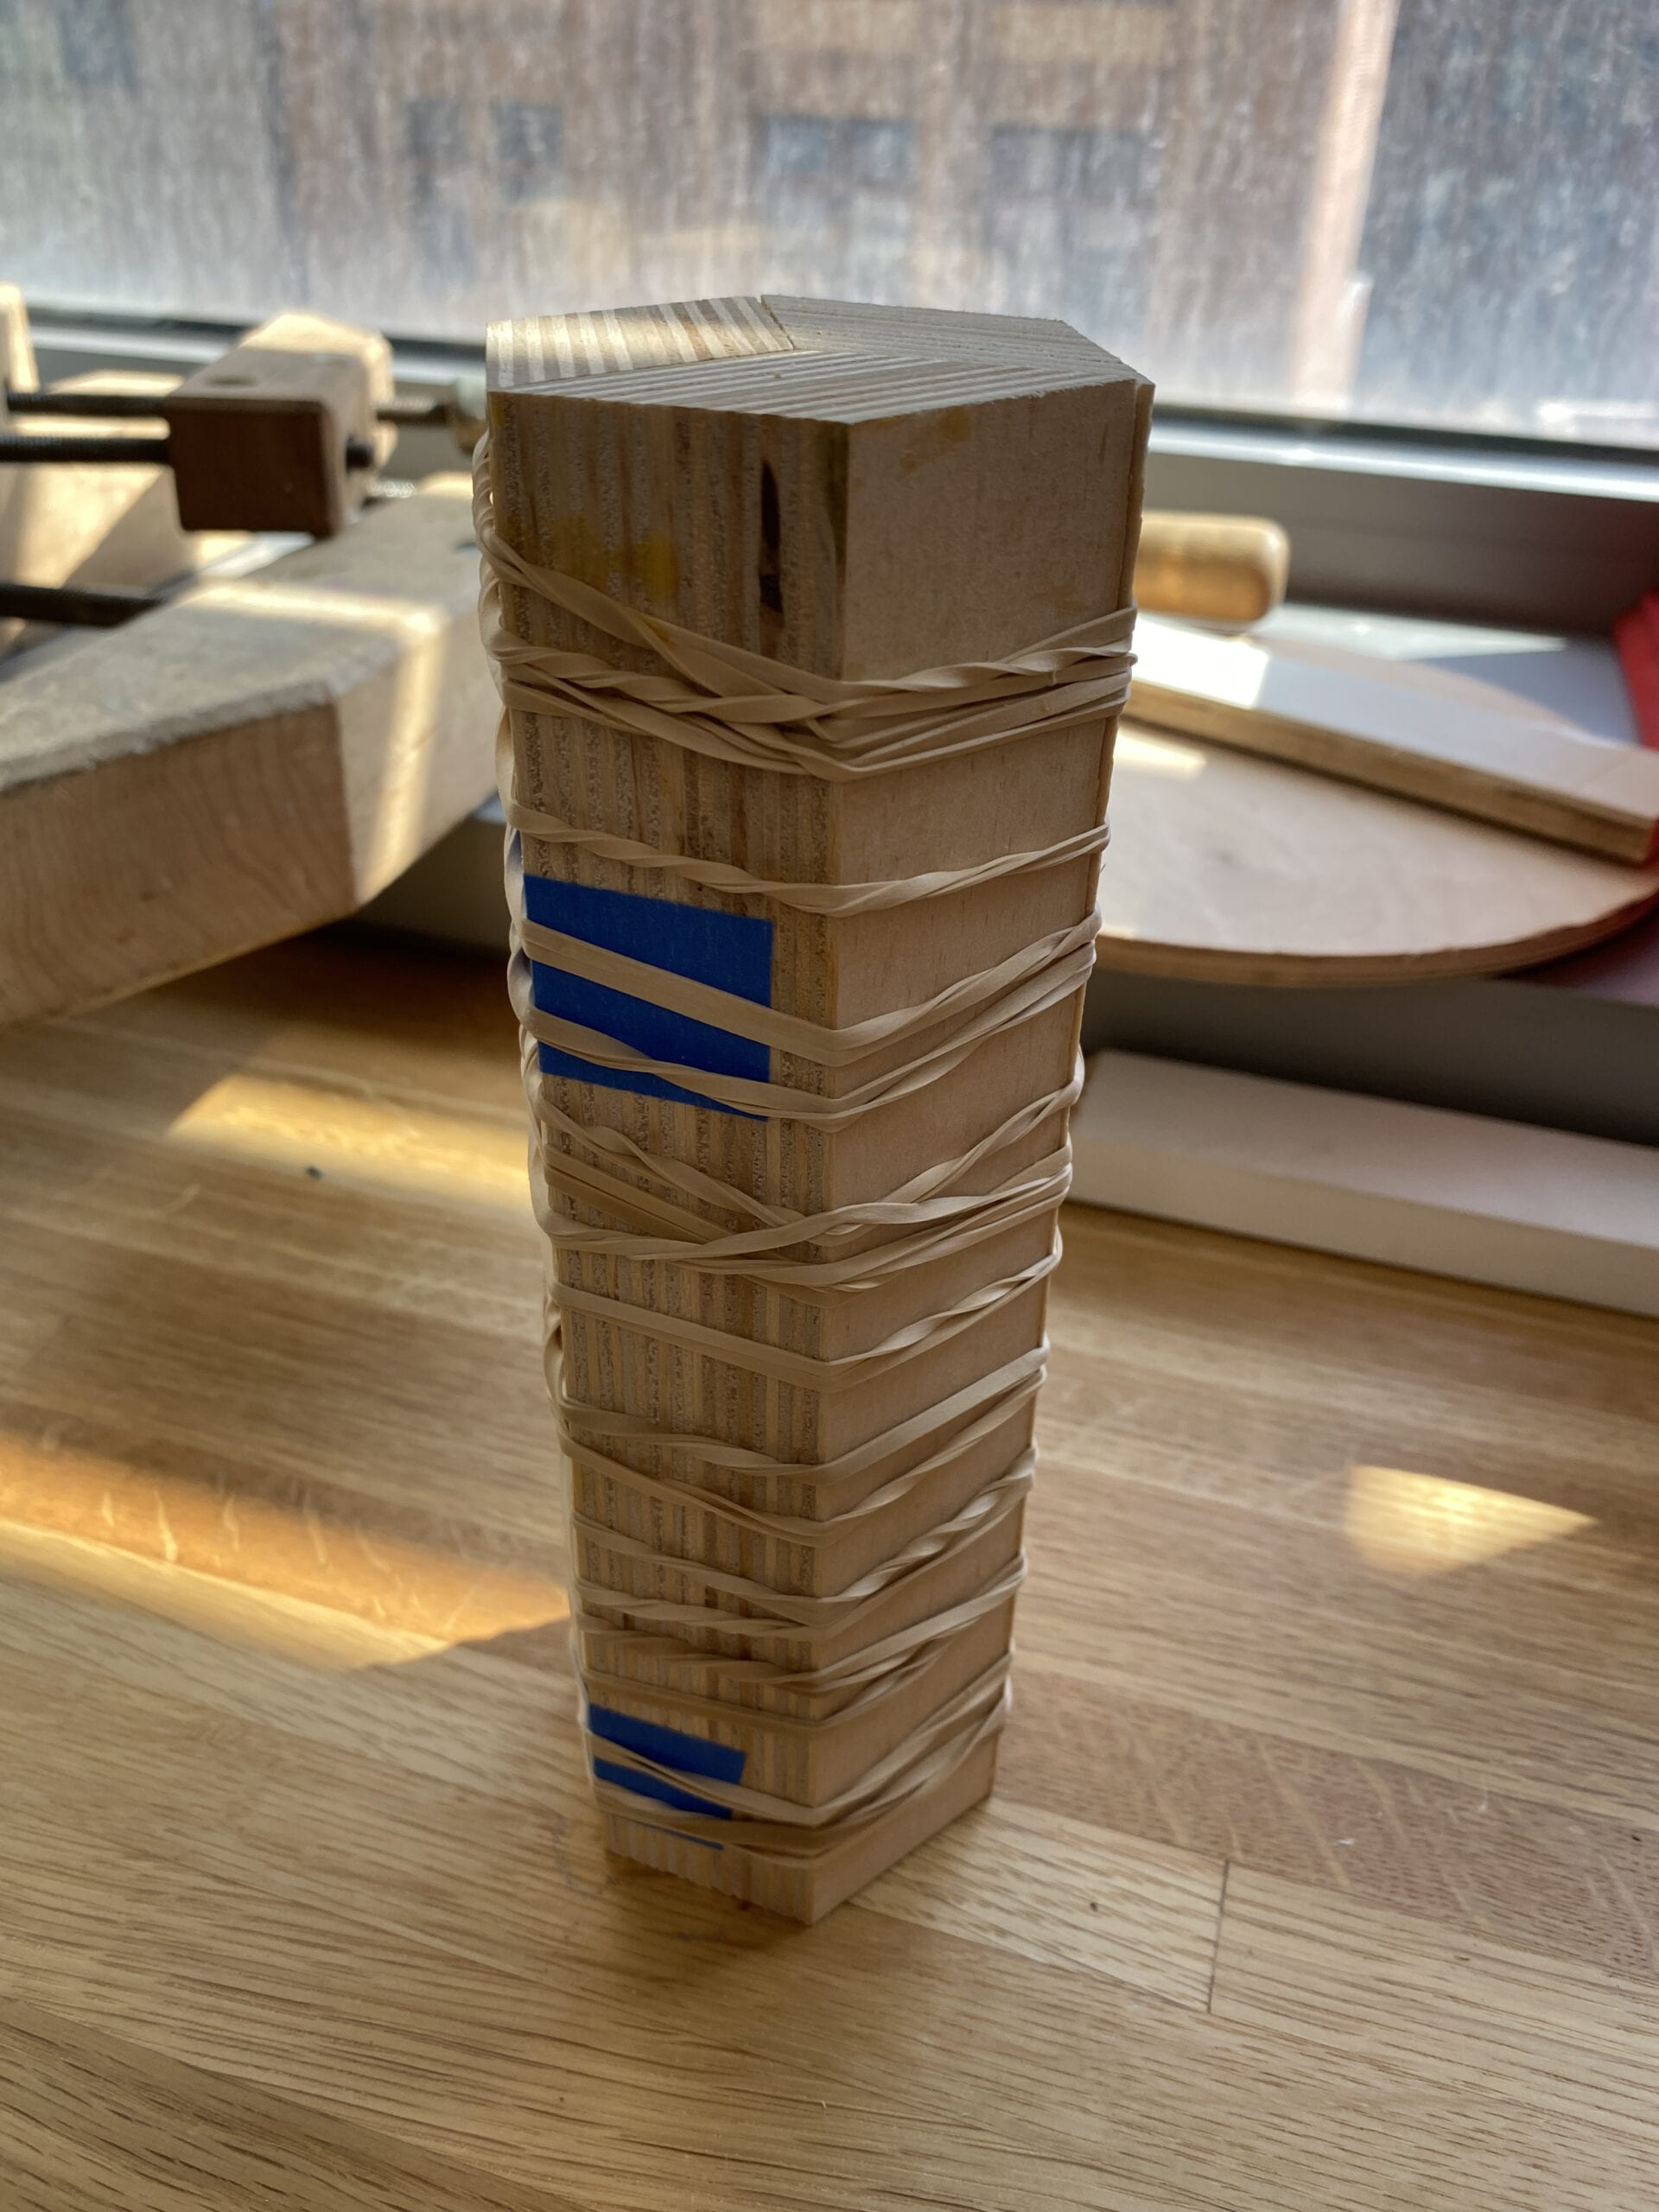
So I tested the clamping method recommended in the video, rubber bands. I put as much as I could before my hands were hurting from stretching them, and here is the result next morning.
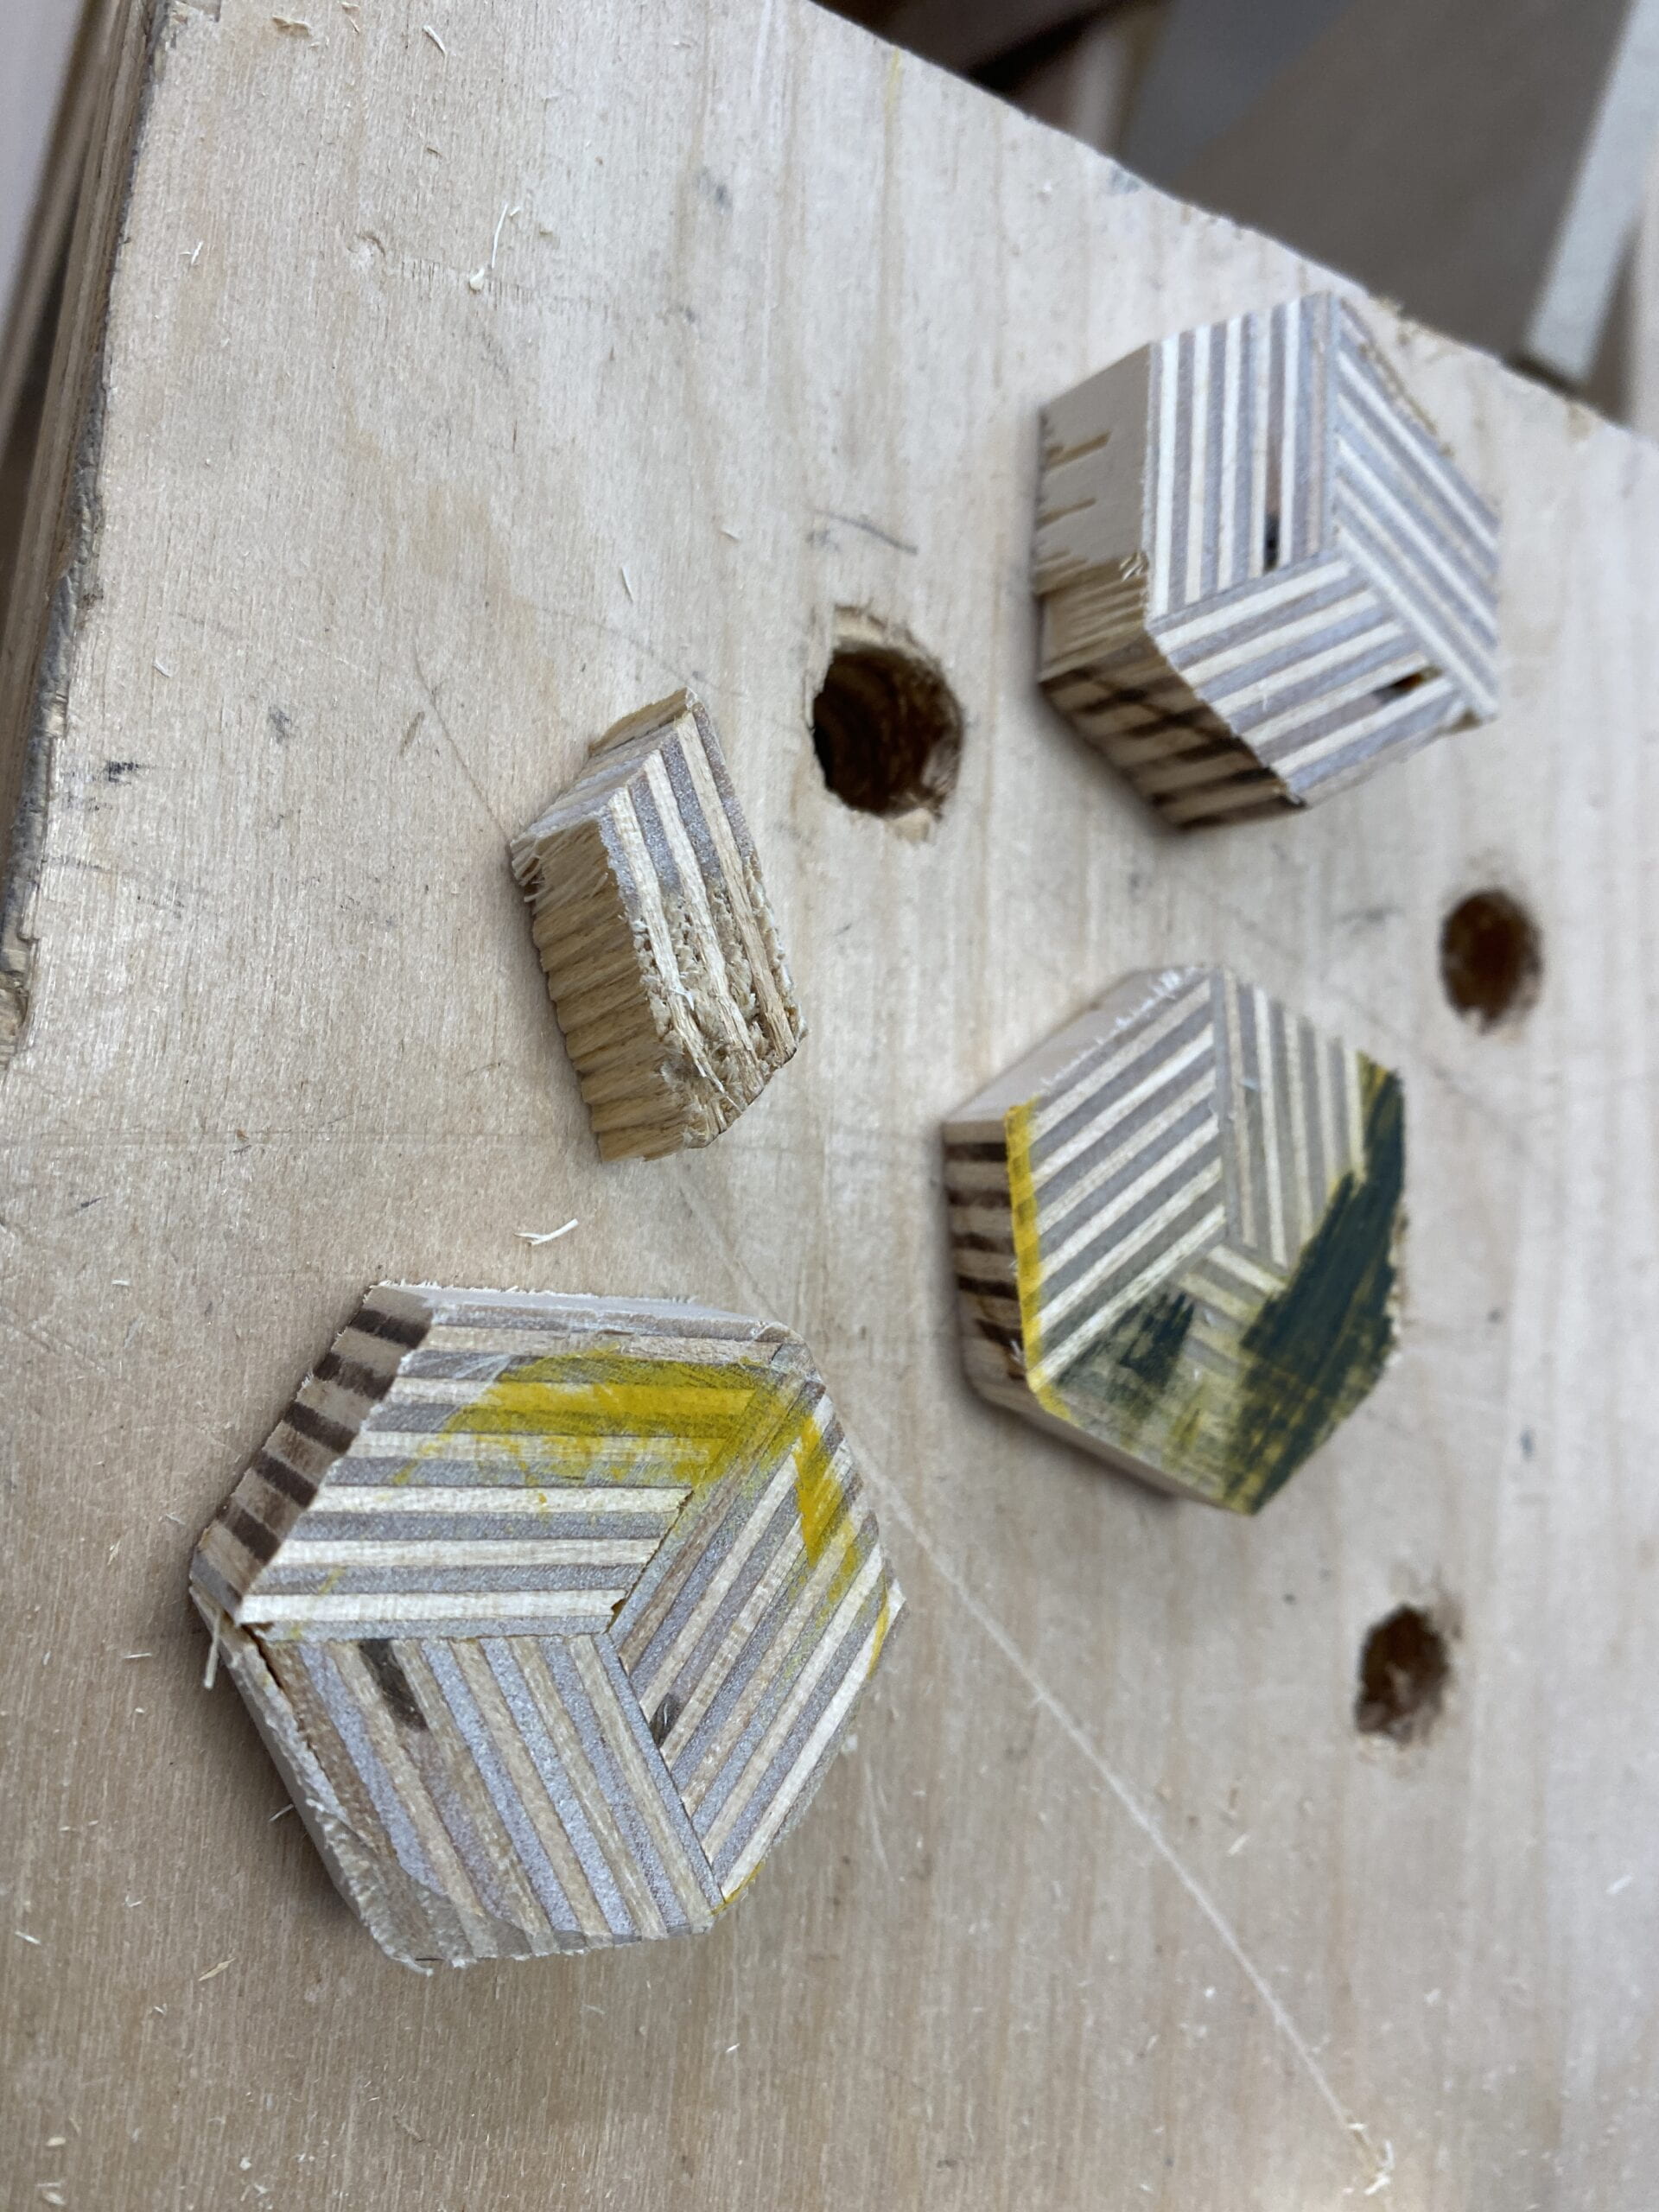
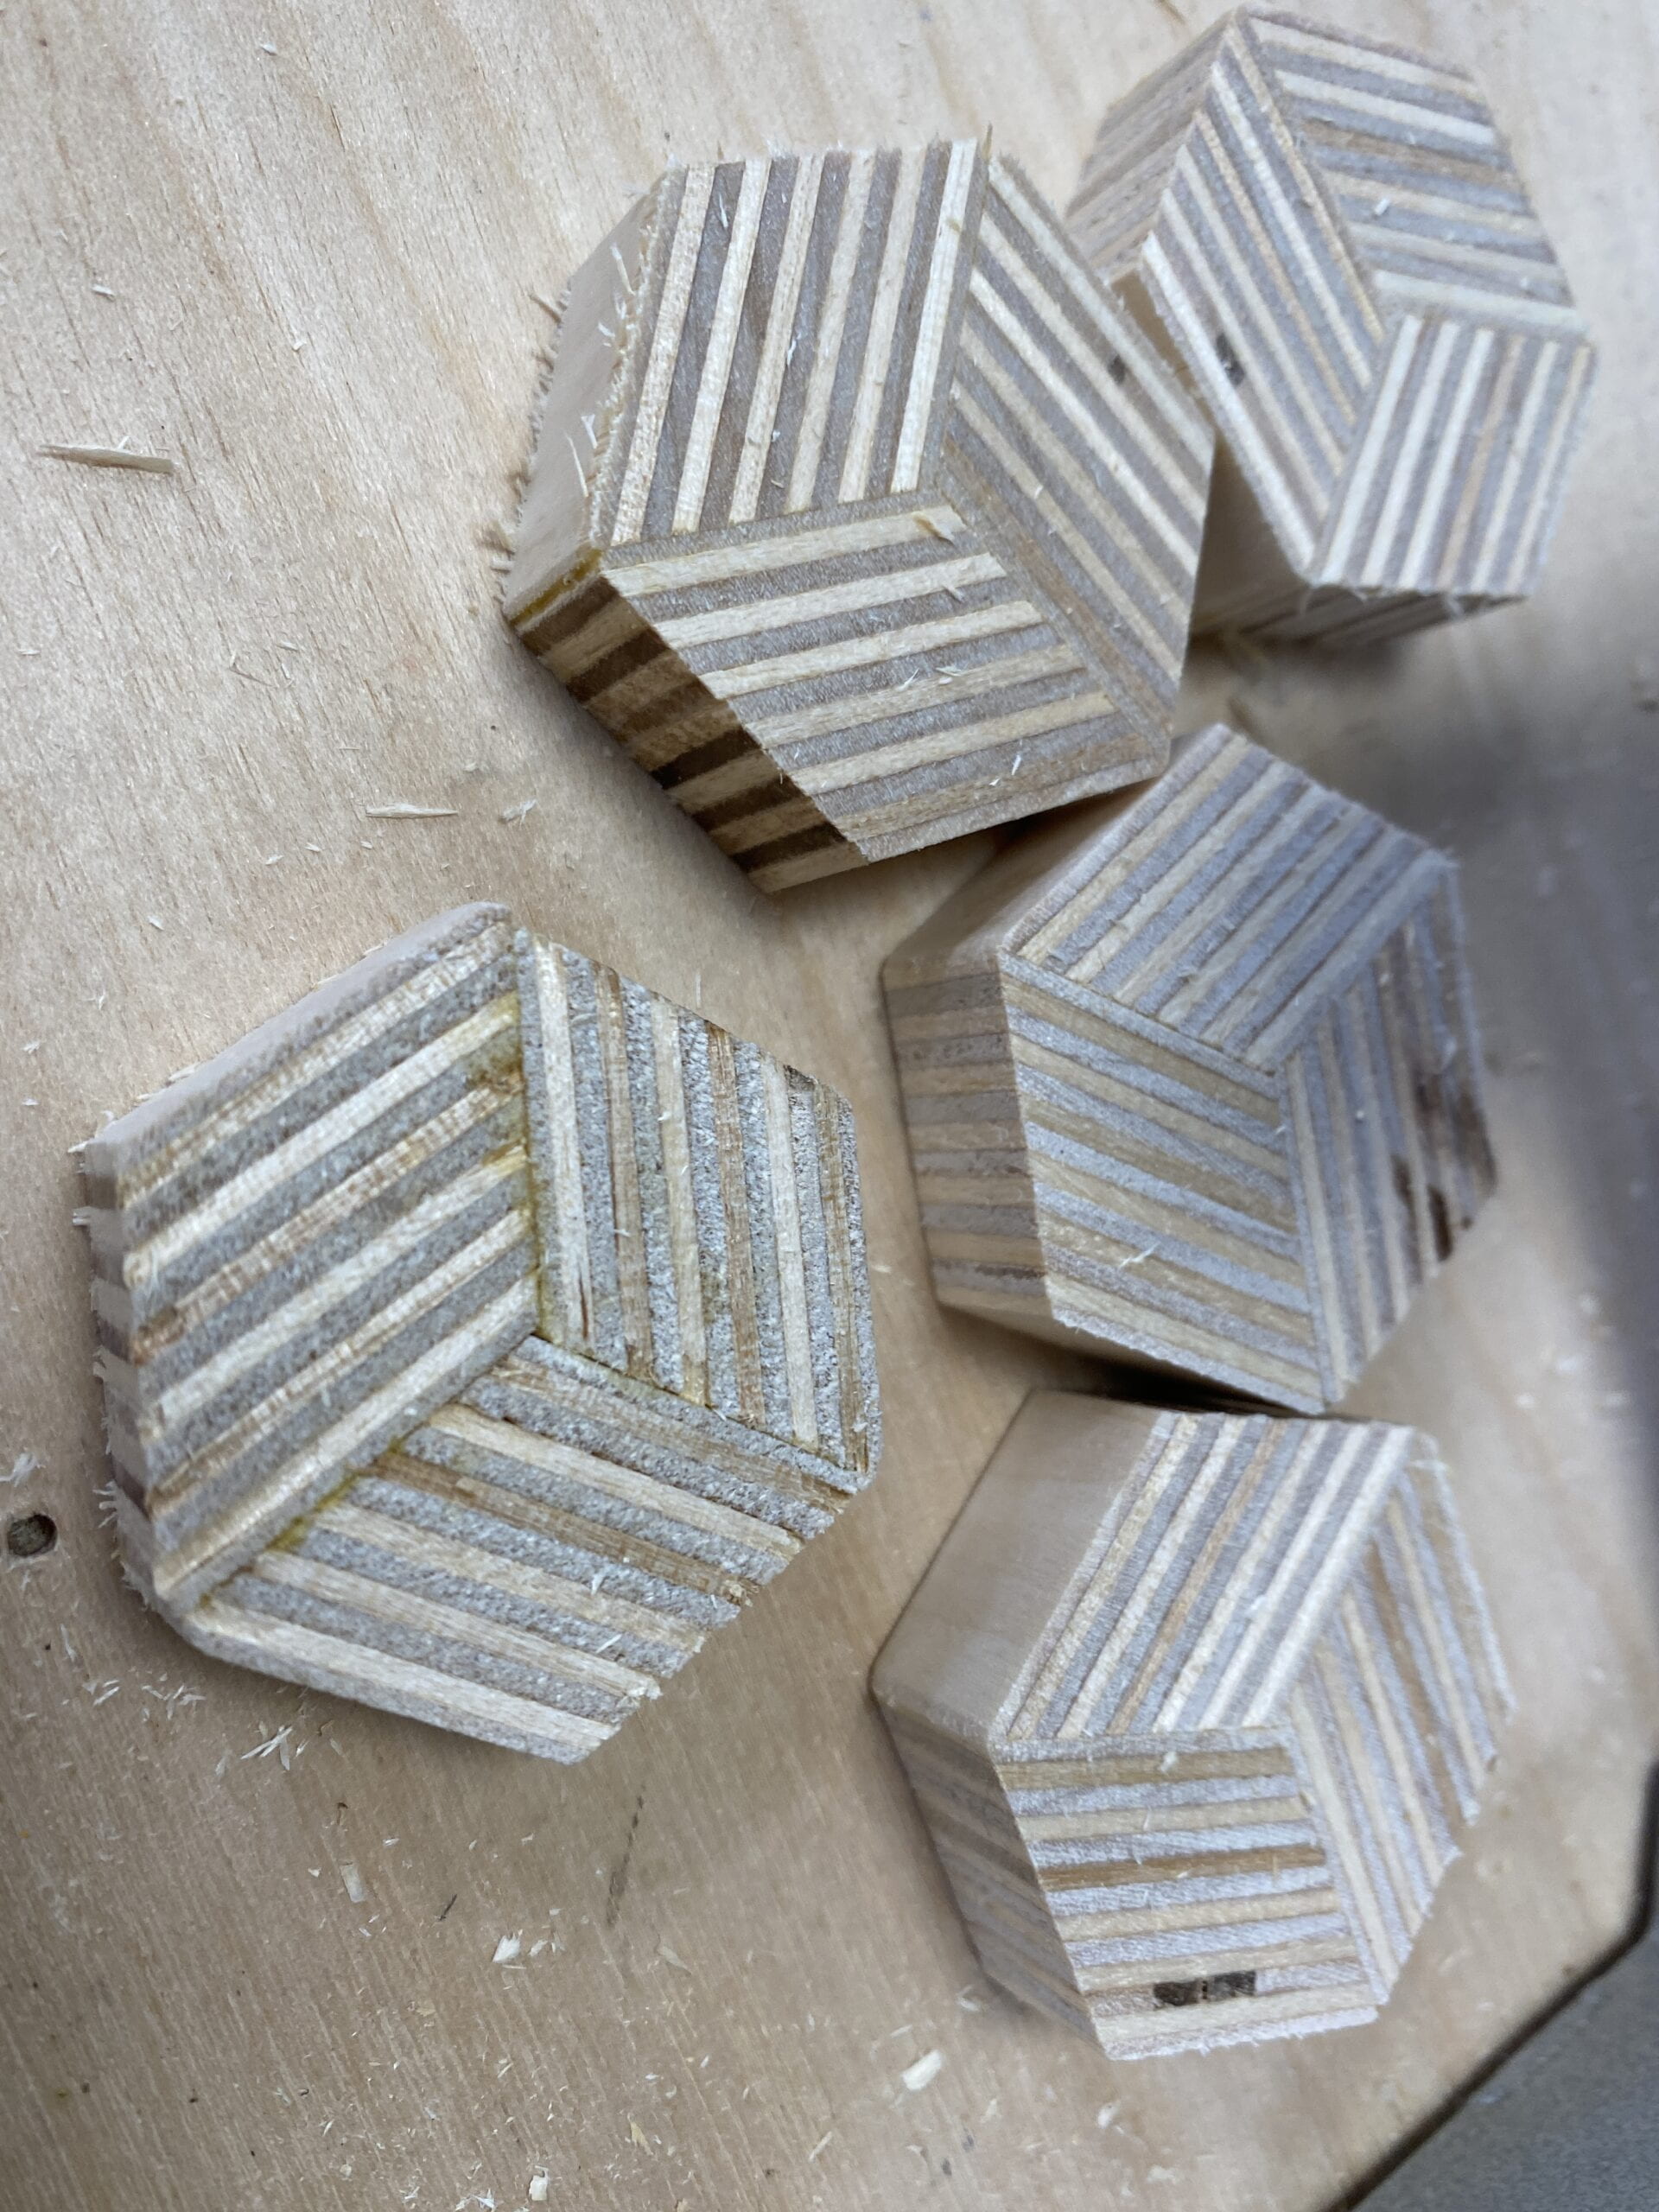
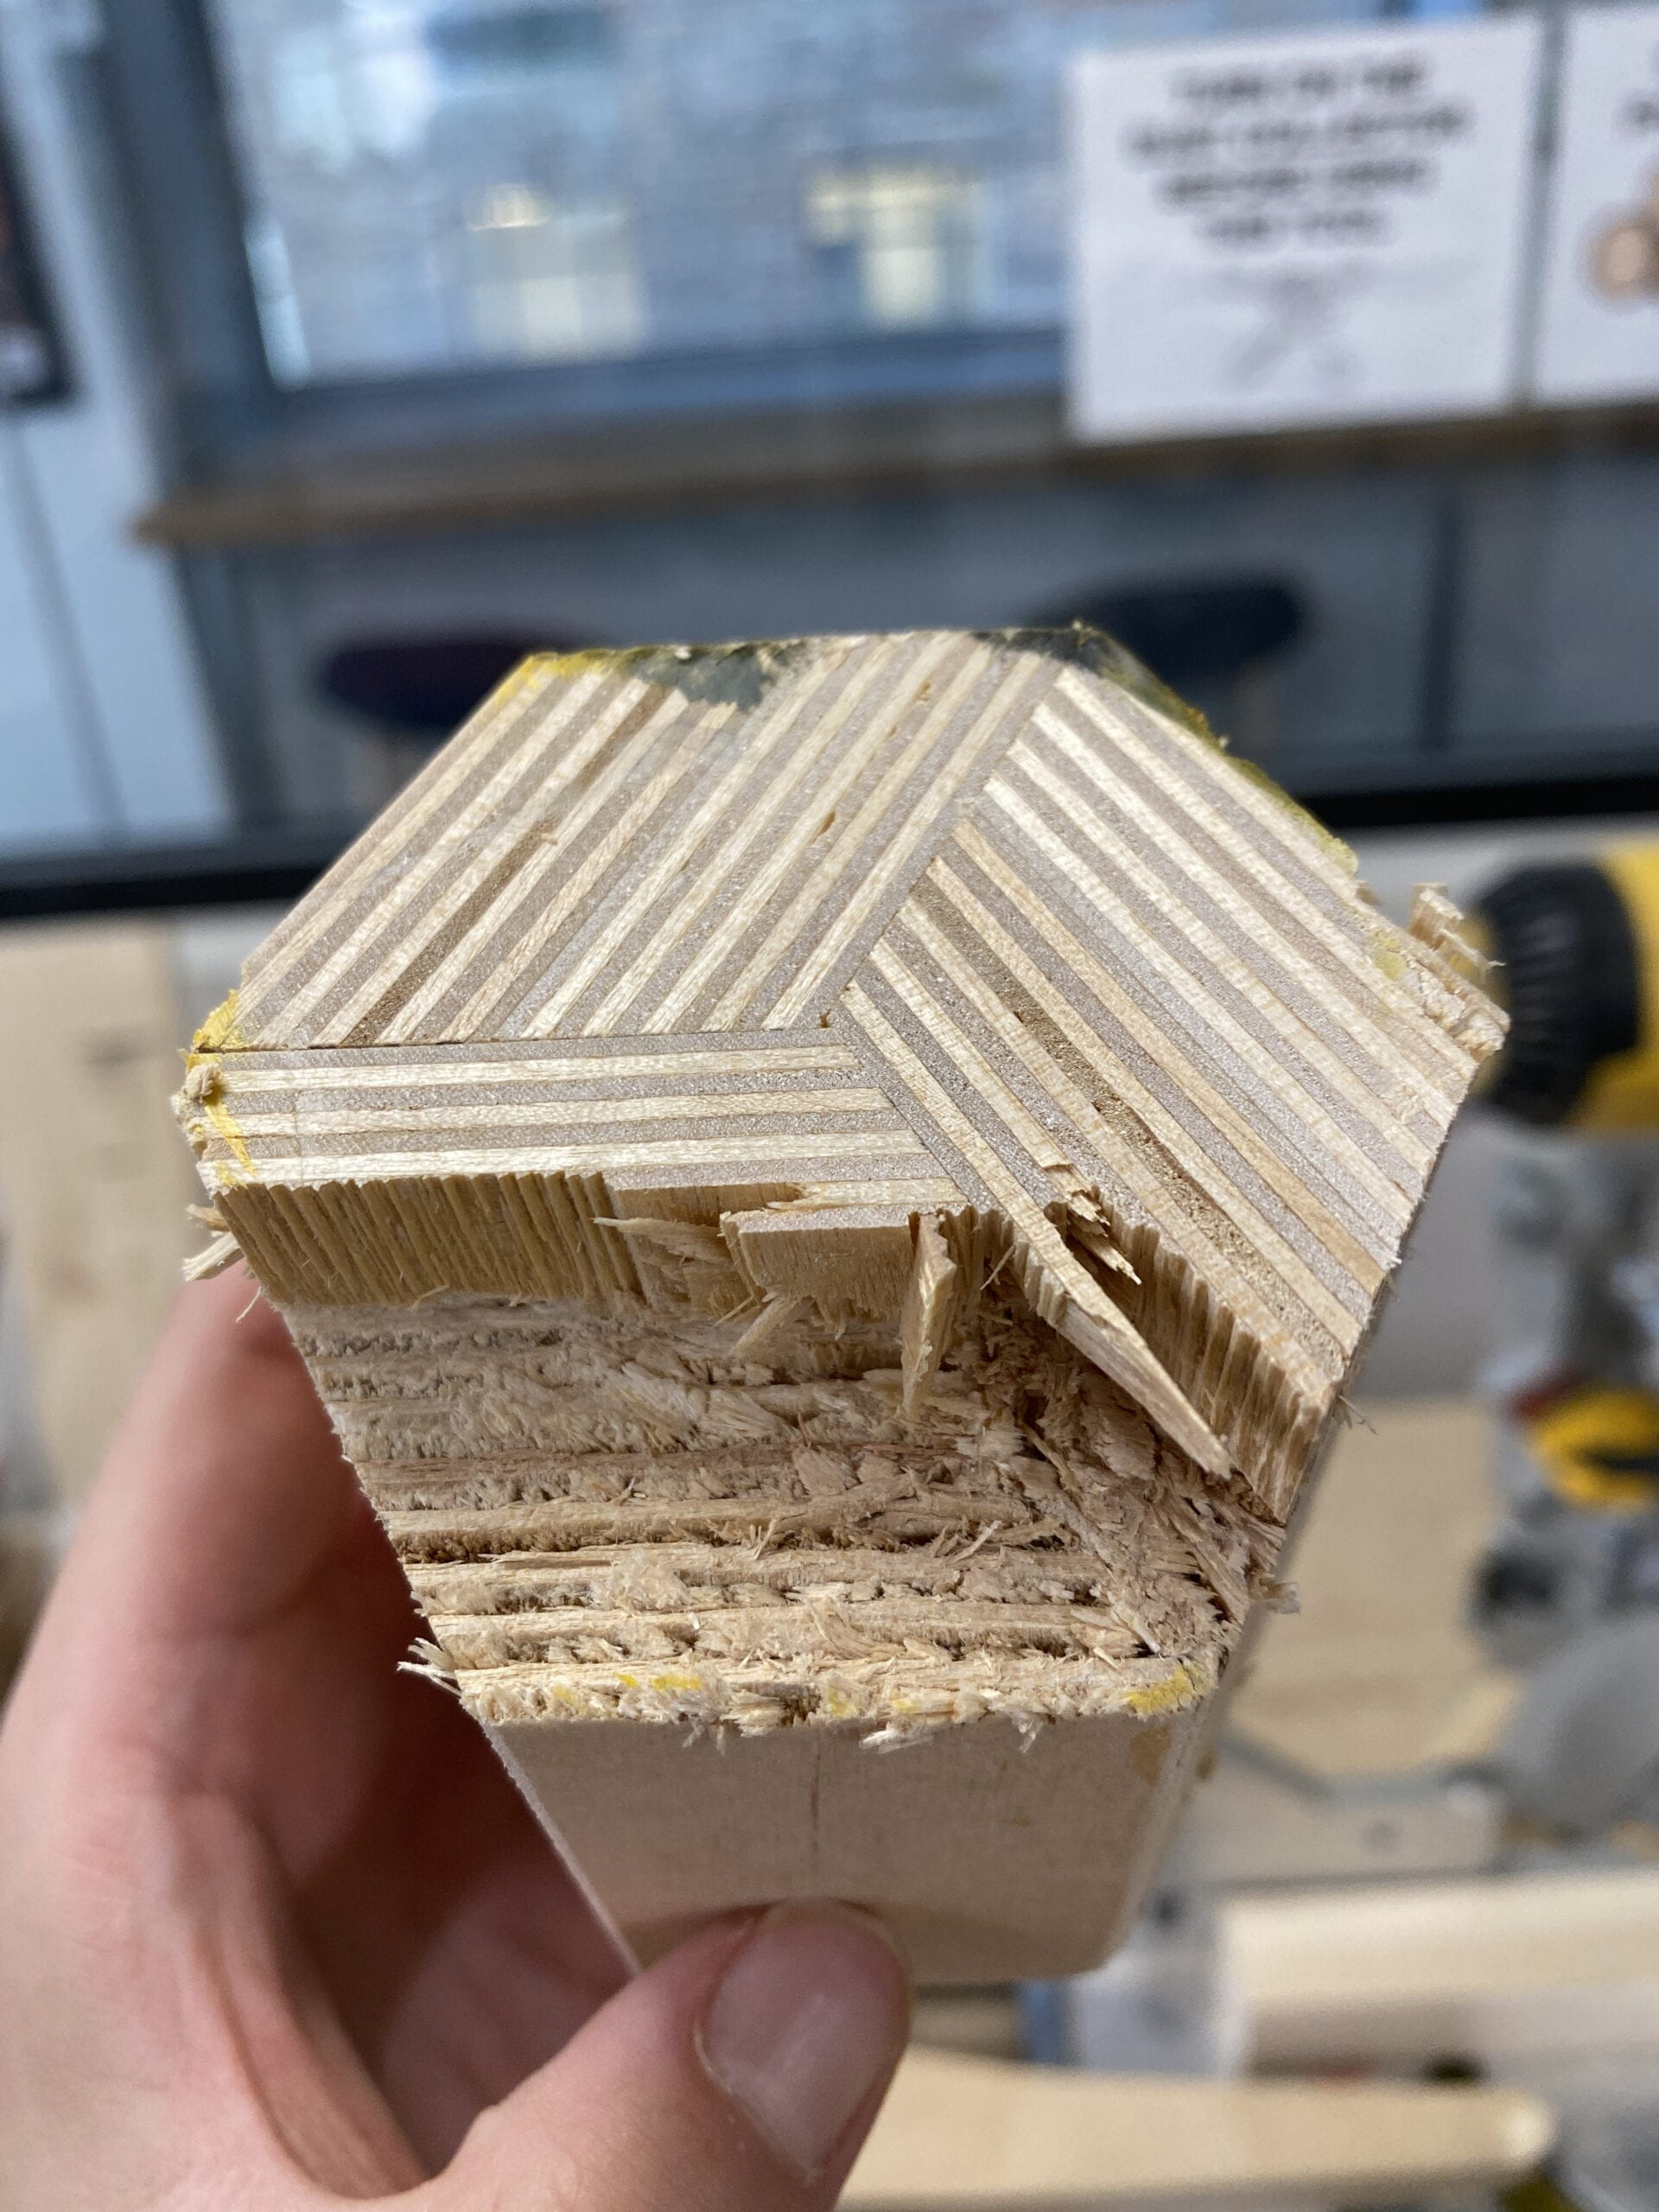
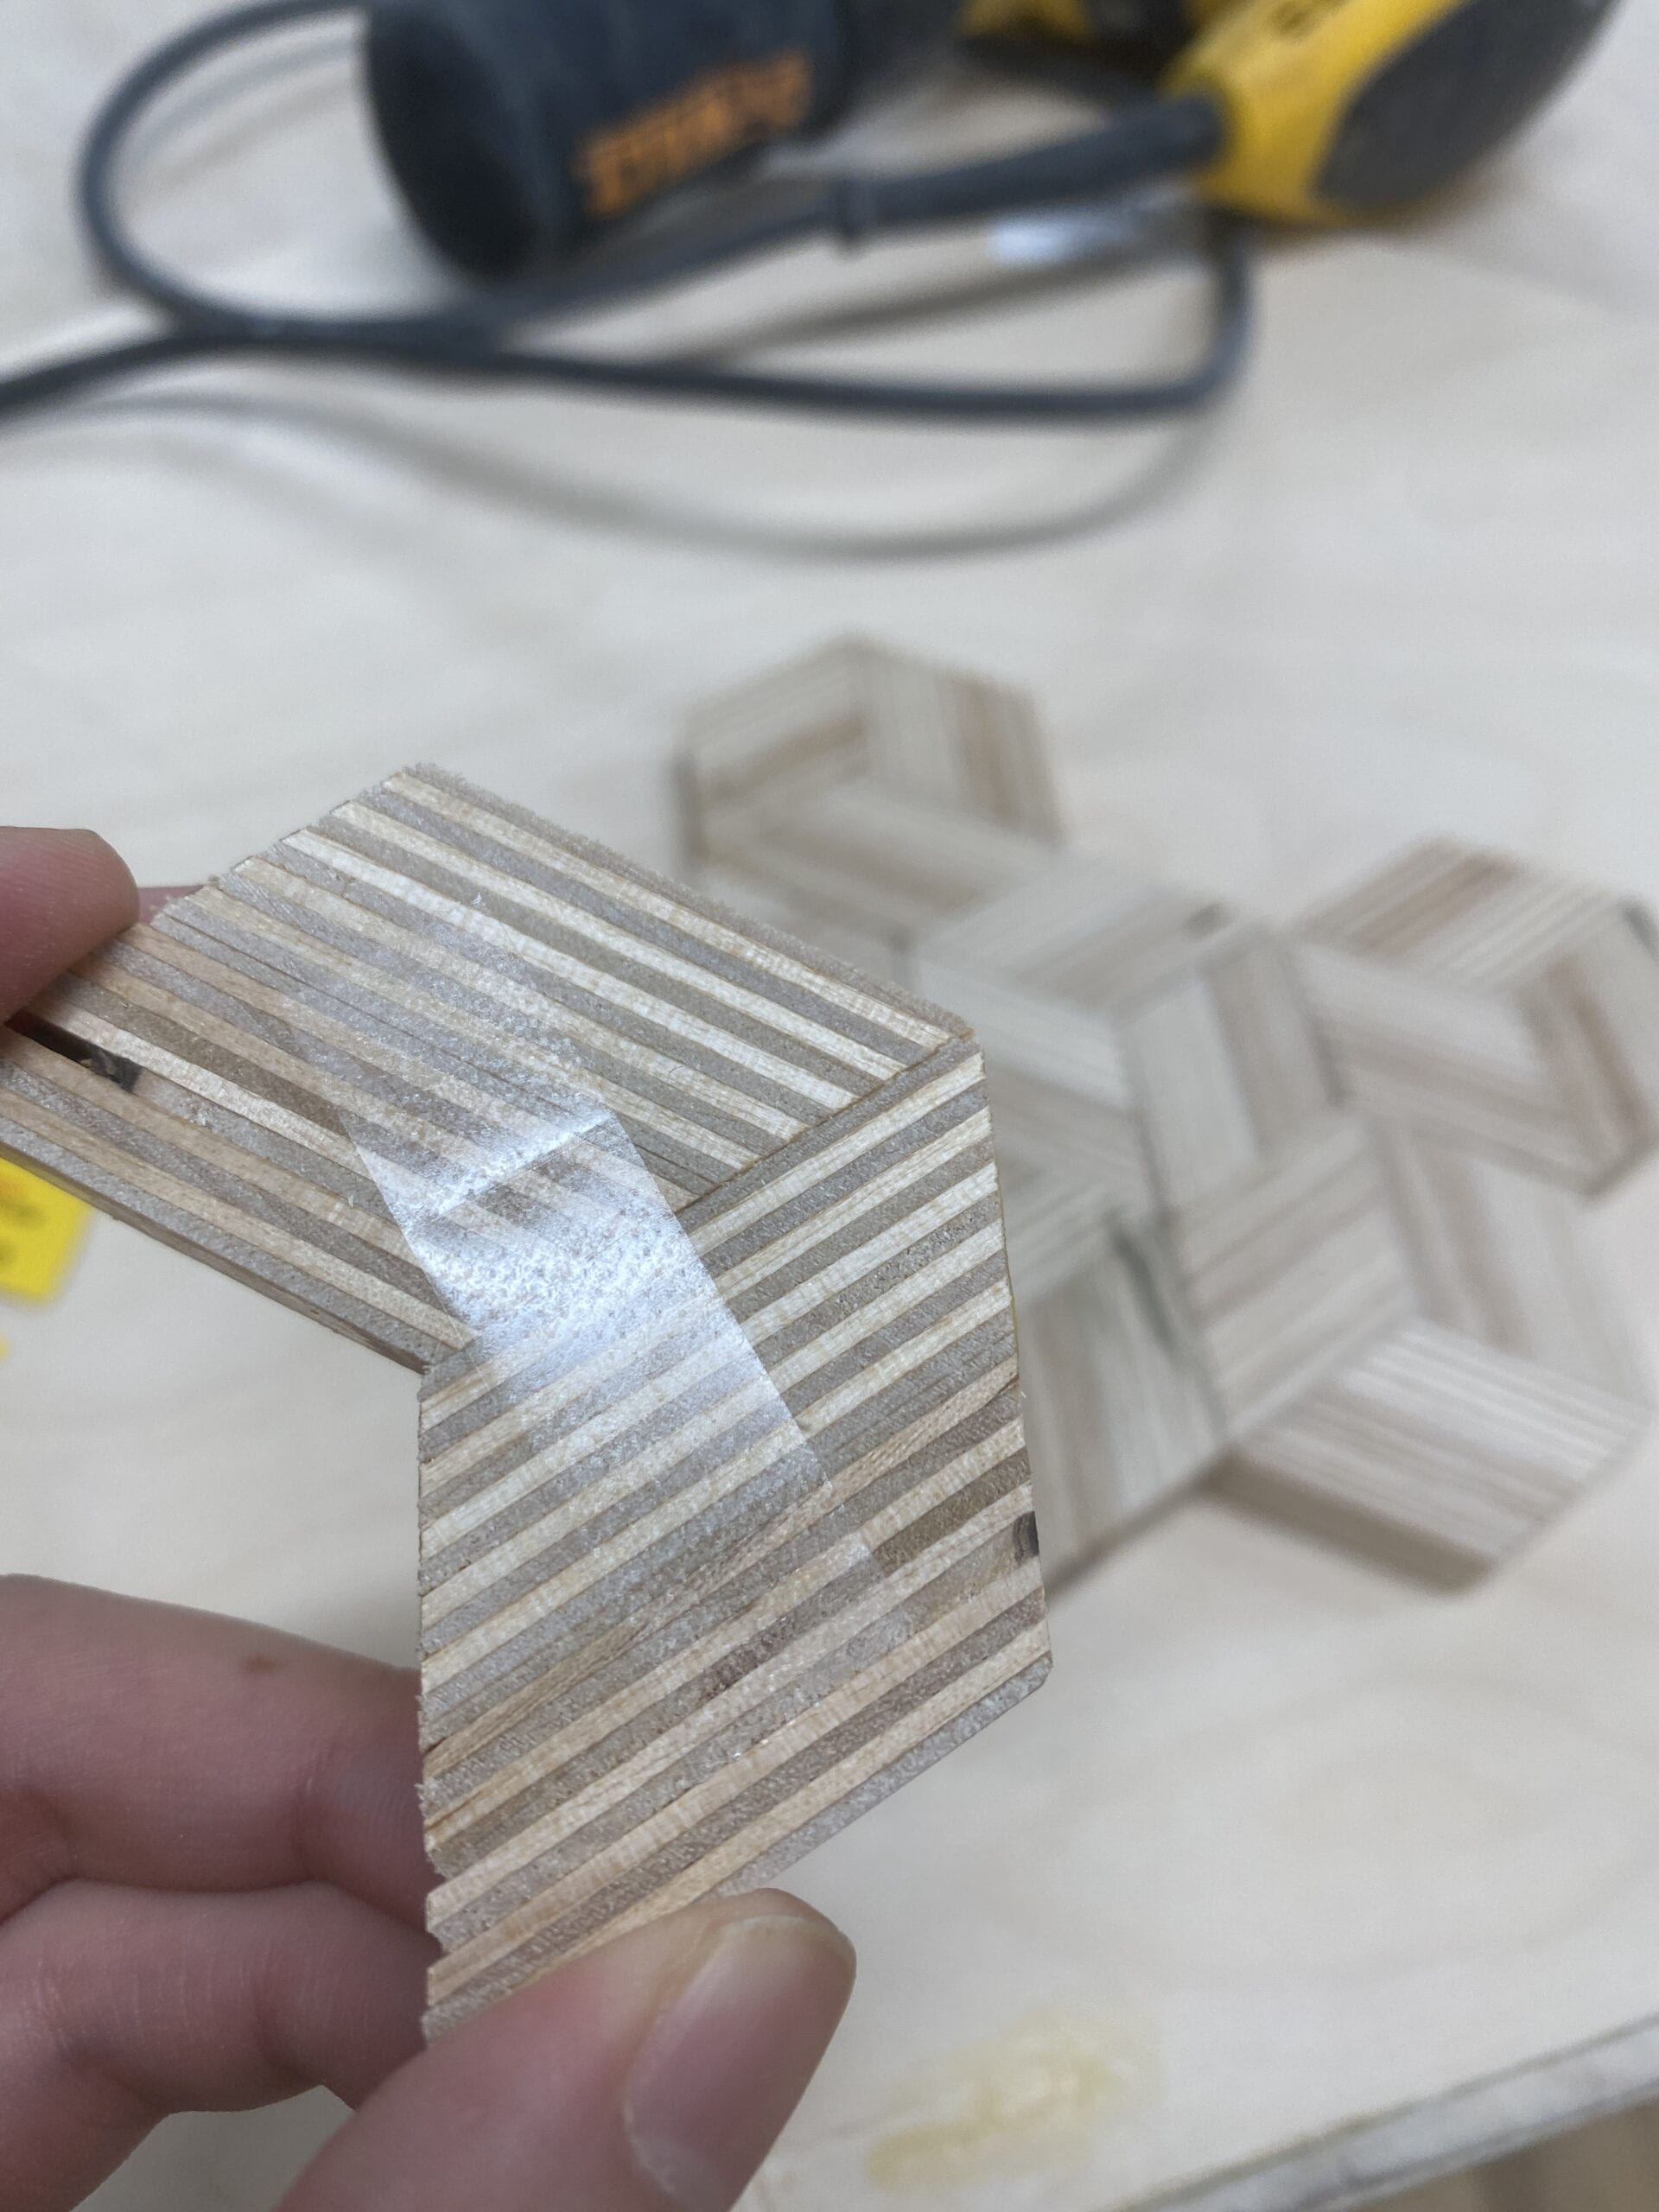
I went ahead and tried to chop them into thin pieces about half an inch in thickness, some worked pretty nicely, the gap was not even that visible in some pieces, to my surprise; but for some it was pretty nasty with all the tears and burns.
Problem
Big problem time. As the “log” gets chopped shorter and shorter, it became progressively harder to hold since it was somewhat round and it wanted to roll around. And I thought I was being pretty smart doing this: 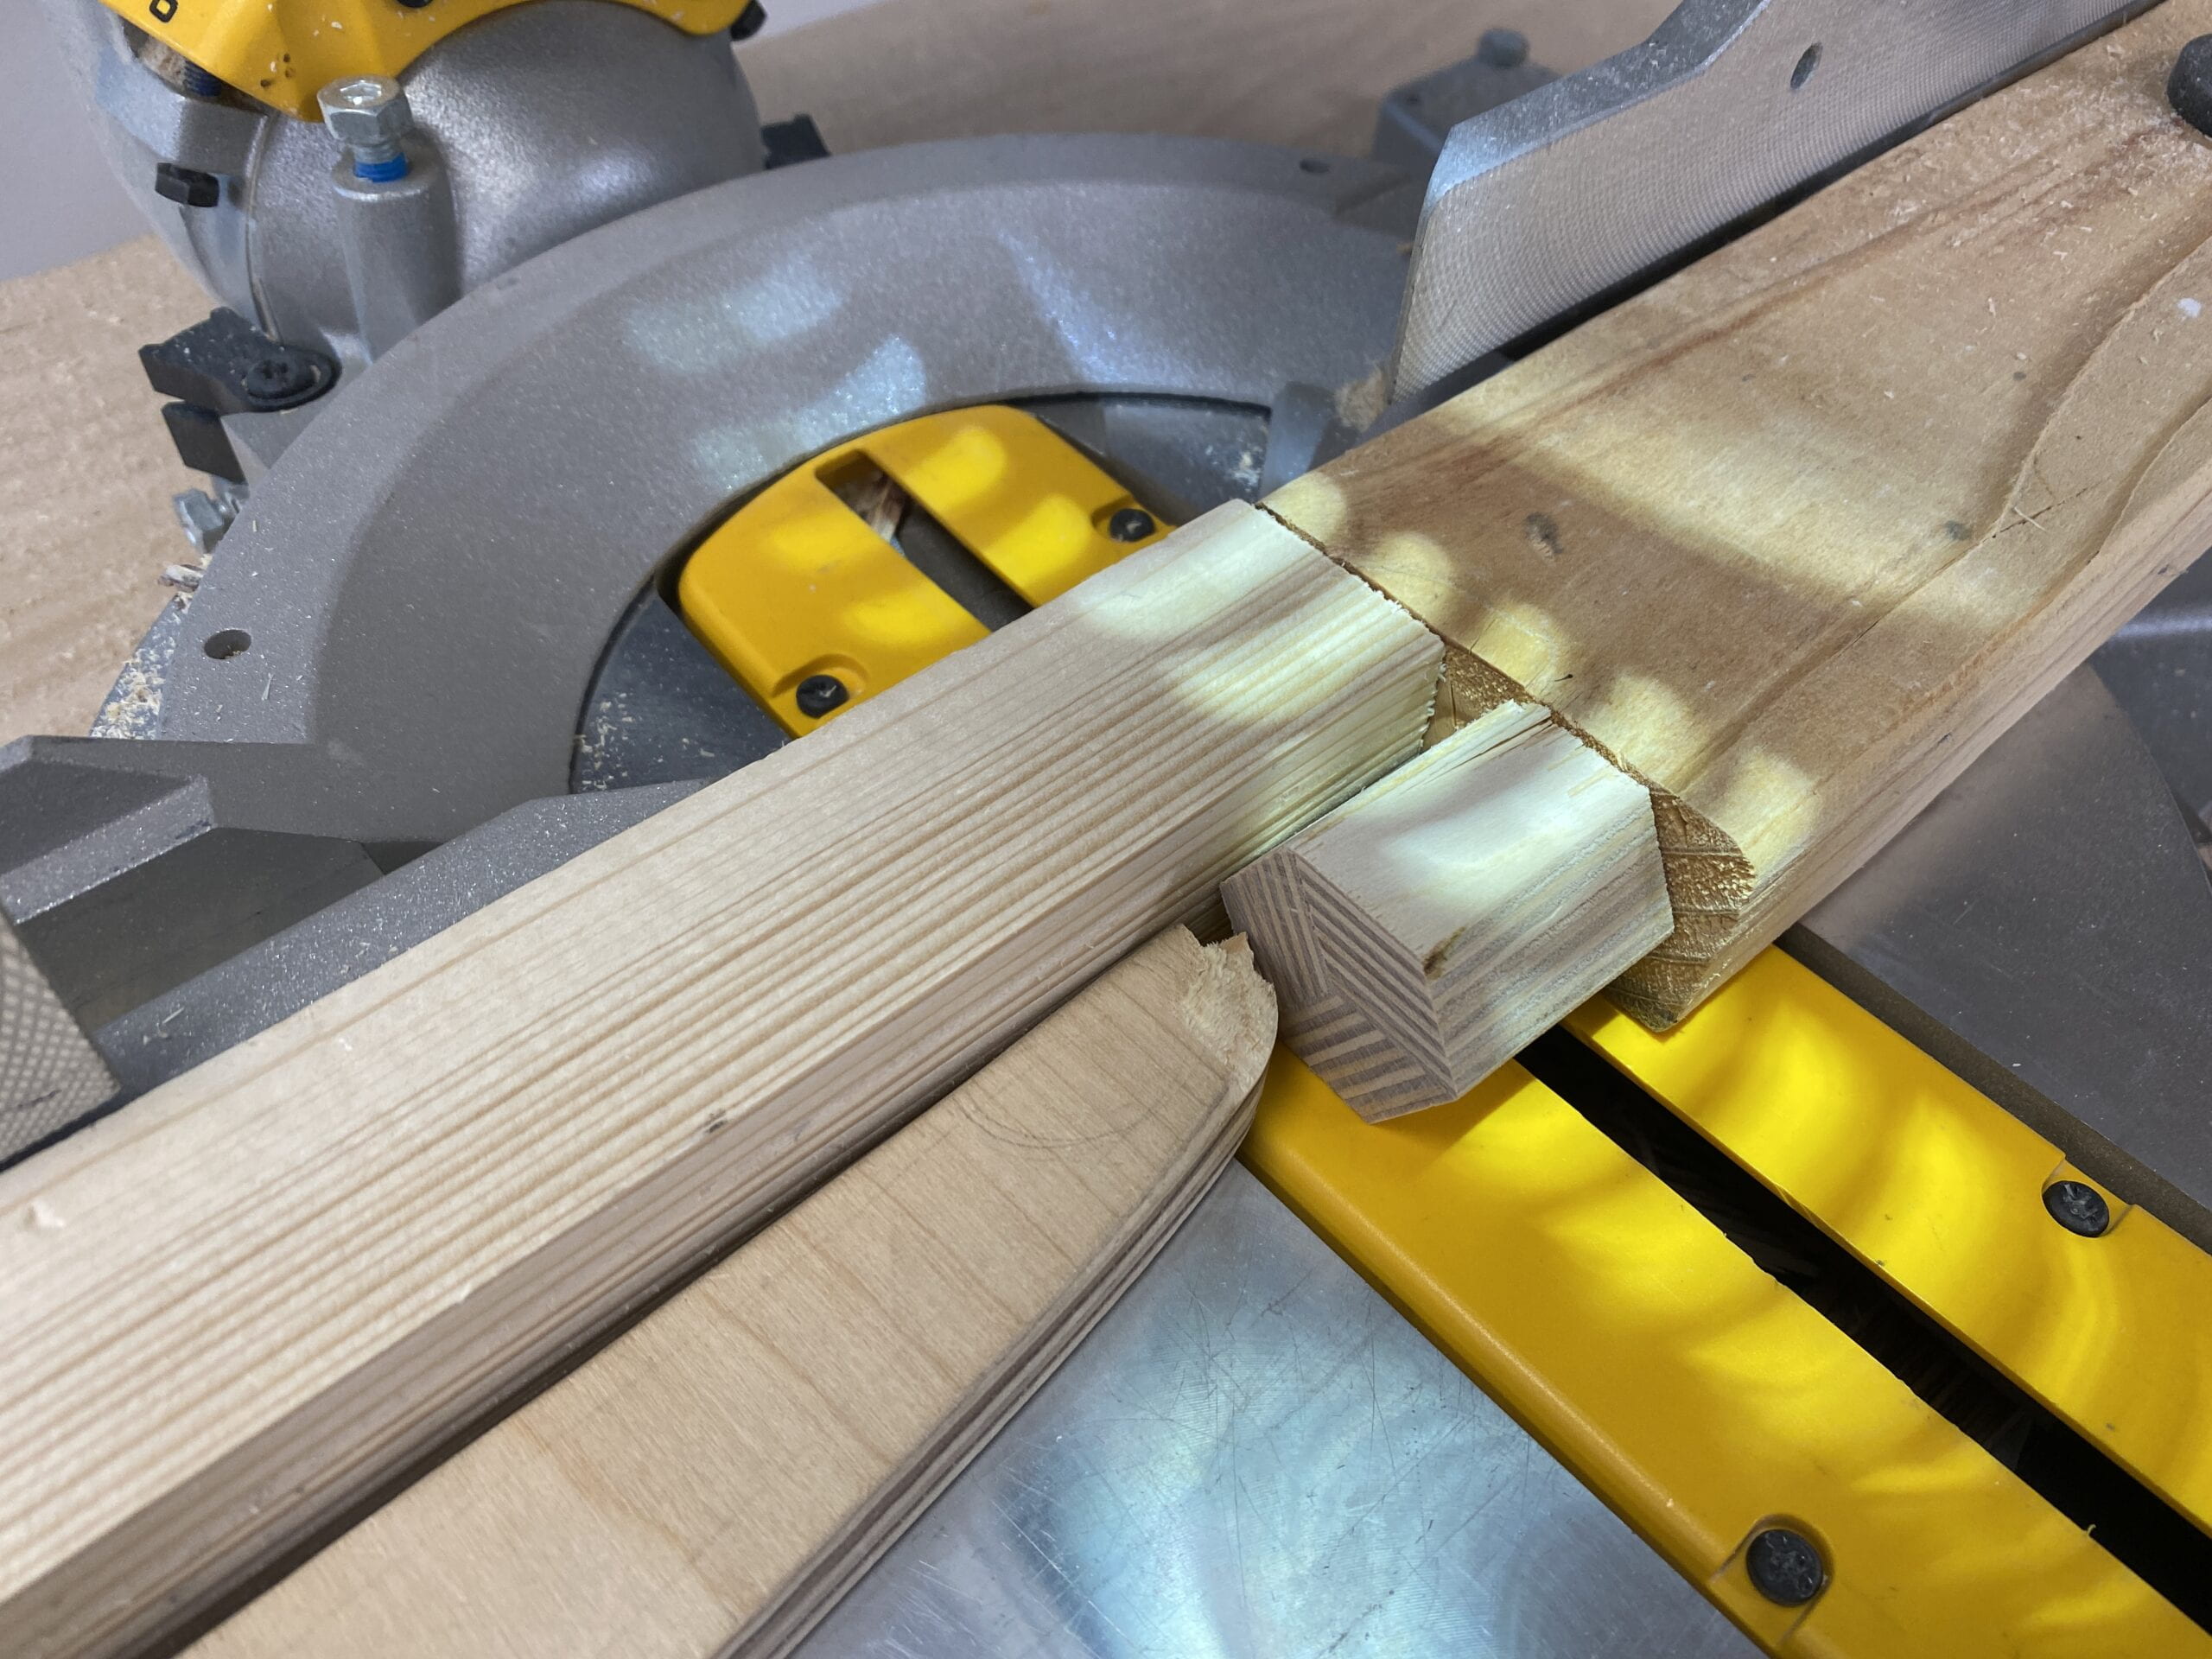
using a piece of scrap wood to support the side of the log, which effectively elongated the fence and brought it up to the saw directly, which might actually work if I had clamped my piece on the saw table, because the fence was not supporting effectively the direction that the wood wants to fly off in. So, this happened.
Luckily I was fine and there was no one else in the room, or else it would be pretty scary.
Final sanding and future possible finishes
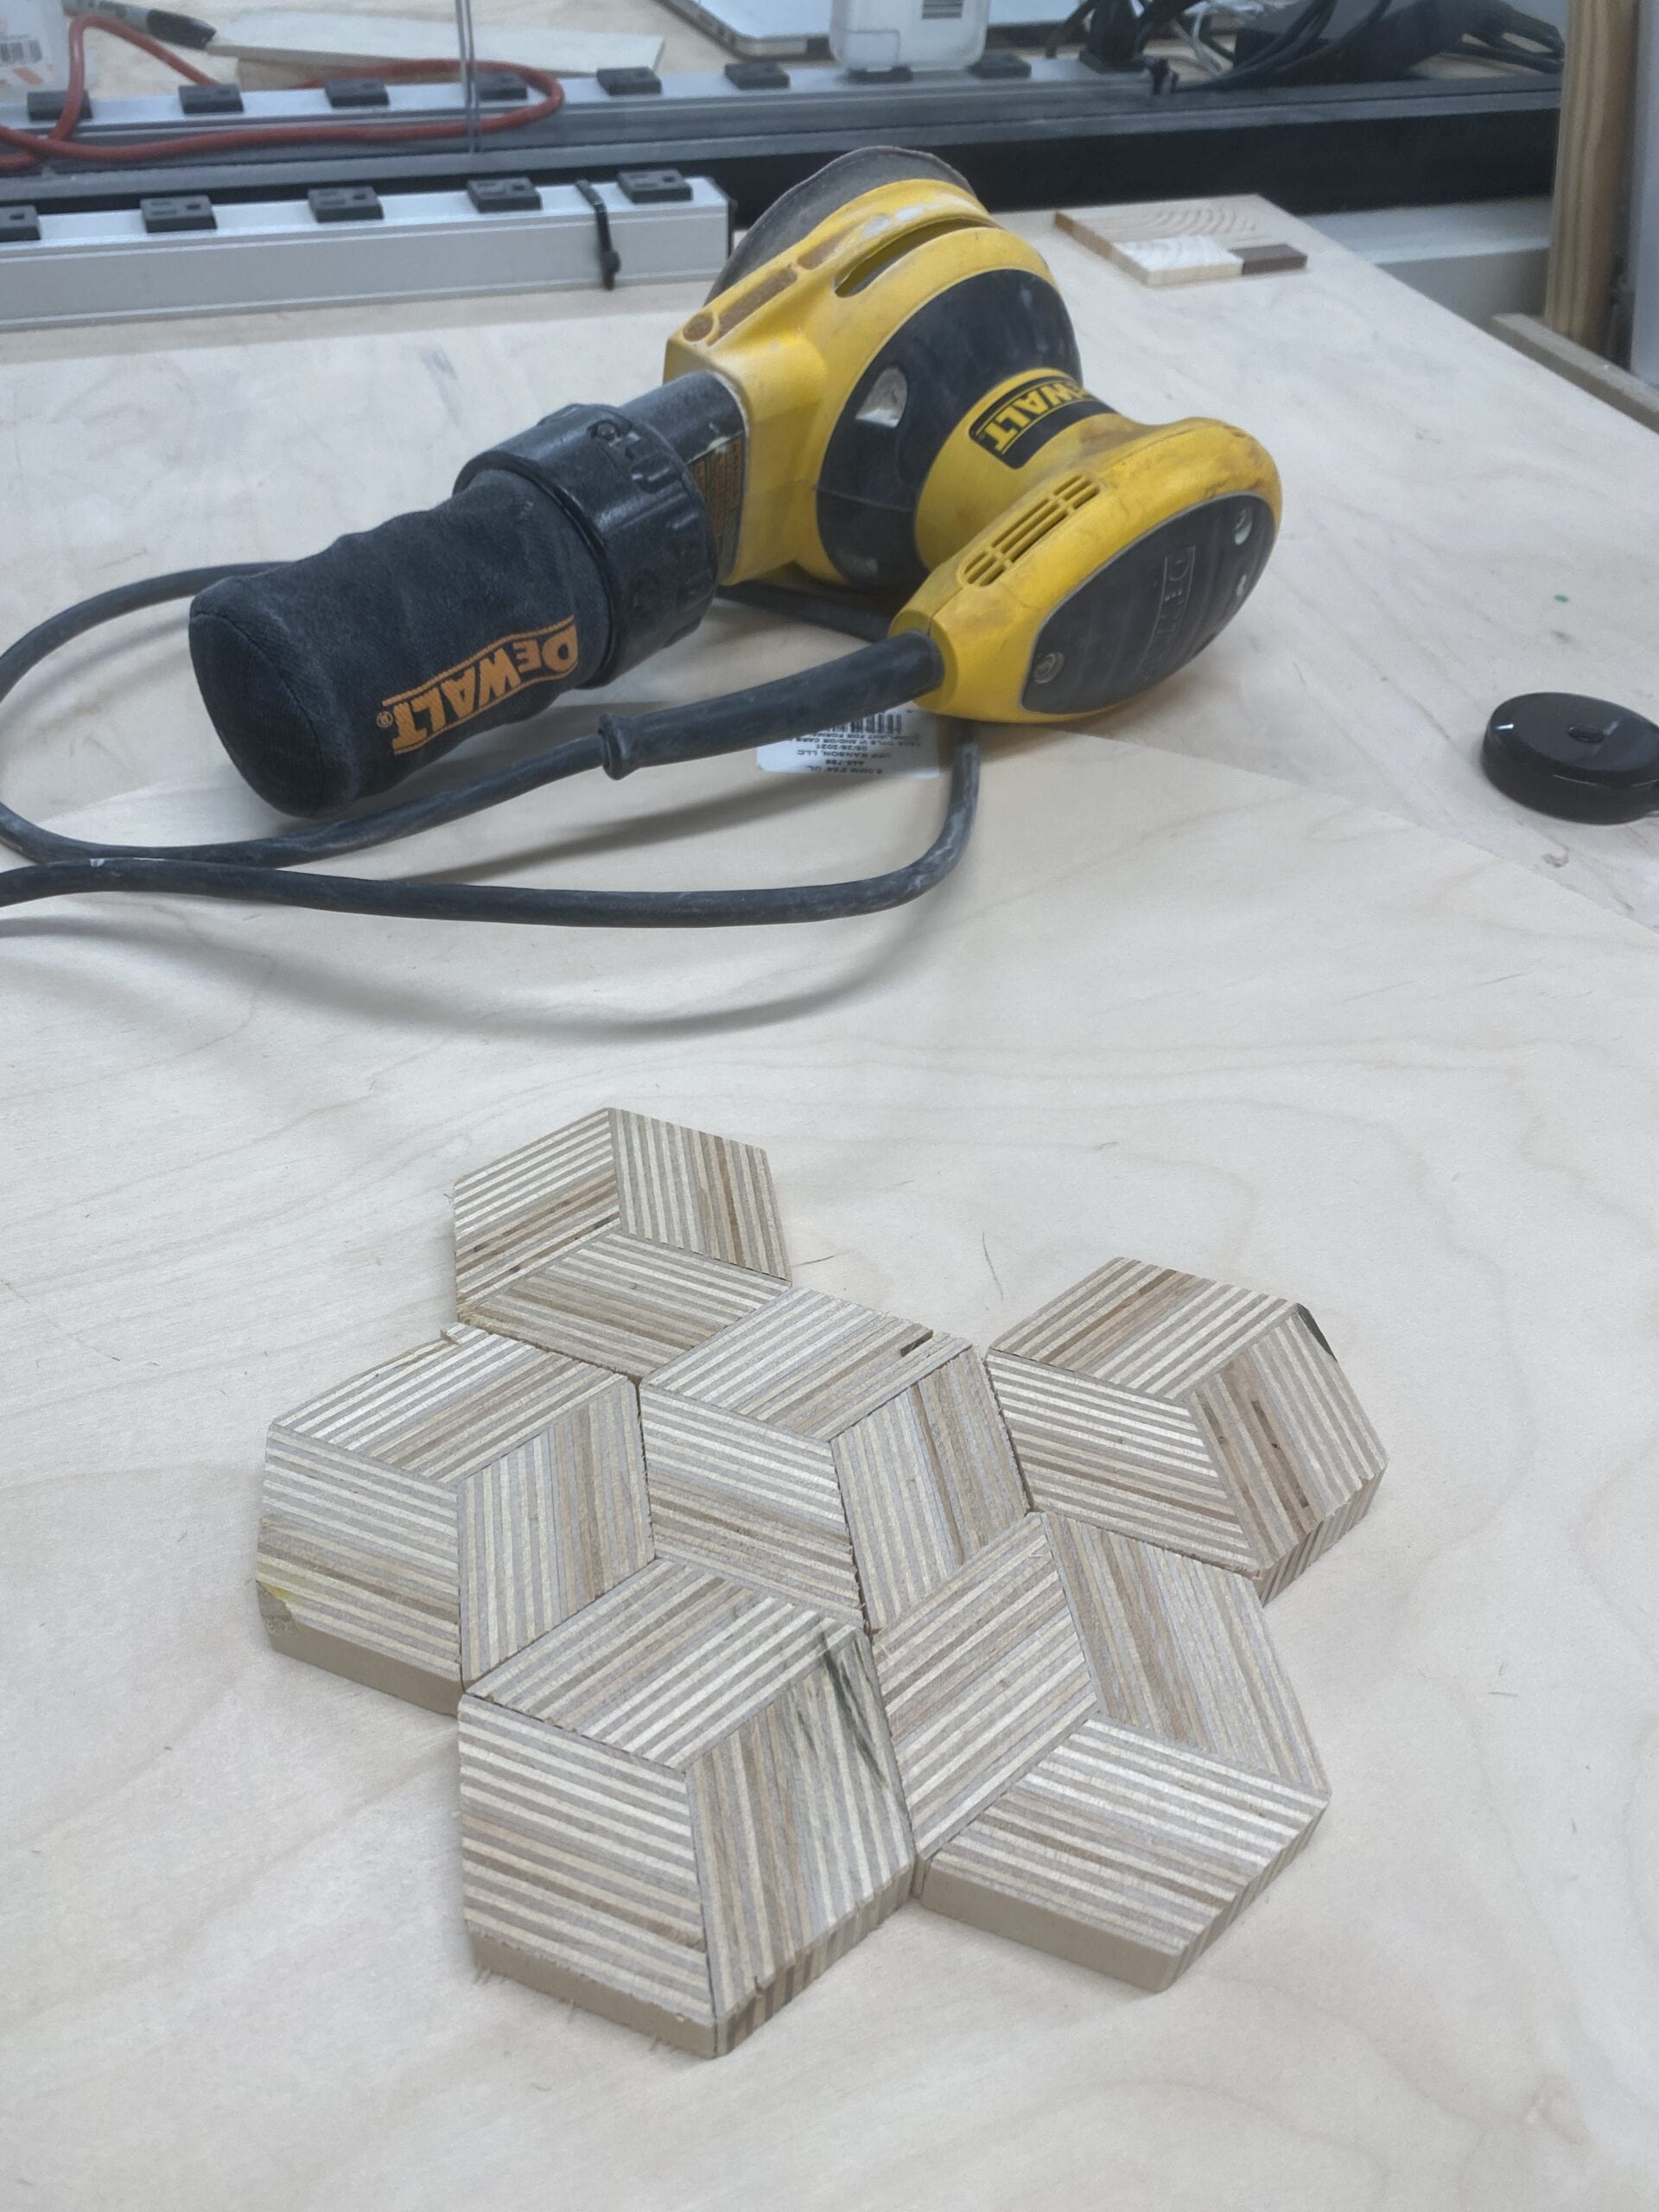
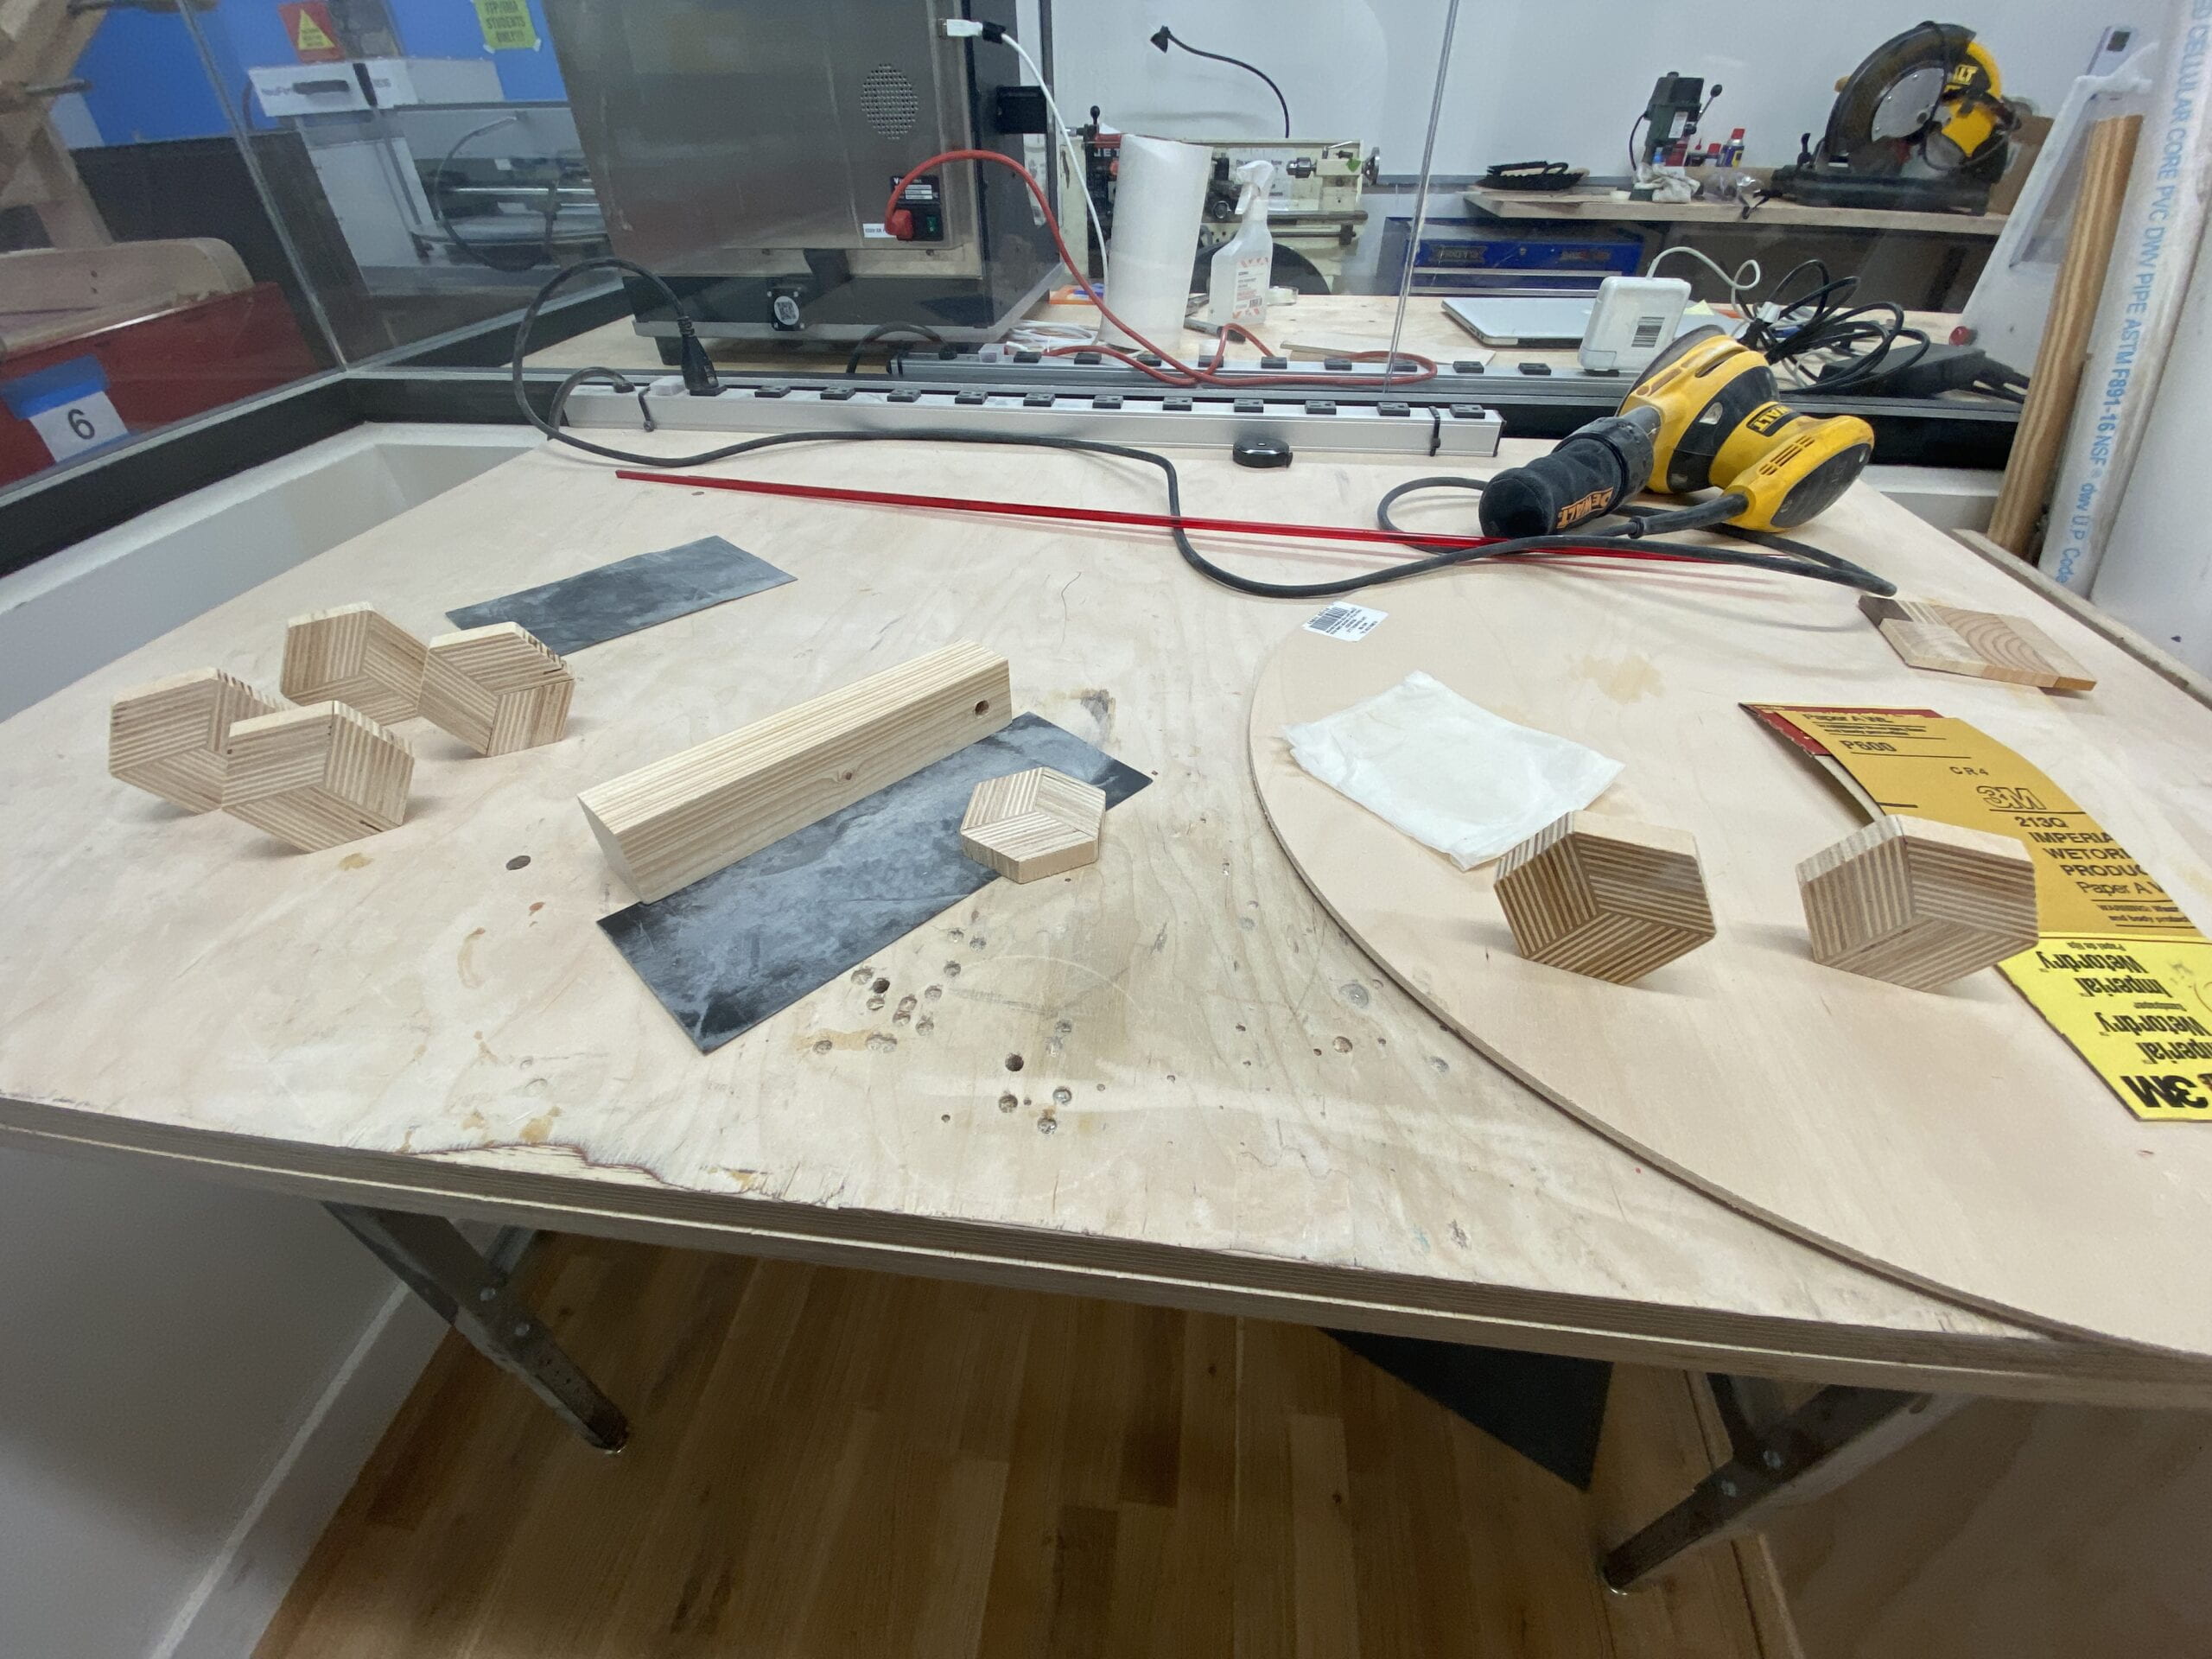
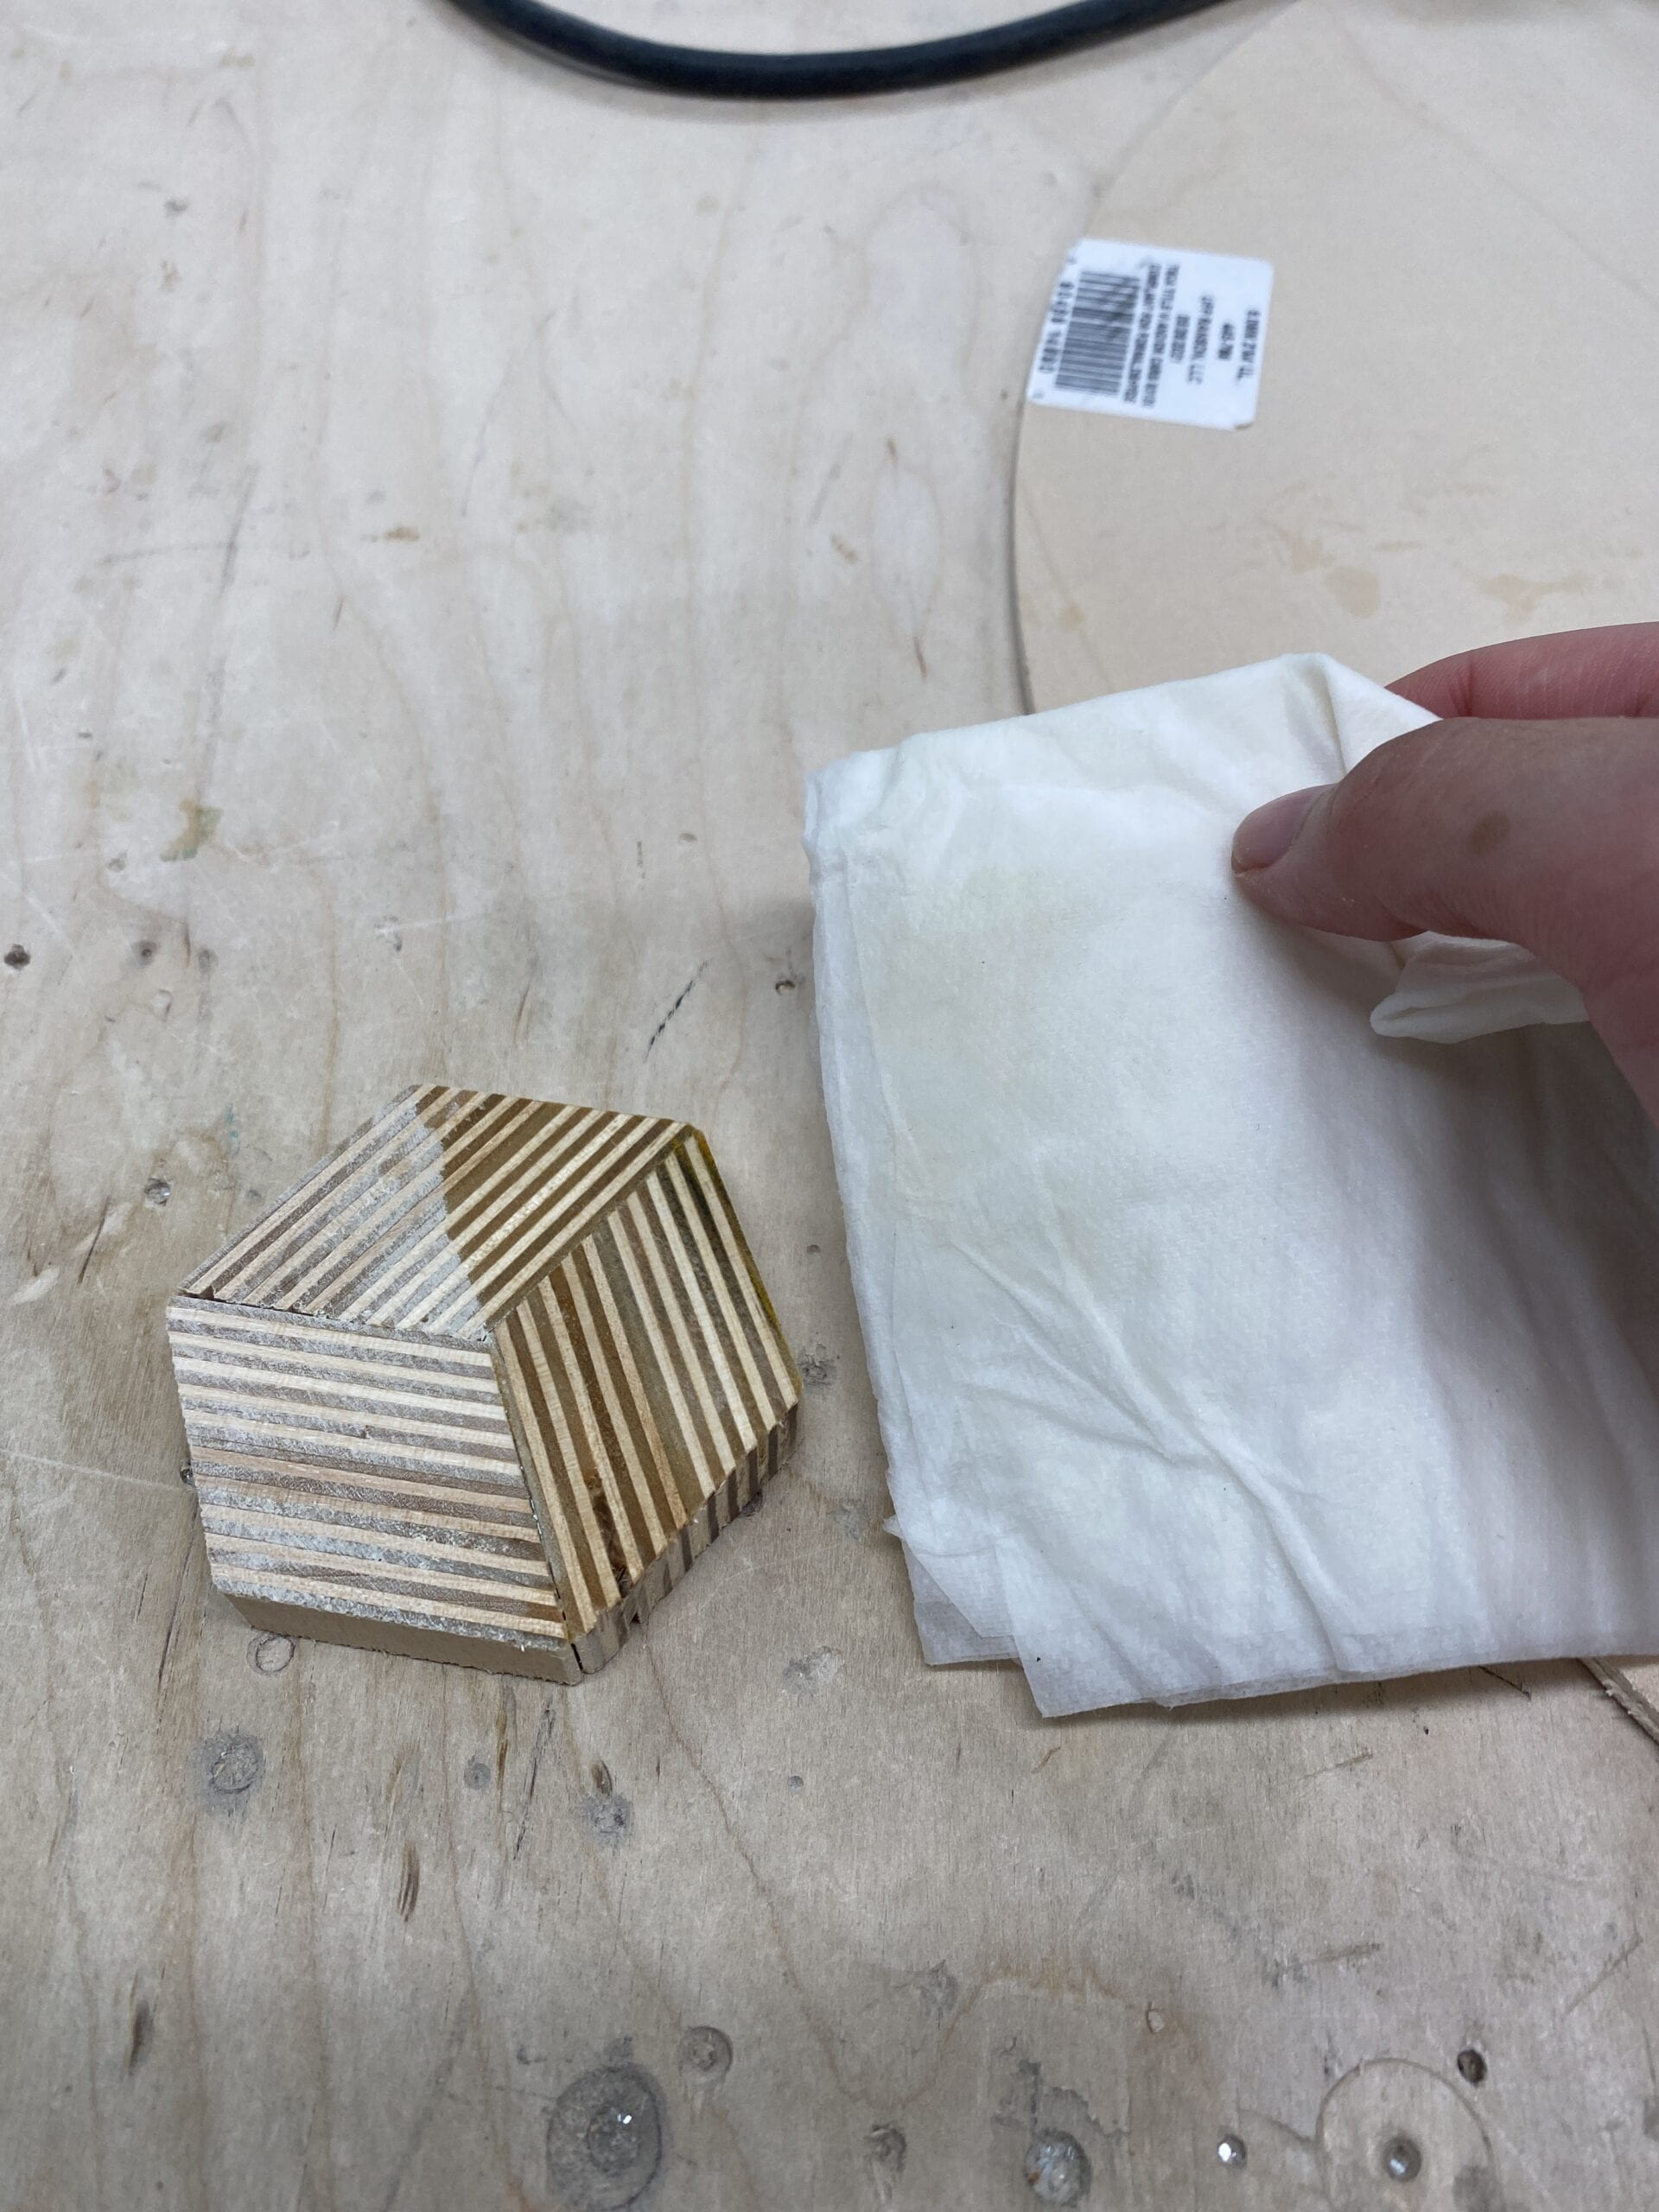
For sanding, I used some double-sided tape to tape everything on a flat piece of plywood and began sanding them with the orbital sander, some pieces came off but it was largely fine.
Then I began hand sanding them. Luke was kind enough to find me some 400 grit sandpaper in the basement, and I found some 600 grit ones in the drawer, so I went to work. I sanded the pieces 3 times with each grit, applying a light tap of water between each sanding to remove the dust as well as lift up some of the squashed wooden fibers to be sanded off. This is a trick I learned from my undergrad doing woodworking to make the wood last longer.
Discussion
First of all, in the video they were using a table saw, which made the process very different from what I could come up with here.
in measuring the thickness, they simply put the cut face down and used that to position the fence of the table saw so it was more convenient and precise.
and in measuring the angle, it was at least more reliable to read from an actual device that measures tilt than a plastic pin on the miter saw.
But, as the class spirit, don’t blame the machine. Because using a miter saw versus a table is not much of a challenge if I remembered to clamp the pieces securely and the fact that the angle and thickness is a bit off proved not to be much of an issue since 1 more than half of the pieces came out just fine and 2 for those with holes I can fill them with saw dust + wood glue filler and 3 for the extra edges extending to the outside of the logs I was going to sand them off anyways.
And last bot not lease, I need to buy my sand papers……