Inspiration:
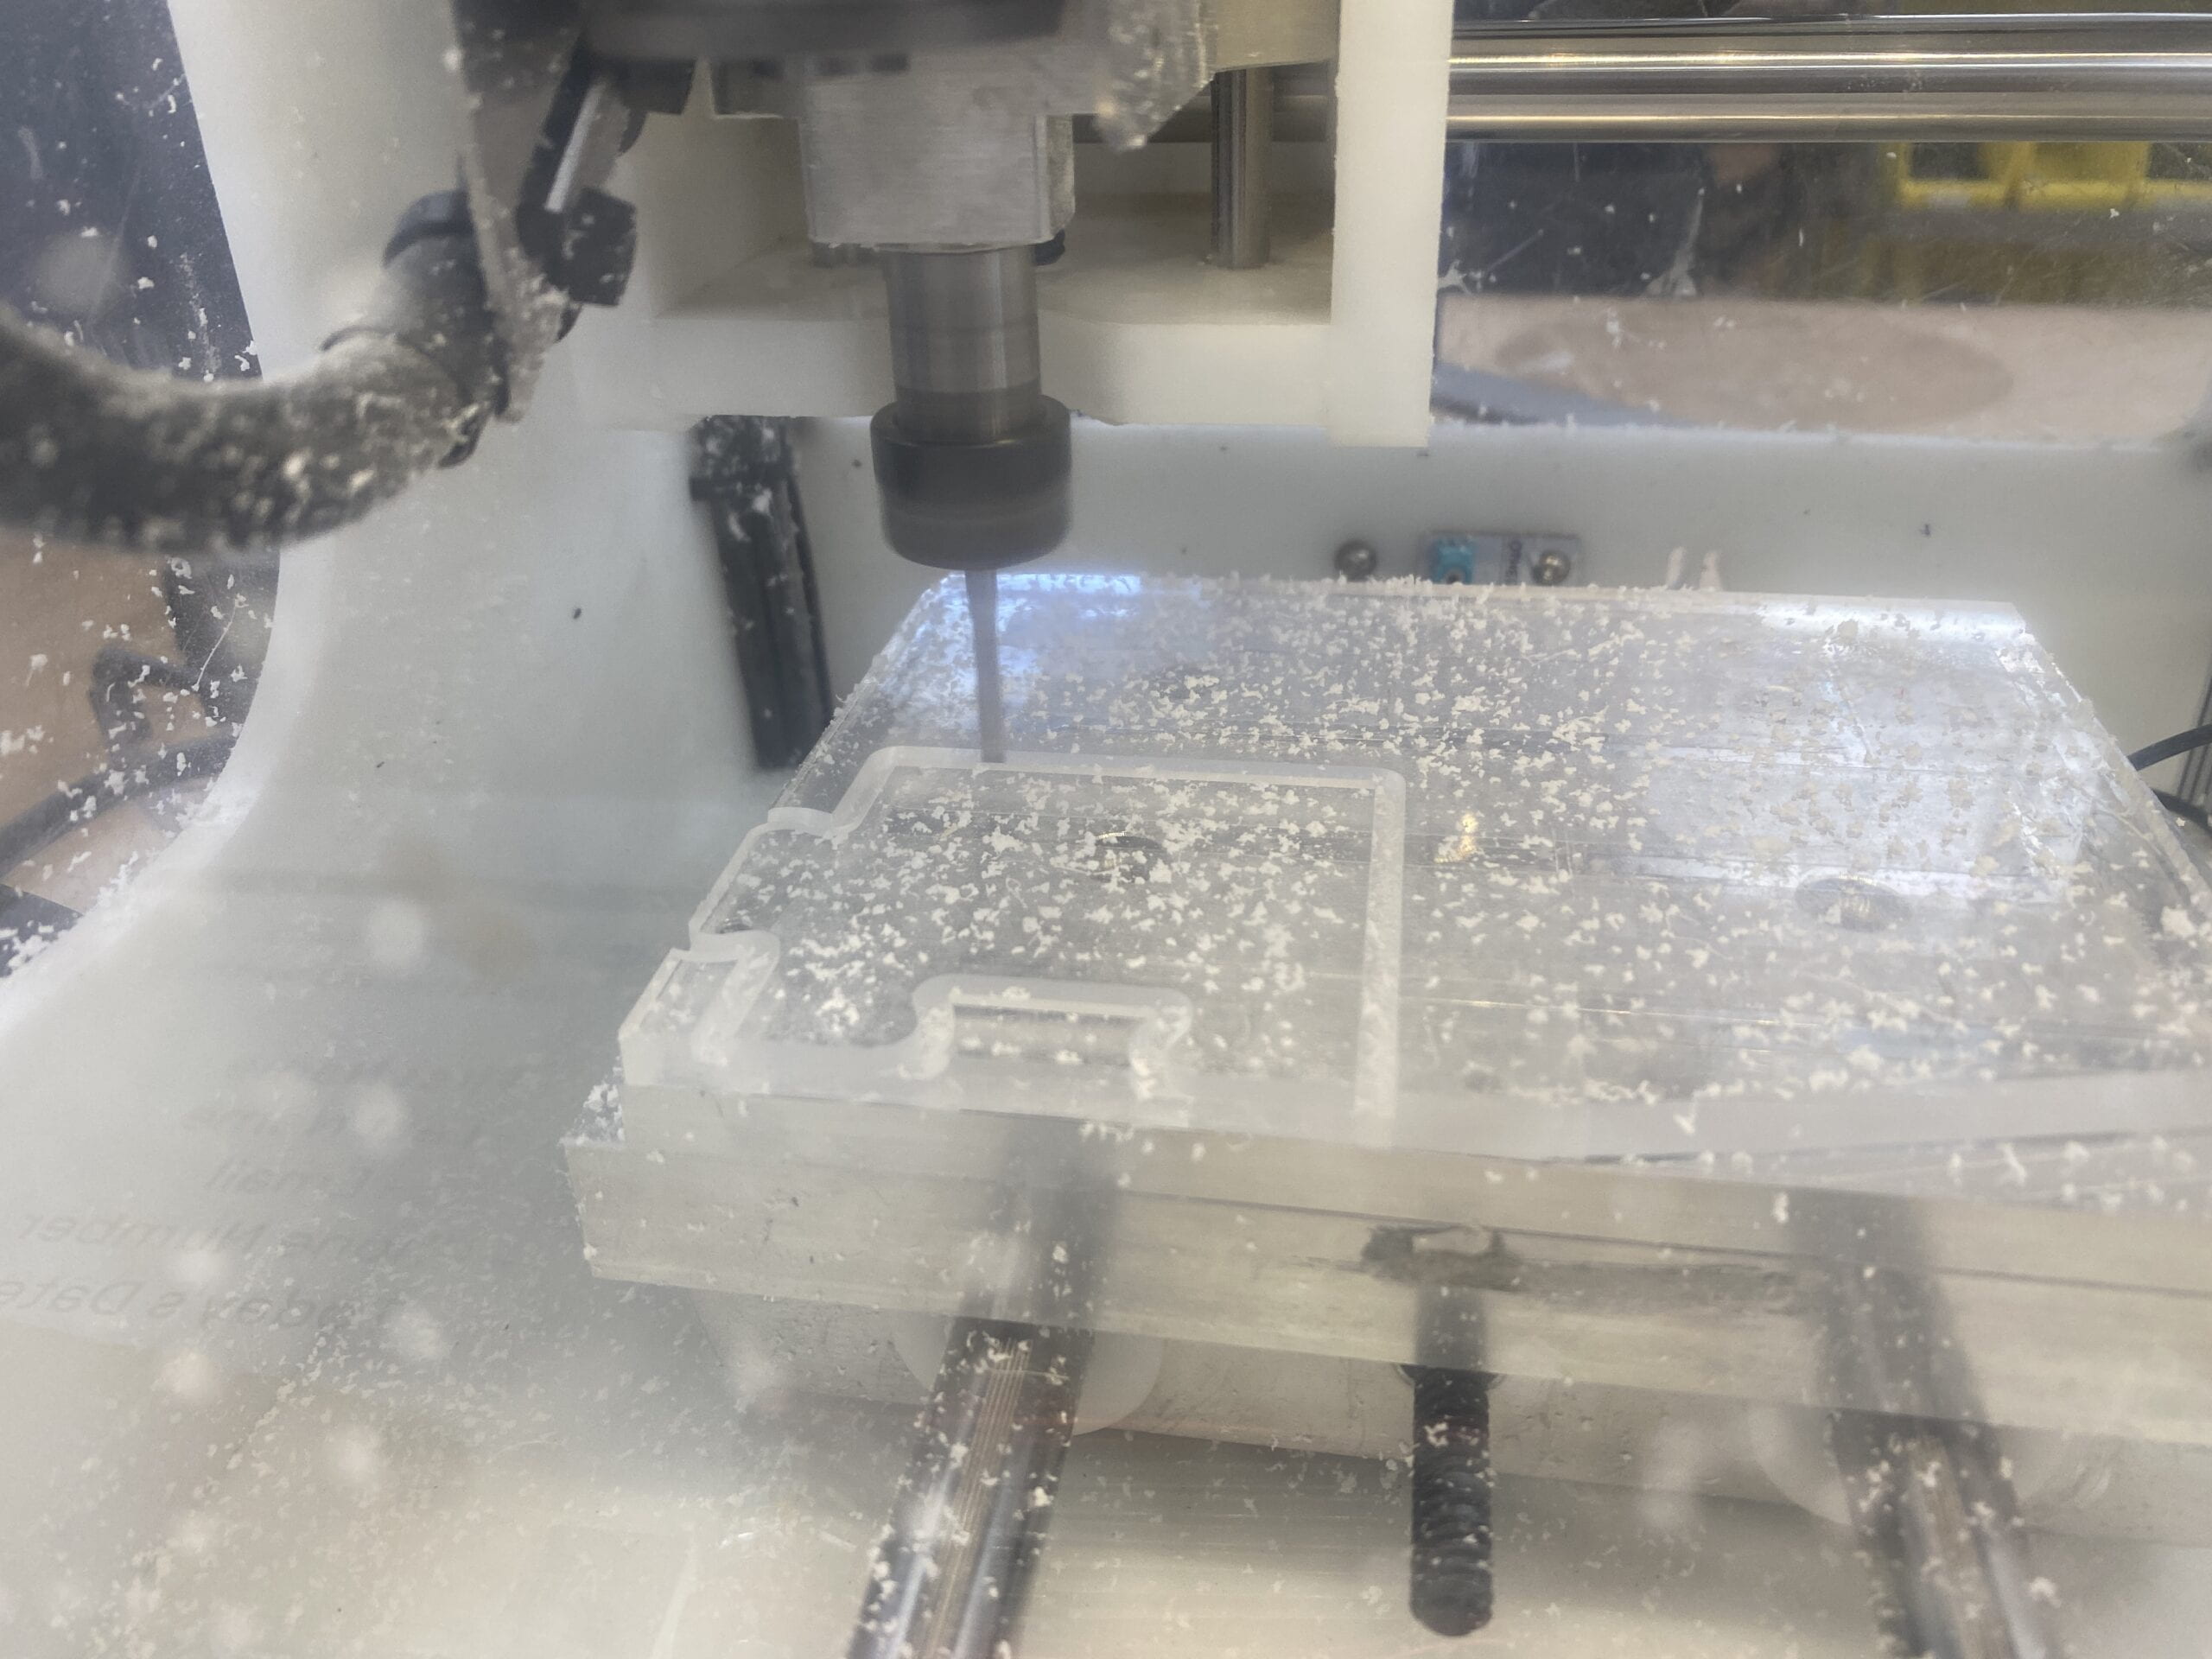
This week we were assigned to make something more advanced on the table top CNC. Since we were taught that CNC can do very precise works, I set out to do what I call a “perfect fit”.
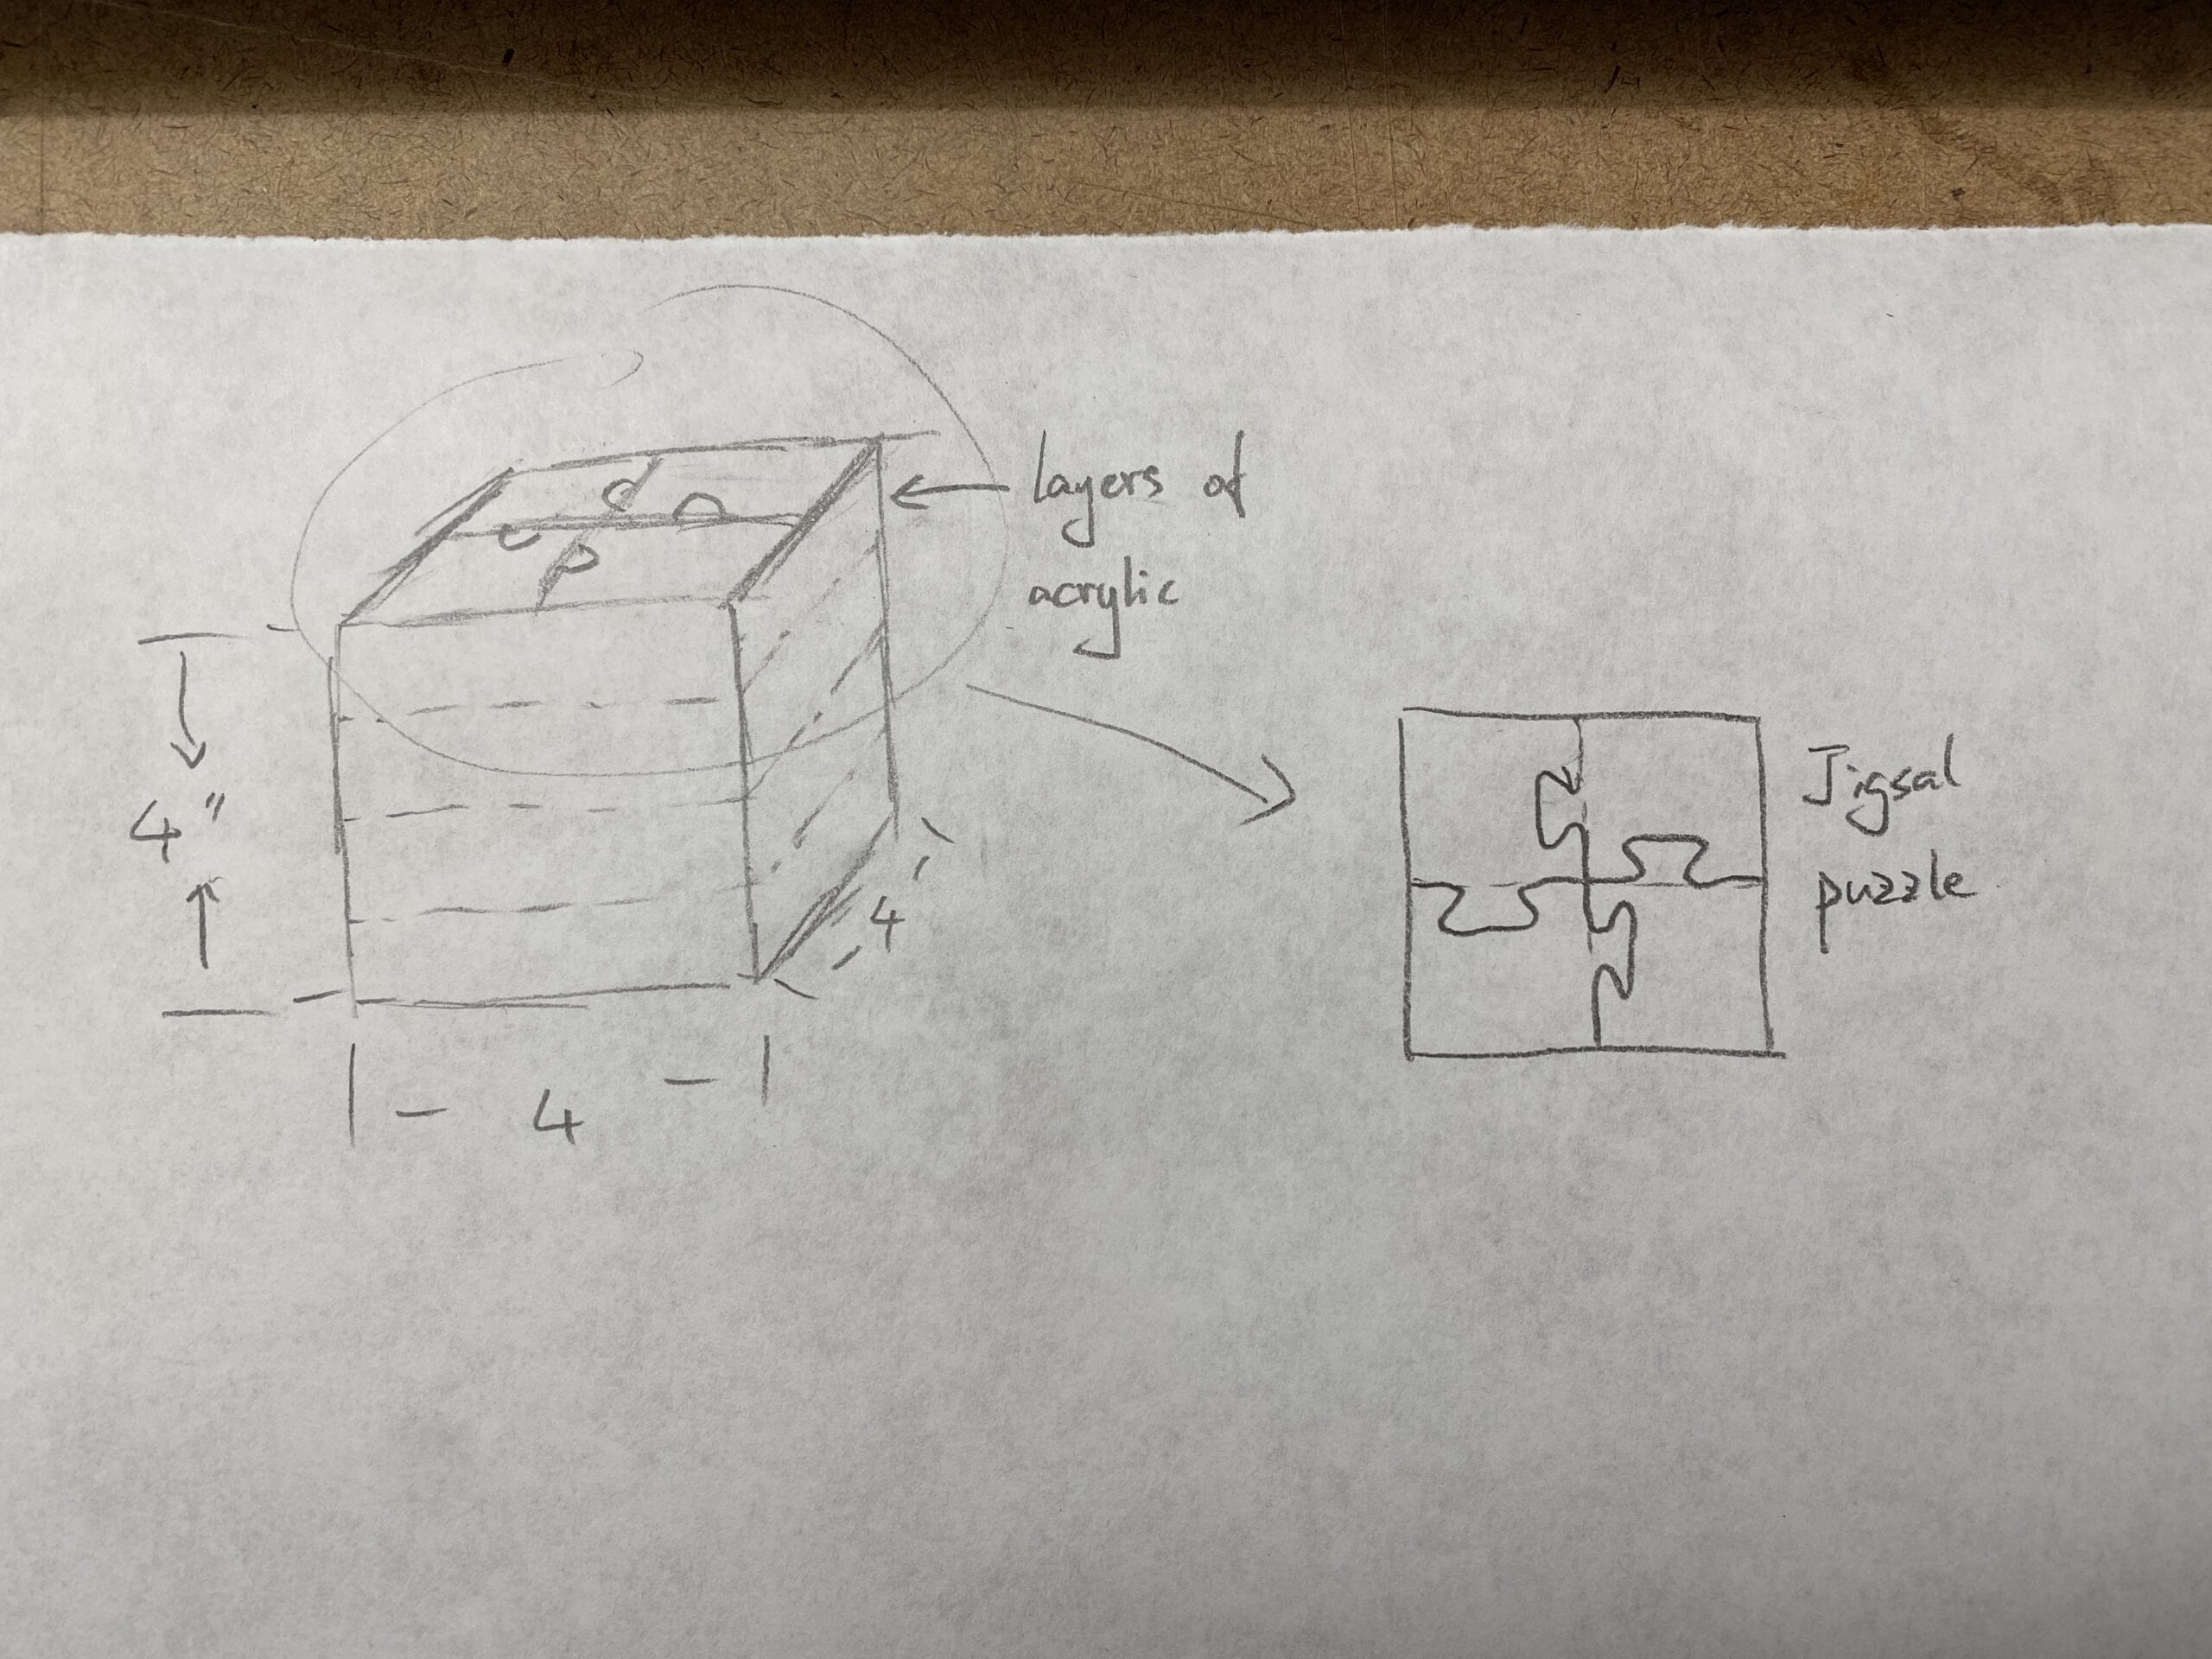


Inspired by the most satisfying render by Corridor Crew and this puzzle fidget toy by Puzzlemaster.ca, I decided to do a jigsaw puzzle fidget toy.
The design was fairly basic, just about 16 jigsaw puzzle pieces, the challenge though, is to make the connection all fit together, and I want to achieve a very low resistant fit, like the piece would slide together rather than me forcing them. Also I was aware that the pieces need to be shrunk before they could fit, but by how much is what I needed testing.
Process:
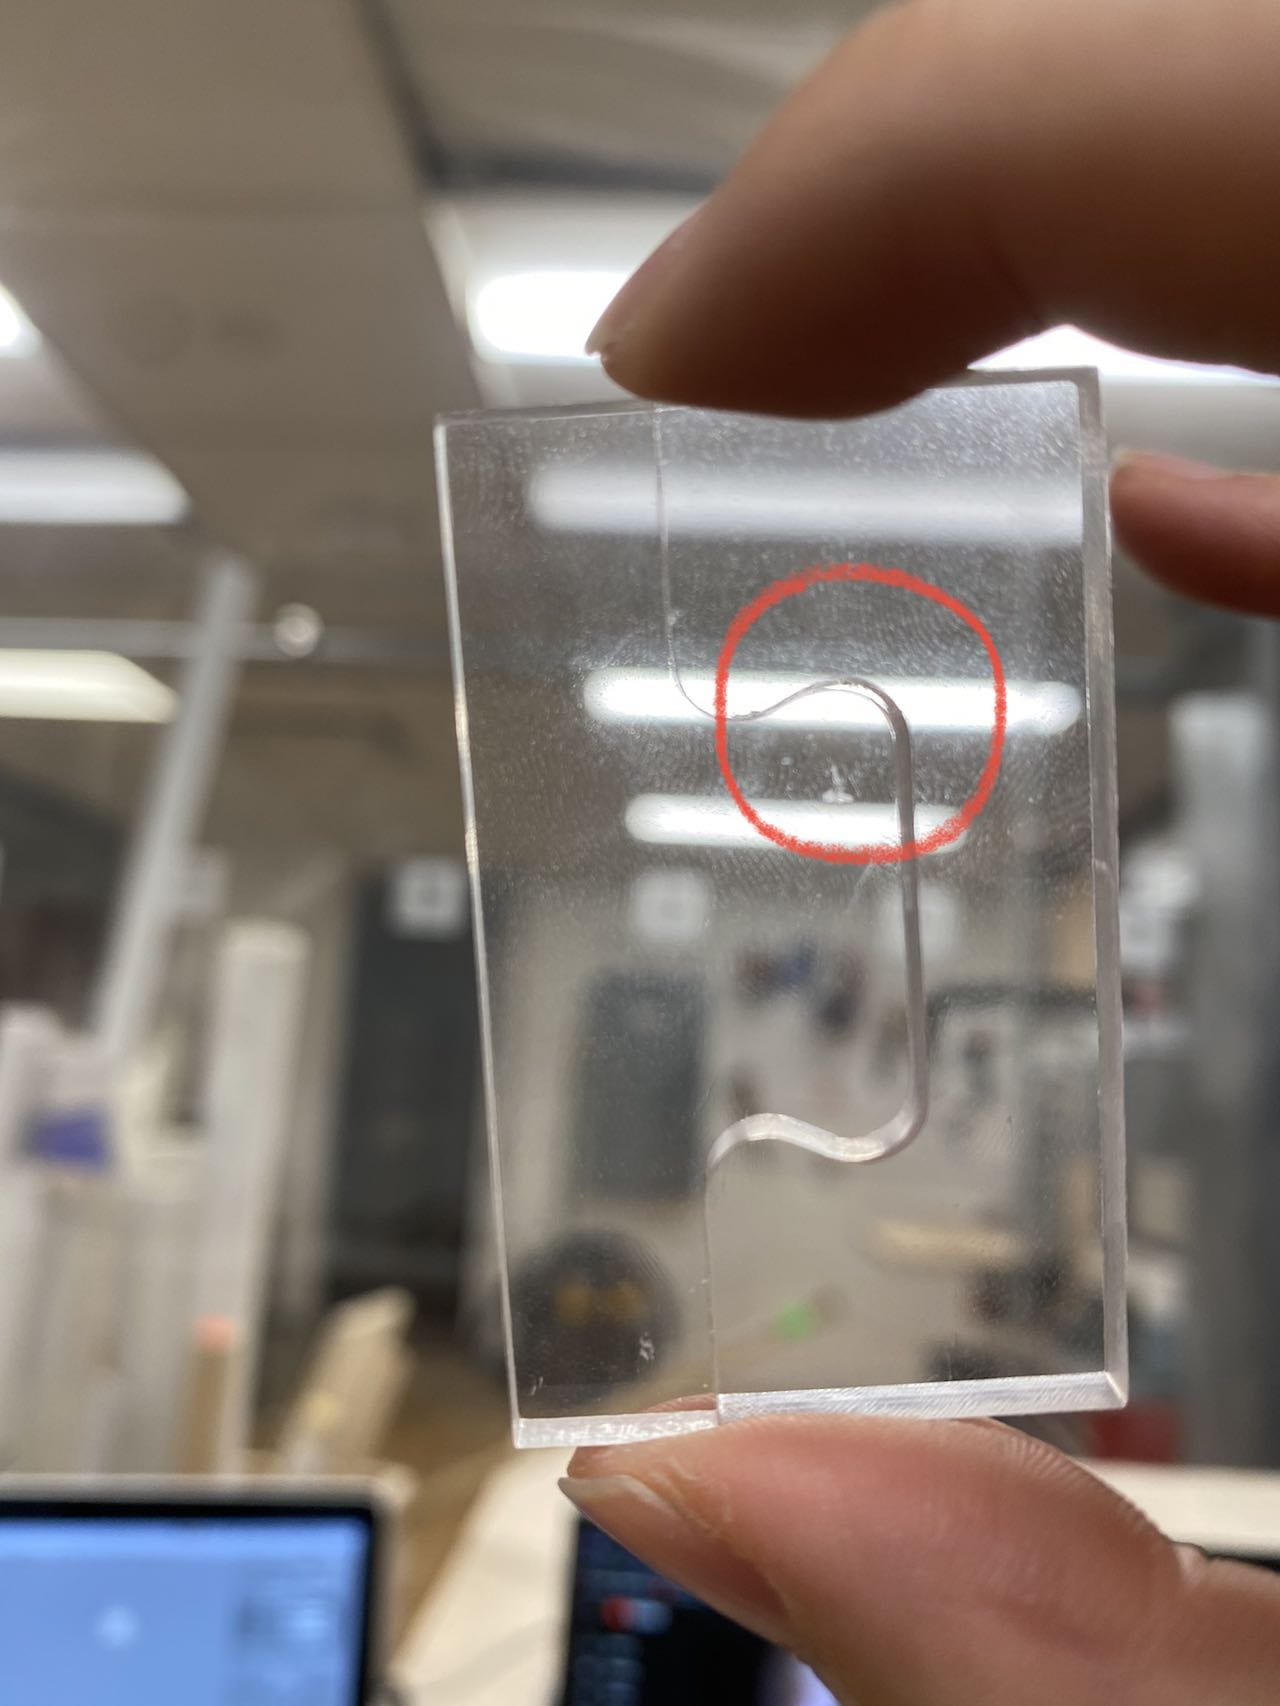
I first traced (on Rhino) a 4-piece jigsaw puzzle I found on the internet, and opened it on bantam tools.
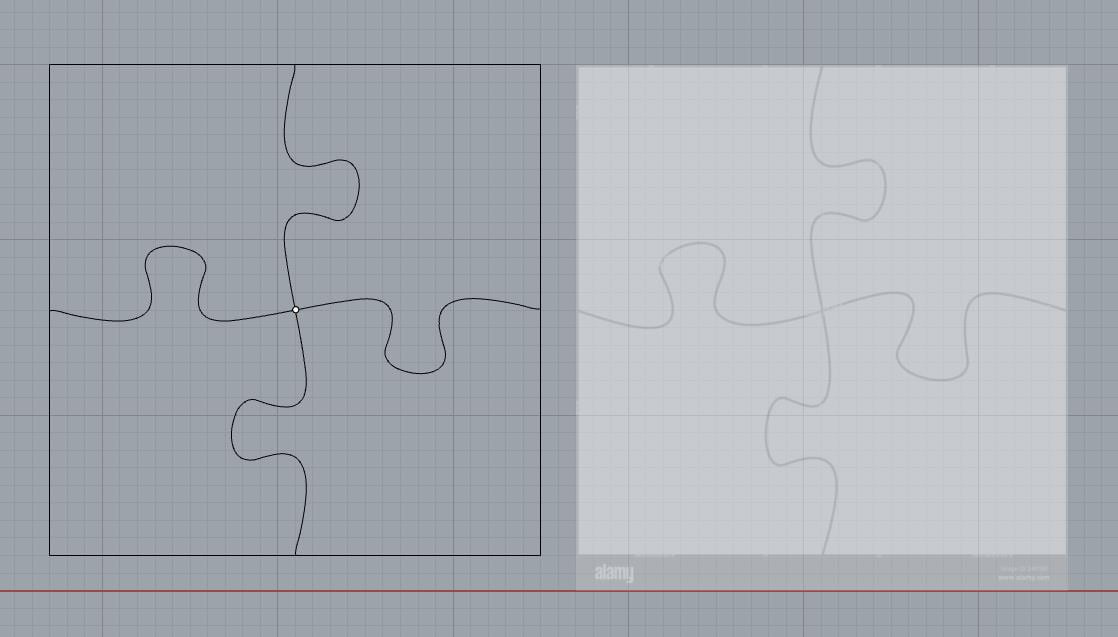
As we can see, lots of red lines here around the knob and the notch where everything fits. that means I either need to increase the piece size, which means increasing the cutting time, or design the connection from scratch myself.
I found out later that the curvy lines in this jigsaw puzzle are super hard to shrink while making the lines feel natural, and also I didn’t want to make the piece any bigger than it already was, so I decided in the end to redesign the connection.
1st redesign.
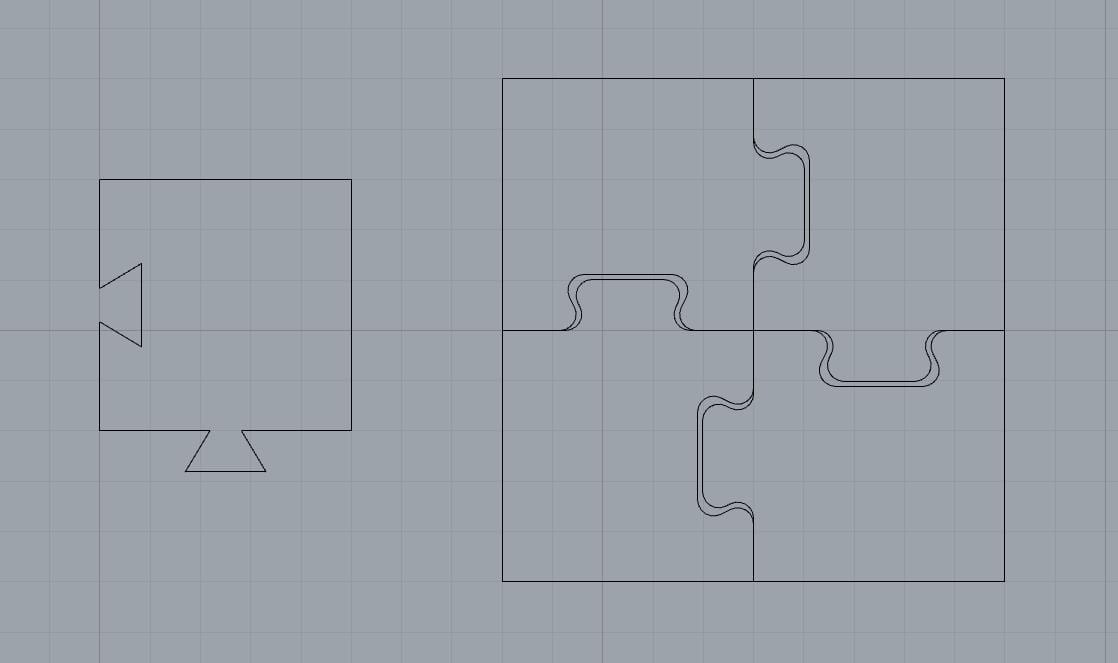
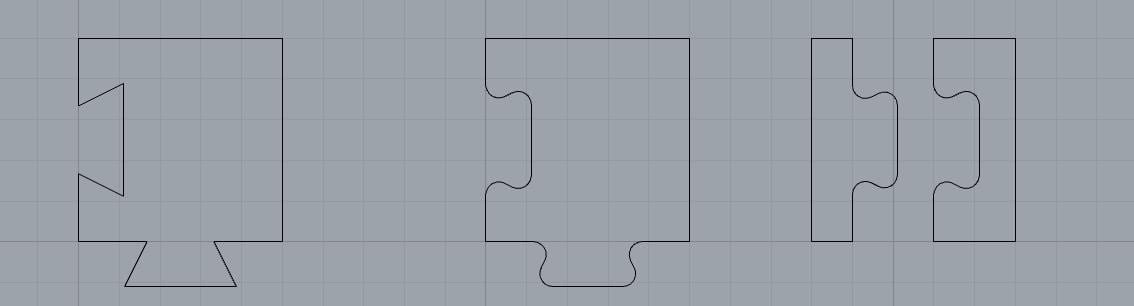
I ended up with a design that looks like this: I made a square, then draw the notch and knob, and then shrink the knob by a tiny bit, and then finally round up all the sharp corners to the diameter of the drill bit, which was 1/8”.
I cut them on the other mill, and the results look like this:
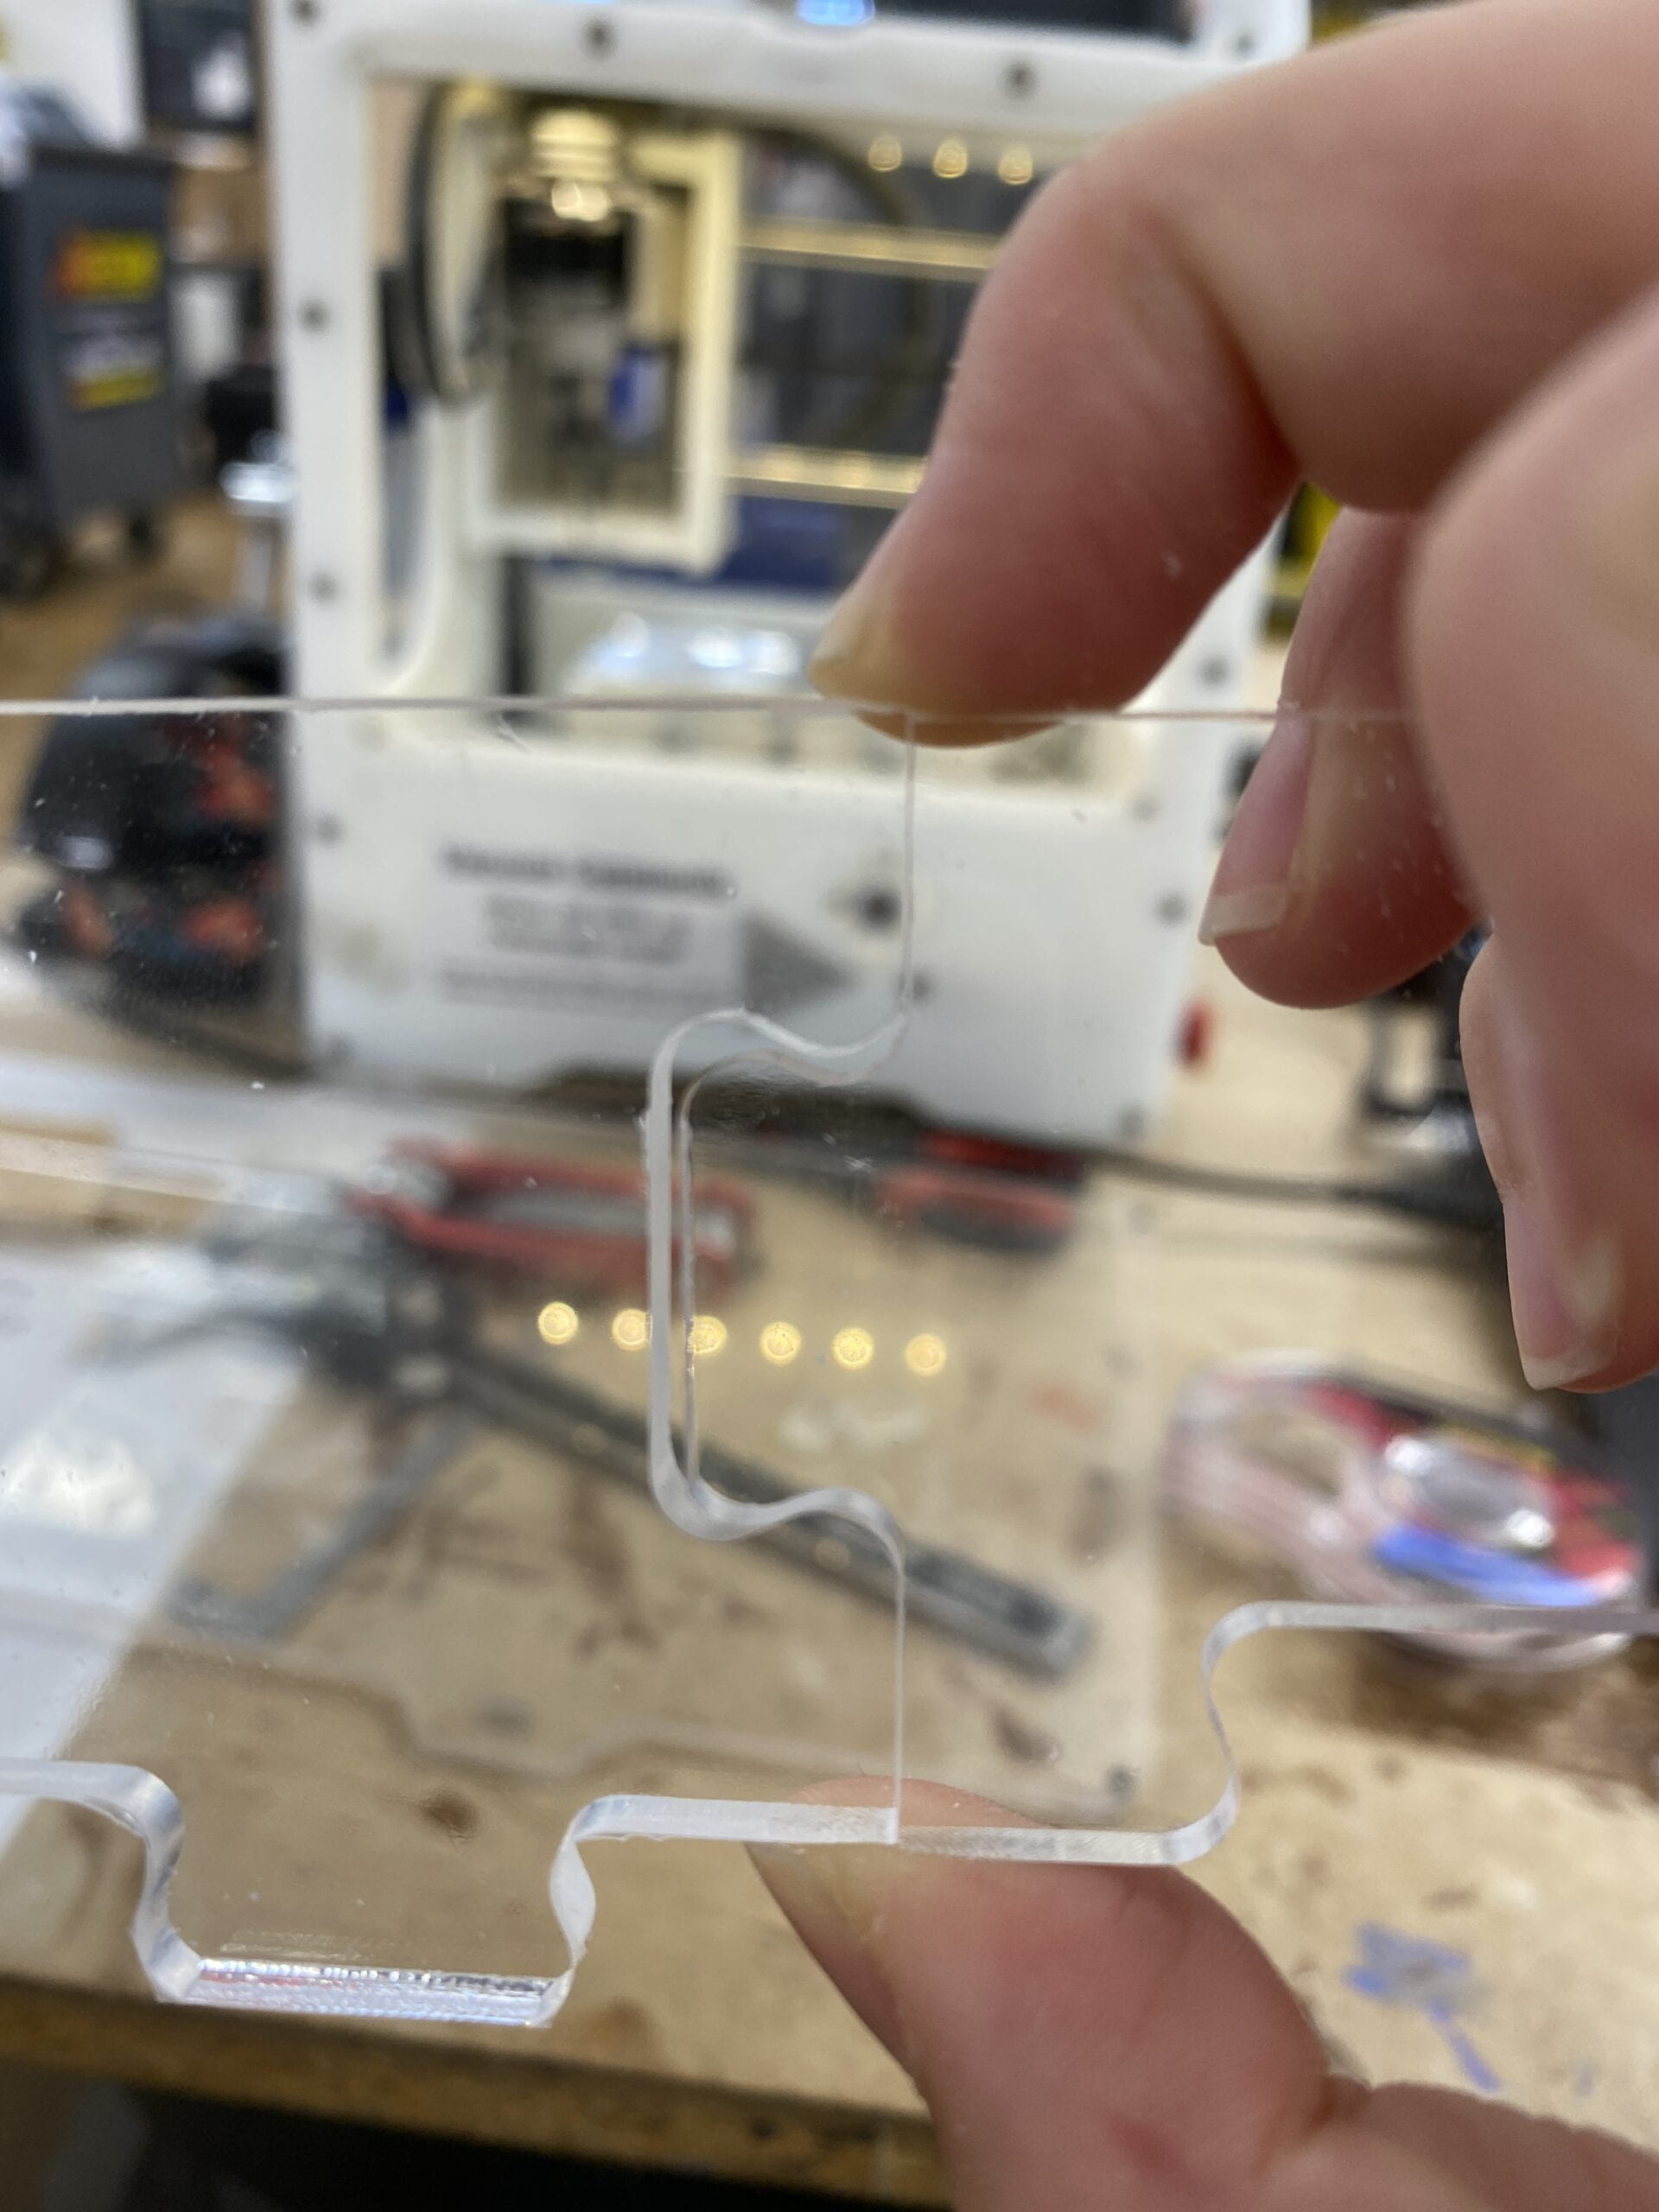
as we see here, there was a huge gap between the pieces and the connection was super wobbly, as expected. I shrunk the knob by 1 mm, which was actually huge for a piece that is less than 2” wide. and also, I found that cutting whole pieces take way longer, thus giving it more chance to go wrong at whatever step, so I decided to only test the connection on two tiny pieces.
So, here is ver 2:
I increased the width of the knob by a bit, and then shrunk it by 0.1mm. Spoilers, they didn’t fit.
However, limiting the cut to only the one thing I am testing proved to be way more efficient, so I decided to keep testing like this.
Ver 3 and 4 were shrinking the knob by .5 and .3 mm respectively.
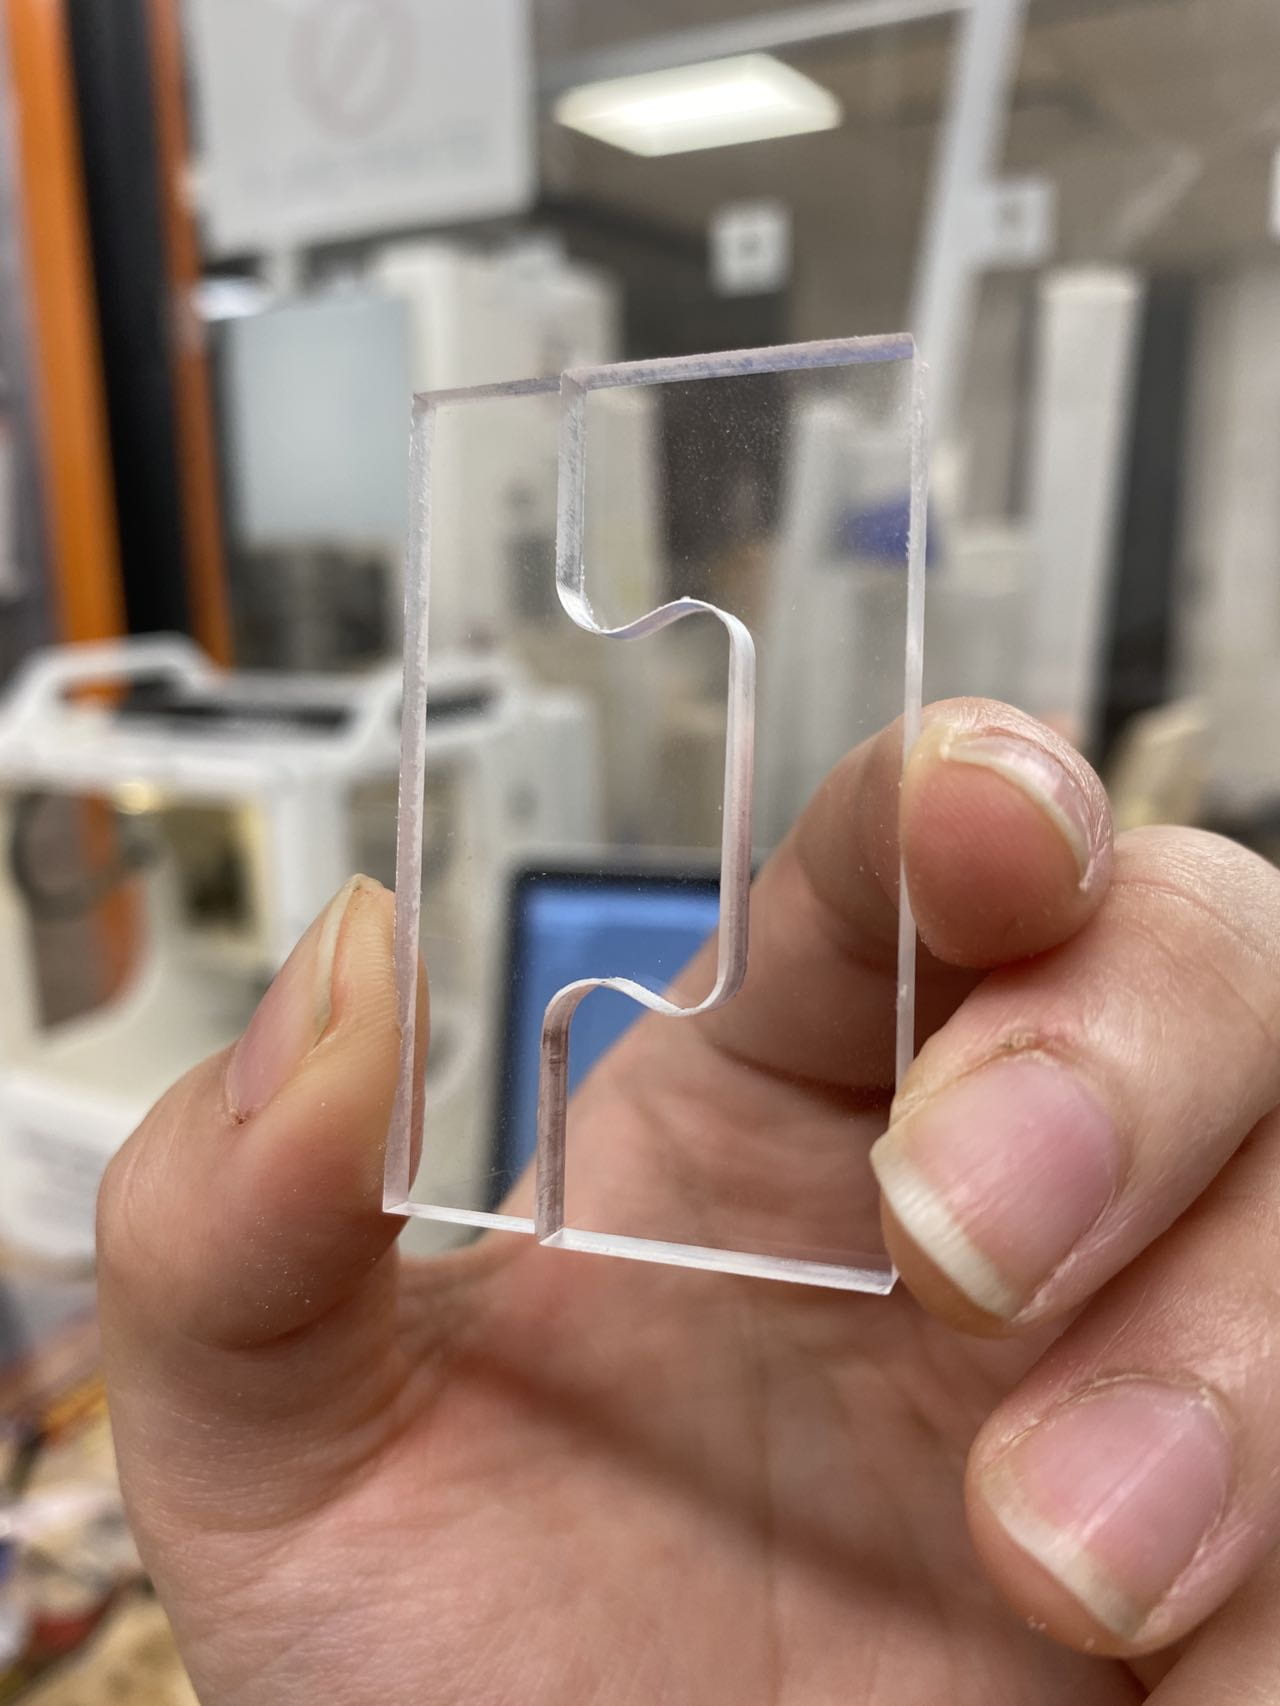
Here is a very tightly fit ver4:
as we see here, the top piece is a bit warped, that’s because I forced them together. although the fit was good, that’s not what I wanted.
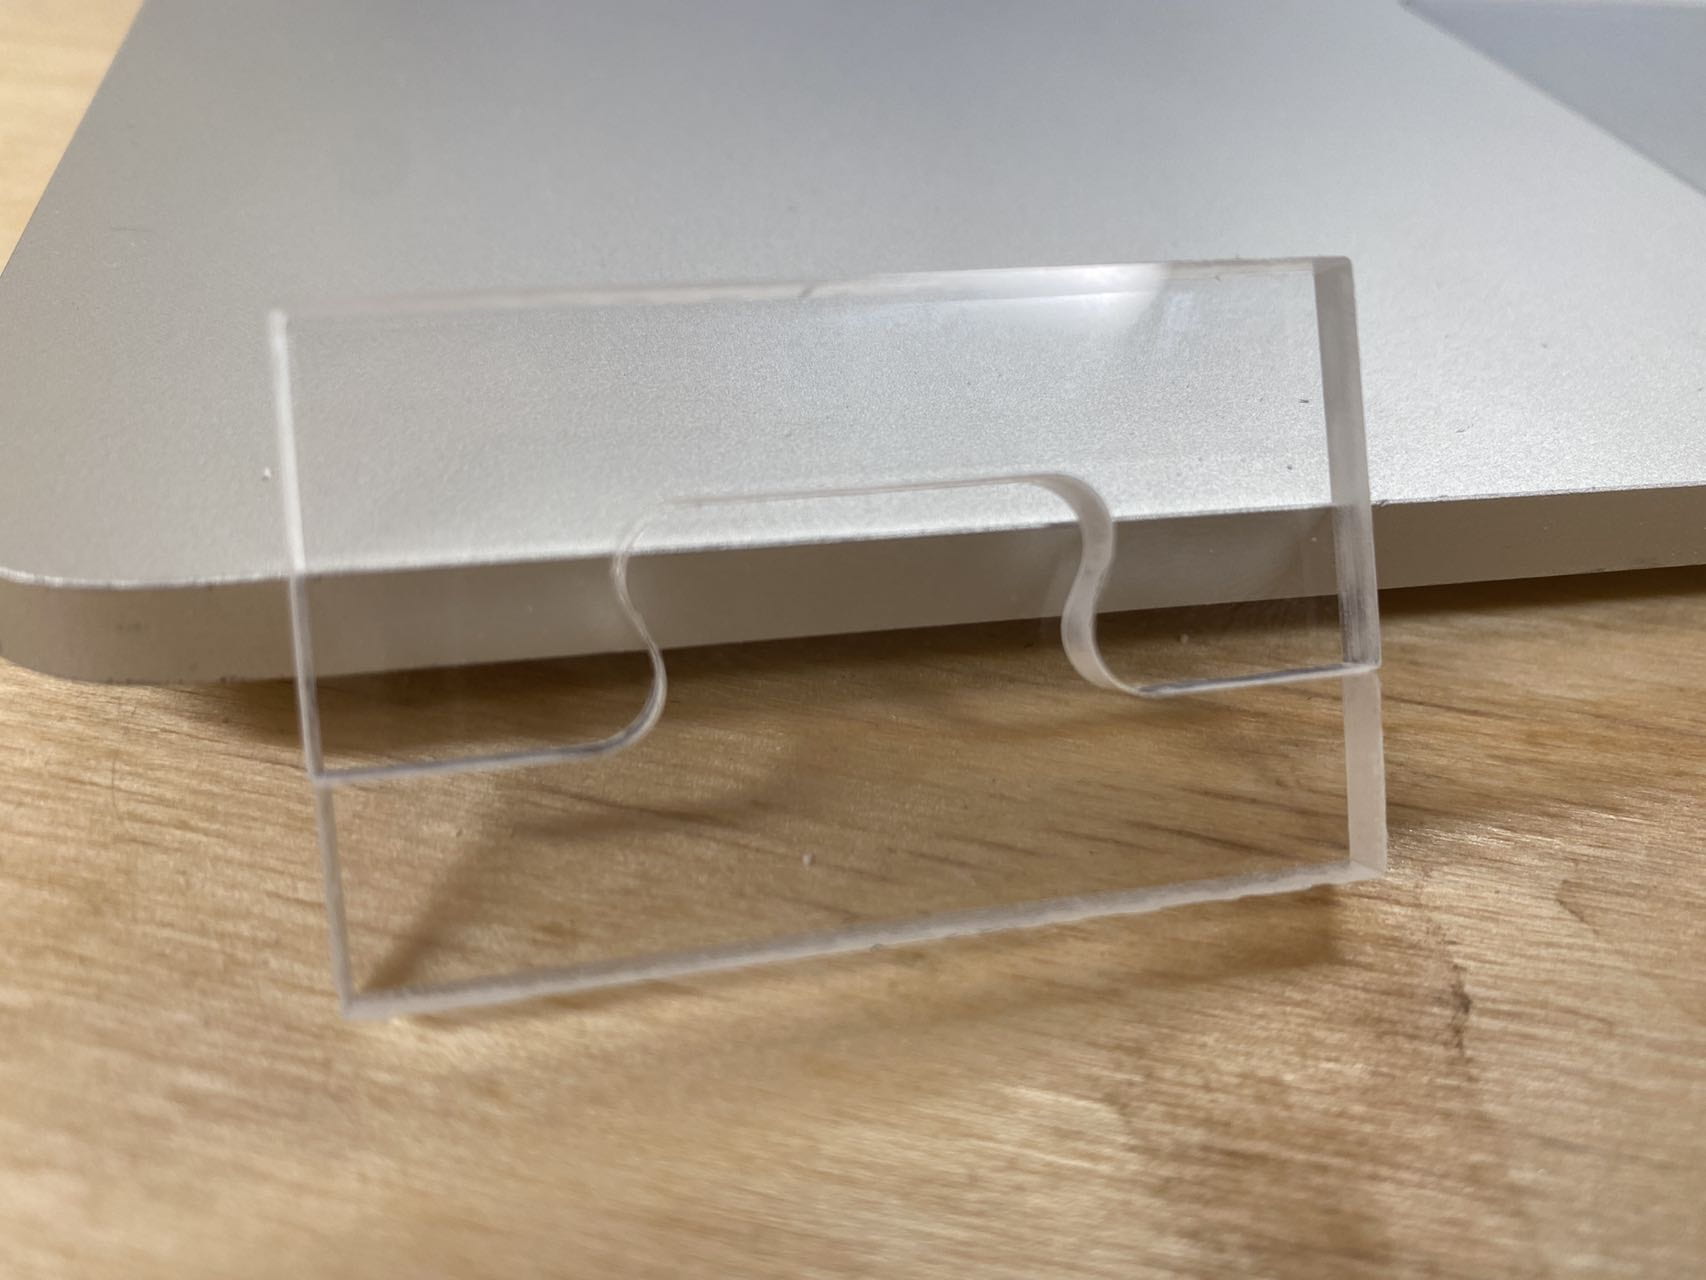
So, here is ver 5 with the shrinking sweet spot at .4 mm
is slide in super nicely and did not wiggle very much at all. which I was very happy about. however, there was one problem:
on the corner there was still a very visible gap. and that is because I rounded the corners before I shrunk the knob by .4mm. And that resulted in me shrinking the rounded edge along with the knob, and that caused the gap.
So, ORDER OF OPERATION.

I changed it so that I round the corners after I shrunk it. and that somehow fixed the problem.
here is ver 6:
fits pretty nicely.
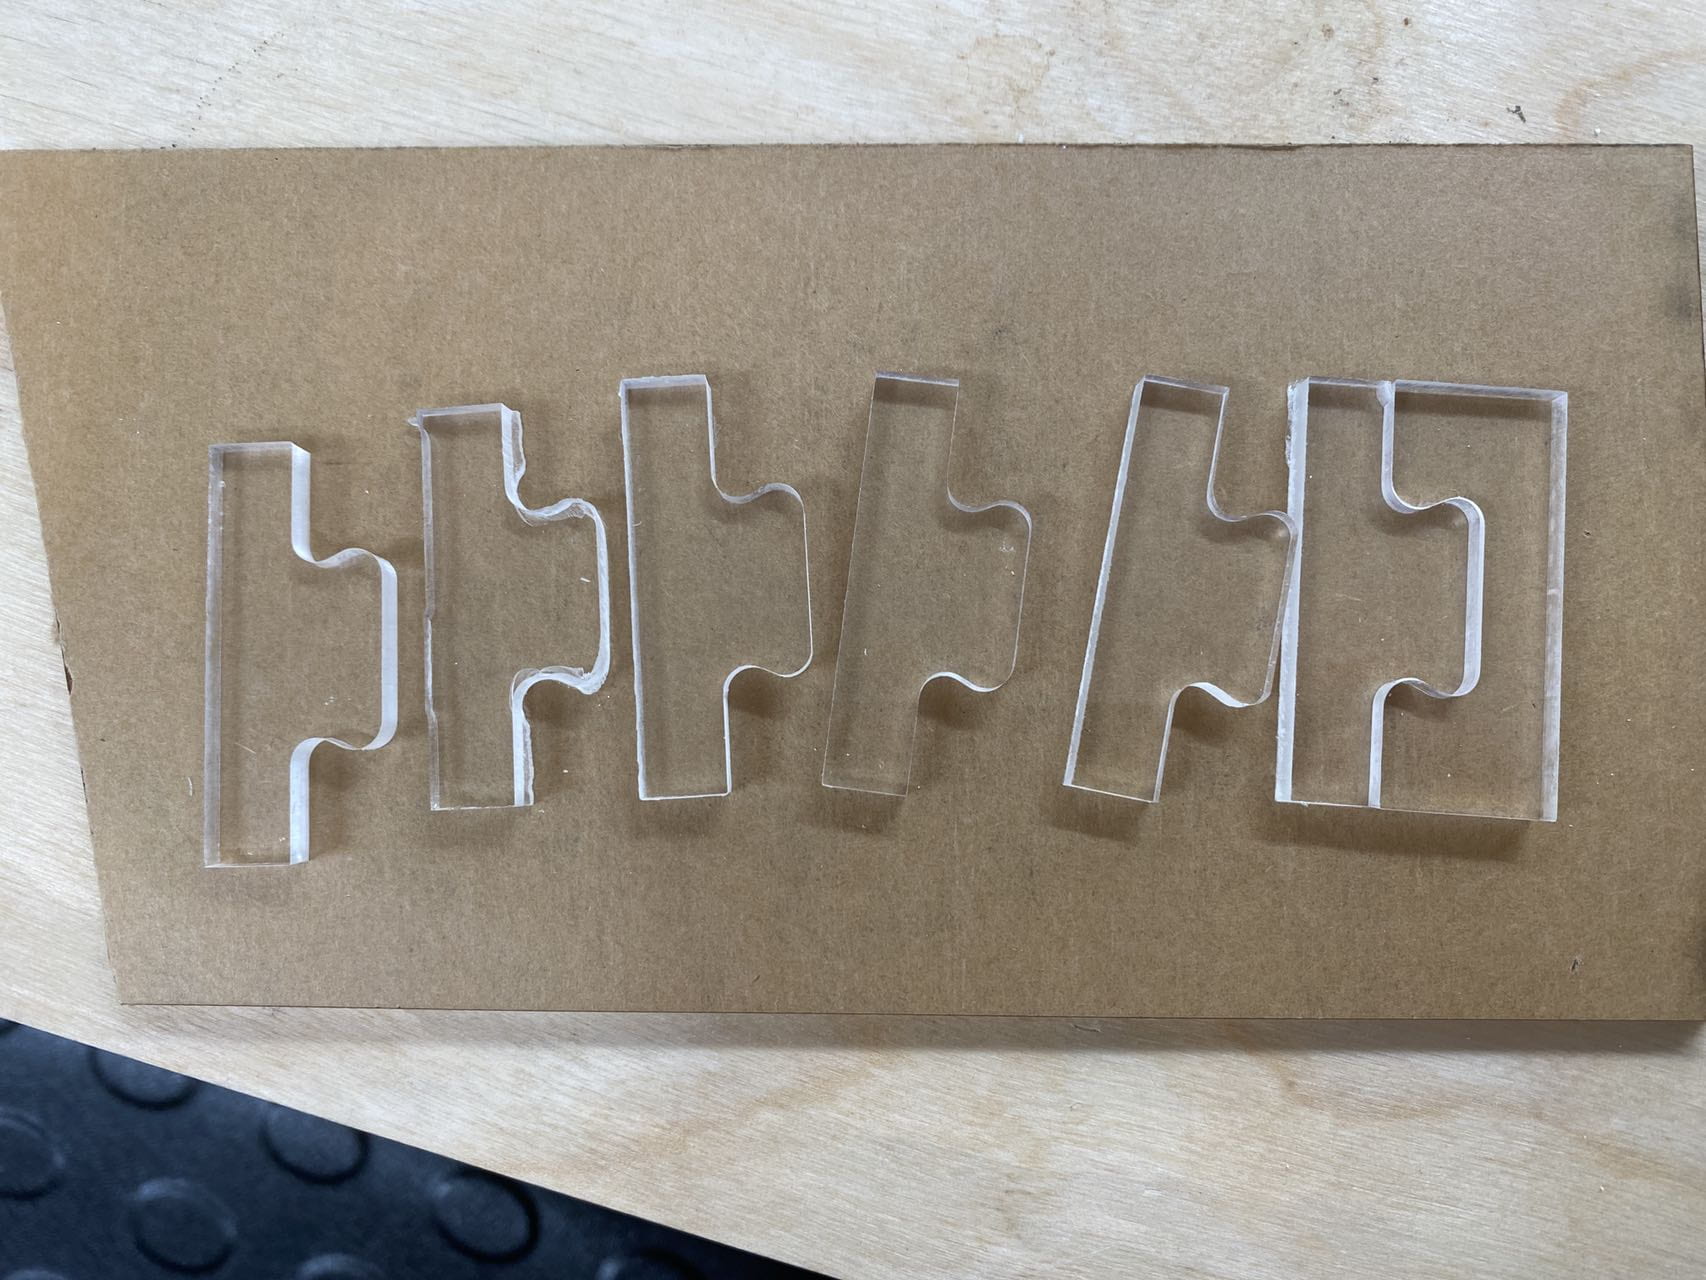
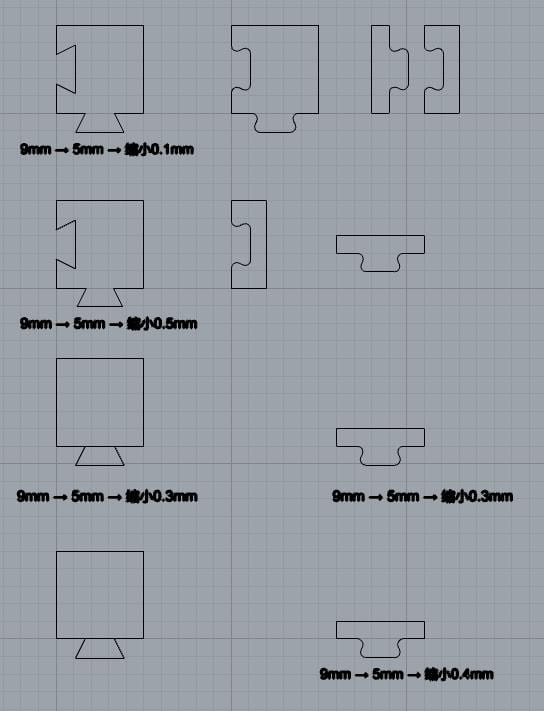
here are all the testings I did.
Final verdict:
I unfortunately didn’t have enough time to finish what I set out to do. And I was not fully satisfied with the final results I got. The reason I say it is a 98% perfect fit was that there was still a tiny little gap along the outer edge of the knob and I don’t know how to fix it. This will be a problem for future Steve I guess.
Given more time I would also cut out all the pieces, glue them and wax them. I would love to see this big acrylic piece come to shape.