
March 7, 2023 • 3pm- 5pm • The Ability Project Lab
The Software
For this project, we’ll be using an open source software called Inkscape to create .svg files. You can also import svg files from another source such as Adobe Illustrator into InkScape. We’ll be preparing the svg files for stitching using an extension called Ink/Stitch. Additionally, we’ll be using another extension for text called Hershey Text.
Install Inkscape
-
-
- You need to install Inkscape first, before installing Ink/Stitch
- The current version at this time is 1.2.2
-
Install Ink/Stitch
Install Eggbot / Hershey Text (AxiDraw)
Working with an Existing Image – File Preparation
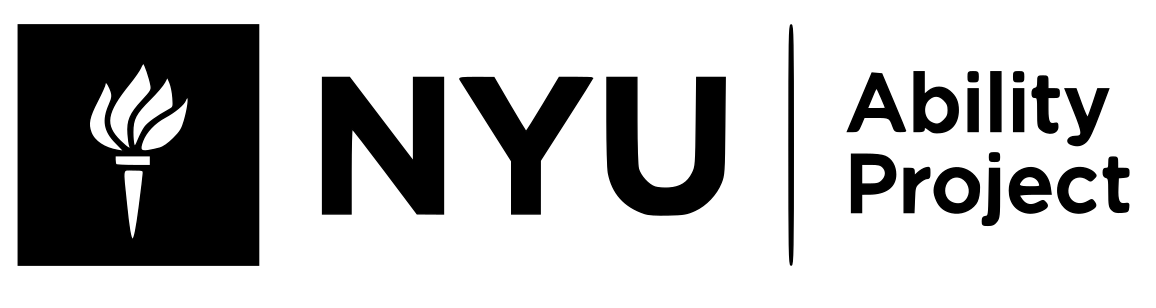
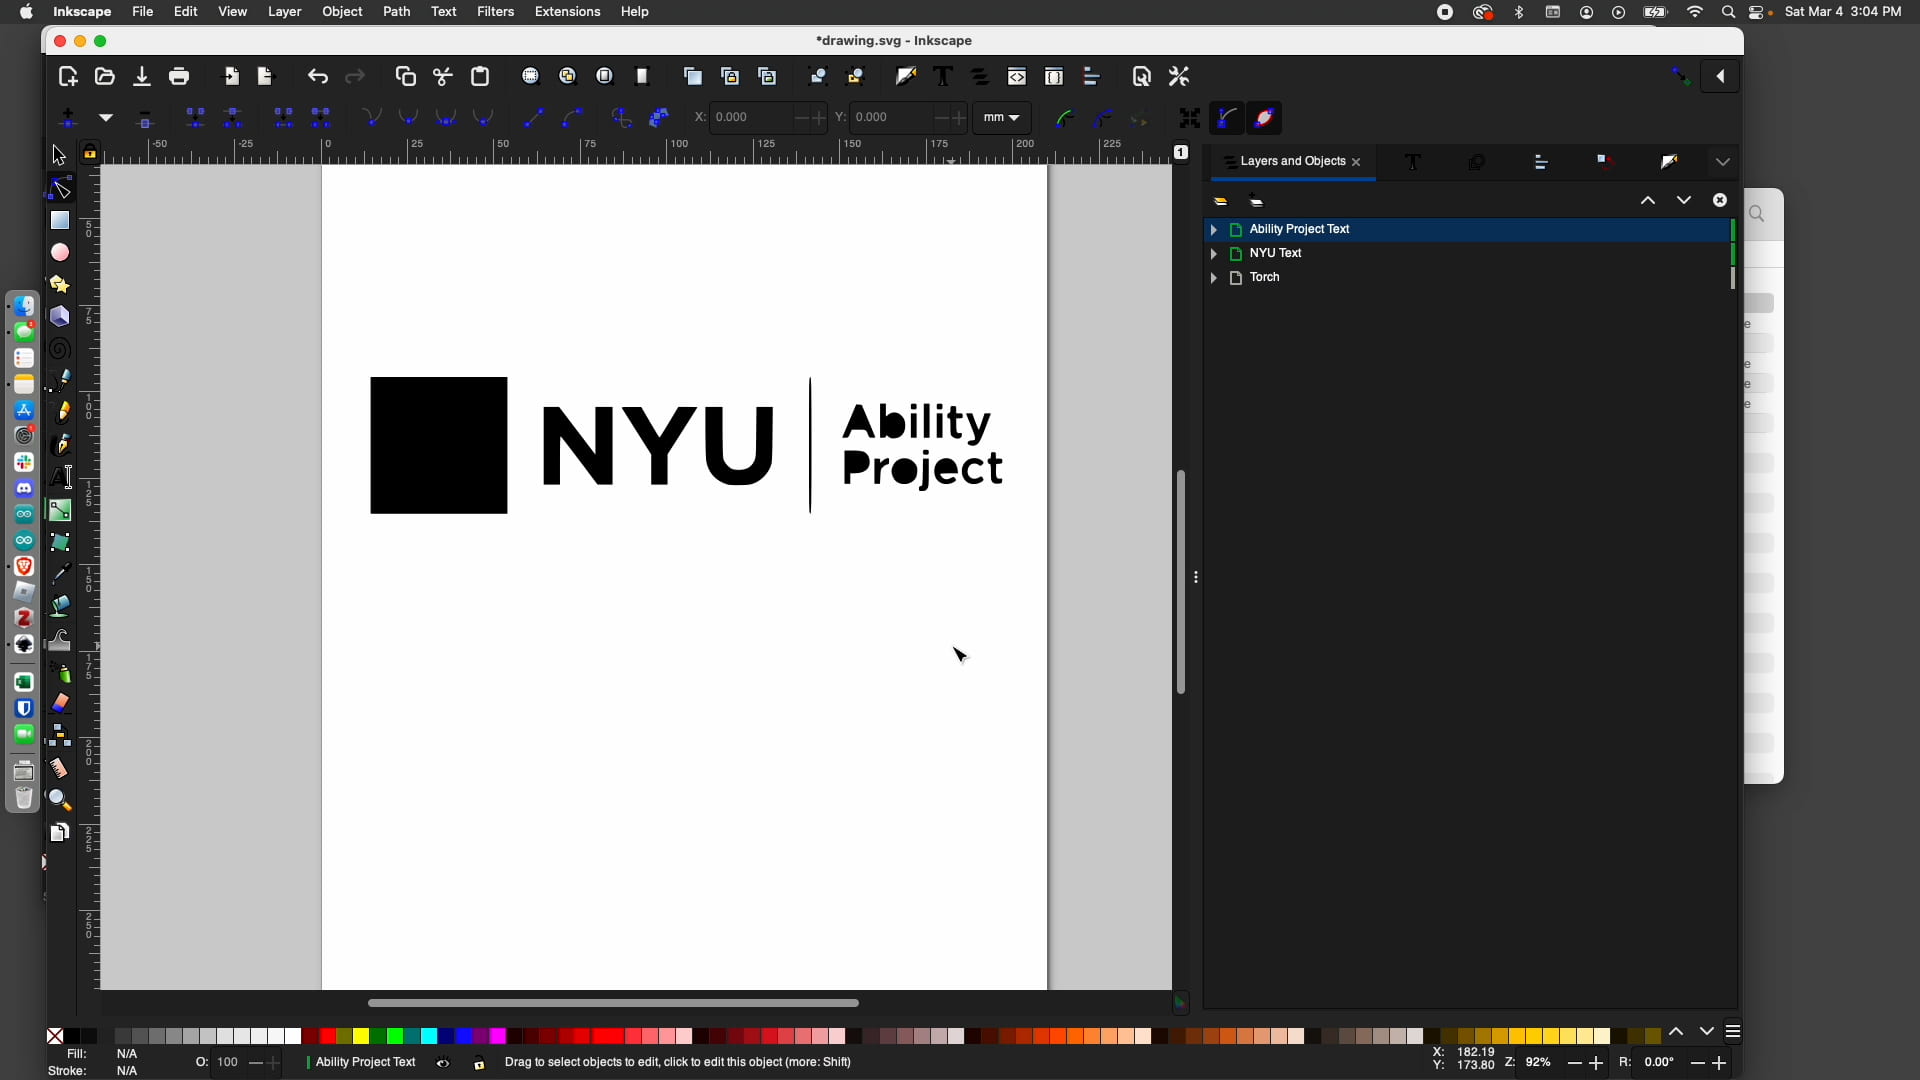
We’re going to be working with the Ability Project logo.
You can download it here.
We’ll convert this .png file in Inkscape to a vector image using the bitmap trace function.
- Open Inkscape
- Set up your document to match the hoop size you’ll be using
- File > Document Properties
- We’ll be using the large rectangular hoop, 150 mm wide x 240 mm high
- Close the dialog box. The measurements will automatically update. You can save this as a template as well. (File > Save Template)
- We’ll be using the large rectangular hoop, 150 mm wide x 240 mm high
- File > Document Properties
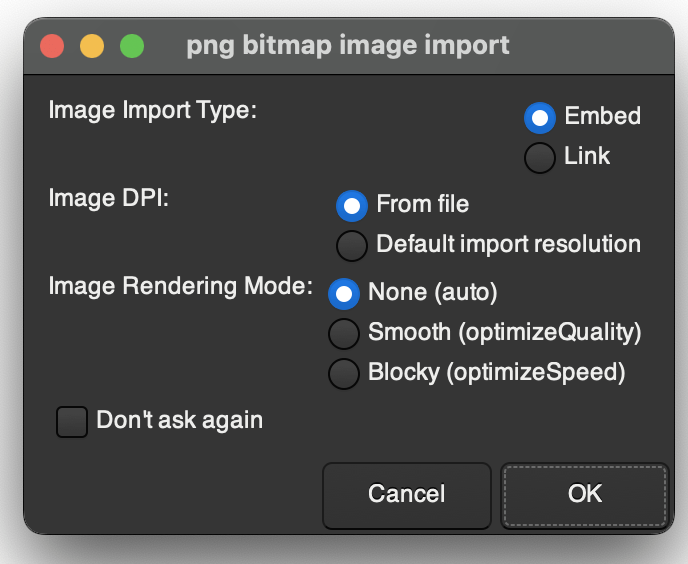
- Import the image
- File > Import > Ability Project Logo.png
- Image Import Type > Embed
- Image DPI > From File
- Image Rendering Mode > None (auto)
- Click OK!
Importing a png
- Keep the original on its own layer and make a duplicate to work with on another layer.
- Layer > Duplicate current layer
- Hide the original by clicking on the eye to the right of the original in the layers panel
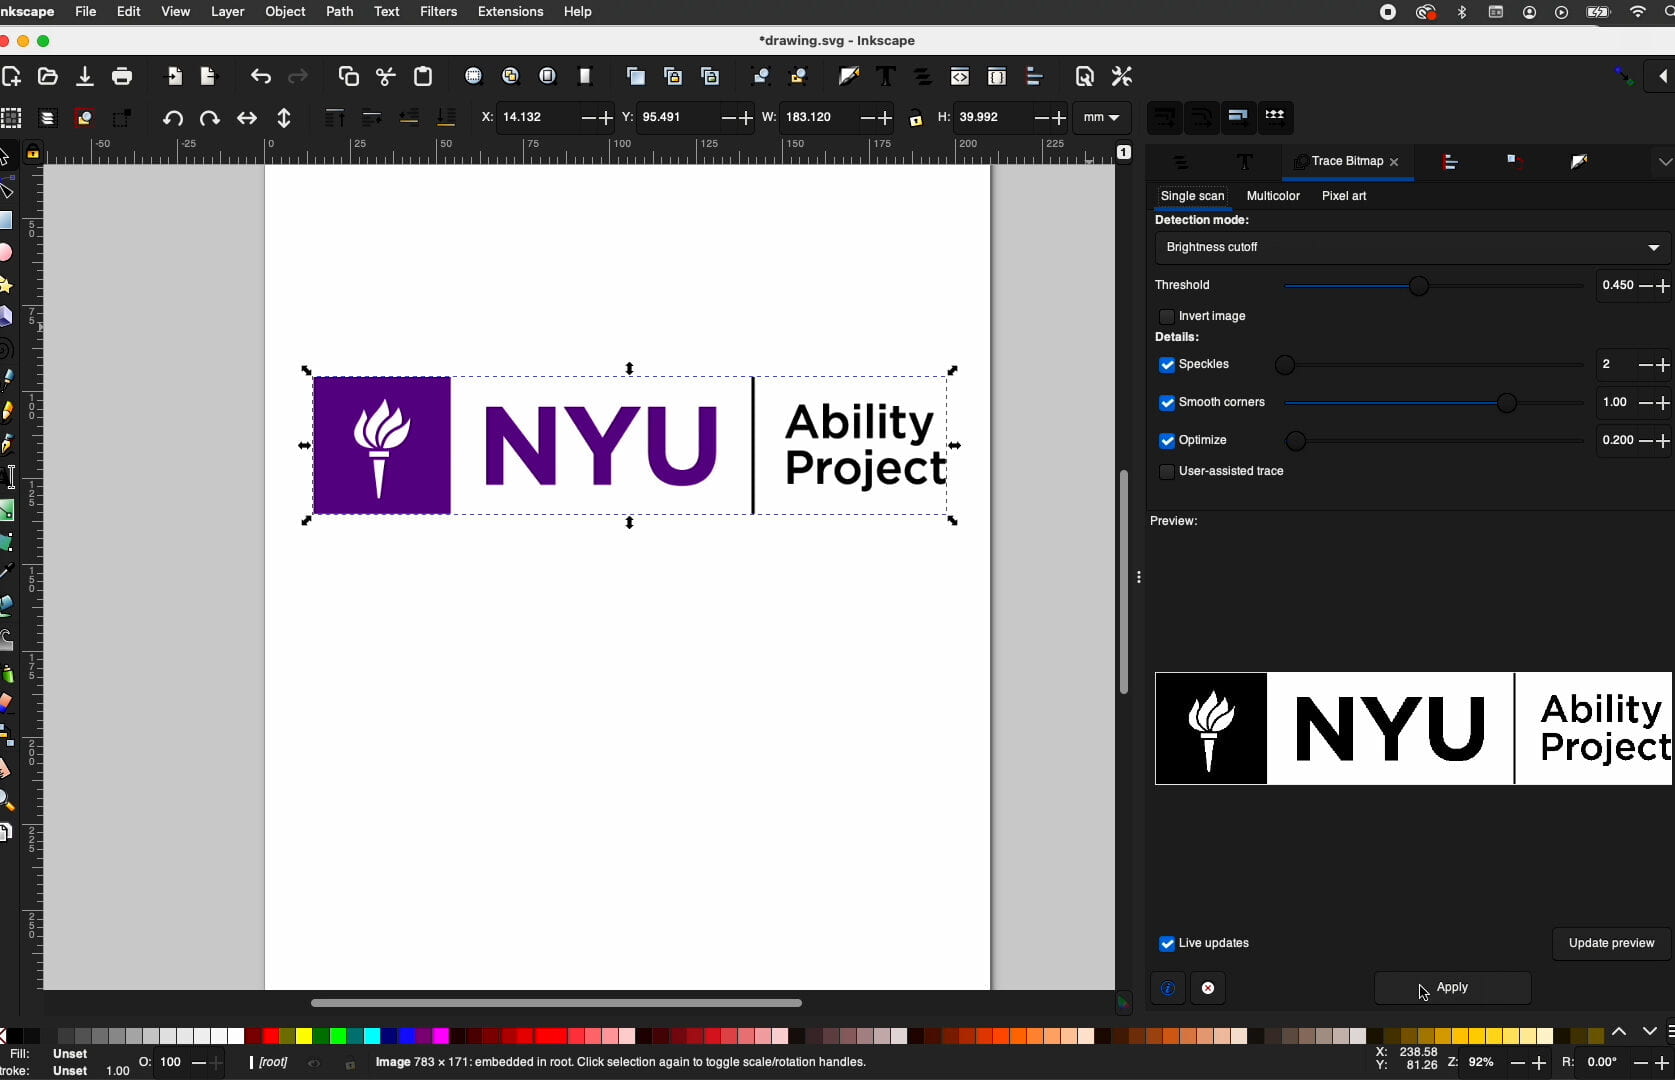
- Select the image layer
- Path > Trace Bitmap
- Try the Brightness cutoff first.
- Click Apply
-
-
-
- In the layers panel, there will now be a path added to the layer. Delete the image copy.
-
-
Break Down the Image -> is it text, a shape, or something in-between?
For embroidery on paper, solid fills that would work nicely on fabric won’t work nicely at all. If the stitching (needles holes) are too dense, the paper will perforate. Designs with loose textures and outlines have worked best so far.
Organize Your Layers!
One principle that will come in handy is organizing your layers. We’ve decided that each element of the image will be treated slightly differently and it’s good to make layers for each segment: Torch, Fill Text (NYU) and Ability Project text.
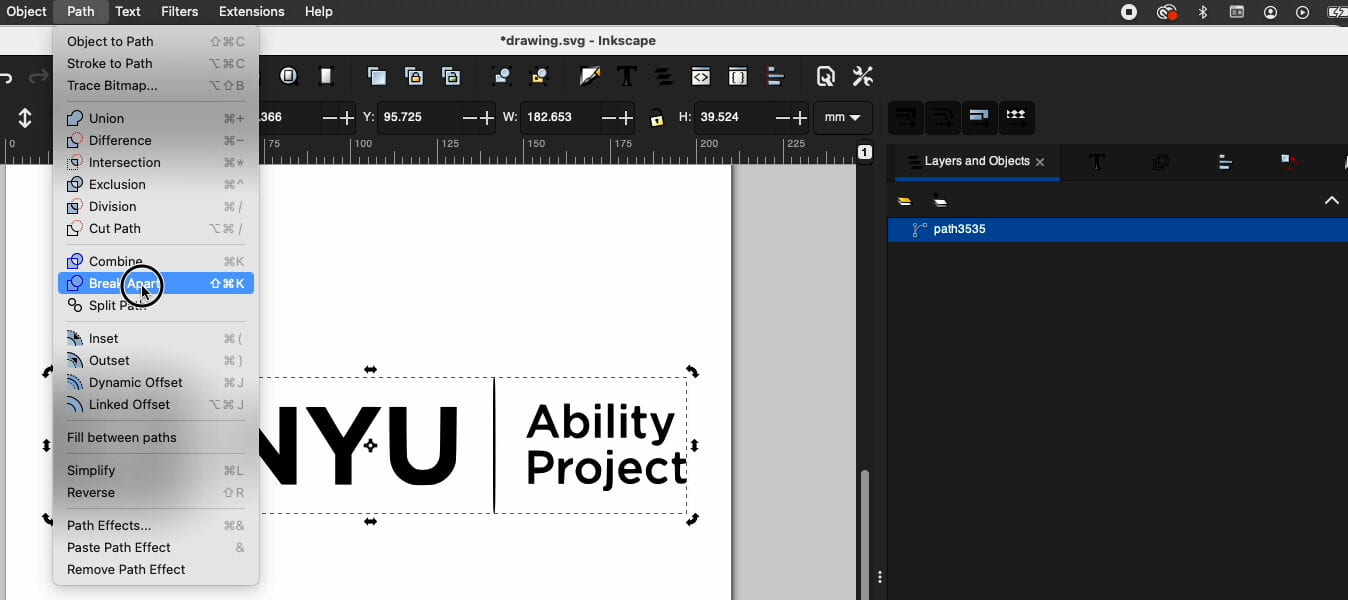
- Once you’ve deleted the original image, you’ll be left with a Black and White version, and there’ll be only one path in the layers panel
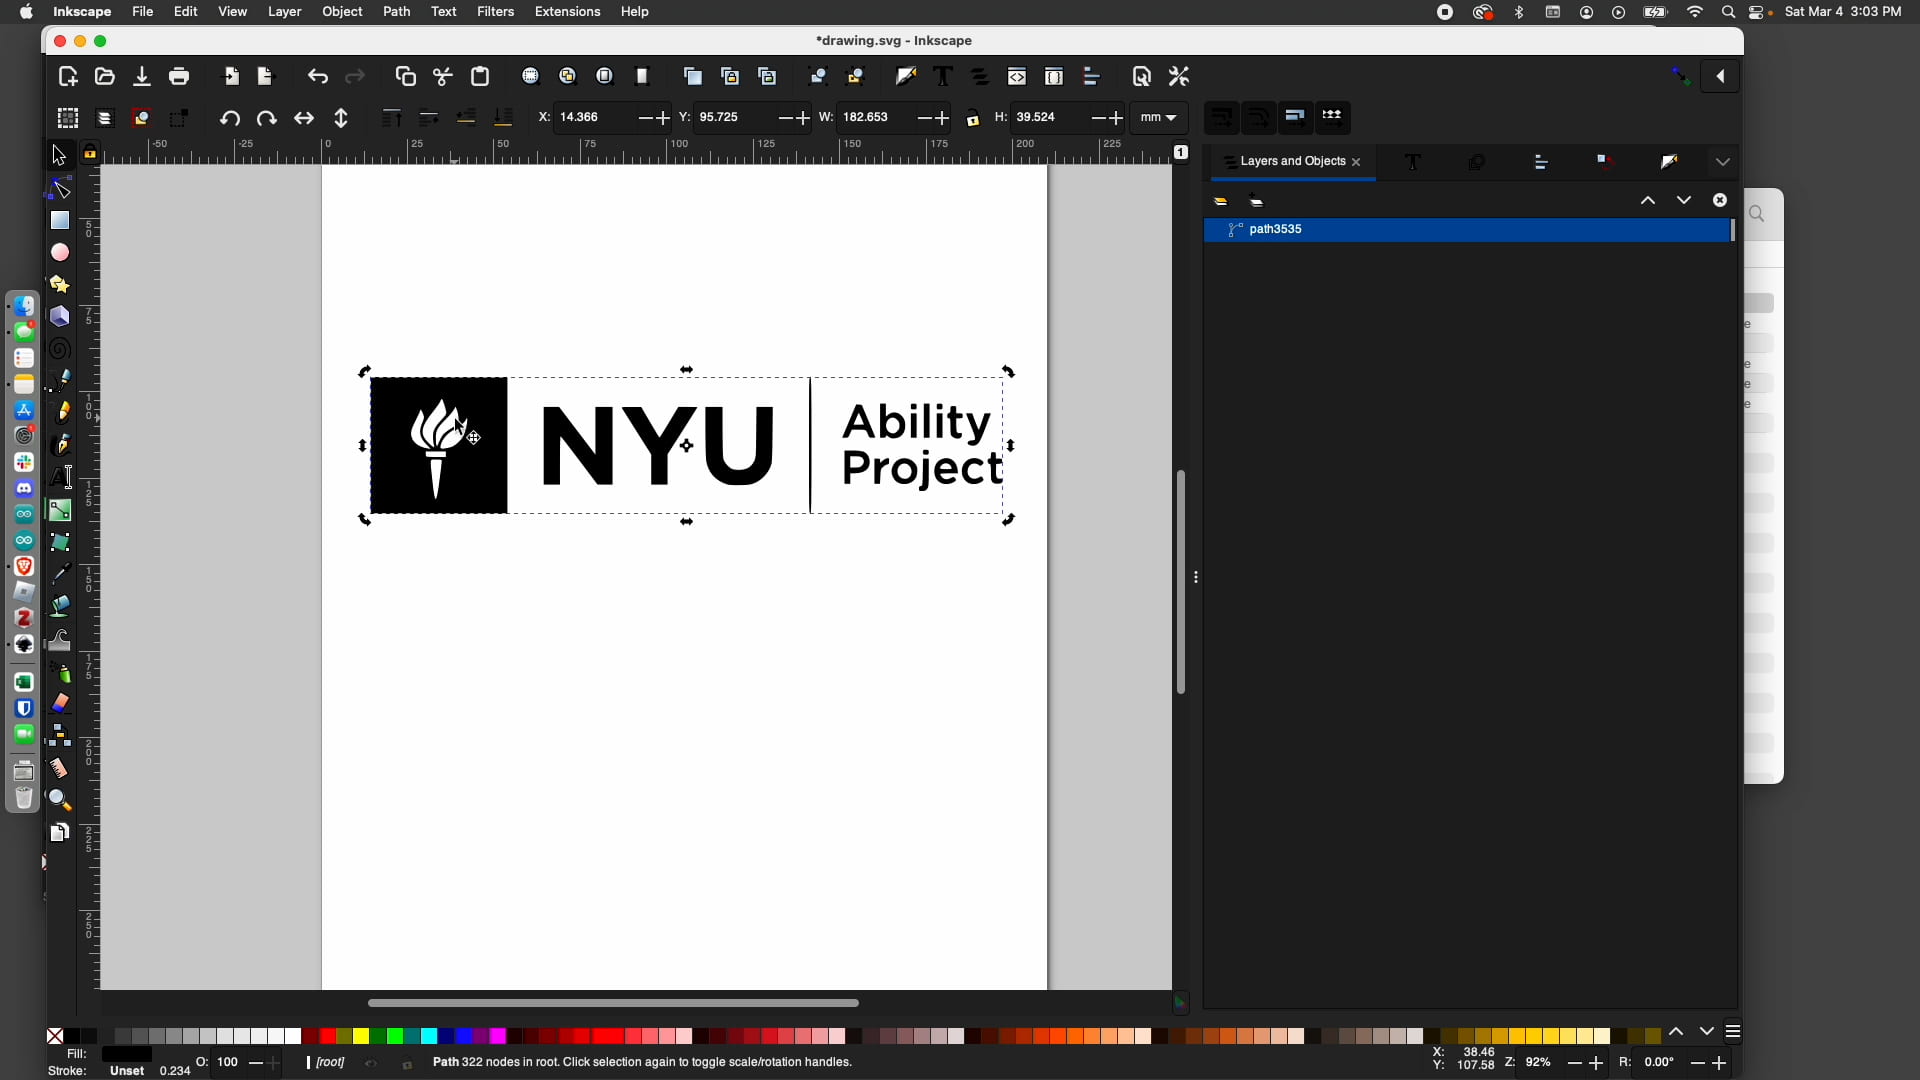
- Select Path > Break Apart to separate the elements
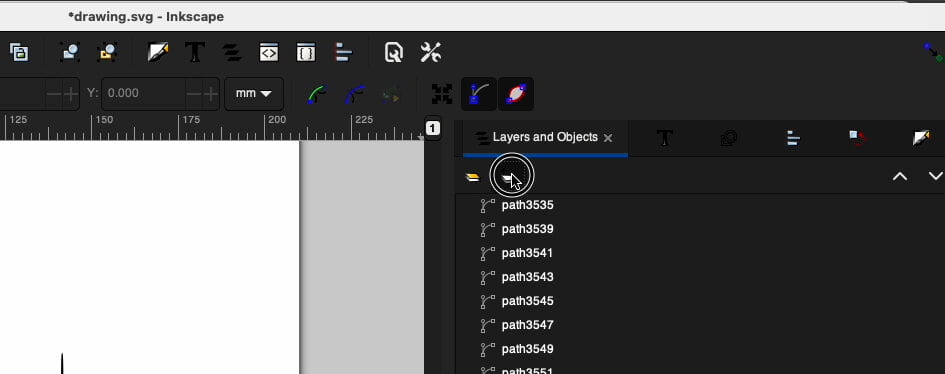
- Make a new layer
- Click the “New Layer” Icon
- Click the “New Layer” Icon
-
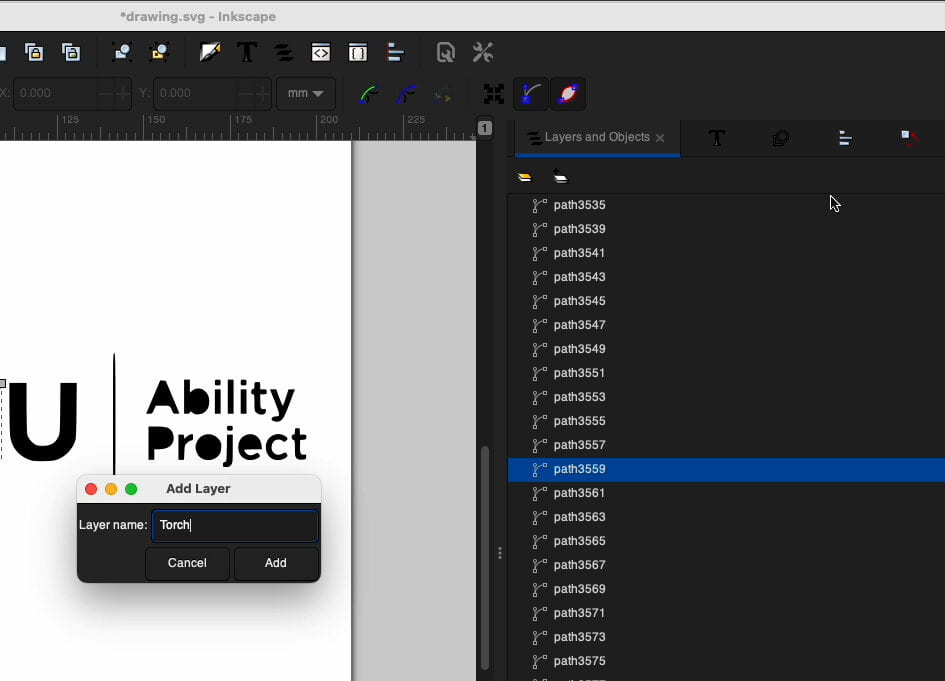
- Name the layer “Torch” & Click Add
-
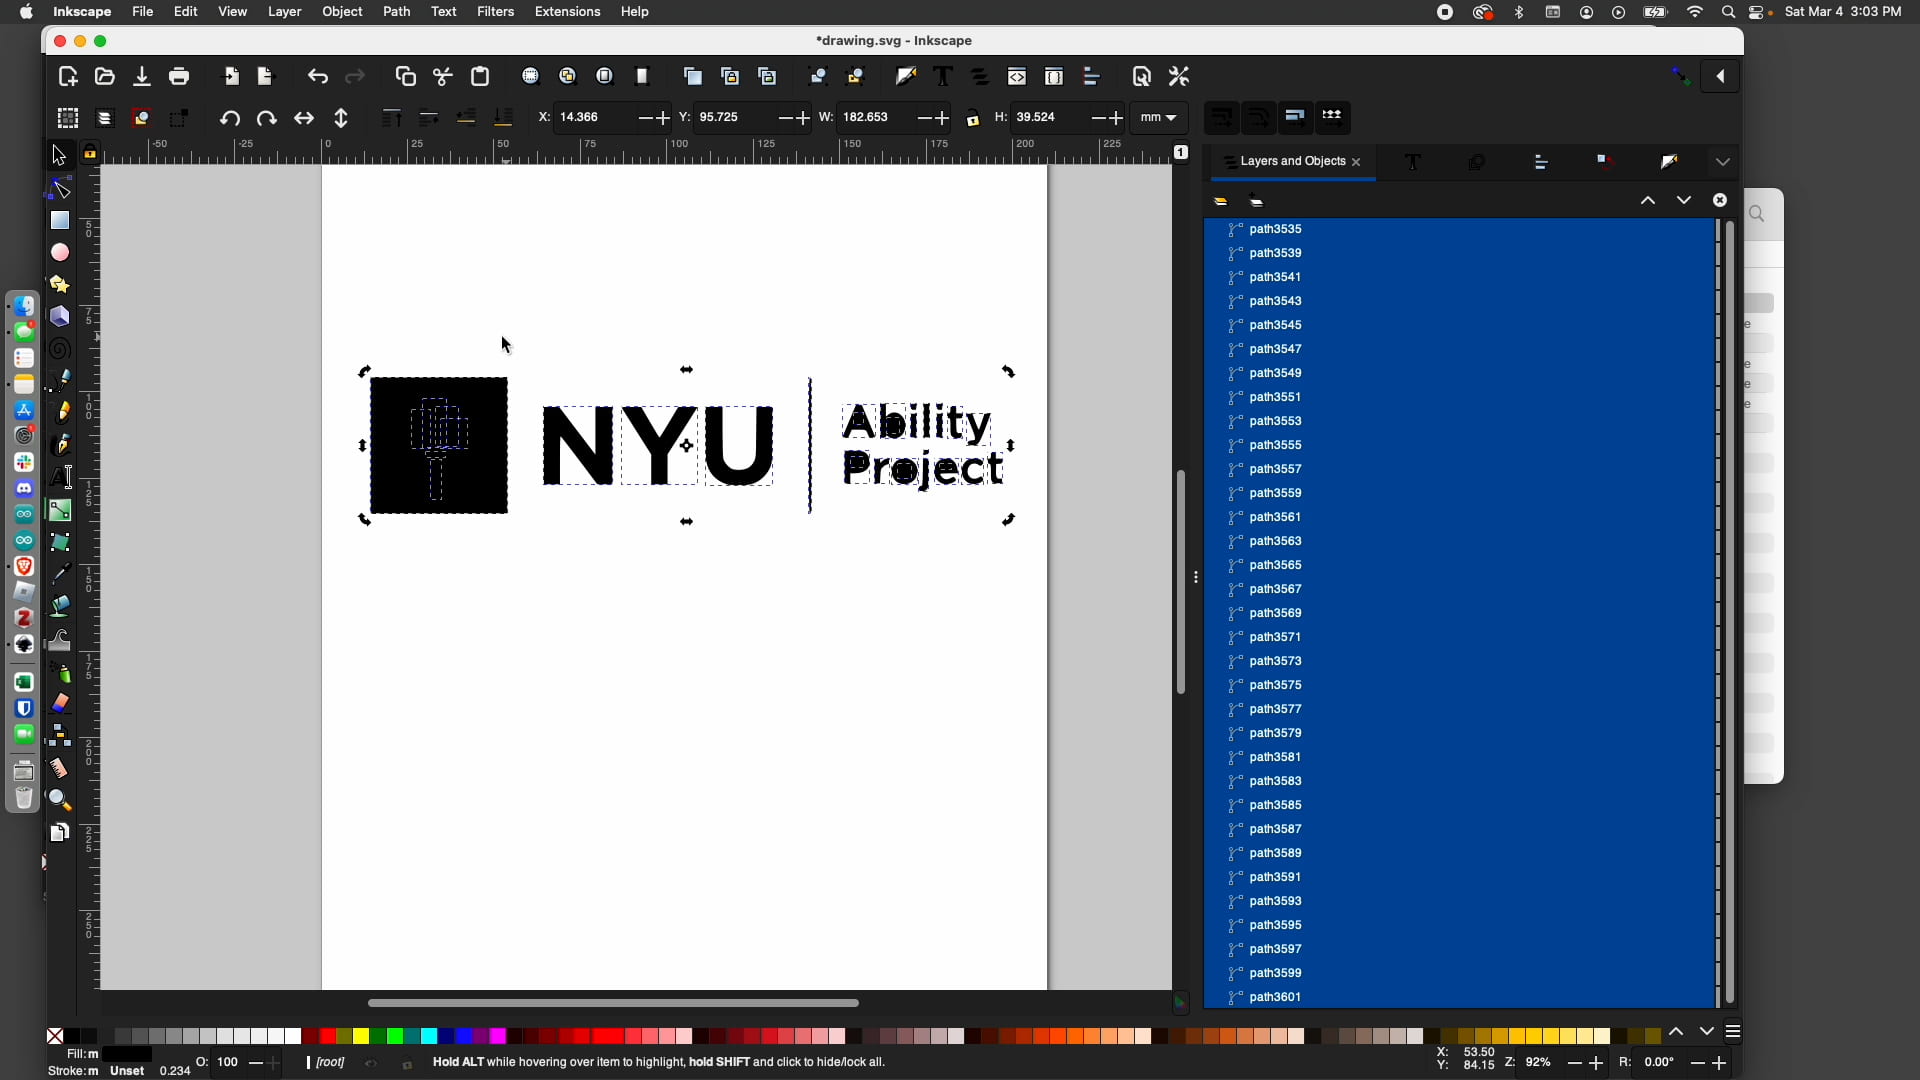
- Using the Edit Paths by Nodes tool (N), drag a marquee around the black square that contains the torch.
- Layer > Move Selection to Layer
- Choose the Torch Layer

- Repeat this for the other elements of the image: NYU Text and Ability Project Text. You can include the vertical line in the Ability Project Text layer.
All done!*
*sort of
- The Torch
- Select the “Edit Paths by Nodes” tool (N) and click on the torch area of the logo. You’ll see the grey nodes appear.
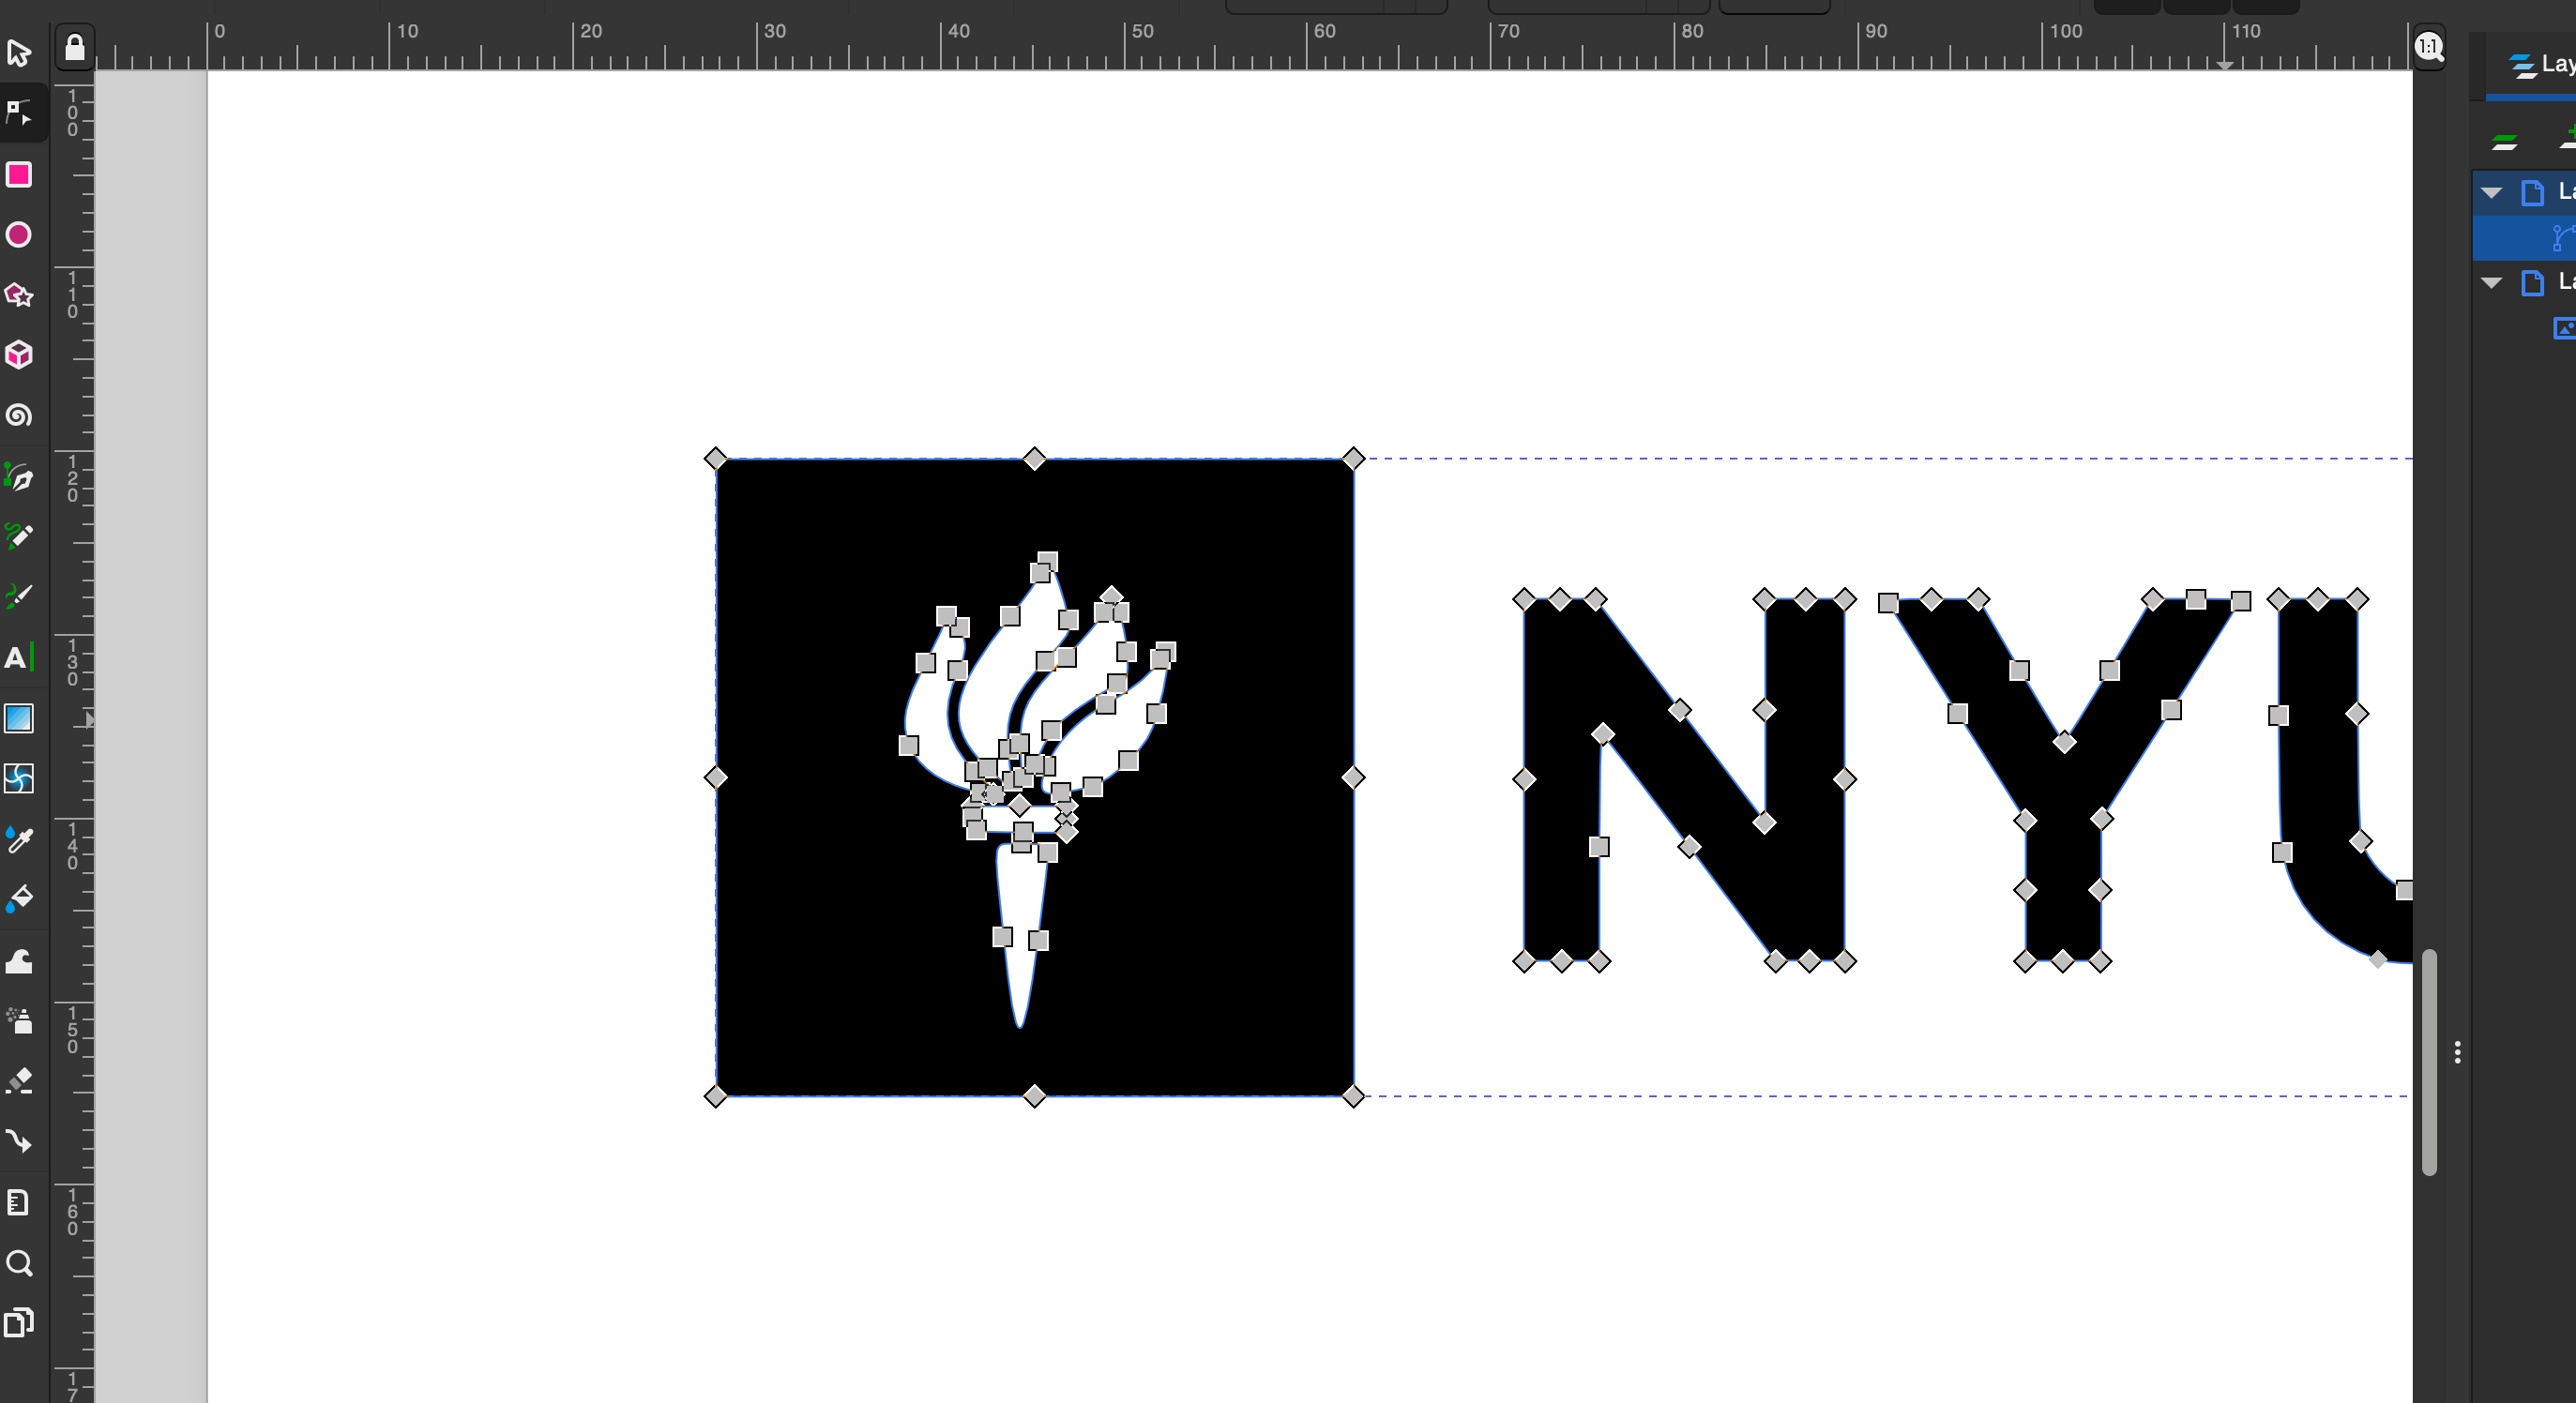
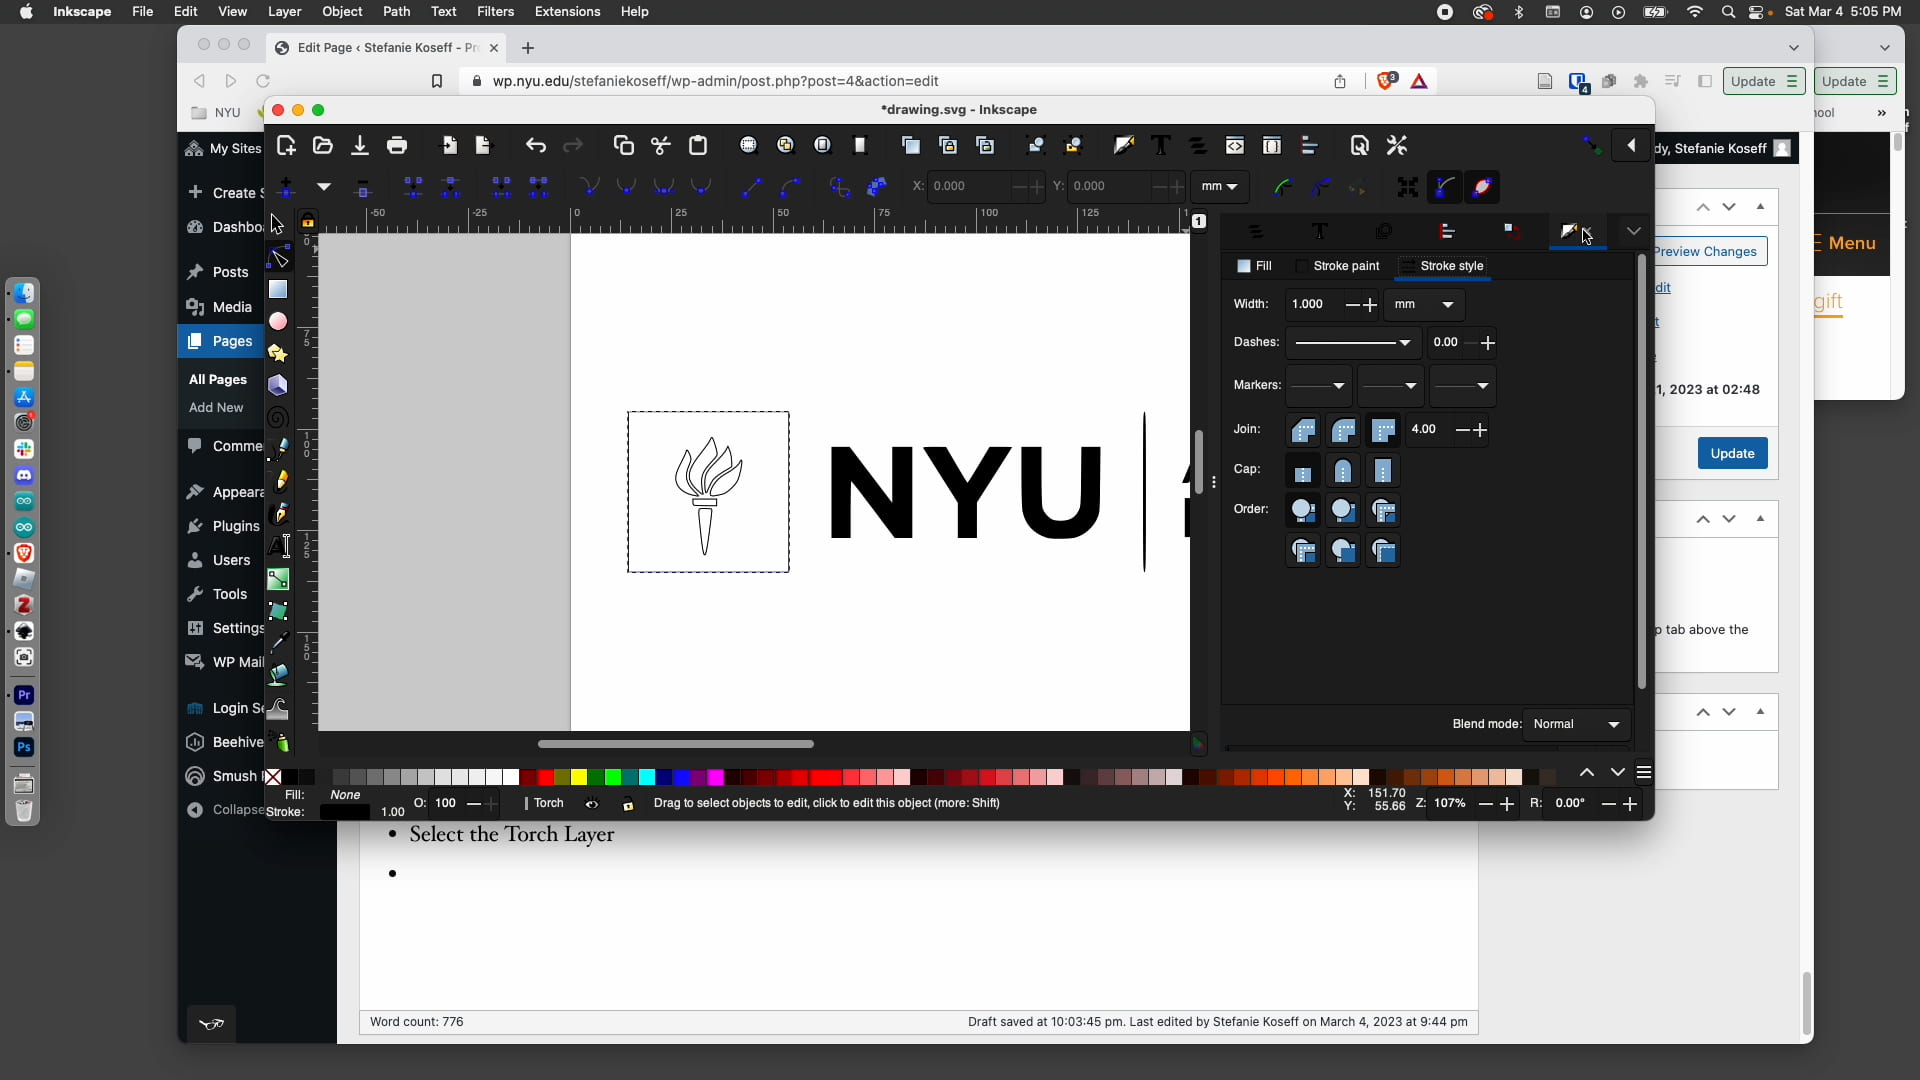
If you look at the bottom left corner of the screen you’ll see the Fill and Stroke boxes.
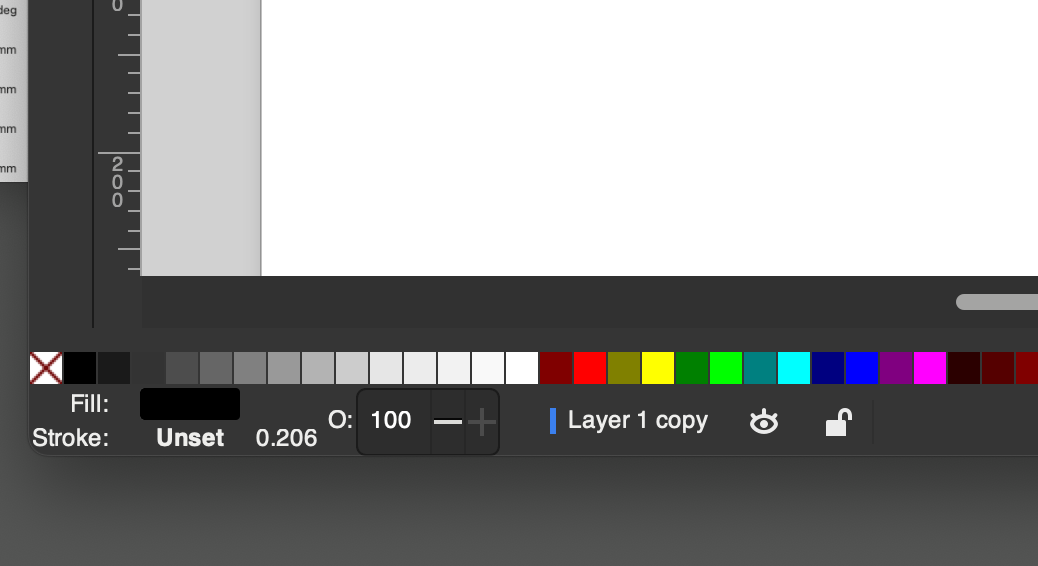
You can click on one of the color boxes to quickly change the Fill, and Shift+Click on a color to change the Stroke. Click or Shift-Click on the box with the red X to remove Fill or Stroke. Let’s remove the fill and use only a stroke for the torch. Click on the X box to remove the fill and Shift+Click on a color to choose the stroke.
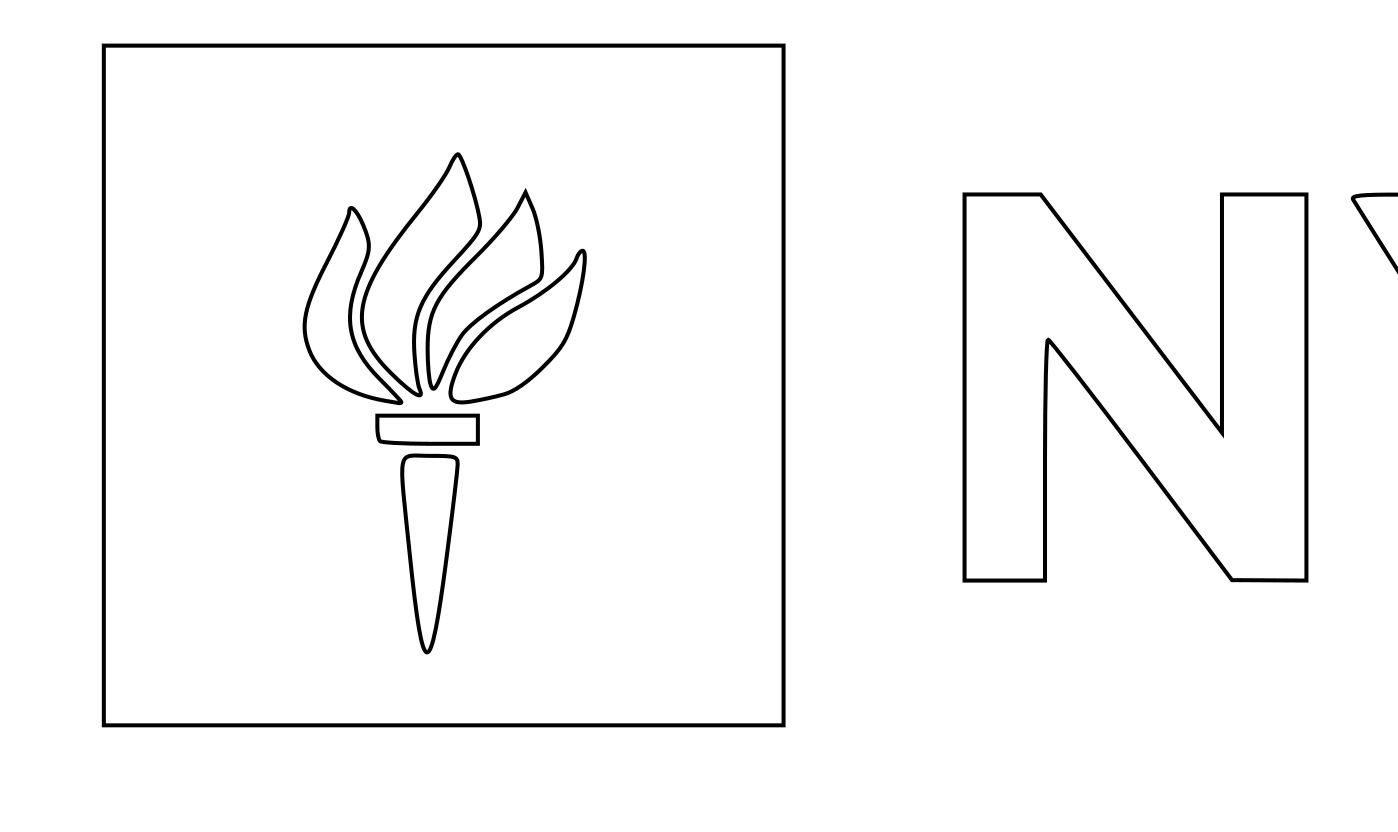
Parametrize the Image (i.e. get it ready for embroidery)
- Select the paths in the Torch Layer
- Click on the X to remove the fill (if necessary).
- Shift+Click on a color to use a stroke to outline the image
Types of Stitches for Outlines
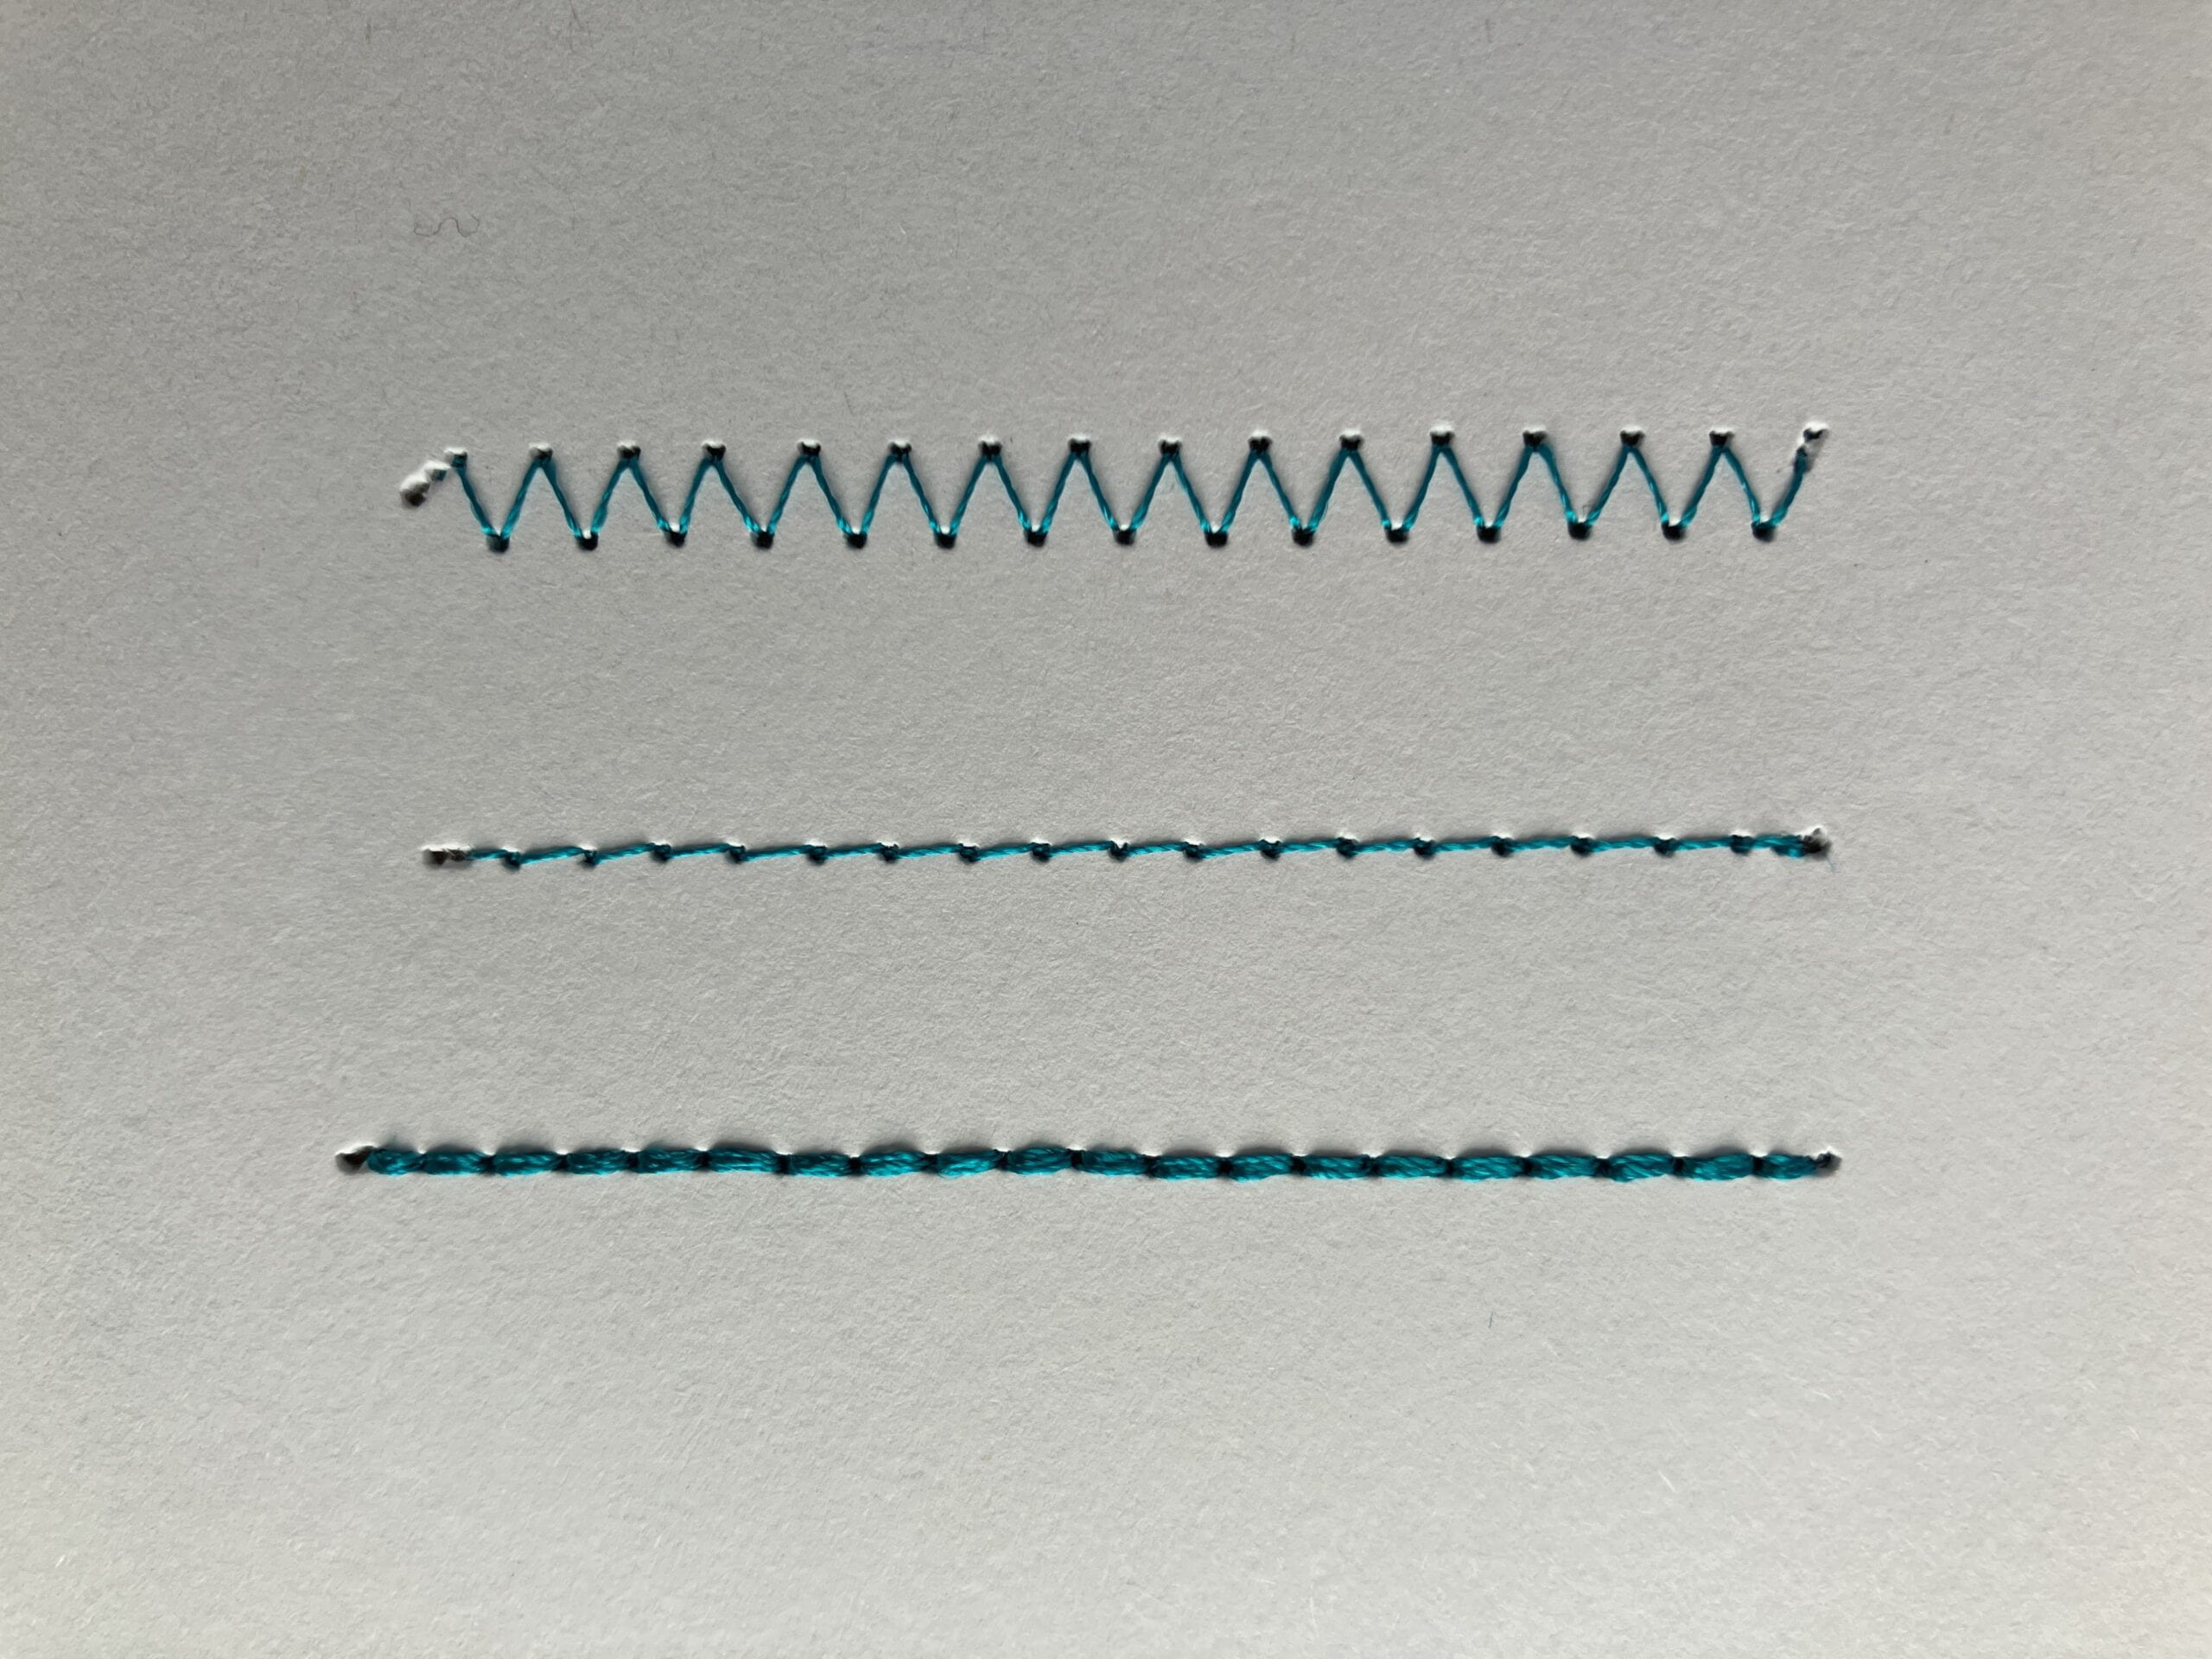
- Zig Zag Stitch (aka simple satin stitch) – use a solid stroke in InkStitch
- Running Stitch – use a dashed stroke in InkStitch
- Bean Stitch – create a Running Stitch with a dashed line, then indicate Bean Stitches in the Params menu
Create a Bean Stitch for the Torch Outline
- Select the Torch Layer
- Select Object > Fill & Stroke
- The Fill & Stroke Panel will open up on the right-hand side of your screen. Use the drop down “Dashes” menu to choose a dashed line (can be any kind).
- Now go to the Params Menu
- Extensions > Ink/Stitch > Params
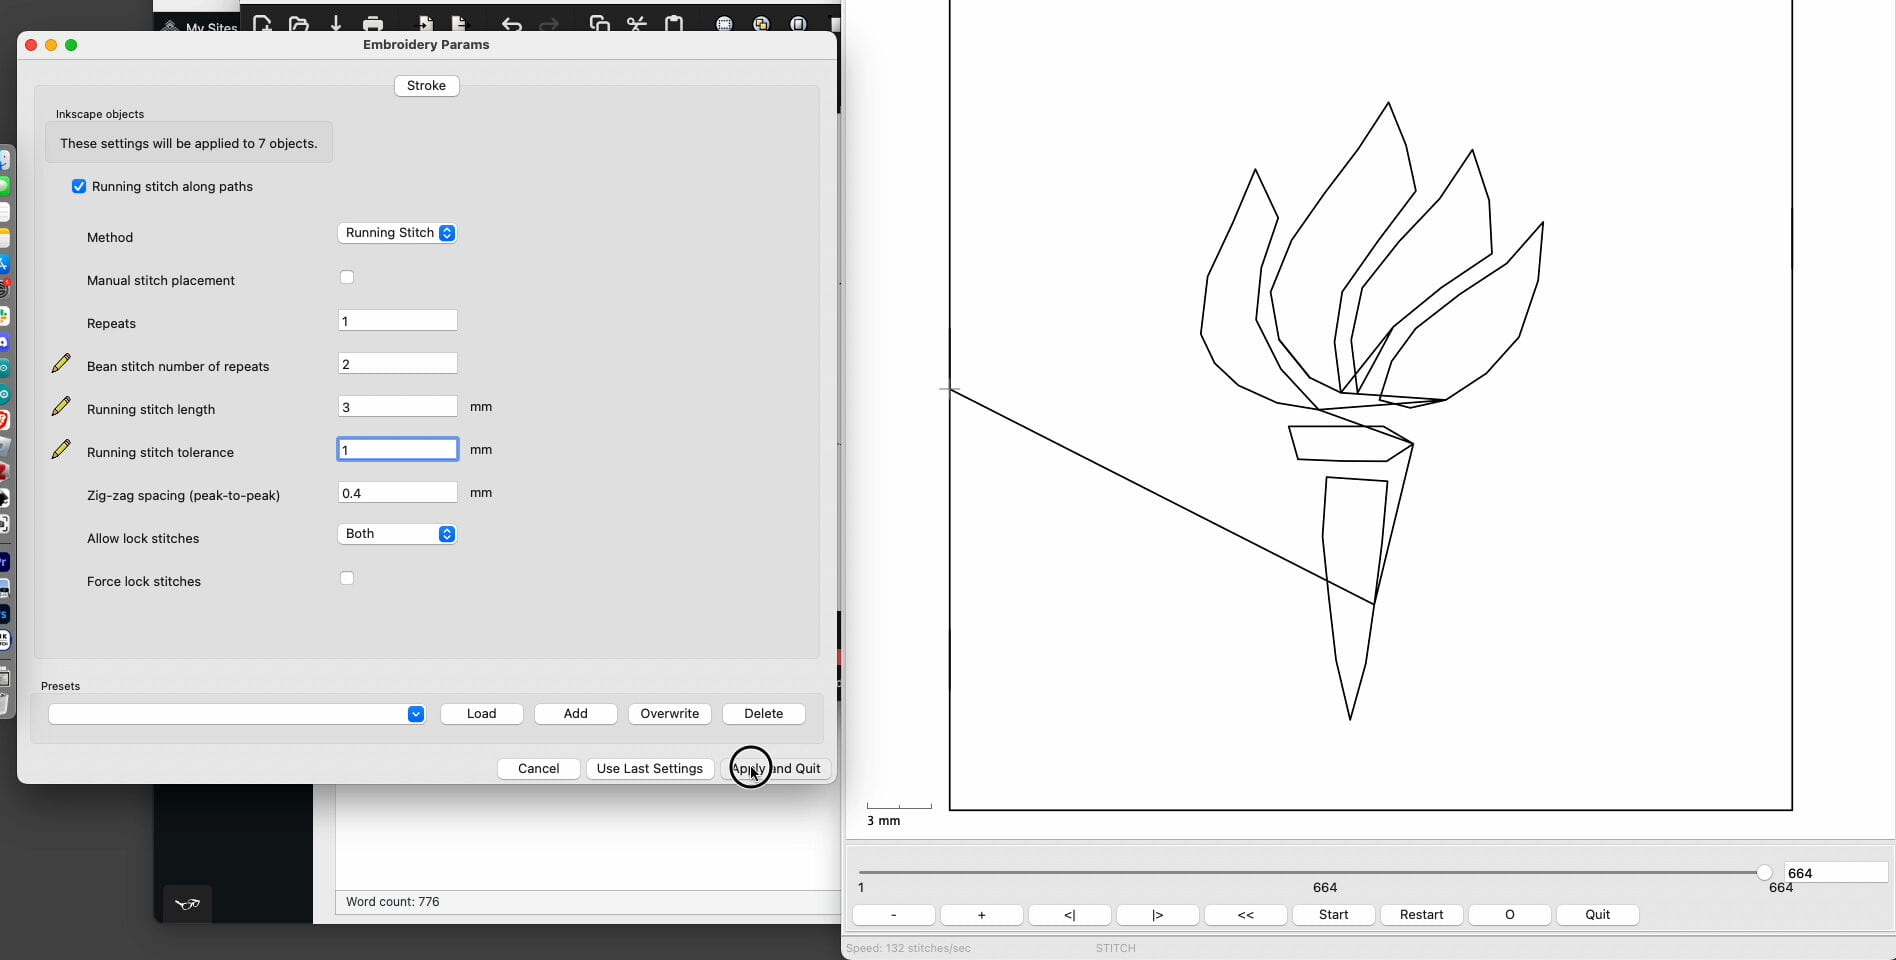
- Enter the numbers as shown below
- Repeats > 1
- Bean Stitch number of repeats > 2
- Running Stitch Length > 3 mm
- Running Stitch Tolerance > 1 mm
- Apply & Quit
- Enter the numbers as shown below
- Extensions > Ink/Stitch > Params
The NYU Text
We’ll treat these letters as shapes and fill them with texture.
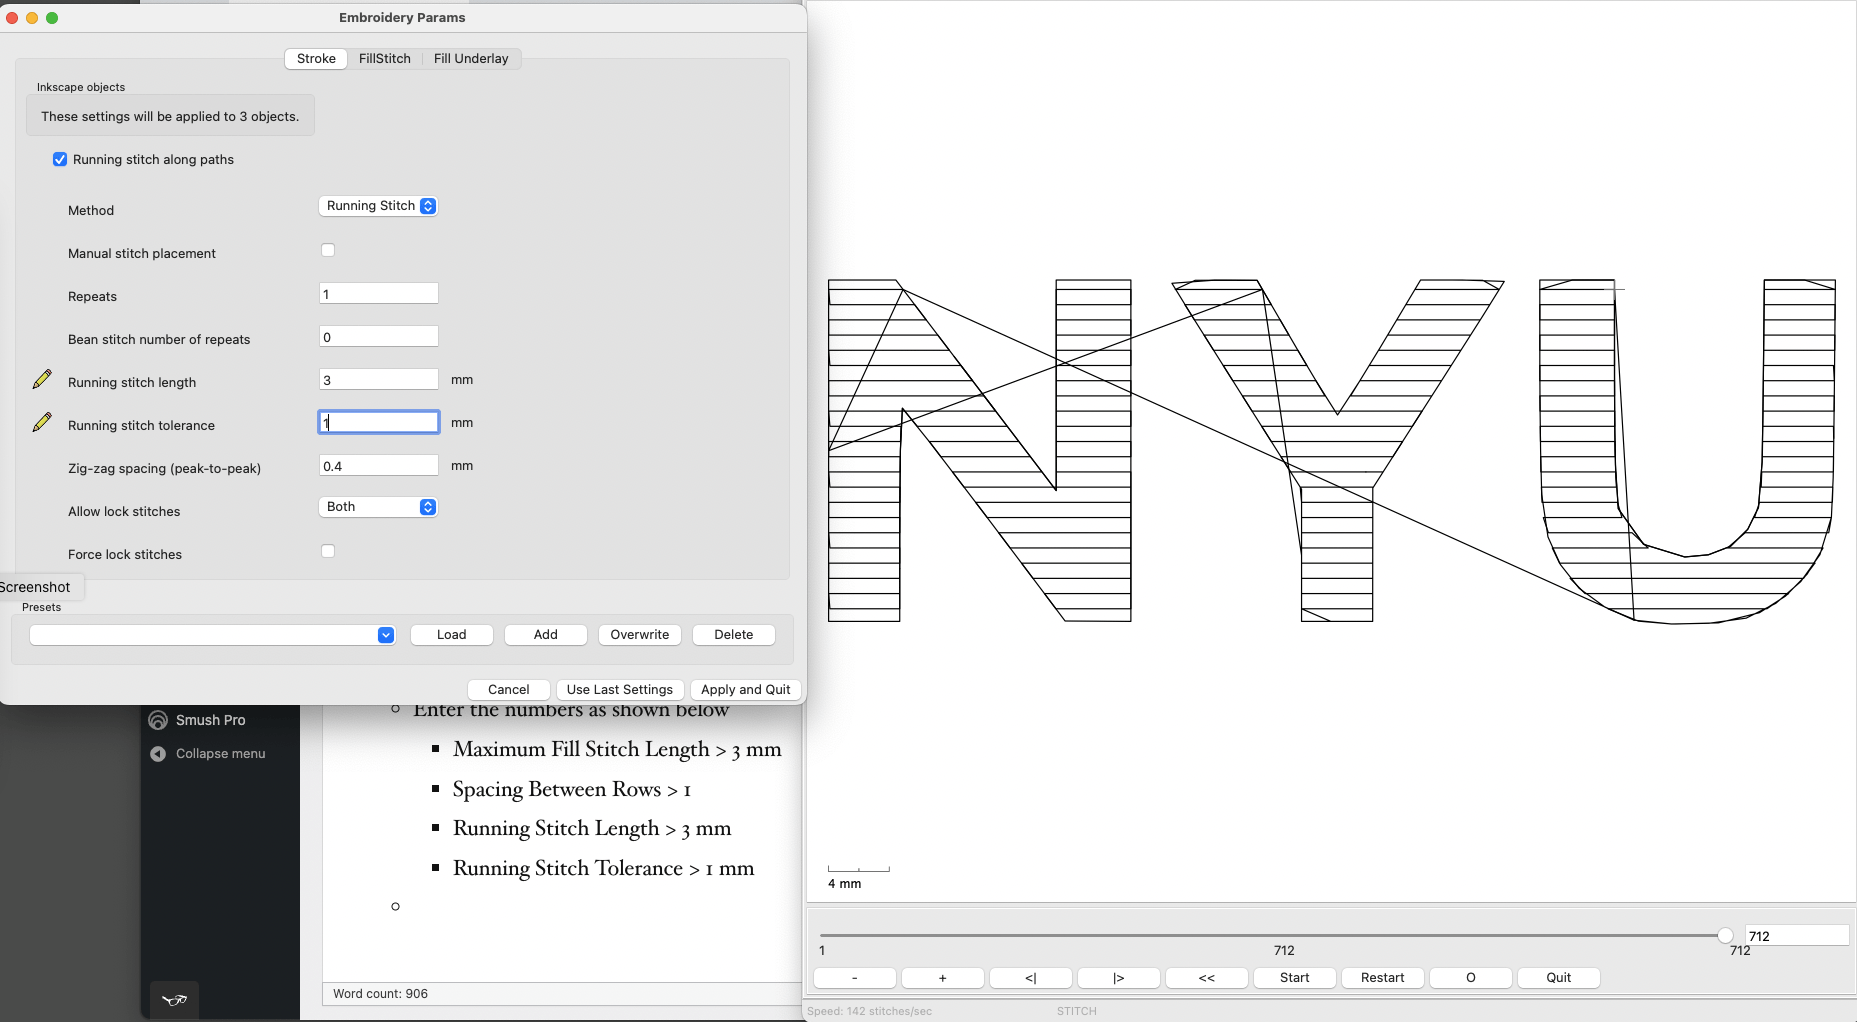
Create Filled Text for the NYU text
- Select the NYU text layer
- Select a dashed line for the stroke, and make sure it’s filled with any color
- Extensions > Ink/Stitch > Params
- Fill Underlay > Deselect Underpath
- Deselect Underlay
- Fill Stitch > Deselect Underpath
- Enter the numbers as shown below
- Maximum Fill Stitch Length > 3 mm
- Spacing Between Rows > 1
- Running Stitch Length > 3 mm
- Running Stitch Tolerance > 1 mm
- Fill Underlay > Deselect Underpath
The Ability Project Text
Smaller, fine letters can be tricky in embroidery on paper. We’ll use the Hershey Text extension which executes text in a single line format, as opposed to letters that are rendered as shapes to be filled (like the NYU text above).
Create Single-Stroke Text with Hershey Text
- Select the Ability Project Text layer
- Use the Text Tool (T) to create new text
- The BMP trace function created shape paths out of all of the text. We want the software to recognize them as text again, so we need to remake this part (maybe not the most efficient way to do things!)
- Select the new text
- Extensions > AxiDraw Utilities > Hershey Text…
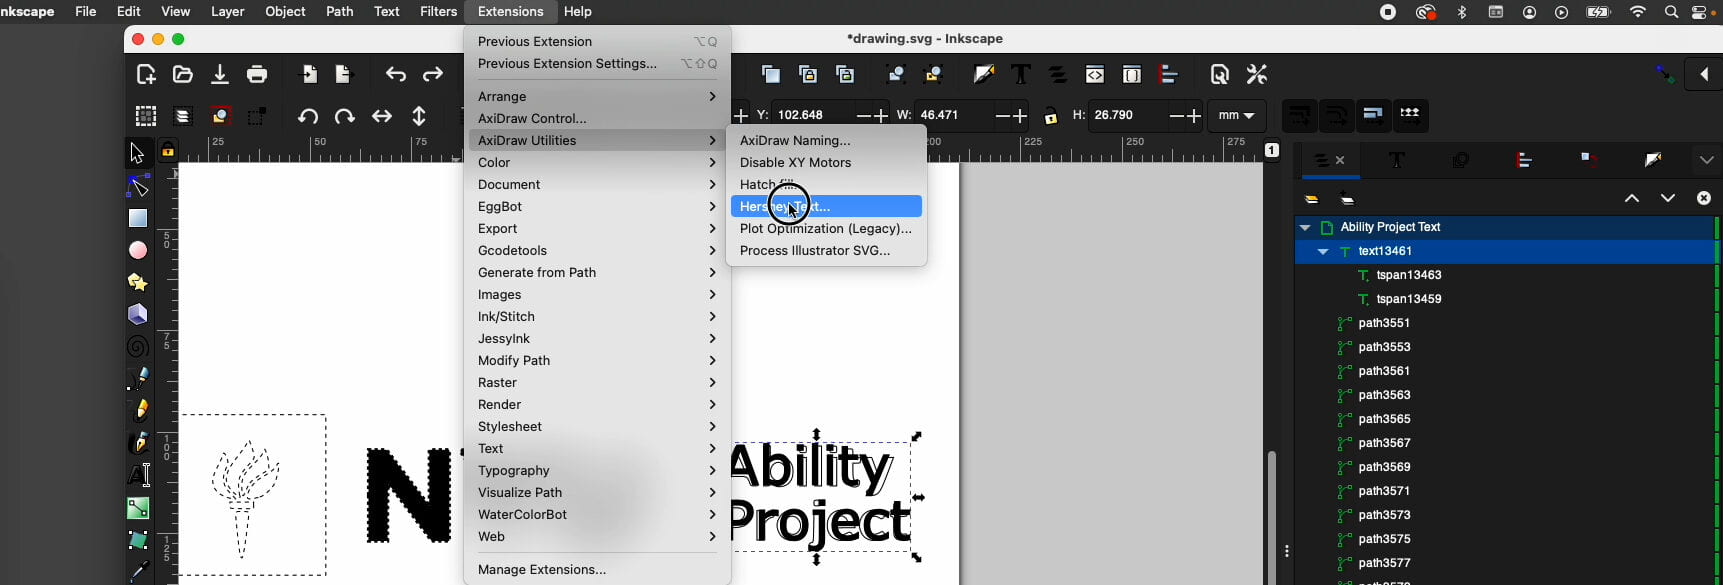
- The Hershey Text dialog box will open. I’ve found that EMS Readability is the easiest to use for embroidery.
- Extensions > AxiDraw Utilities > Hershey Text…
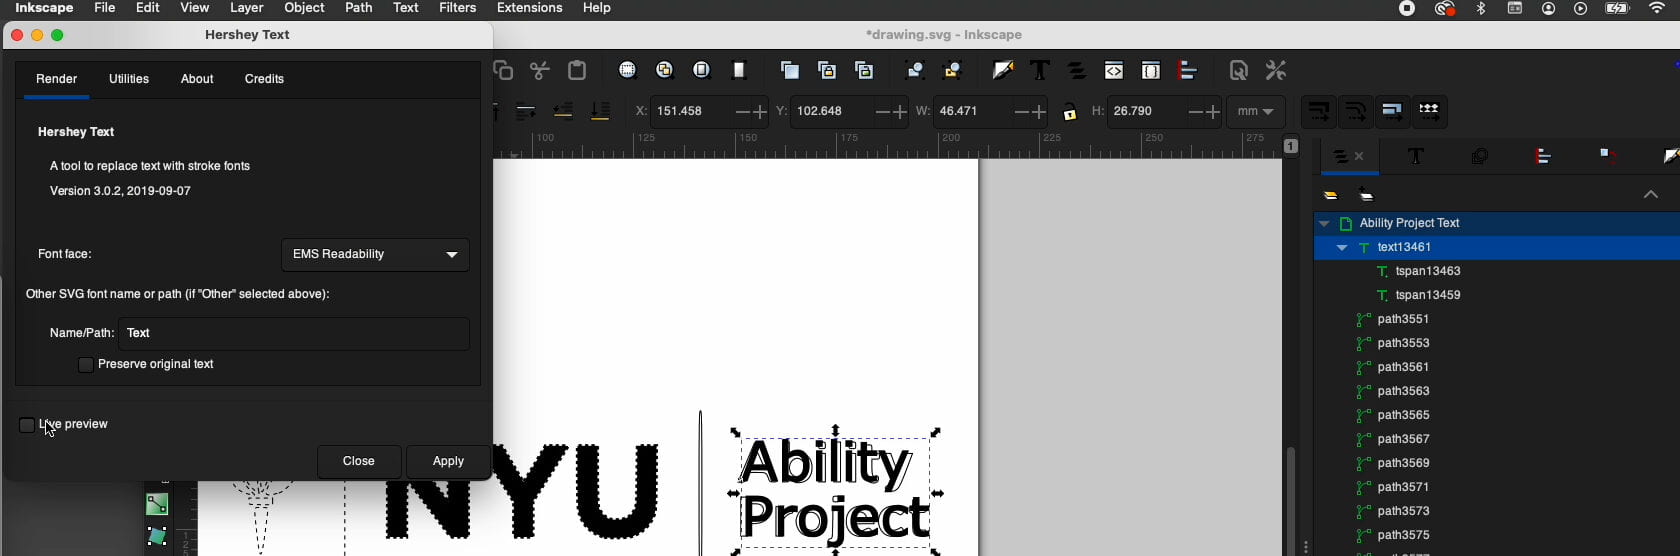
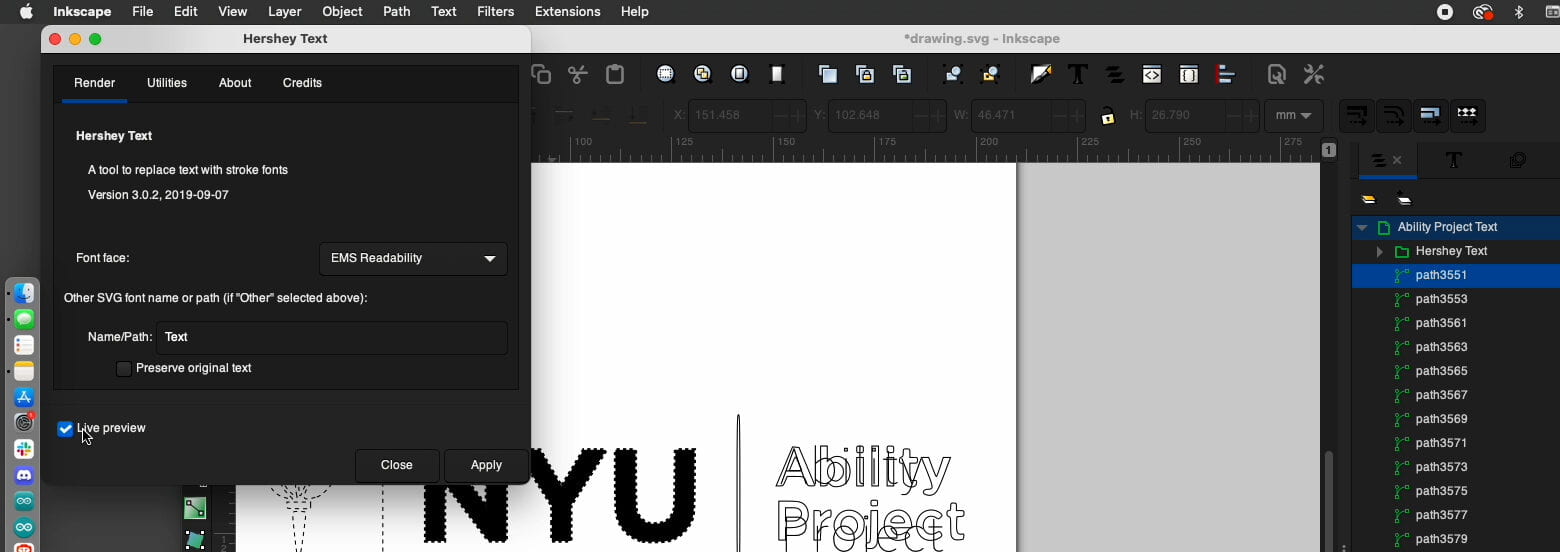
- Select Live Preview to see how the text will look. Choose “Preserve Original Text” if you think you might make more changes later.
- Click Apply & Close
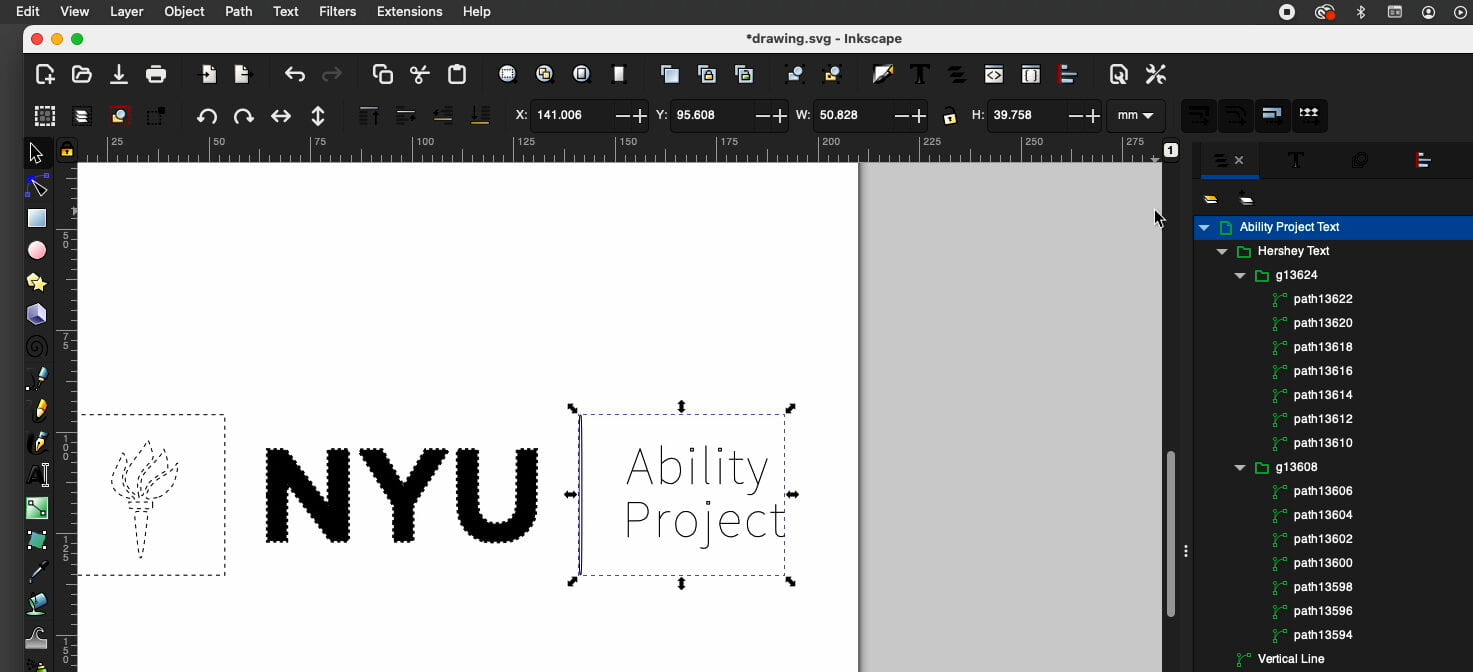
- Move the new letters around to match the positions of the original text.
- Delete the original text paths. Hershey Text remains.
- Select the Ability Project Text and make the stroke dashed.
- Extensions > Ink/Stitch > Params
- Create a Bean Stitch for the Text as we did for the Torch
- Enter the numbers as shown below
- Repeats > 1
- Bean Stitch number of repeats > 2
- Running Stitch Length > 3 mm
- Running Stitch Tolerance > 1 mm
- Apply & Quit
- Enter the numbers as shown below
Notes on Text:
-
-
- 3mm is a good large stitch distance to start with. For very curvy or precise lettering, reduce it to 2 mm. The tolerance can be adjusted as well (lower) if you find that letters aren’t being stitched completely. If the tolerance is lower, the software will add more stitches necessary to complete a line.
- Sometimes, particularly for small letters, the thread won’t stay in the needle hole, as the stitch is too short. You can use the Node tool (N) to extend the path by a tiny bit and that often is enough to get a good stitch for that part of the letter.
-
Stitching Order!
- Ink/Stitch stitches layers and paths as they are in the layer panel from the bottom up. Rearranging the layers and paths so they flow in a logical order helps for smooth stitching and not too many jump stitches. This is particularly important when stitching text. You can also organize your stitching by color, so that all the shapes/paths of one color are done first and you don’t have to keep stopping the machine to change the thread.