“I don’t need a drill, I need a hole on the wall”
产品导向 用户导向 结果导向
daily routines: what do you do
let them talk & dig in: 5 whys
DIVERSITY
visualizing
实地考察2次左右,选取active时段,
“I don’t need a drill, I need a hole on the wall”
产品导向 用户导向 结果导向
daily routines: what do you do
let them talk & dig in: 5 whys
DIVERSITY
visualizing
实地考察2次左右,选取active时段,
For the talk with the trash collector 闫师傅, it was very informative. I actually had a community trash collector back in Beijing, so I did know about this job before. But there were something new for me to learn also.
What I did not know before was how the prices fluctuate throughout the “seasons” as the Shifu was calling it. It did make sense to me tho because they were selling the recyclables to the government but I truly assumed that they decide the prices all by themselves.
Also I didn’t know that so many things that I usually throw into the recycle bin were not taken by the collectors and that there were things that they wouldn’t bother to recycle just because of the price so that was also something new.
In terms of the opinion on the job, I realize there are many negative opinions especially among Chinese households against those seemingly “lesser” jobs so I’m glad that Shifu was treated with respect among his family.
For the reading:
I guess what I learned from it was the details on how people initially thought about plastic bags and the battle back and forth on the ban and fees against it in the USA. What I was most surprised about is how advertisements can diverge people’s attention from what problems they are interested in and what sounds “emergent” to them, and how corporates like ACC can abuse that characteristic about human beings to manipulate the public’s opinion and feelings towards plastics. Because in the end, public opinions are important and people are generally stupid……
For me personally, I’m all for any actions that go against the usage of plastic bags or paper bags or actually any human-made products that are not sustainable, but again, the success of them largely depends on how the public feels towards those products, which is hard because public’s mind is easily manipulated. So I guess the most long-term goal is to better educate the public, and also as we discussed, provide a way or option for the public to live more sustainably, such as labeling the kinds of plastic used in certain products to facilitate more effective recycling or provide plastic-free options in stores.
HIIIIIIII
For the final project of this course I chose to make a Cajon drum out of selected material and with a custom design of the pattern.
Inspiration and Design:
The main design element of the cajon box is from the various cutting board designs on the internet, which usually use woods in high contrast in colors to make simple and colorful patterns. Usually one black one pale and one red, sometimes there is yellow but it is kinda rare.

For mine I designed it to be three major stripes of red (African padauk) and black (walnut), with white (maple but then decided beech might be better) thin stripes in the middle. (loosely inspired by my middle school uniform by the way)


I thought it gives a nice color contrast and would finish nicely.
So I directly ordered the wood boards at a rough size from Taobao and got them delivered.
Fabricating:
I trimmed my boards to size according to a relative size with each other on the table saw. Then I glued them all together according to my design. In this step I used a lot of clamps to eliminate as many gaps as I could, because in my research I found that for wood instruments it is important to avoid gaps in the walls of the sound chamber because it will muffle the sound by a lot.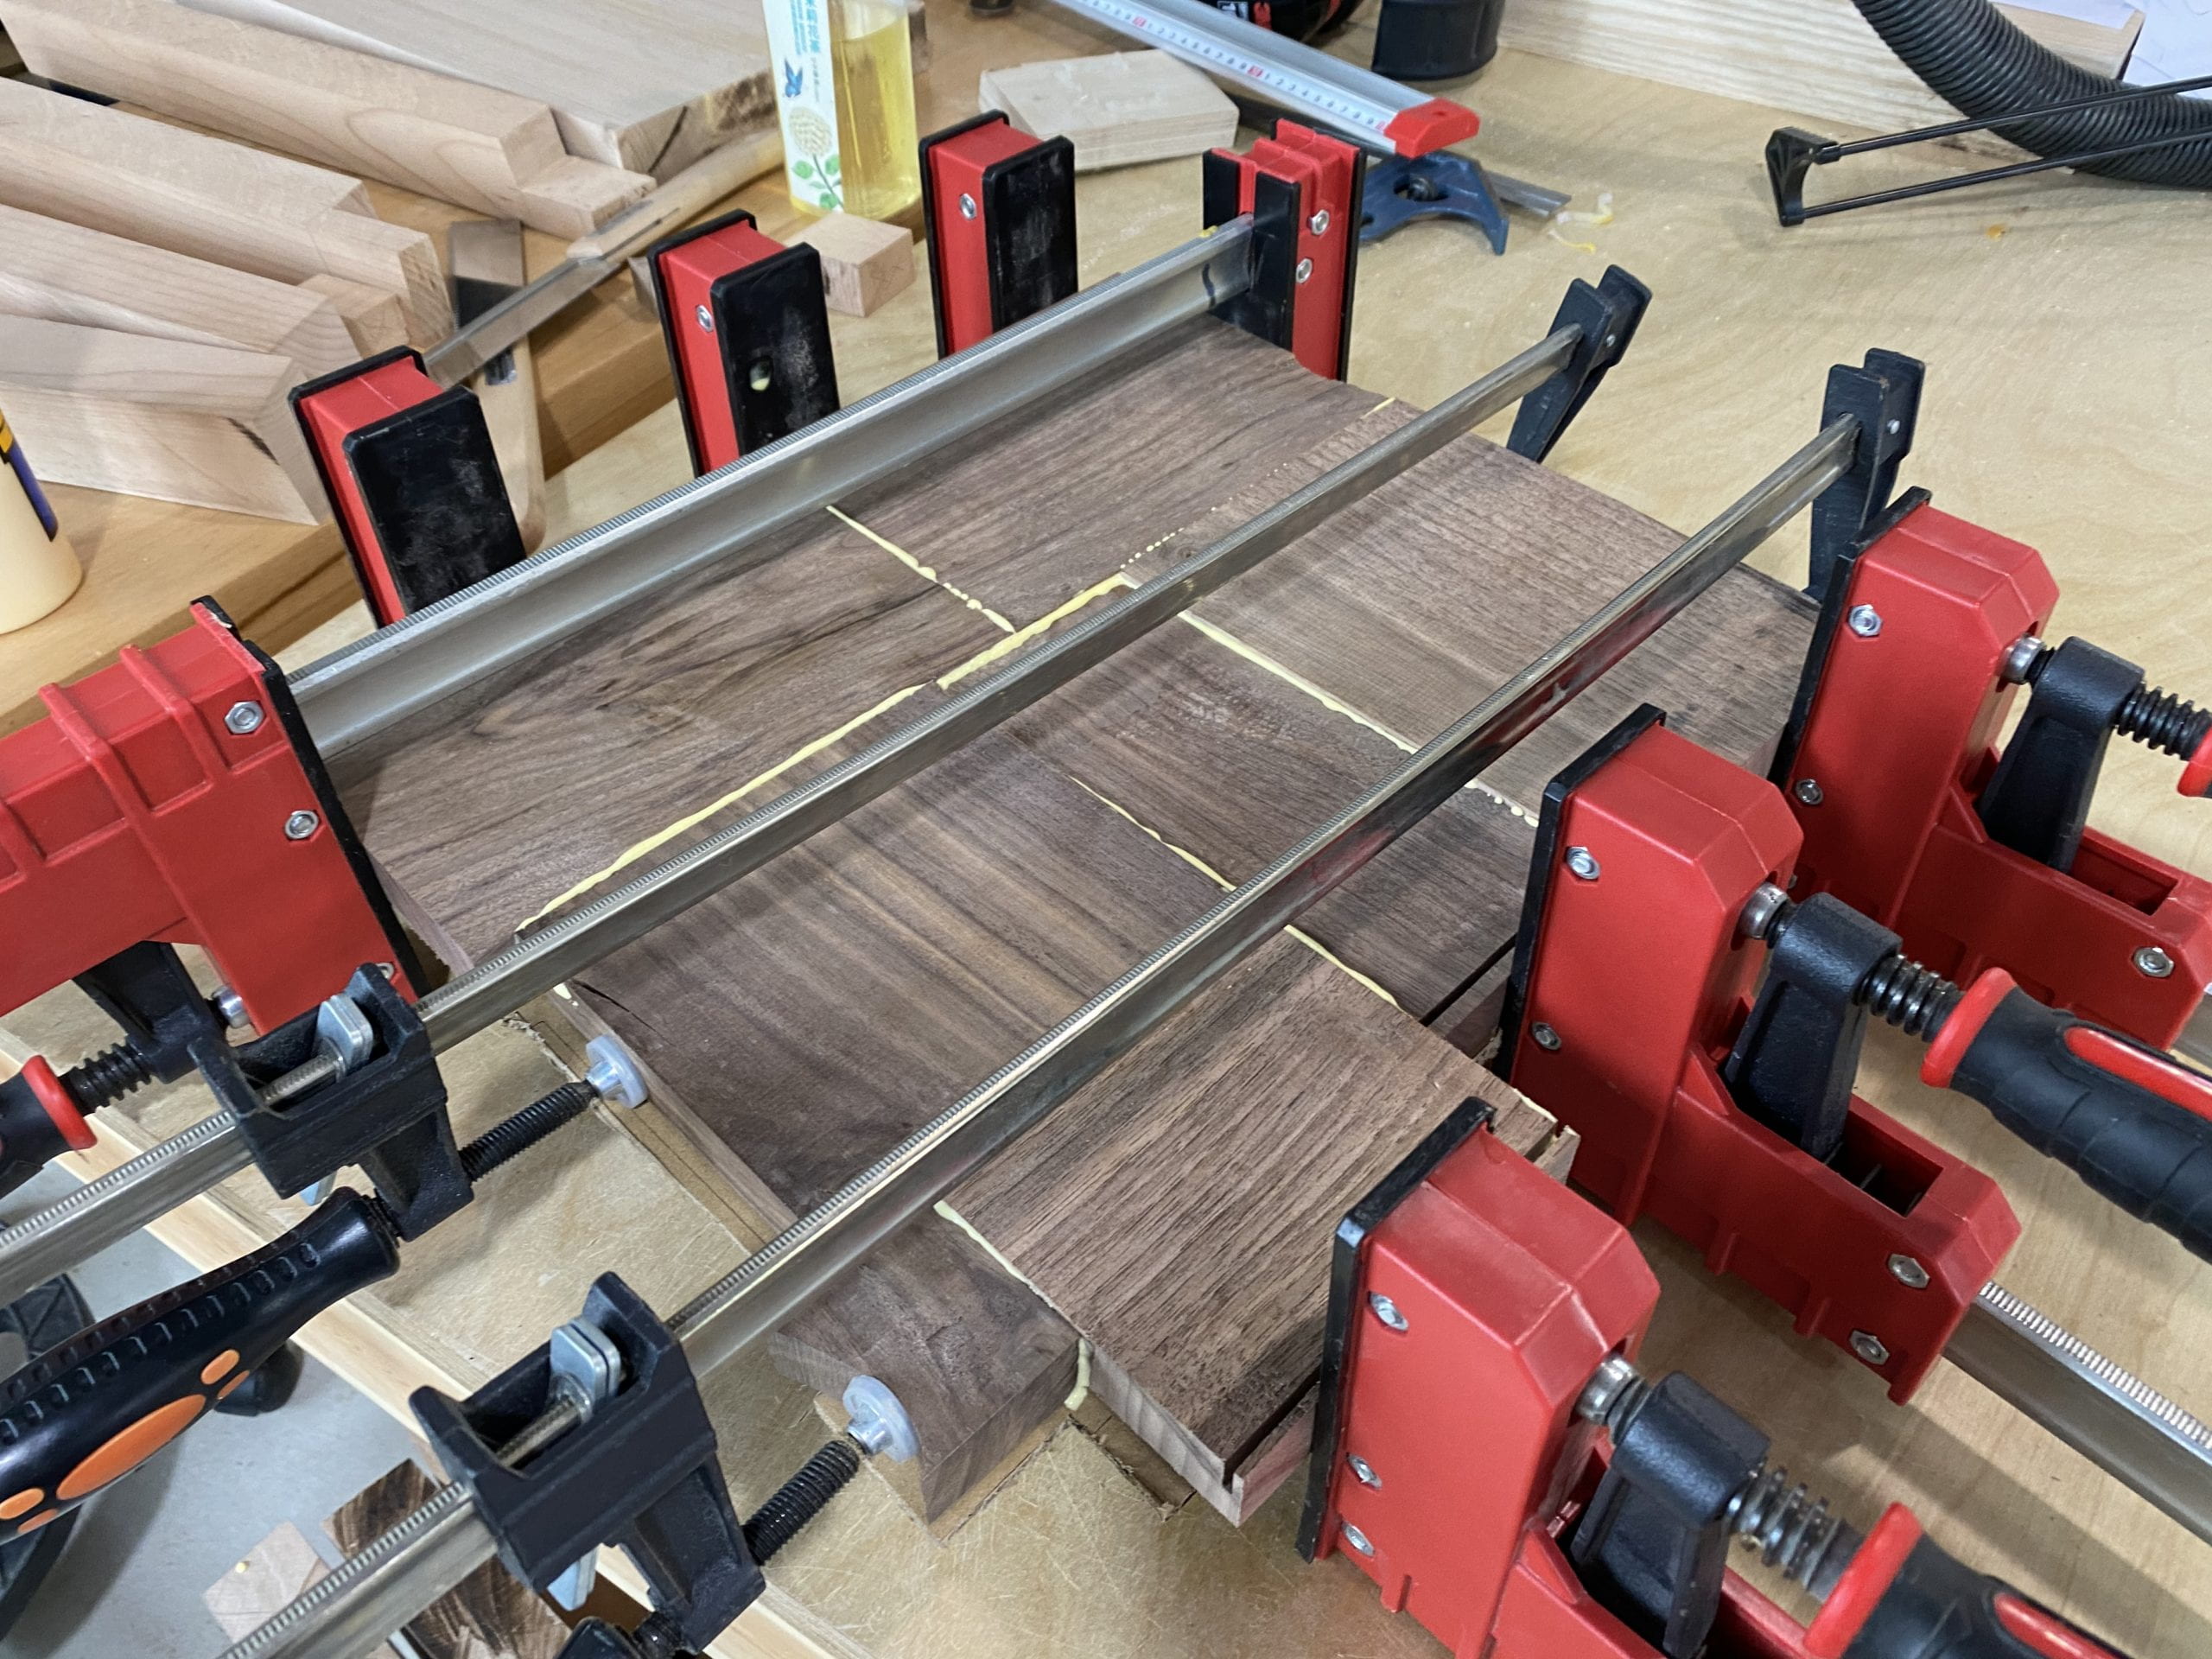
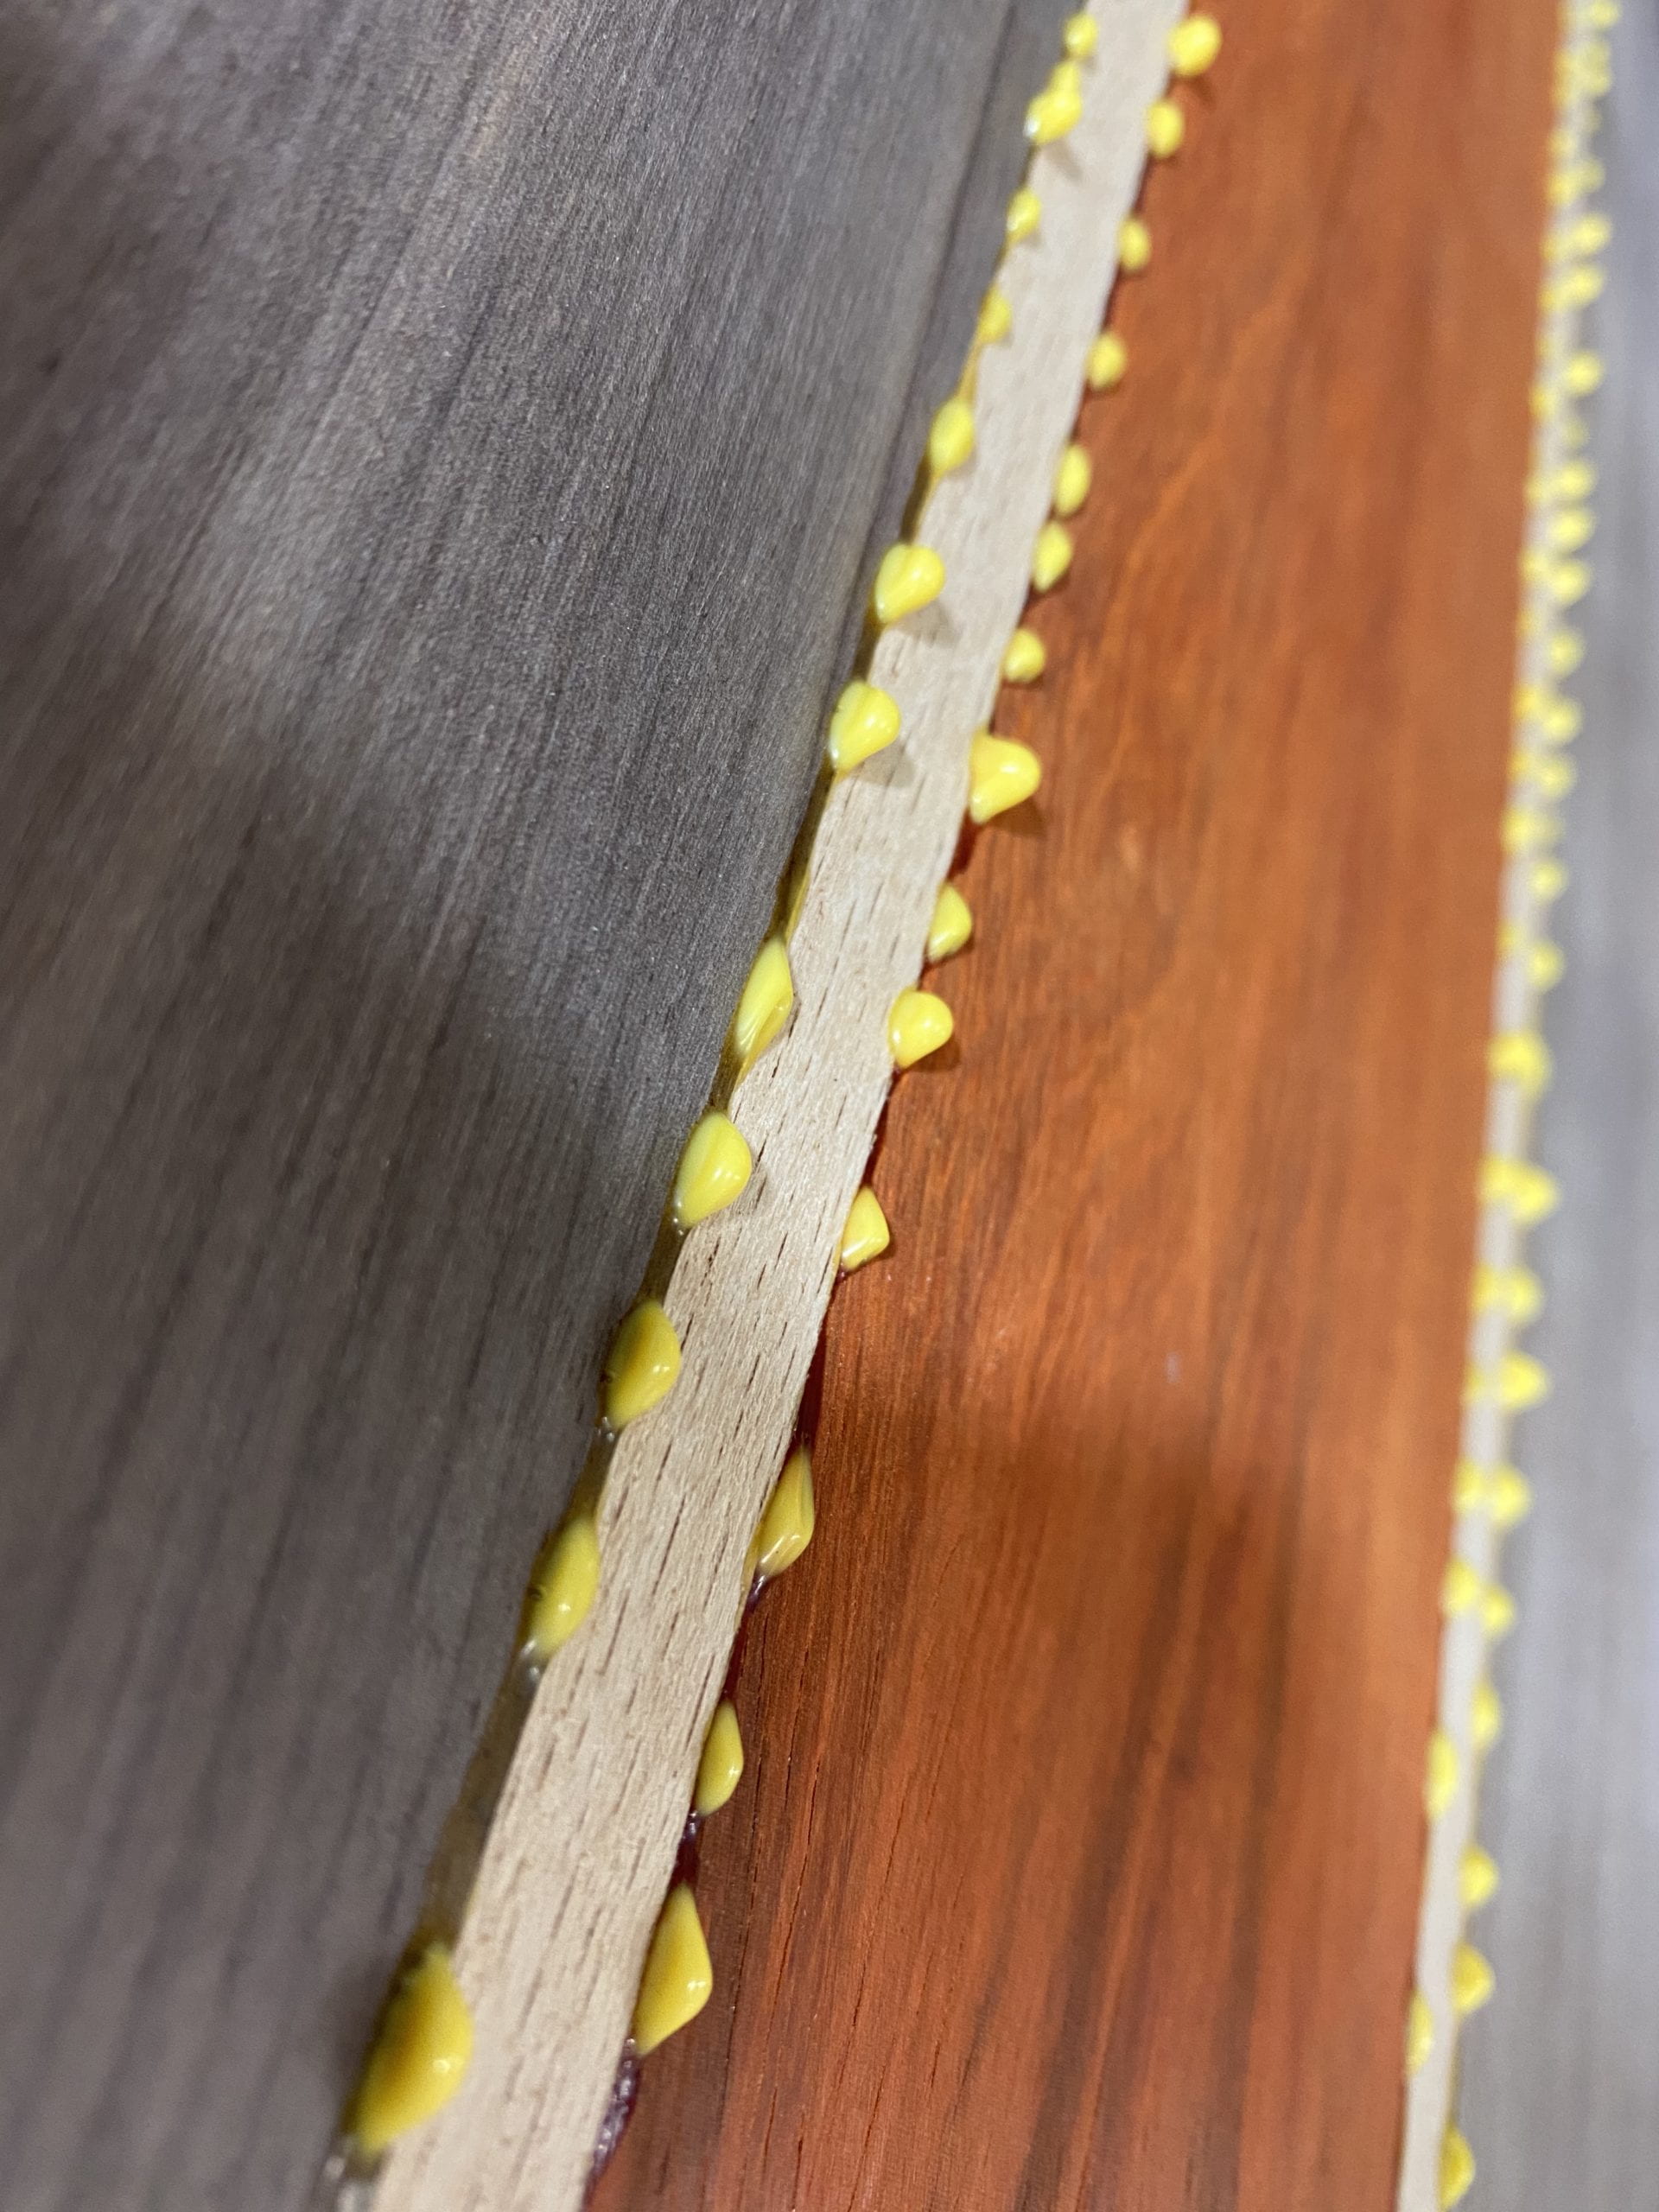
The first picture was for the bottom, I just found a bunch of random walnut pieces and glued them together. I didn’t think it would work but it did, it came out of the planer much cleaner than I thought.
Speaking of the planer, I then proceed to plane all the wood boards i have for the side pieces (after getting rid of most of the glue squeeze-outs). They did not take too long to plane because I already had them pretty much to the sides.
I then went on the table saw to test out the rabbet joint I was gonna use for the box. I used a piece of scrap ply both to test if the joint fits my boards and also the depth into which I cut into the board (I was able to see this on the layers of the plywood).
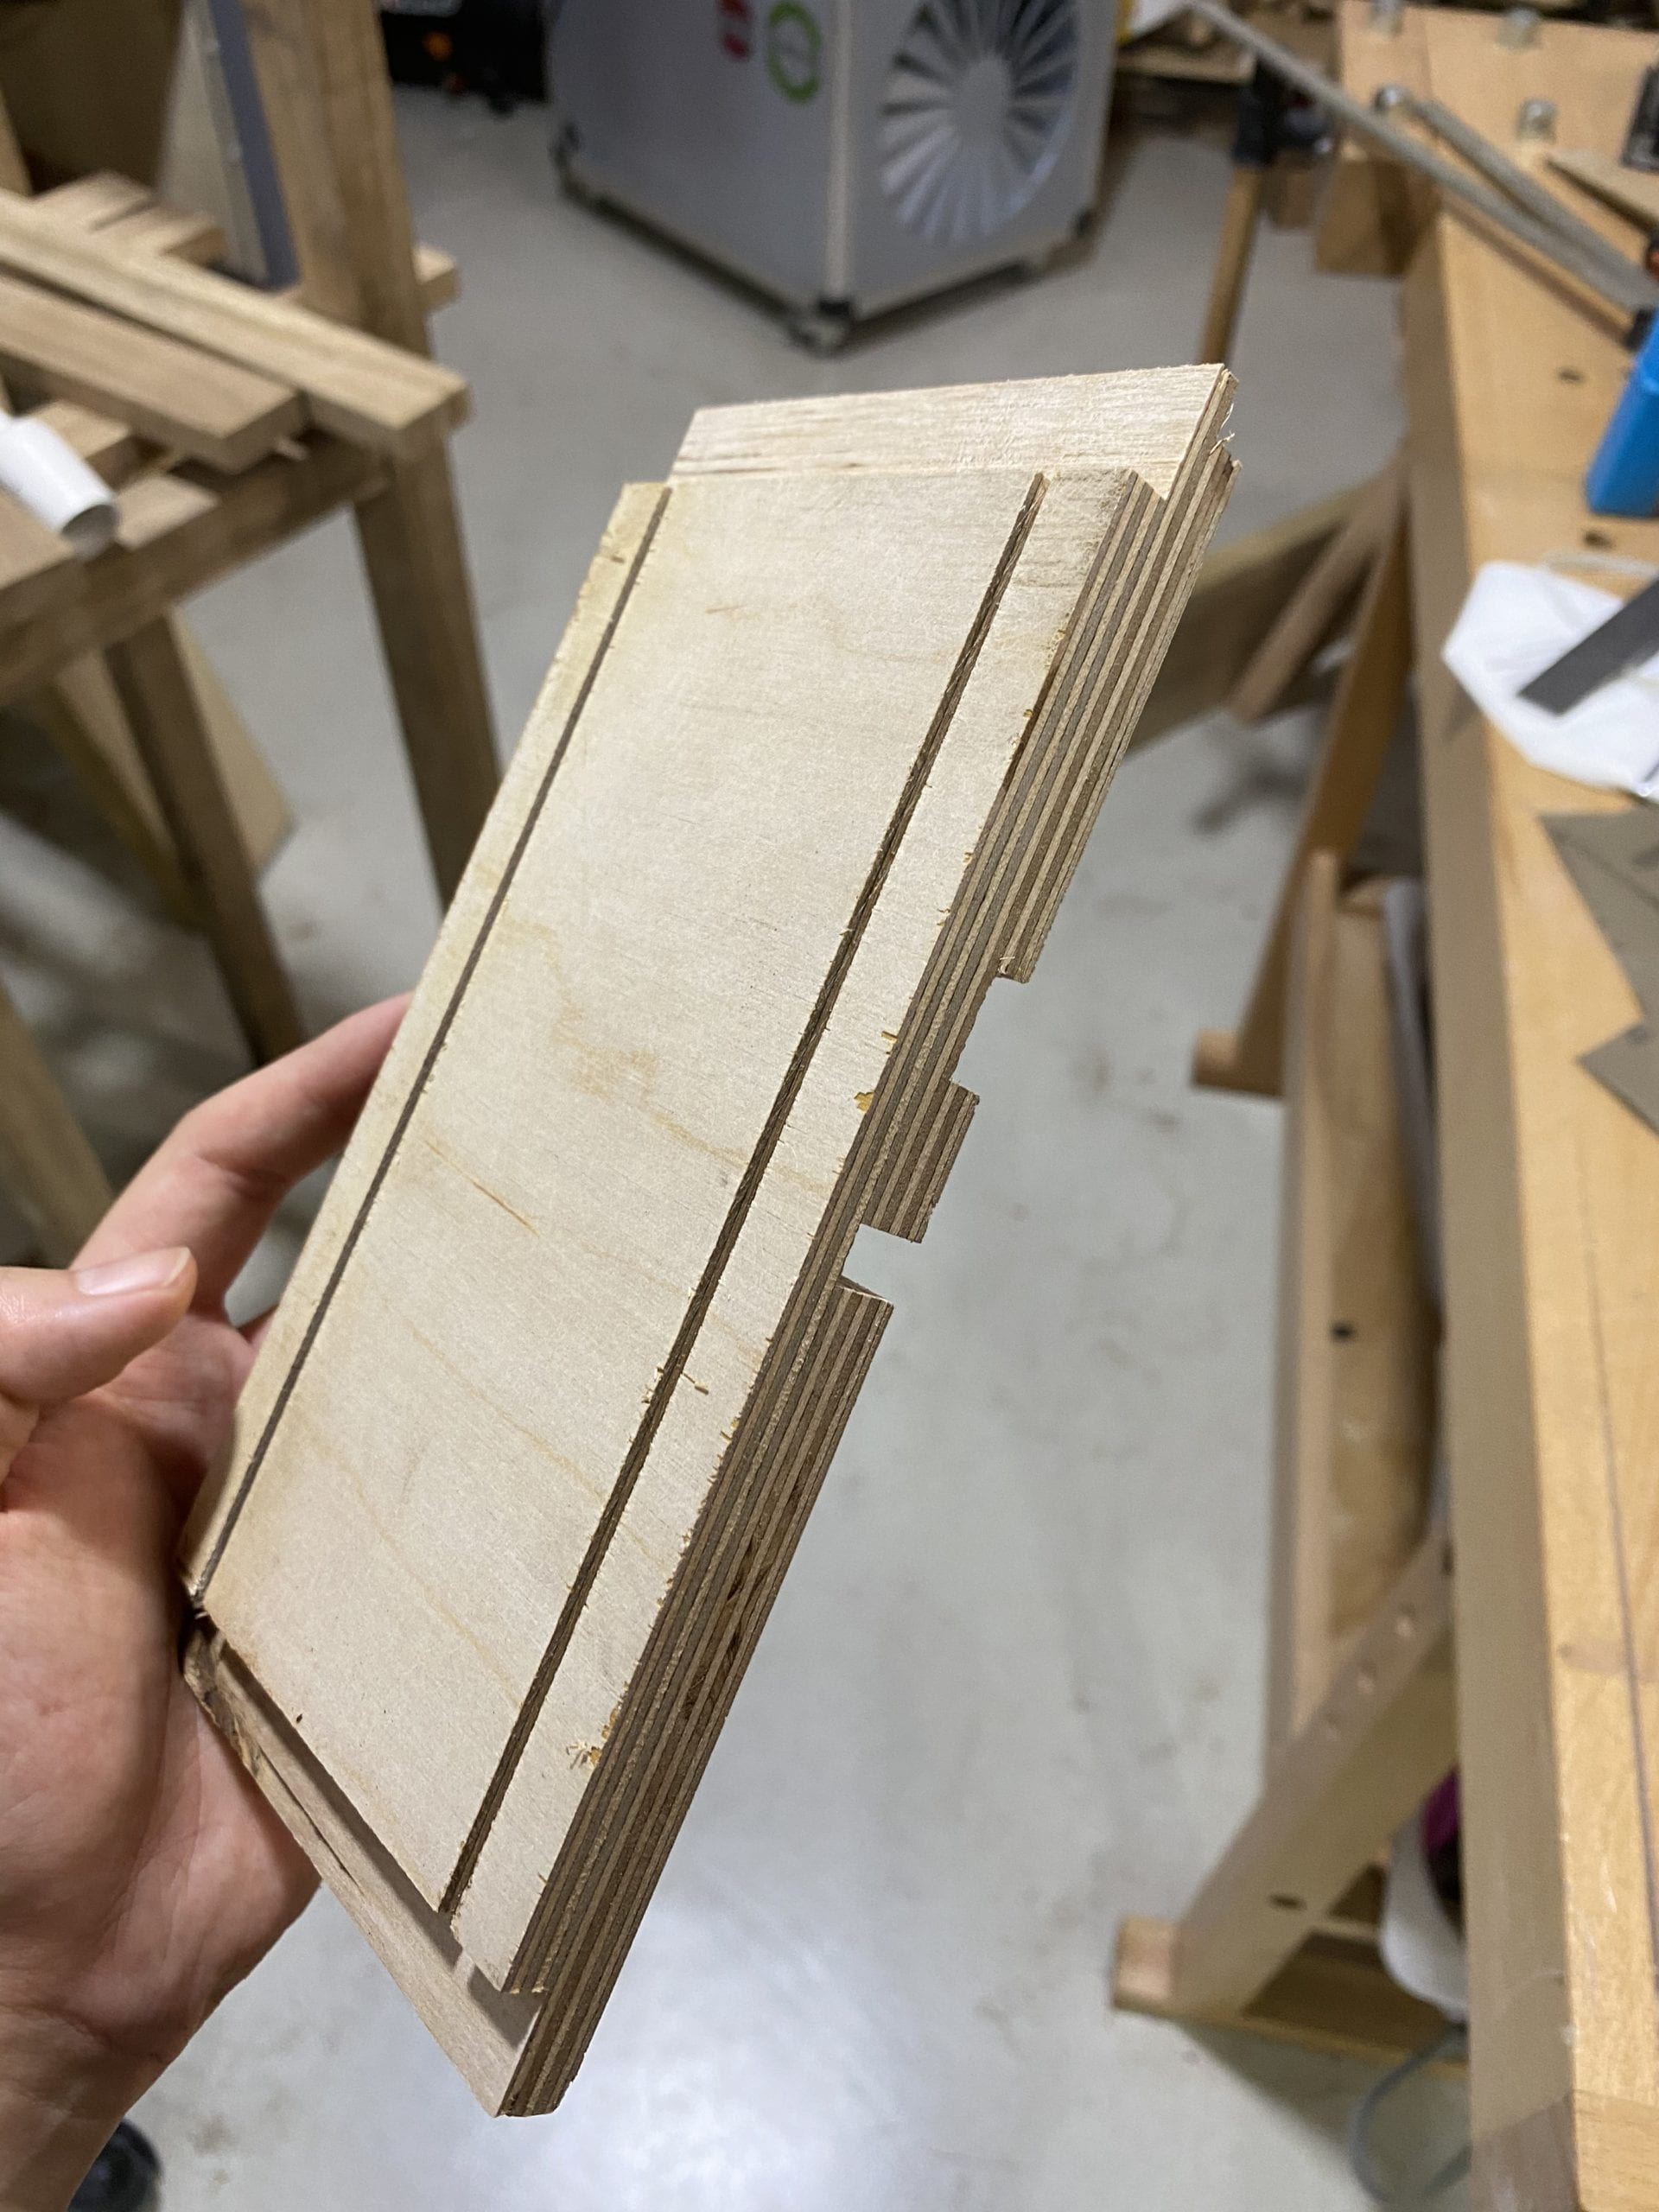
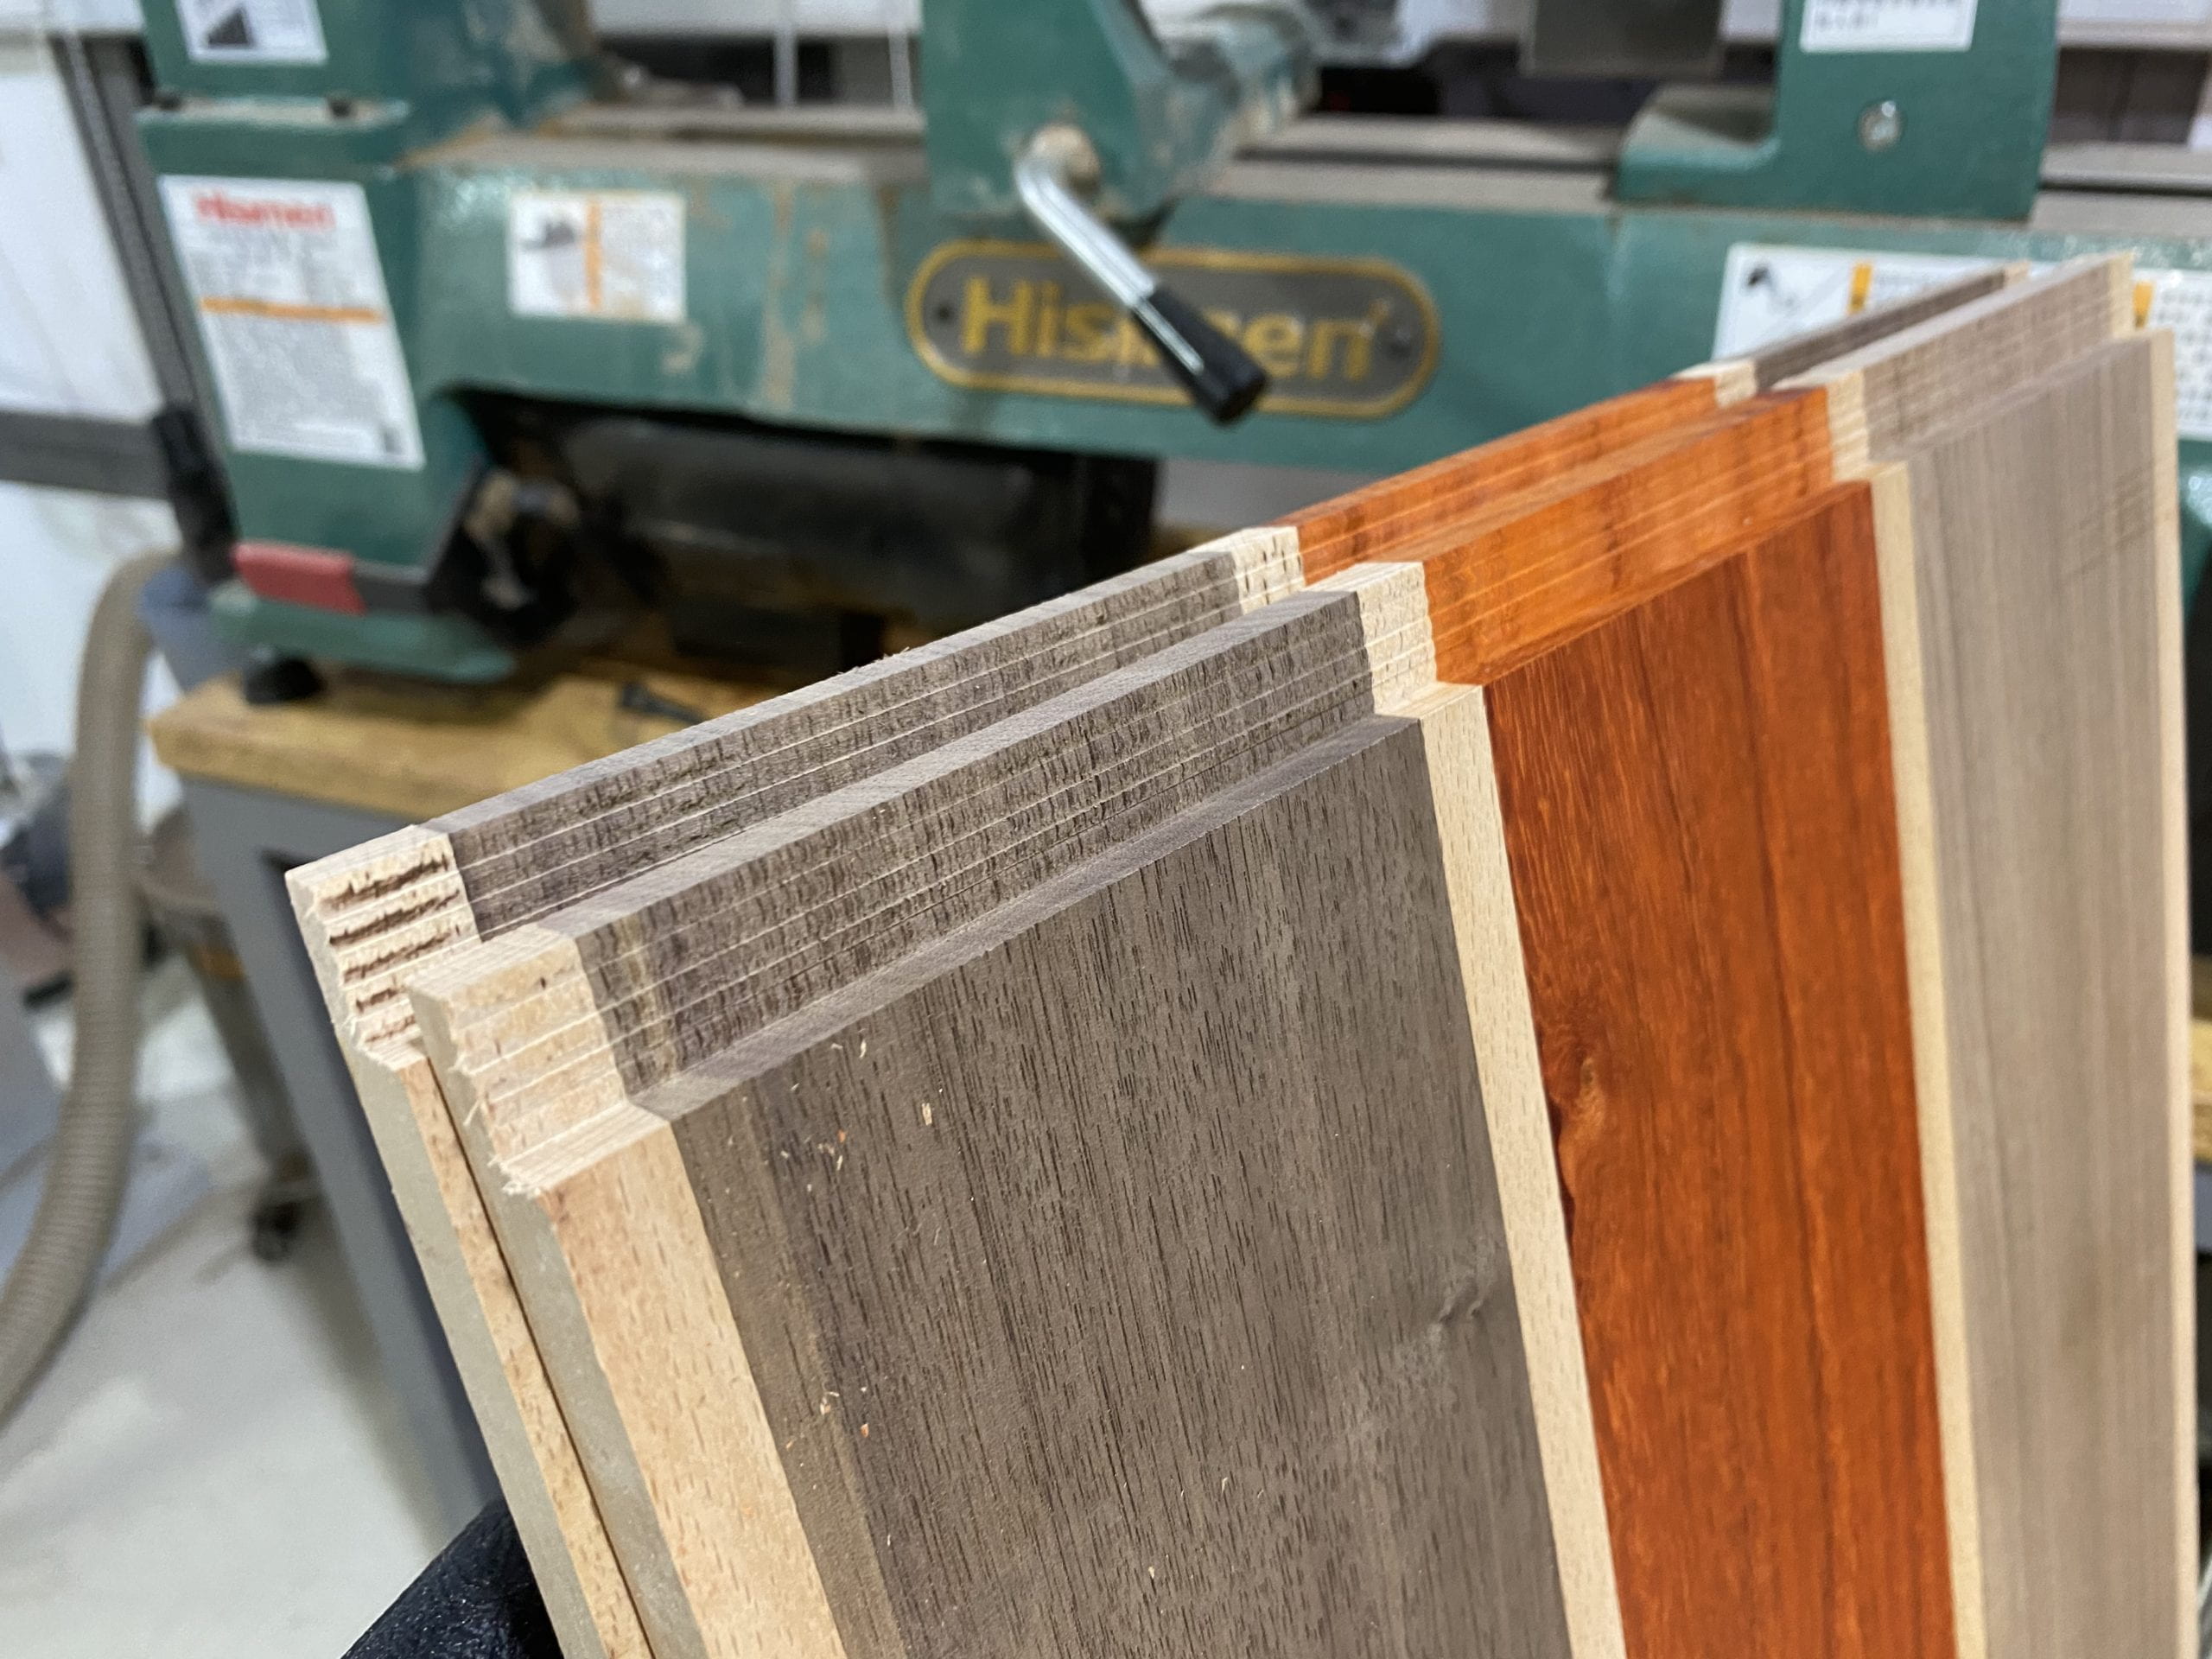
I was not able t0 get the joints perfectly flat and parallel with the sides of the boards because the boards were slightly curved because I left them in the lab for a little too long before doing the joints. This turned out to be somewhat of a problem because I was not able to close the gaps in the sides of the box perfectly when I glued up the frame of the box. It looked kind of obvious but I will live with that.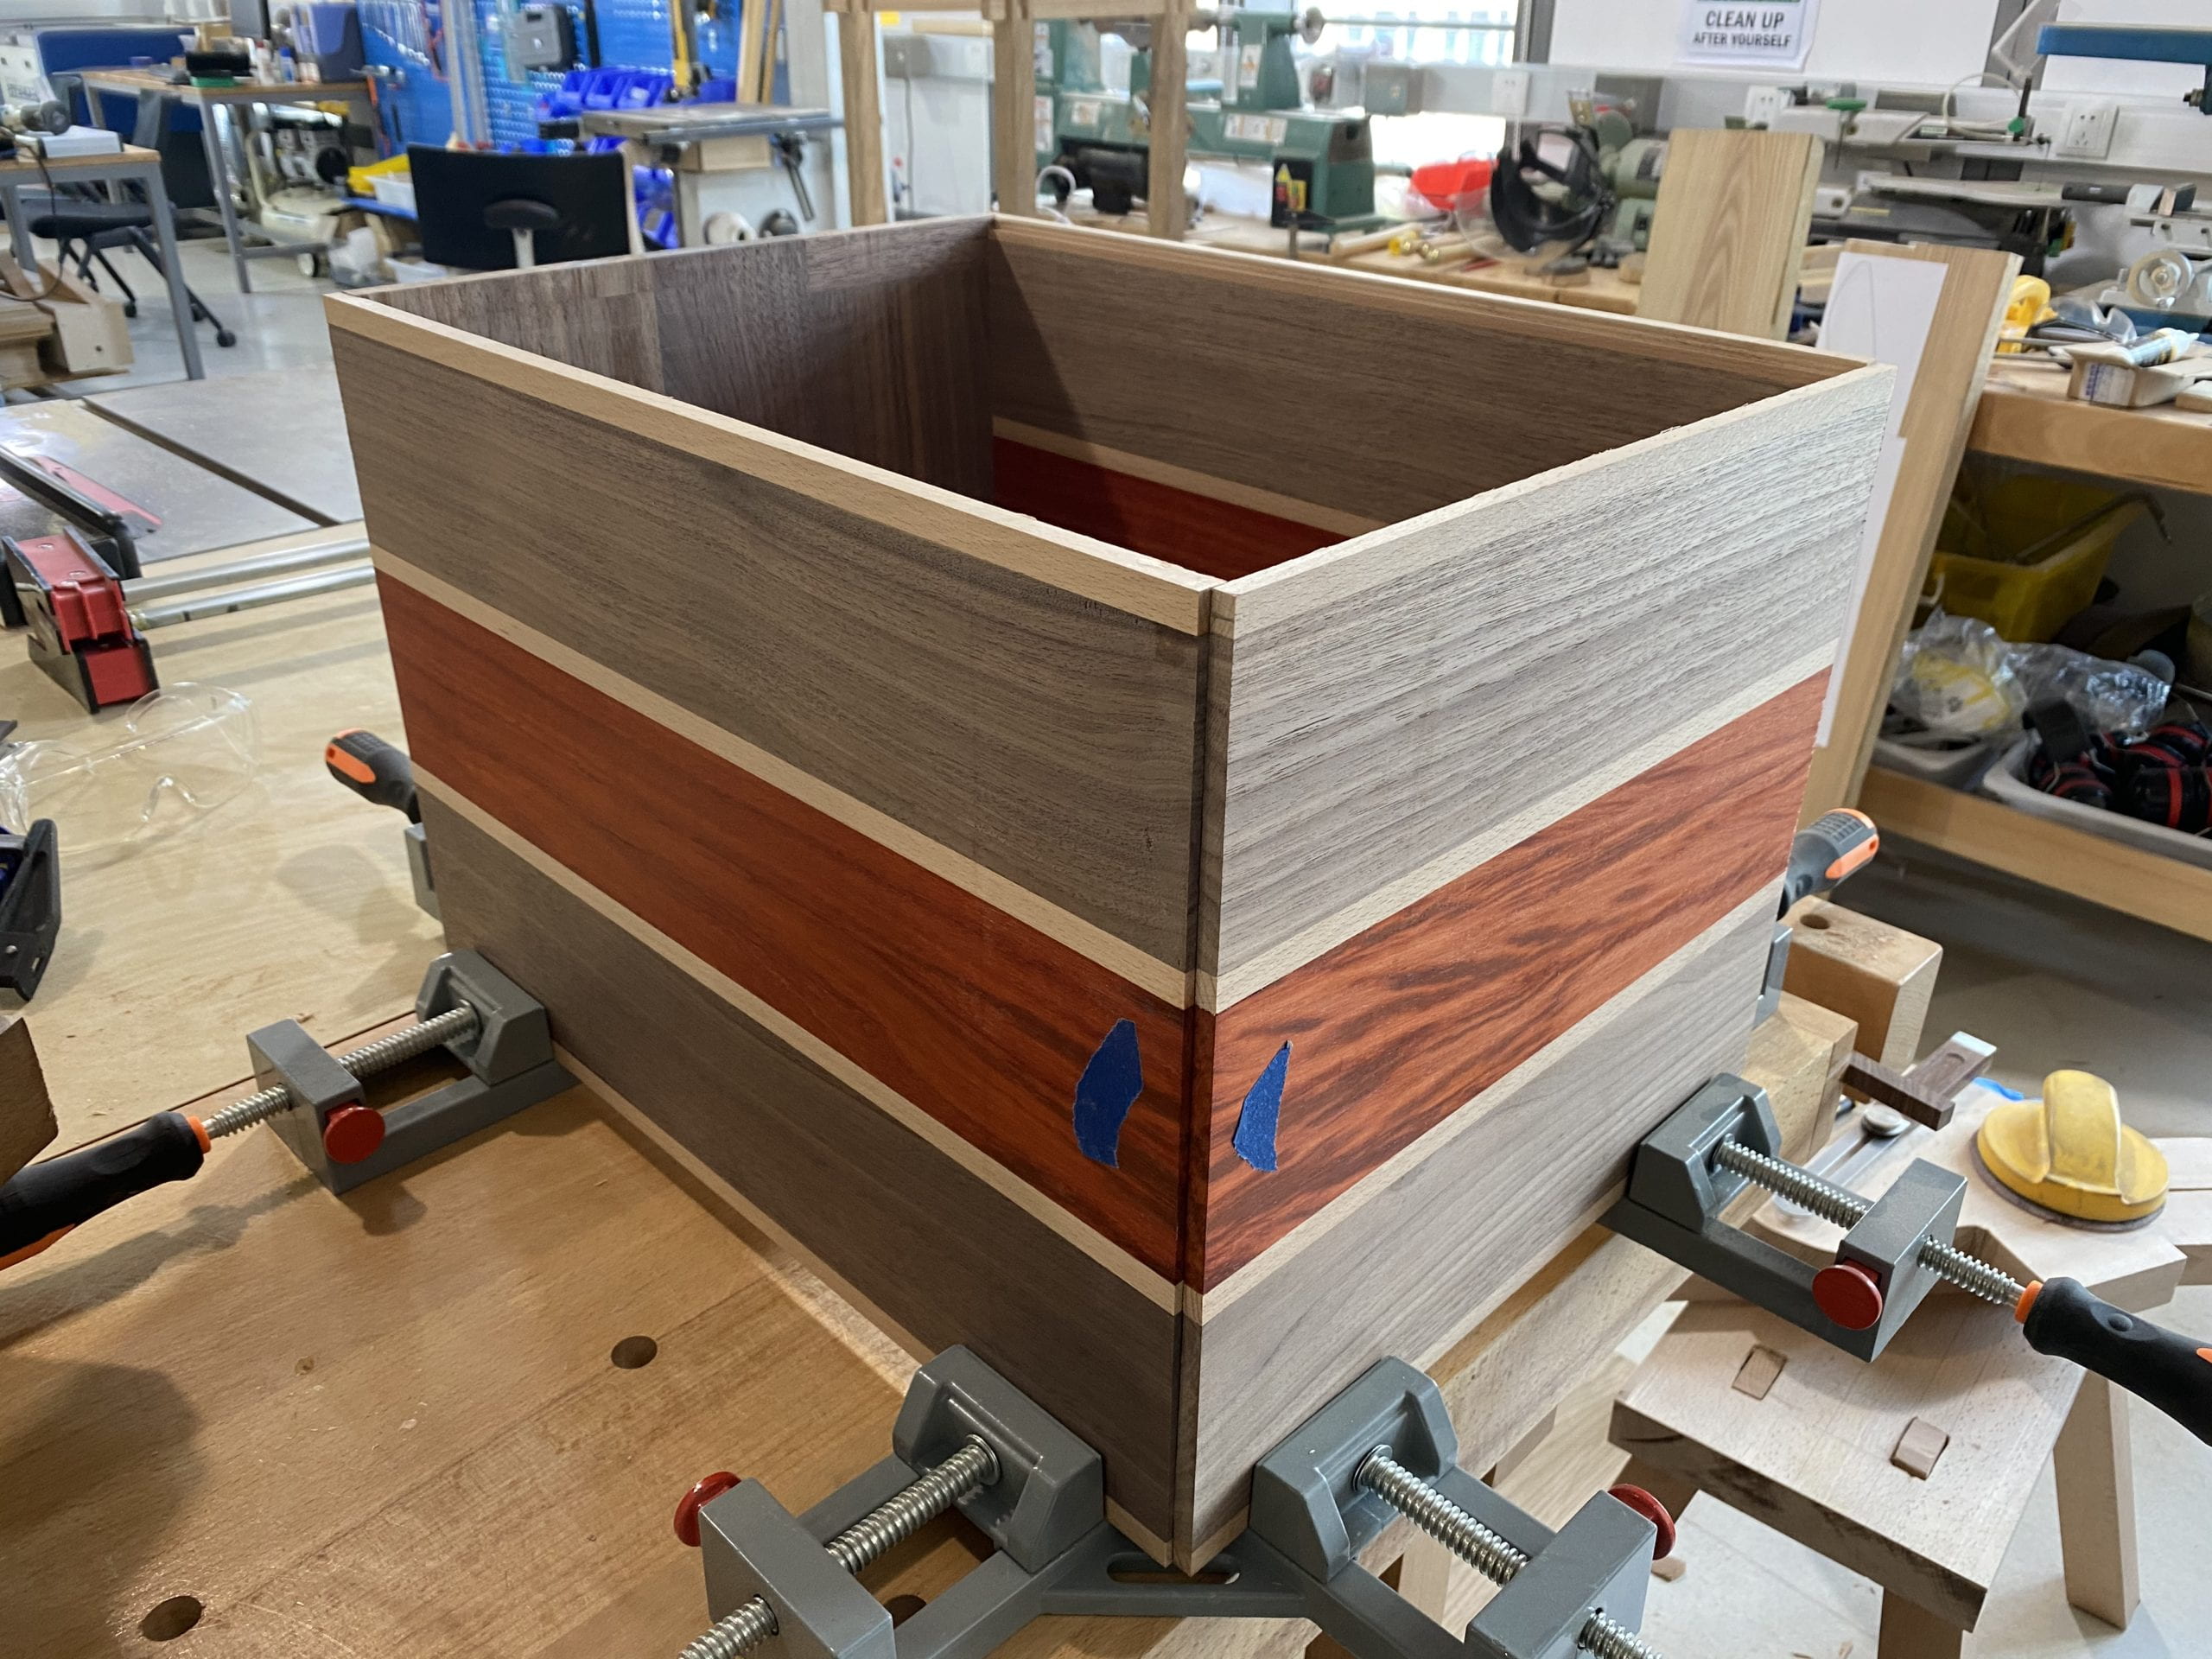
Then using these random right angle clamps I found I was able to stand these boards up and glue them together. I probably did not clamp the perfect way so I ended up with some more gaps (especially in the back with the 5 mm plywood), which I did plan to fix with some epoxy and gold dye, I thought it might look nice when I fill them up, bit like Kintsuki.
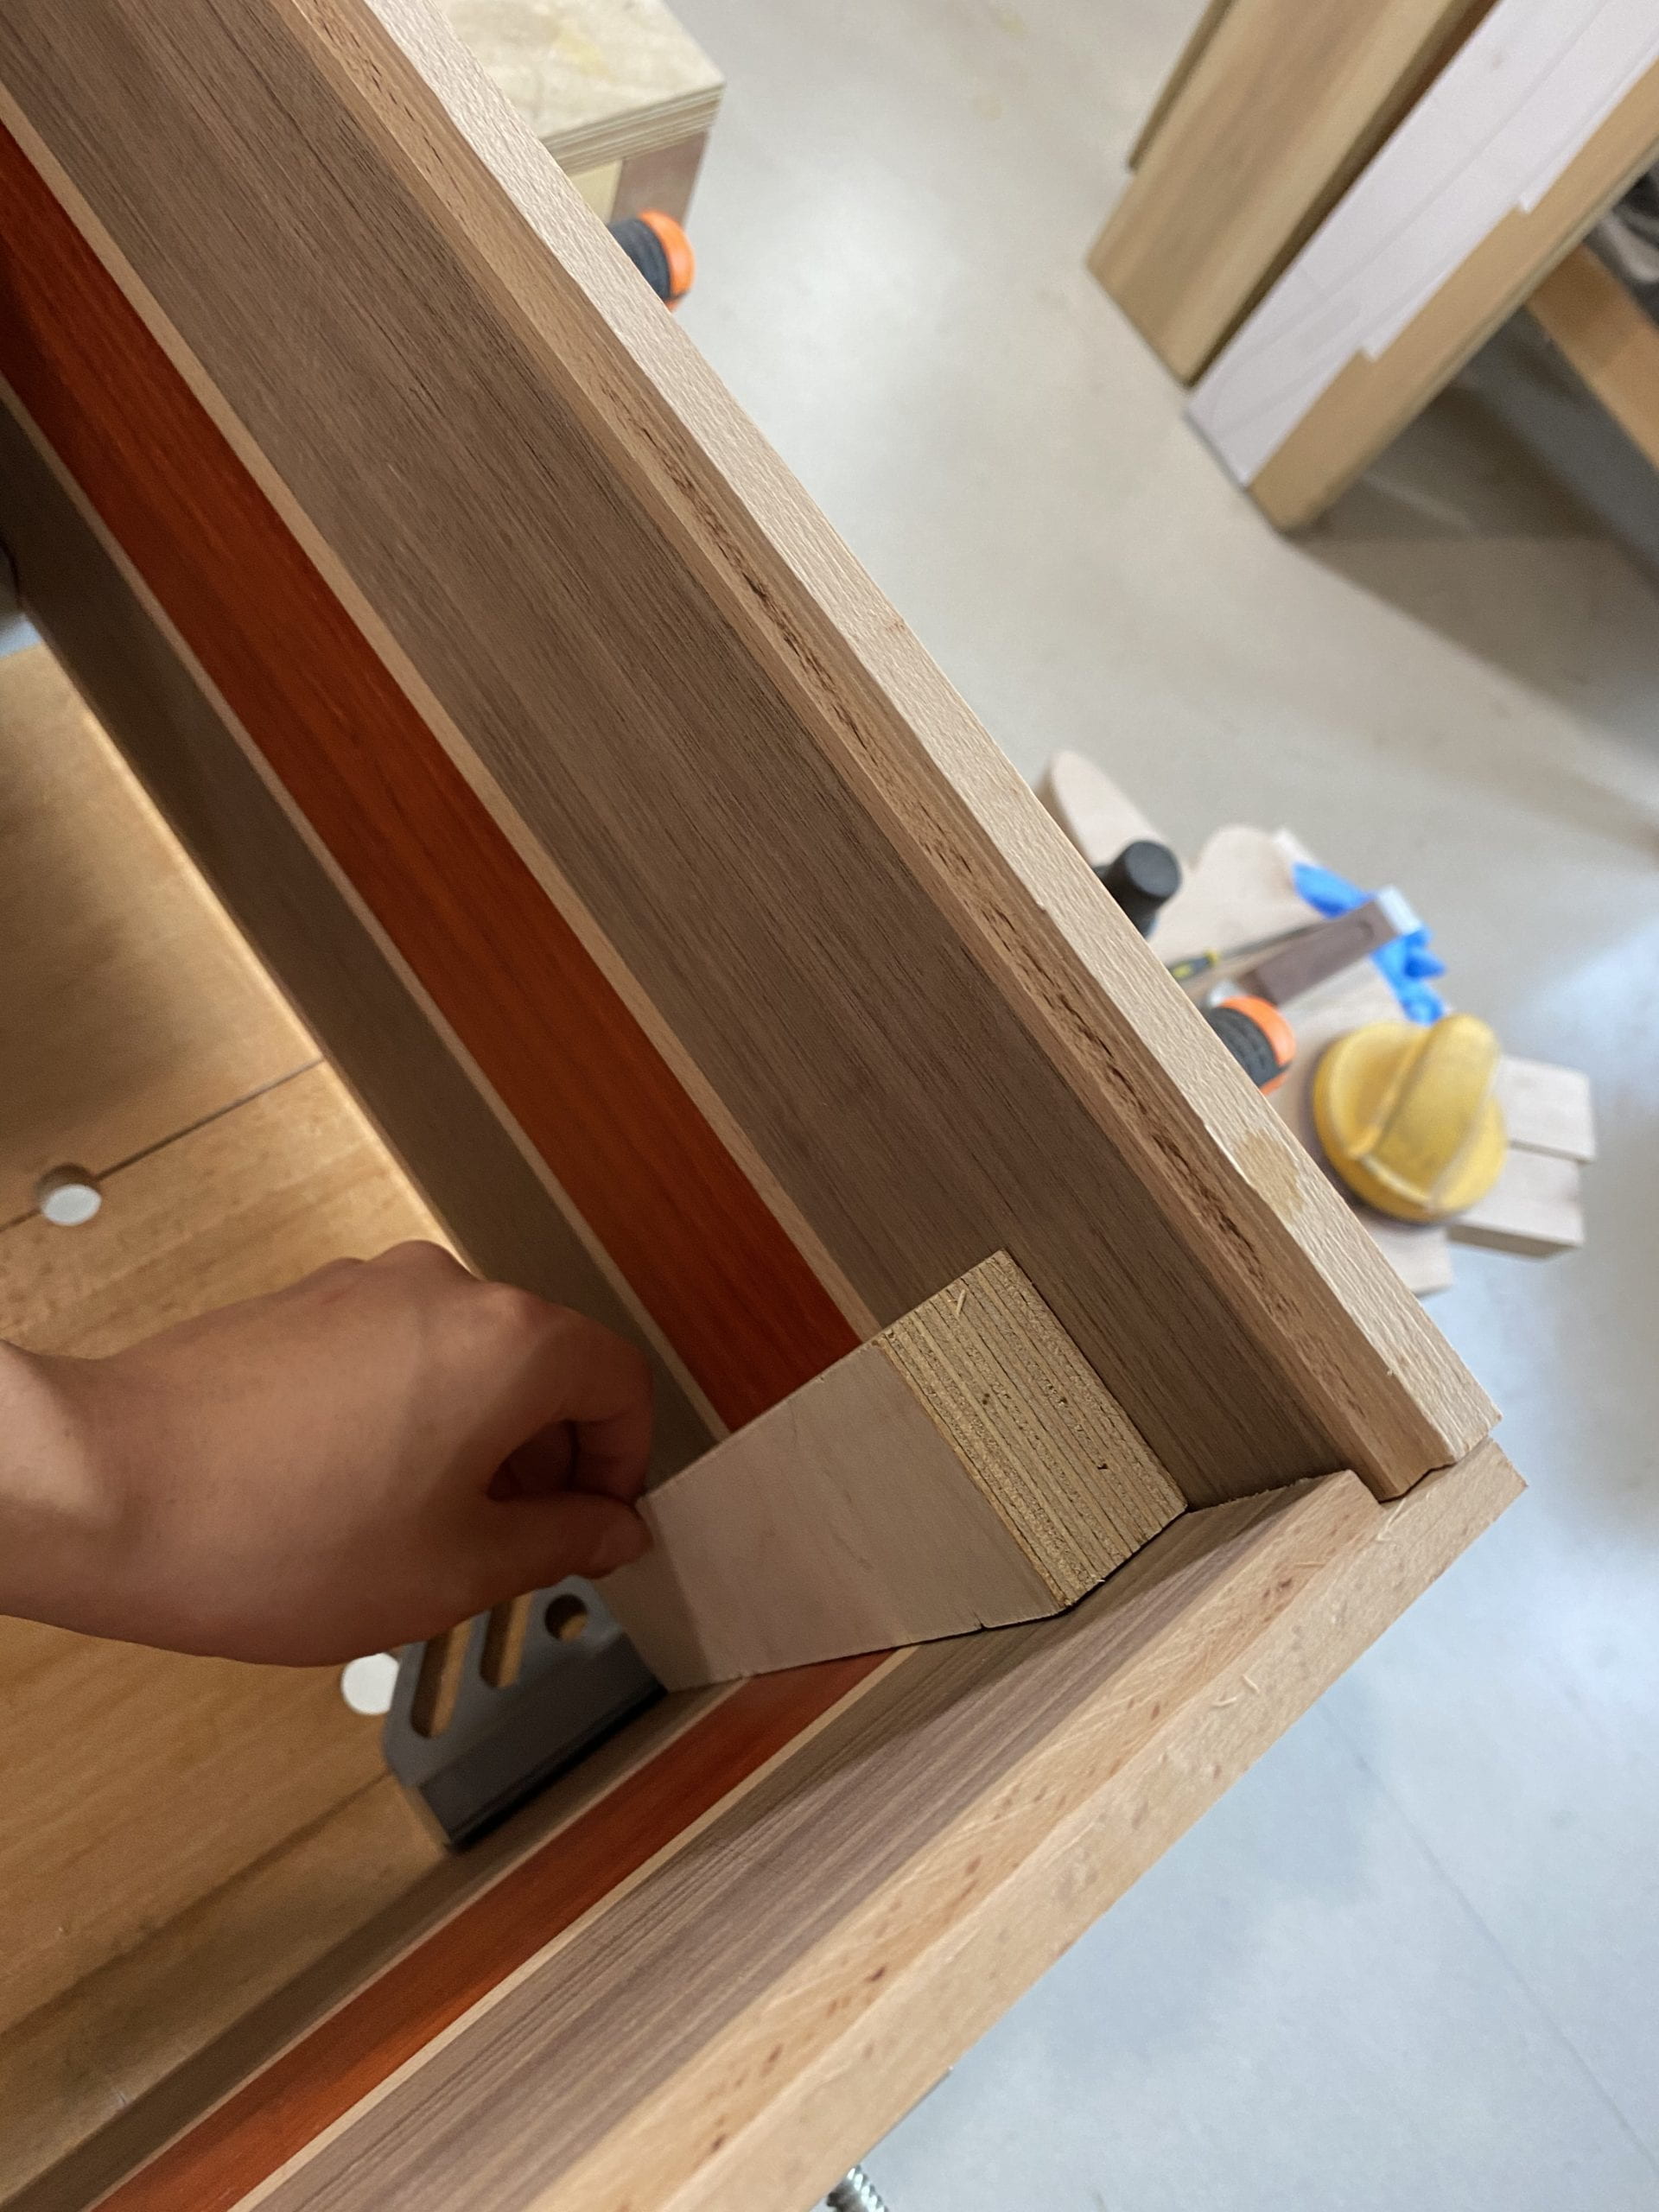
I was planning to add some corner pieces like this to hold it up better but I talked to the professor and we decided it was not necessary.
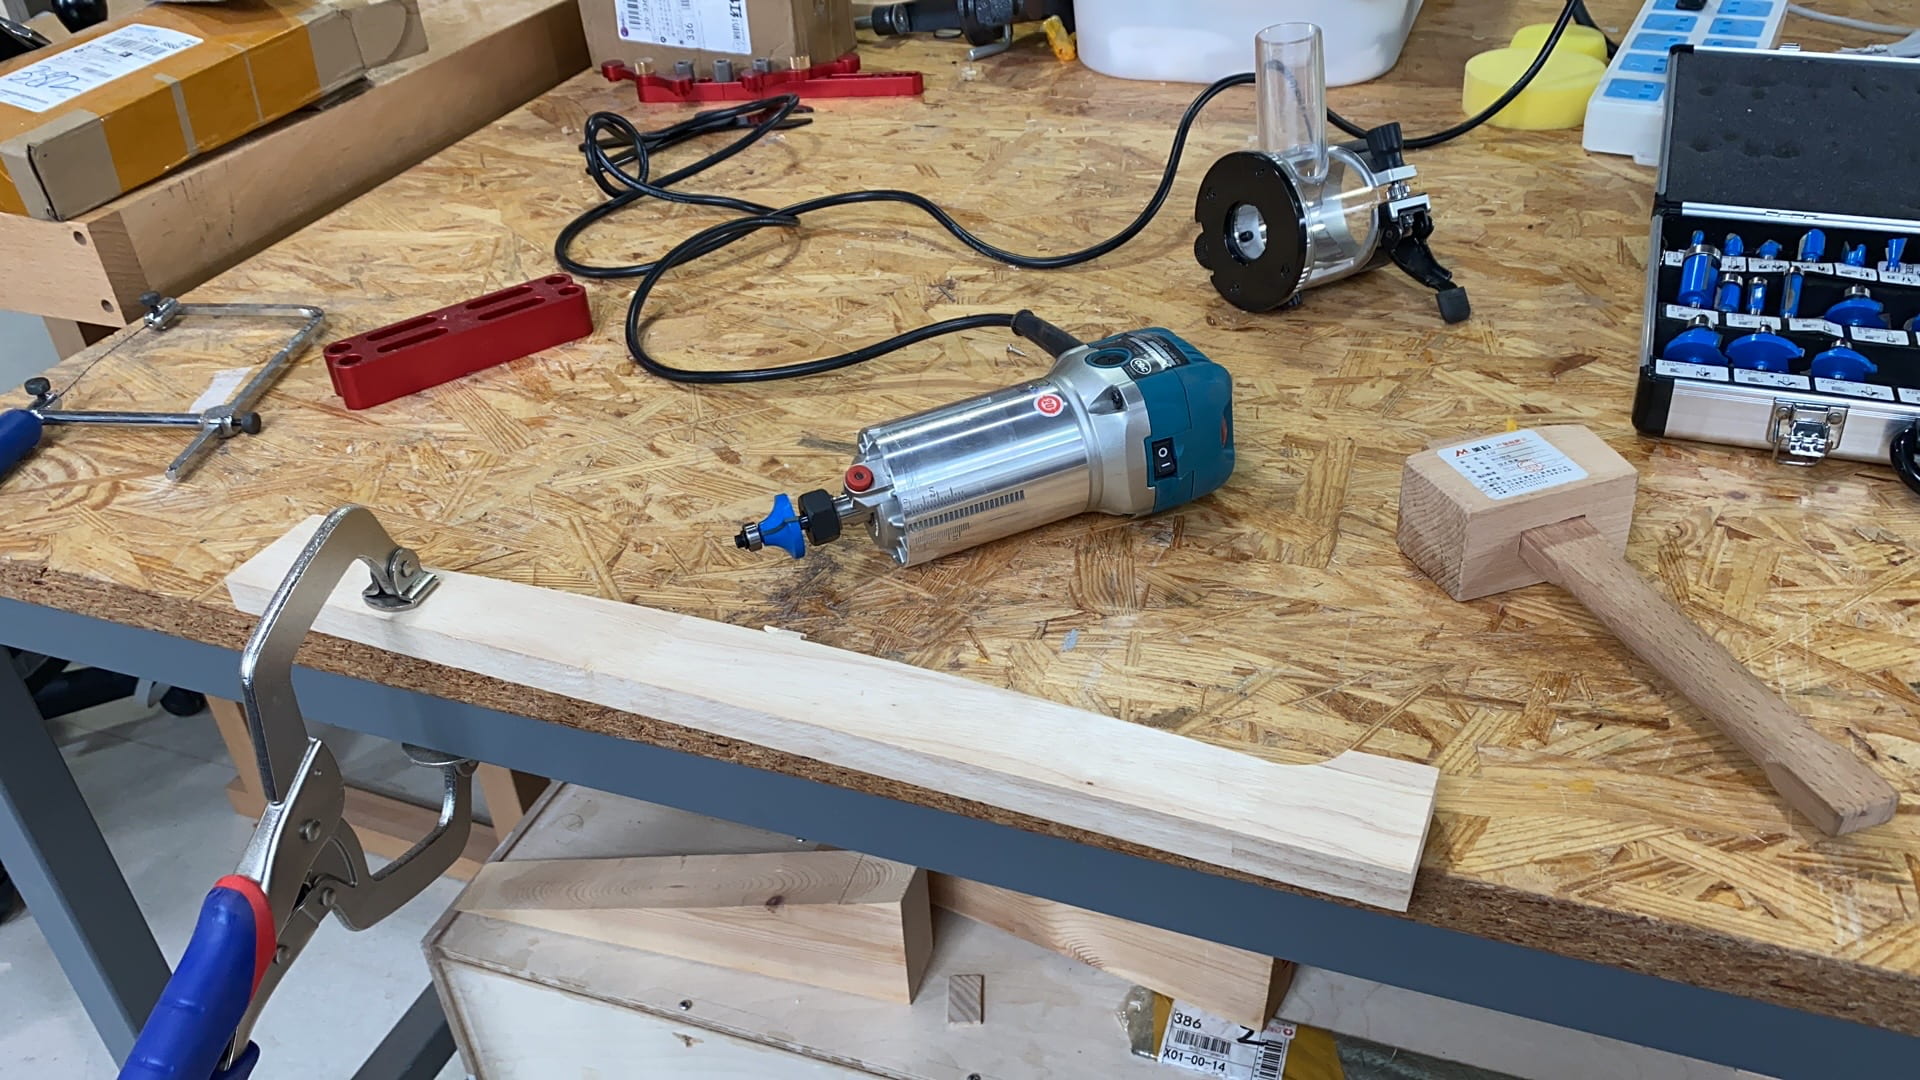
then I used the router the rounded up the edges after I tested on a scrap wood about the bits. (this was roughly when one of the vacuums broke lol)
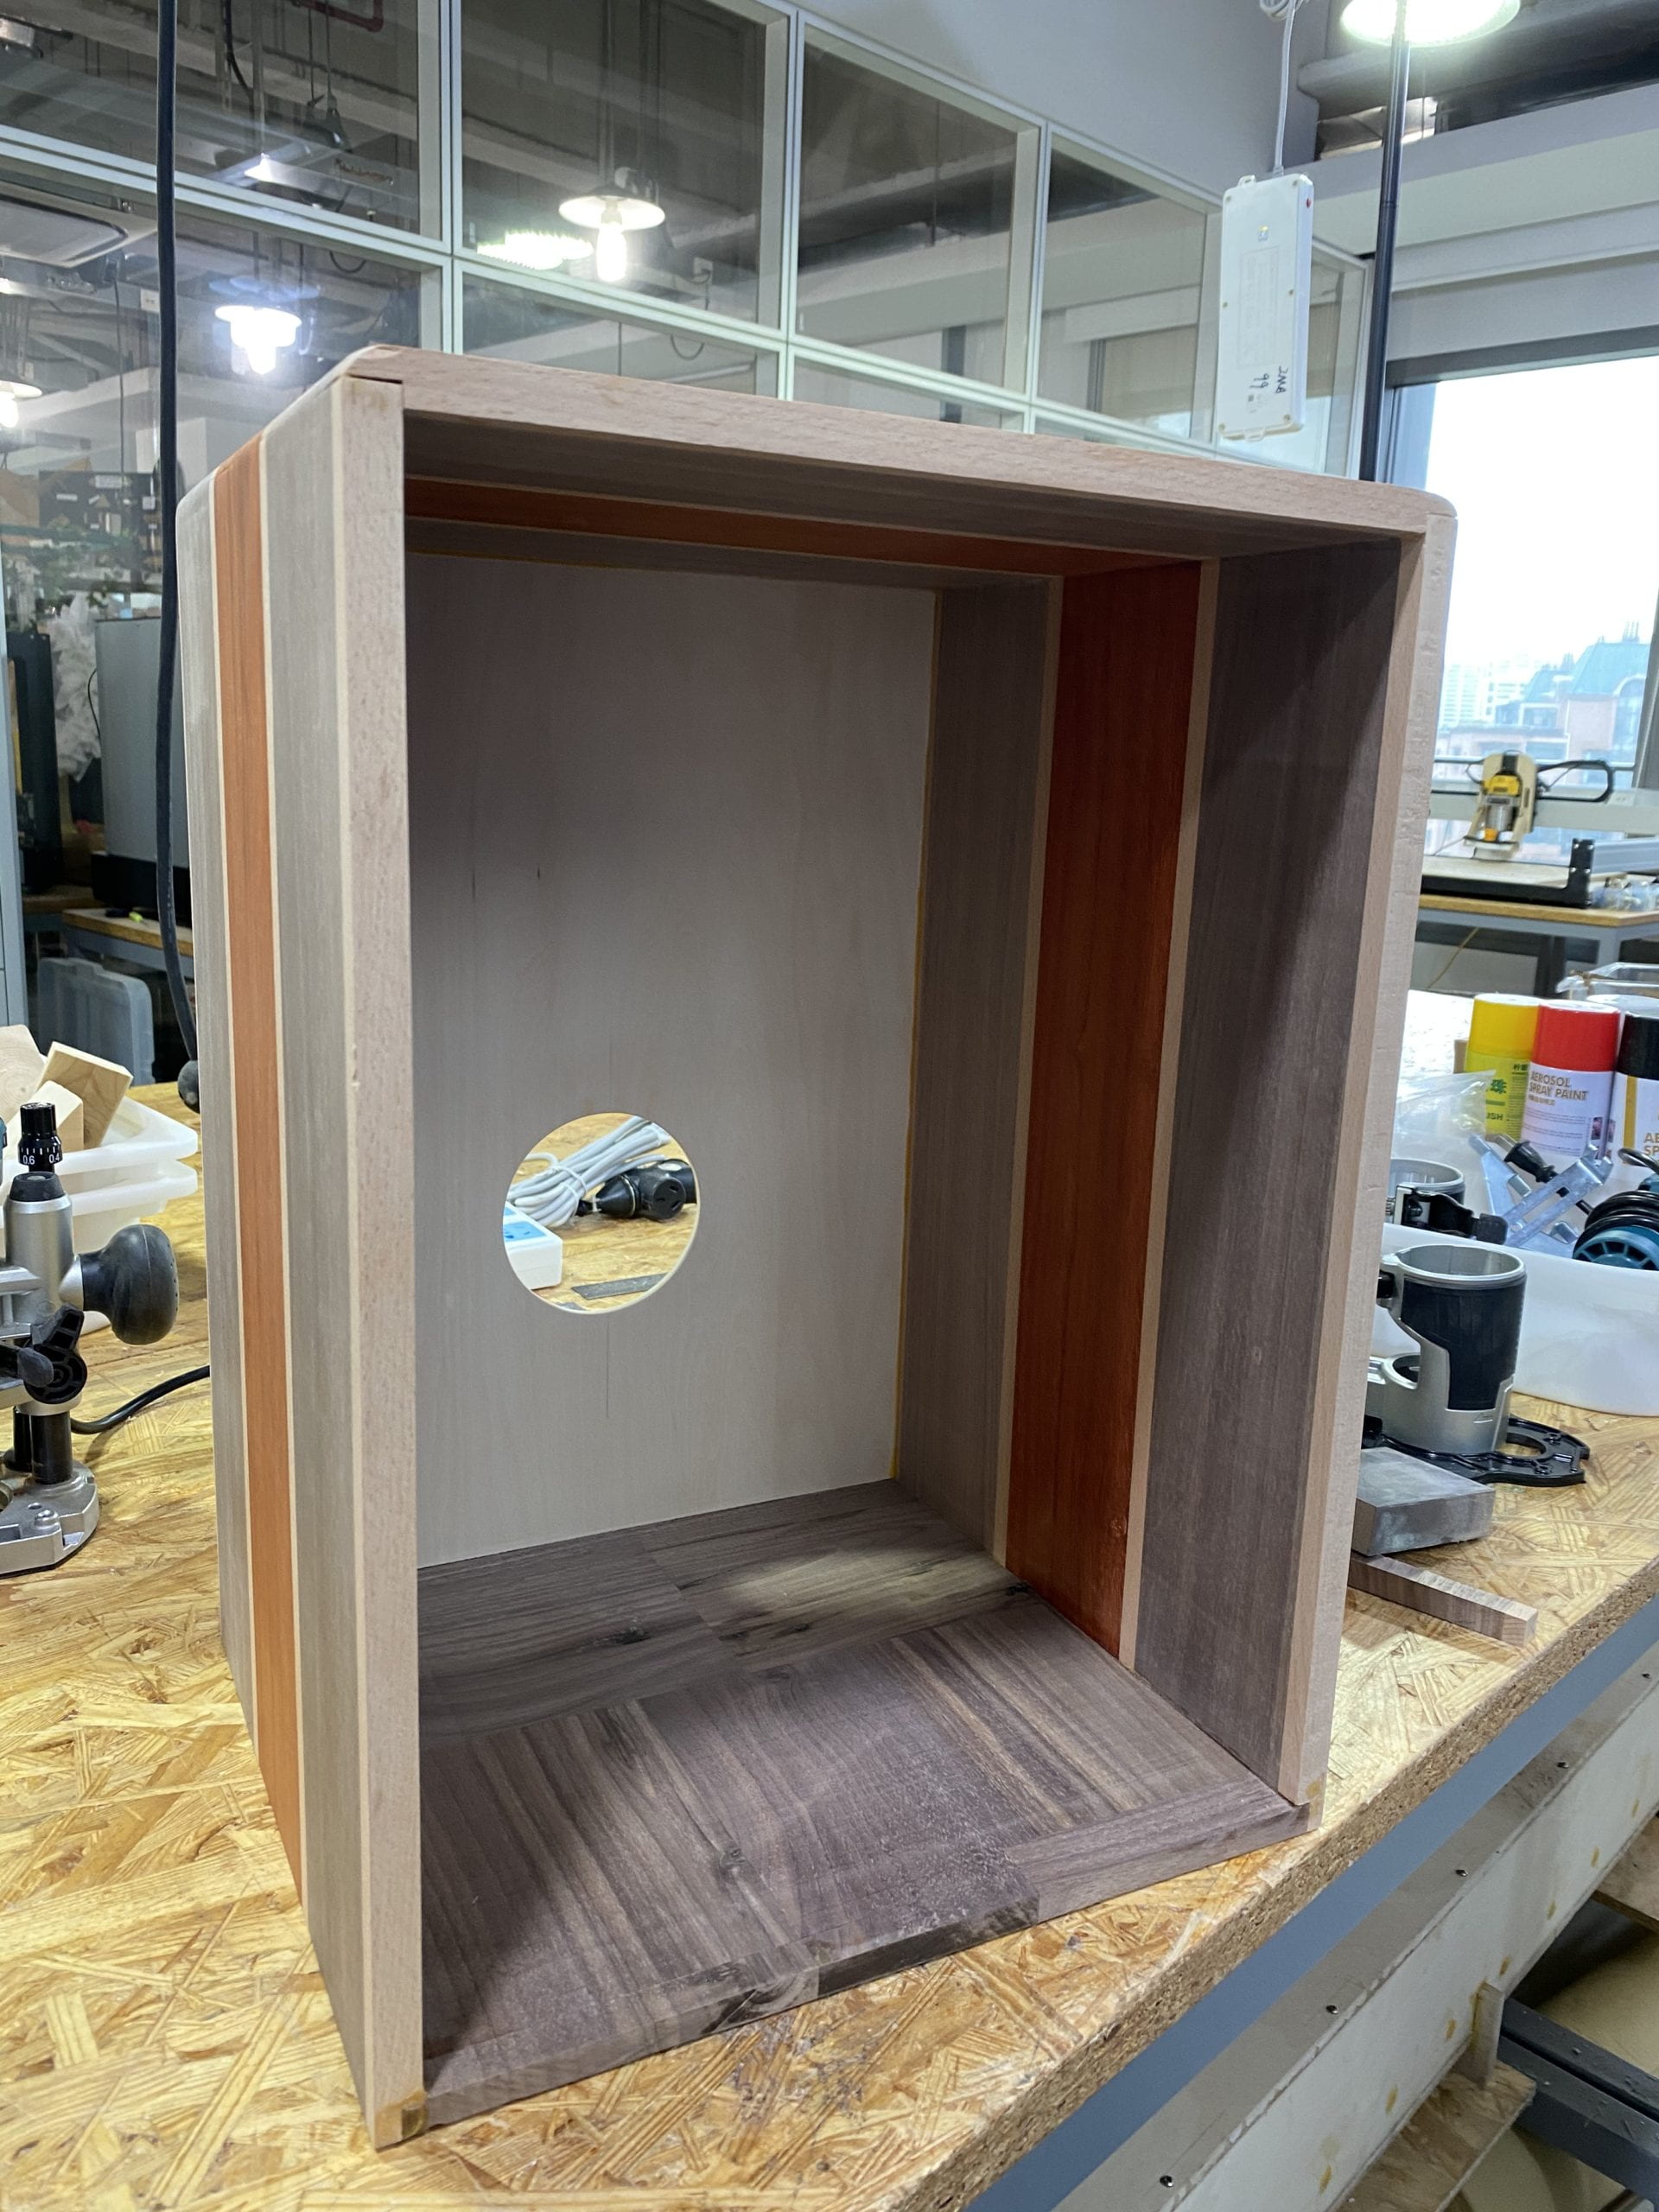
Then I sanded it to 240, applied water and sanded again with the ROS and repeated it until no wood fiber was raised after the water was applied.
The last step was to prepare the front panel. According to the sketch, I was able to decide where the screws go, so I first punched a small dent on the exact point of the screw, then drilled a small hole that was just slightly smaller than the screw size. Then using that drilled board, I was able to drill holes along the walls and installed the front panel. One highlight here was I used a bigger drill bit and drill in the opposite direction to make dents for the screw head to settle in so that the front of the Cajon would be completely flat. 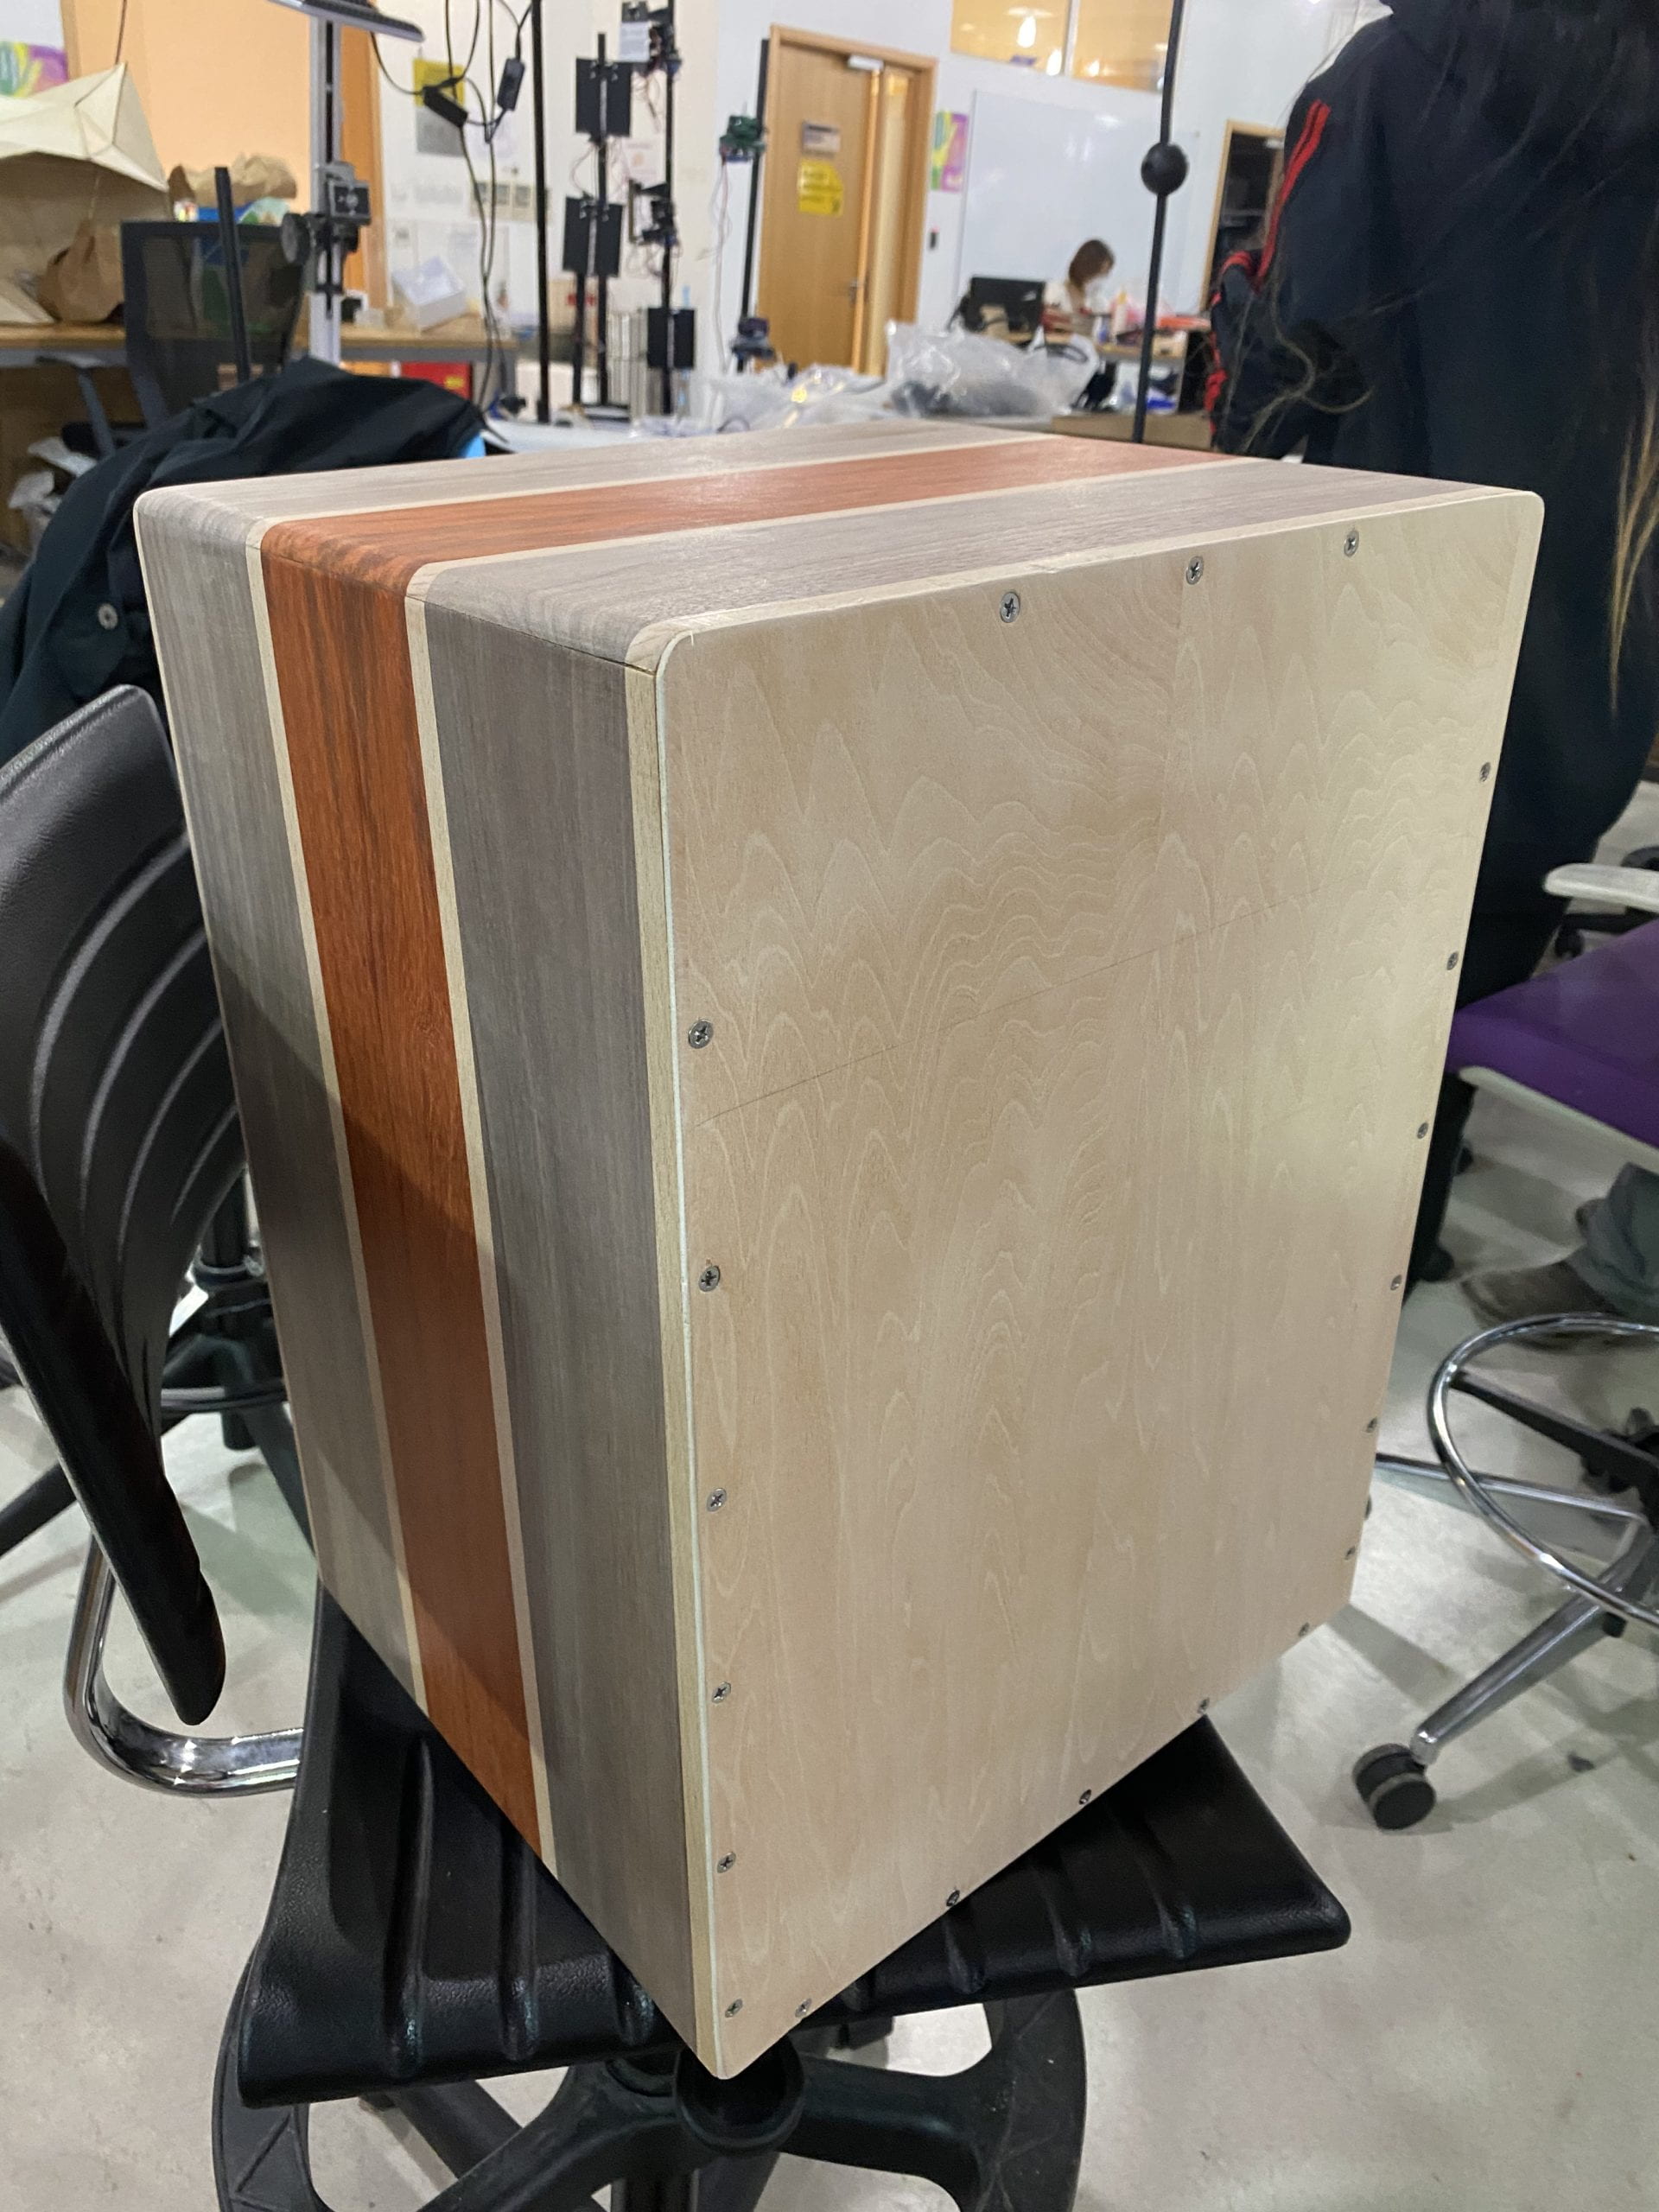
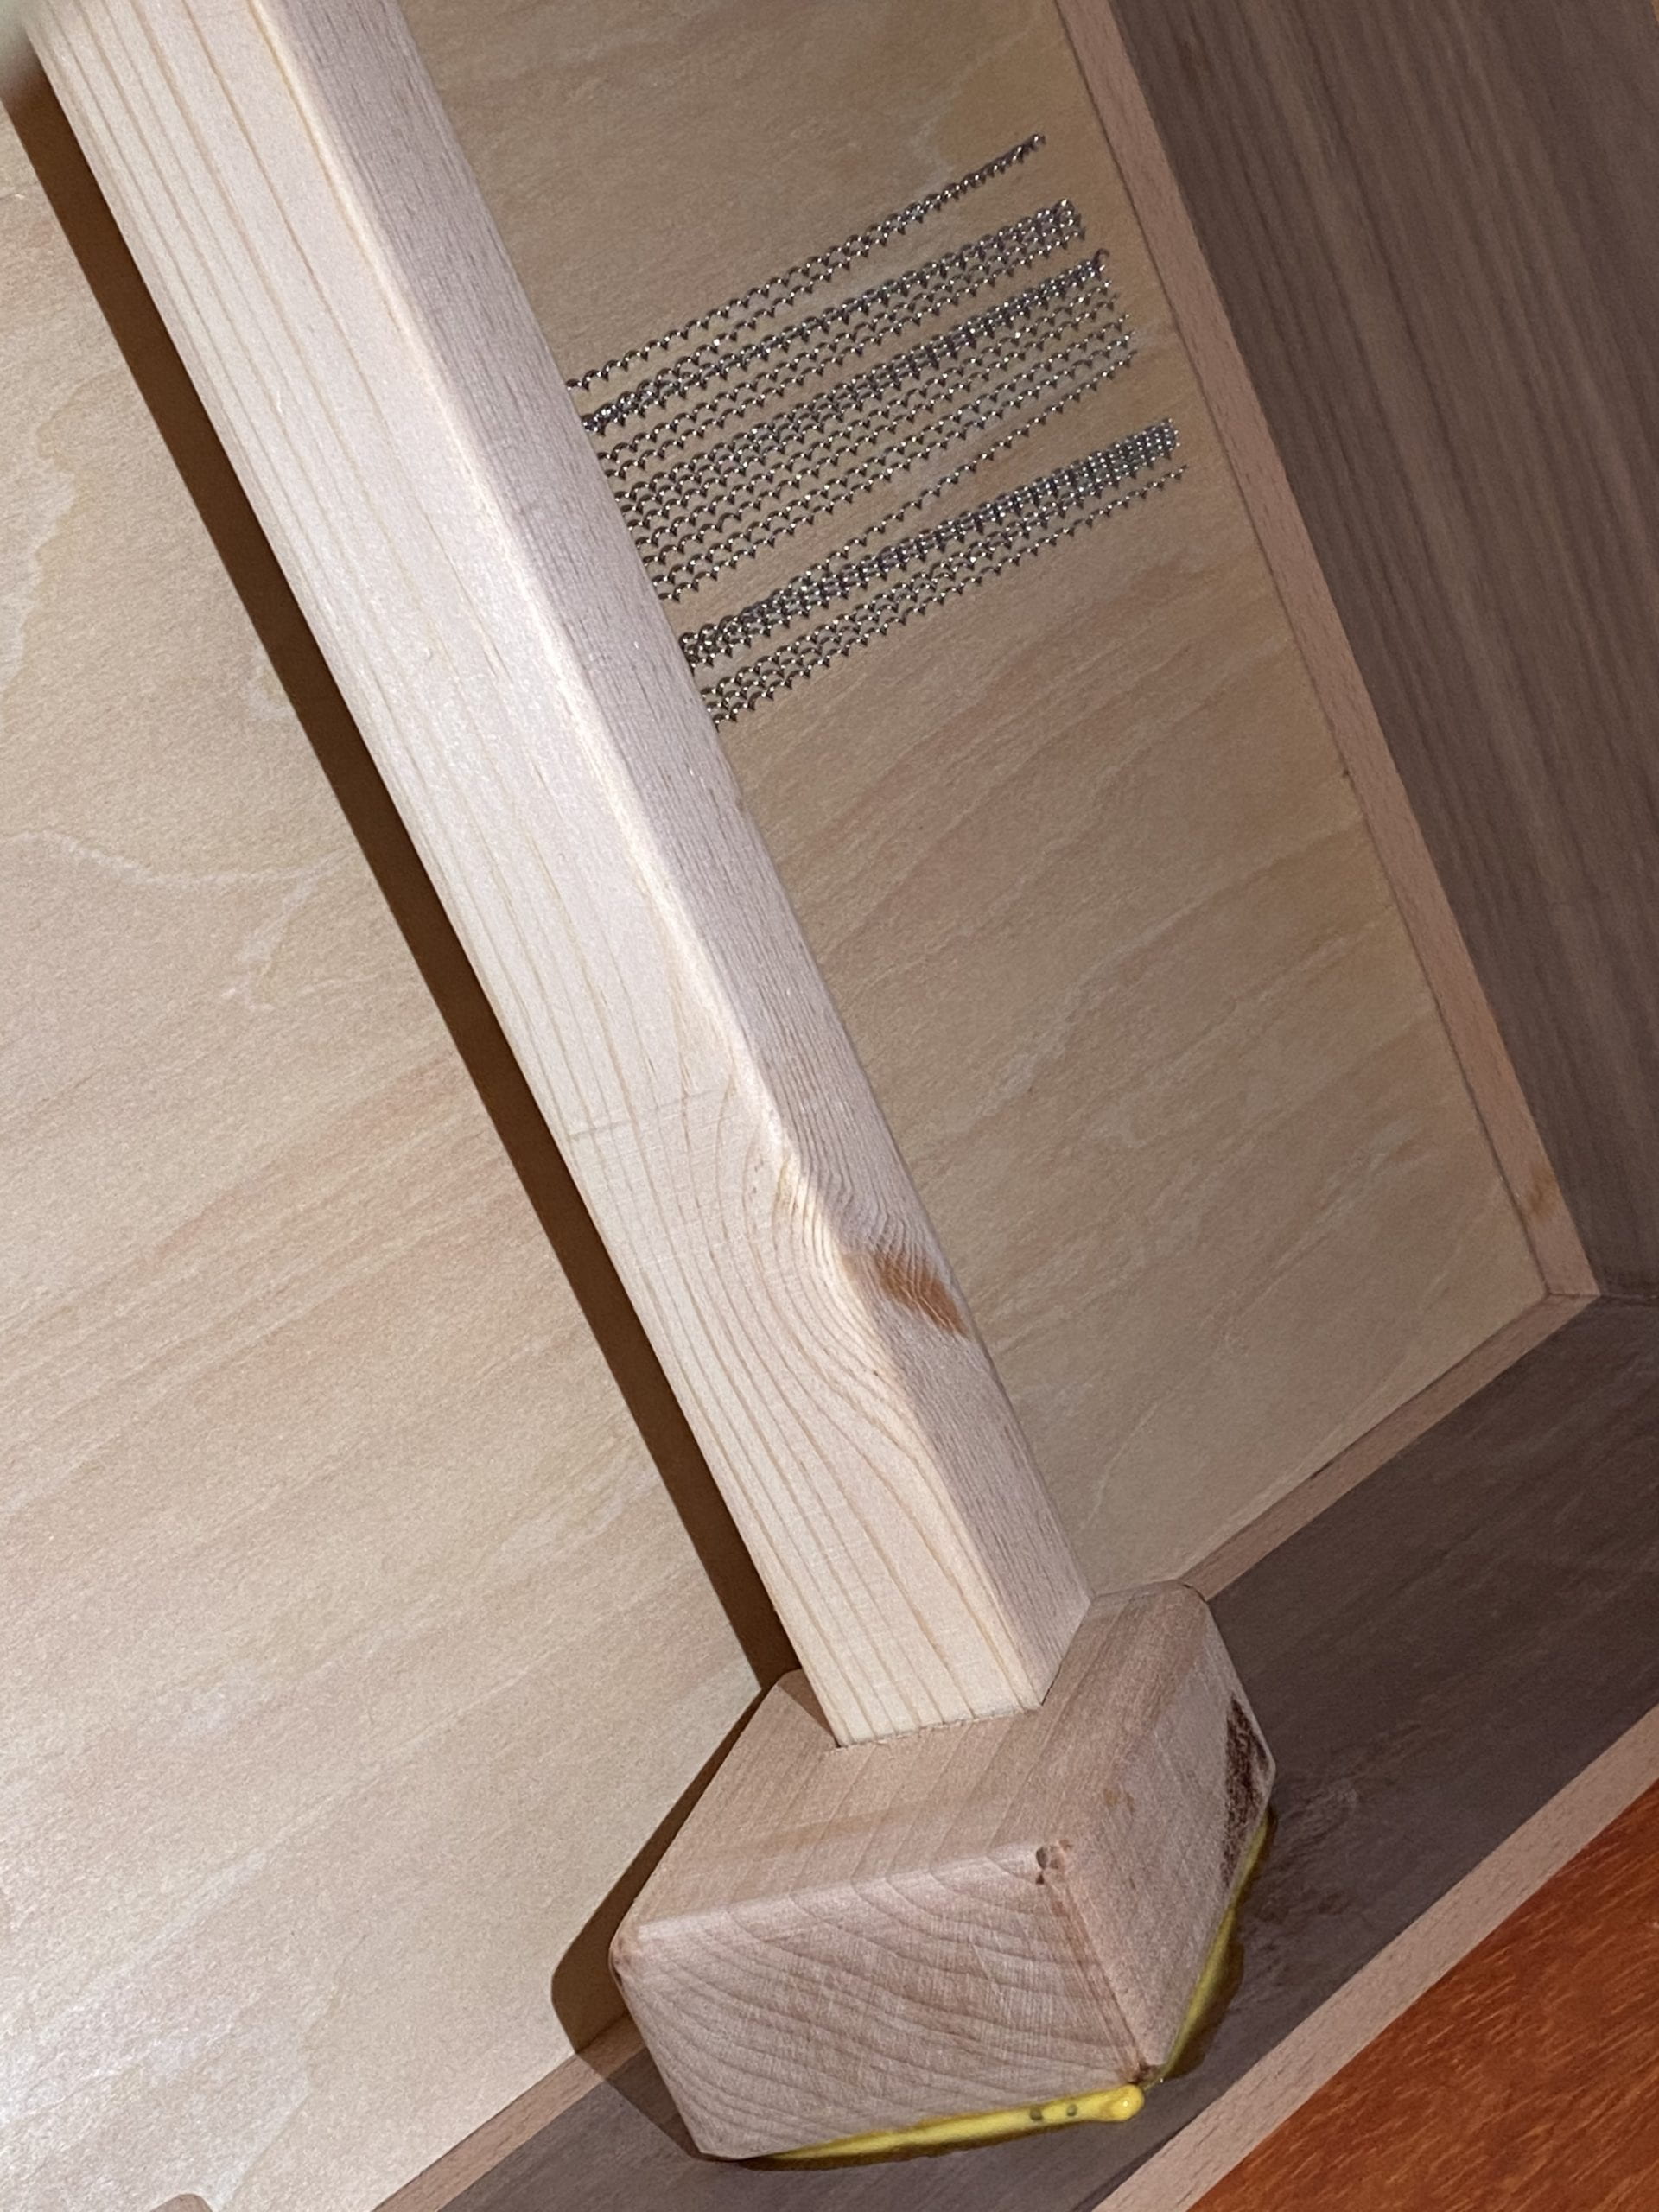
then using table saw I was able to make these little notches for the snare to go in (without glue) so that the snare would be detachable and replaceable.
Then after a bit of final finishing and sanding I will be done by tomorrow.
Discussion and reflection:
the slight curving of the glued board was honestly a little bit surprising, I might better off doing the joint cutting right after I glued up the boards and they have dried. Otherwise, there won’t be much for me to change if I were to do it again. However if I were to improve the project further on I might choose to use nicer plywoods and screws and probably use one solid piece for the bottom.
Project title: custom-built Cajon drum (possibly with adjustable snare)
Description: a Cajon drum is a percussion instrument that can create the sound of a drum kit but can also be used in other applications such as a solo or in situations where drum kits would be too loud. It consists of the body which is a wooden box, a snare placed inside the box to create sound texture, and a hole in the back for spreading the vibration. My goal for this project is to make the box as perfect as possible and try out different patterns using different woods in the side walls. If everything works well, I may consider making the snare attachment adjustable.
Motivation:
i have been wanting to buy a Cajon for a long time but haven’t got the time to actually try one out in the music shop. So I want to take the chance and make one myself, if it worked then great, if it sounds terrible at least I could give this as a gift to someone else (lol).
Three examples of objects:
p1: solid wood cajon using maple and walnut, front and back panels are ply
p2: wood pattern on the sides, absolutely beautiful but really hard to get uniform shapes
p3: looks like a solid piece of wood is used for the side panels.
The biggest difference is how the side panels are made. And also how the walls are joined together. The first one uses box joint which I think would be time-consuming, plus I am not a big fan of that aesthetic. However, p1 is probably the way I am going to design my walls, just different kinds of wood with big color contrast in stripes of different width. I think that would make a very pretty design. For the joint I would go for the design in p2 and 3, I think it hides the seam well, especially 2.
There are no specific artists I could find who specify in making cajons but there are certainly lots of videos online……
Build plan:
Stock: two to three colors of wood that have fairly high contrast and are fairly strong. Like maple, walnut, and whatever that red panel used to demonstrate book matching was……
Construction steps:
(depending on the design, subject to change)
make the side panels: cut different types of stock into roughly the same thickness and width, glue and plane.
joints: make hidden joints with table saw.
figure out how to install the snare.
drill hole in the back panel.
assemble all the walls except the front
install the snare
add the front panel.
Inspiration and ideation:
For this bandsaw box project I wanted to re-create something from one of my favorite games Minecraft. I thought it would be fun to make a box based on one of the wooden blocks. I chose the crafting table because it has rather complicated pattern which I thought would look nice recreating with different types of wood.

I decided to use maple for the main body of the block, alternating with plywood boards for the darker stripes around the perimeter, and finally walnut for the dark vertical stripes. Rather than a regular drawer, I envisioned this box to be opened from the top, which means a different drawer design altogether (which I will discuss later).
The fabrication process:
I started by planing the maple and the walnut using the machine (which made a big mess) as well as by hand, I was curious to try out the method some of us did with their walnut which they glued them up and planed them by the machine, but later I found out it wasn’t necessary because I only needed thin strips of the wood.
I glued the different woods together and made sure they are aligned as best as I could at least on one side so as to minimize later cutting and sanding.
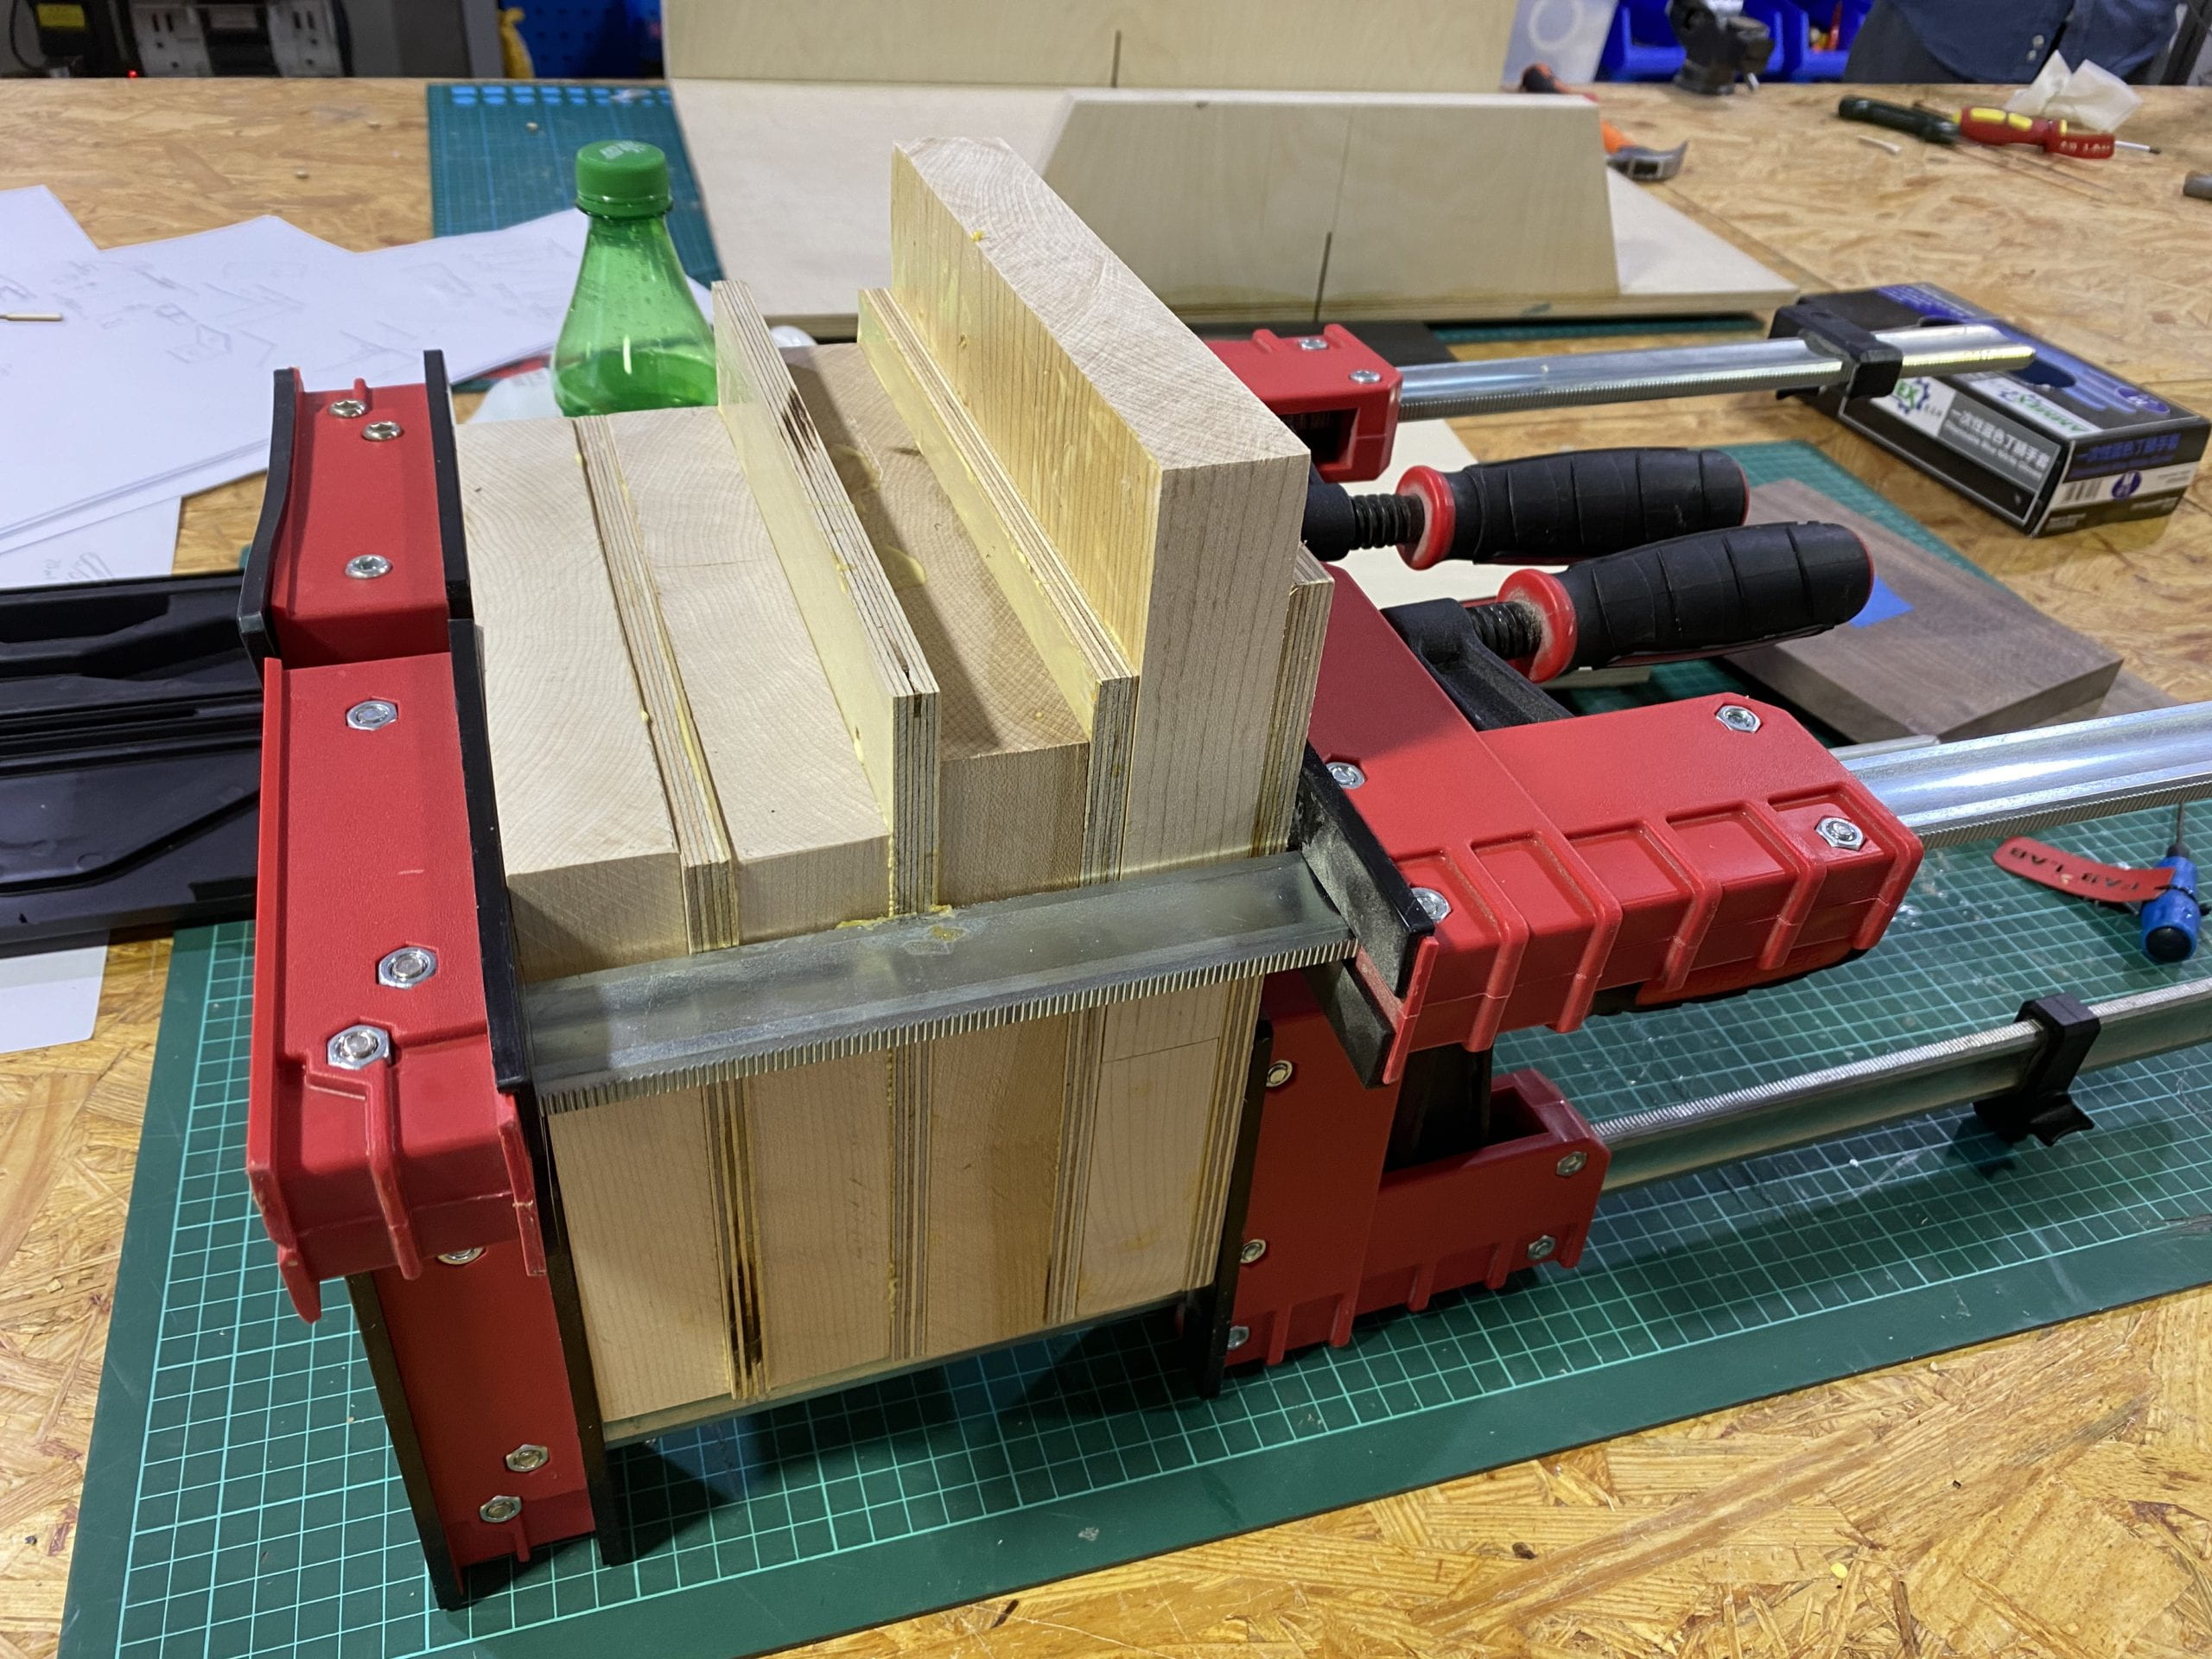
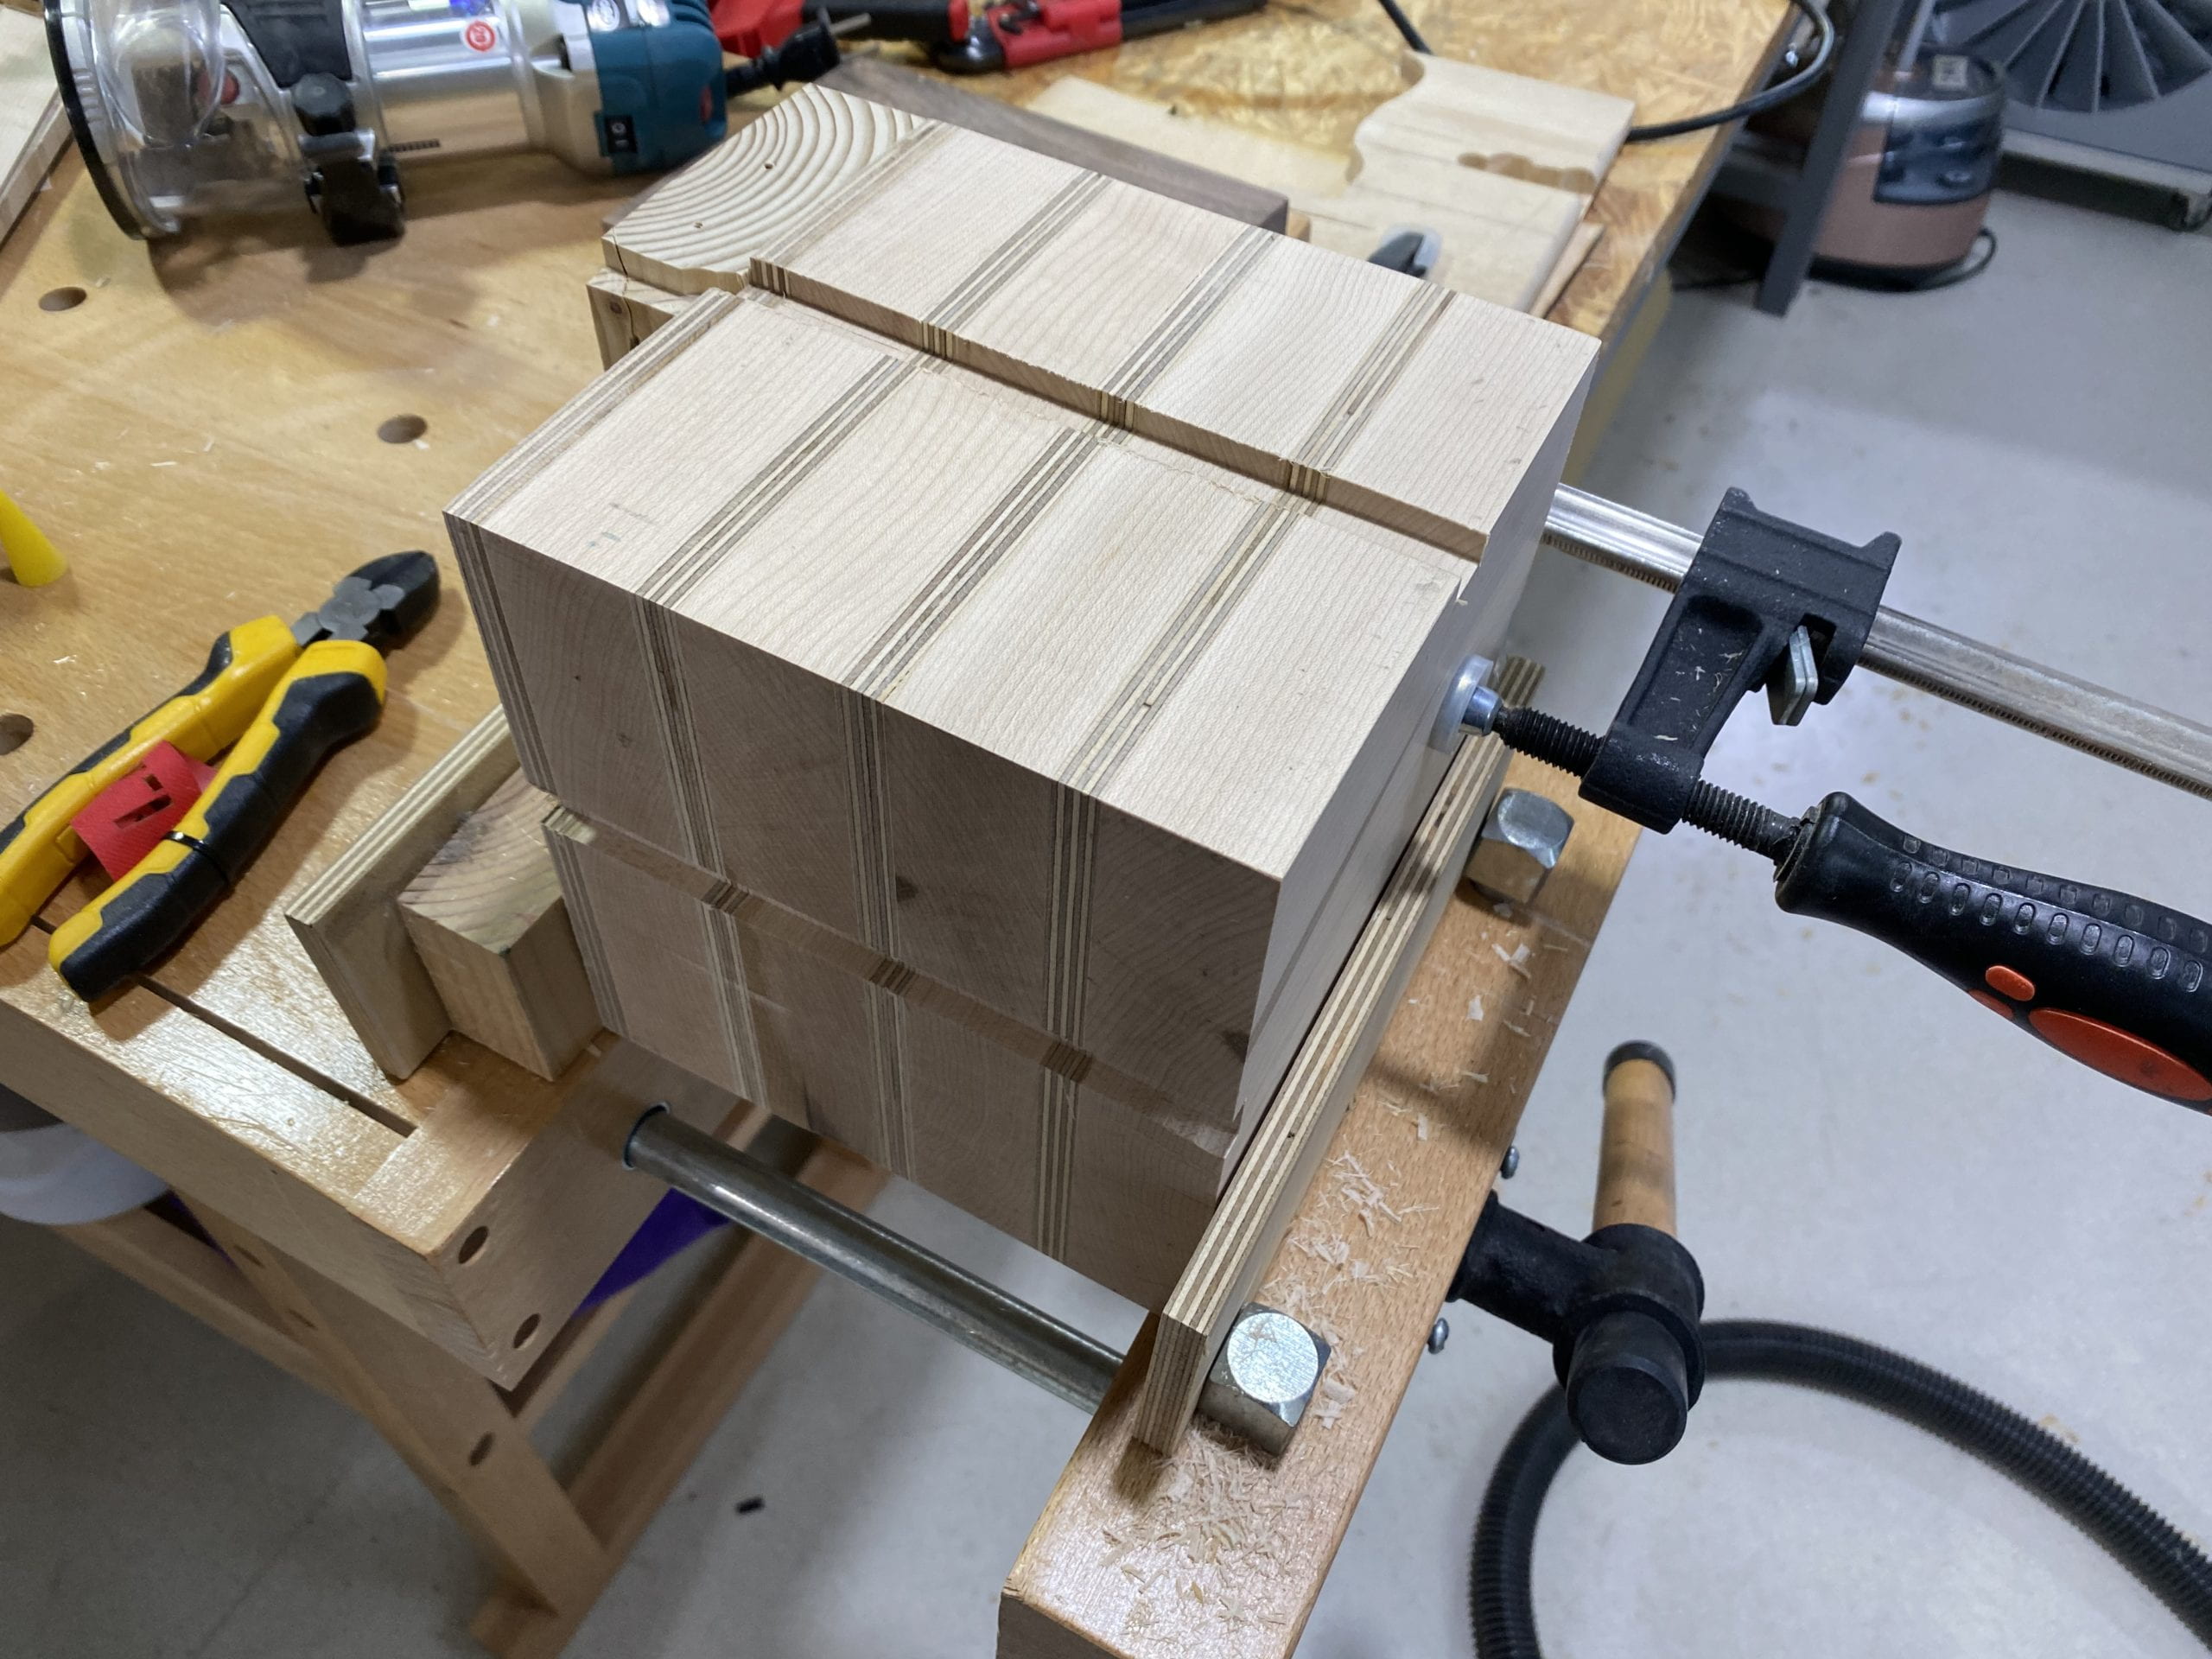
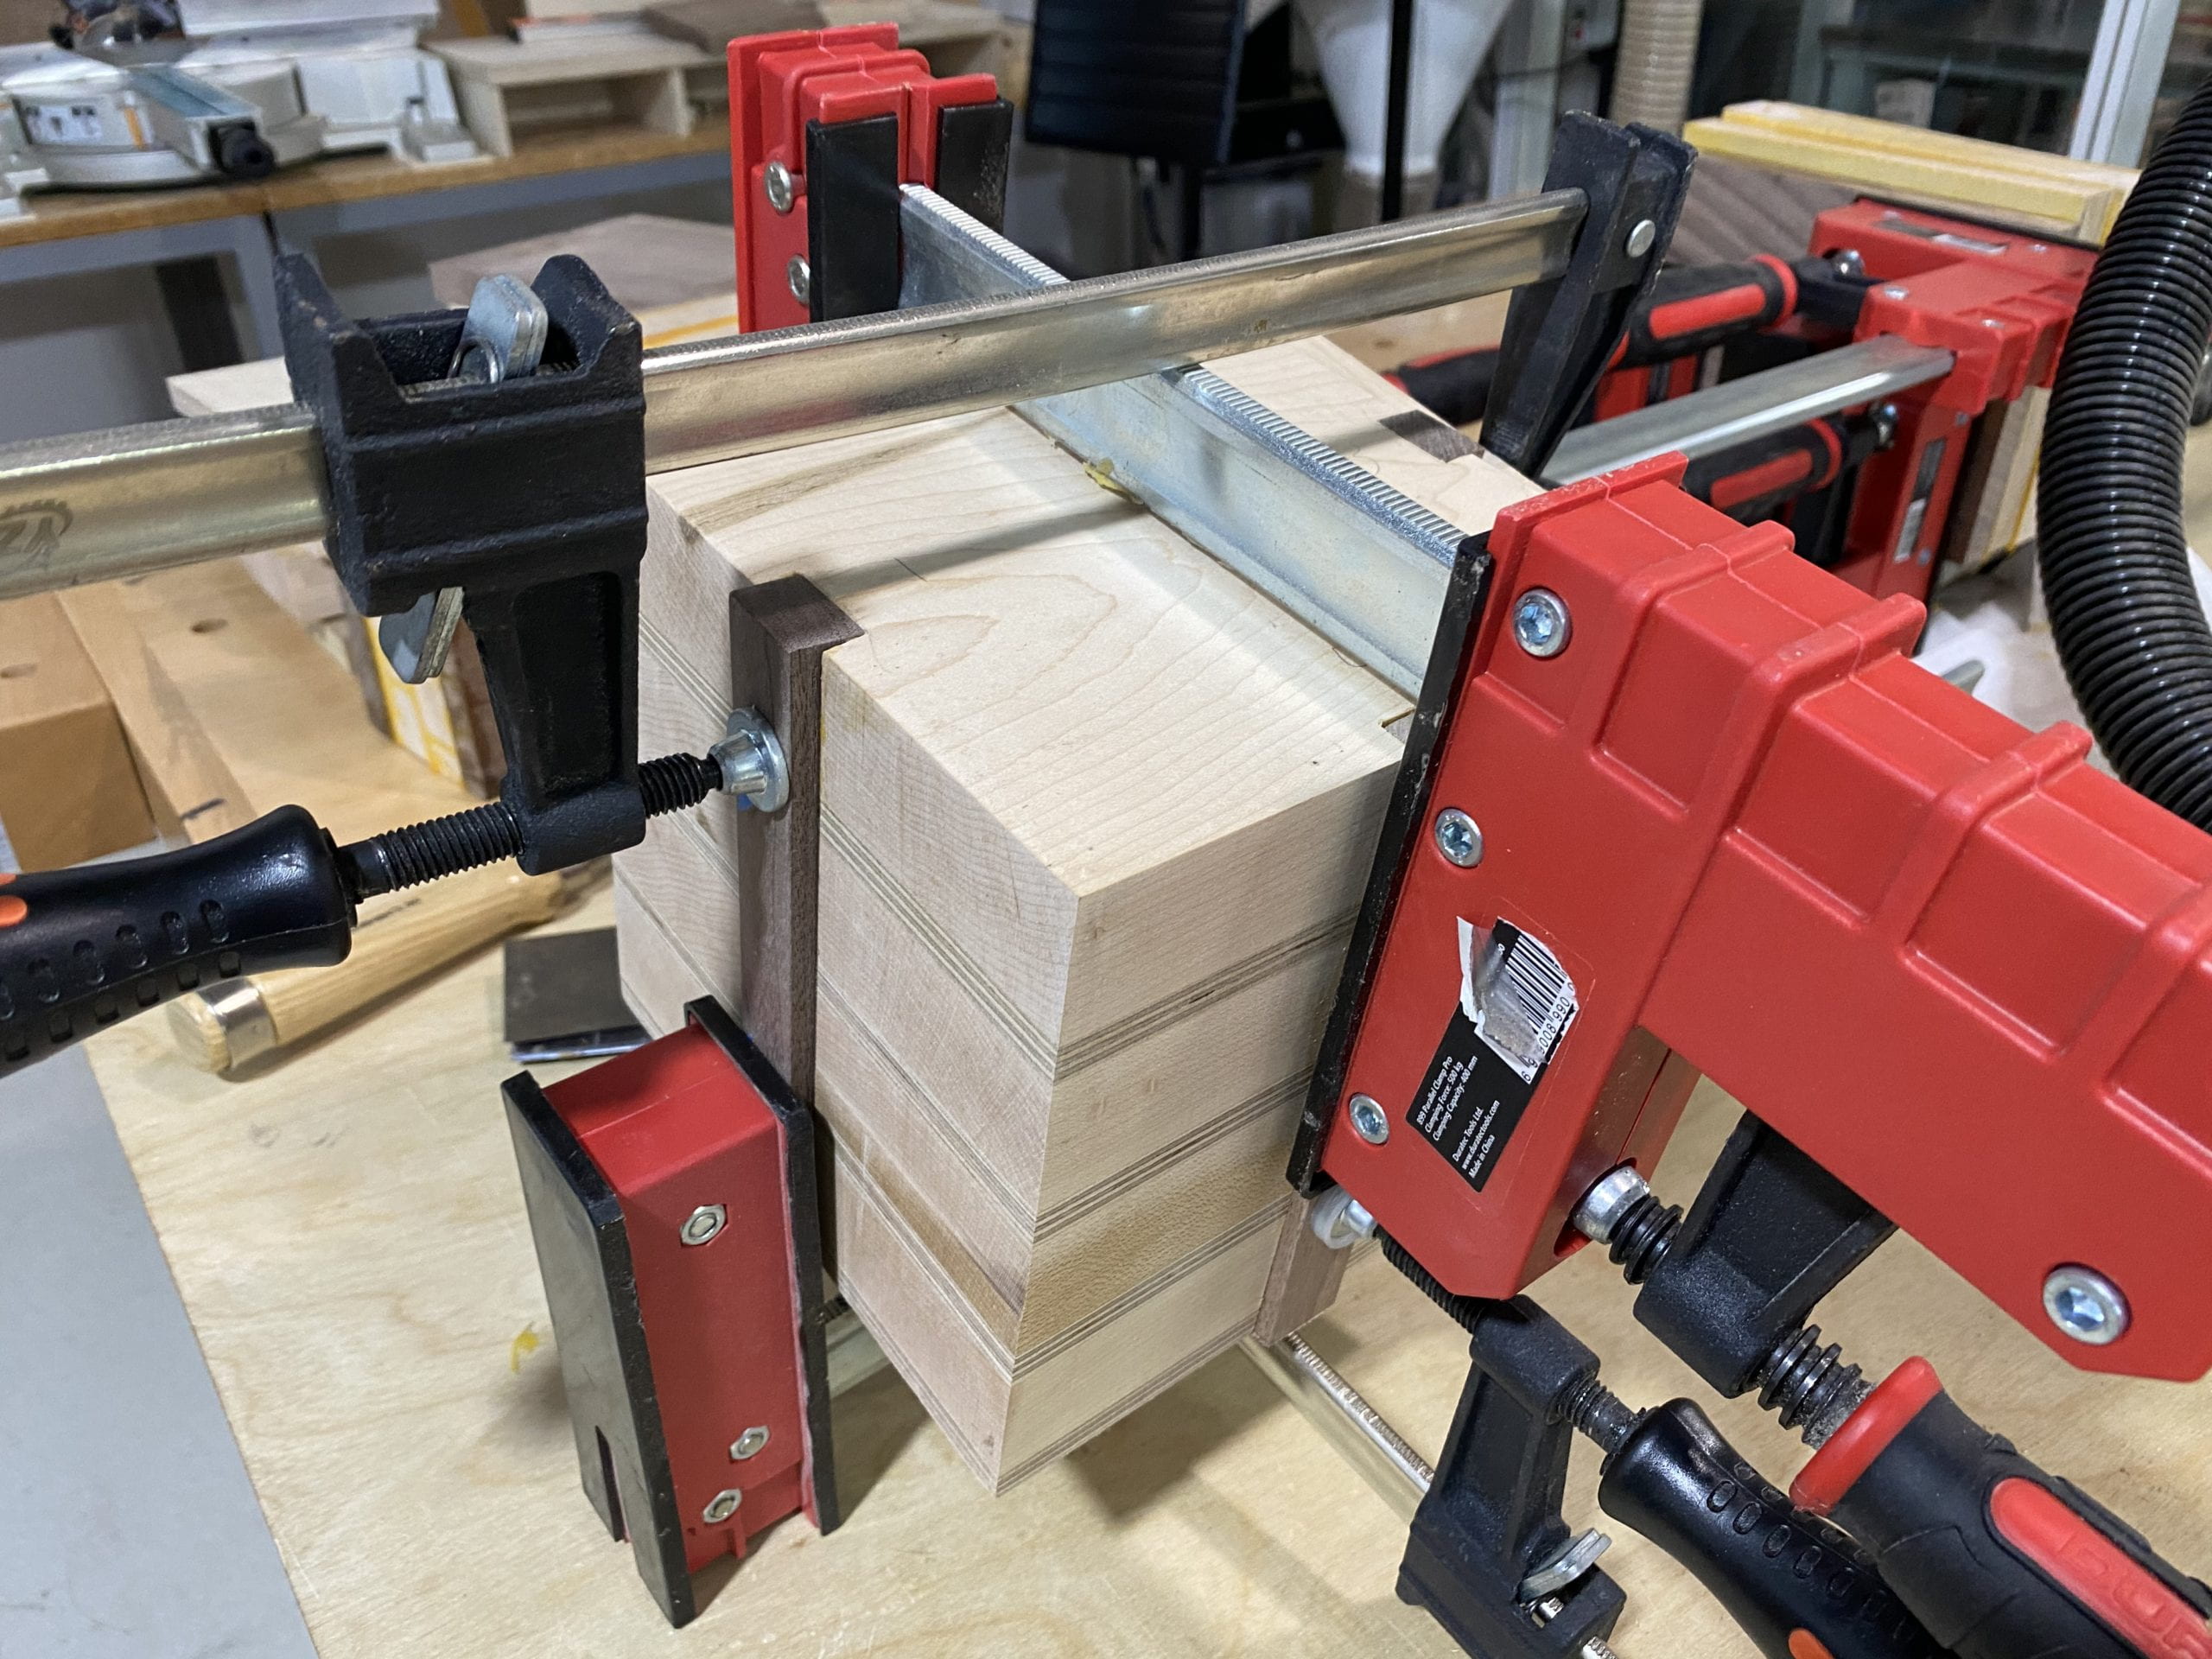
then I cut down the block to size, cut out the grooves along the sides using the router, and then inserted the walnut stripes.
one technical highlight here is that I used chisels and a hammer to flatten out the sides of the grooves (created by the inevitable errors of the router) so that the stripe fits easily into the groove.
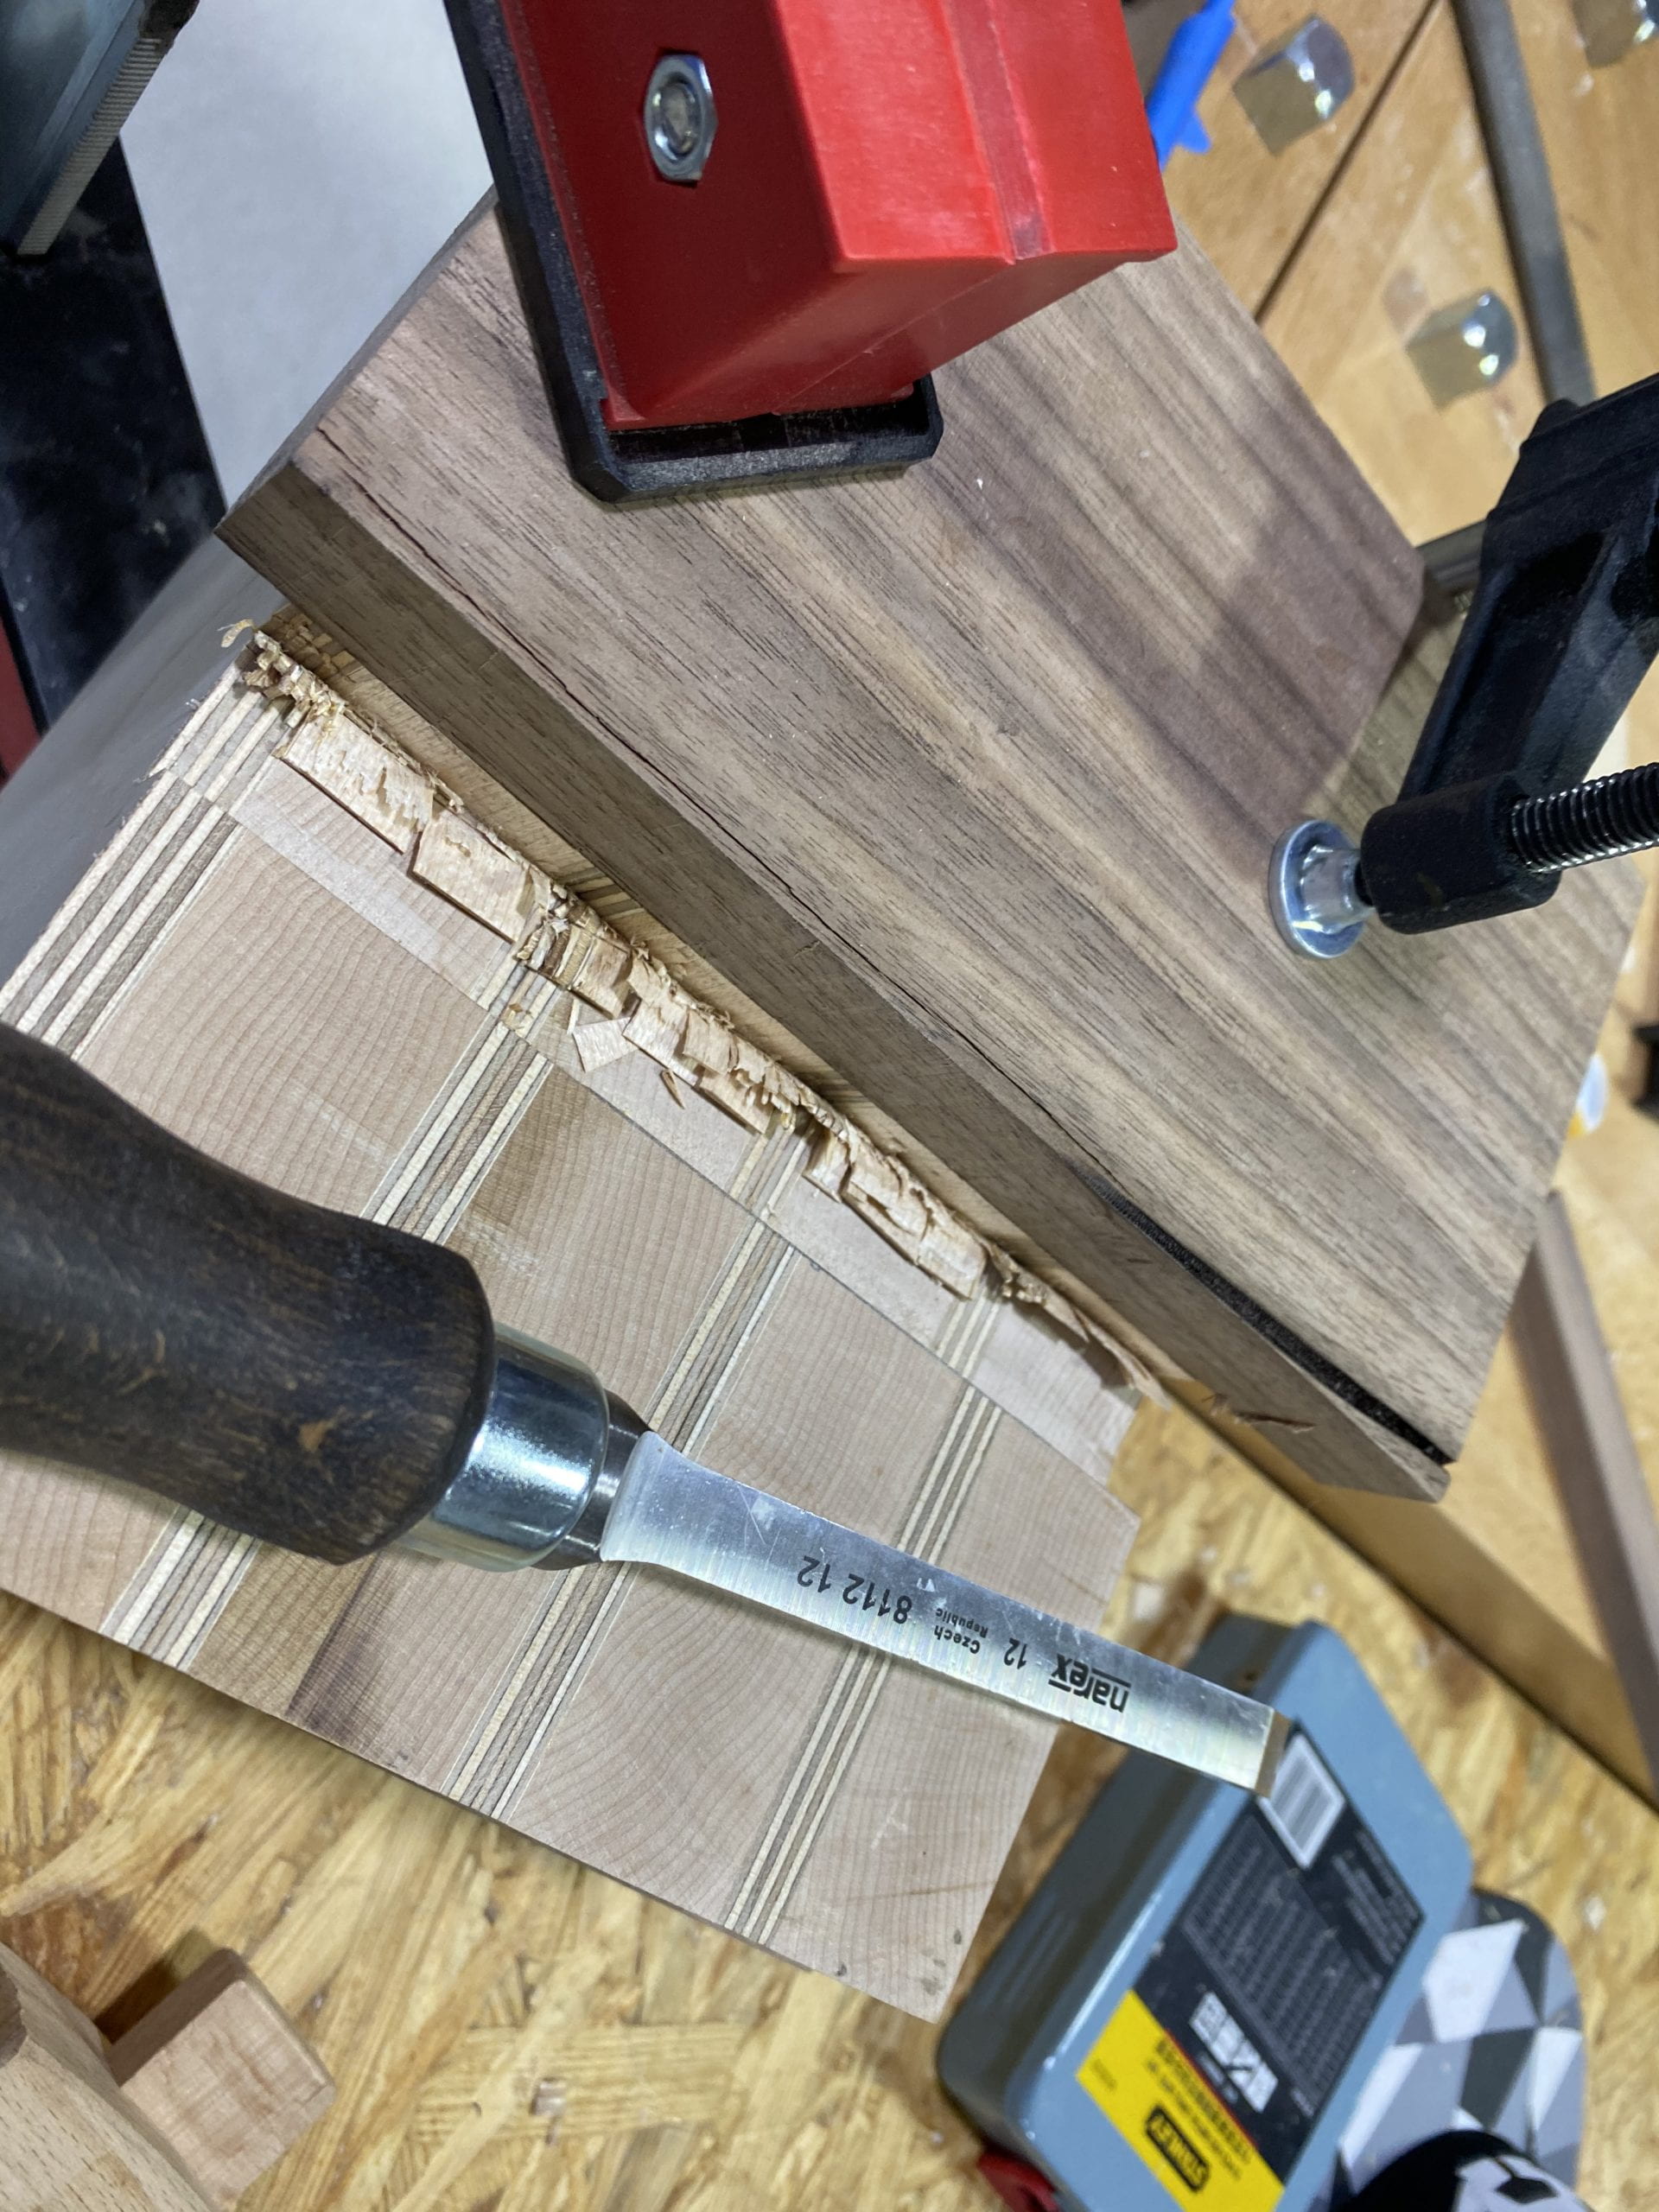
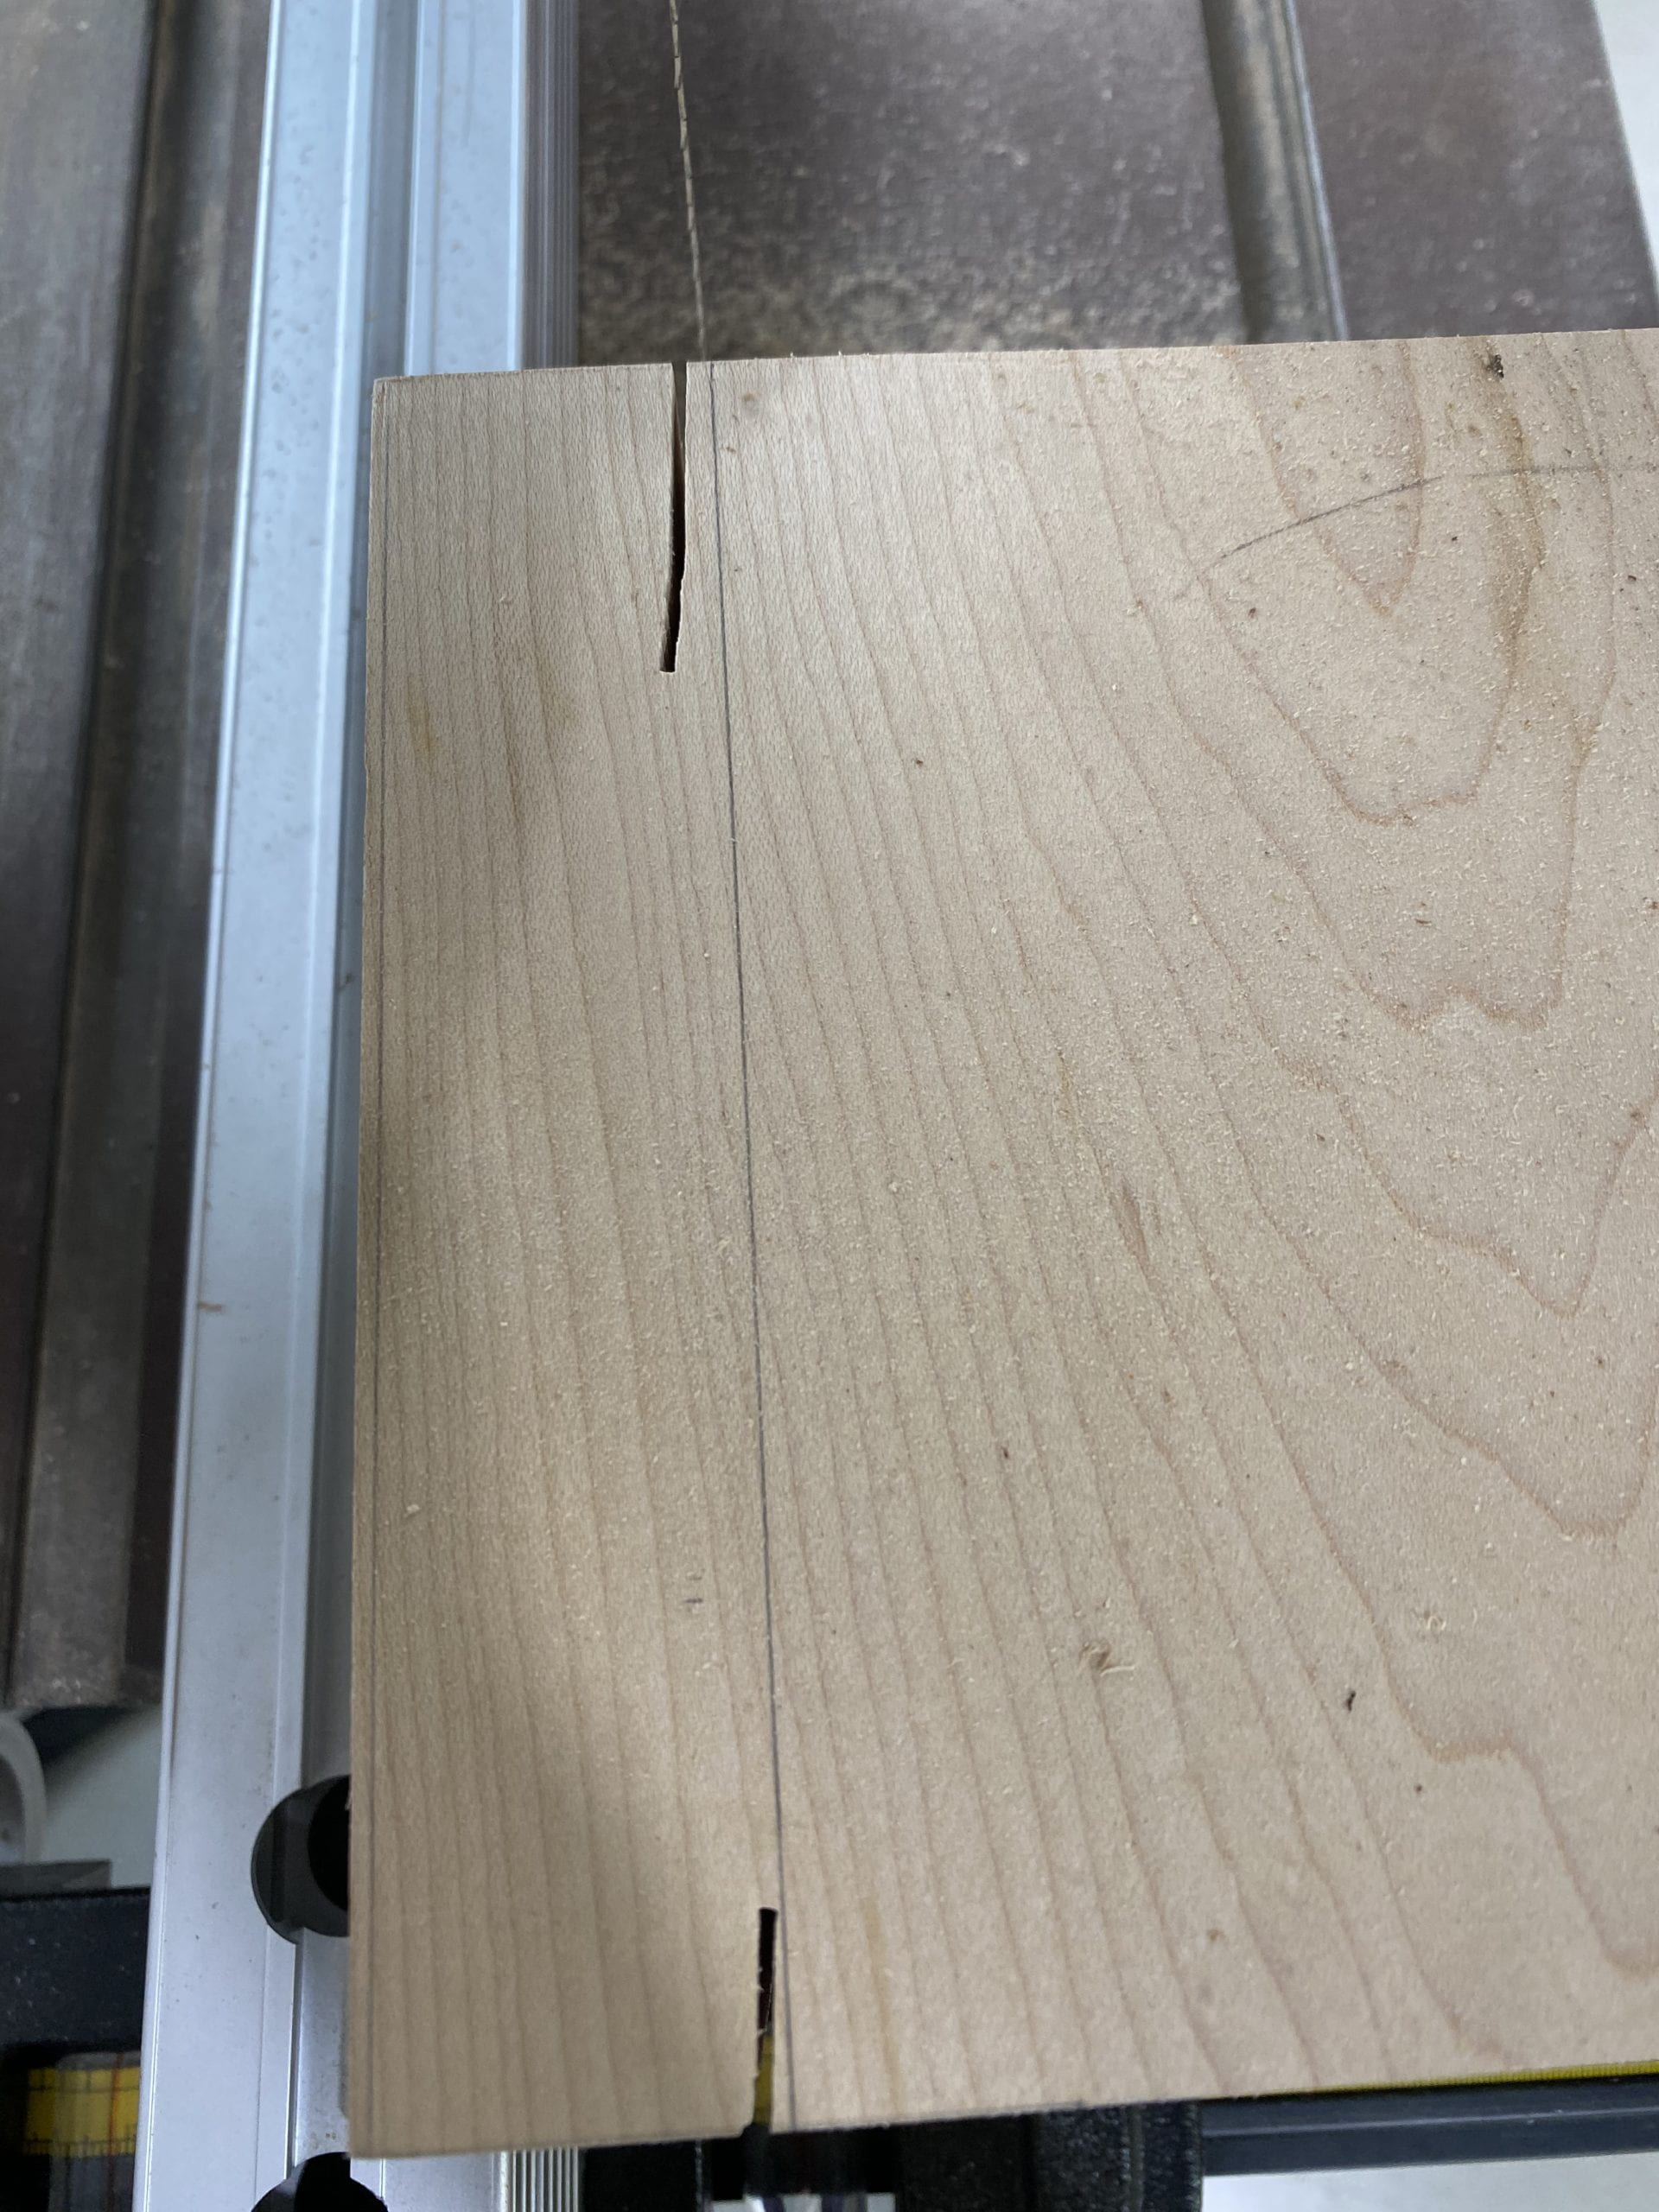
then I did the regular procedure of cutting the core out of the block and creating a tray out of it, but when I was cutting the bottom the band saw blade curved and cut into the wall so I had to start from the other side.
unfortunately I didn’t have a photo documentation of what happened then but basically it did something like this: the blade curved and at a large margin. that mainly was because of the fence I was using, because I was cutting off such a great amount of wood, the blade (although I was using the half-inch wide one) was under so much pressure that it wants to bend to either side, in which case you are better off using your hand to adjust the direction of the wood (sometimes rotating as far as 45 degrees) to account for the bending of the saw blade.
When cutting the drawer I accidentally cut the bottom at a slight angle and it was not flat at all so I had to sand the middle section short a bit and replace the bottom with a piece of plywood that I know was flat but this ended up making the drawer a little too short for the shell, btu it was not a huge problem.
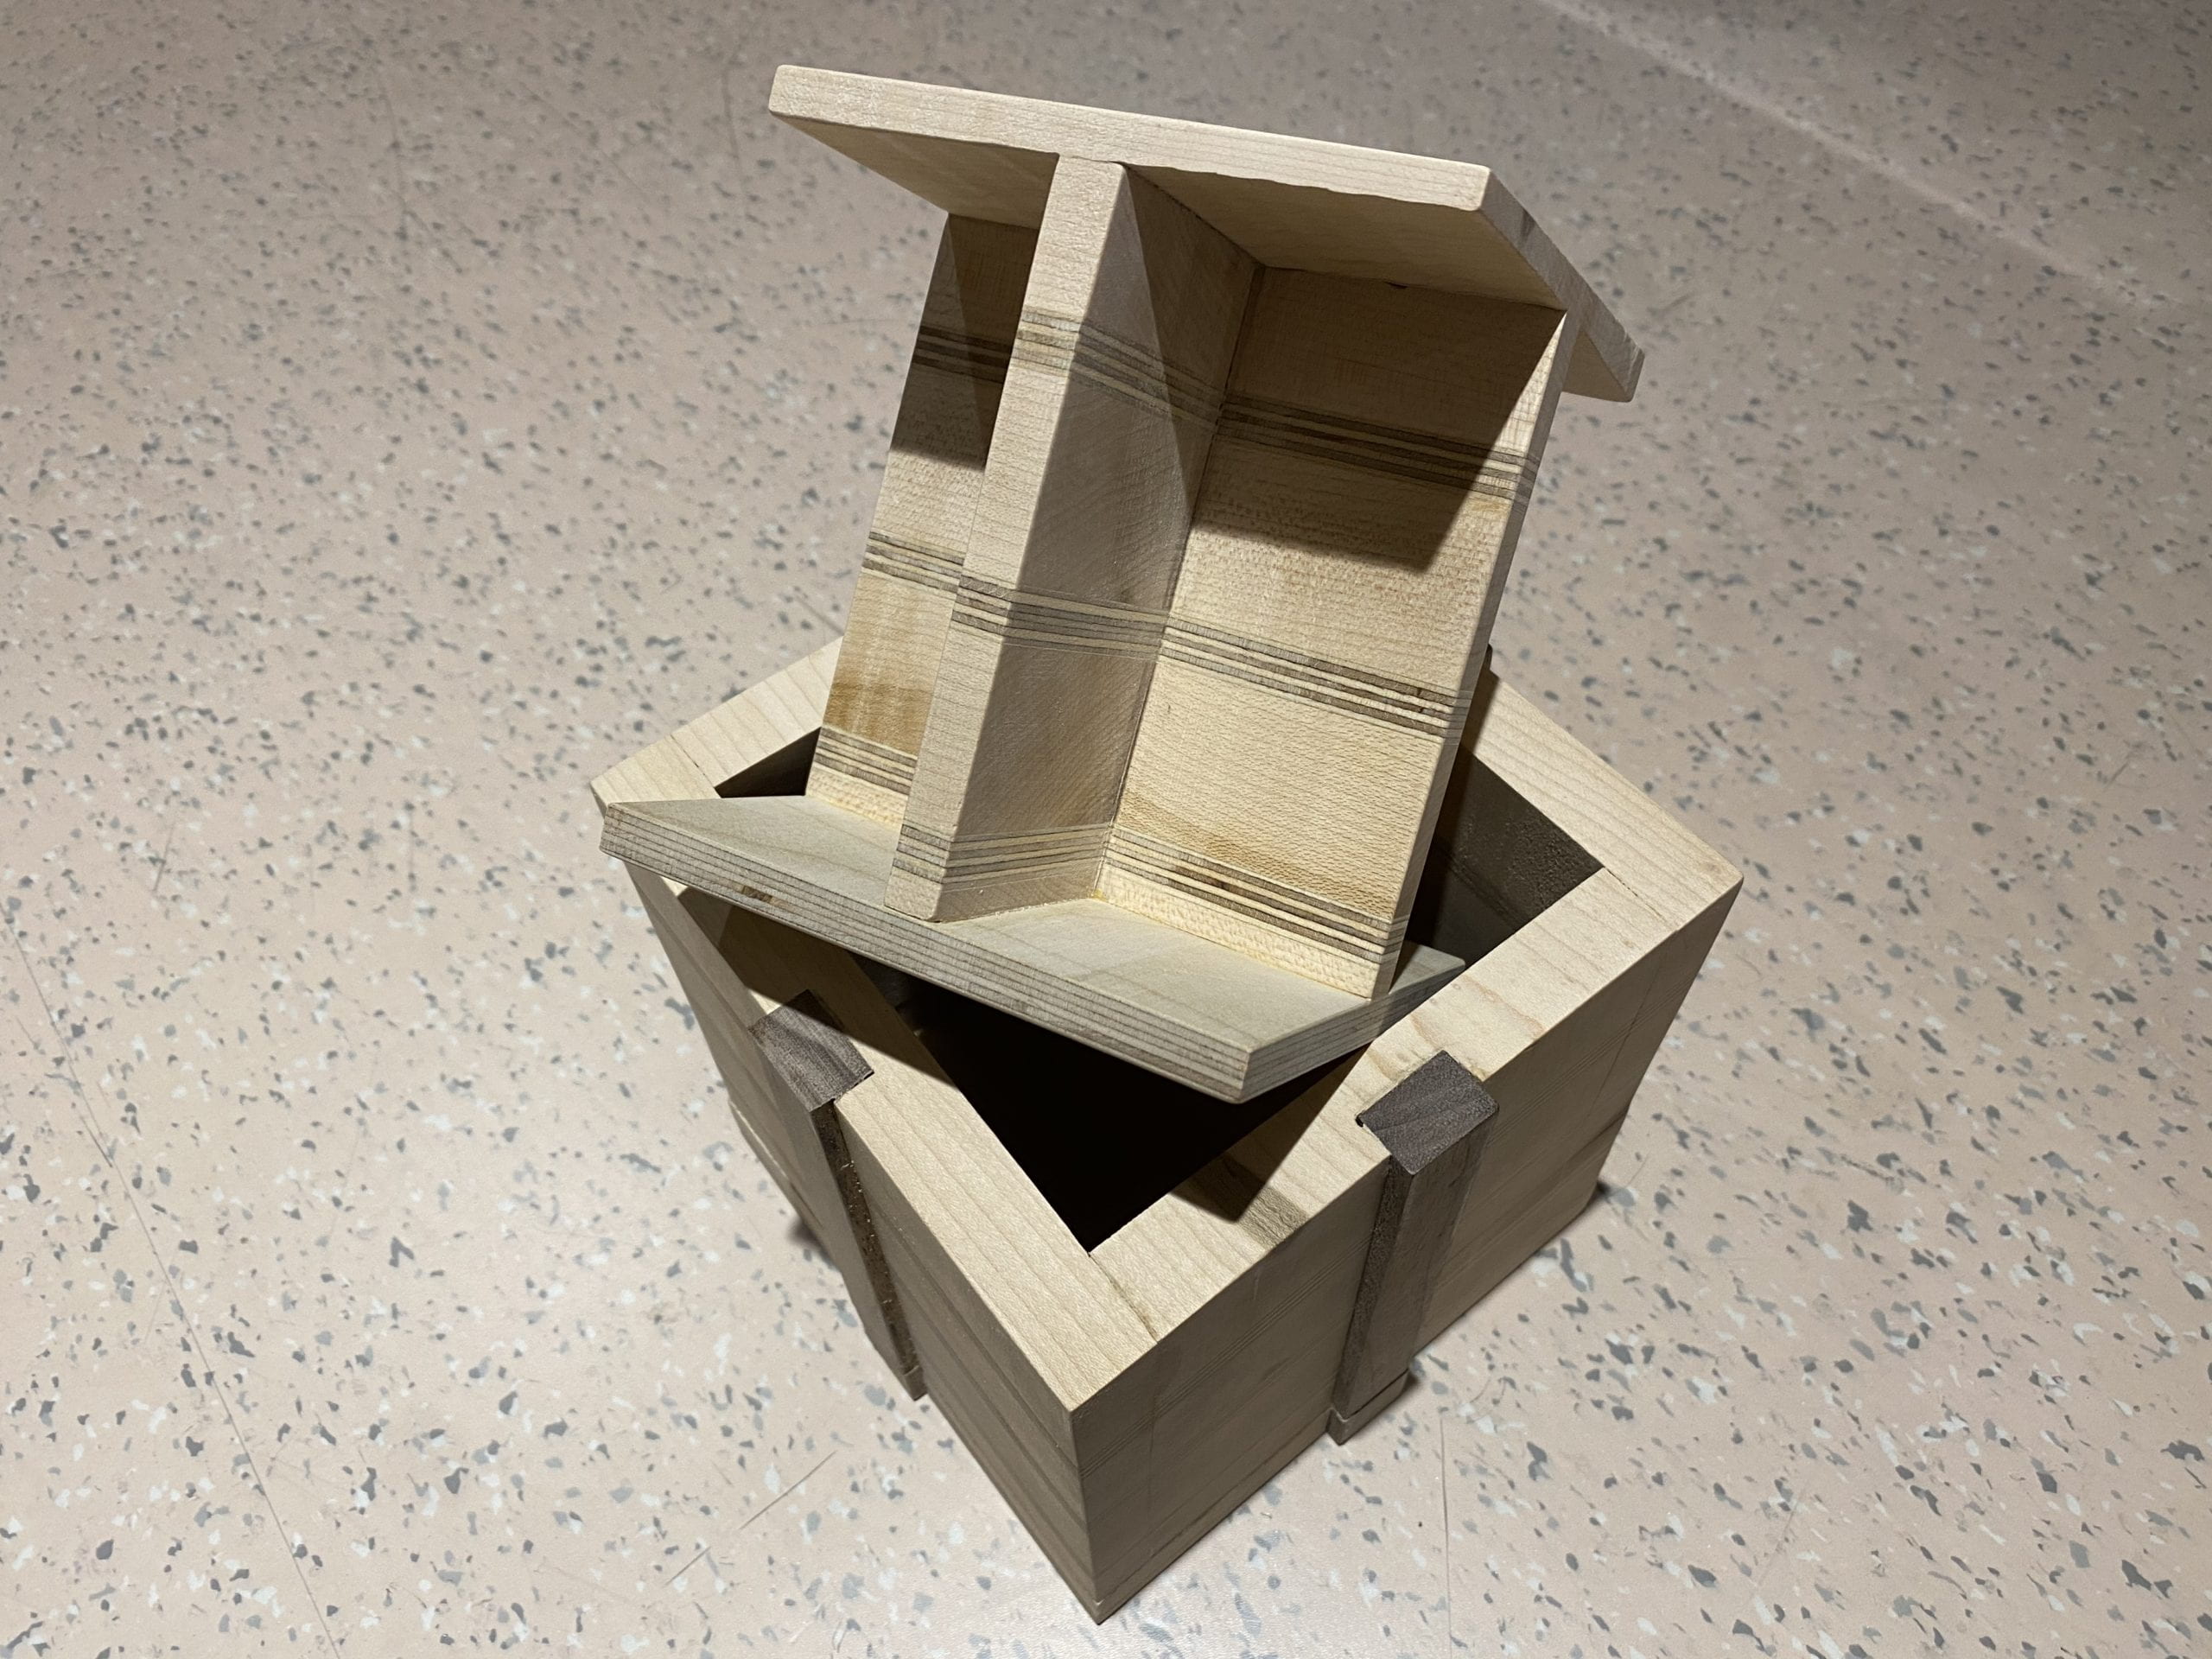
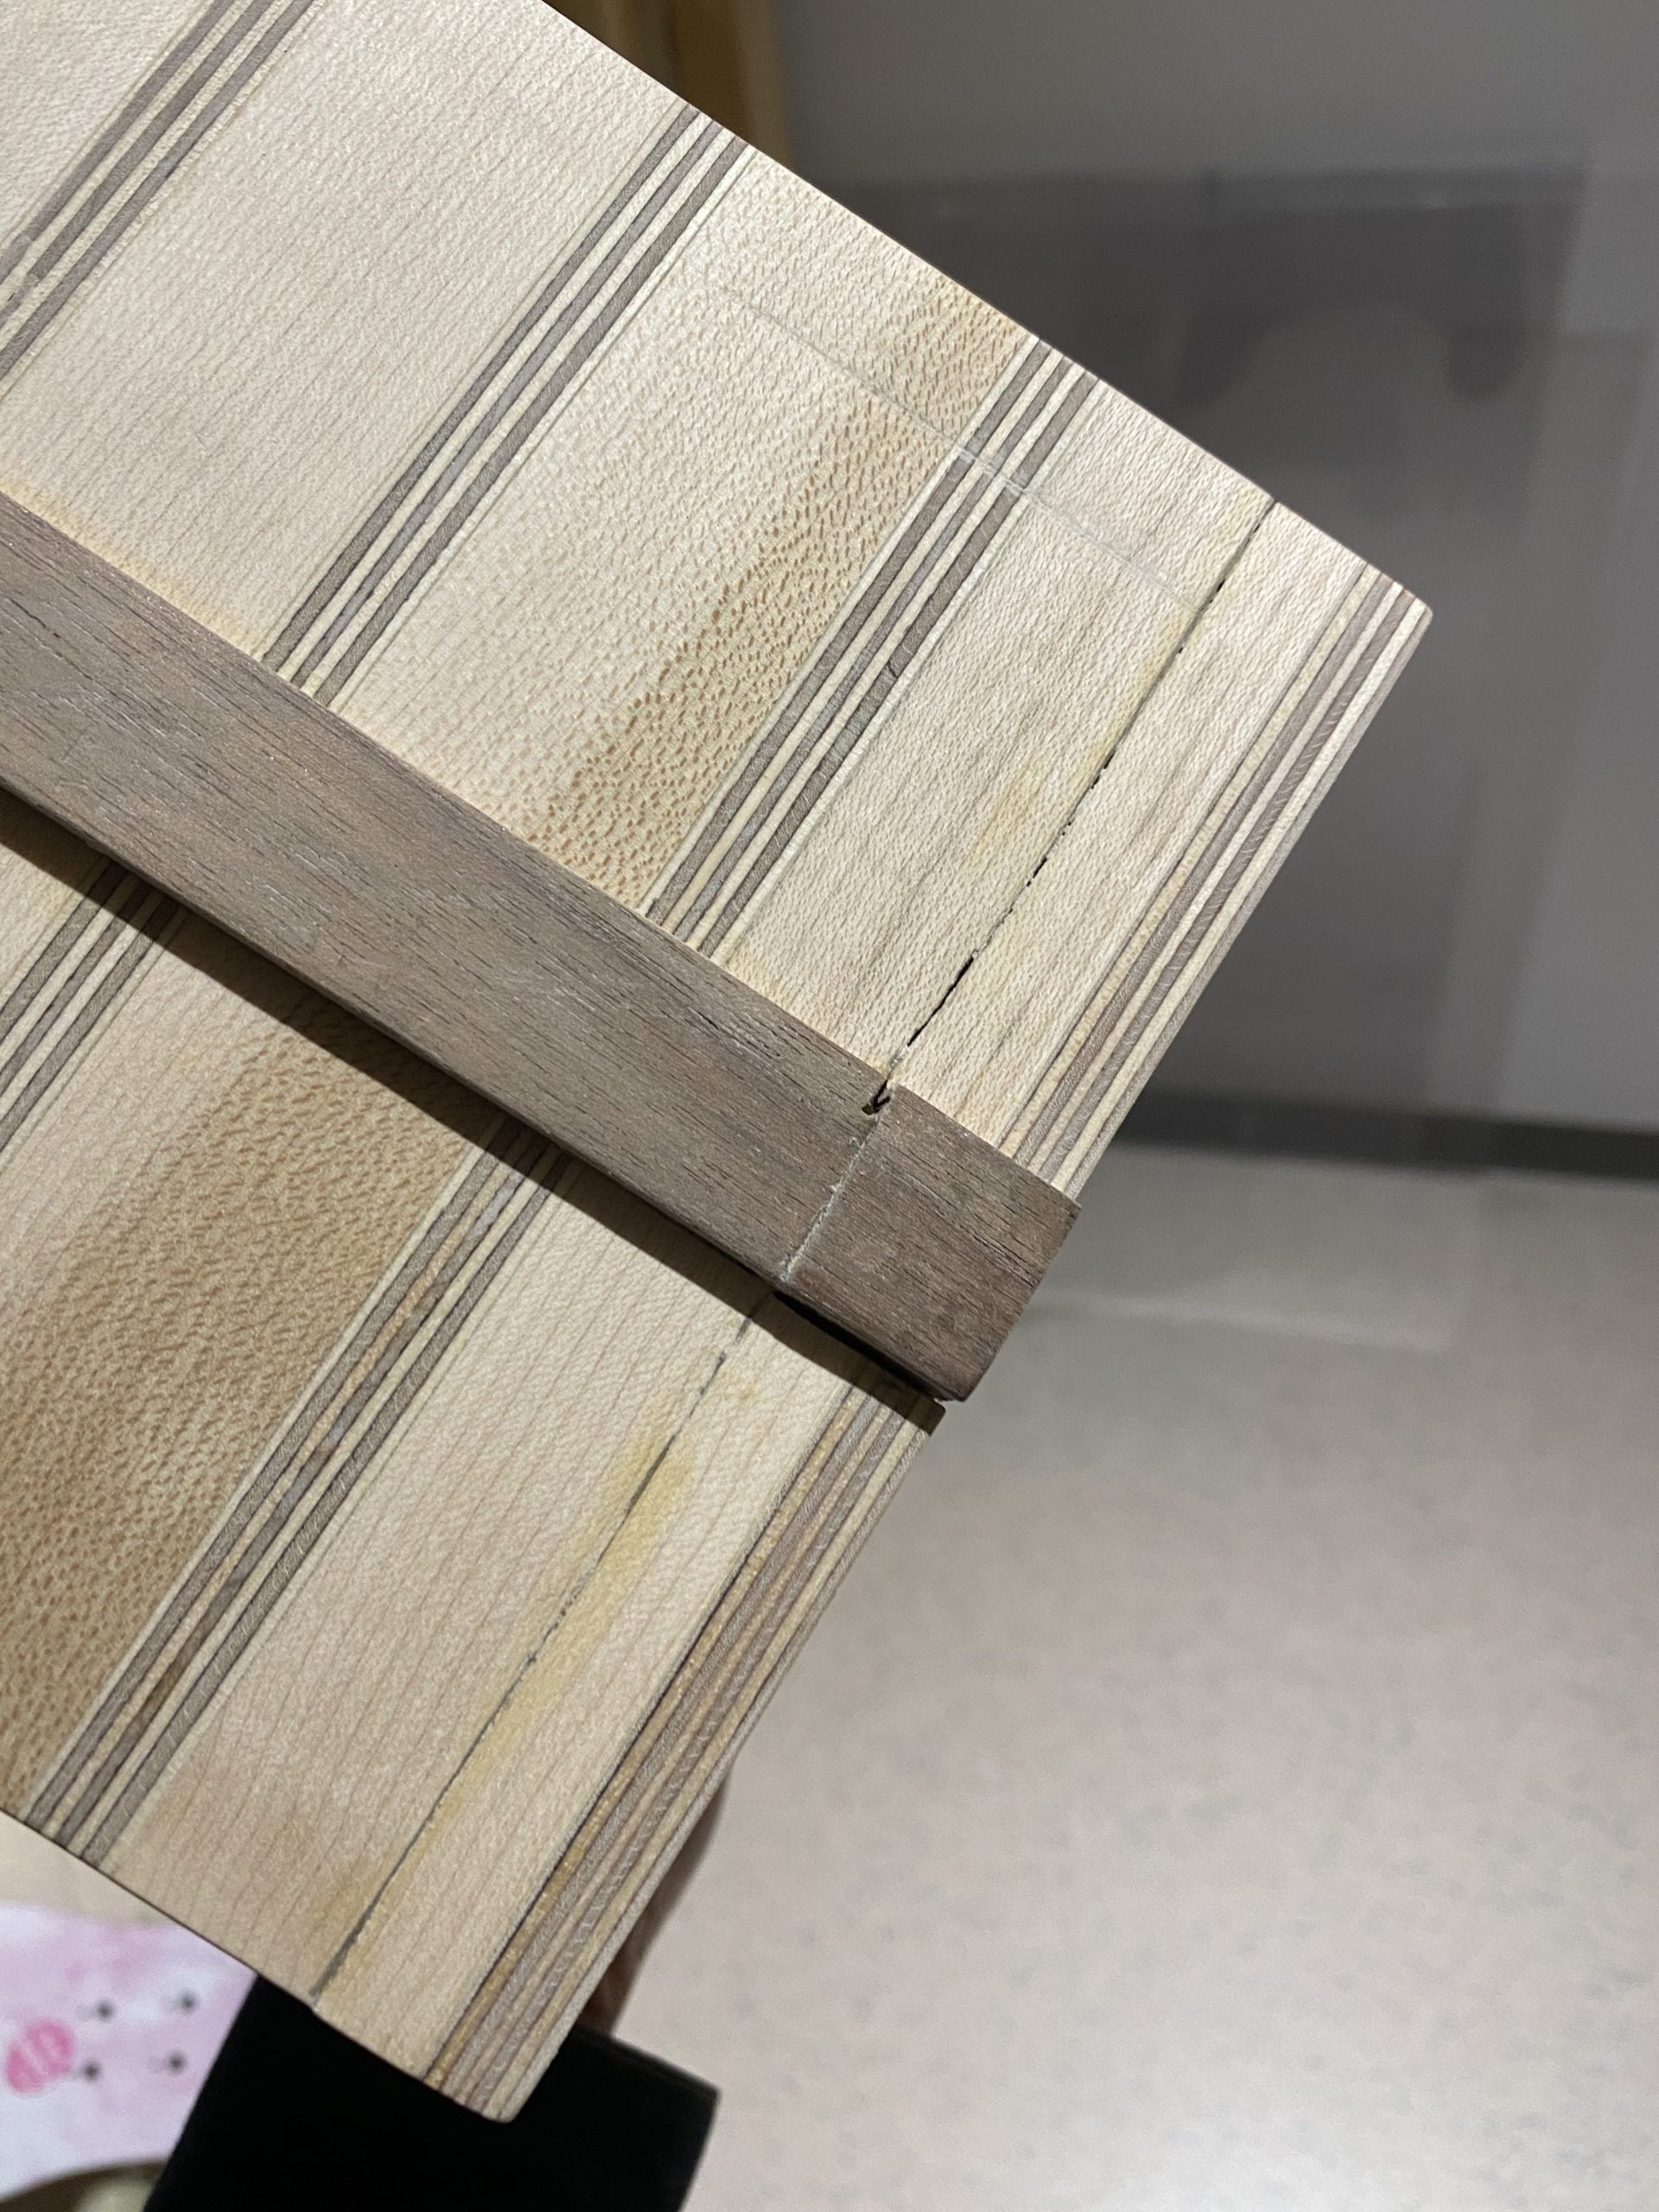
what was a huge problem though was I could have done some more planning and insert the walnut stripes after I had glued the walls and the bottom back together (even cutting the groove before that) so that the cutting won’t show as much on the outside (especially when the band saw went wrong). I will have to fill them in with fillers later.
Future plan:
in progress, laser-cut pieces almost ready to be added onto the box
Background Story
For this project I really didn’t think I have too many small object to store, mainly because I simply just put everything in my pocket. However I have always been a fan of smart kitchen gadgets so I thought it would be cool if I could build something for my kitchen. So I looked around, and found lots of small bottles of spice and small tasting spoons that were sort of just lying on the counter top and looked kinda messy, so I decided to build a little spice cabinet.
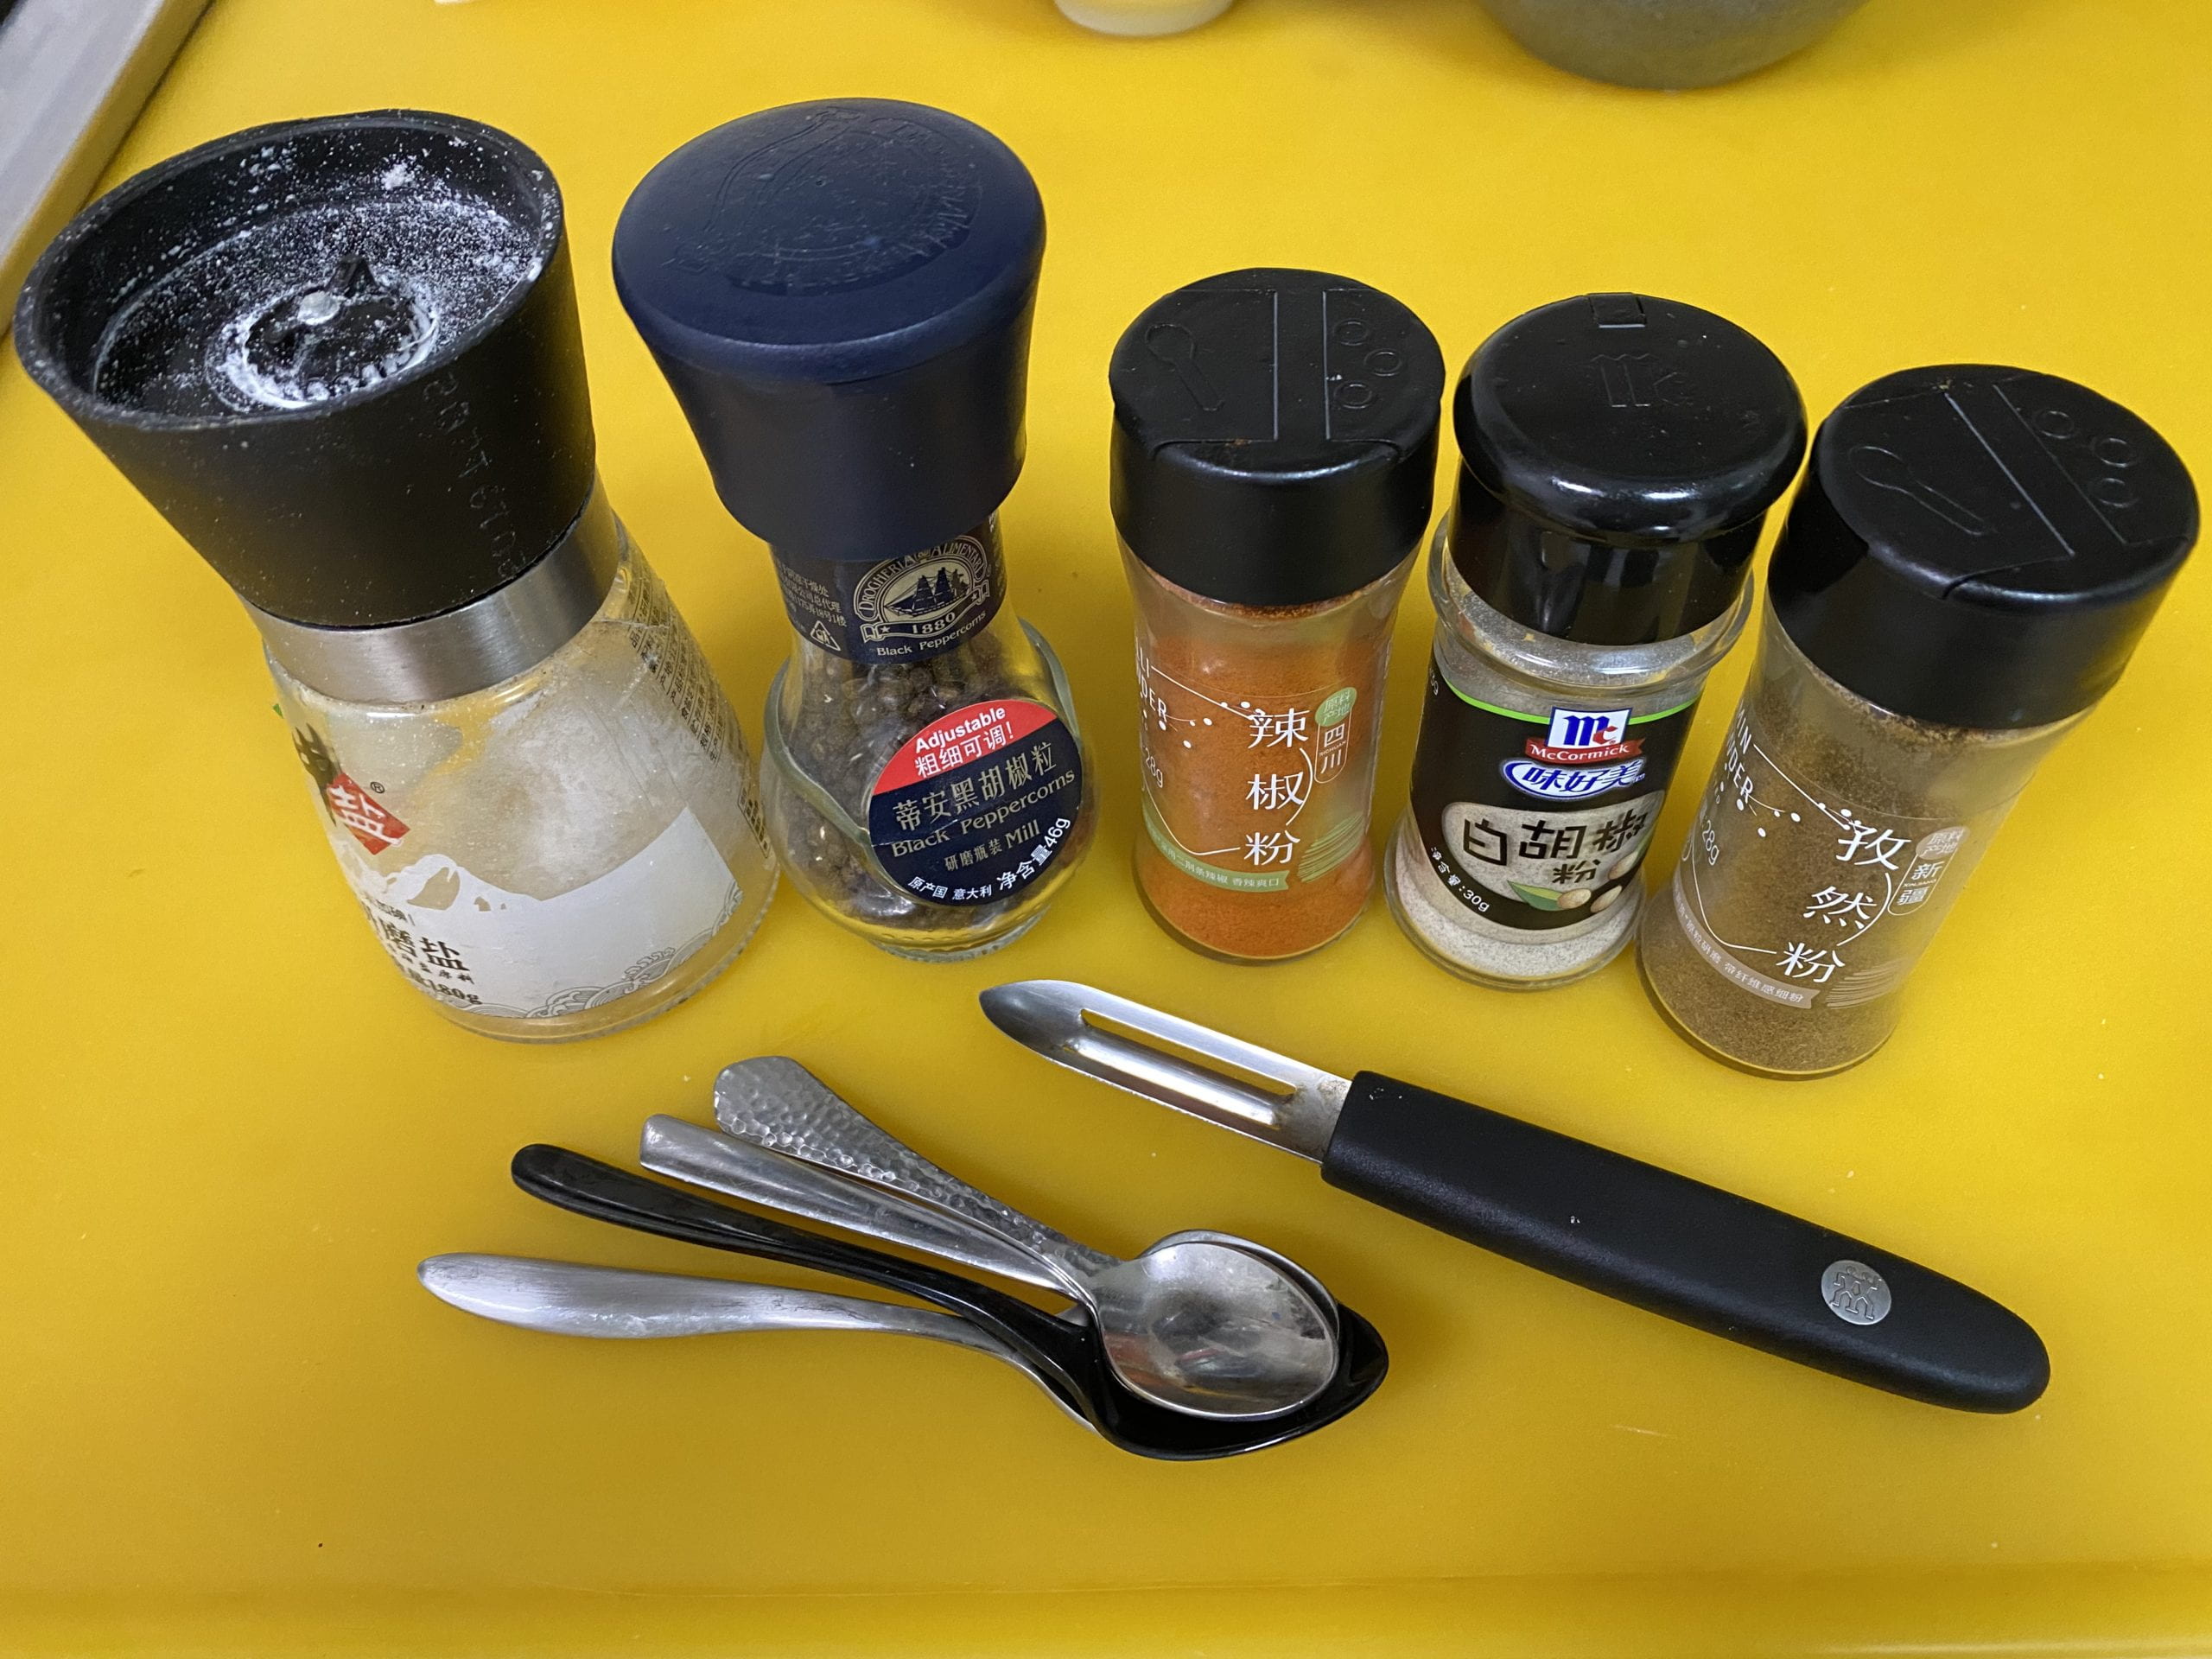
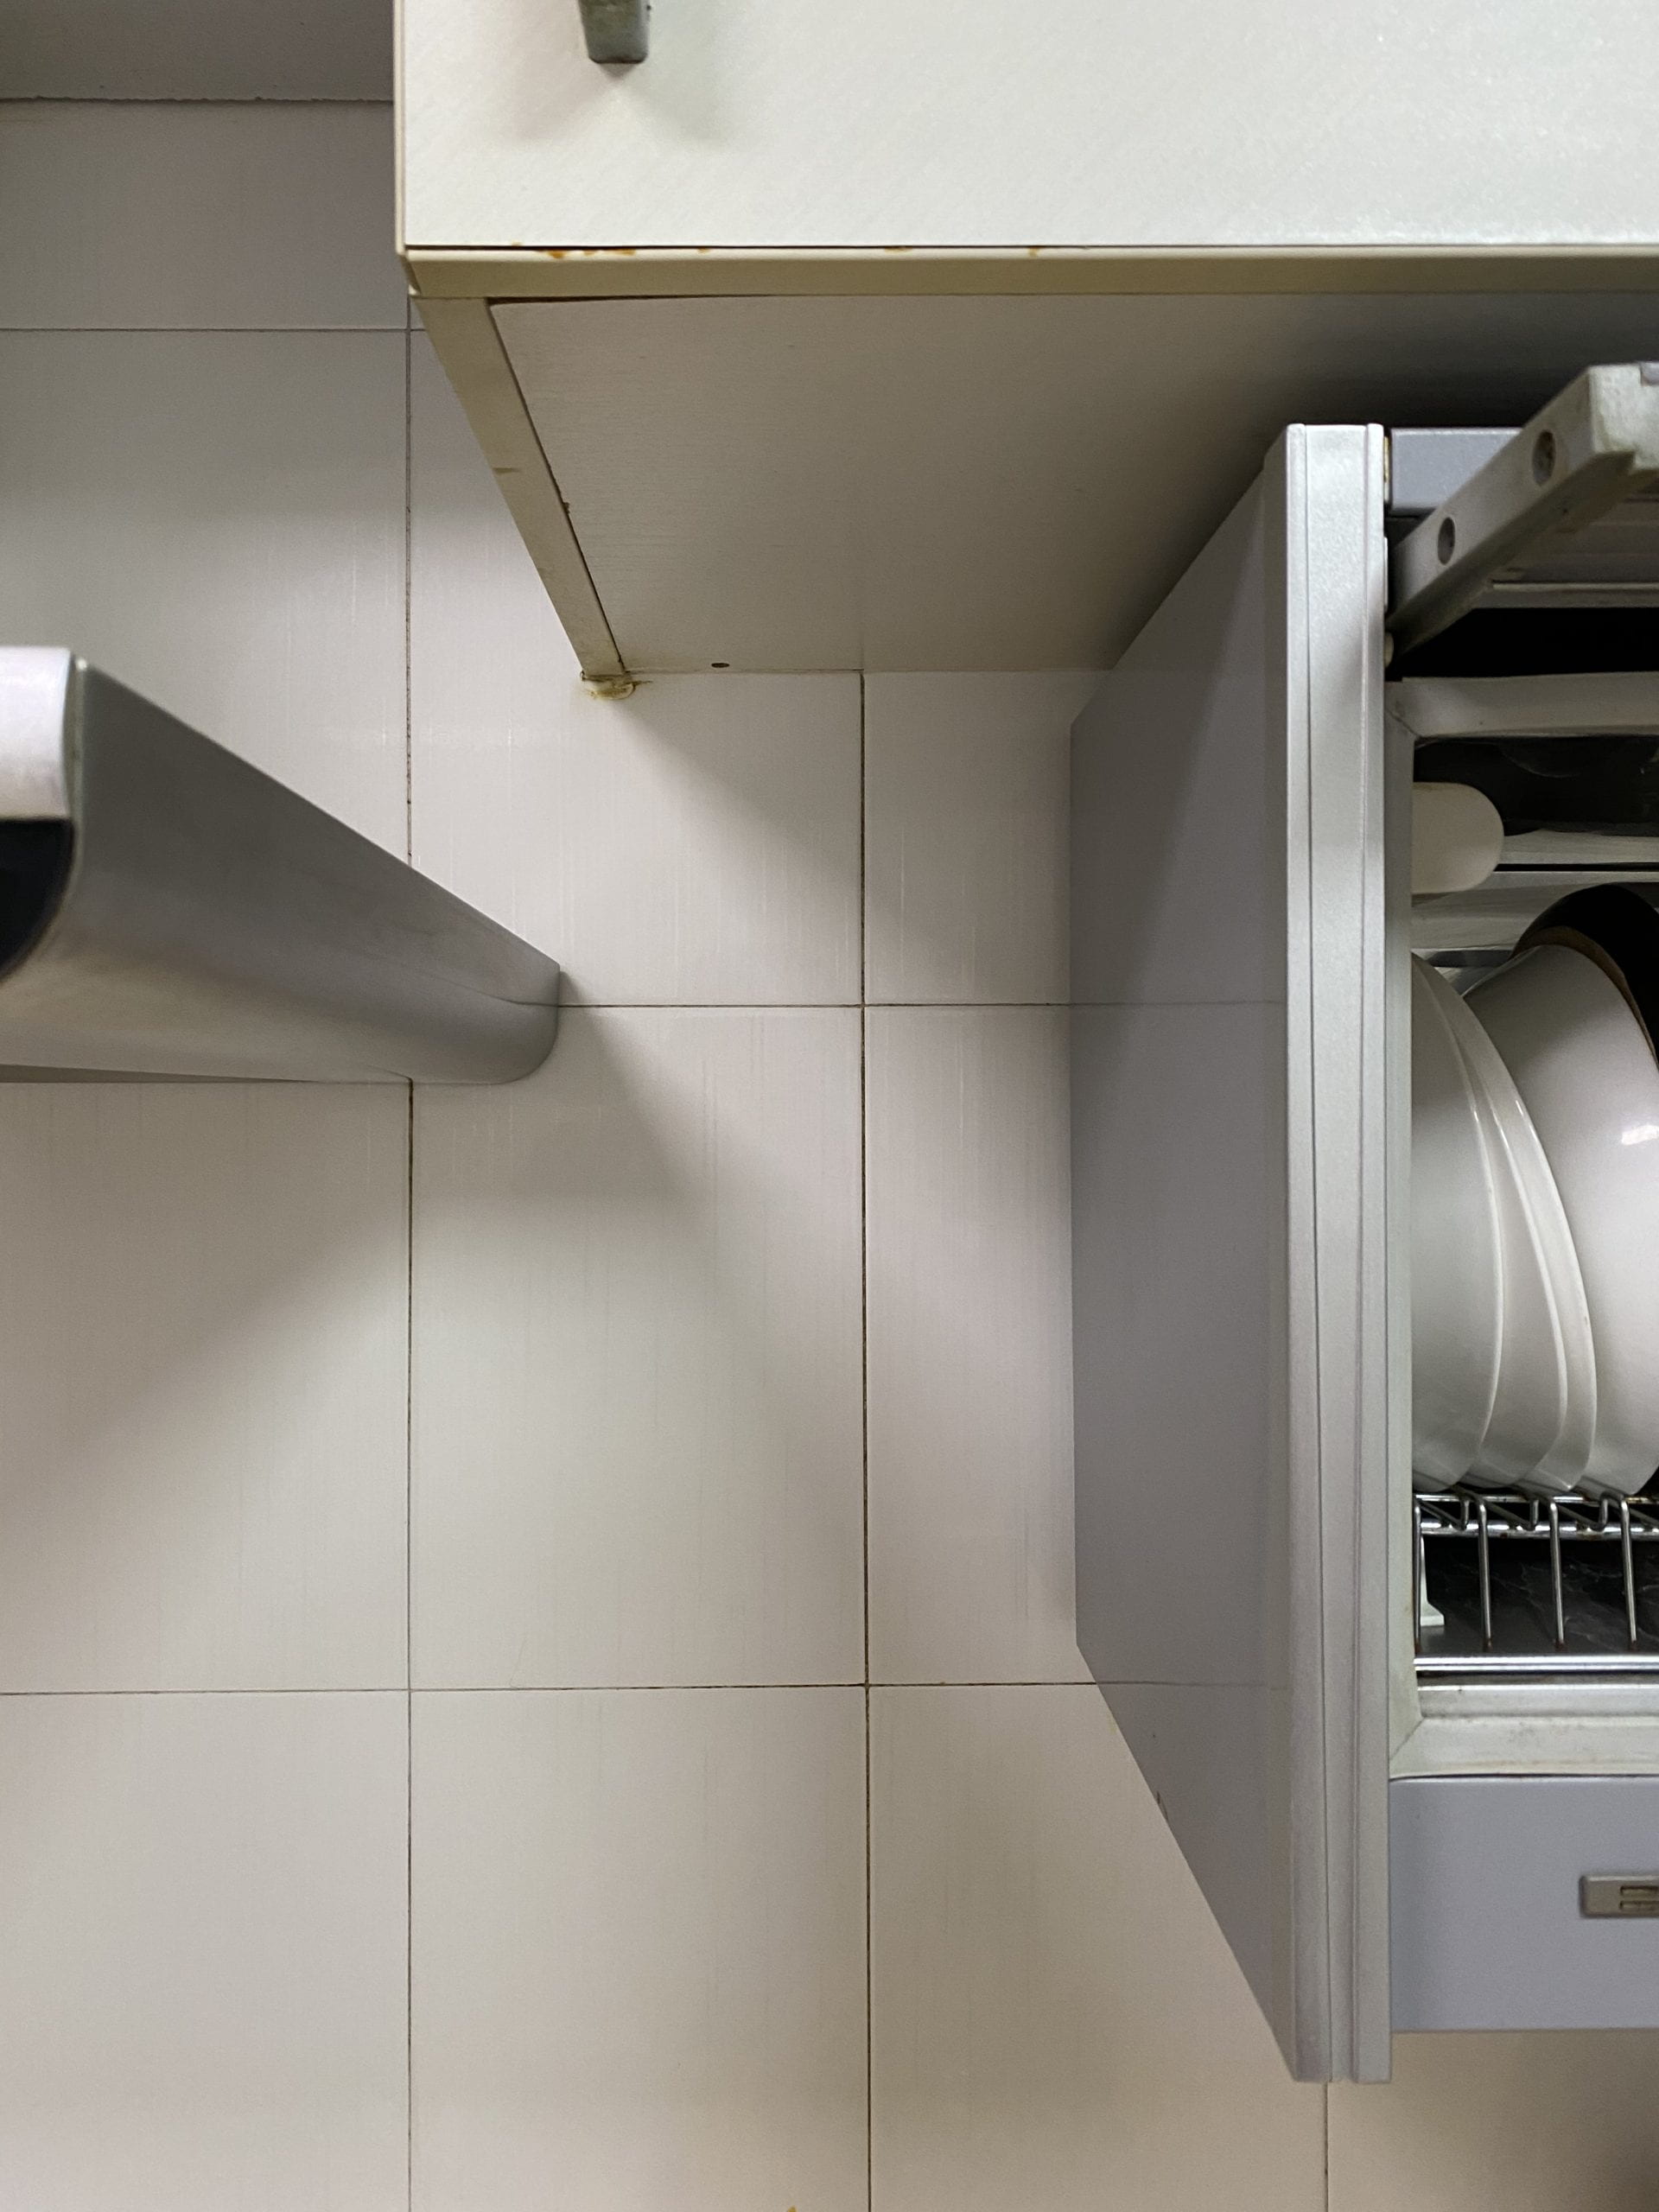
p 1, 2: the bottles of spices & the place I wanted to place the spice rack in my kitchen
Designing and Sketching:
So using a caliper I measured the dimensions of all the small bottles very presicely (which I later discovered I didn’t have to), and used that to finish the design of the cabinet. I also designed the way to hold the spoons in this stage.
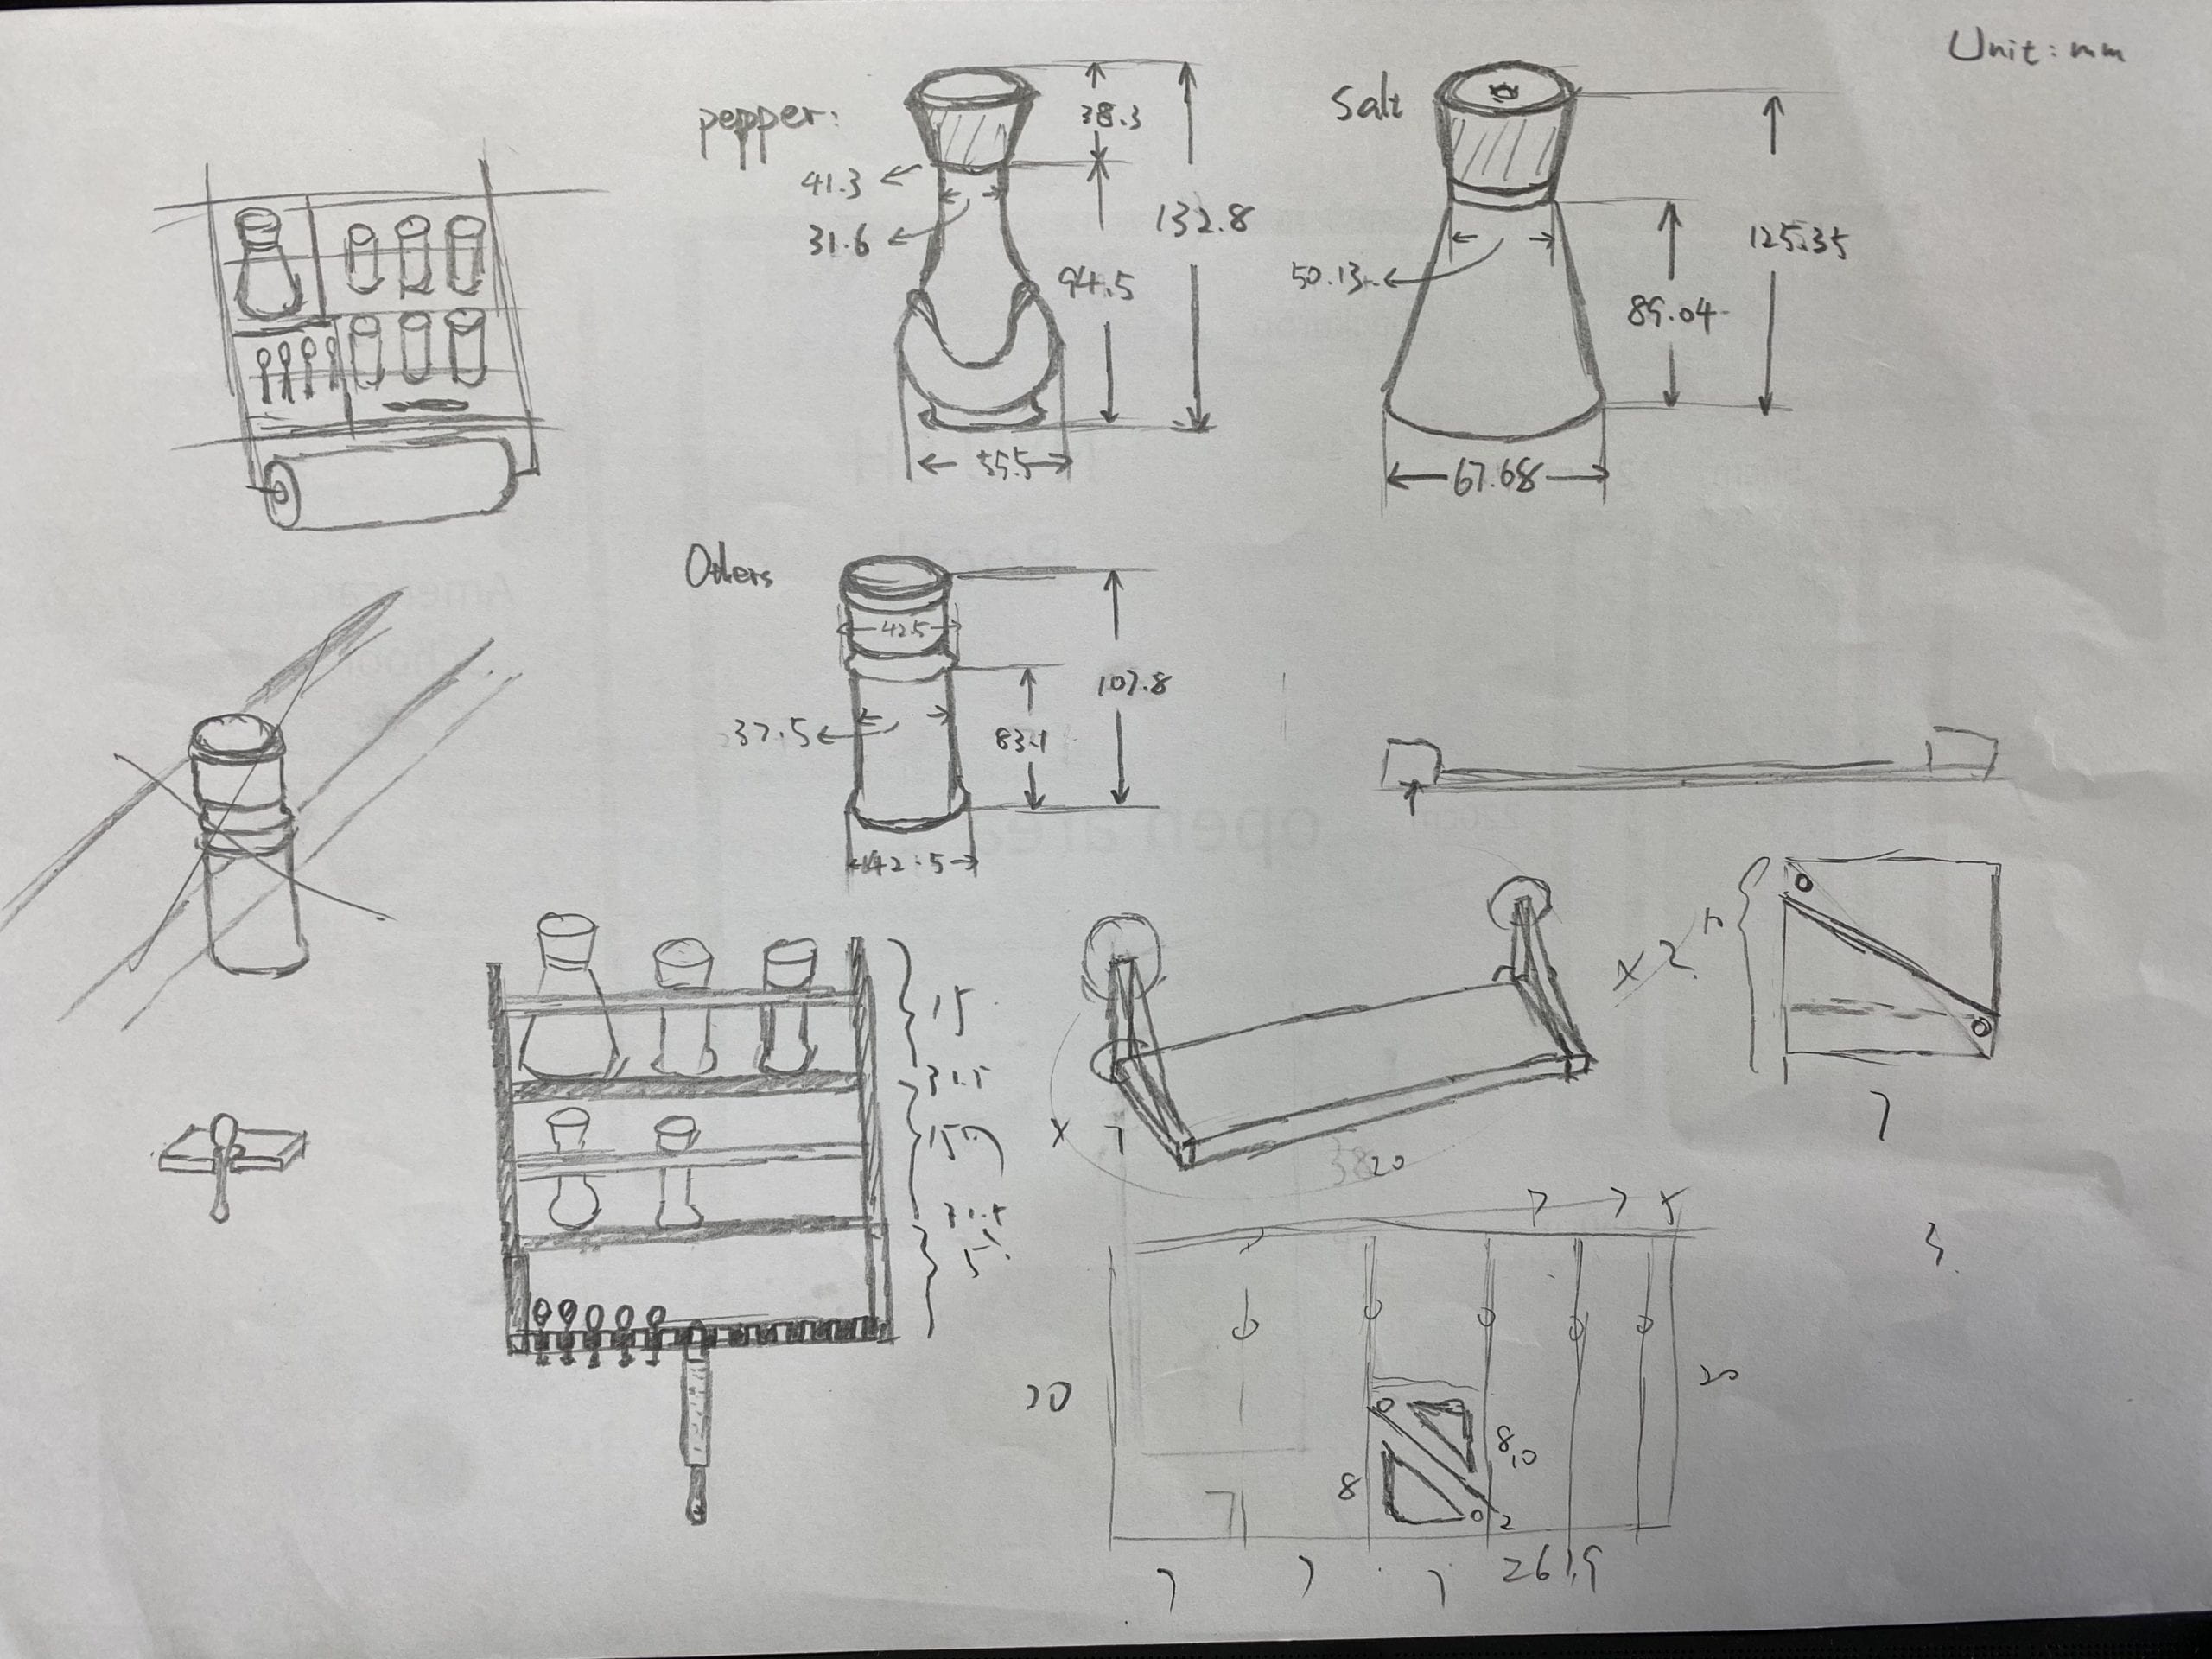
Then I tried to design the Illustrator file. Here I rtied my best to fit everything into a 40*20 board, while the gaps in the middle were all exactly 6.35mms wide. However later when Andy was modifying the file he made all the gap 15mm wide to prevent the cnc going two times on the same line……
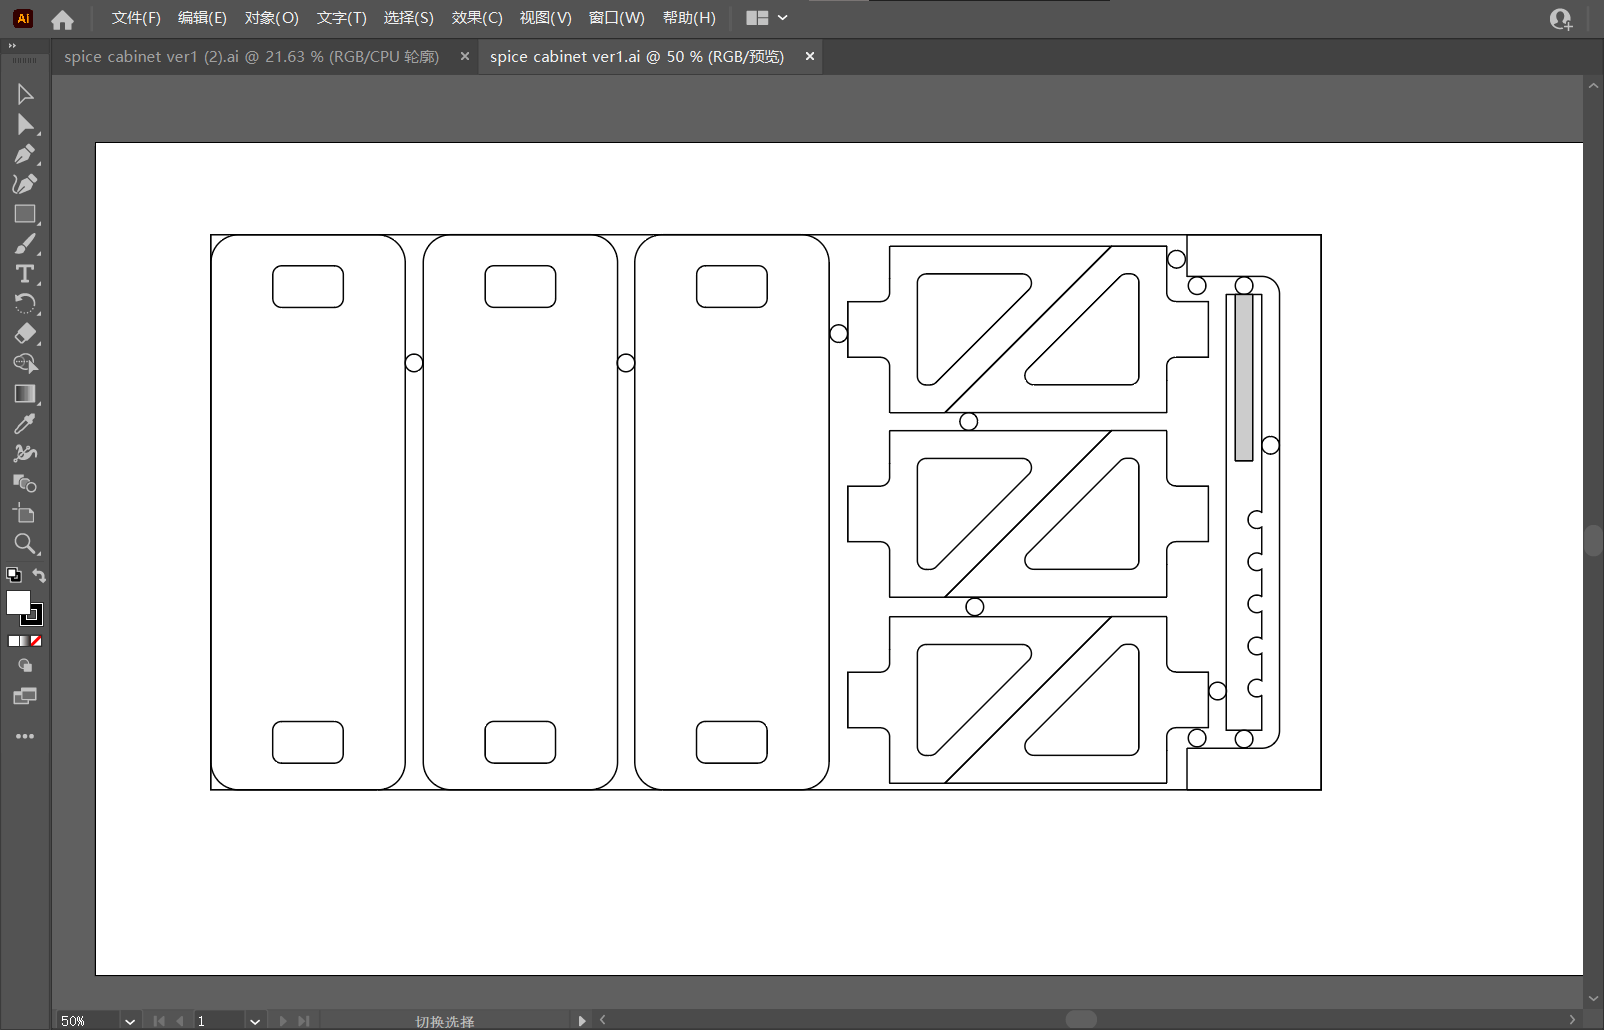
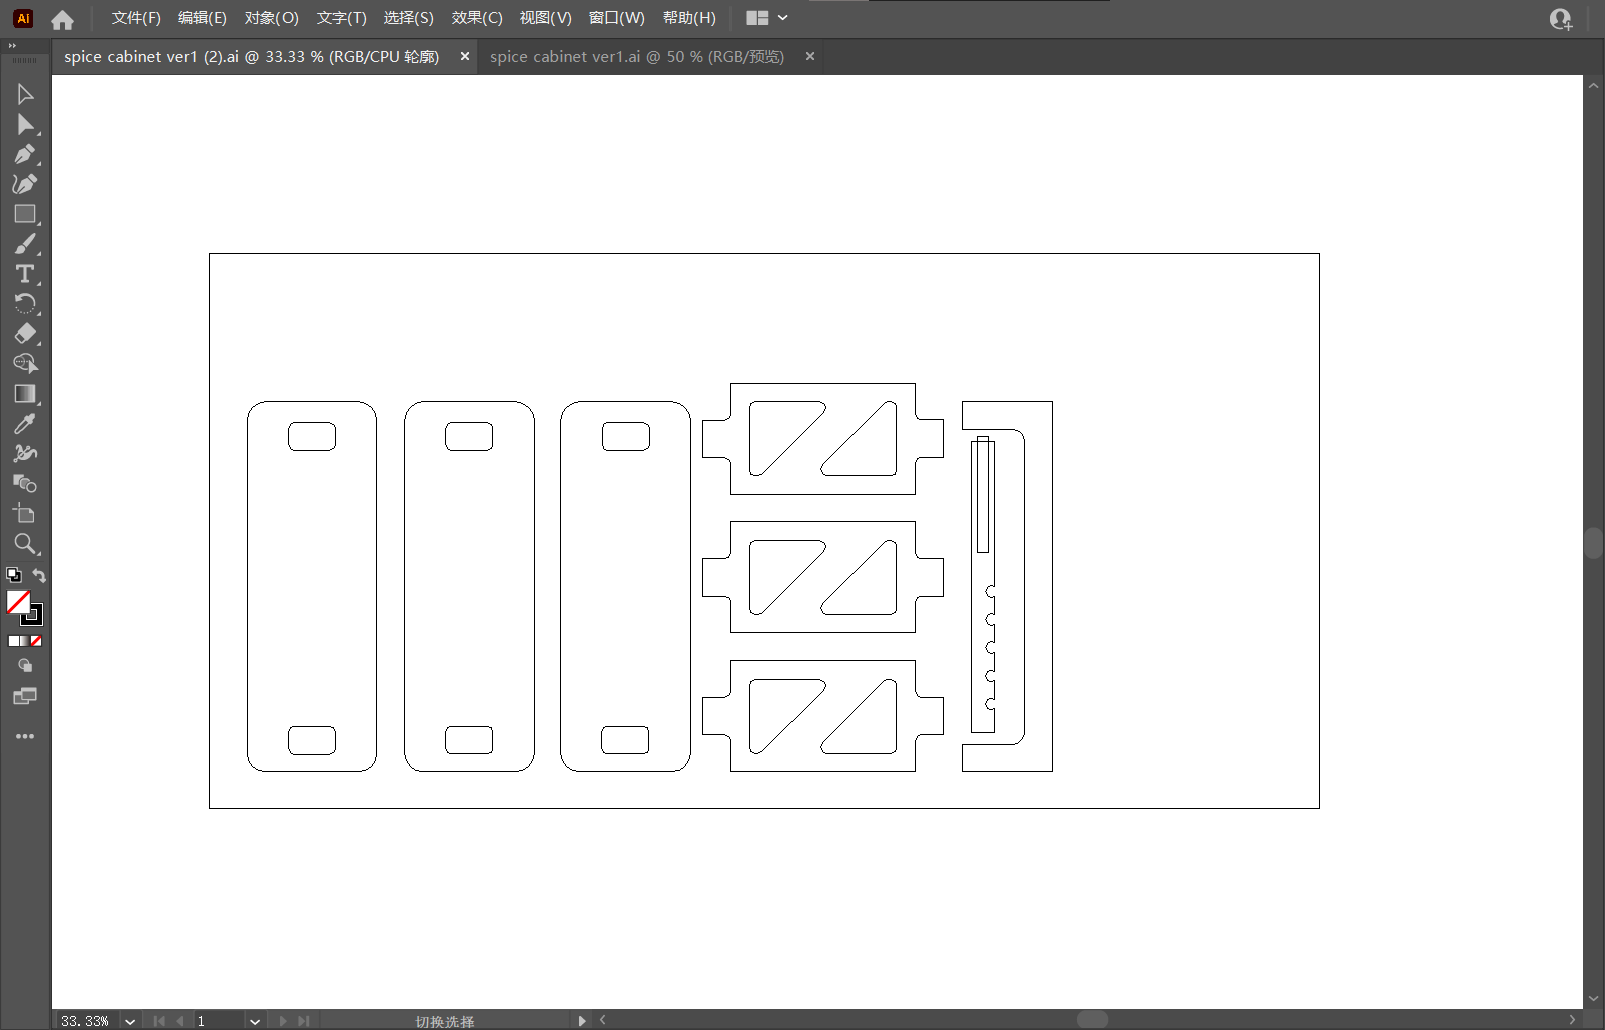
p 4, 5: before and after modifying.
Fabricating:
So I CNCed it, and a few things I thought were important: firstly the thickness of the board should be noted before anything because some of us were using 15mm while others were using 18mm, this changes the setting of the cnc so its important to take note of that before everything — even before designing; secondly, blue tape is usefull in preventing tearing.
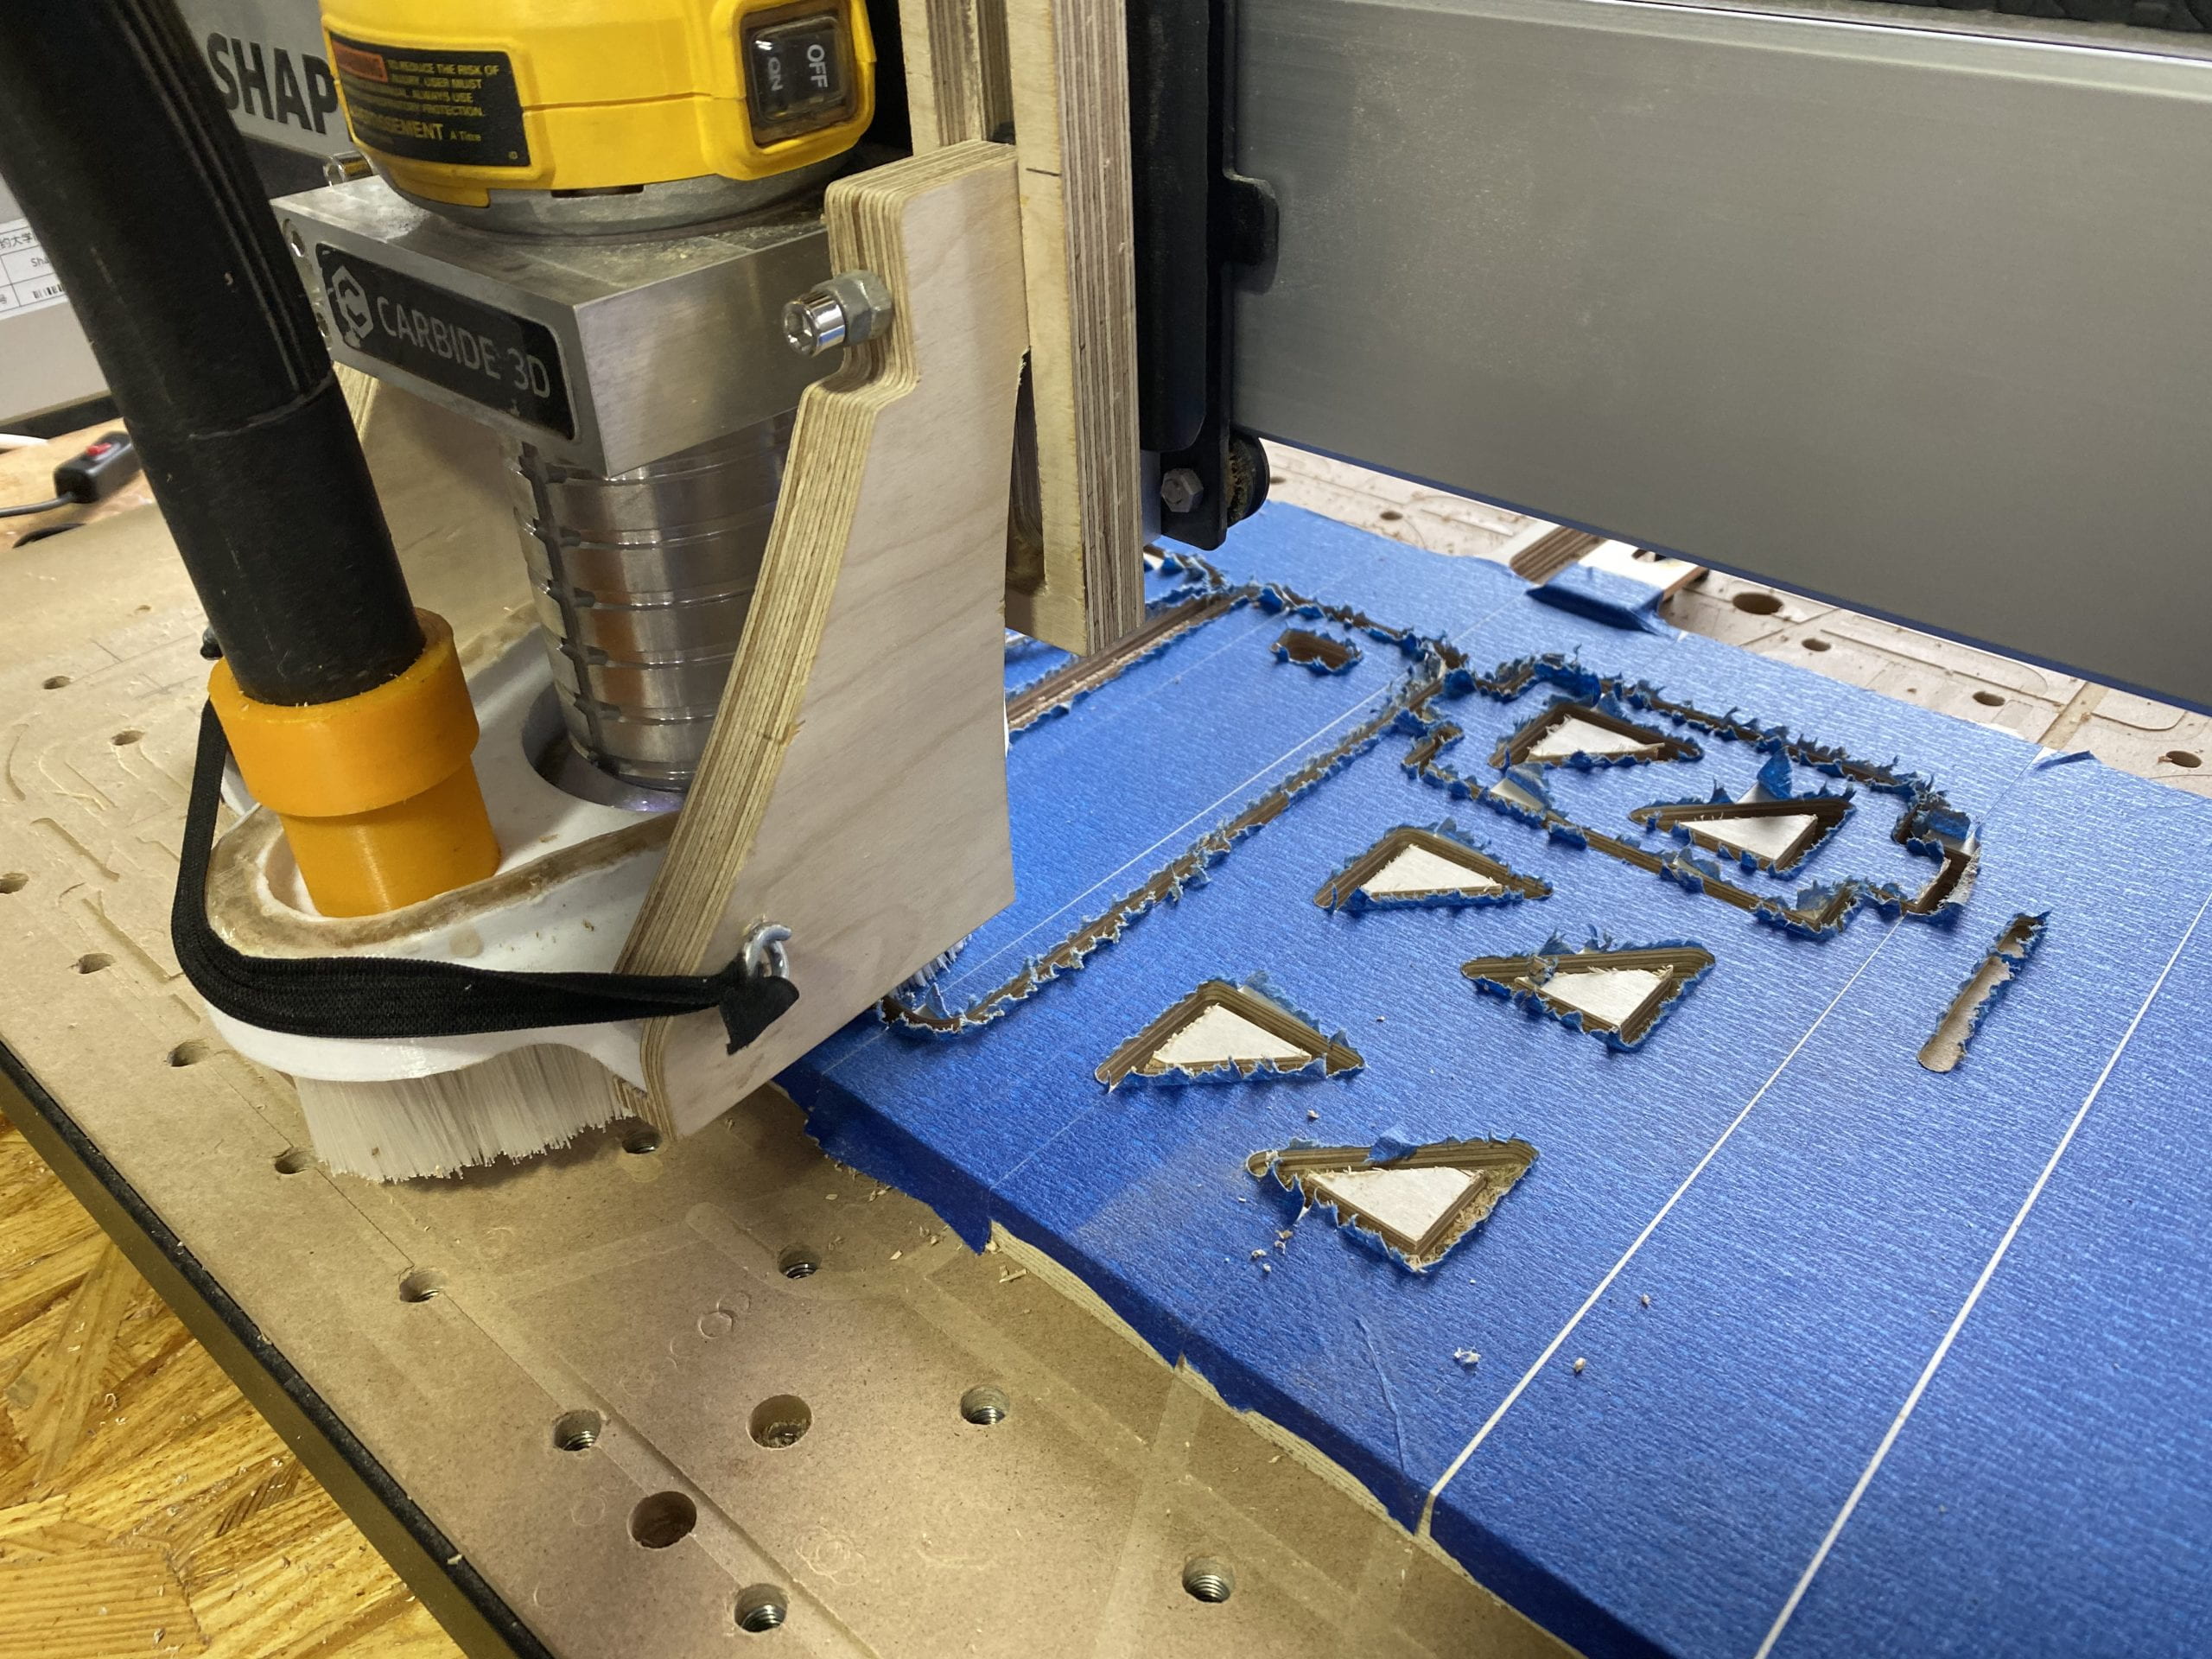
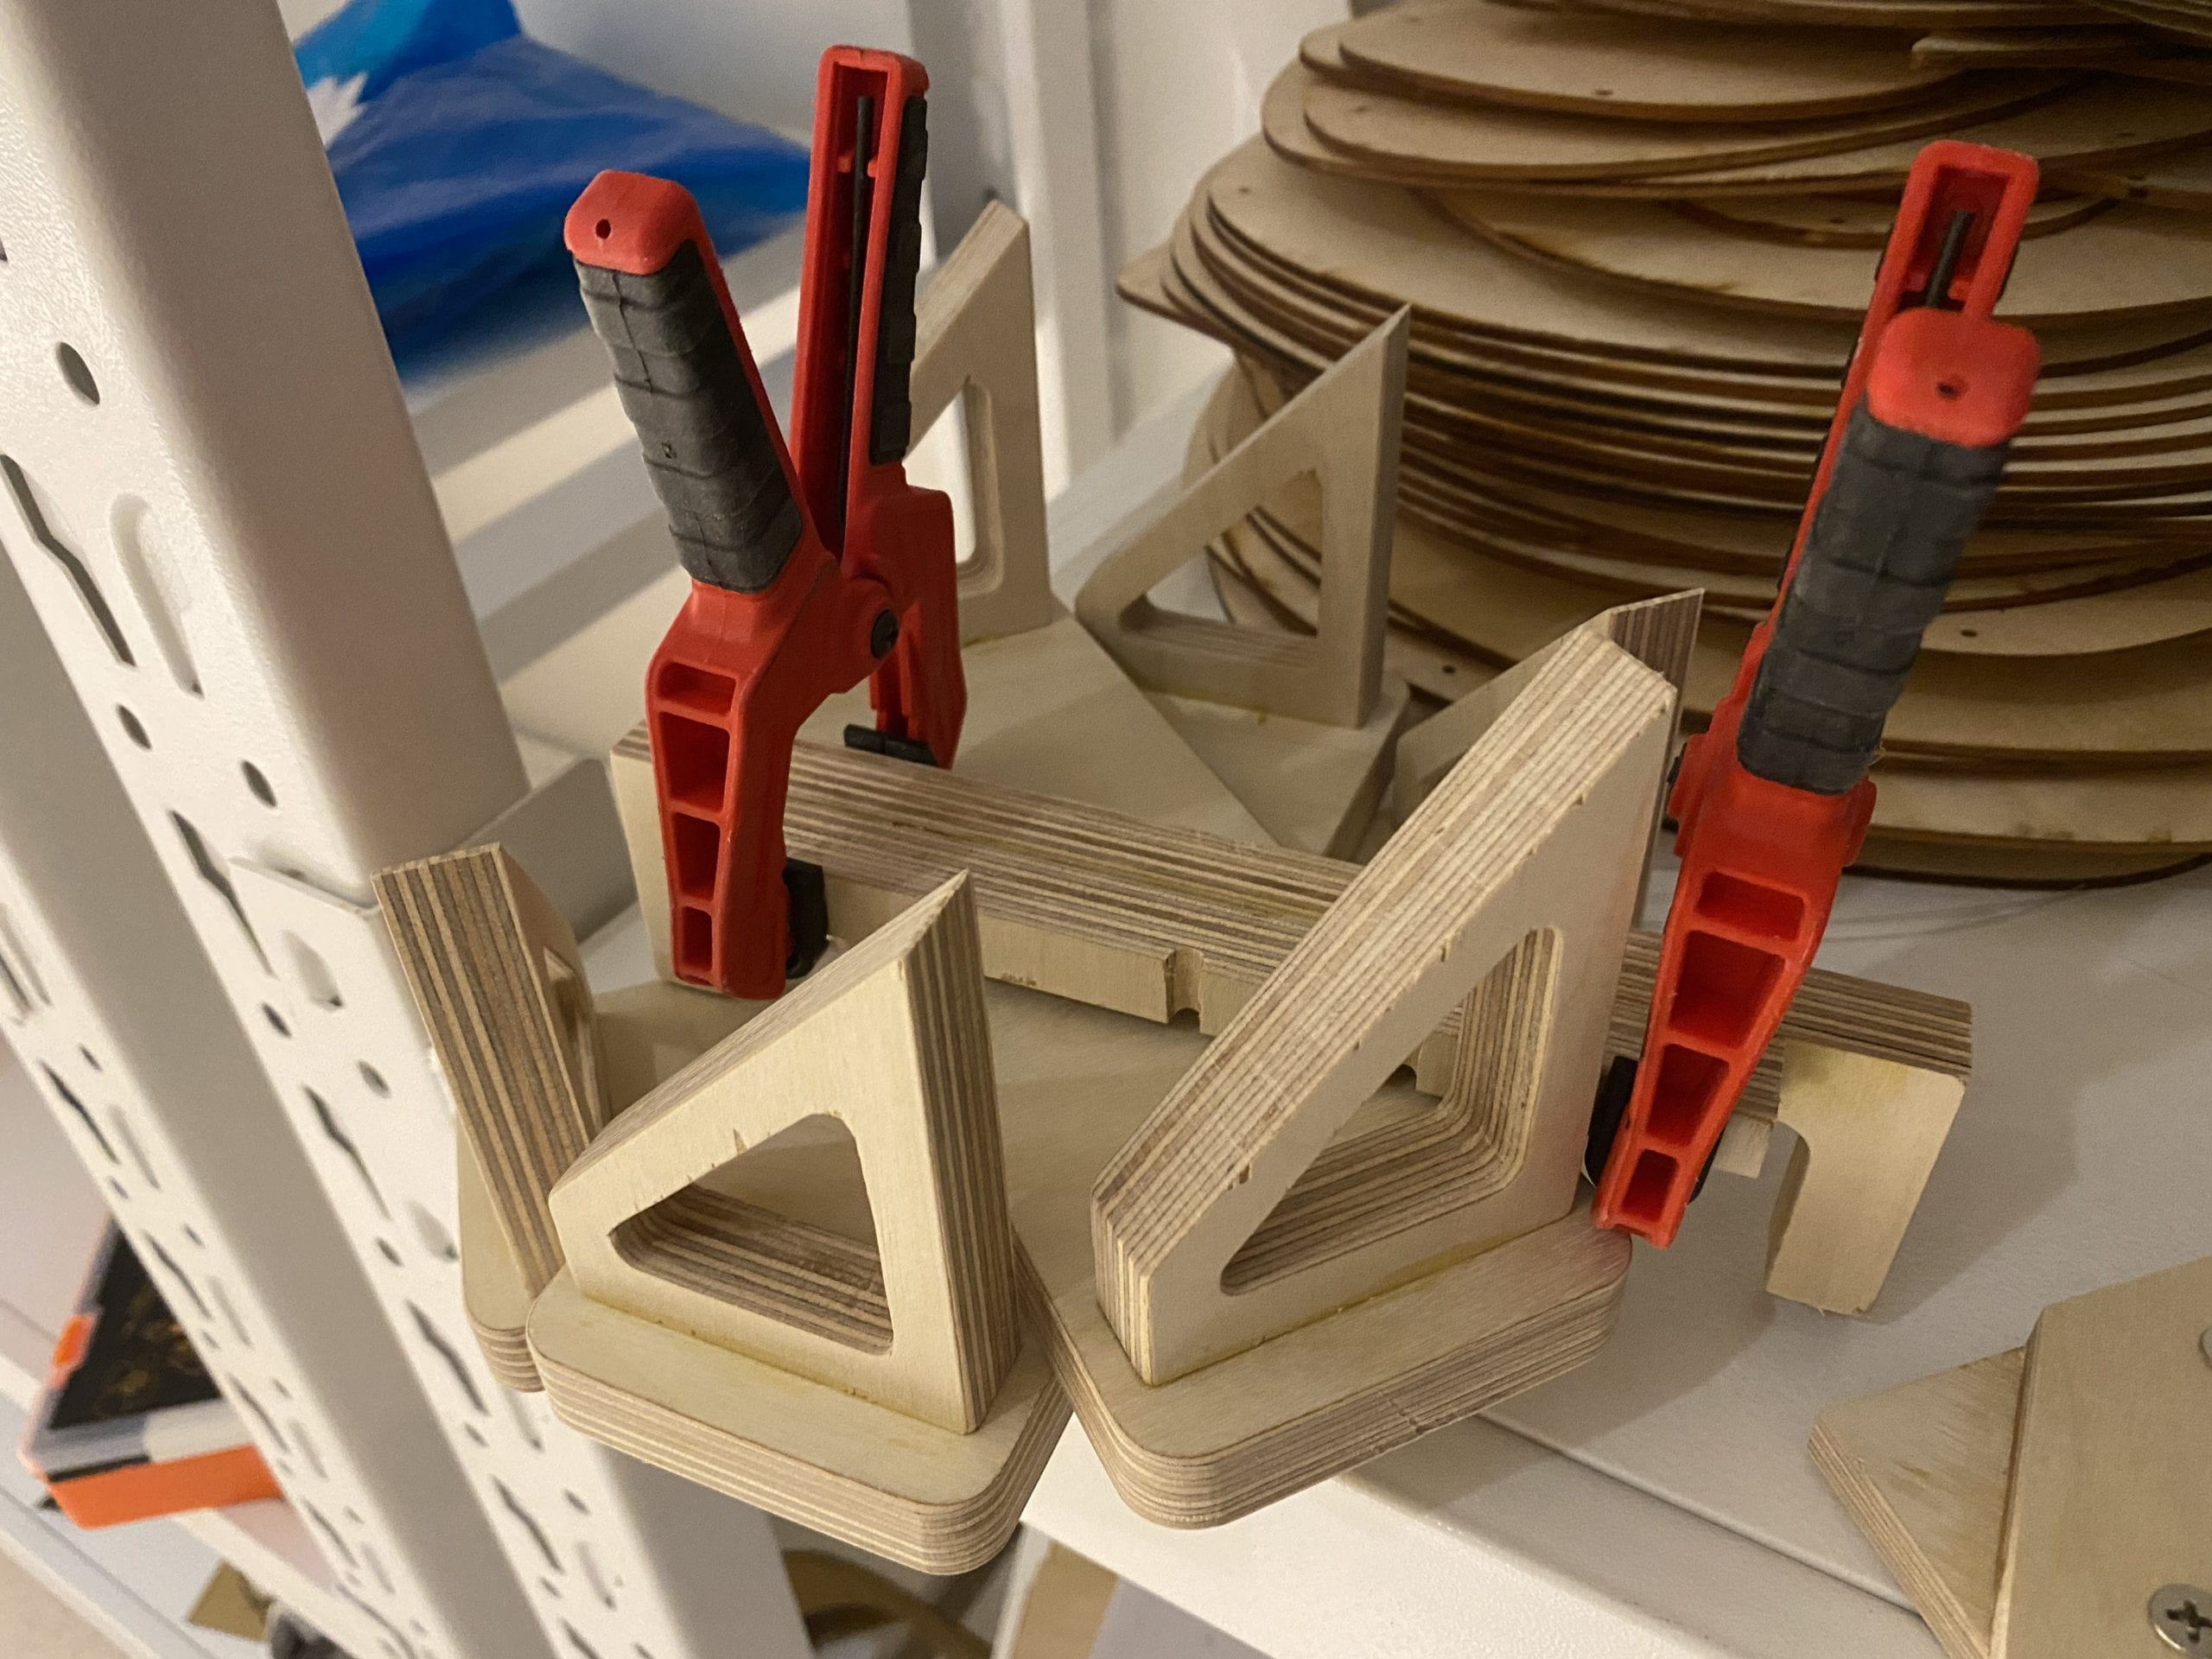
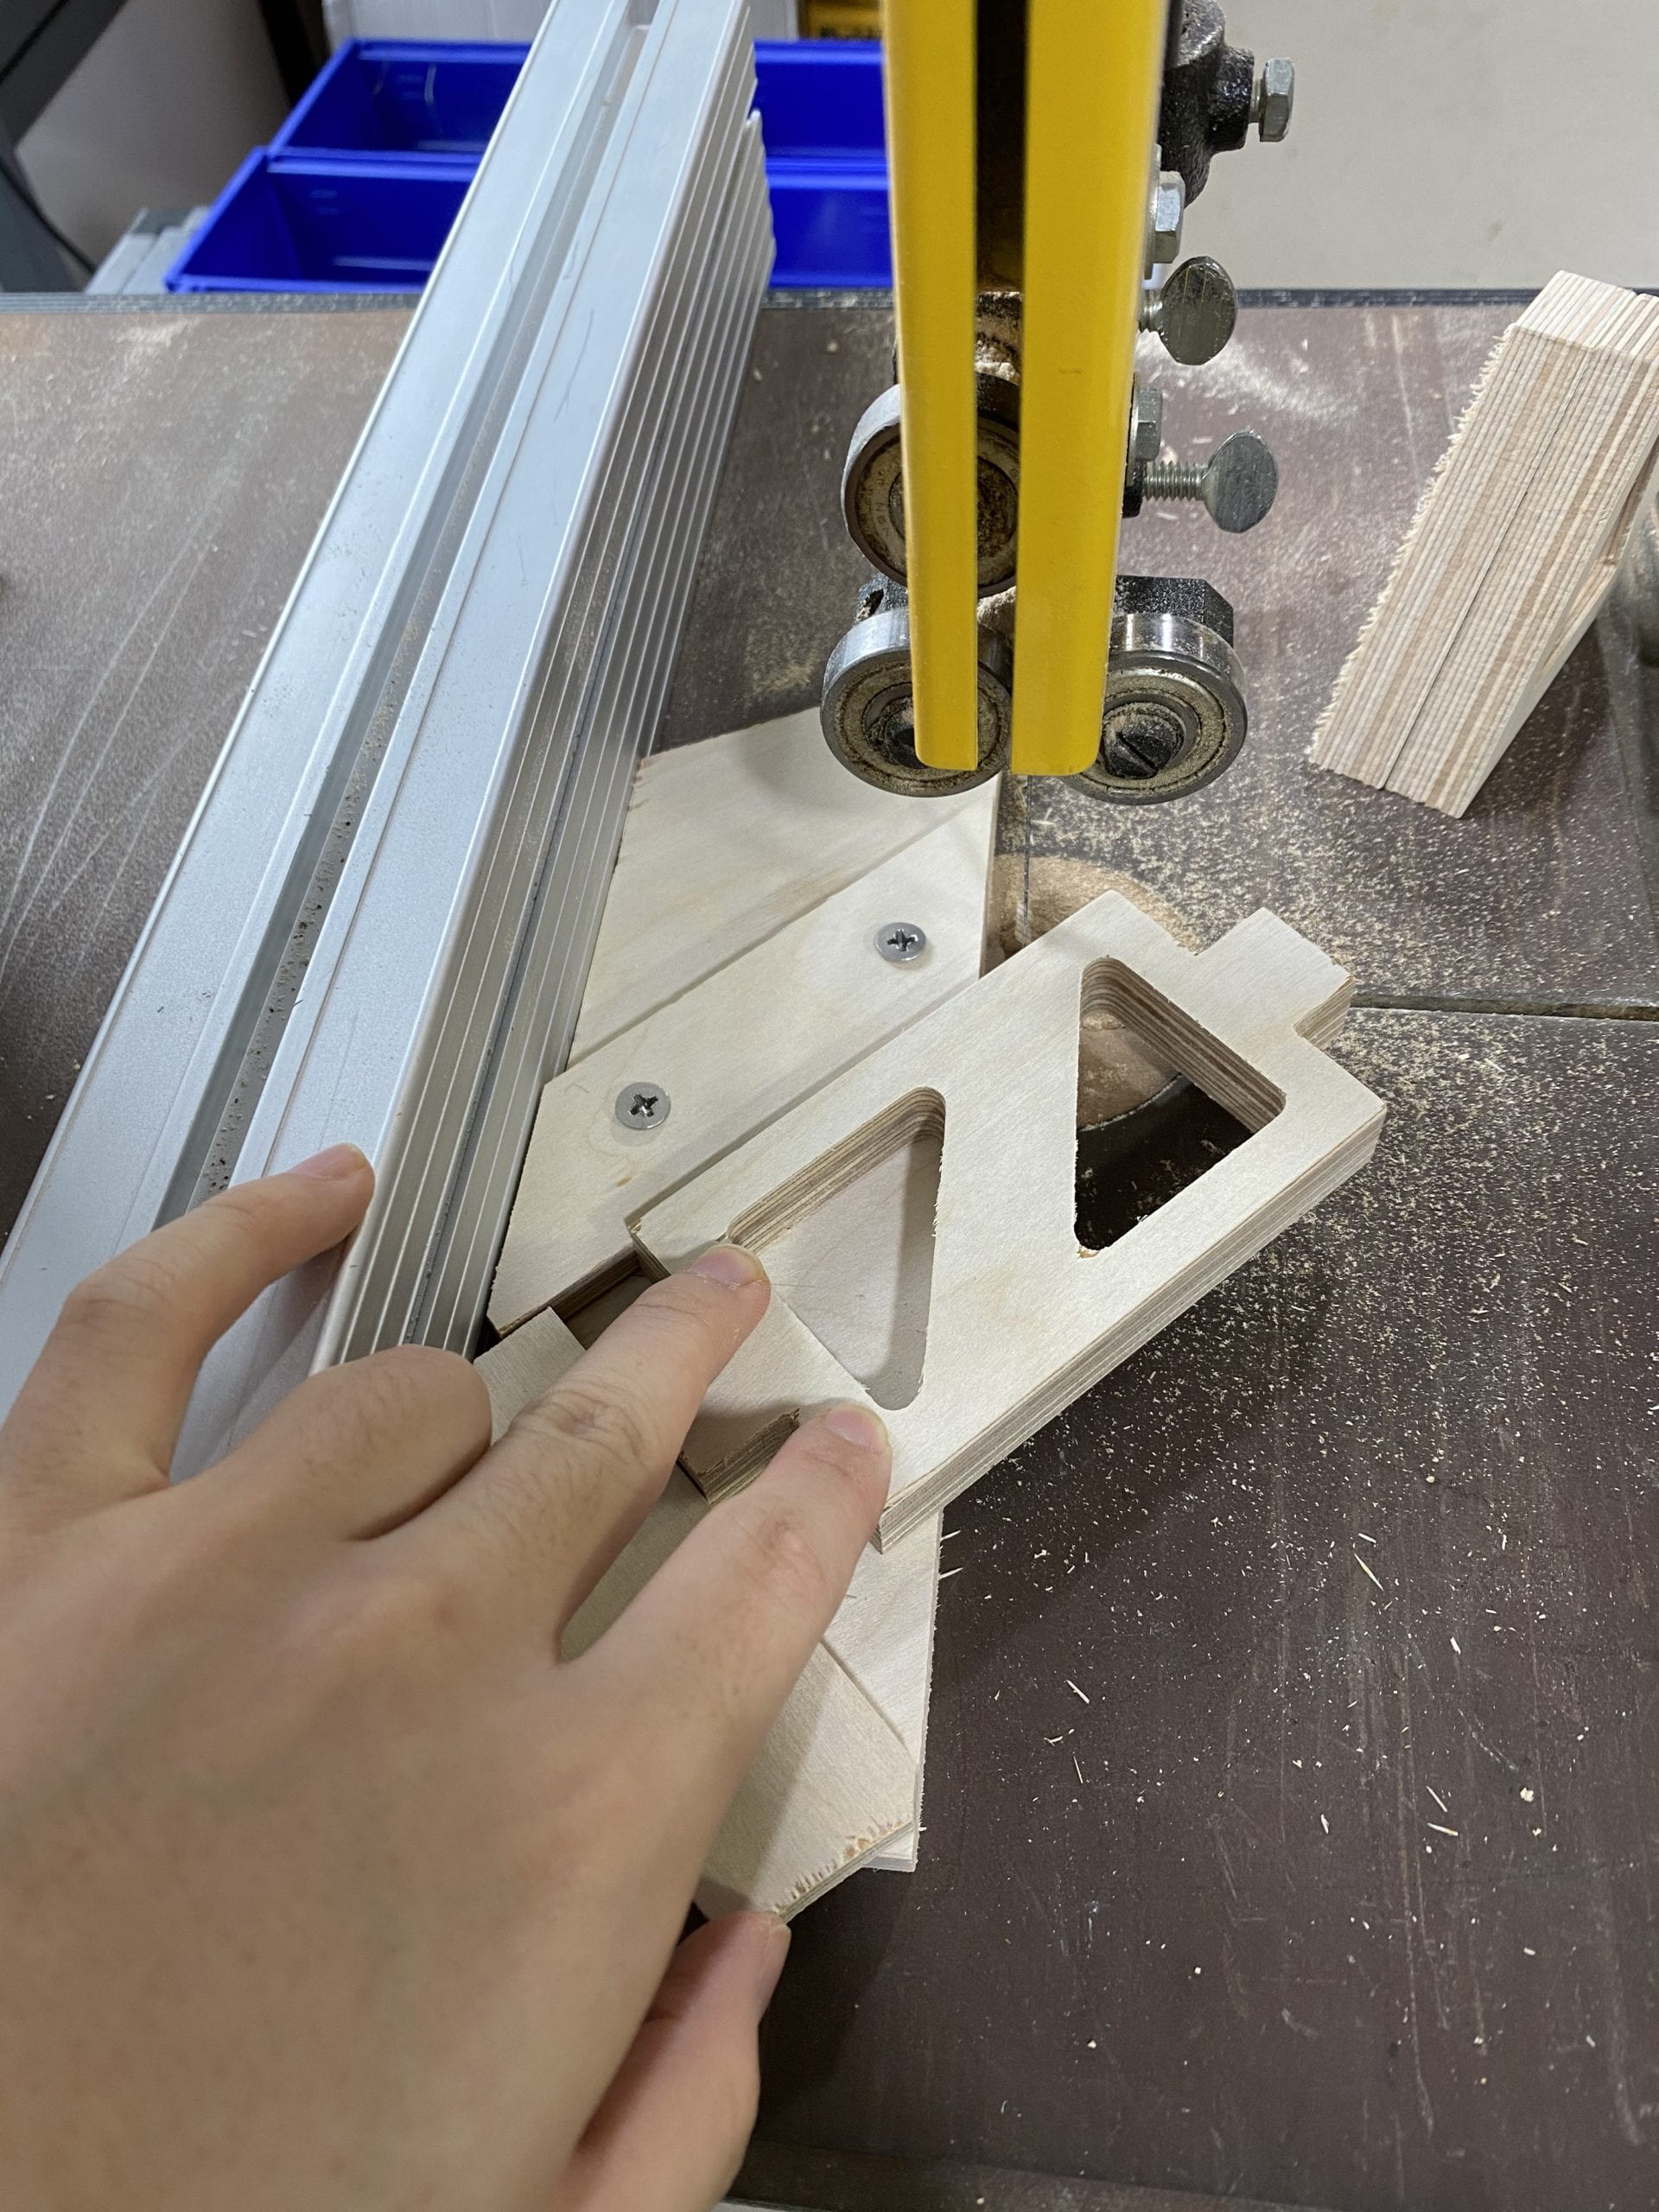
technical highlights: I made a quick jig for cutting the 45-degree angle on the side pieces, which made the process a lot quicker and more precise.
Sanding and finishing:
to be done……
part 1: the fabrication process:
0. researching and sketching:
the original title of the project is cutting board so I thought that it would be fun to make a cutting board that looks like it can cut stuff. So I found this image on pinterest which is a cleaver-shaped food platter. (I wasn’t able to find the original image I was referencing to originally but here is a similar one also on pinterest)

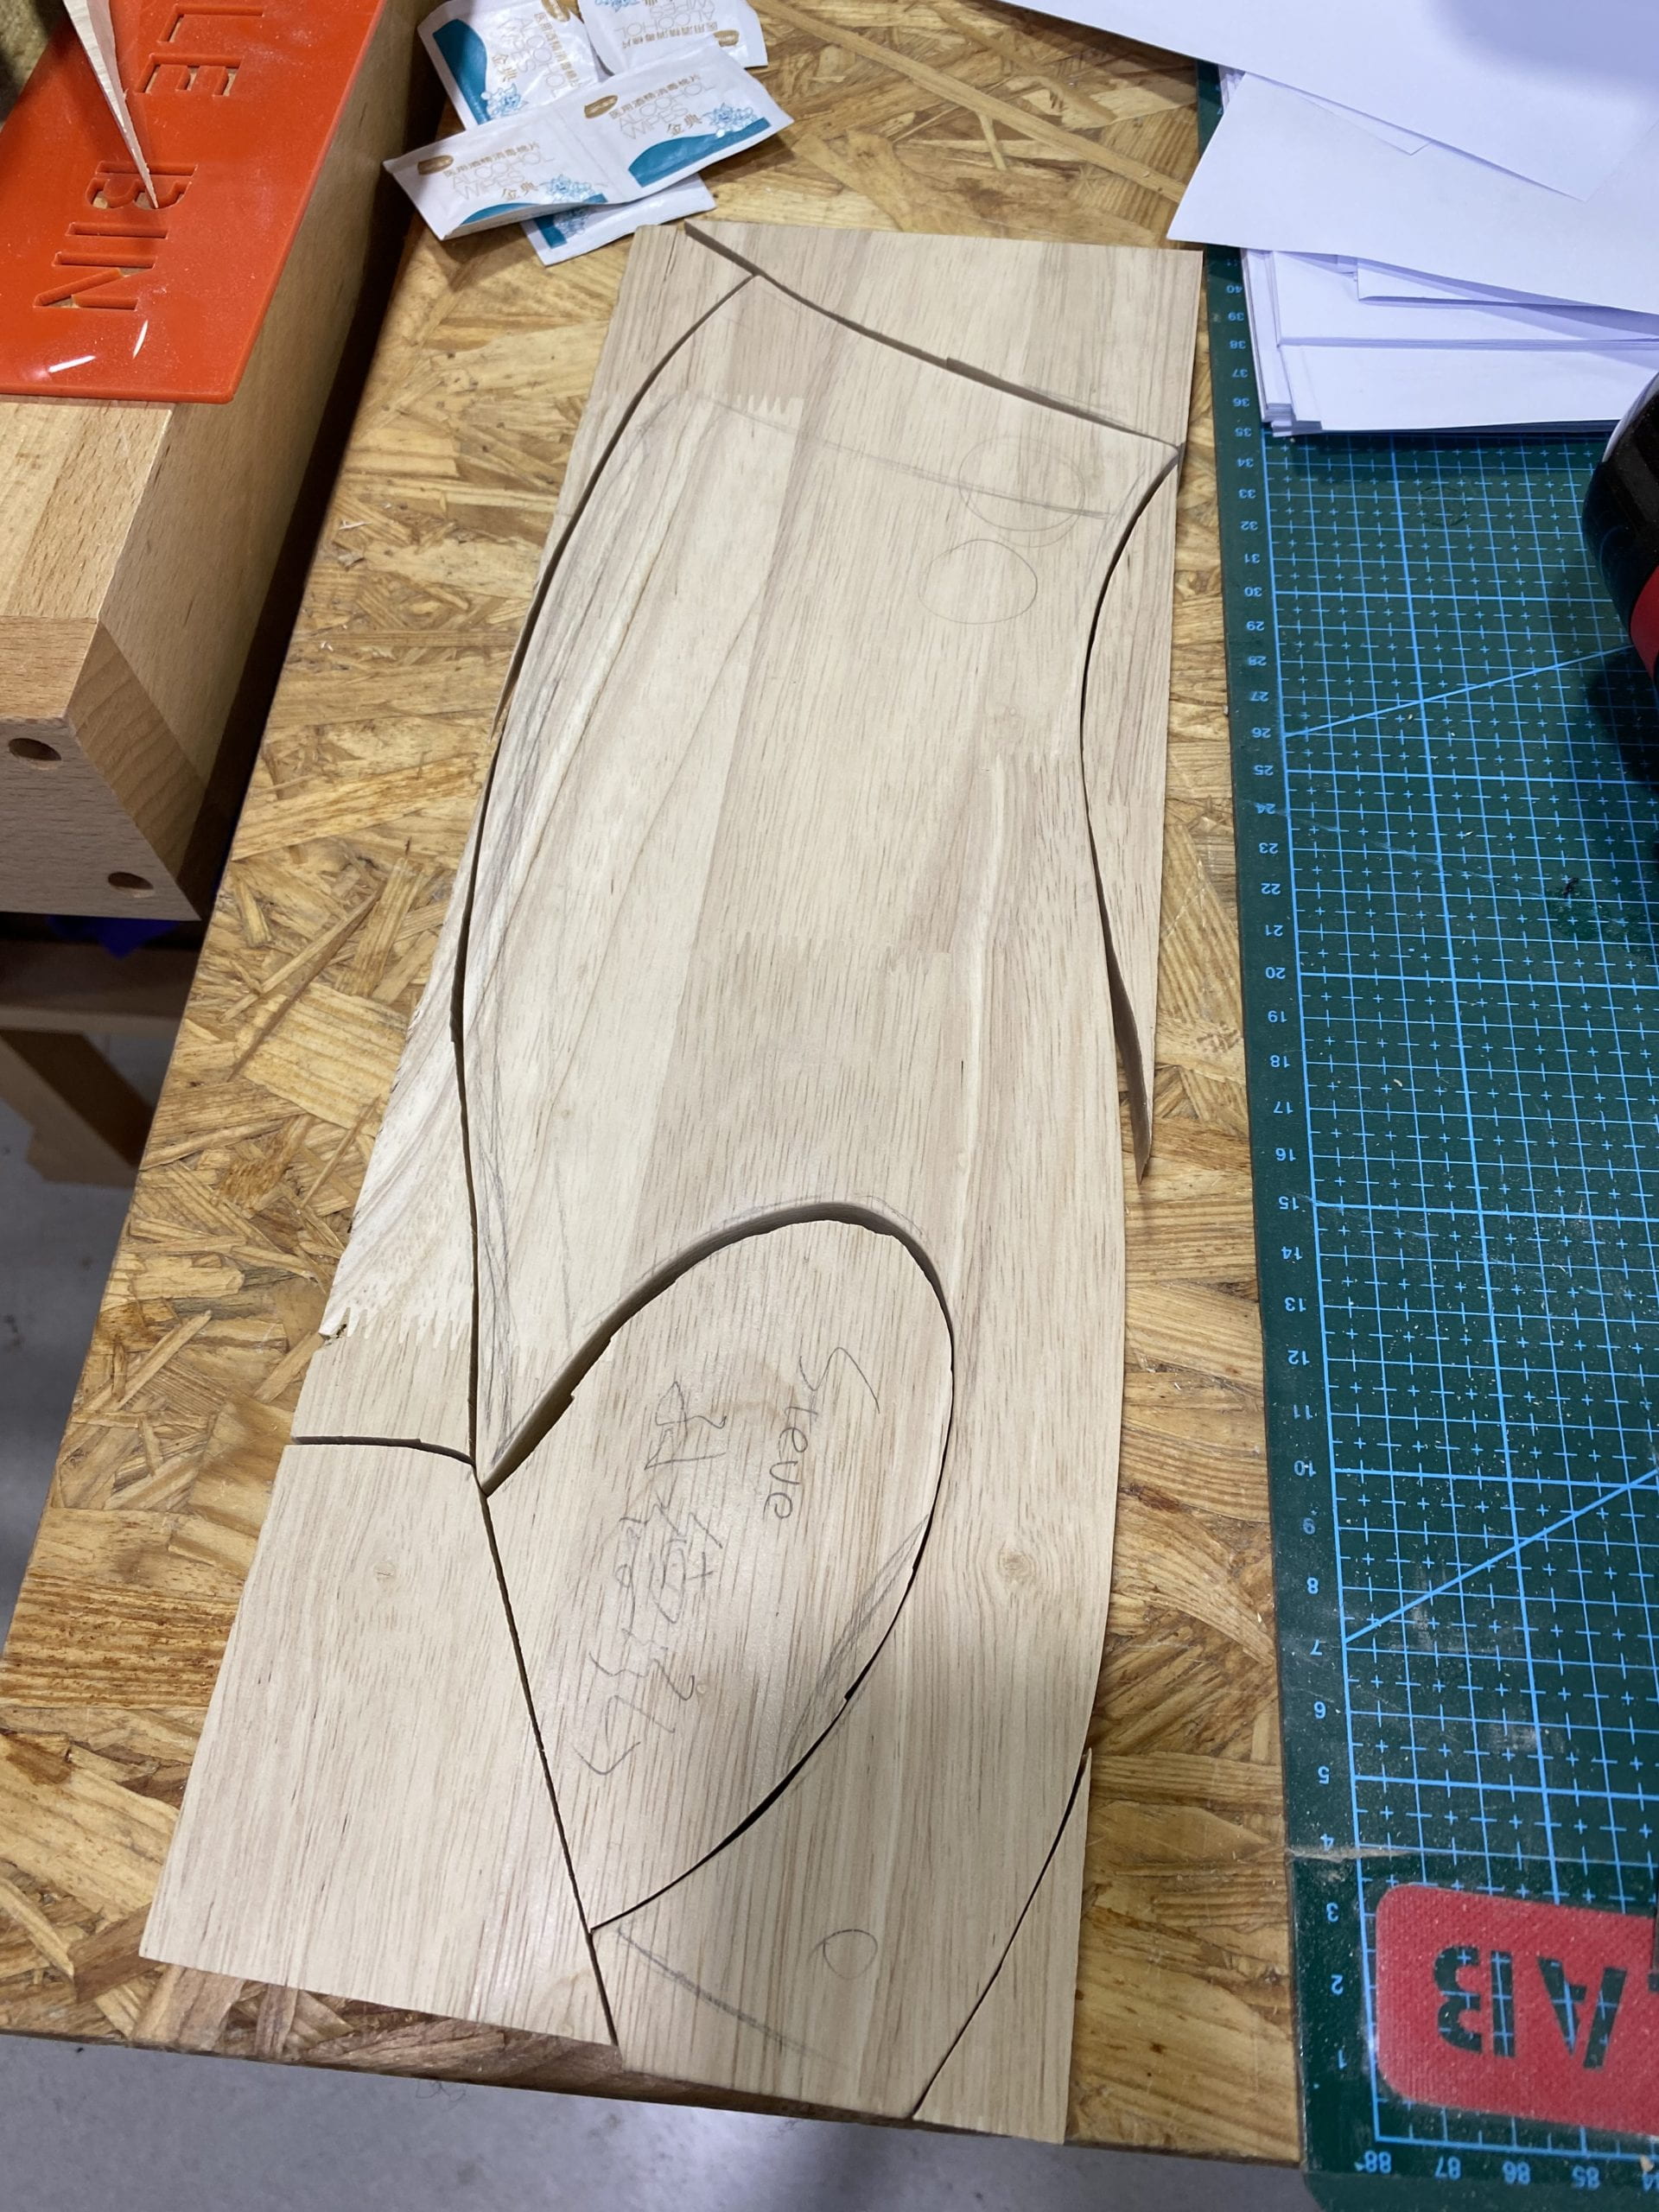
the band saw was used and its thinner blade gave me a bit more control over cutting corners and sharper turns.
luckily I didn’t have any inner holes to cut otherwise I would have to use the string saw (the one with the super-thin detachable blade with which you could cut inside a shape) which I do not like to use because it is very slow and pretty hard to control.
I chose the shape and design for it is fun to hold and play with while having enough area to actually hold a substantial amount of things on it. Also with the two holes, it is easy to be hung on walls thus easy to store.
2. drilling and sanding:
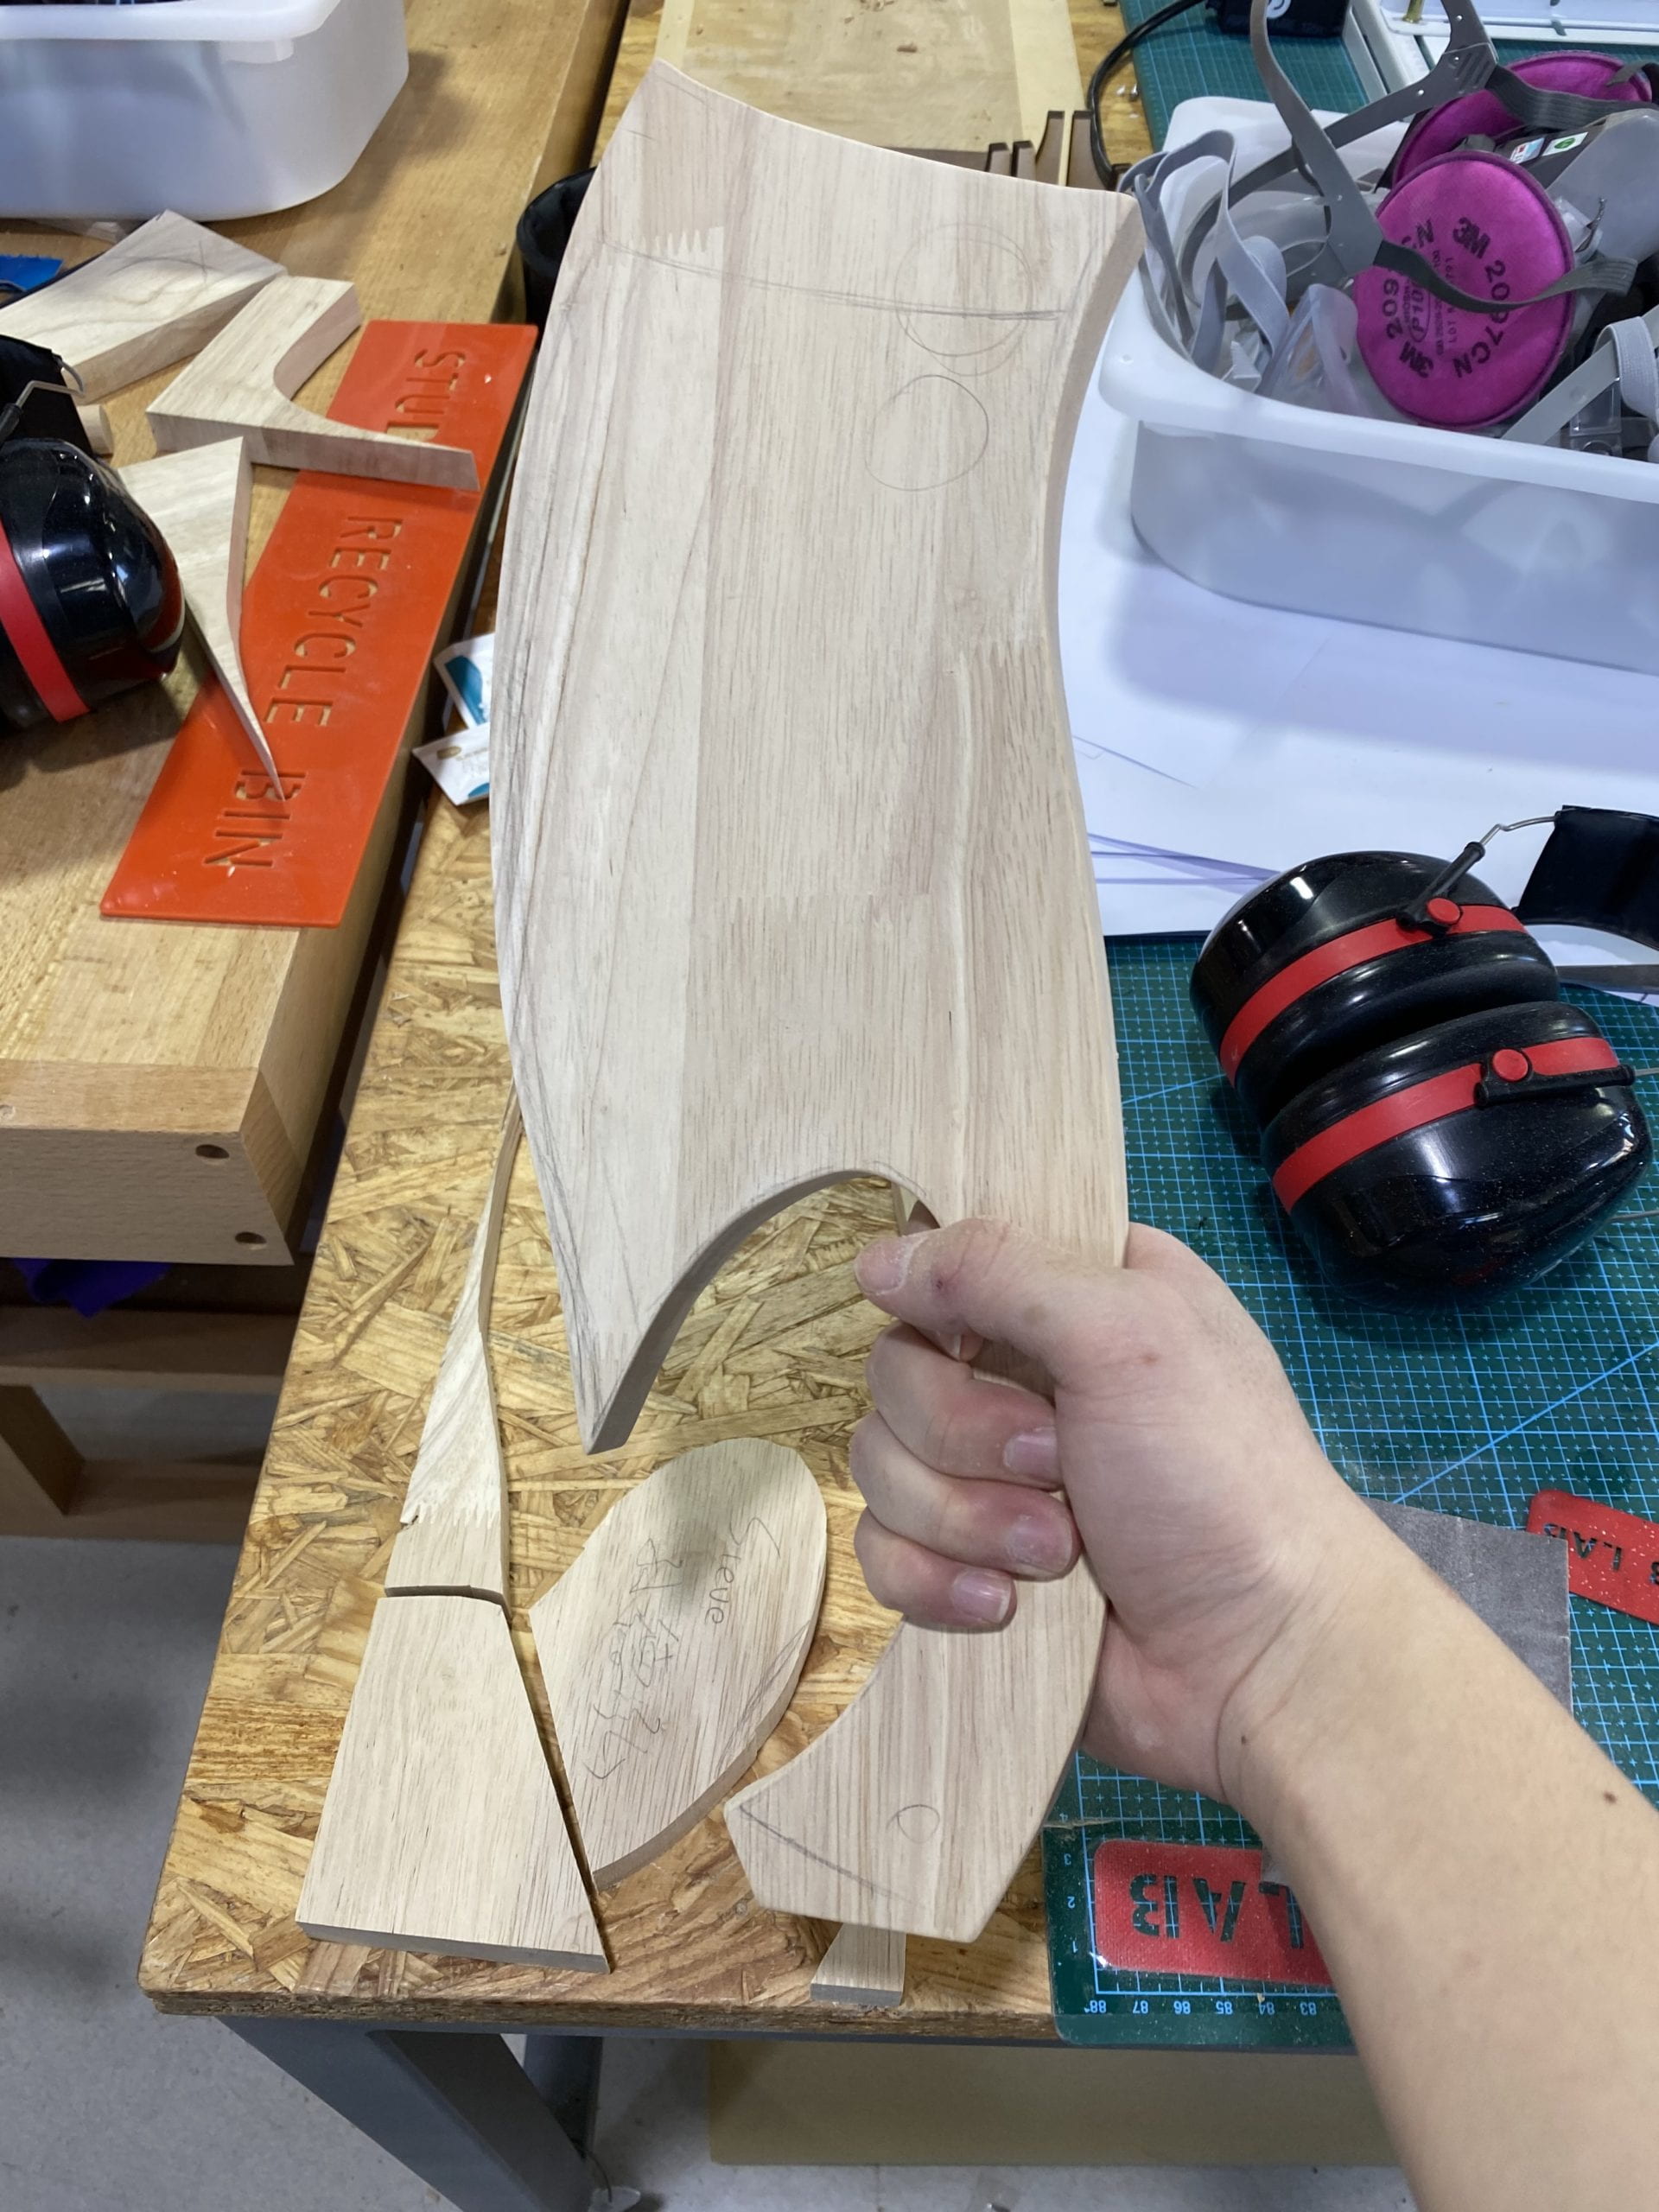
I drilled the two holes using the drill press and the hand driller. The bottom hole got snapped a bit because I was changing up the drill bits a bit too fast and one of the bigger bits got stuck in the hole.
Also I didn’t take the time to sand the inside of the bigger hole enough and I wasn’t able to sand the smaller hole entirely because I wasn’t sure how to. So next time I would avoid small holes like that if possible (or find some rods to glue the sandpaper on probably?).
3. routing and finishing:
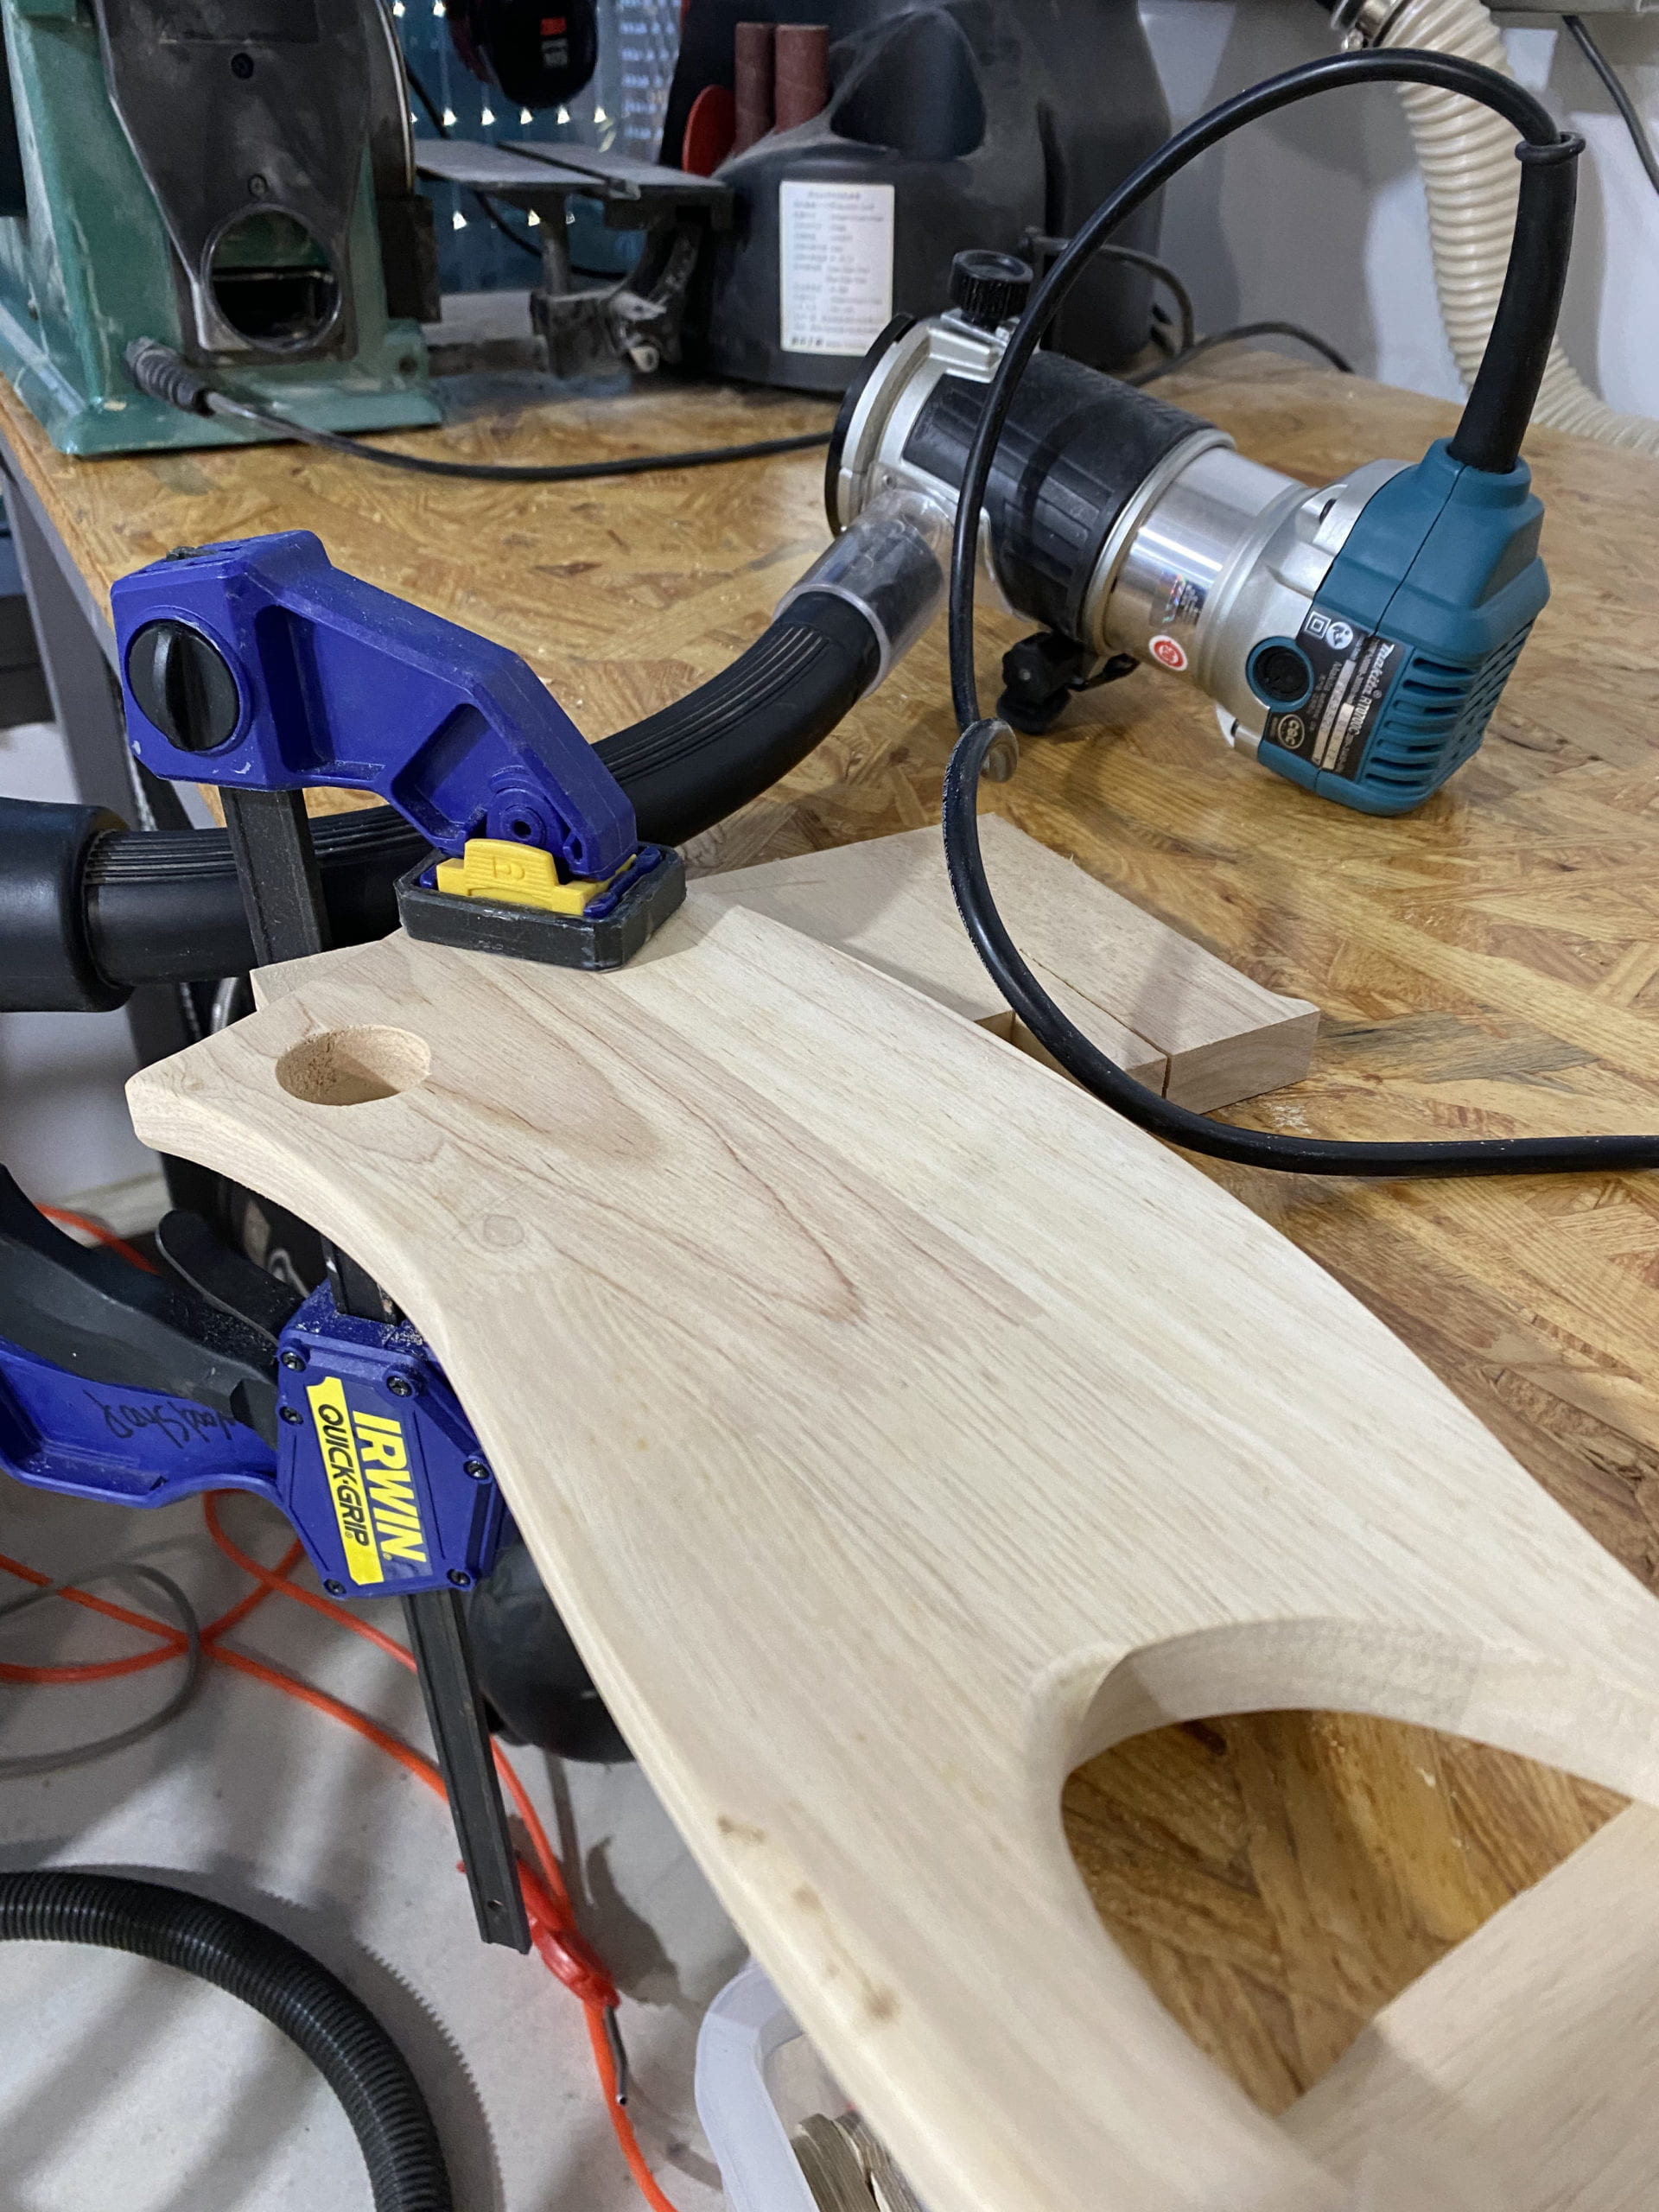
using the router I was able to smooth out the angles in the handle and the back of the cleaver. The processor went not as messy as I thought because it was my first time using a router. I burned some of the areas because I stayed at the same spot for a little too long but it was easy to just sand it off later.
When applying the finishing I saw some irregularities which I didn’t see when I was sanding: there were some grooves that might have been created due to the sawdust on the table where my piece was touching and moving so I might need to sand once again to eliminate them. Otherwise I thought the finishing worked great, the surface looked smooth, just not as dark as I wanted it to be but it’s not a huge problem.
IMG_1559 This is the final project for Digital + Sculpture. The prompt for it is to create a digital sculpture that speaks to repetition, pattern, or multiple in some ways.
Project description
In the time of social media when people can share information and opinions freely, some of the more serious terms and concepts were used and misused in social media as the title of a “hashtag” or a trend, so repeatedly that their original meaning begins to fade away into nothingness. More often than not, the hashtag posters on social media haven’t even thought of the meaning of the concept they are posting — they just think that it is cool to follow the trend and pretend to be thinking about the deeper concepts.
This project is the first piece of a group of kinetic sculptures that tries to convey the idea above. It consists of the main part which is a group of laser cut pieces with the shape of a hashtag, placed in specific ways to form a shadow that has the shape of the Chinese word “女权” (feminism) when the light was cast on at a specific angle. When the main part rotates, the shadow turns into the original form of the laser cut pieces, which are just meaningless hashtags. The rotation of the main part is determined by a dataset of the frequency the word “女权” has been used on Weibo (a social media platform) over the years. The more frequently the word is used, the more the piece will rotate towards the ‘hashtag’ side.
video documentation:
The ideation process:
I have always been obsessed with shadow arts, I think through the shadow they tell one time more story than ordinary sculptures so I wanted to expand in this field myself. The initial inspirations come from a pinterest post that I saw, and the work of Mr. Hu Weiyi. (linked in the images below)
I wanted to build something like the first piece but also want to have my own narrative inside just like the second one. So I pondered upon the feeling of “fragments” in the first piece and came up with the idea of “meaning becomes fragmented or dissolves”.
The fabrication and prototyping process:
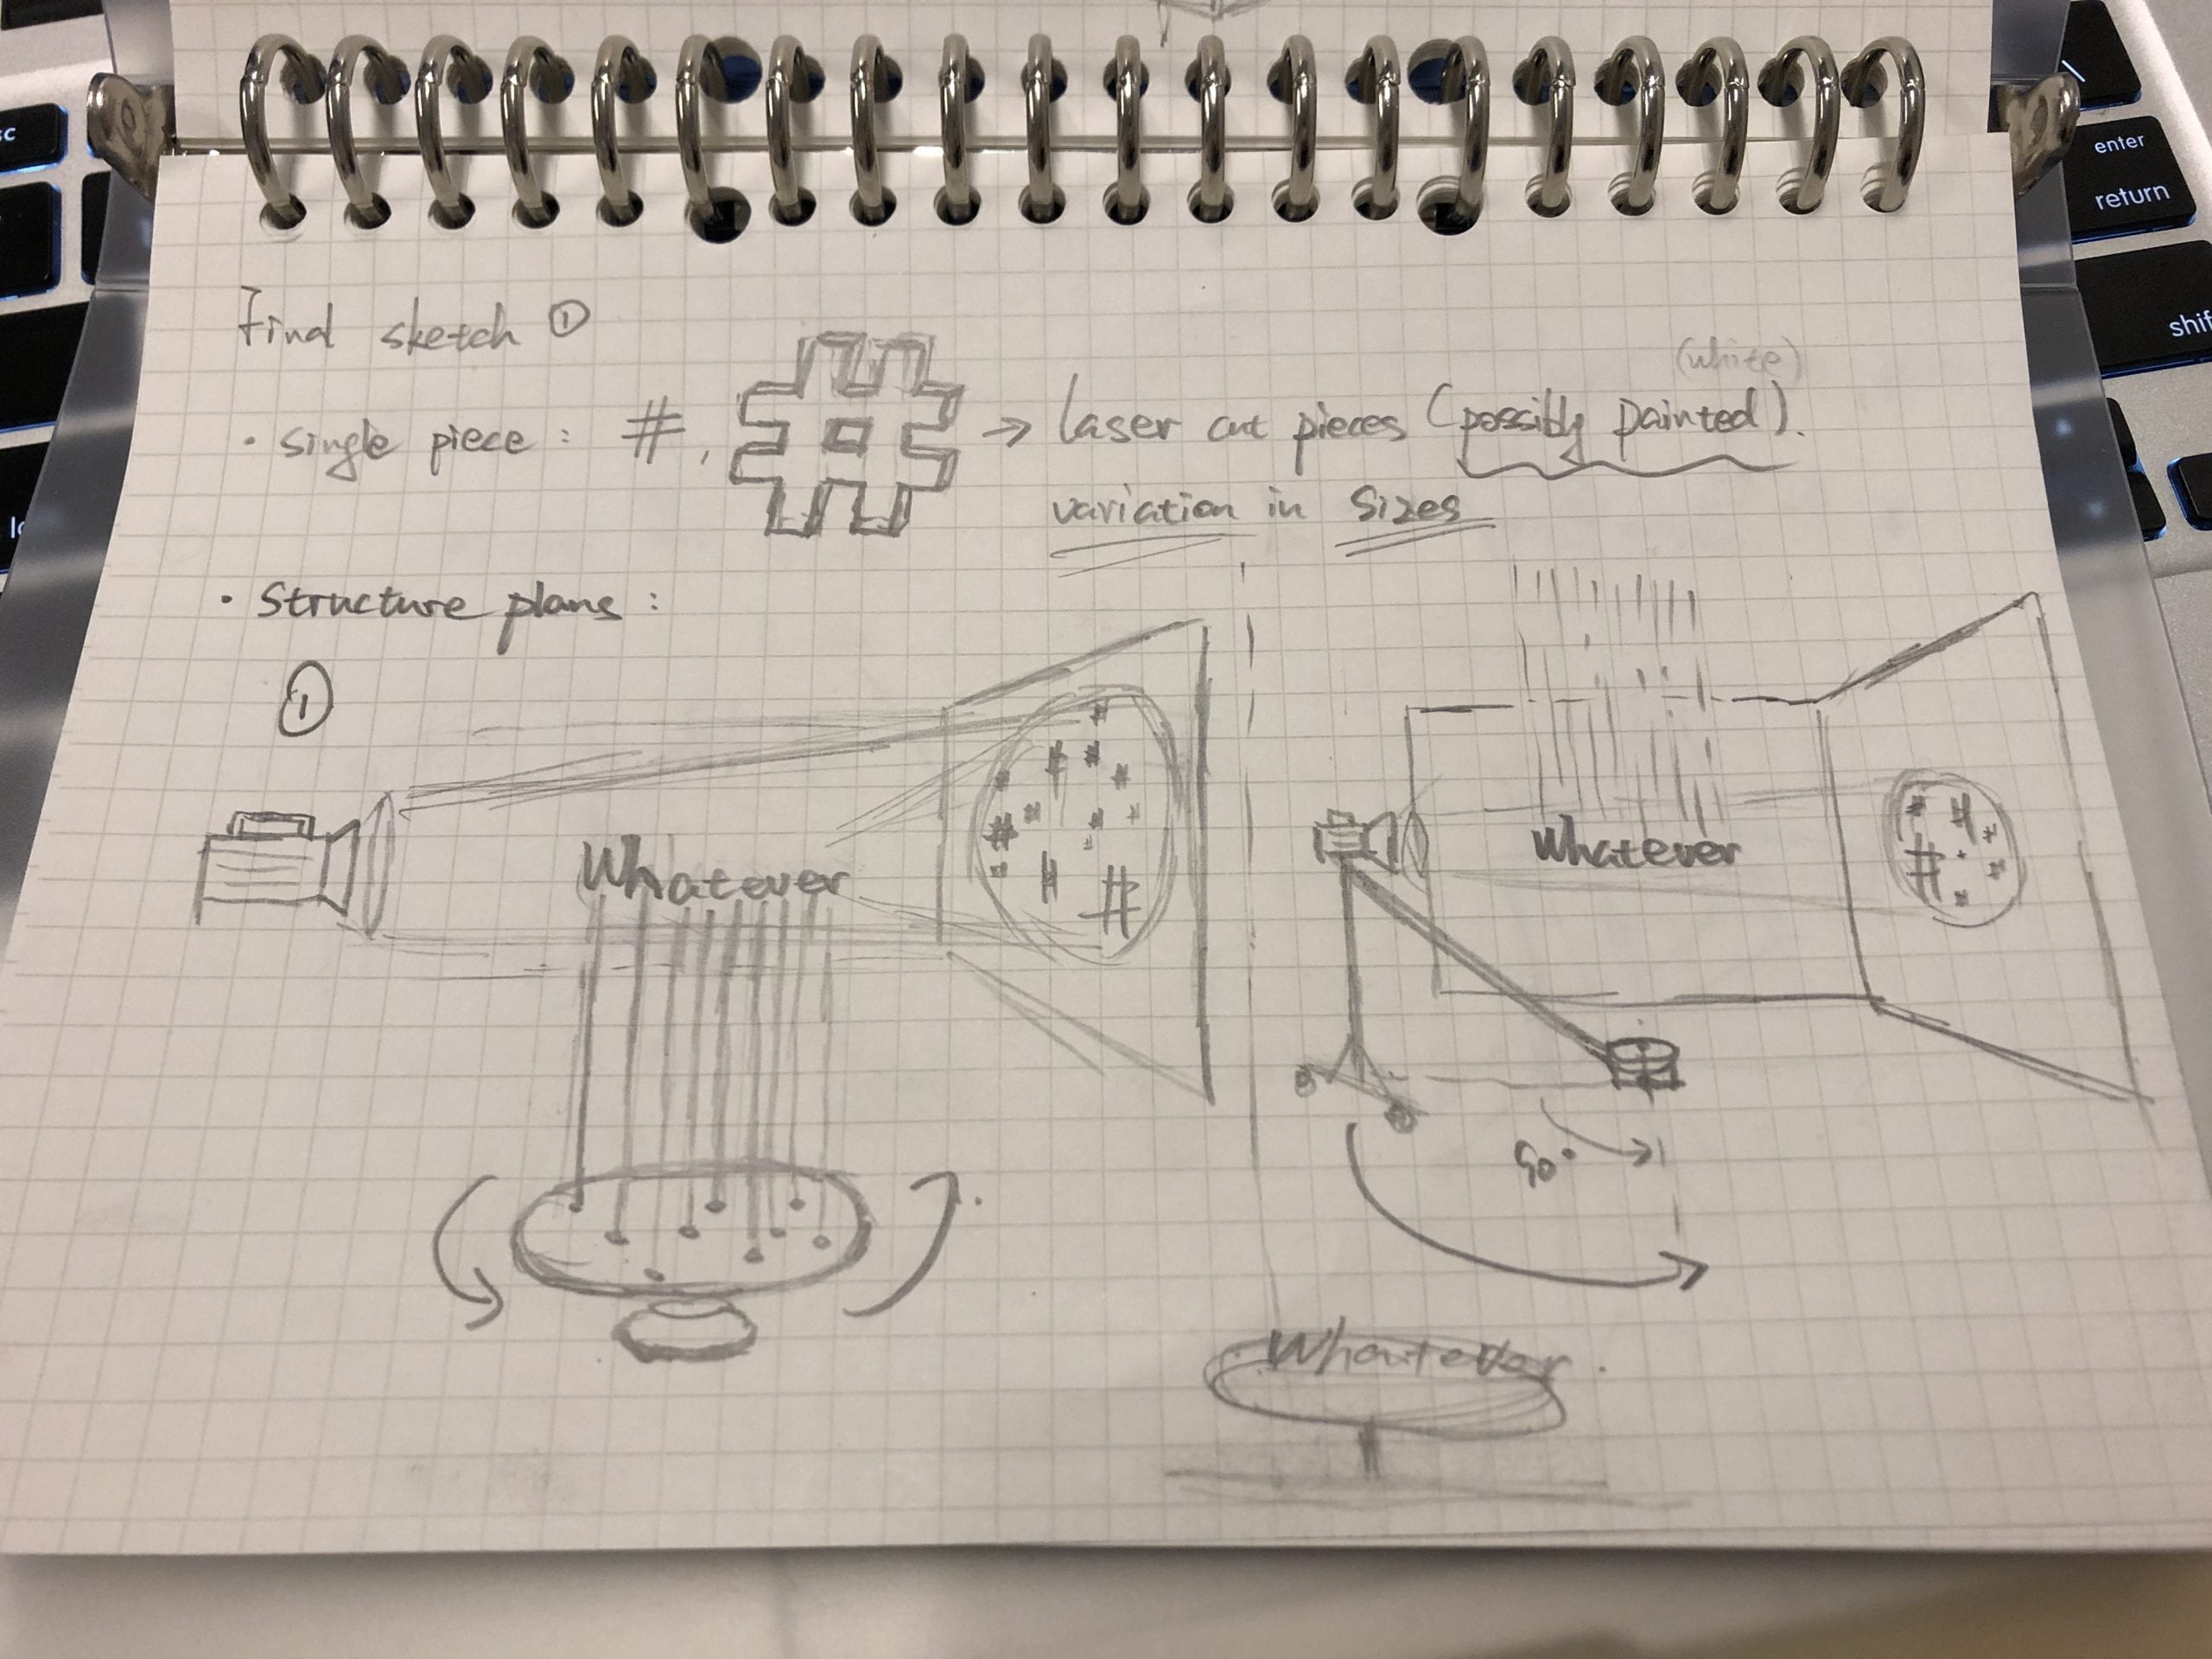
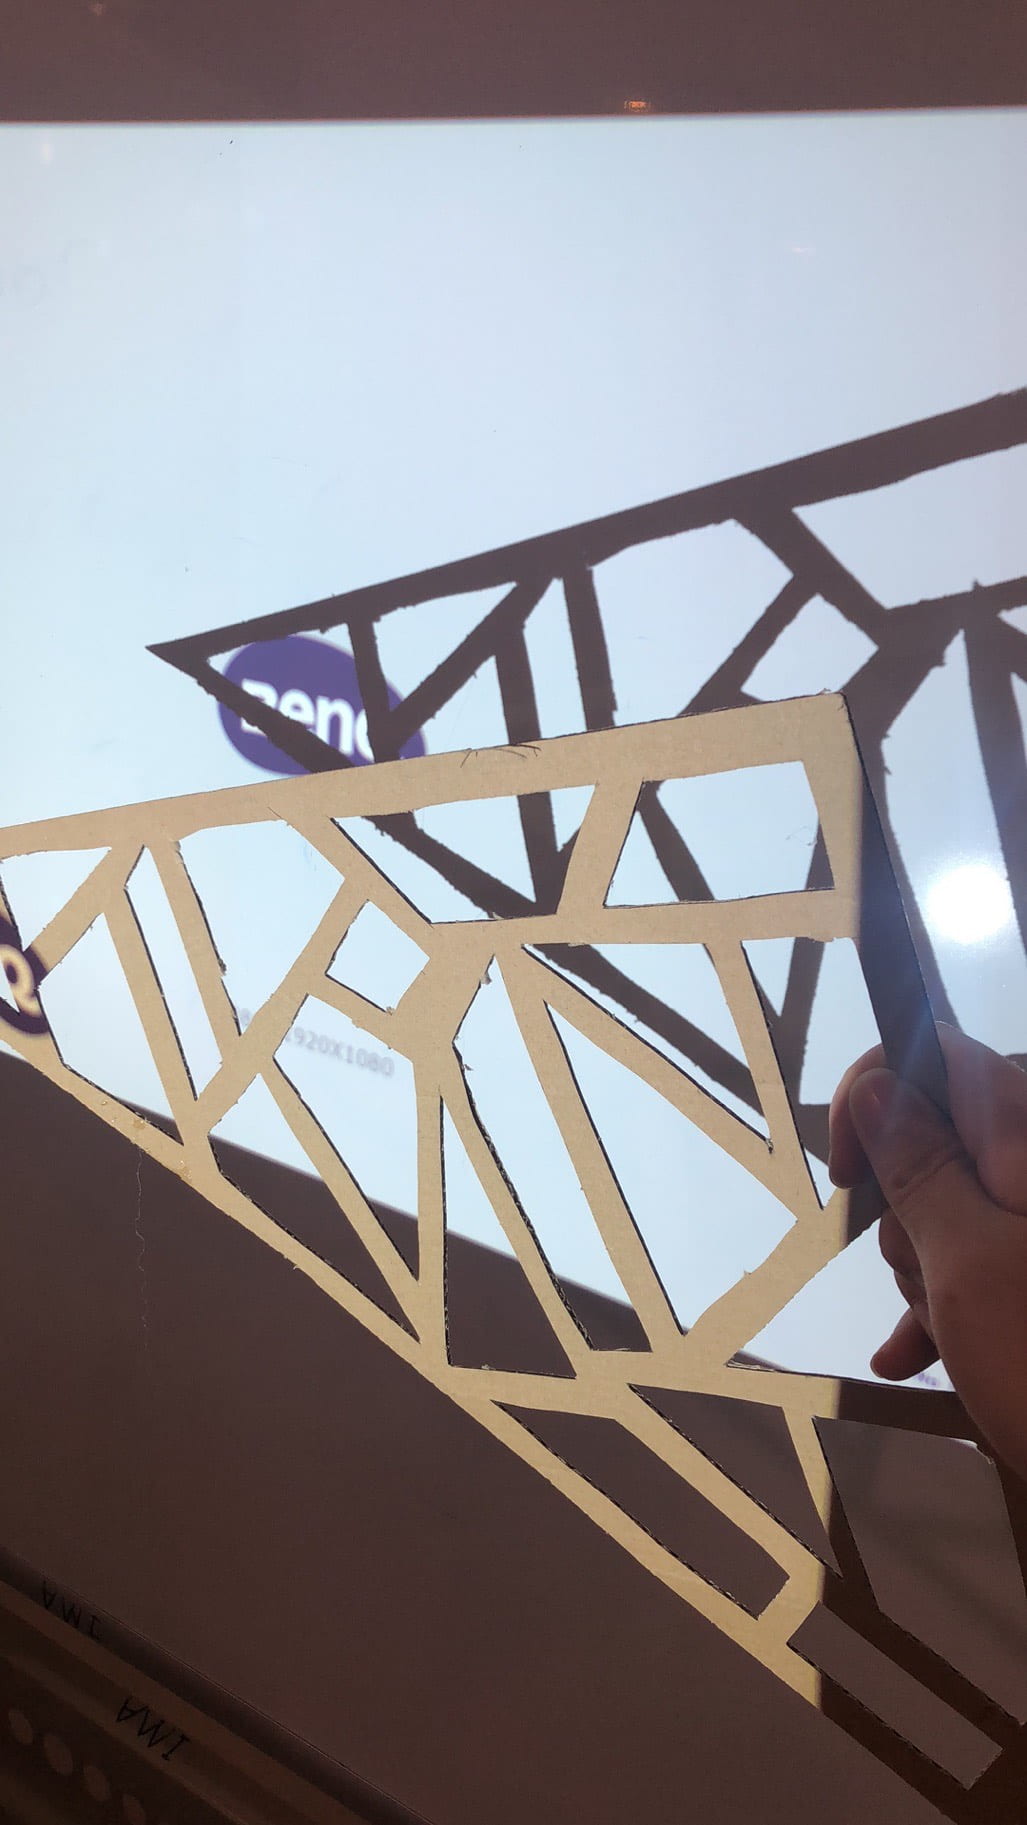
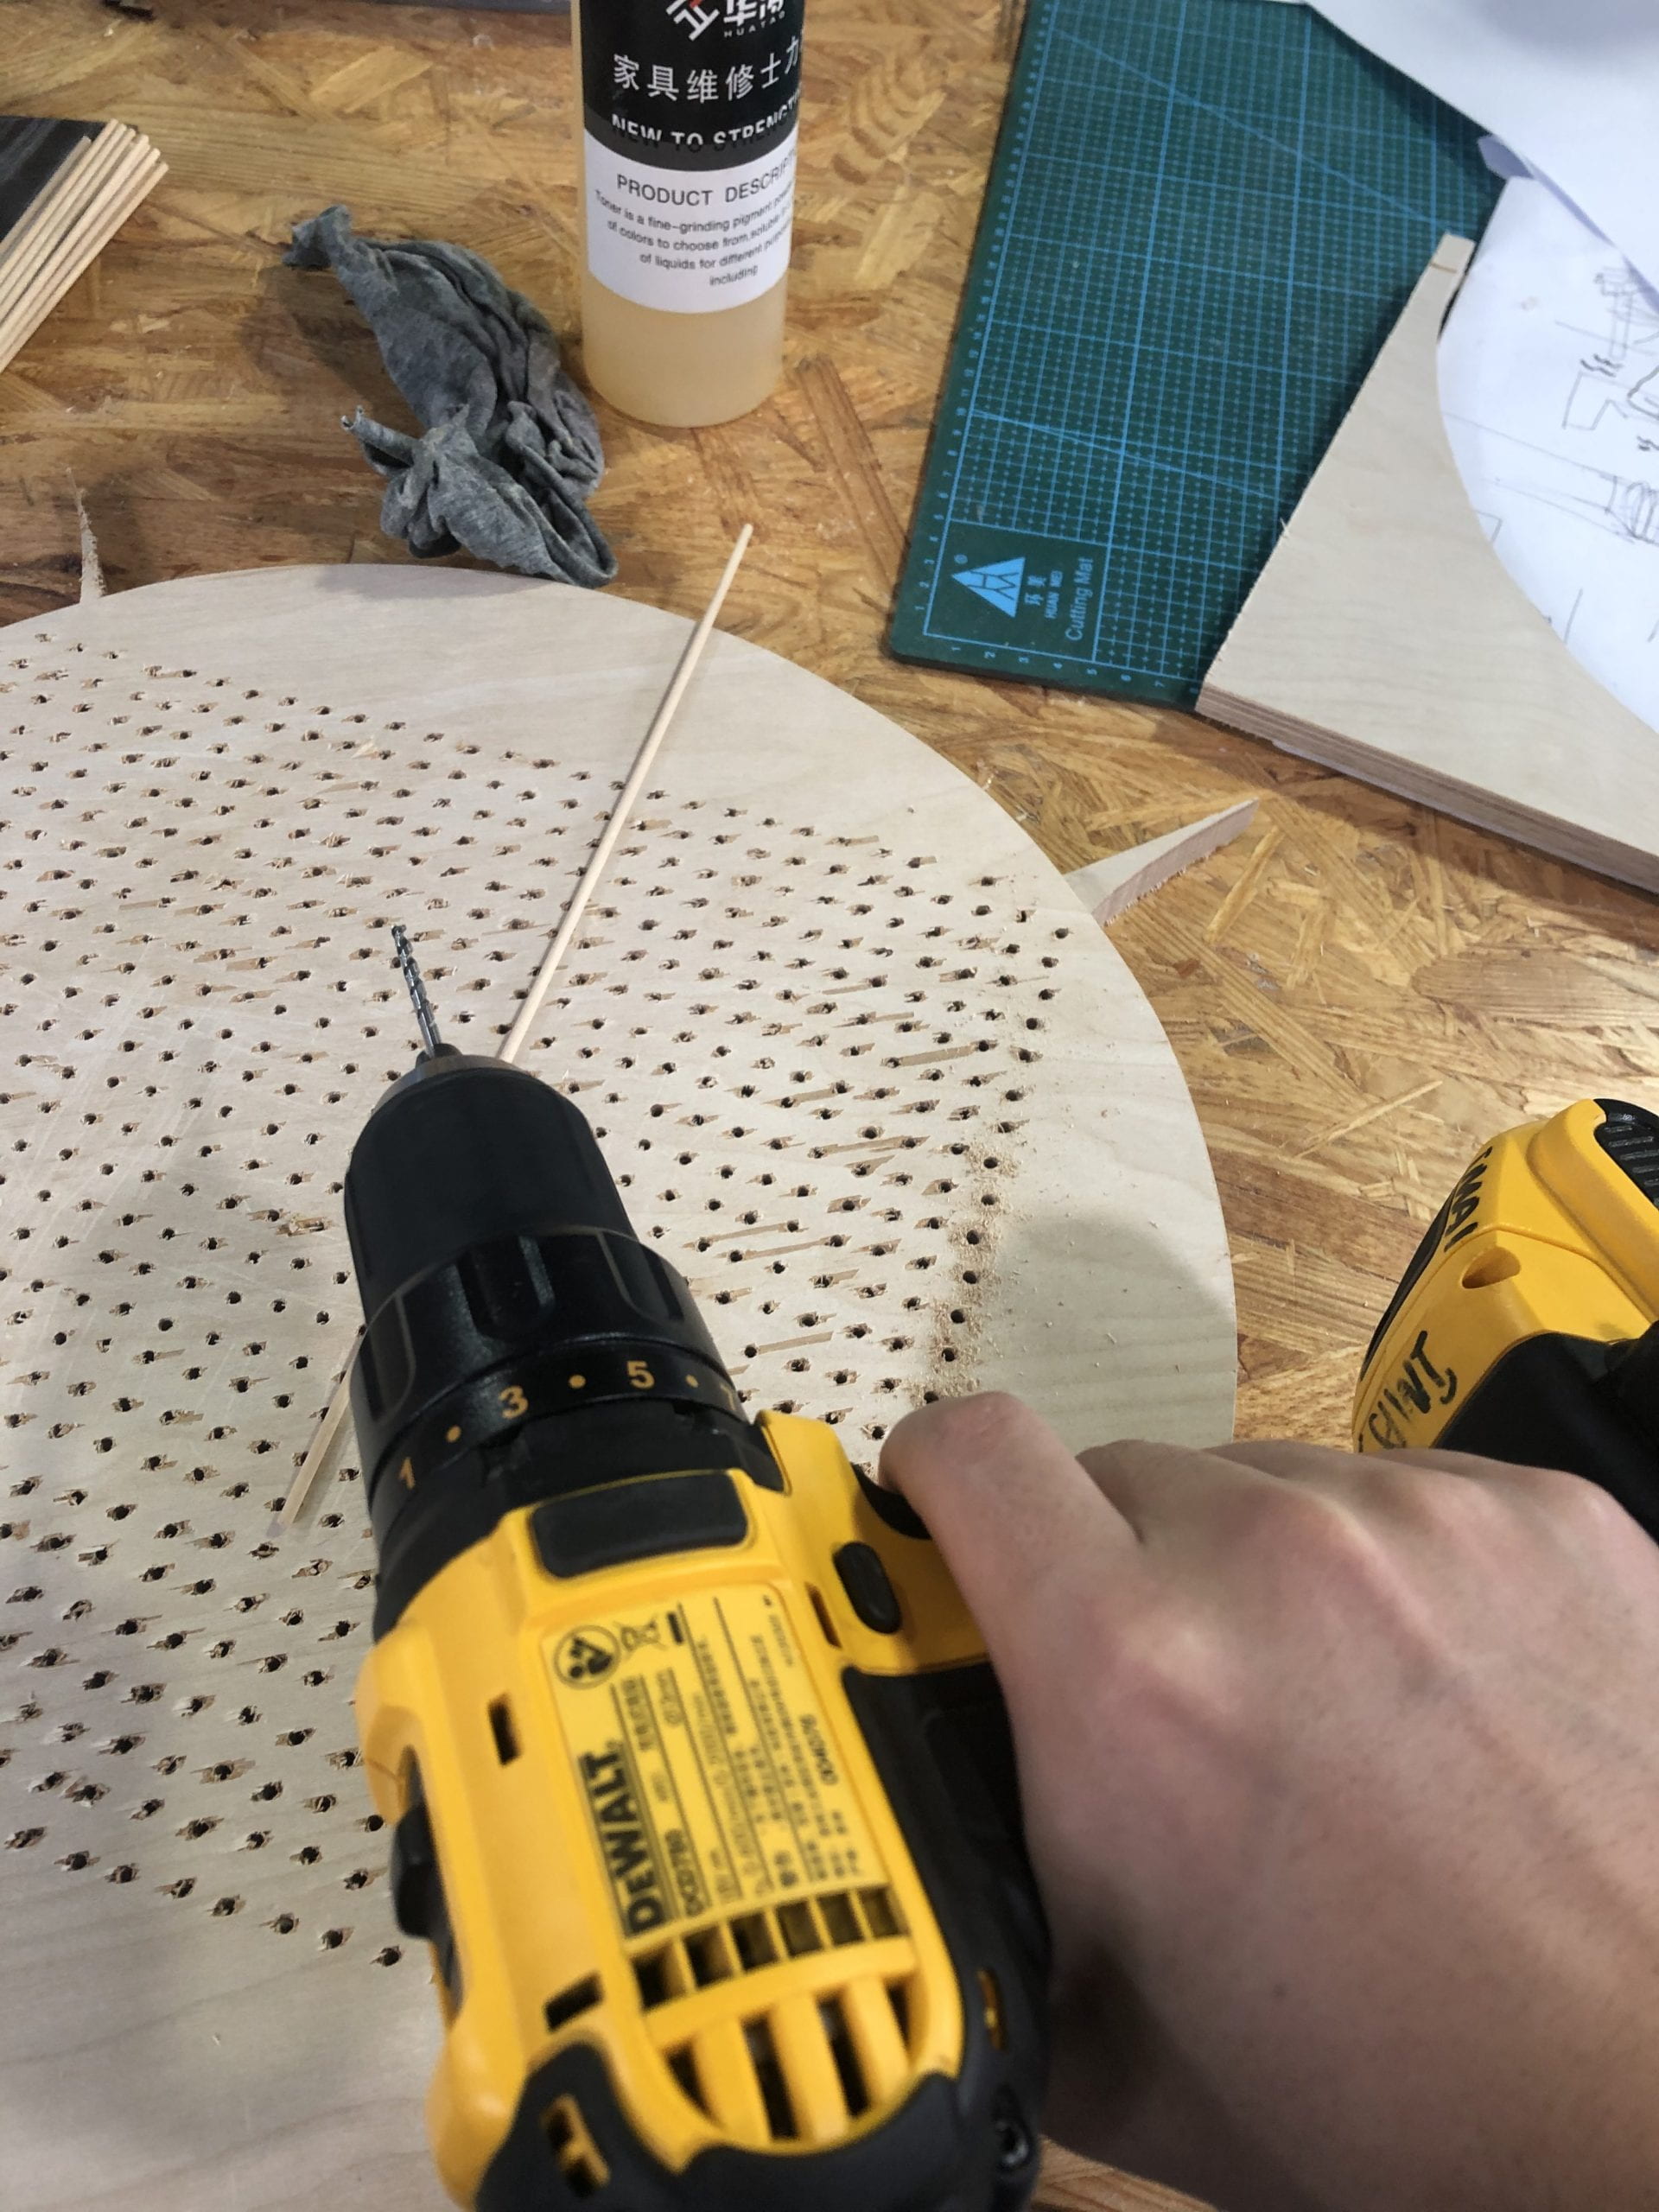
p1: 2 plans, rotating the light or rotating the sculpture
p2: testing the definition of the shadow with cardboard
p3: hand drilling the holes in the supporting plate, to have more control over where precisely I want to put the sticks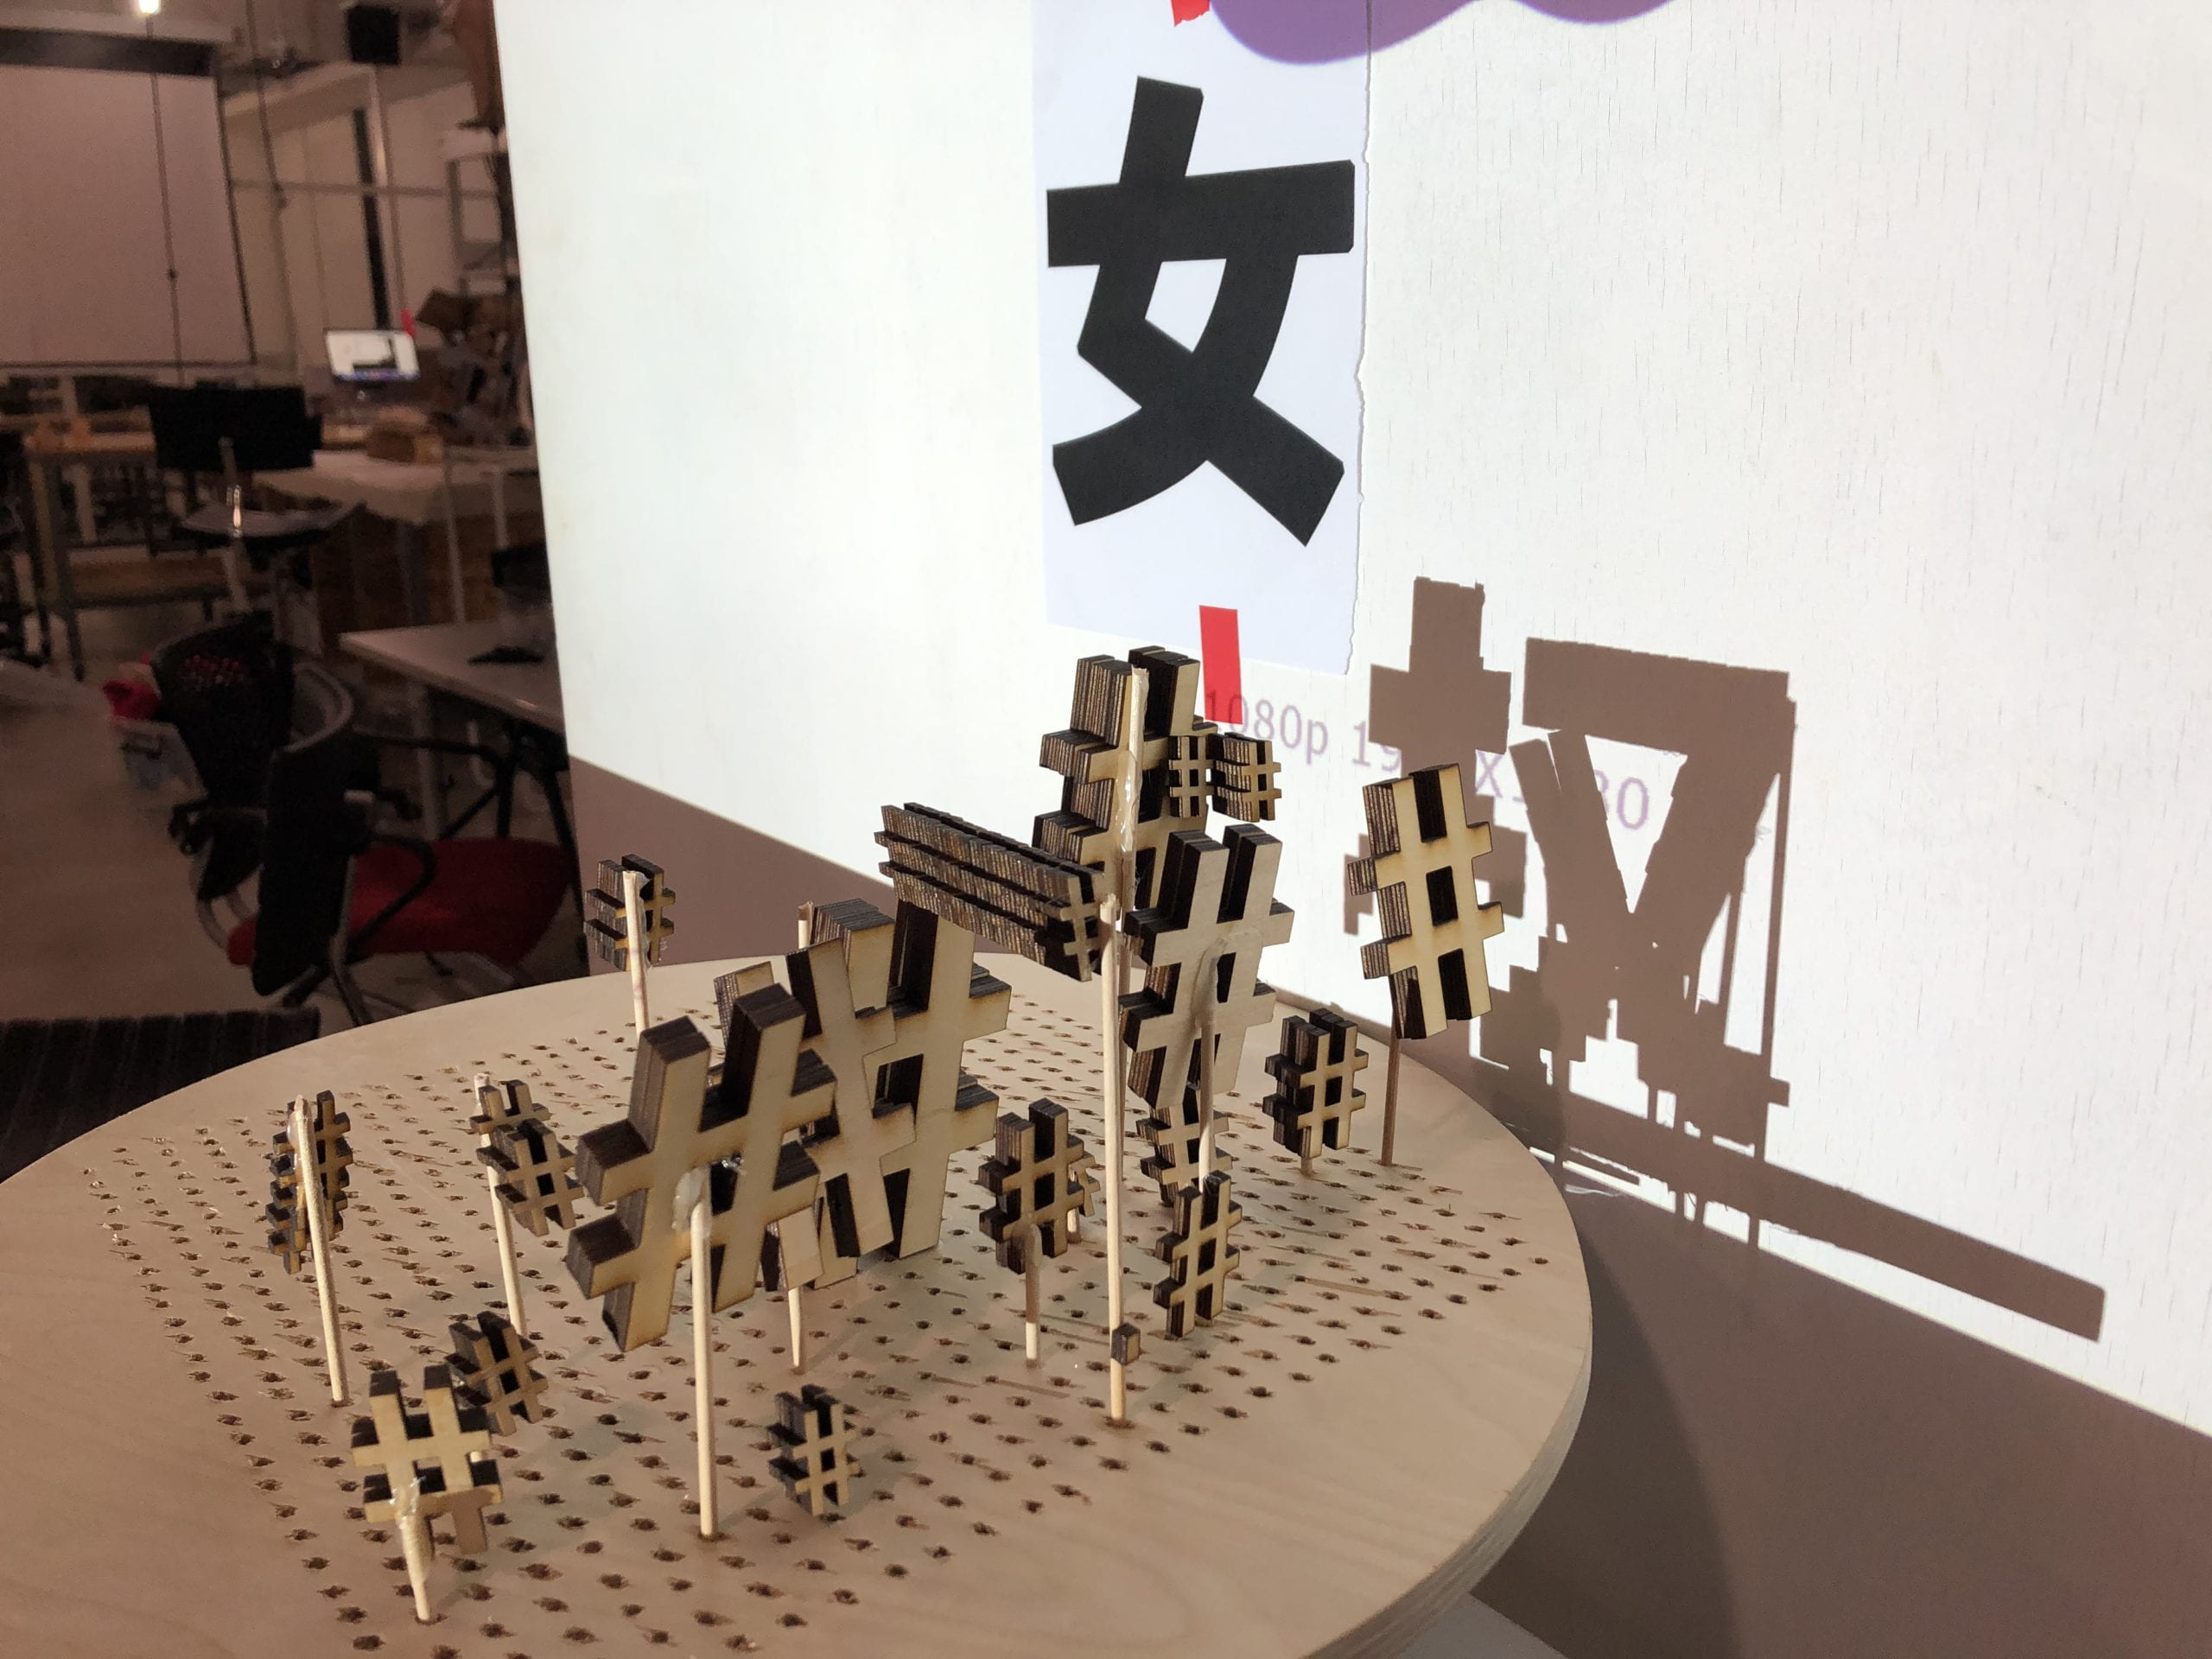
p4: printing the characters out and use them as building templates
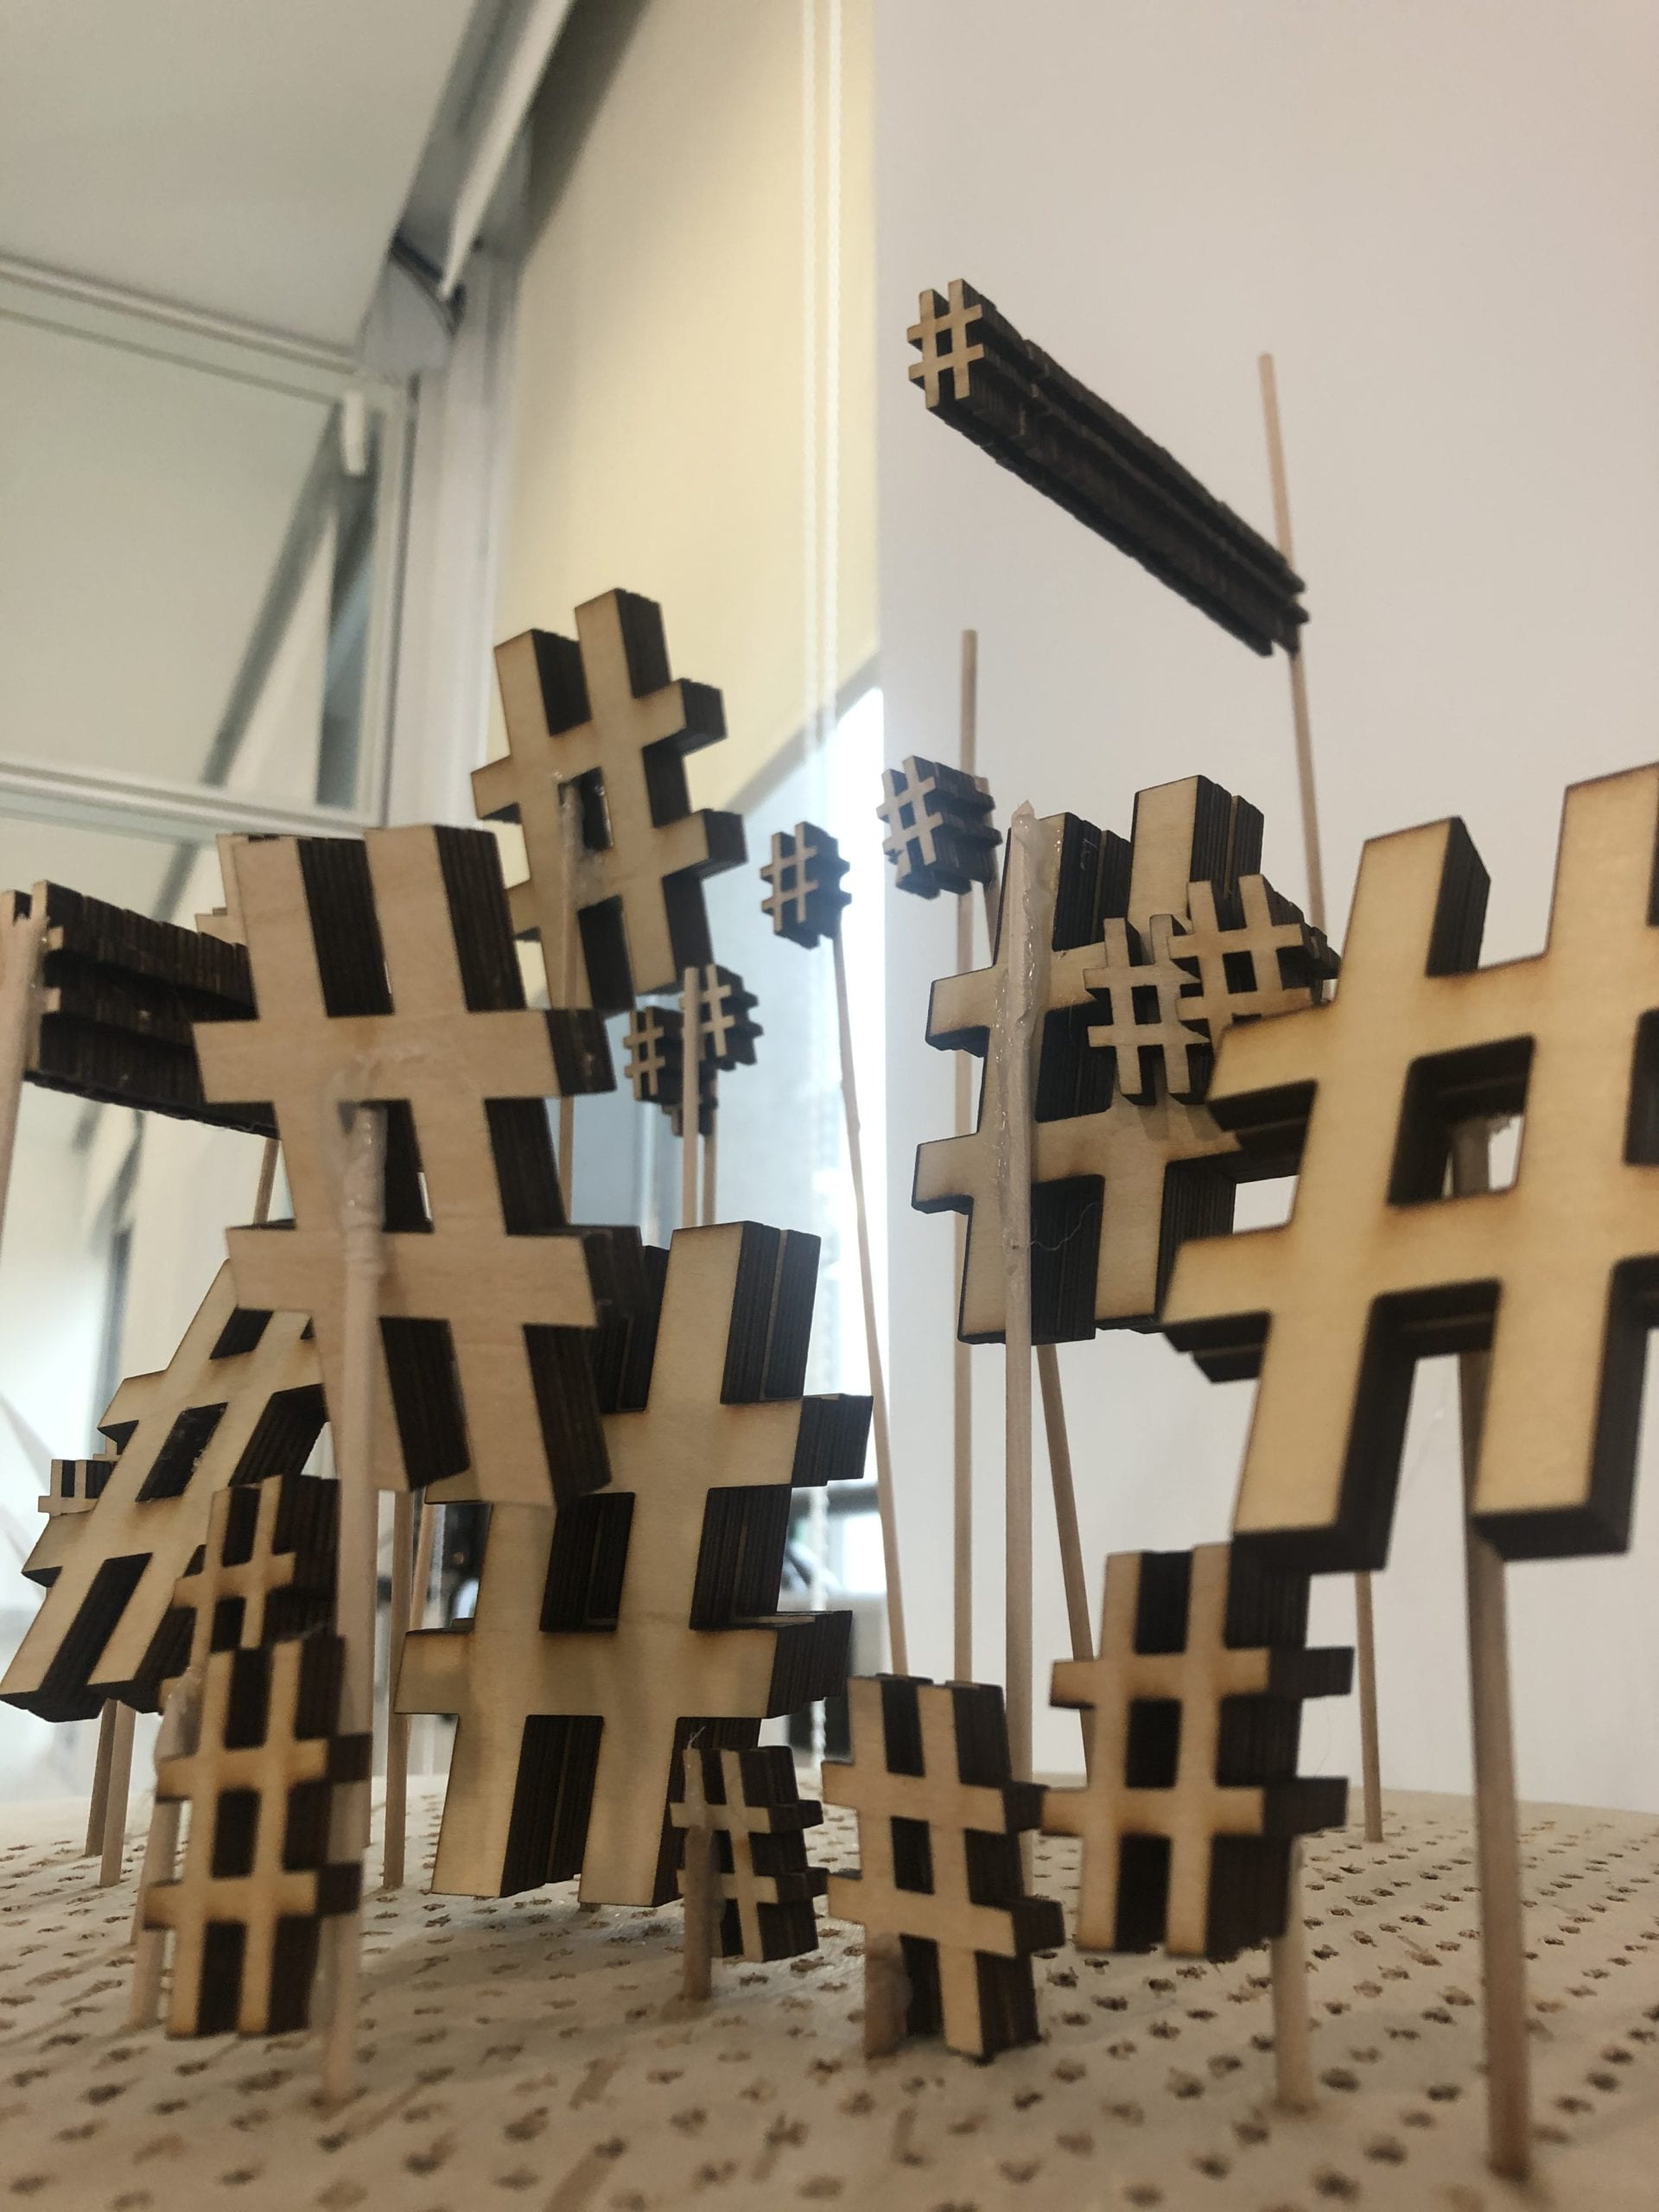
p5: detailed look at how are the individual pieces were put together: Laser cut pieces, hot glued on a wooden stick, then fixed in a hole on the grid board at the exact position.
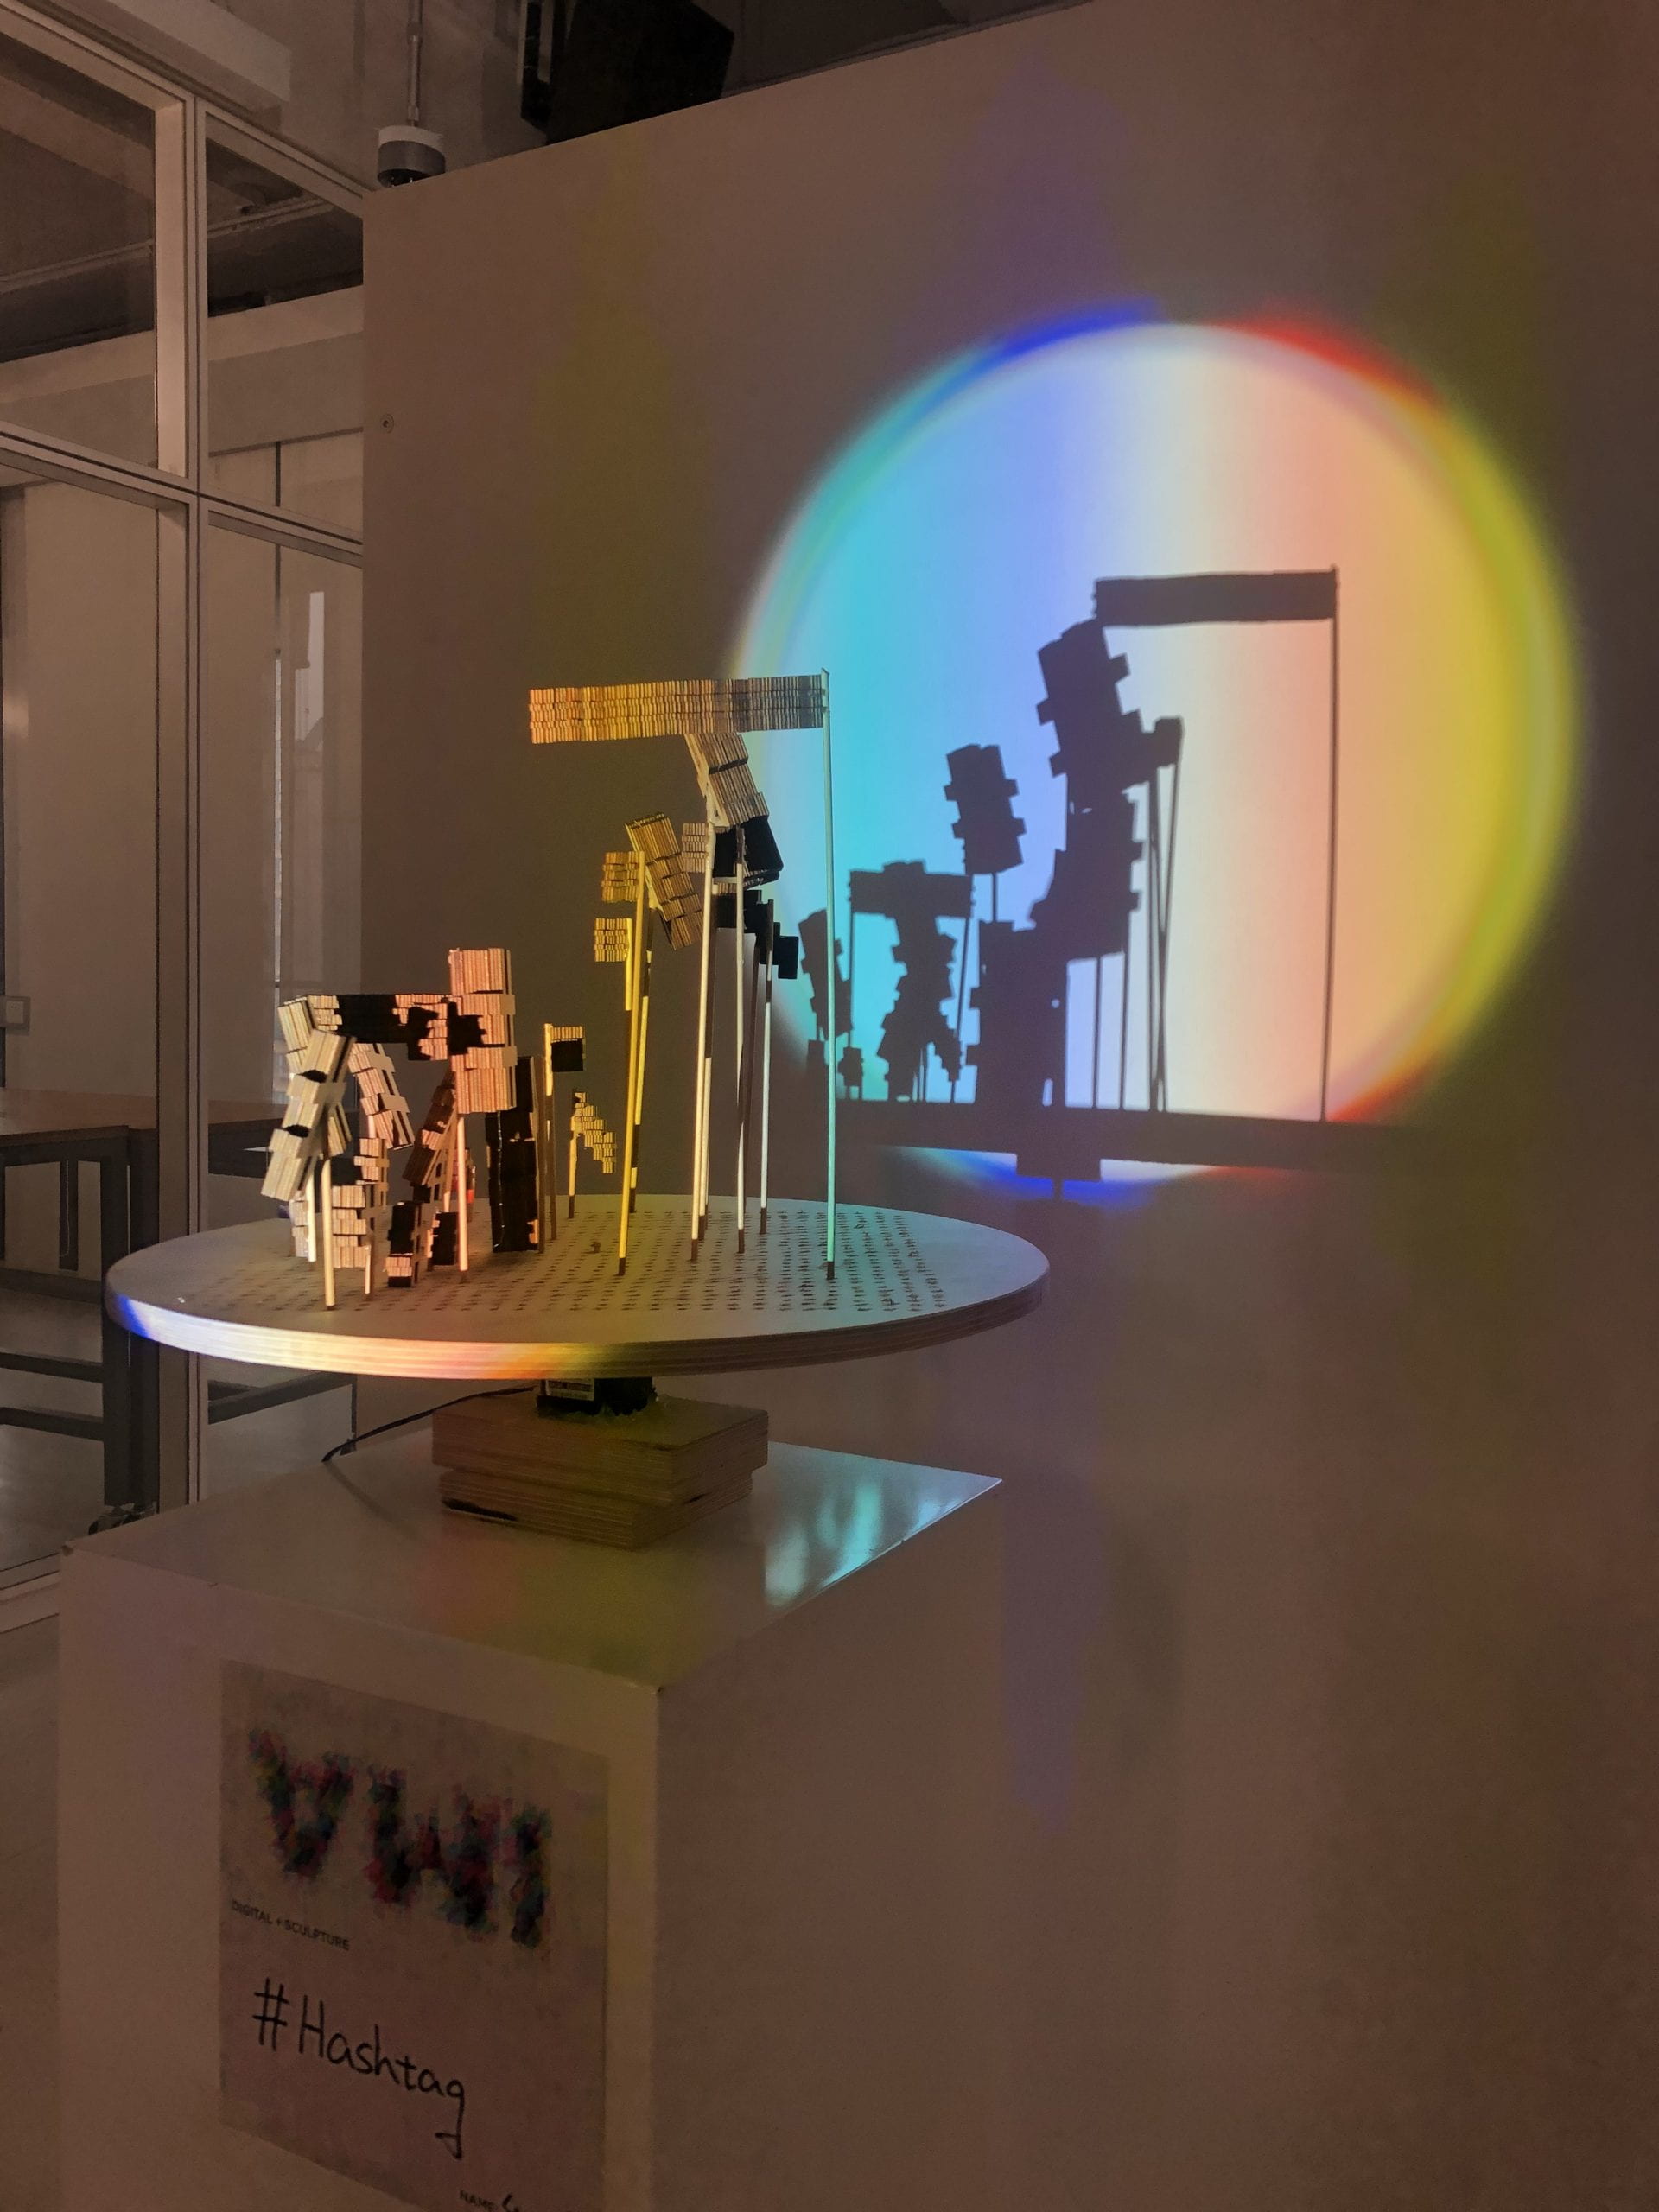
p6: the finished piece (light is distorted by the projector)
Reflection and future improvements:
I think this piece is one of my more completed projects recently, it speaks to my true feelings about the internet and social media in a precise way, and it is clean and pleasing to look at. So, as for this single piece, I wouldn’t say there is too much to be improved, however, I do plan to make this into a series of sculptures in which each one has a different word that, similar to the word “feminism”, got also so overused that their meaning dissolved. So for the future, I will have a more factory-line fabrication process and change the plan of displaying them.