Category: Creative Game Design and Development
I played “Celeste” this week. I haven’t finished the whole game, only completed the third part (the hotel).
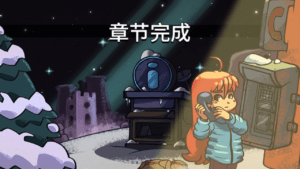
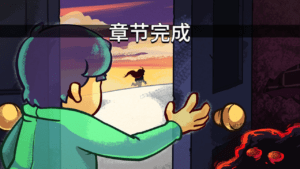
First, let me talk about what I like. I played with a controller, and controlling the character felt really comfortable. The pixel art style is adorable, and the whole game runs smoothly. The music is also unique (I especially love the music in Chapter Two).
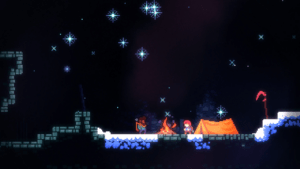
Regarding the storyline: Currently, I still don’t have much understanding of the overall story and the involved characters. The plot feels somewhat fragmented, with mainly some character dialogues at the beginning and end of each chapter. Right now, all I know is that the protagonist is climbing a mountain, but I’m not clear on the details (such as the existence of another dark protagonist and the reason for climbing the mountain).
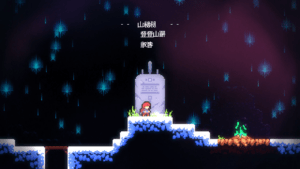
About the map design: As I progressed to the third chapter, I started to feel a bit frustrated because of the increasing difficulty. Initially, it was like a parkour game, requiring precise controls. However, in the third chapter, dynamic monsters are introduced. If you touch them, you have to restart. There are also some added difficulty traps, like certain ground elements that can only be touched once. Overall, because of the increased number of deaths and respawns, I became somewhat impatient. The levels I dislike the most (currently) are in the third chapter. The final few levels of the third chapter are long, and even if you’re close to the finish line, dying means restarting from the beginning. I feel these long levels disrupt the balance set by the shorter levels and fixed camera angles of the previous chapters, making the gameplay less enjoyable than the first two chapters.
Lastly, let’s talk about the controls: Although the controls are quite responsive, I still find some aspects uncomfortable after playing through these chapters. One issue is the inconsistency in character control methods. I believe the dash and jump actions should be in the same direction. However, by default (when not moving the directional joystick), jumping is upward while dashing is to the left or right. This inconsistency is exacerbated by the tactile differences of the controller, unlike a keyboard where it’s easier to distinguish between up, up-right, and right, it’s more ambiguous with a controller. A significant portion of my deaths is due to misalignment in controller sensation. Often, I intend to dash right, but end up dashing up-right, or I intend to go up-right but end up going right. Another issue is the design where the character bounces off walls upon contact. For example, when climbing a wall (moving to the right), nearing the top, I instinctively jump to the right, but due to this bouncing design, the character is propelled leftward, resulting in a fall. While I understand this design, it doesn’t quite align with my personal habits. Because of my continued discomfort with the controls, there are several levels somewhat torturous to play.
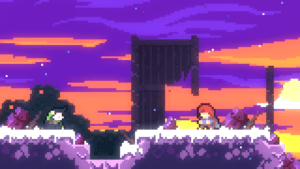
However, overall, this game is still very good and definitely worth playing. I’m currently on the fourth chapter, where the background depicts a sunrise, filling one with hope.
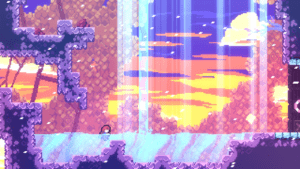
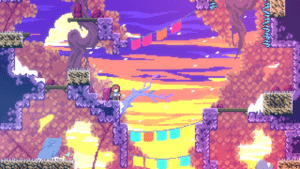
We revised some content in our game and remade the tutorial part.
Plane Rotation Movement:
Initially, we used the Unity physics engine to do the rotation movement, adding centripetal force to the plane. However, only using the “add force” method makes the movement hard to control when put into practice. So we found a simpler and easy-to-understand way — applying the transform function to do the rotation. We adjusted some subtle values, such as gradually decreasing the speed as the plane ascends and increasing the speed as it descends.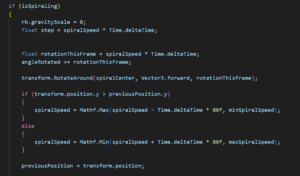
Remake Tutorial Part:
In the previous tutorial section, we did not clearly “teach the player,” with many instructions being unclear. Therefore, we have revamped the tutorial to focus solely on the plane’s controls, requiring players to precisely maneuver the plane to a specified area, enabling them to learn the most crucial part of the game.
We also added a little storyline at the beginning.
Flow chart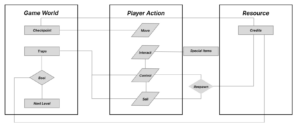
Describing
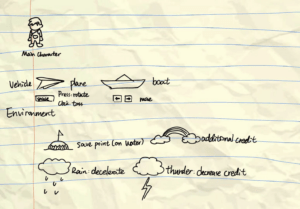
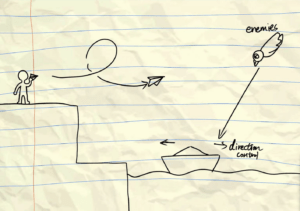
The game revolves around controlling the main character and a paper airplane. The main character progresses through the storyline, while the paper airplane requires player input to fly over obstacles and complete challenges. Before the player flies the paper airplane, there will be checkpoints. Players can use up to three sheets of paper at a time, and when they run out, they must restart the game from the last checkpoint.
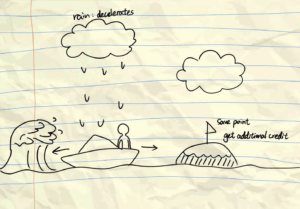
The paper airplane’s flight is primarily controlled by the spacebar (possibly later replaced by a gamepad). At sea levels, the paper airplane can also transform into a paper boat to navigate through various challenges.
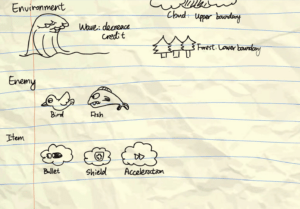
The obstacles we have set include clouds in the sky, waves in the sea, and fish. Additionally, other factors affect the paper airplane’s flight, such as wind, rain, lightning, and more. The introduction of these elements increases the difficulty of gameplay. However, there are temporary power-ups players can collect, such as speed boosts, shields, and more. These additions make the gameplay experience richer and more enjoyable.
Recording:
Game (not fake game): Geometry Dash
In Geometry Dash, players control a square, guiding it to jump over obstacles and reach the end. If the square falls off the map or collides with obstacles, it disappears only to respawn at the starting point.
Screen Recording:
Play by others:
Development:
1. Basic Movement of the Cube: At first, I need to accomplish the basic movement of the cube, including the jump and the rotation. The jump function is not hard to realize, but the square rotation function needs some calculation formulas and detailed data. Then, I studied this tutorial and completed the basic jump rotation function according to the data given in the tutorial.
if (OnGround())
        {
            Vector3 Rotation = Sprite.rotation.eulerAngles;
            Rotation.z = Mathf.Round(Rotation.z / 90) * 90;
            Sprite.rotation = Quaternion.Euler(Rotation);

            //jump
            if (Input.GetKeyDown(KeyCode.Space))
            {
                rb.velocity = Vector2.zero;
                rb.AddForce(Vector2.up * 26.6581f * Gravity, ForceMode2D.Impulse);
            }

        }

        else
        {
            Sprite.Rotate(Vector3.back, 452.4152186f * Time.deltaTime * Gravity);
        }
2. Build collision logic: Cubes can move normally on the ground, but will collide with the side of the platform, resulting in death and respawn. I used a function to determine if it is colliding by detecting if it overlaps with the box area specified by the other colliders on the specified layer, and returns a boolean value.
bool OnGround()
    {
        return Physics2D.OverlapBox(GroundCheckTransform.position + Vector3.up - Vector3.up * (Gravity - 1 / -2), Vector2.right * 1.1f + Vector2.up * GroundCheckRadius, 0, GroundMask);
    }

    bool TouchingWall()
    {
        // 将盒子的位置稍微向上移动,以确保它与角色的侧面接触
        Vector2 boxPosition = (Vector2)transform.position + (Vector2.right * 0.55f) + Vector2.up * 0.1f;

        return Physics2D.OverlapBox(
            boxPosition,
            new Vector2(GroundCheckRadius * 2, 1.0f), // Use GroundCheckRadius * 2 for the width of the box
            0,
            GroundMask
        );
    }
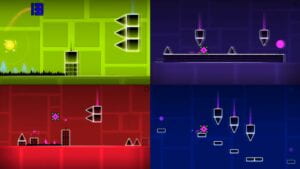
3. Map Design: To enhance the game’s challenge, I designed some intricate areas, including traps. This step involves creating maps that are both interesting and challenging, ensuring players experience a sense of challenge.
I referenced some of the official designs:
4. Integration of Sound: I added sound effects by creating a sound manager and binding relevant code to it. The death sound effect will be triggered when the square hits the obstacles or falls out of the map. Additionally, I added background music.
using System.Collections;
using System.Collections.Generic;
using UnityEngine;

public class SoundManager : MonoBehaviour

{
    public static AudioSource audioSrc;
    public static AudioClip die;
    public static AudioClip bgm;

    private static bool isBgmPlaying = false;

    // Start is called before the first frame update
    void Start()
    {
        audioSrc = GetComponent<AudioSource>();
        die = Resources.Load<AudioClip>("game");
        bgm = Resources.Load<AudioClip>("bgm");
        PlayBgm();
    }

    // Update is called once per frame
    void Update()
    {

    }

    public static void PlayClip()
    {
        audioSrc.PlayOneShot(die);
    }

    public static void PlayBgm()
    {
        if (!isBgmPlaying)
        {
            audioSrc.clip = bgm;
            audioSrc.loop = true; // 设置为循环播放
            audioSrc.Play();
            isBgmPlaying = true;
        }
    }

    public static void StopBgm()
    {
        // 停止背景音乐
        audioSrc.Stop();
        isBgmPlaying = false;
    }
}
5. Deathzone, Endzone, and Text Display: I introduced “Deathzone”, “Endzone”, and used TextMeshPro to display time and attempts. At the end of the game, the player’s game time and attempts will be calculated and displayed on the interface. This allows players to see their performance.
void CheckDeathZoneTrigger()
    {
        // 使用 Collider2D 的方法检测当前角色是否与DeathZone相交
        if (deathZoneCollider != null && deathZoneCollider.IsTouching(GetComponent<Collider2D>()))
        {
            // 如果角色与DeathZone相交,执行死亡操作
            Die();
        }
    }

    void CheckEndTrigger()
    {
        if (endTrigger != null && endTrigger.IsTouching(GetComponent<Collider2D>()))
        {
            EndGame();
        }
    }

    void EndGame()
    {
        gameEnded = true;

        // 计算时间和尝试次数
        float endTime = Time.time;
        float gameTime = endTime - startTime;

        // 显示游戏结束文本
        SetGameOverTextVisibility(true);
        gameOverText.text = "Congratulations";
        timeText.text = "Time: " + gameTime.ToString("F2") + "s"; // 保留两位小数
        attemptText.text = "Attempts: " + attempts.ToString();

        Time.timeScale = 0f;
    }

    void SetGameOverTextVisibility(bool isVisible)
    {
        gameOverText.gameObject.SetActive(isVisible);
        timeText.gameObject.SetActive(isVisible);
        attemptText.gameObject.SetActive(isVisible);
    }

}
In this attempt, I learned how to implement basic player movement, including moving left and right and jumping; I understood some collision logic and how to detect the player’s interactions with the ground, platforms, and walls; I also constructed challenging level designs with traps and tricky sections to increase the difficulty of the game; and I learned to incorporate musical sound effects into the game.
Challenges:
1. Some mechanics: Adjust the parameters of rotation speed, gravity, movement speed, and jump height to make the game playable and look comfortable.
2. Collision detection: Ensuring accurate collision detection, especially when dealing with different platforms and walls, can be challenging.
C#Challenges
| Variables |
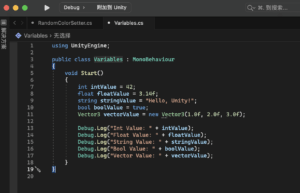
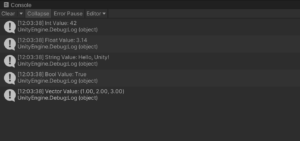
Create variables:
Small story:
| if statement |
Car Speed Control-1:
using UnityEngine;

public class CarSpeedControl1 : MonoBehaviour
{
    float carSpeed1 = 0.0f;
    public float accelerationMultiplier = 10.0f;

    void Update()
    {
        // Accelerate with the 'W' key
        if (Input.GetKey(KeyCode.W))
        {
            carSpeed1 += accelerationMultiplier * Time.deltaTime;
            Debug.Log("Car Speed: " + carSpeed1);
        }

        // Decelerate with the 'S' key
        if (Input.GetKey(KeyCode.S))
        {
            carSpeed1 -= accelerationMultiplier * Time.deltaTime;
            Debug.Log("Car Speed: " + carSpeed1);
        }

        // Translate the car based on the current speed
        transform.Translate(Vector3.forward * carSpeed1 * Time.deltaTime);
    }
}
Car Speed Control-2:
using UnityEngine;

public class CarSpeedControl2 : MonoBehaviour
{
    float carSpeed2 = 0.0f;
    public float accelerationMultiplier = 10.0f;
    public float maxSpeed = 10.0f;

    void Update()
    {
        // Accelerate with the 'W' key
        if (Input.GetKey(KeyCode.W) && carSpeed2 < maxSpeed)
        {
            carSpeed2 += accelerationMultiplier * Time.deltaTime;
            Debug.Log("Car Speed: " + carSpeed2);
        }

        // Decelerate with the 'S' key
        if (Input.GetKey(KeyCode.S) && carSpeed2 > 0.0f)
        {
            carSpeed2 -= accelerationMultiplier * Time.deltaTime;
            Debug.Log("Car Speed: " + carSpeed2);
        }

        // Translate the car based on the current speed
        transform.Translate(Vector3.forward * carSpeed2 * Time.deltaTime);
    }
}
Car Speed Control-3:
using UnityEngine;

public class CarSpeedControl3 : MonoBehaviour
{
    float carSpeed3 = 0.0f;
    public float accelerationMultiplier = 10.0f;
    public float maxSpeed = 10.0f;

    void Update()
    {
        // Accelerate with the 'W' key
        if (Input.GetKey(KeyCode.W) && carSpeed3 < maxSpeed)
        {
            carSpeed3 += accelerationMultiplier * Time.deltaTime;
            Debug.Log("Car Speed: " + carSpeed3);
        }

        // Decelerate with the 'S' key
        if (Input.GetKey(KeyCode.S))
        {
            carSpeed3 -= accelerationMultiplier * Time.deltaTime;
            Debug.Log("Car Speed: " + carSpeed3);
        }

        // Log out car states based on speed
        LogCarState();

        // Translate the car based on the current speed
        transform.Translate(Vector3.forward * carSpeed3 * Time.deltaTime);
    }

    void LogCarState()
    {
        if (carSpeed3 == 0.0f)
        {
            Debug.Log("Car State: Stop");
        }
        else if (carSpeed3 > 0.0f)
        {
            Debug.Log("Car State: Moving Forward");
        }
        else if (carSpeed3 < 0.0f)
        {
            Debug.Log("Car State: Moving Reverse");
        }

        // Check for overspeed
        if (carSpeed3 > maxSpeed)
        {
            Debug.Log("Car State: Overspeed");
        }
    }
}
| switch statement |
Random Color Setter:
using UnityEngine;
using UnityEngine.UI;

public class RandomColorSetter : MonoBehaviour
{

    // Reference to the car's Material
    public Material carMaterial;

    // Default colors
    Color colorRed = Color.red;
    Color colorBlue = Color.blue;
    Color colorGreen = Color.green;
    Color colorYellow = Color.yellow;

    // Reference to the UI button
    public Button colorChangeButton;

    void Start()
    {
        // Add a listener to the button
        colorChangeButton.onClick.AddListener(SetRandomColor);
    }


    // Function to set car color with a random color from default options
    void SetRandomColor()
    {
        int randomValue = UnityEngine.Random.Range(0, 4);

        switch (randomValue)
        {
            case 0:
                carMaterial.color = colorRed;
                break;
            case 1:
                carMaterial.color = colorBlue;
                break;
            case 2:
                carMaterial.color = colorGreen;
                break;
            case 3:
                carMaterial.color = colorYellow;
                break;
            default:
                break;
        }

        Debug.Log("Car Color Set to Random Color");
    }
}
| Array & For Loop |
Create Array By Tags:
using System.Collections;
using System.Collections.Generic;
using UnityEngine;

public class CreateArrayByTag : MonoBehaviour
{
    public GameObject[] trees;

    // Start is called before the first frame update
    void Start()
    {
        trees = GameObject.FindGameObjectsWithTag("Tree");

    }

    // Update is called once per frame
    void Update()
    {

    }
}
Change all trees color to yellow:
using System.Collections;
using System.Collections.Generic;
using UnityEngine;

public class ChangeTreesColor : MonoBehaviour
{
    public GameObject[] trees;
    public Material tree_Mat;

    Color colorYellow = Color.yellow;

    // Start is called before the first frame update
    void Start()
    {
        // Find all game objects with the specified tag and store them in the array
        trees = GameObject.FindGameObjectsWithTag("Tree");

        // Iterate through each tree and change its material color to yellow
        for (int i = 0; i < trees.Length; i++)
        {
            // Ensure the tree has a Renderer component
            Renderer treeRenderer = trees[i].GetComponent<Renderer>();
            if (treeRenderer != null)
            {
                // Access the material of the tree and set its color to yellow
                treeRenderer.material.color = colorYellow;
            }
        }
    }
}
| Functions |
Click game object function:
using UnityEngine;
using TMPro;

public class ClickGameObject : MonoBehaviour
{
    public TMP_Text cubeNameText;

    // Update is called once per frame
    void OnMouseDown()
    {
        // Change the color to red
        GetComponent<Renderer>().material.color = Color.red;

        // Print the cube name on the screen
        string cubeName = "Clicked Cube Name: " + gameObject.name;
        Debug.Log(cubeName);

        // Display the cube name on the TMP Text element
        if (cubeNameText != null)
        {
            cubeNameText.text = cubeName;
        }
    }
}
Change color function:
using TMPro;
using UnityEngine;

public class ChangeColorFunctions : MonoBehaviour
{
    public TMP_Text cubeNameText;
    public Color customColor = Color.green; // New color variable

    // Update is called once per frame
    void OnMouseDown()
    {
        // Change the color to red
        GetComponent<Renderer>().material.color = Color.red;

        // Print the cube name on the screen
        string cubeName = "Clicked Cube Name: " + gameObject.name;
        Debug.Log(cubeName);

        // Display the cube name on the TMP Text element
        if (cubeNameText != null)
        {
            cubeNameText.text = cubeName;
        }
    }

    // Update is called once per frame
    void Update()
    {
        // Check for space key press
        if (Input.GetKeyDown(KeyCode.Space))
        {
            // Call the ChangeColor function with the customColor variable
            ChangeColor(customColor);
        }
    }

    // Function to change the color of the GameObject
    void ChangeColor(Color newColor)
    {
        // Change the color of the GameObject to the specified color
        GetComponent<Renderer>().material.color = newColor;

        // Print a message to the console
        Debug.Log("Color Changed to: " + newColor);
    }
}
Distance Calculator Function:
In my perspective, learning serves as the cornerstone of video game gameplay, involving interactions and decision-making. Game developers create gaming experiences that enable players to develop various knowledge, interests, and skills. In this way, novices eventually evolve into experts as they come to understand and master the game space (Selen Turkay).
In games like Minecraft and Don’t Starve Together, the primary objective is to learn how to survive, encompassing collaborating with friends, acquiring food, and utilizing materials to construct. Players accumulate experience through failures, progressively refining their survival skills. The gameplay hinges on mastering the materials within the game world, allowing players to unleash their creativity. Especially in the case of Minecraft, is acclaimed for highly free-form gameplay. Learning to combine materials and memorizing the rules of the world is fundamental to achieving this freedom. Additionally, the inclusion of mods introduces new elements to learn, breathing fresh life into these games.
When discussing freedom of choice in gaming, Baldur’s Gate comes to my mind. This game demands an investment of time to grasp its intricate system and rich world. However, it becomes significantly more captivating as players gain knowledge about the world—be it in combat strategies or unraveling the narrative. The thrill of discovering something new in the game instills excitement, fostering a strong desire to experiment and test newfound knowledge. Undoubtedly, learning significantly contributes to the overall gameplay experience.
Work Cited:
Turkay, S., Hoffman, D., Kinzer, C. K., Chantes, P., & Vicari, C. (2014). Toward understanding the potential of games for Learning: Learning theory, game design characteristics, and situating video games in classrooms. Computers in the Schools, 31(1–2), 2–22. https://doi.org/10.1080/07380569.2014.890879