Task #1: Make a Processing Etch-A-Sketch
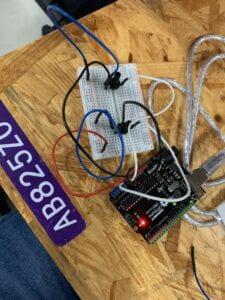
For the first task, I connected two potentiometers to the breadboard. It wasn’t difficult since we did this during class as well.

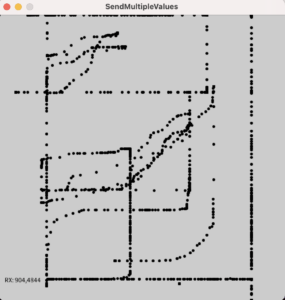
After connecting the potentiometers, I ran the example codes in Arduino and Processing so that Arduino would send two analog signals to Processing. Then I changed the code in Processing so that the change in the values from the potentiometer would control the x and y axis for drawing. This is the following code:
import processing.serial.*;
import osteele.processing.SerialRecord.*;
Serial serialPort;
SerialRecord serialRecord;
void setup() {
size(500, 500);
String serialPortName = SerialUtils.findArduinoPort();
serialPort = new Serial(this, serialPortName, 9600);
// If the Arduino sketch sends a different number of values, modify the number
// `2` on the next line to match the number of values that it sends.
serialRecord = new SerialRecord(this, serialPort, 2);
}

void draw() {

serialRecord.read();
int value1 = serialRecord.values[0];
int value2 = serialRecord.values[1];

float x = map(value1, 0, 1024, 0, width);
float y = map(value2, 0, 1024, 0, height);
line(x, y, x, y);
stroke(0);
strokeWeight(5);
if (keyPressed == true) {
background(200);
}
}
This is the output on the screen:

This was the physical interaction:
It was very cool to see use the potentiometers to draw something on the computer. Using potentiometers to draw isn’t an interaction that I would think of because I would only think about potentiometers as resistors.
Task #2:
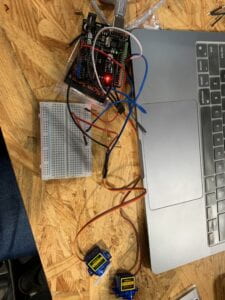
For task 2, I first connected the servo motor to the Arduino and set up the code so that the Arduino would receive an analog signal from Processing.

Making a ball move on the screen wasn’t difficult.
I faced a challenge while trying to send the signal from Processing to the Arduino. The signal wasn’t being sent properly and I think the value would sometimes be negative which the Arduino didn’t want which would cause an error. At the end, I was able to solve it. The final code in Processing was:
import processing.serial.*;
import osteele.processing.SerialRecord.*;

Serial serialPort;
SerialRecord serialRecord;
int x = 0;
boolean edge = false;

void setup() {
  fullScreen();

  String serialPortName = SerialUtils.findArduinoPort();
  serialPort = new Serial(this, serialPortName, 9600);

  // In order to send a different number of values, modify the number `2` on the
  // next line to the number values to send. In this case, the corresponding
  // number in the Arduino sketch should be modified as well.
  serialRecord = new SerialRecord(this, serialPort, 1);
}

void draw() {
  background(0);
  if (x < width && edge == false) {
    x = x + 5;
    circle(x, height/2, 100);
  } else if (x == width) {
    edge = true;
  }
  if (edge == true) {
    x = x - 5;
    circle(x, height/2, 100);
    //serialRecord.values[0] = x;
    //serialRecord.send();
  }
  if (x < 0) {
    edge = false;
  }
  serialRecord.values[0] = x;
  serialRecord.send();
}
The Arduino code was based on the example code to make the servo move. The final code on the Arduino side was:
#include "SerialRecord.h"

// Change this number to the number of values you want to receive
SerialRecord reader(1);

#include

Servo myservo;  // create servo object to control a servo
Servo myservo2;

int potpin = A0;  // analog pin used to connect the potentiometer
int val;          // variable to read the value from the analog pin


void setup() {
  Serial.begin(9600);
  myservo.attach(9);
  myservo2.attach(10);
}

void loop() {
  reader.read();
  //Serial.println(reader[0]);
  val = 100;
  if (reader[0] > 1420) {
    myservo.write(val);
  }
  else if (reader[0] > 1400){
    myservo.write(val - 100);
  }
  if (reader[0] < 10) {
    myservo2.write(val);
  }
  else {
    myservo2.write(val - 100);
  }
  //delay(20);  // reads the value of the potentiometer (value between 0 and 1023)  // scale it for use with the servo (value between 0 and 180)
              // sets the servo position according to the scaled value
}
I worked with Jack and used his servo motor. Since I already finished the coding, we worked together by connecting the servos together. It was interesting to see physical interaction due to something that was on the screen. I think this would be interesting to implement in one of my projects.