Mini Project2. Interactive Drawing_Shelly

  • Cat’s Drawing Board
    • Brief Description and Concept
      • Here is a Cat’s grawing board (I’d like to call it, Mr.Luo). the background can keep changing colors while moving your mouse. Here are functions you can interact with the board: 1. press your mouse and draw threads freely; 2. double click your mouse, then left a white snow spot on it; 3. press any key from a to z, then you can see the cat change a movement; 4. simply move your mouse(imitate using a rubber) to clean the board, or you can just click the CLEAN on the left bottom; 4. press the key 1-9 to change the weight of thread and size of snow spots. When drawing on the board, you can notice two eyes following you and find the thread’s color changed with mouse moving as well. Make a try and enjoy it!
    • Demo/Visual Documentation:(the music was played by my phone. Though it did not belong to the project, I thought it quite suitable Mr.Luo’s grawing board.)
  • Development and Technical Implementation
    • Coding: include code snippets that are of particular importance (you worked extra long on them/don’t know why they work/they achieve something crucial to your idea), screenshots of outcomes, short screen recordings, etc.
      • 1. How to show the track of strokes while keeping the color of background changing(the idea of background(mouseX/2+150,160+mouseX/2-mouseY/2,mouseY/2+150) comes from a class )
        • with the help of TA Sam, I explored the index of transparensy. After trying for countless times by changing the index of transparensy and puting the background(…) in diferent position(like in some if condition sentences). at the last moment I came up with the idea(the green code below) and decided to practice into my cat’s drawing board.
        • //the cat
          background(mouseX/2+150,160+mouseX/2-mouseY/2,mouseY/2+150,2);
          fill(160,140,140)
          if(catVersion==true){
          fill(160+mouseX/2-mouseY/2,mouseY/2+150,mouseX/2+150,5)
          noStroke()
          ellipse(202,405,410,250)
          stroke(160,140,140)
          strokeWeight(40)
          noFill()
          bezier(20,410,30,397,68,360,118,450)
          strokeWeight(1)
          stroke(0)fill(160,140,140)
          // background(mouseX/2+150,160+mouseX/2-mouseY/2,mouseY/2+150,2);
          triangle(70,380,185,347,130,420)
          triangle(width-70,380,width-185,347,width-130,420)}else{
          fill(mouseY/2+150,160+mouseX/2-mouseY/2,mouseX/2+150,5)
          noStroke()
          ellipse(202,405,410,250)
          stroke(160,140,140)
          strokeWeight(40)
          noFill()
          bezier(20,380,30,450,120,460,136,445)
          strokeWeight(1)
          stroke(0)fill(160,140,140)
          // background(mouseX/2+150,160+mouseX/2-mouseY/2,mouseY/2+150,2);
          triangle(114,310,195,345,130,420)
          triangle(width-114,310,width-195,345,width-130,420)}
        • below is one of the unsatisfying attempts
        •  //the cat
          fill(160,140,140)
          if(catVersion==true){
          stroke(160,140,140)
          strokeWeight(40)
          noFill()
          bezier(20,410,30,397,68,360,118,450)
          strokeWeight(1)
          stroke(0)fill(160,140,140)
          background(mouseX/2+150,160+mouseX/2-mouseY/2,mouseY/2+150,8);
          triangle(70,380,185,347,130,420)
          triangle(width-70,380,width-185,347,width-130,420)}else{
          stroke(160,140,140)
          strokeWeight(40)
          noFill()
          bezier(20,380,30,450,120,460,136,445)
          strokeWeight(1)
          stroke(0)fill(160,140,140)
          background(mouseX/2+150,160+mouseX/2-mouseY/2,mouseY/2+150,8);
          triangle(114,310,195,345,130,420)
          triangle(width-114,310,width-195,345,width-130,420)
          }
      • 2. I think the changing color of back ground was also a complex process for me. Since I wanted to make the color always changing with mouse moving, it was hard to make the color always seen comfortable. Also, when I tried to use mouseX-mouseY , I found it not alway positive. Thanks to my professor, after serveral attemps, it was managed by abs(). Besides, in order to make unexpected changes, I switch the positions of some parameters:
        • background(mouseX/2+150,160+mouseX/2-mouseY/2,mouseY/2+150);
        • fill(160+mouseX/2-mouseY/2,mouseY/2+150,mouseX/2+150,5);
        • fill(mouseY/2+150,160+mouseX/2-mouseY/2,mouseX/2+150,5);
        • stroke(mouseX/2+30,mouseY/2+30,abs(mouseX/2-mouseY/2));
      • The last time before I wrote down this blog, I recall an idea came up with at the very beginning.  Quite lucky to execute the function of doubleClicked() with the help of Reference in my cat’s drawing board!
        • function doubleClicked() {
          let x1=mouseX
          let y1=mouseY
          fill(255)
          noStroke()
          ellipse(x1,y1,d*8)
          }
  • Reflection/Lessons Learned

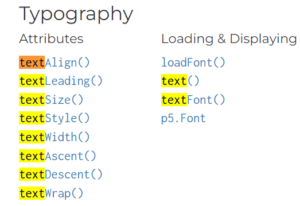
This idea came into my mind when I heard that the instuctions mentioned “interactive”, “drawing with your mouse and keys”, “unique”(which gave me great courage then to develop this inspiration). By doing this project, I learned much about the use of if&else, key&keyIsPressed&keycode, mouseX&pmouseX&mouseIsPressed&doubleClick function. And I was trying thinking about what is art and what is crazy ideas, which might be a long-term question I have to think about the answer as well as pay more practive and attempts. My Curiosity drived me develop more functions and skills through this process. That’s really a nice feeling. There are two things I want to learn more about and hope to apply into my futural project. One is that making sure that code inside this if statement(lead by keyIsPressed())is only executed once by a boolean variable(like previousLoopKeyPressed). The other one is to explore more about the text formatting .
Reading1_Conditional Design_Shelly

  • What do we learn about the process of the designers and the artist discussed in the text? What is the role of “process” in their overall activity?
    • One thing impressed me a lot about the process of the designers and the artist discussed is that instruction’s execution need understanding and coorperation, as is presented in Jules’ article :”To that extent, the expectation of‘beauti-ful drawings’ is no more than another constraint, rule the participants are given and have to deal with together. “(2009) From my perspective, the “process” in their overall activity is also a kind of art pieces, a part of create, as they stated apparently on their home page :”The Process Is the Product”.
  • Describe how their approach differs from designs or drawings you have created in the past and what the impact on the resulting work is. 
    • When I was going to create something, I used to make a plan/image on paper or in my mind, and then think how to fit the plan with approaches and adjustments. But their approach to create seems to make the process of create itself a work of art, rather than only the result of it. Comparing with results, mine are limited in the original ideas and the process of creating seems almost to stop at the planning/designing stage; While the conditional design artiests’ results are more random and have some unpredictability which makes the results expecting and depart from convention.
  • The text introduces the concept of the conditional drawing, where the artwork is the result of a series of instructions (rules) being performed. Can you imagine a (short) set of rules that, when followed on a sheet of paper, might produce an interesting, or unexpected, result?
    • Sometime I can simulate the instructions executed in my mind, so I can imagine what will happen. However, this process is only easy to imagine when the instructions are simple and fixed. I can’t clearly imagine what will happen under instructions that might be changed at any time. And the results are more likely a blurred image in my mind. Just as what happened in Vitruvian Paint Machine, I can imagine the walls finally filled with colorful lines, curves, and shapes, but I can not tell how they will be and how they fit together. Therefore, I think it might be interesting and sometimes unexpected.


  • Describe your thought process when devising your rules. Can you imagine the resulting image in your head, or are you tempted to act out your own rules on a sheet of paper – just to get an idea of what the result might look like? (If the latter, try to identify what part of your rules made you do so.)
    • As what I described for the Q3, I like to imagine different processes running in mind more than drawing them down on paper. But sometimes, if the process of designing in mind is too complicated and abstract, I have to draw a draft or find some existing staff (maybe pictures online, things around me, works shared by others) to help get the figure of results. When devising my rules, most of the time, I would like to learn more about what I’m going to make first and gain some simple experience and instructions to make sure the direction would not be too far away off my origin inspirations/goals. Then I will list some basic principles(in mind) as well as the fundamental elements I want to use, which was used in a poster design this weekend for the Lantern Festival next Tuesday. For example, I told myself to magnify the title and consider the content more than interesting stickers. In that way, I made this poster a good joy, efficiently. In this work, I didn’t draw any draft and just followed rules and used elements I collected. (It was my first time to make a poster via PS after going to the university, so I browsed something about PS and posters before I started my work ). By the way, if there comes a great inspiration of results, I may draw down some drafts to catch that feelings first 😀

Mini Project1. Drawing with Code_Shelly

  • Project Title
  • My Desktop for the New Term
  • Link to your project
  • https://editor.p5js.org/ShellyXuan/sketches/QD2TtSAUS
    • Brief Description and Concept
    • Through the screen, we can see a simplified overview of my desk cleared for the new semester.
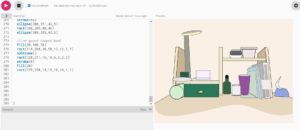
    • The main sructure is the bookshelf and the tabletop with various things on and in. As we can see, here are obviously a table lamp, a perple mug, and some books; the tiny green rectangle on the lamp is a moisturizer, the green bottle in the right cell is filled with facial lotion, and the big green box in the shelf is used to contain smalls learning tools which was originally the packaging of my skin care product mentioned above:D ; The light green one in the left cell is actually a pen bag; the light colored box above is a candy box put on the lid of another box which is on the top of the shelf, right of a clock; the blug one on the right of this picture is a half-used napkin 😛
    • Above is an overview of my description for the project.
    • Demo/Visual Documentation:
  • Development and Technical Implementation
    • Coding
    • it was a pity that I haven’t take any screenshot of my failures and bewilderments.
    • 1. the lamp’s head
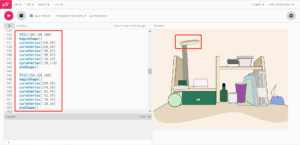
      • Firstly I asked the LA for the way to realize a oblique ellipse. After knowing that it will be learnt in the future but not so early as now, I come up with the idea to replace rotation by shaping. However, I misused “curve” to locate points and failed to reach my goal. Luckily, with the help of the professor I learnt “curveVertex()” and finally understand how it works as well as “curve()””bezier()”.
      • fill(180,180,180)
        beginShape()
        curveVertex(220,98)
        curveVertex(220,58)
        curveVertex(190,53)
        curveVertex(150,59)
        curveVertex(128,70)
        curveVertex(128,110)
        endShape()fill(250,250,188)
        beginShape()
        curveVertex(220,20)
        curveVertex(220,58)
        curveVertex(192,70)
        curveVertex(152,76)
        curveVertex(128,70)
        curveVertex(128,30)
        endShape()
    • 2. the napkin
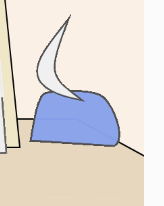
      • After understand how “curveVertex()””bezier()” work, the ideas to use them came into my mind when I was drawing the napkin. With the help of https://p5js.org/reference/#/p5/bezierVertex, I managed to draw an abstact napkin 🙂
      • fill(140,160,240,30)
        beginShape()
        vertex(556,356)
        vertex(618,360)
        vertex(610,324)
        vertex(572,320)
        curveVertex(562,328)
        endShape(CLOSE)
        fill(240)
        beginShape()
        vertex(594,326)
        bezierVertex(538,316,566,290,584,266)
        bezierVertex(568,308,570,308,594,326)
        endShape(CLOSE)
    • 3. round egdes
      • After using “curveVertex()””bezier()” and so on, I thought there must be some ways to make round egdes easile(especially when working with regular shapes ). Therefore, I found the guidance from reference(https://p5js.org/reference/#/p5/rect) and succeeded.
      • //the clock
        fill(250)
        rect(350, 141, 56, 40, 17, 17, 10, 10);
        fill(100)
        rect(353,146,50,20,10,10,4,4)
  • Reflection/Lessons Learned
  • From the lessons, I started the journey of creative coding though p5.js for the first time. It is quite interesting to see the code I typed down transferred into concrete figures. It also inspired me to think how I can made shapes better ones and how I can use codes on the first stage to replace something we would learn much later; For example, the oblique ellipse on the lamp is drawed by “beginShape/endShape” and “curveVertex”. And later, I was inspired to use “vertex””curveVertex” even “bezierVertex” to draw the napkin. The process was tiring but amazing! The bigest problem here is that I chose such a complicated picture and eagered so much to do it well that I spent too much time on it. Although next time I might change my way of learning and practice(try to be not so strict to myself ), the plenty of practice did make me quite familier with the p5.js 😀


Hello world!

Welcome to Web Publishing @ NYU. This is your first post. Edit or delete it, then start creating your site!

Online help is available via the Web Publishing Knowledge Site (wp.nyu.edu/knowledge) and the ServiceLink knowledge base (www.nyu.edu/servicelink). Through ServiceLink, you can find step-by-step instructions, as well as tutorials.

Digital Accessibility

As content creators who create and publish text, images, video, and audio, you must adhere to the NYU Website Accessibility Policy (https://www.nyu.edu/digitalaccessibility/policy) when creating and publishing digital content.

Web Publishing-specific Digital Accessibility Best Practices and examples of how to ensure your content are compliant are available at https://wp.nyu.edu/digitalaccessibility

If you have additional questions, contact the IT Service Desk for assistance. Support is available 24/7/365. For more details, visit www.nyu.edu/it/servicedesk.