To be your own unlimited musician
–Xie Mingxuan(Shelly) & Nomun Altan-Ochir
—Instructor: Margaret Minsky
–2022Fall IXlab Final Project
CONCEPTION AND DESIGN:
In what ways did your understanding of how your users were going to interact with your project inform certain design decisions you made? Account for several such decisions. In addition, what form, material or elements did you use? What criteria did you use to select those materials? Why was it/were they best suited to your project purpose, more than any other one/s? What might have been another option? But you rejected it—why?
Luckily, this project ran on the way of the proposal, though we finally changed our idea to make a larger, digital music box instead of simply use the one I bought online.
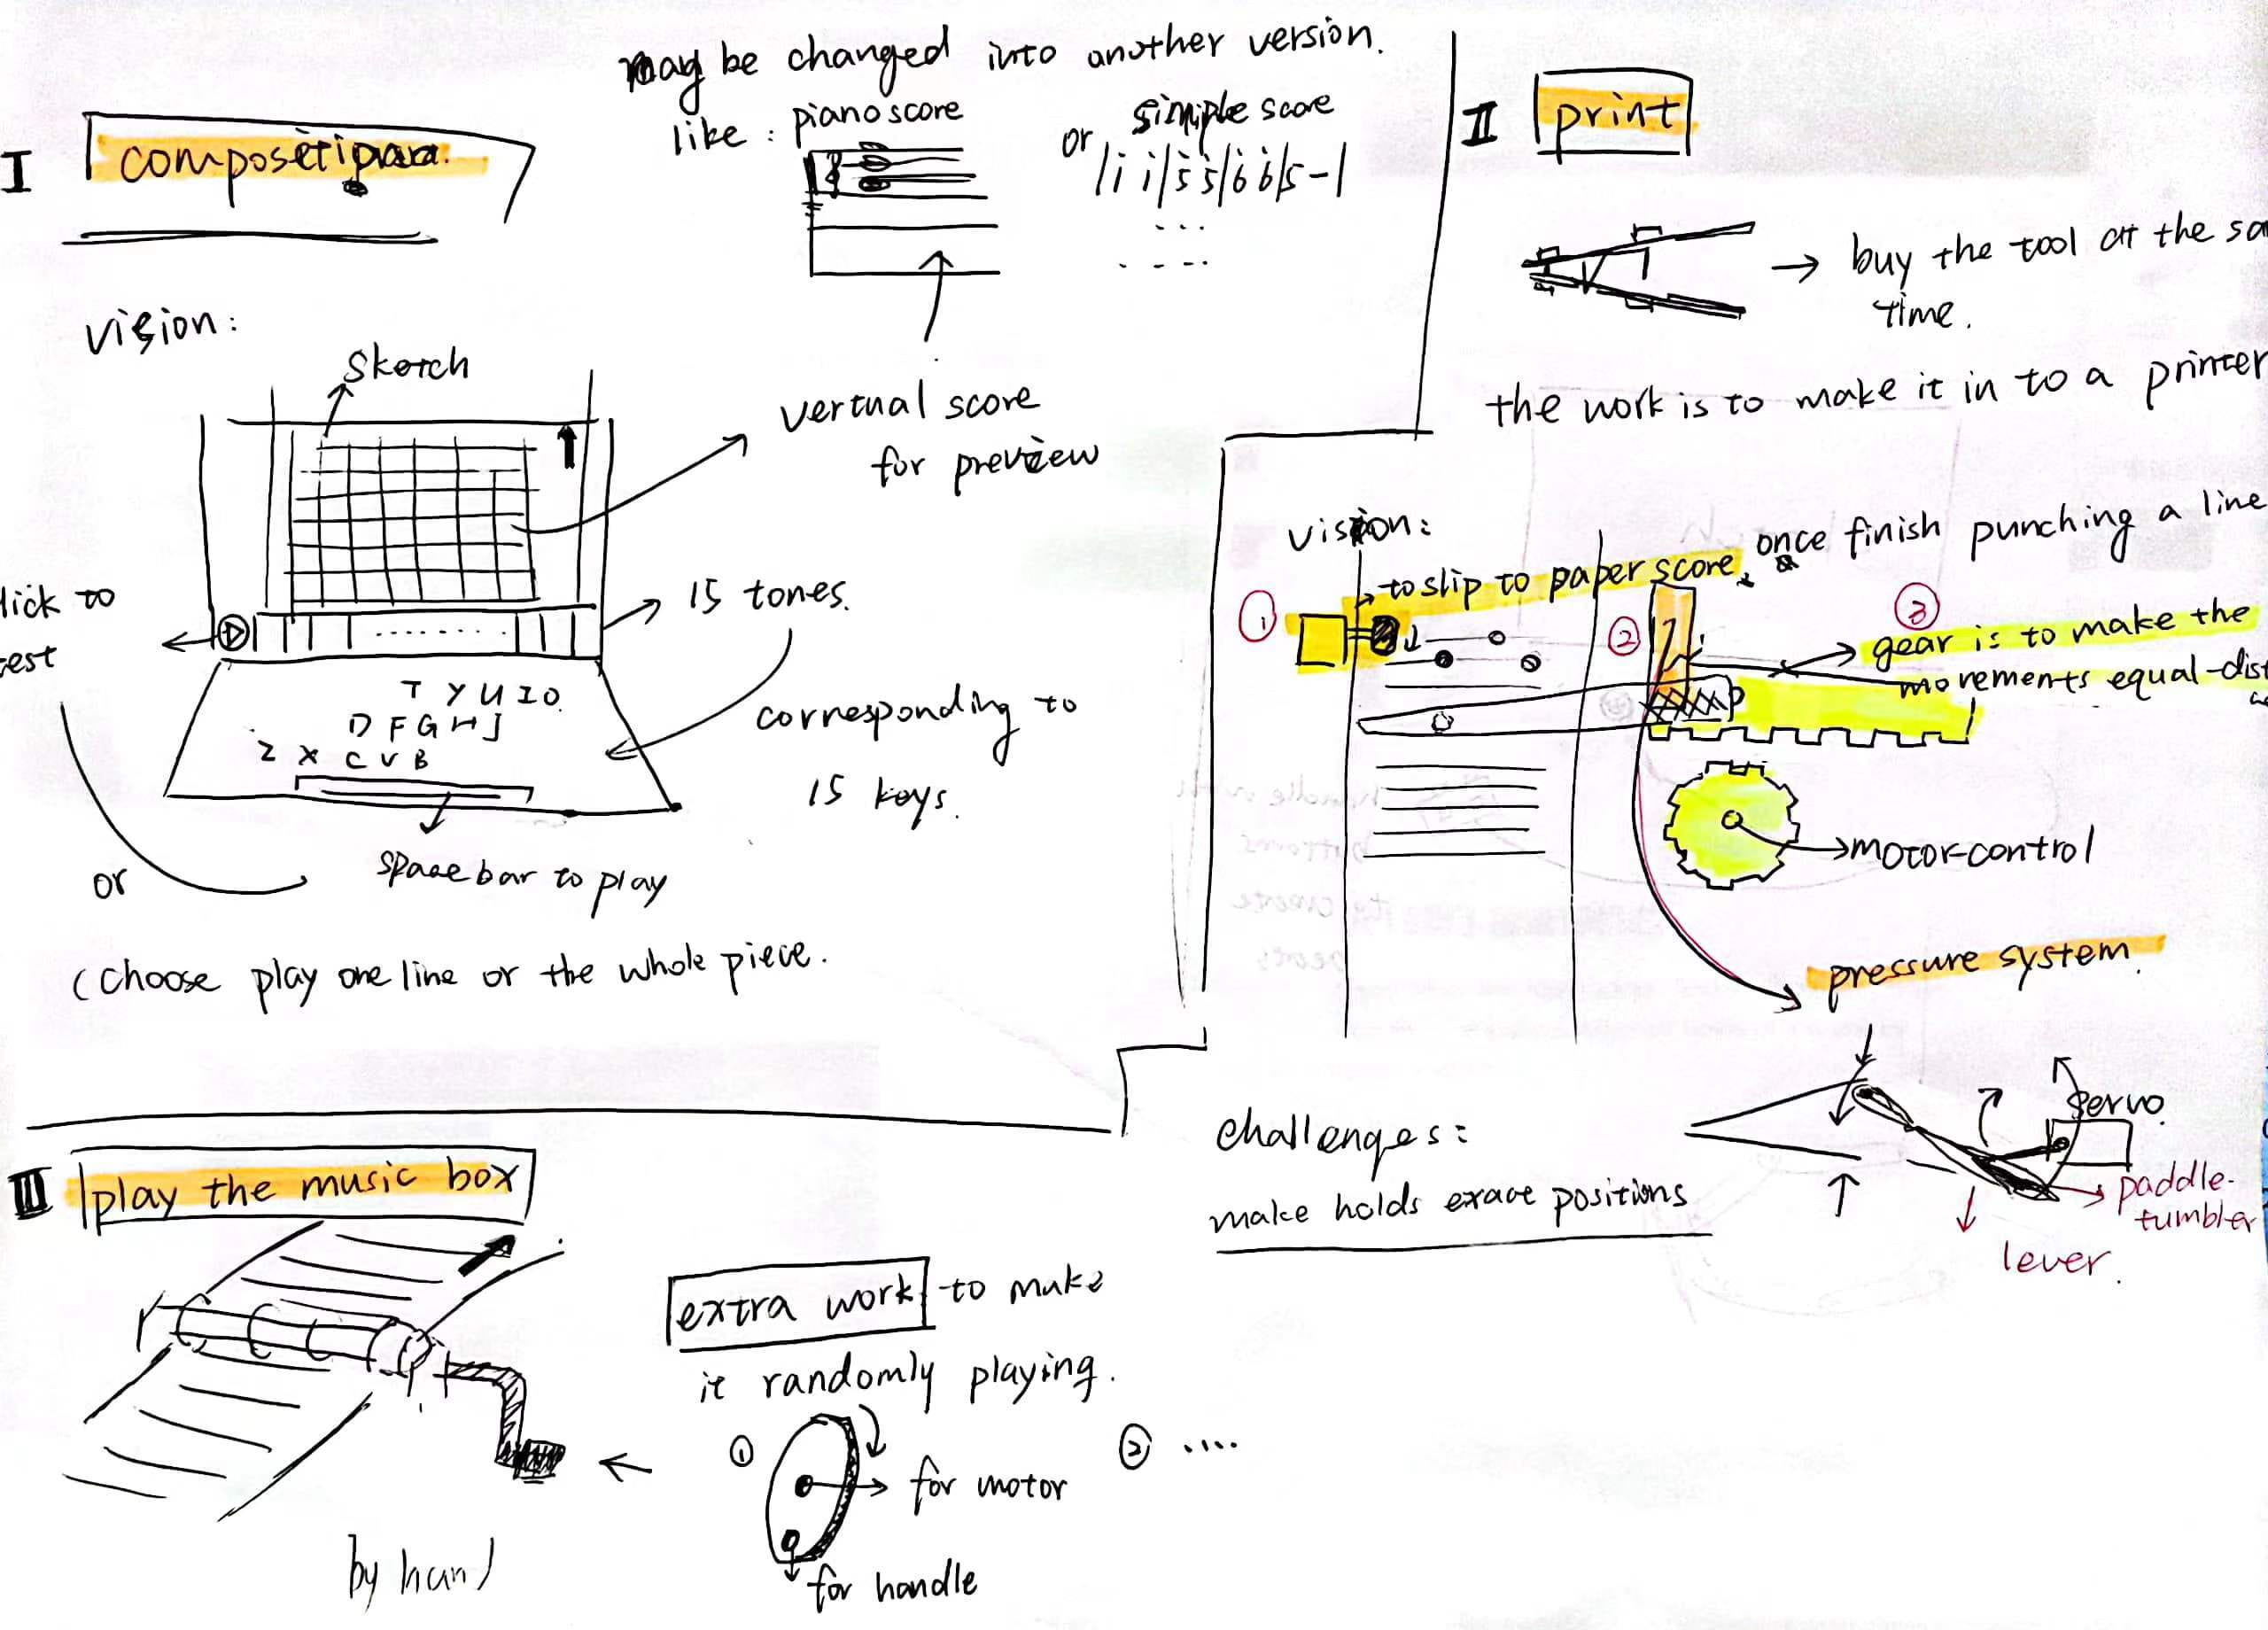
The supposed interactions between users and the project are:
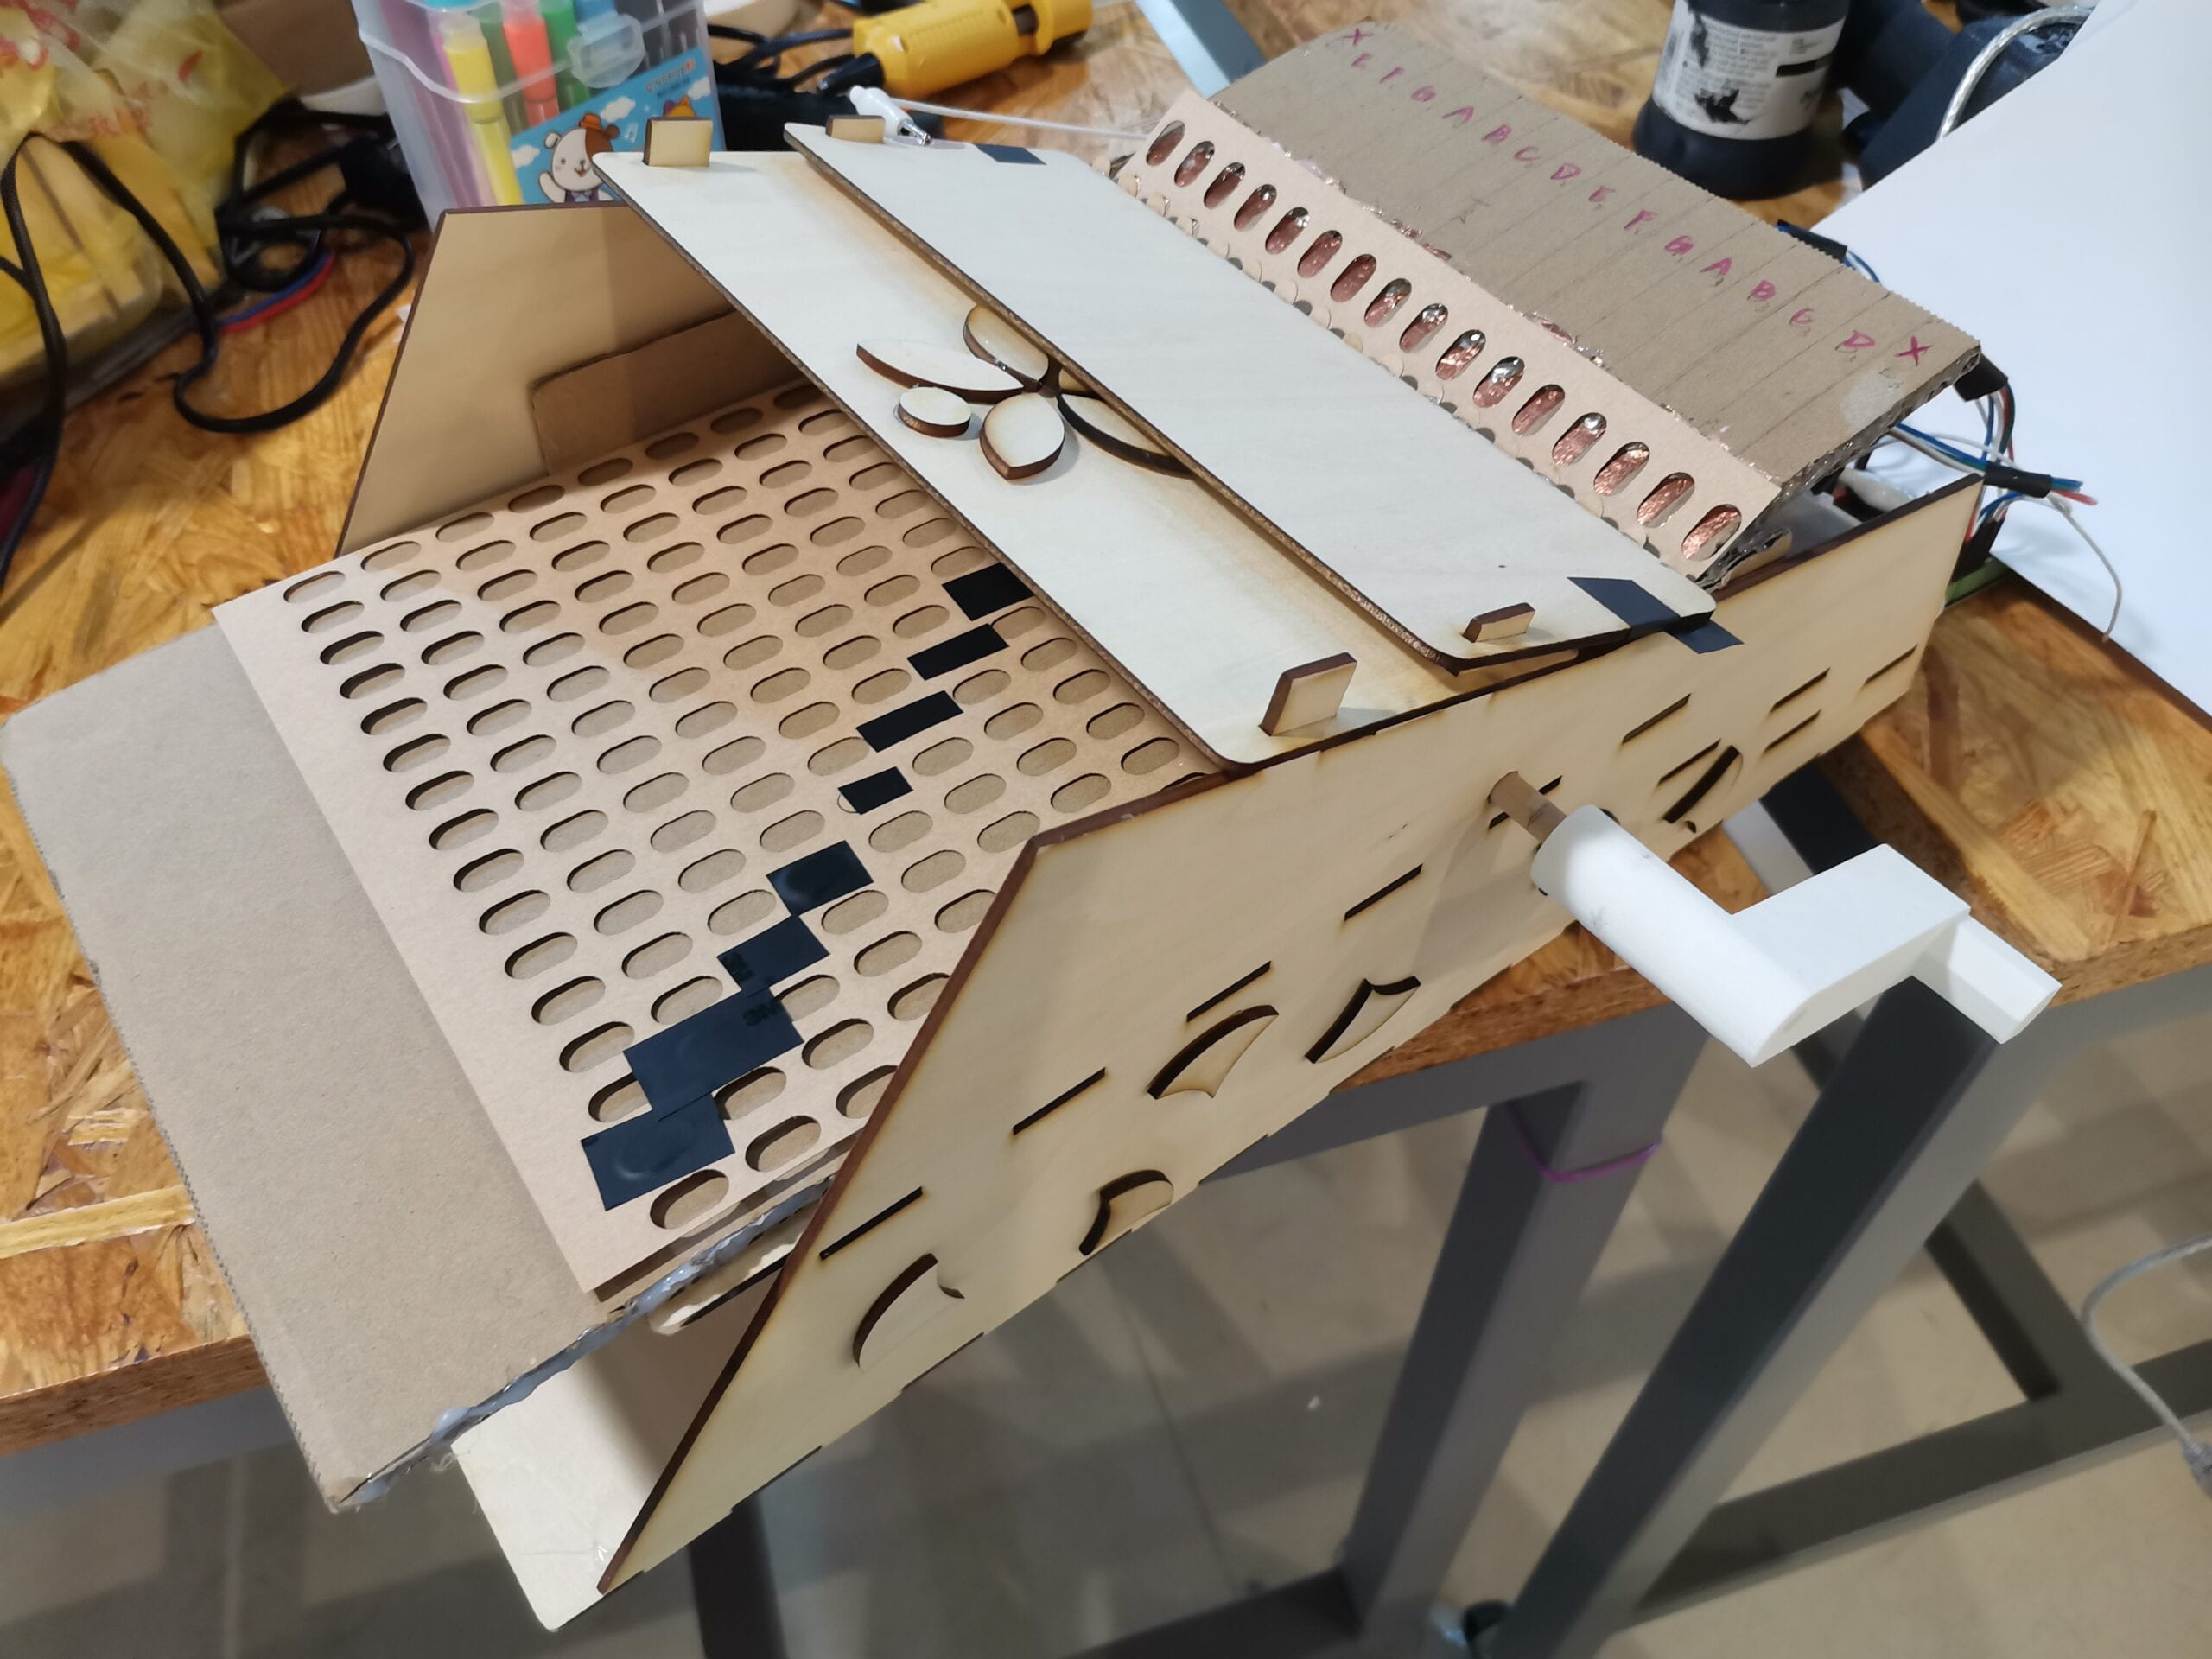
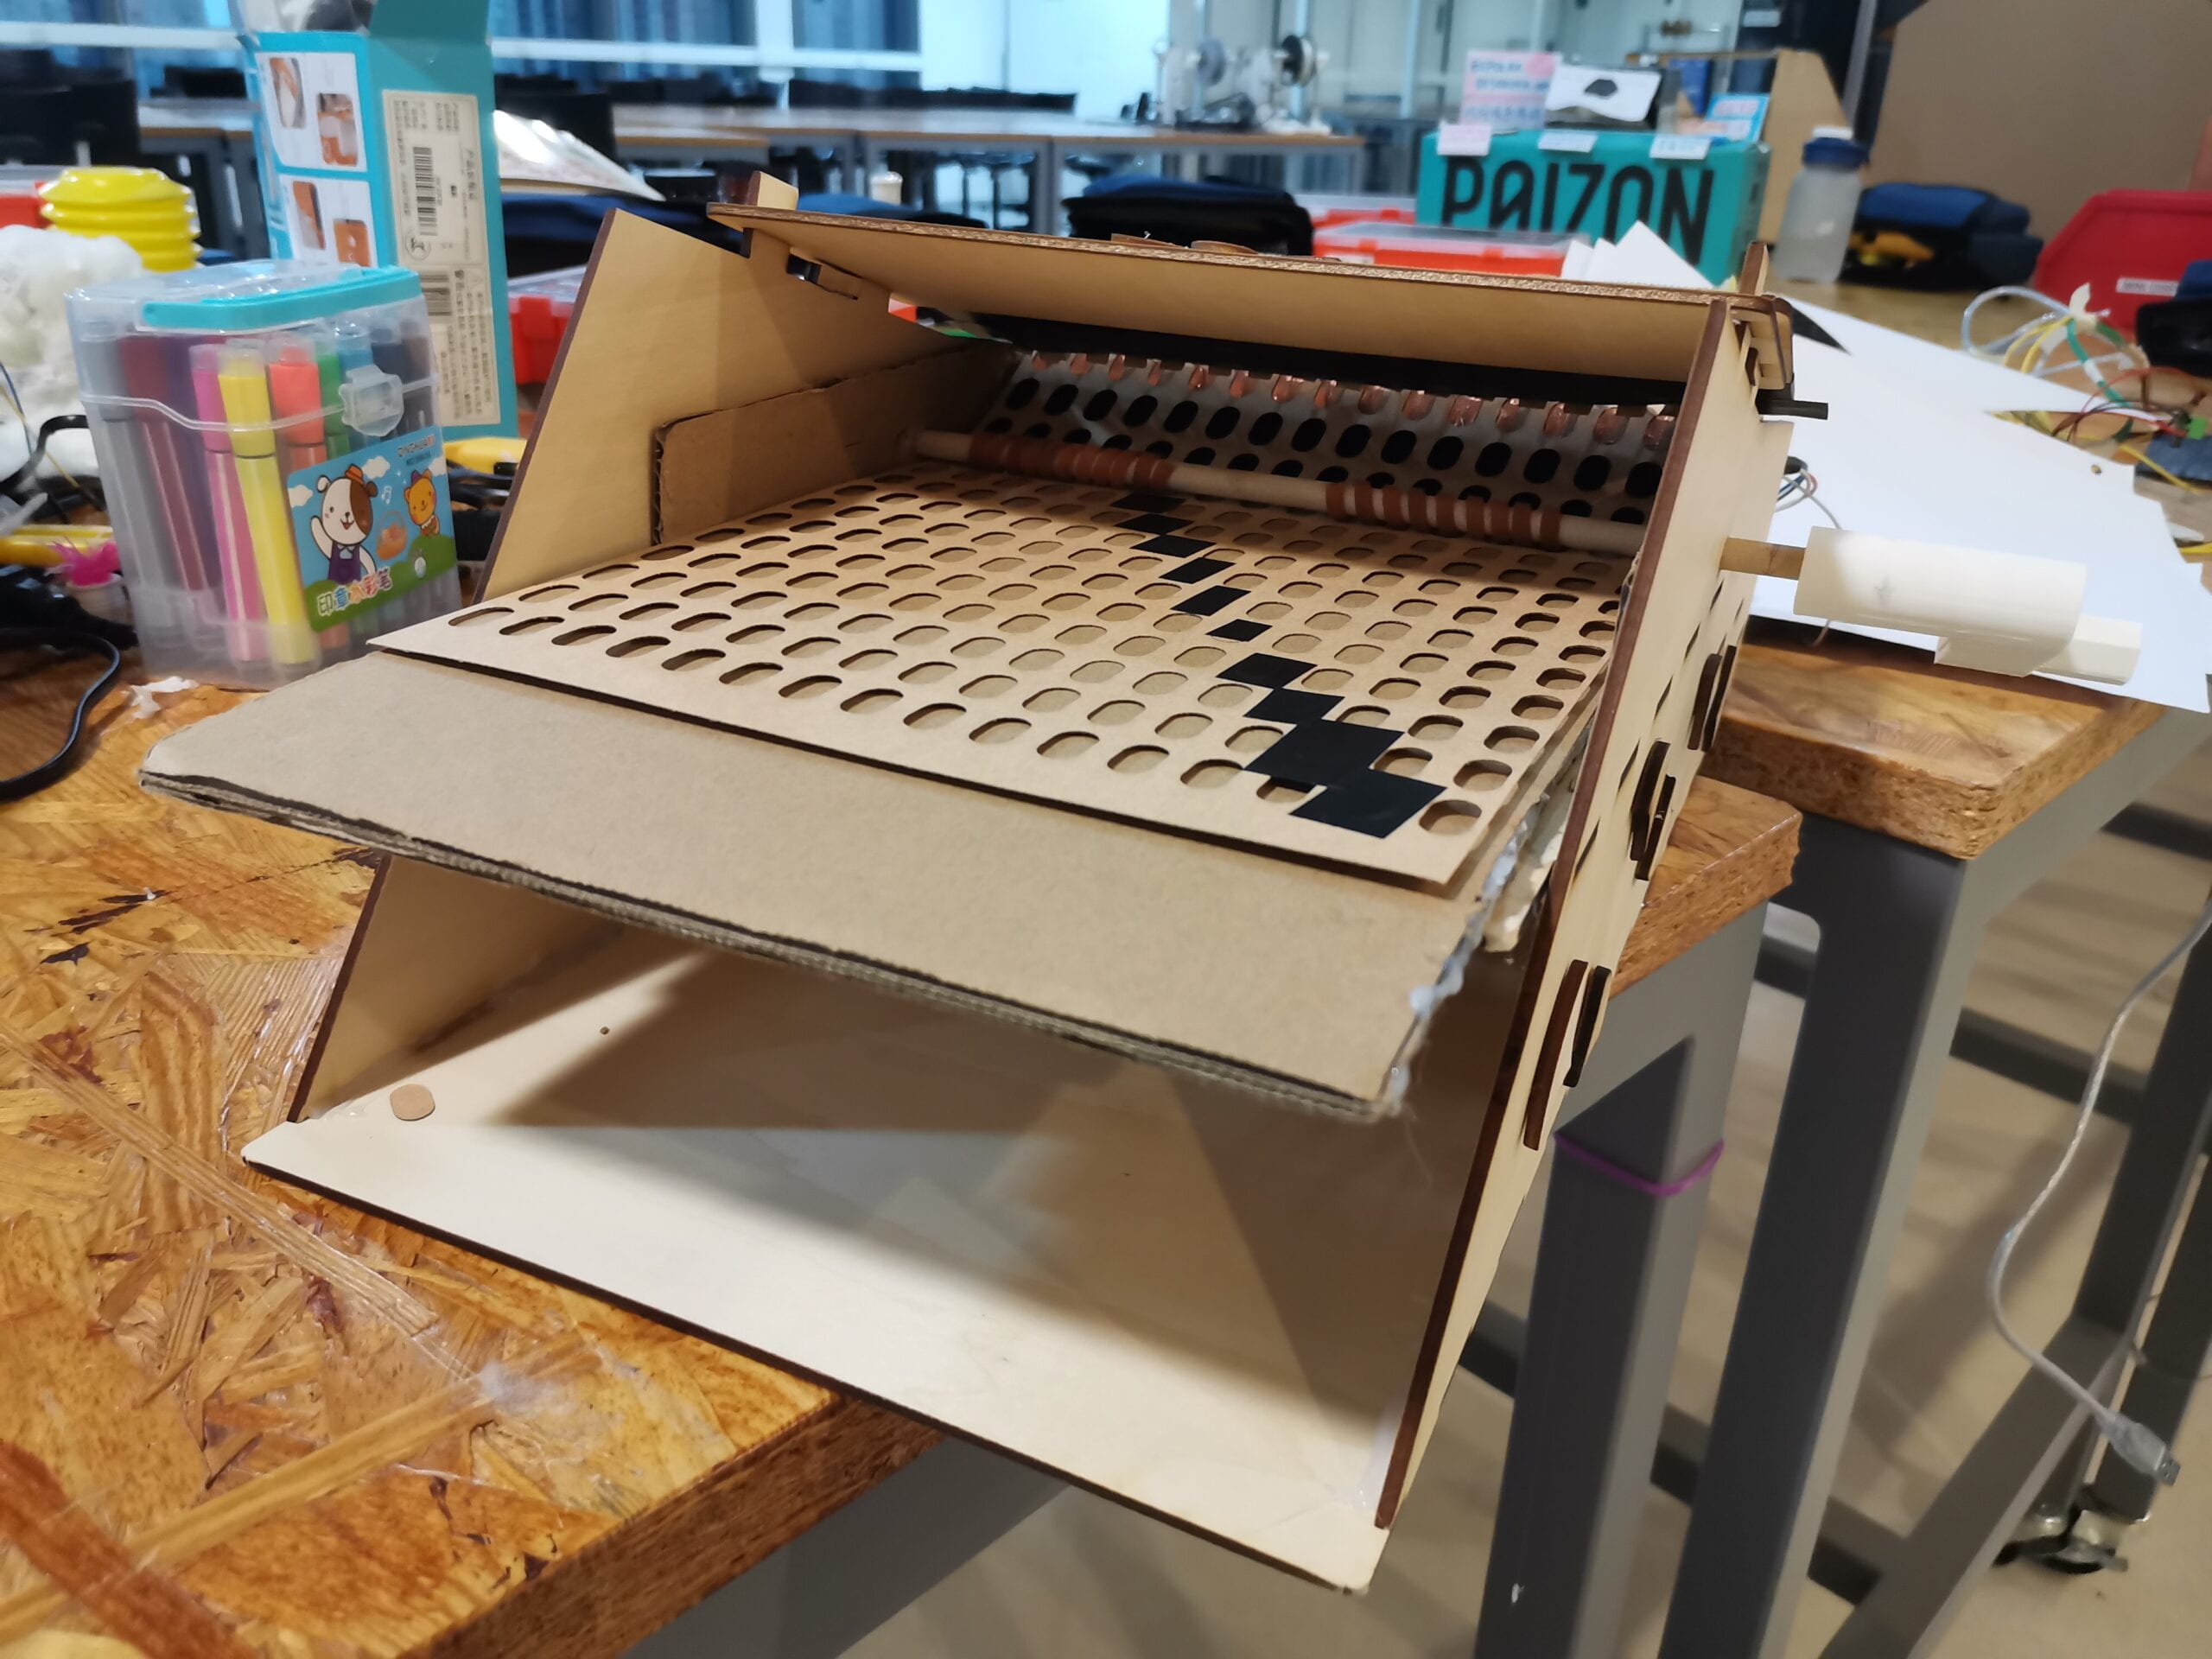
- First, they can try the sample score and send the paper throught the box by rotating the handle–there is an interation from movement to another motion and music effect and visualization on the Neopixel. Here is a hidden action that users can play a score in four different directions.
- Then we will offer some empty scores and some partly finished scores with type and circle paper for them to compose their own notes.
During the User Testing Session, Almost everyone admired our “machine” but they were not active to try punch holes on white paper at that time. While also the connection of switches of notes worked not so well at that time. Besides, we gain much suggestions about the appearence. Therefore, we decided to improve the score making logic and seek for a better way to make 16 switches work better. Moreover, we started our 3D print and laser cutting work to build up a outer box.
FABRICATION AND PRODUCTION:
In this section, describe and assess the most significant steps in your production process, both in terms of failures and successes. Please clarify exactly what contributions and roles you personally made to the process and project along the way, and describe the process your group used to work together. What happened during the User Testing Session? How did your user testing process influence some of your following production decisions? What kind of adaptations did you make? Were they effective? In short, keeping in mind your project goals, how do you account for and justify the various production choices you made for your project? Include sketches and drawings.
[the interaction with notes–switches control]
- We diceded to make each switches corresponding to one notes. It means we will have 16 conditions referring 16 different notes. To begin with, also to leave some space for debugging, we first let notes interacted with keyboard after spending much time on the proper and licensed notes series. Therefore, we can change the conditions into swithes’ digital data later.
2. later in the user test, keyboard test was included into a step of user intructions. But we got feedback from Prof. Godfrid to remove it from the main part of user test. That’s pretty important, reminding us of the focus of our project. At least, keyboard test should not be a step of using the project.
[the interaction with notes–switches control]
This is one of the most essential part of the project, including both physical structure designing, making, testing, and revising, and programming logic to interact.
The switches for notes: how to make paper holes be recognized by the project?
Initially, I wanted to use a photosensor to identify holes at different points in a slit — that is, the change from no light to light. However, However, after my test, the accuracy and sensitivity of the photoresistor in kit and the equipment room are relatively low, which cannot meet the our expectations. Because we want to realize that multiple holes on A4 are identified and monitored by different photoresistors. Due to the small width of the paper, the transverse perforation will result in a tight distance between the positions that need to be monitored in the same line. Plus A4 white paper itself is thinner. Ambient flooding between adjacent paper holes affects each other’s photoresistors. Therefore, we were thinking about other methods.
Then the materials in 826 reminded us of the cardboard switch taught to build in the first recitation. We thought we can make a line of seperate tiny Metal tape, and we made one on our prototype by soldering tape with wires.
It’s the left part of the video:
Taking advantage of the slightly curved elasticity of the cardboard, we used that as a support, and started thinking how do we make the other end of this switch–a cover, which was the hardest and most time-consuming part of this project.
I made serveral versions of the cover:
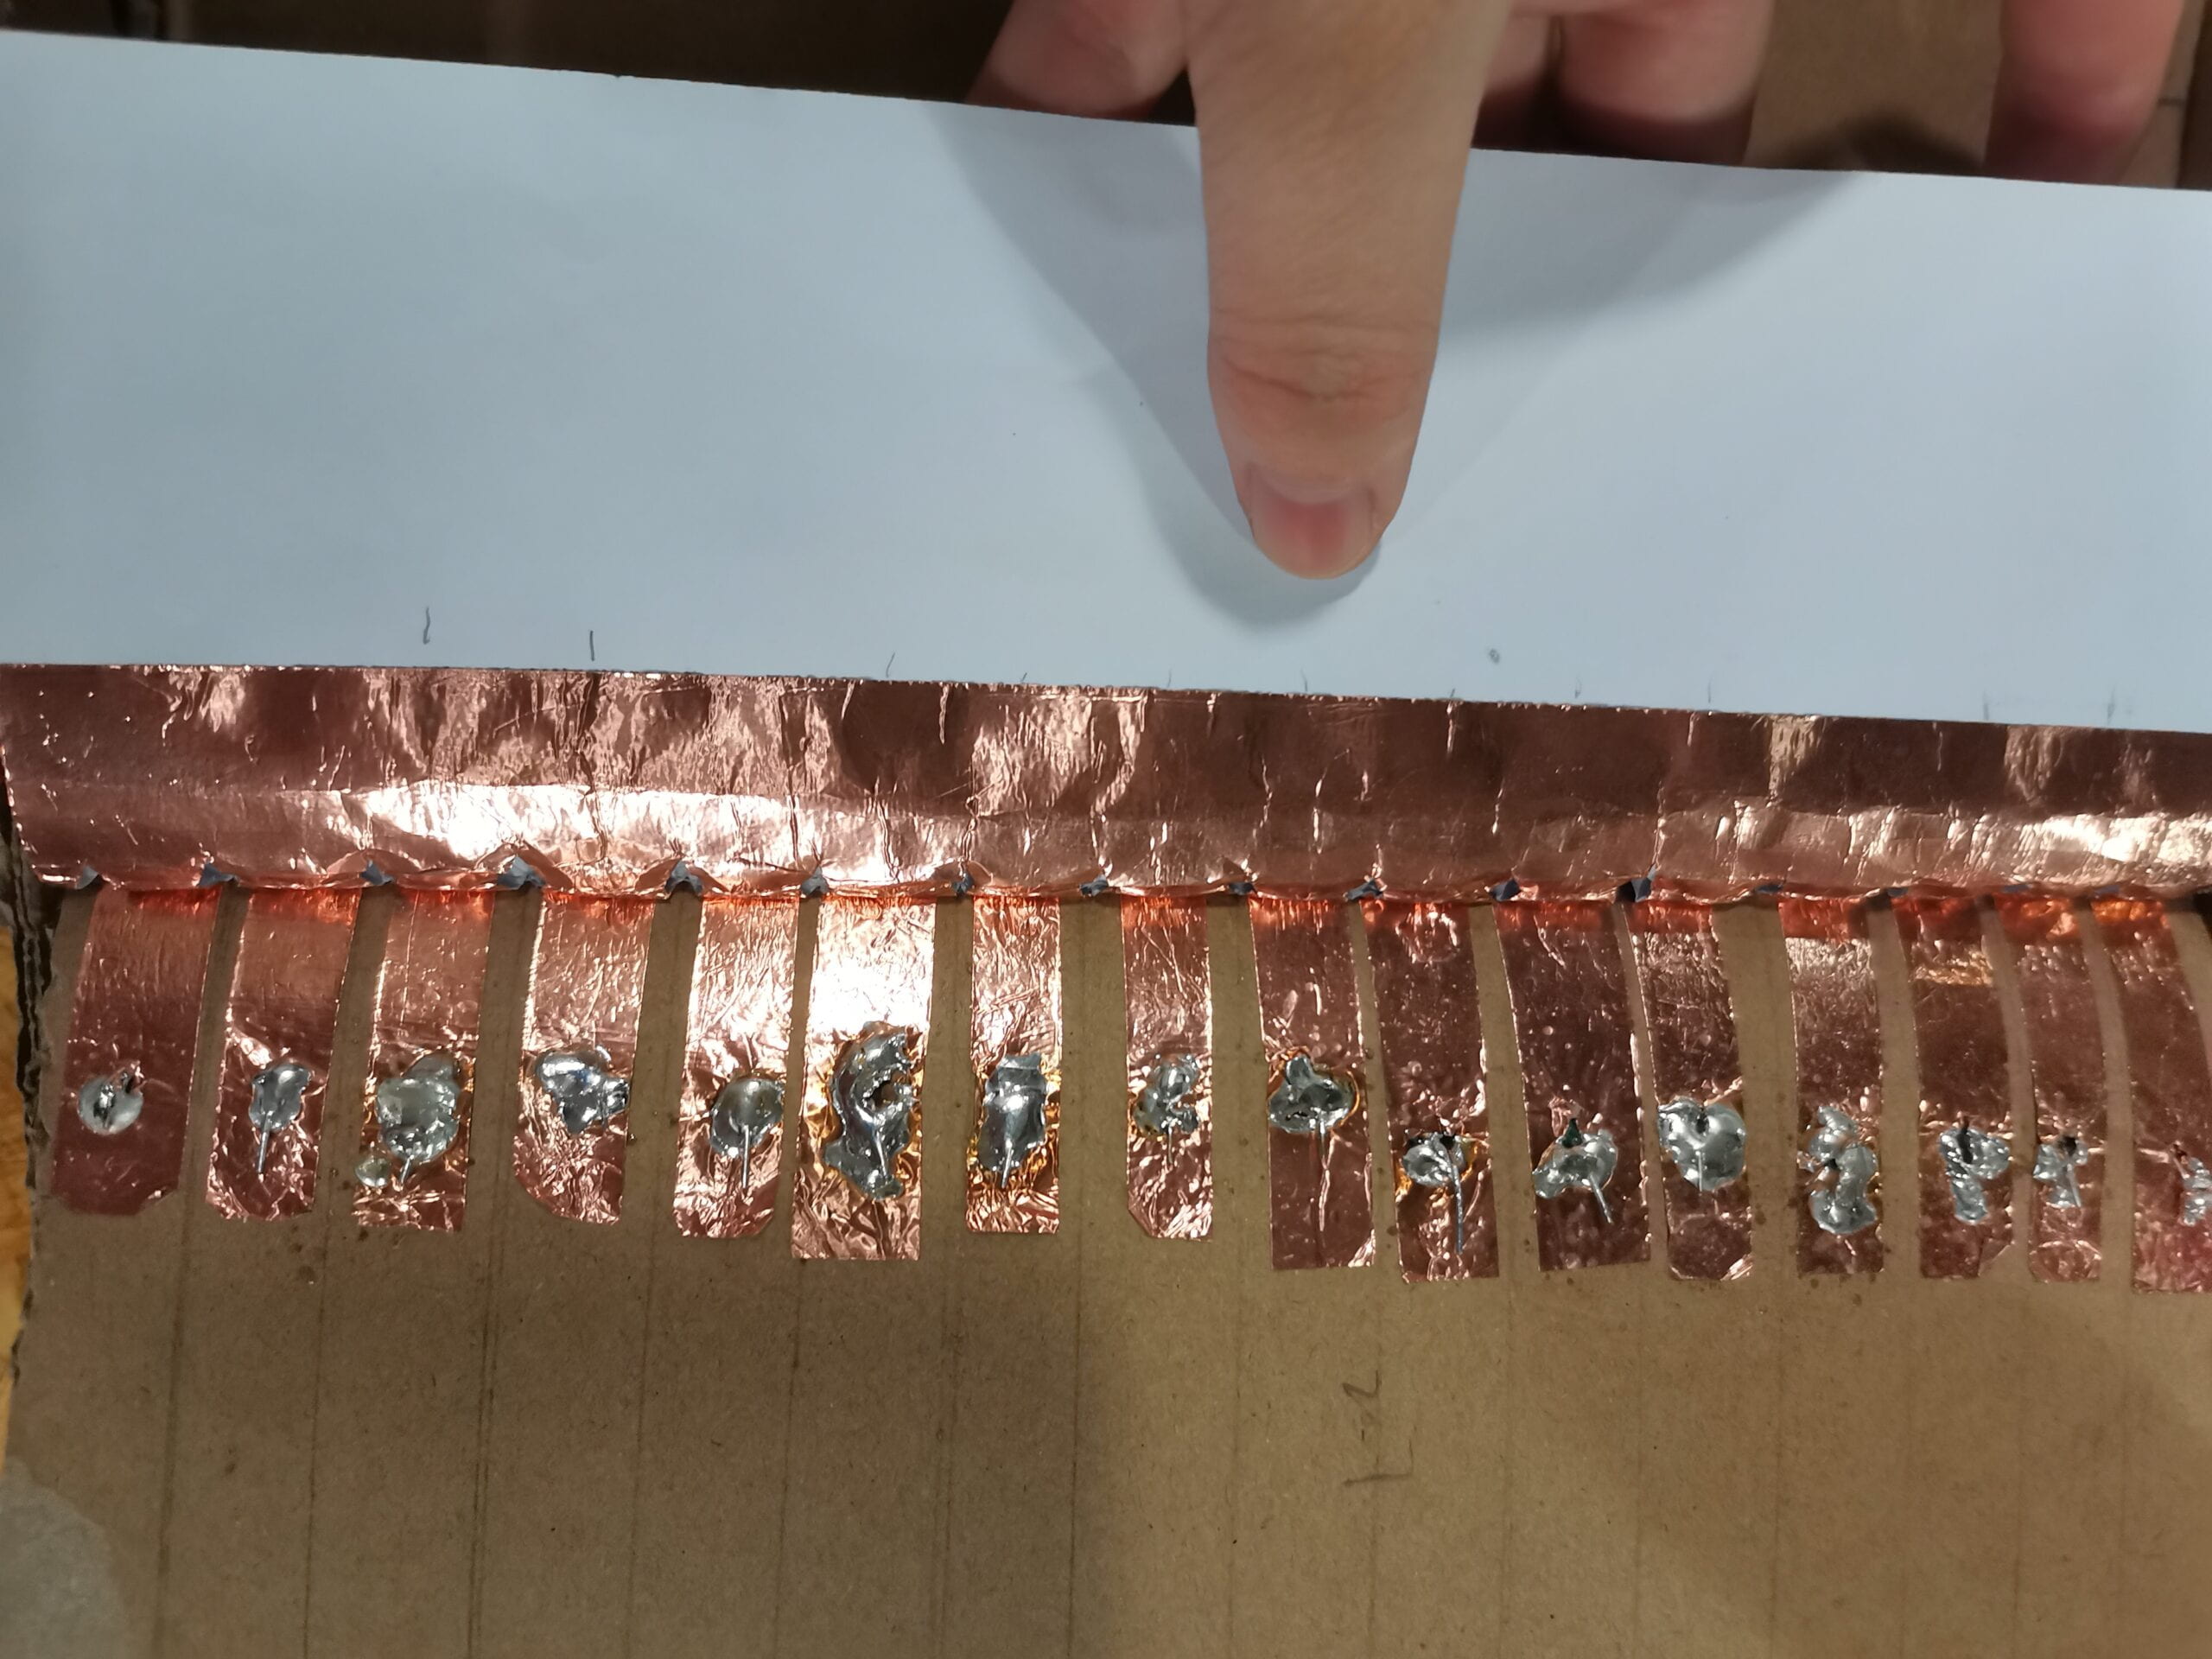
I found it’s hard to give the paper enoght power to make each branch naturally contacting with the every bottom panel well. From my observation, it was because we use cardboard to be the button supporter, and the surface of card board is not flat as we expect. Also, when we use a stick to deliver the power to the side line of this version of cover, the power delivered to the botton panels was not uniform.
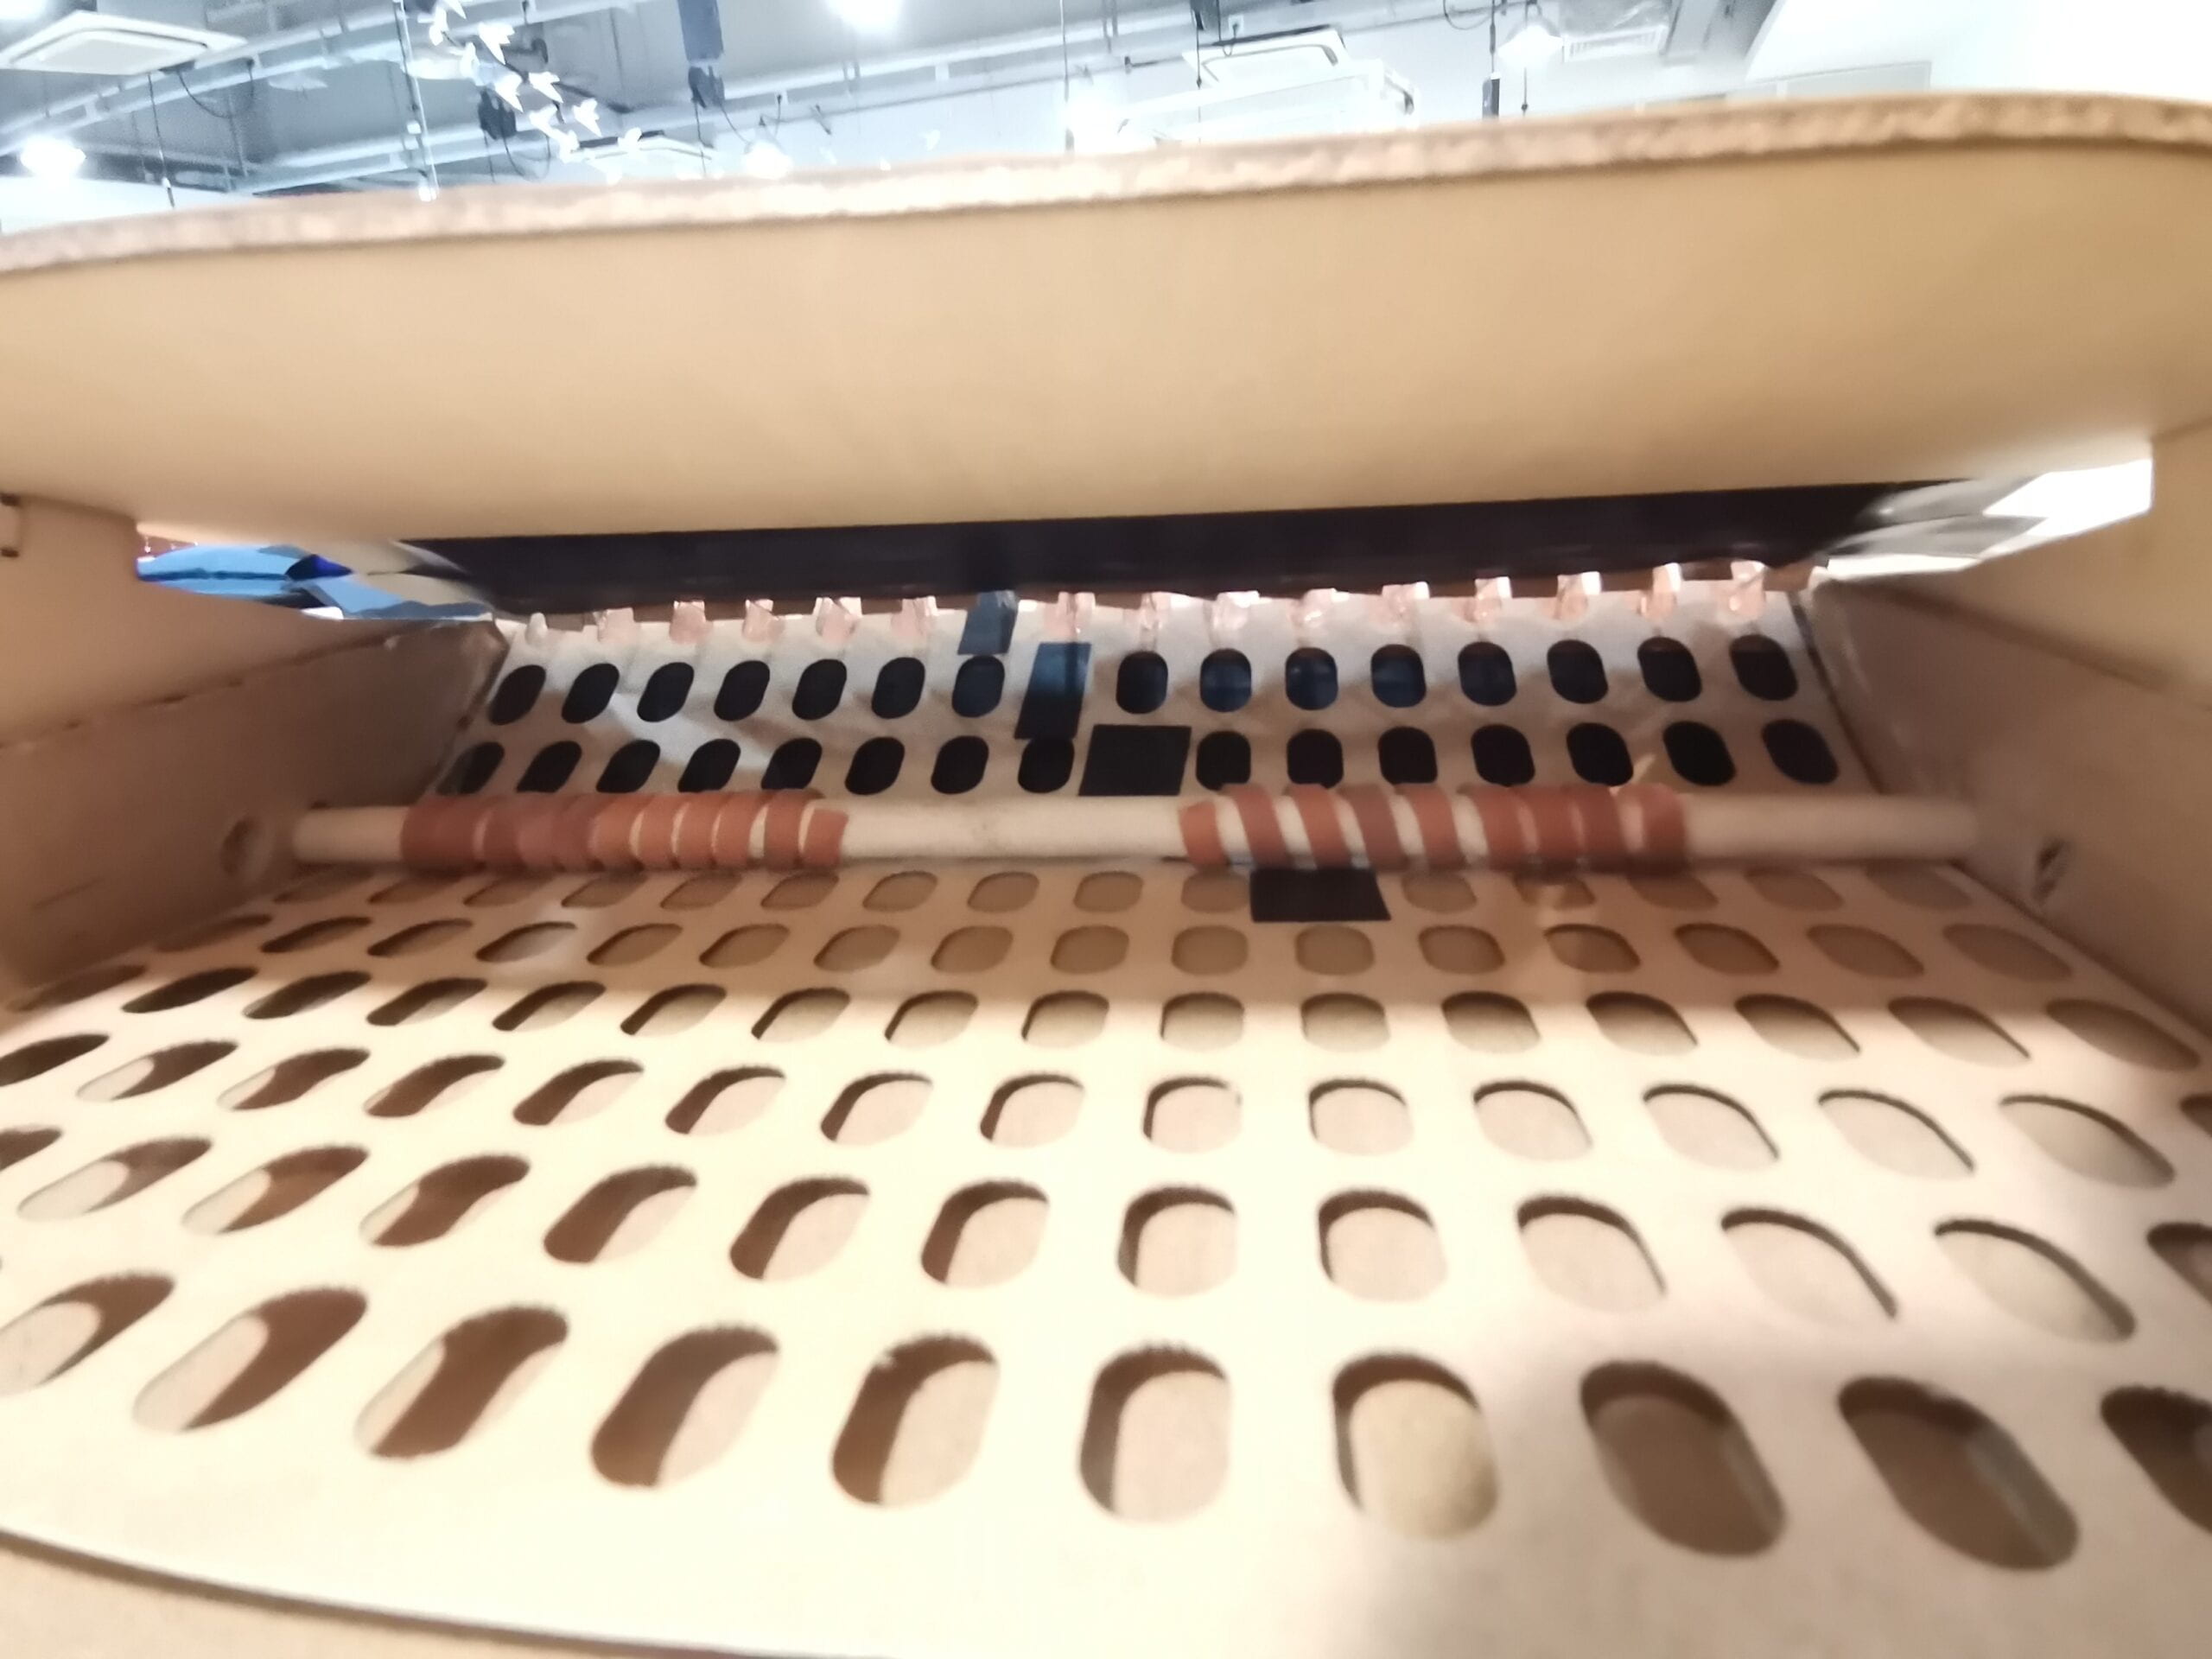
And then I tried to wrap solder wire around the stick to make contact with the bottom plate, but failed. There still some note lost when we test it.
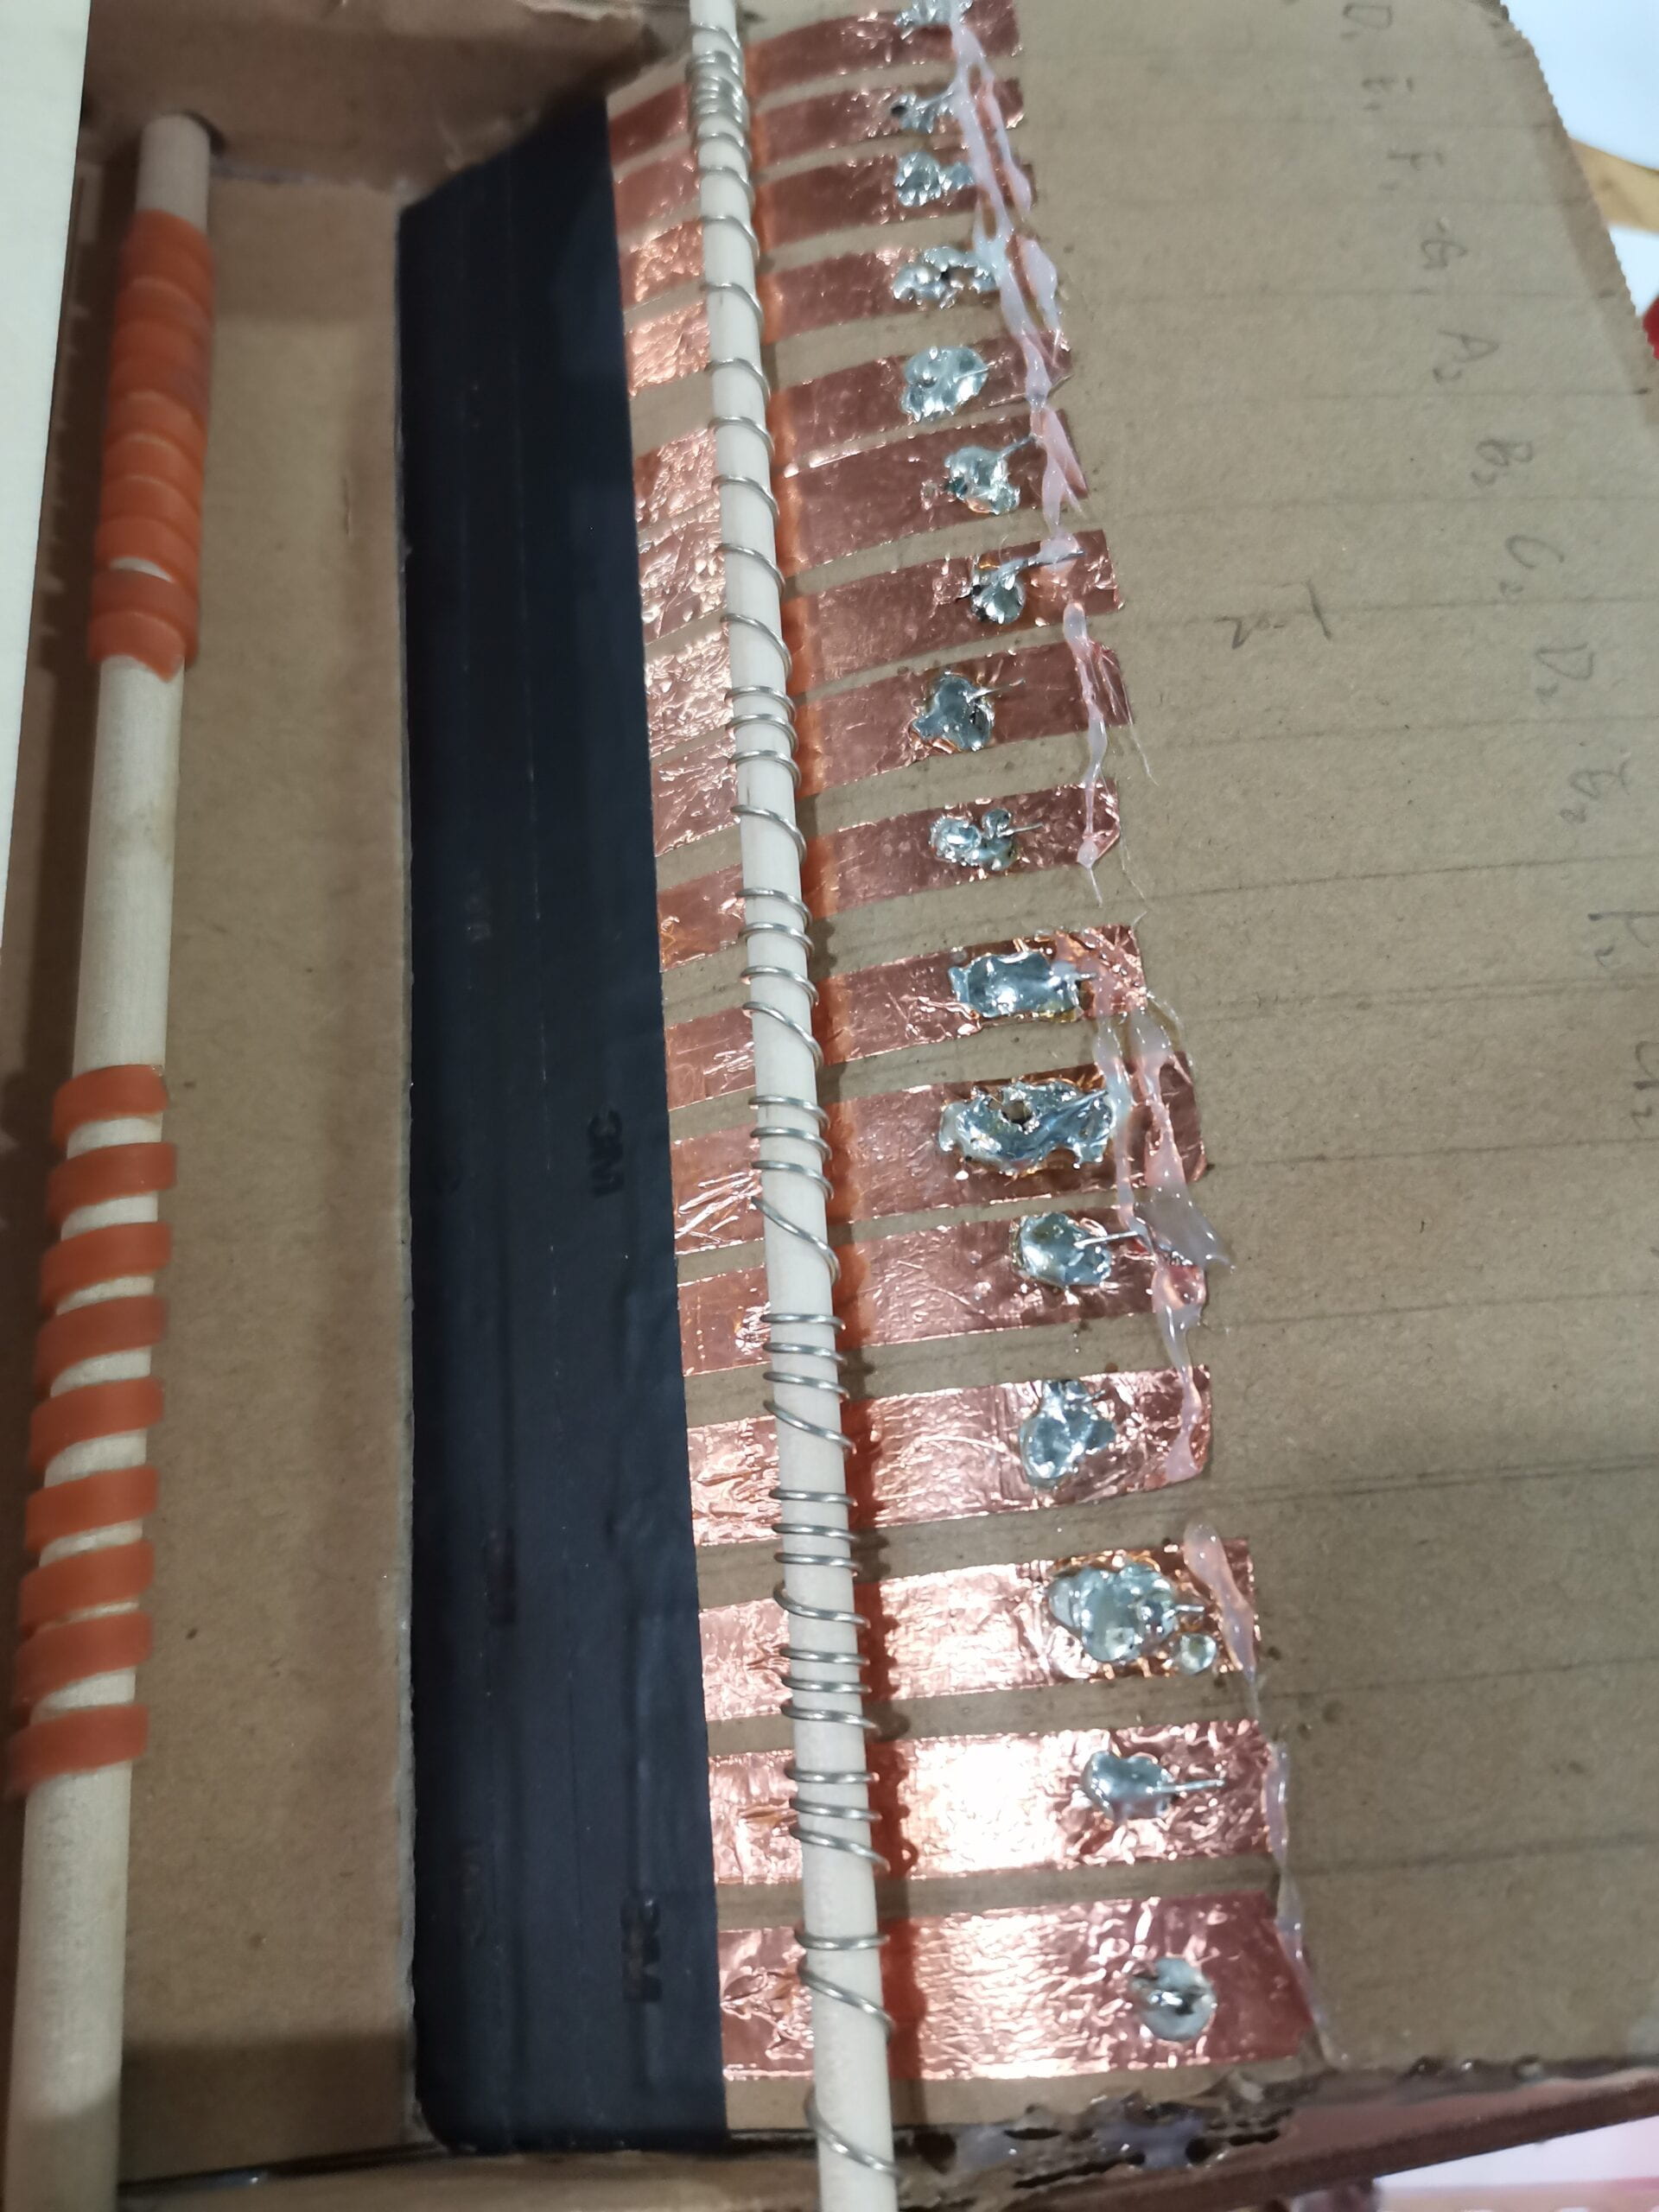
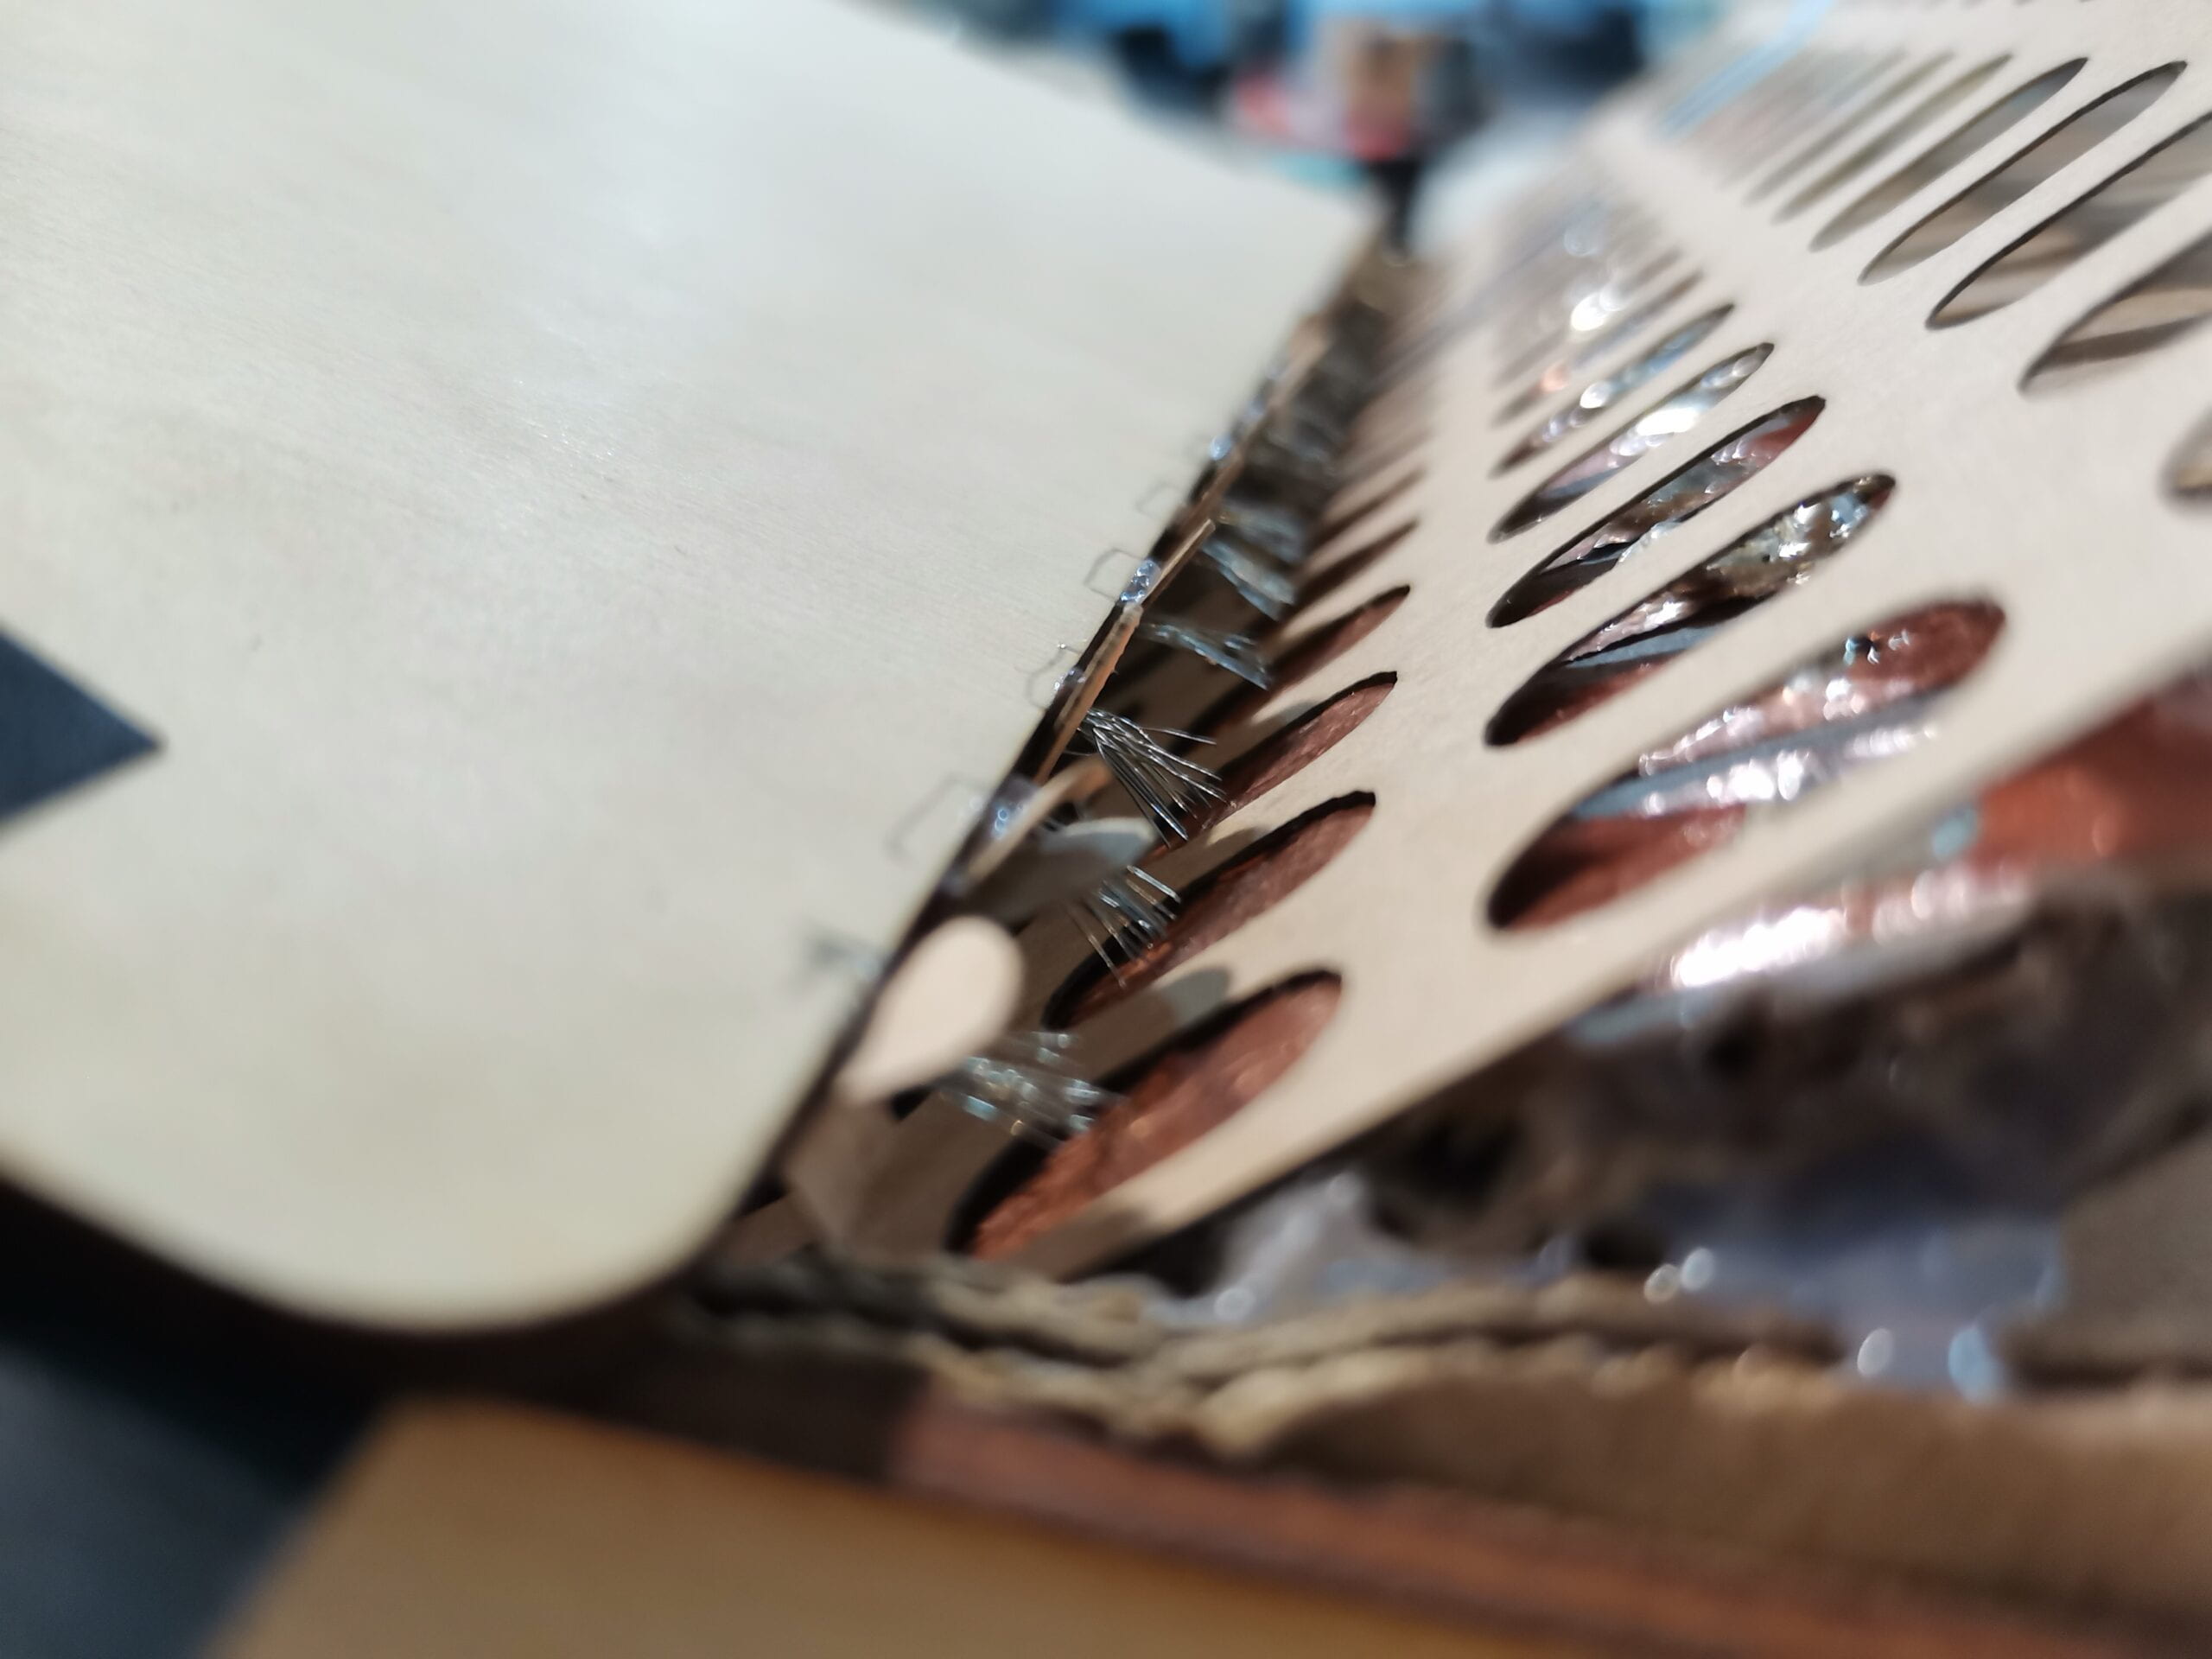
Later. just before the user test, I suddenly got inspirations when I wandering about 8F and thought it might be possible to use the soft wires to make brushes.
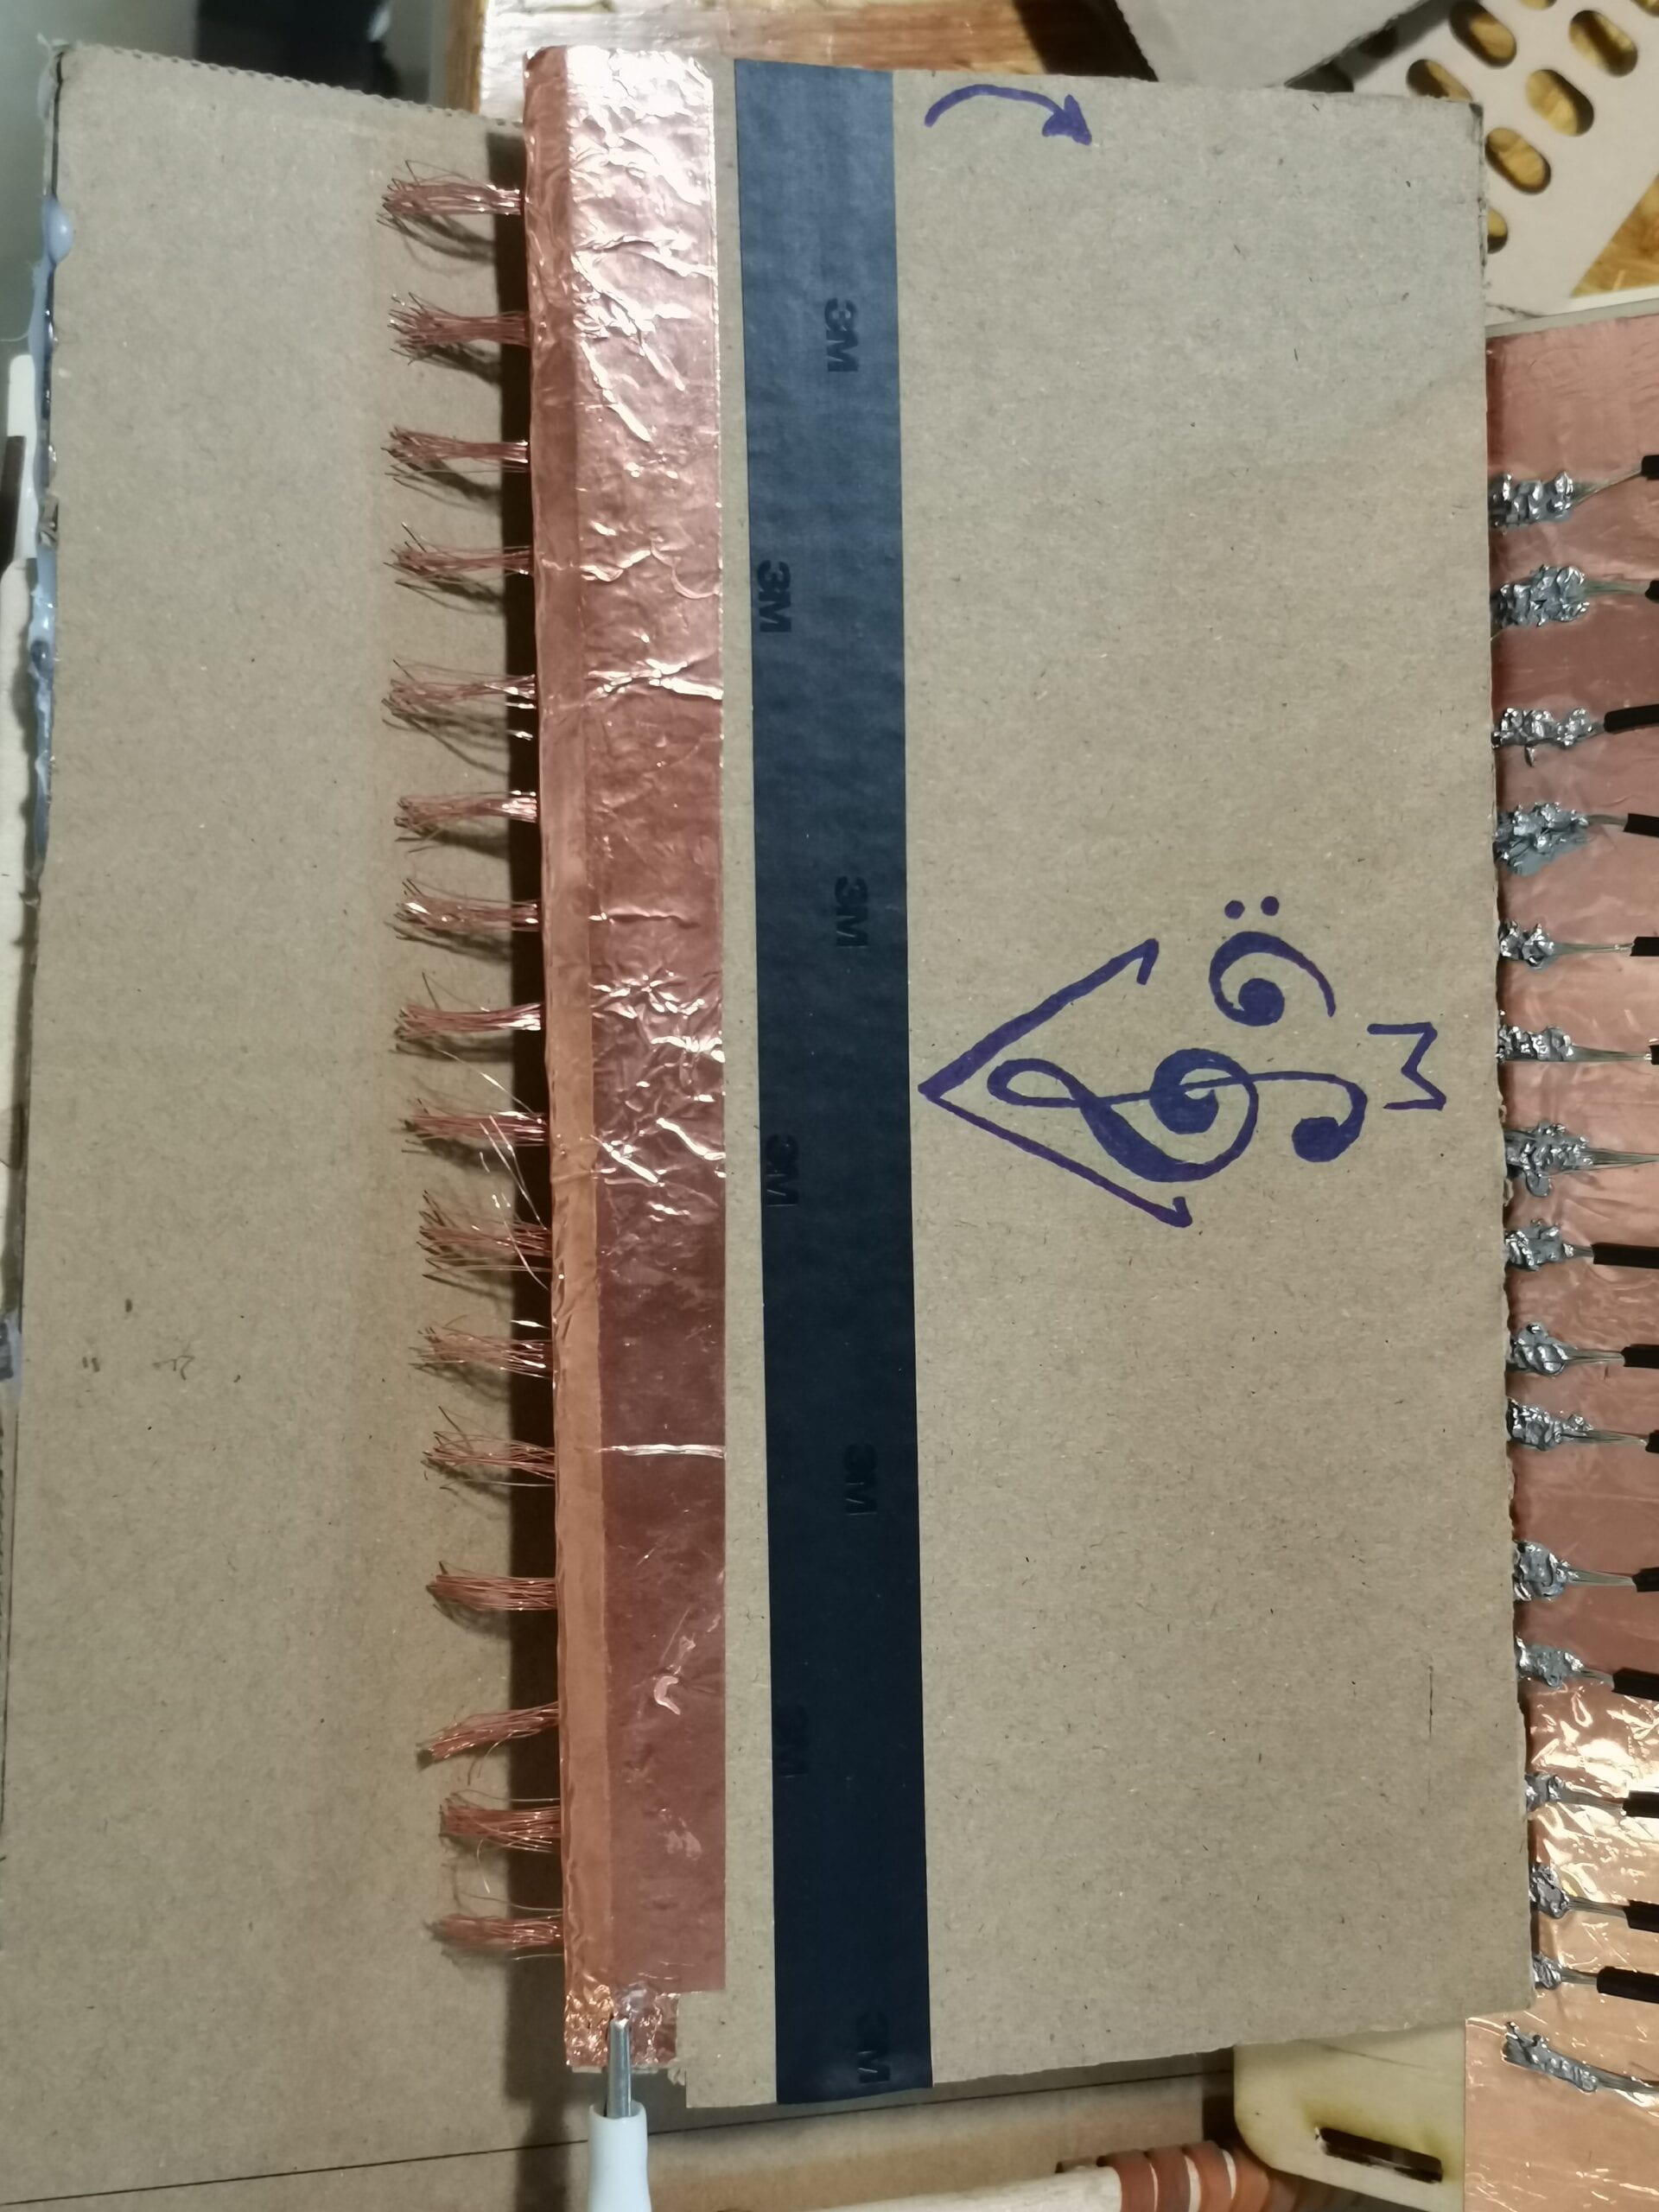
But rose gold flexible wire still has a certain hardness. So before the final presentation, we remade one with woodboard and the Silver flexible wire.

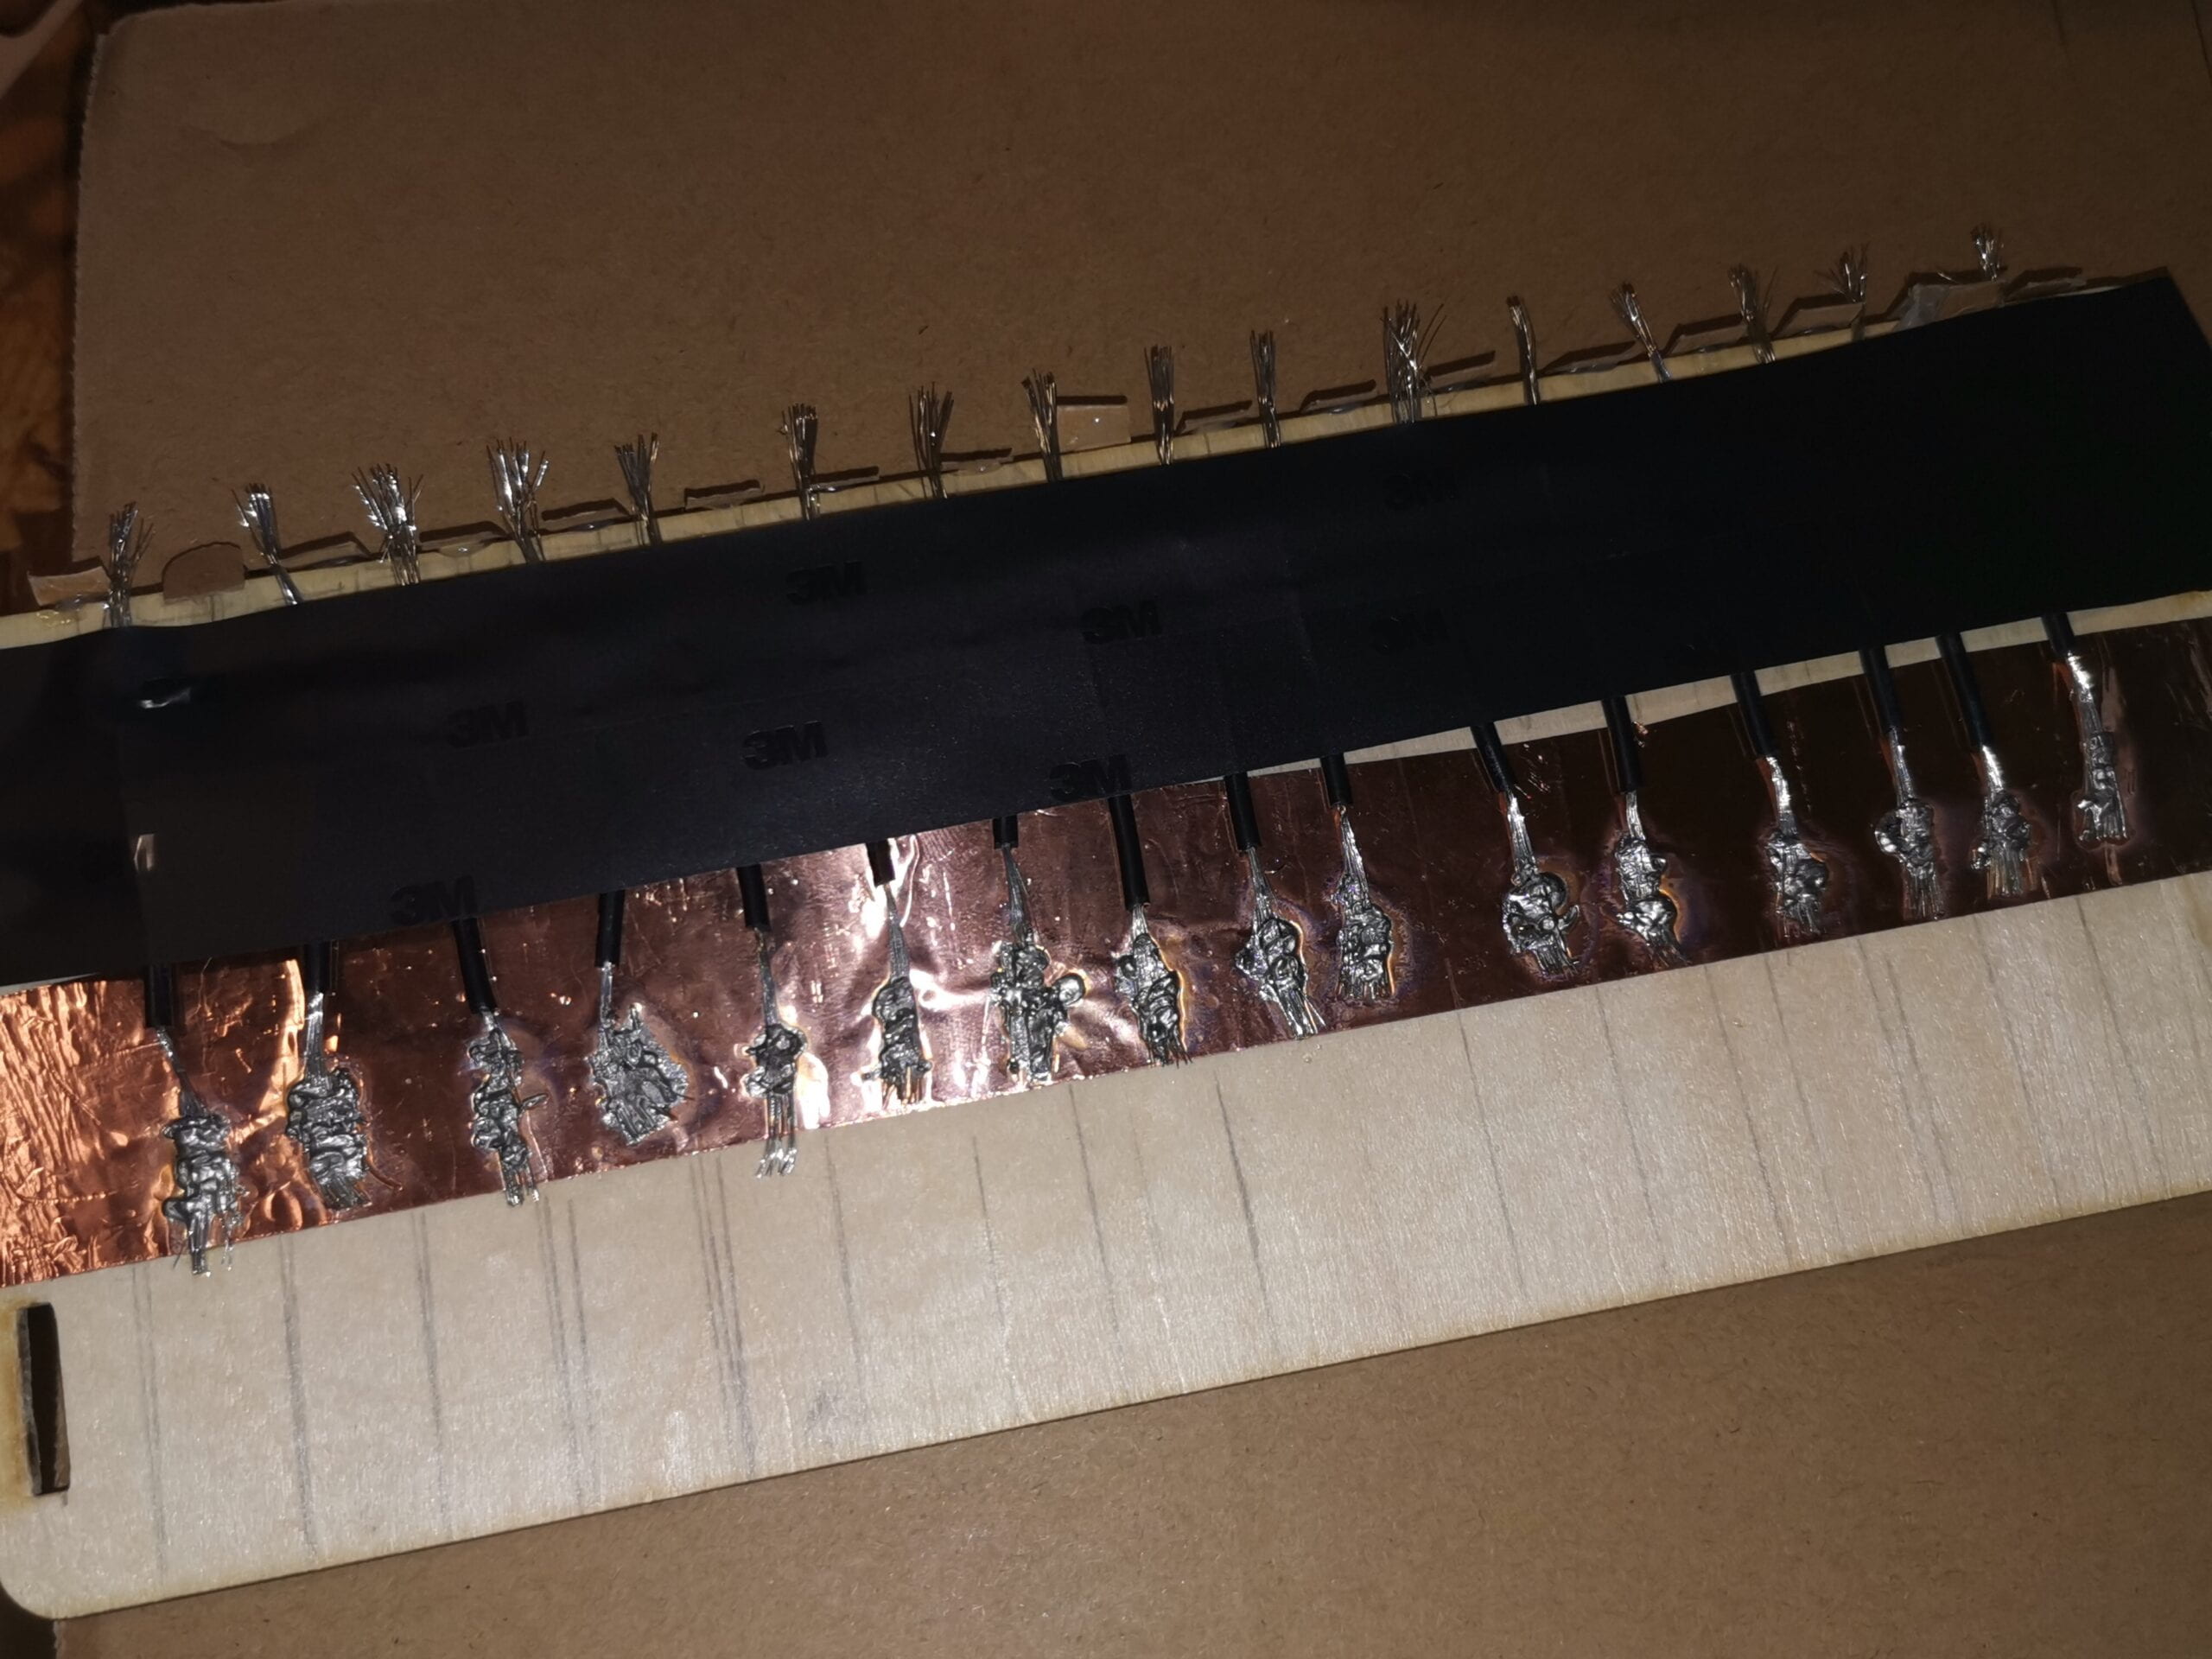
Finally, with some pressure from my hand this version can work. But without outside pressure, it can not show a senstive reflection of holed. That’s a pity to fail on this part.
[other Other memorable parts]
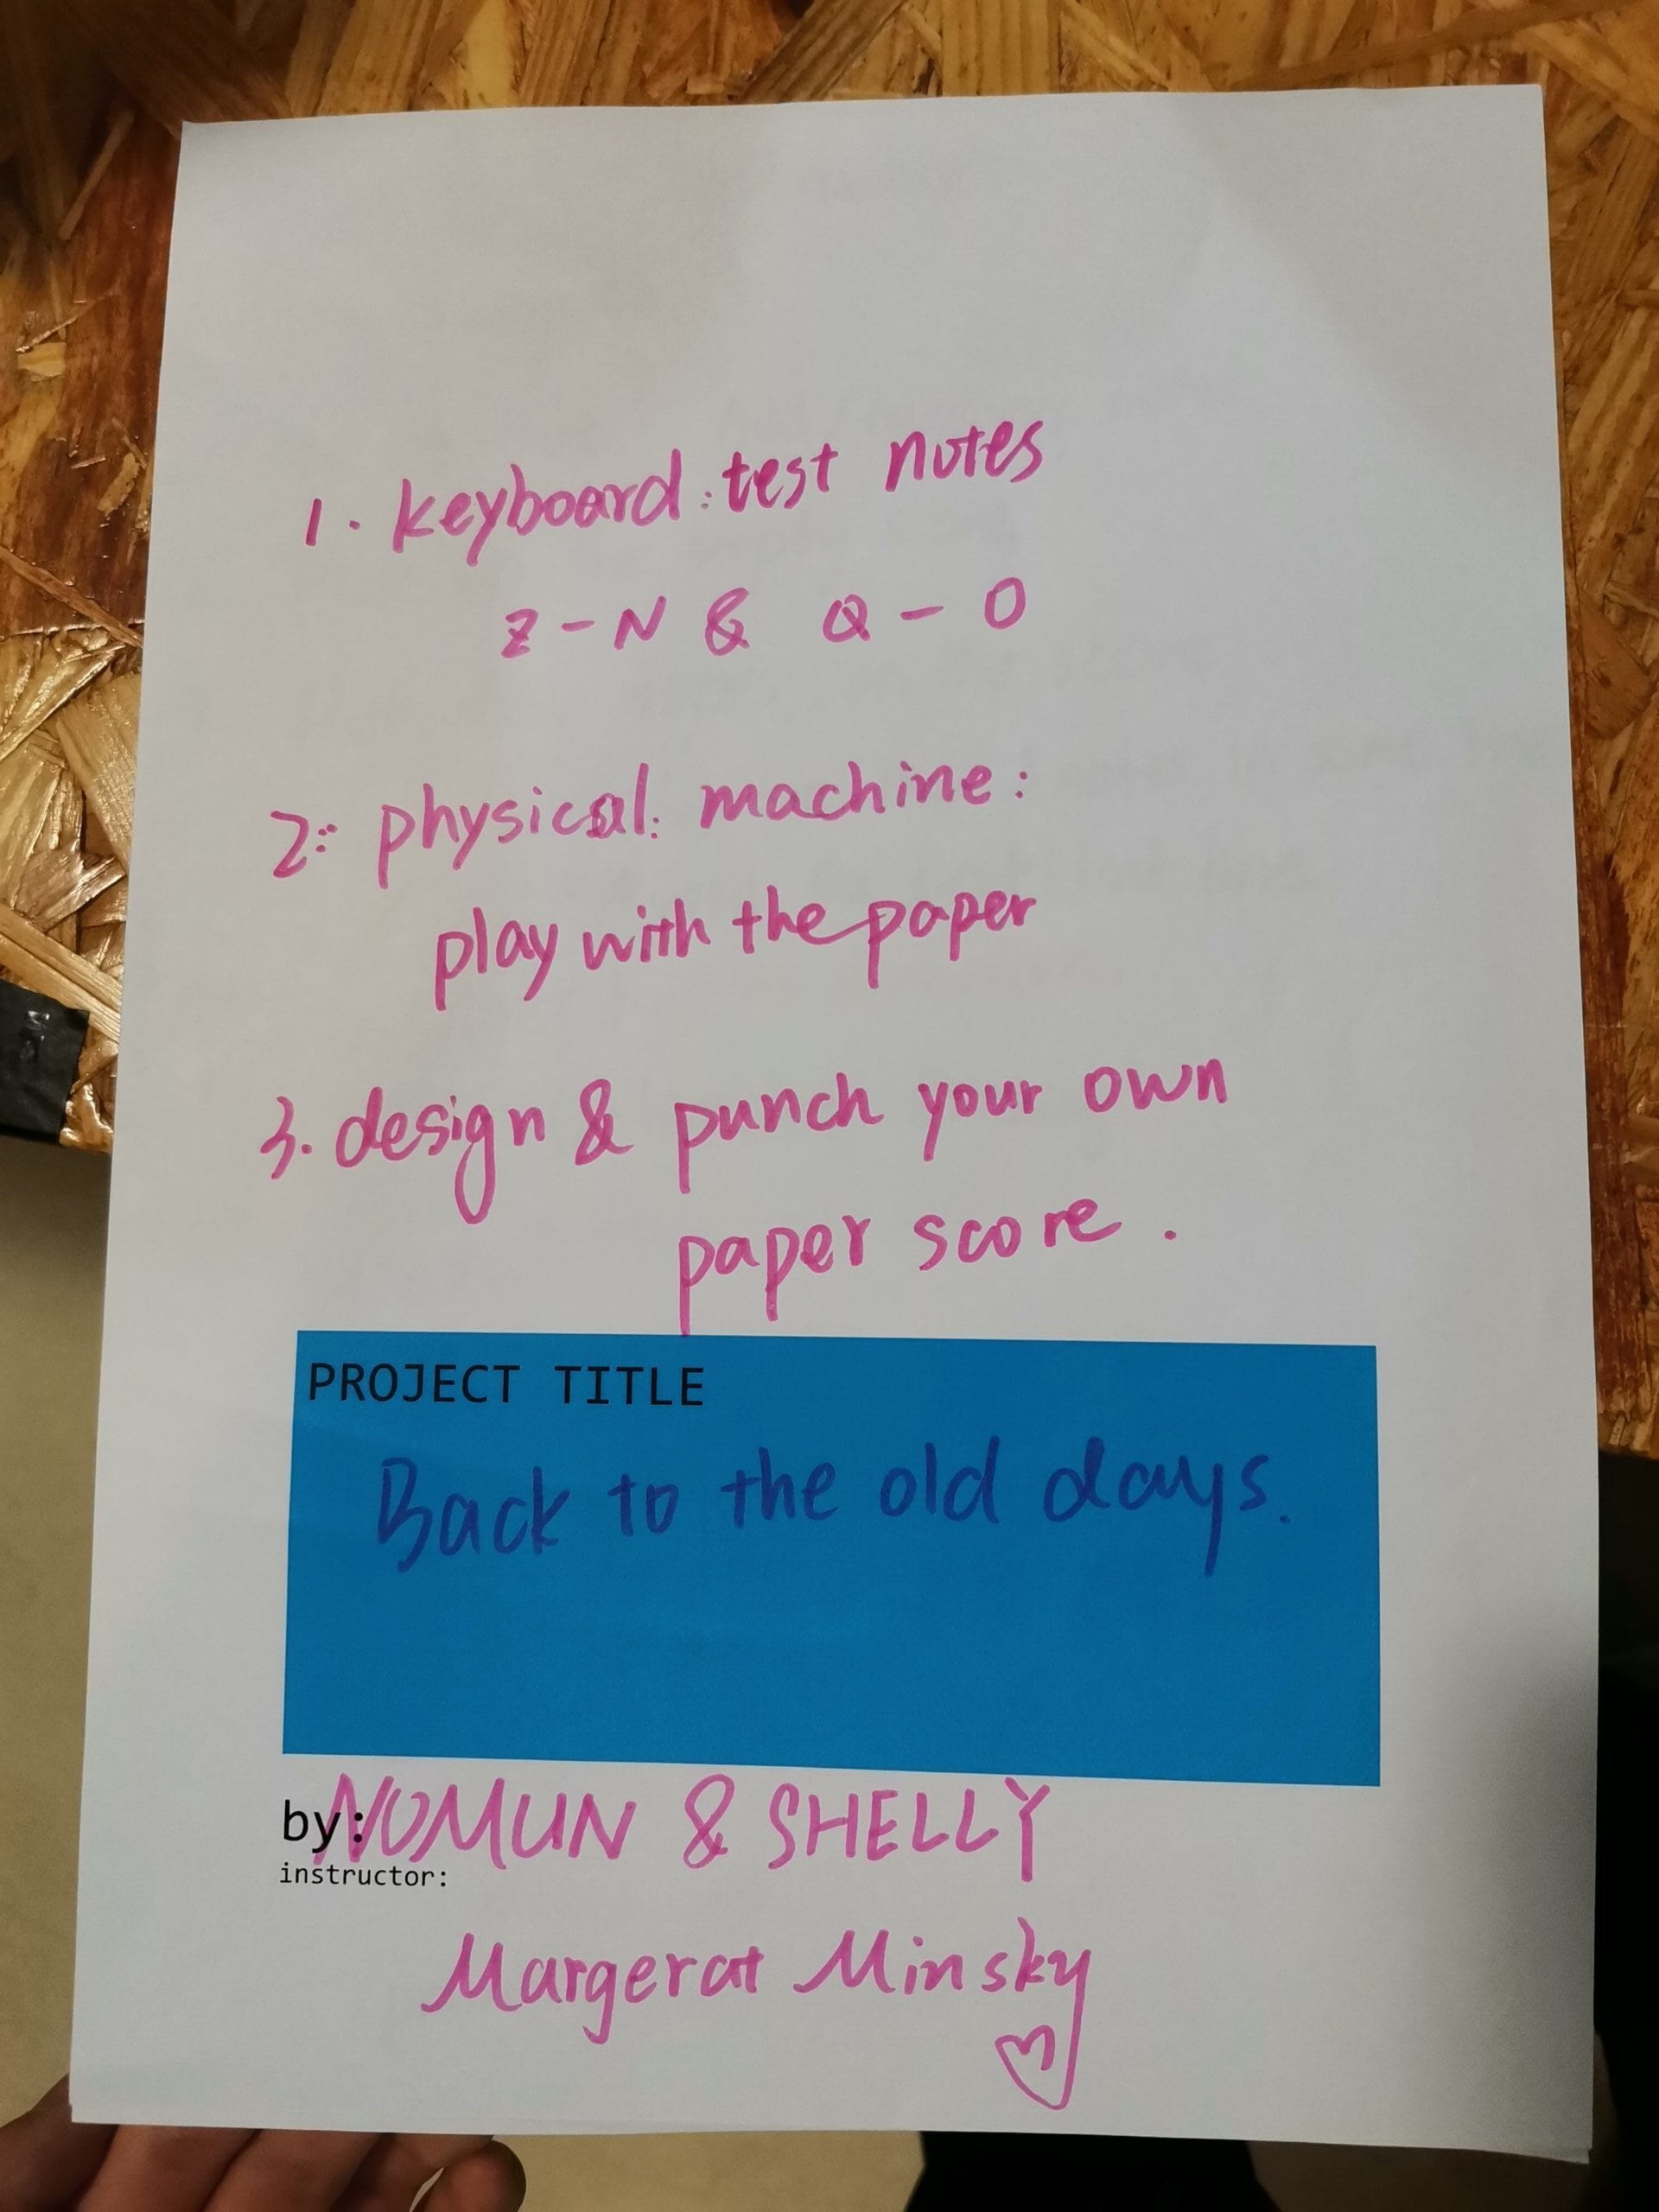
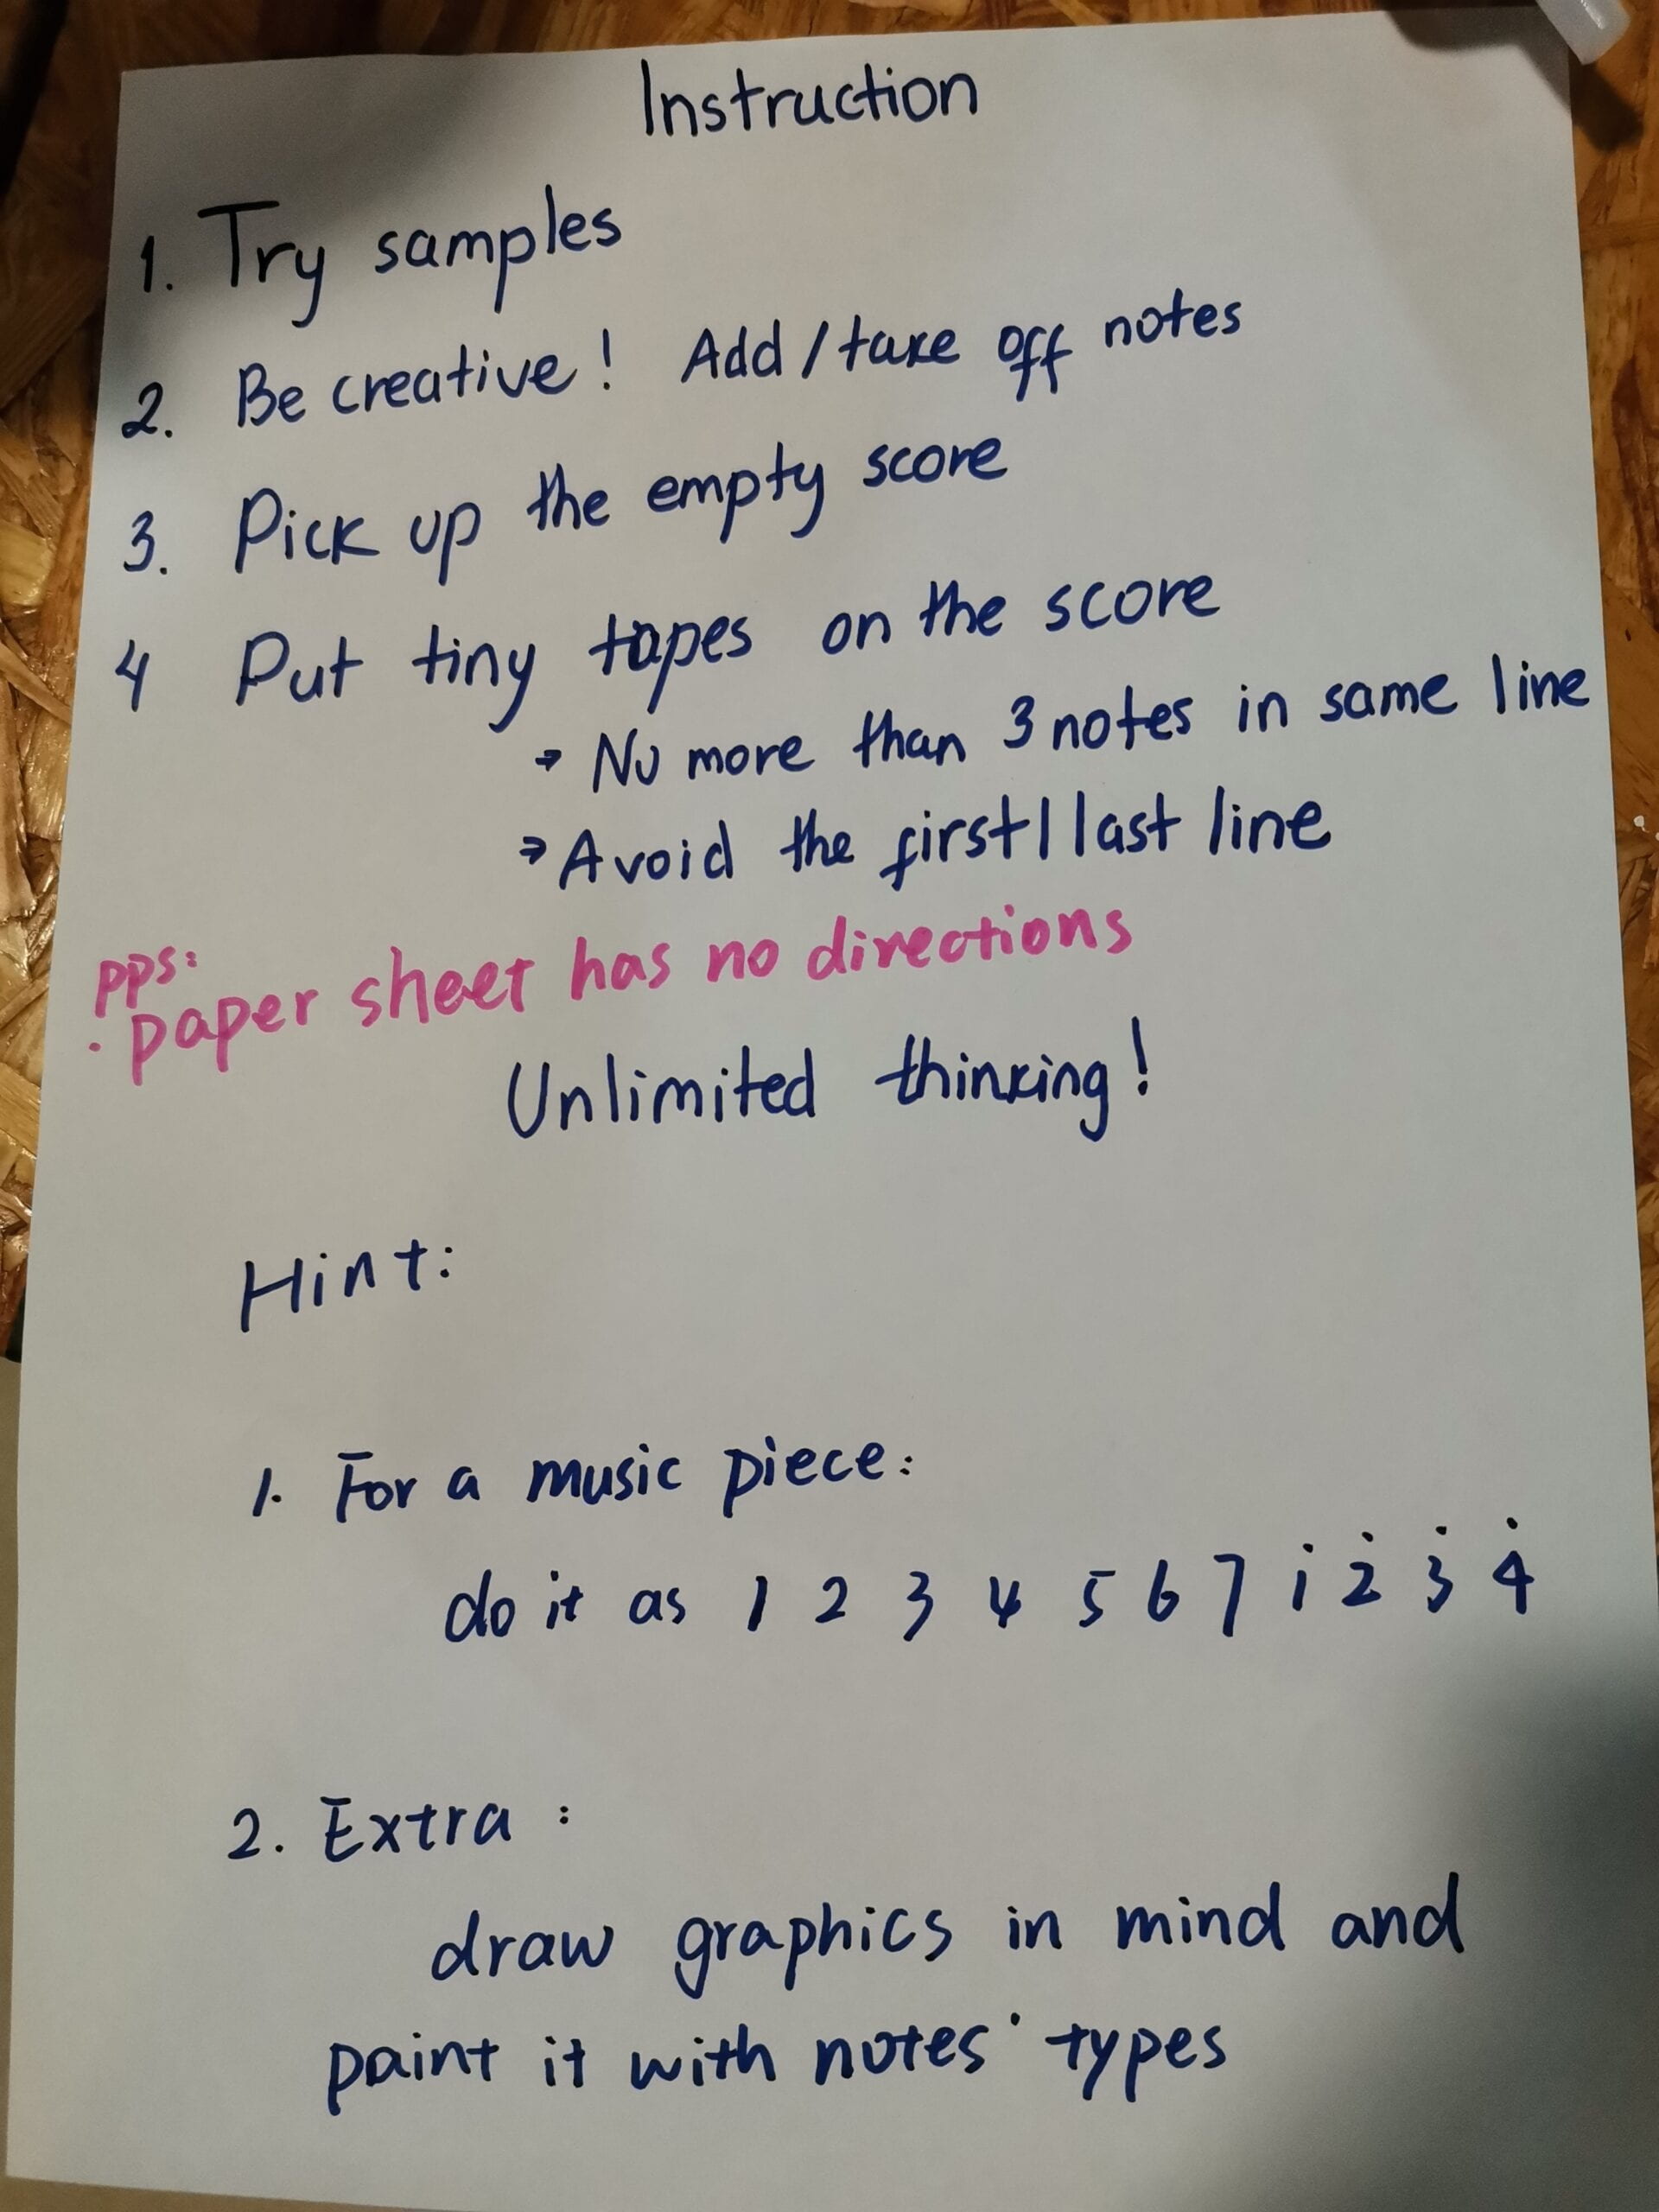
Instruction paper for User test and final presentation:
3D Printing:
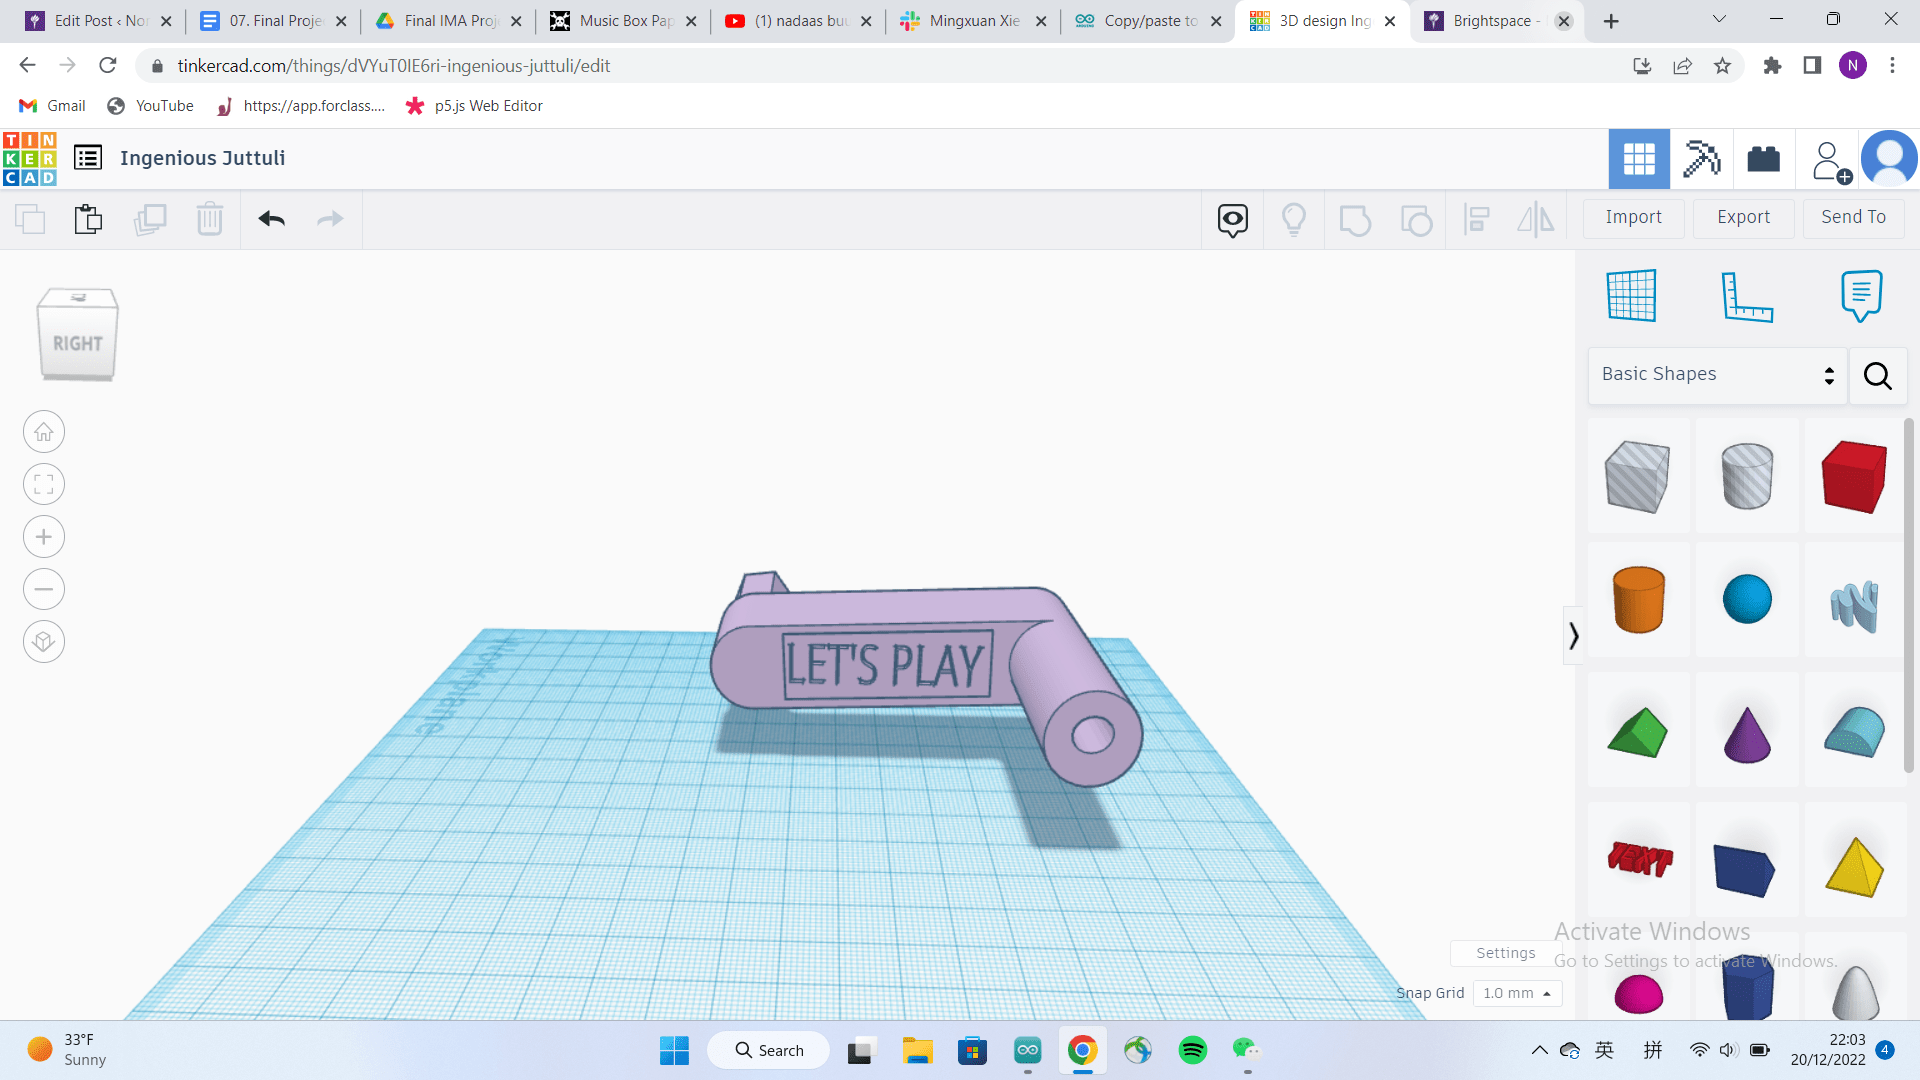
My partner found a original file online and we together change the size, shape, and appearence (the text “LET’S PLAY”) by Tinkercad. Quite interesting to explore this website.
Laser cutting:
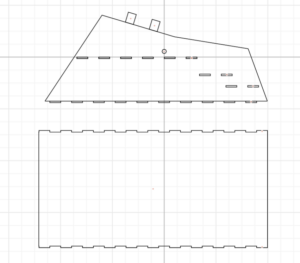
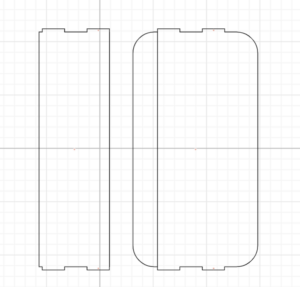
As attached in the Annex, all the files were measured and designed by myself, with the instrutions from Prof. Andy. Besides, I got a personal trainning of laser cutting, including the machine setting and file adjusting; also, I gained some basic knowledge and experience with materials and parameters–now I’m “a advanced user” of laser cutting, as my partner said haha.
Design detials:
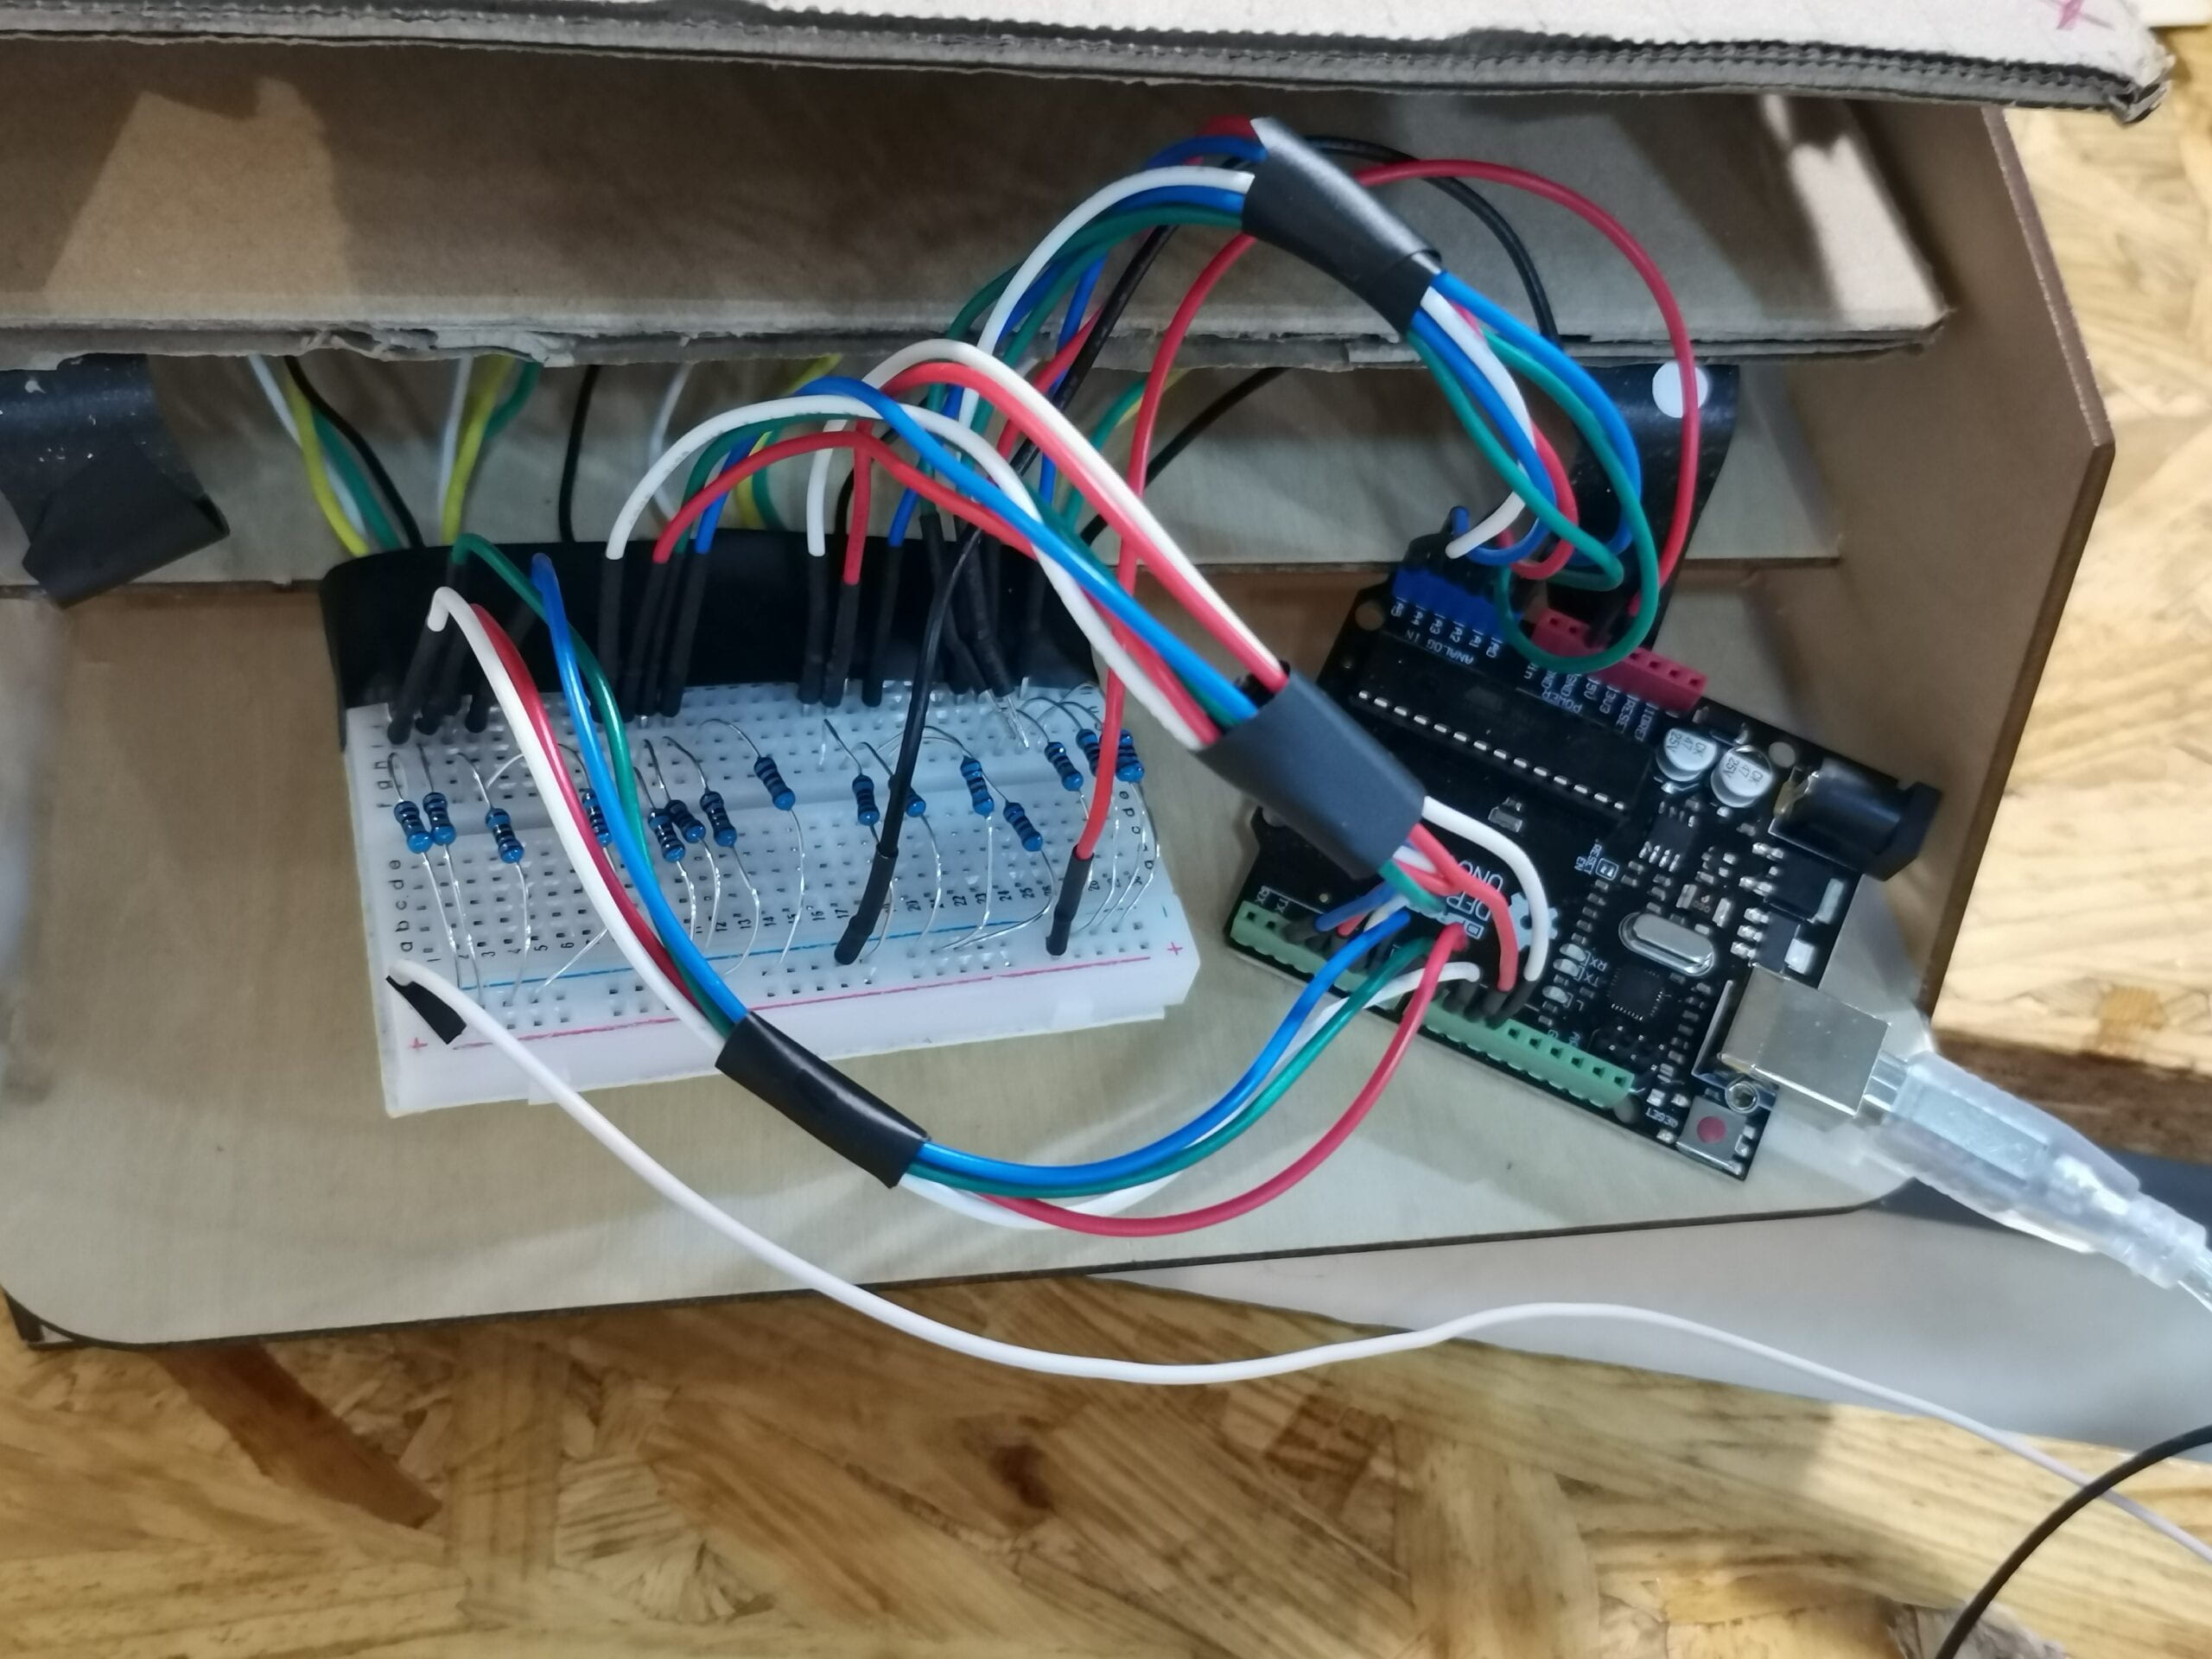
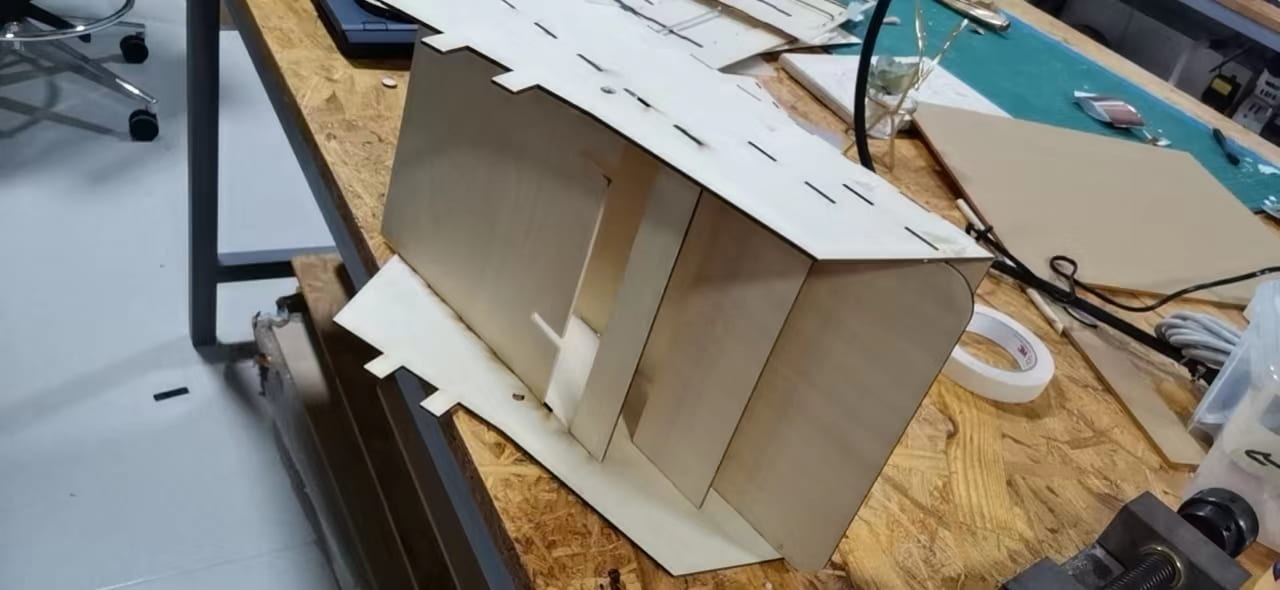
I designed two physical steps(deviders actually) of the outer box to hold the circuits with arduino UNO and breadboard.
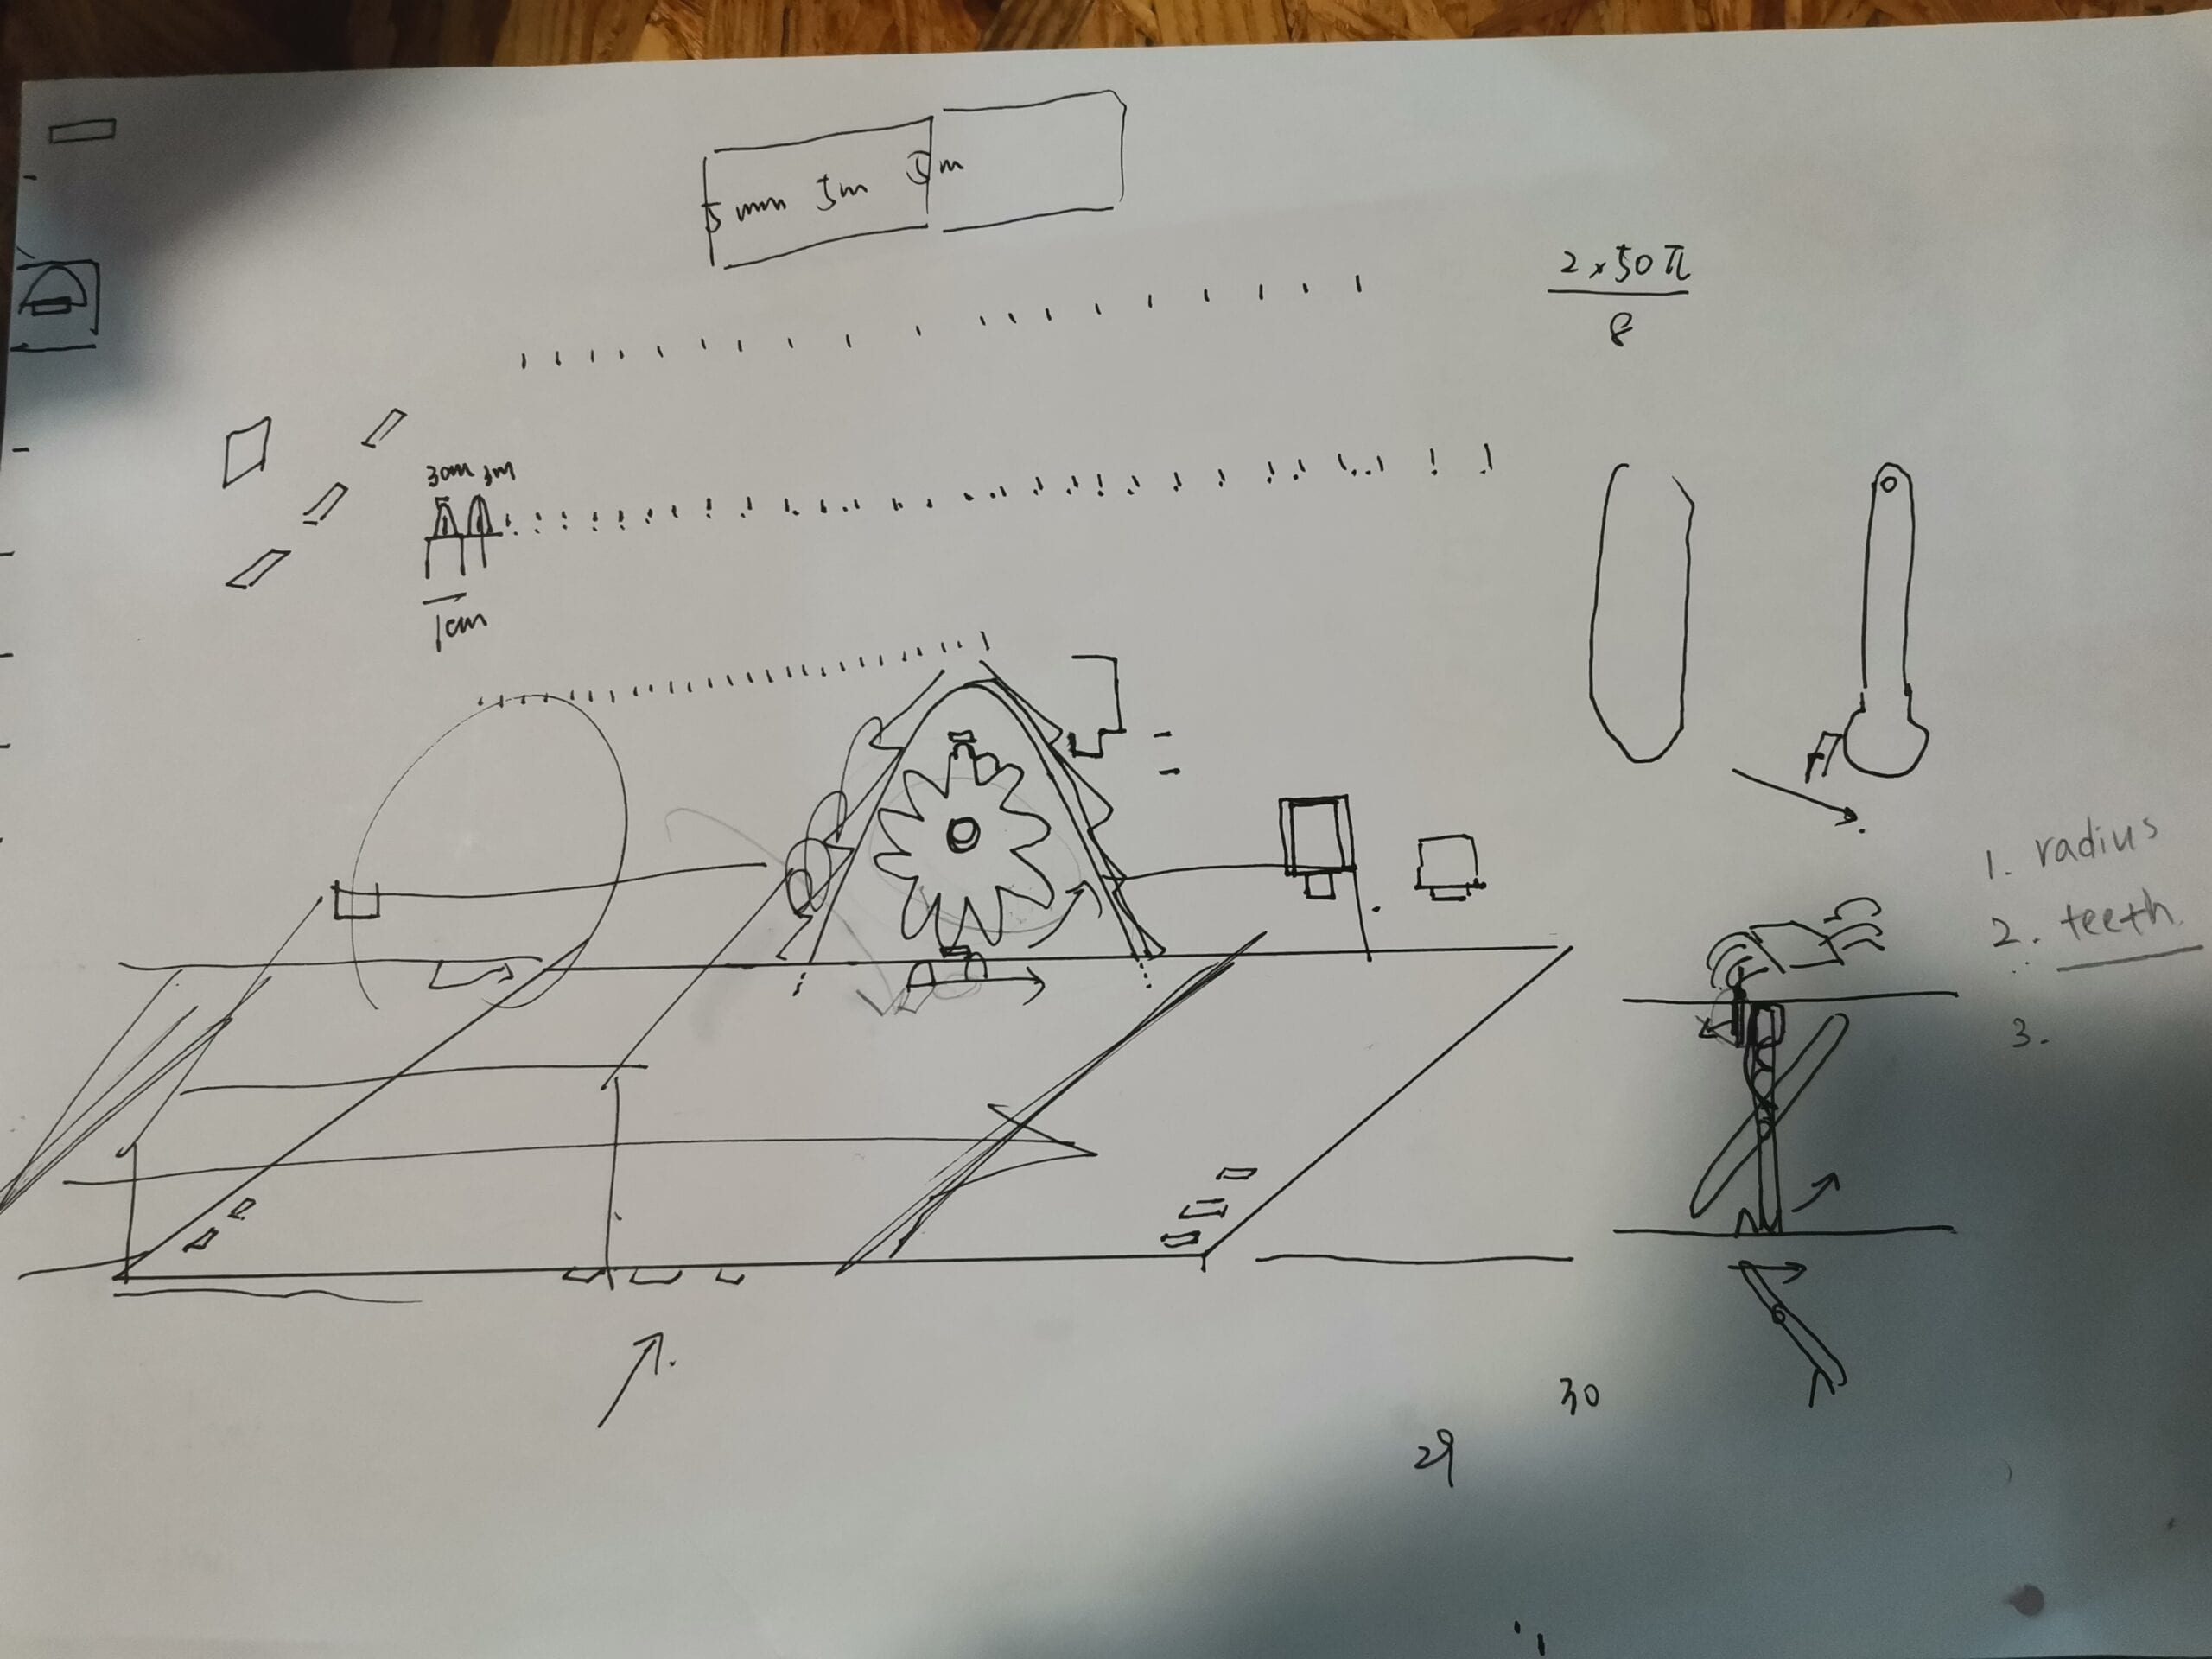
More ideas came up during the process and may be tried in the future: (About the structure of better switches)
CONCLUSIONS:
Begin your conclusion by restating the goals of your project. How do your project results align with your definition of interaction? How do your project results not align with your definition of interaction? Based on both your definition of interaction and your expectations of your audience’s response, how, ultimately, did your audience interact with your project? How would you improve your project if you had more time? What of value have you learned from any setbacks and/or failures? What do you take away from your accomplishments?
The wrap-up of your conclusion delivers your final say on the issues you have raised previously, demonstrates the importance of your ideas, and insightfully synthesizes your thoughts about key elements of the project experience. As such, your conclusion should close by reflecting on the crucial questions “So what?” and “Why should anyone care?”
The original idea was a paper tape punch music box. It allows users to make a physical music by hands, back to the olds and play with the old style of coding, typing, and music making. It’s a reflection of the fast development of technology and people’s laziness caused by it. The interaction is mostly on score editting, playing and machine running with hands.
For the interaction part, users can feel real-time reflection of the project by rotating the handle with mechanisml. They can change the speed of rotating to control the paper speed with observation of the existing speed of the paper. And for the paper score, they can see how sample score and holes on them be interacted with the project(actually the program and computer), so that they can change the position of notes to make different sounds. And one advanced and hidden function is waiting for users to explore, that there is no direction of the score so that they can see a inversed version of a common score; besides, a physical score means not only music but also graphic transformation into a piese of sounds.
The results of the project greatly made people enjoy the old style of pythical score making and machine running. And we heard some reflections of reminding people of the old typing machine or Turing cipher code. Also the internal mechanical structure and interaction attracted people to try this project.
Similar situaction to the user test–making or editting a phisical score takes time and our audience were not so active and patient on making this. We even got a complaint that the student was too lazy to do so and wanna offer more easy way to make a physical score. Actually, I thought it was absurd and ironic to our original goals to bring people back to the physical old styles. But it also made me confirmed that we are doing a right thing and really made some different to make the reflection of laziness and technology-dependence exposed. It somehow led some reflections on our audience, which was expected when we were developing this project. I did regret to make it this way to remind people of the old days!
ANNEX
Laser cutting files:
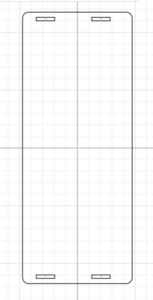
For the wooden outer box of the music box
https://cuttle.xyz/@mx2122/Music-box-outter-box-9umJdt0ZlnAm
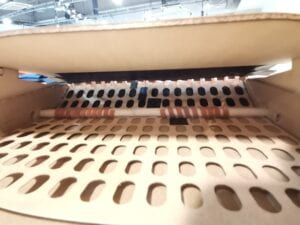
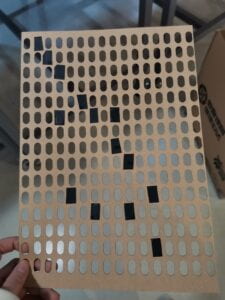
For the empty score of a special hard brown paper:
https://cuttle.xyz/@mx2122/Untitled-Project-L74yLU6AXsCr
3D printing files:
for the handle:

Processing code:
import processing.sound.*;

SoundFile[] file;
// Define the number of samples
int numsounds = 16;
// Define a variable to store the randomly generated background color in
int backgroundColor[] = {255, 255, 255};

//connect with arduino
import processing.serial.*;
import osteele.processing.SerialRecord.*;

Serial serialPort;
SerialRecord serialRecord;
int[] value=new int[16];
int[] preValue=new int[16];
Boolean[] notePlay=new Boolean[16];
//Boolean playWithHoles=true;

void setup() {
  size(640, 360);
  rectMode(CENTER);
  for (int i=0; i<16; i++) {

    preValue[i]=0;
    notePlay[i]=false;
  }
  file = new SoundFile[numsounds];
  for (int i = 0; i < numsounds; i++) {
    file[i] = new SoundFile(this, "musicBox"+str(i+1) + ".wav");
  }
  //arduino
  String serialPortName = SerialUtils.findArduinoPort(2);
  serialPort = new Serial(this, serialPortName, 9600);
  // If the Arduino sketch sends a different number of values, modify the number
  // `2` on the next line to match the number of values that it sends.
  serialRecord = new SerialRecord(this, serialPort, 16);
}

void draw() {
  background(255);
  serialRecord.read();
  stroke(0);
  line(0, height/2, width, height/2);
  noStroke();

  for (int i=0; i<16; i++) {
    preValue[i]=value[i];
    value[i] = serialRecord.values[i];
    //int value2 = serialRecord.values[1];
  }
  if (value[0]==1) {
    for (int i=1; i<16; i++) {
      if (value[i] ==1 && preValue[i]==0) {
        notePlay[i]=true;
        //int value2 = serialRecord.values[1];
      }
    }
  }
  if (value[0]==0 && preValue[0]==1) {
    for (int i=1; i<16; i++) {
      notePlay[i]=!notePlay[i];
      if (notePlay[i]==true) {
        file[i].play(0.5, 1.0);
      }
    }
  }

  //if (value[0]==1 && preValue[0]==0) {
  //for (int i=1; i<16; i++) {
  //  if (value[i] ==0 && preValue[i]==1) {
  //    fill(random(255), random(255), random(255));
  //    rect(30*(i+1), height/2, 30, 30);
  //    //rect(width/16*(i+1), height/2, 30, 30);
  //    //rect(random(width), random(height), 25, 25);
  //    file[i].play(0.5, 1.0);
  //  }
  //}


  //if (playWithHoles==true) {
  //  background(255);
  //  //serialRecord.read();
  //  stroke(0);
  //  line(0, height/2, width, height/2);
  //  noStroke();
  //if (value[0]==1 && preValue[0]==0) {
  //  for (int i=1; i<16; i++) {
  //    if (value[i] ==0 && preValue[i]==1) {
  //      fill(random(255), random(255), random(255));
  //      rect(30*(i+1), height/2, 30, 30);
  //      //rect(width/16*(i+1), height/2, 30, 30);
  //      //rect(random(width), random(height), 25, 25);
  //      file[i].play(0.5, 1.0);
  //    }
  //  }
  //} else {
  //  background(255);
  //  stroke(0);
  //  line(0, height/2, width, height/2);
  //  noStroke();
  //  if (value[0]==1 && preValue[0]==0) {
  //    for (int i=1; i<16; i++) {
  //      if (value[i] ==0 && preValue[i]==1) {
  //        fill(random(255), random(255), random(255));
  //        rect(30*(i+1), height/2, 30, 30);
  //        //rect(width/16*(i+1), height/2, 30, 30);
  //        //rect(random(width), random(height), 25, 25);
  //        file[i].play(0.5, 1.0);
  //      }
  //    }
  //  }

  //}
  //}
}

void keyPressed() {
  if (key=='z'||key=='Z') {
    //playWithHoles=!playWithHoles;
  } else if (key=='x'||key=='X') {
    file[1].play(0.5, 1.0);

    fill(random(255), random(255), random(255));
    //rect(random(width), random(height), 25, 25);
    rect(width/17*2, height/2, 25, 25);
  } else if (key=='c'||key=='C') {
    file[2].play(0.5, 1.0);

    fill(random(255), random(255), random(255));
    //rect(random(width), random(height), 25, 25);
    rect(width/17*3, height/2, 25, 25);
  } else if (key=='v'||key=='V') {
    file[3].play(0.5, 1.0);

    fill(random(255), random(255), random(255));
    //rect(random(width), random(height), 25, 25);
    rect(width/17*4, height/2, 25, 25);
  } else if (key=='b'||key=='B') {
    file[4].play(0.5, 1.0);

    fill(random(255), random(255), random(255));
    //rect(random(width), random(height), 25, 25);
    rect(width/17*5, height/2, 25, 25);
  } else if (key=='n'||key=='N') {
    file[5].play(0.5, 1.0);

    fill(random(255), random(255), random(255));
    //rect(random(width), random(height), 25, 25);
    rect(width/17*6, height/2, 25, 25);
  } else if (key=='q'||key=='Q') {
    file[6].play(0.5, 1.0);

    fill(random(255), random(255), random(255));
    //rect(random(width), random(height), 25, 25);
    rect(width/17*7, height/2, 25, 25);
  } else if (key=='w'||key=='W') {
    file[7].play(0.5, 1.0);

    fill(random(255), random(255), random(255));
    rect(random(width), random(height), 25, 25);
    rect(width/17*8, height/2, 25, 25);
  } else if (key=='e'||key=='E') {
    file[8].play(0.5, 1.0);

    fill(random(255), random(255), random(255));
    //rect(random(width), random(height), 25, 25);
    rect(width/17*9, height/2, 25, 25);
  } else if (key=='r'||key=='R') {
    file[9].play(0.5, 1.0);

    fill(random(255), random(255), random(255));
    //rect(random(width), random(height), 25, 25);
    rect(width/17*10, height/2, 25, 25);
  } else if (key=='t'||key=='T') {
    file[10].play(0.5, 1.0);

    fill(random(255), random(255), random(255));
    //rect(random(width), random(height), 25, 25);
    rect(width/17*11, height/2, 25, 25);
  } else if (key=='y'||key=='Y') {
    file[11].play(0.5, 1.0);

    fill(random(255), random(255), random(255));
    //rect(random(width), random(height), 25, 25);
    rect(width/17*12, height/2, 25, 25);
  } else if (key=='u'||key=='U') {
    file[12].play(0.5, 1.0);

    fill(random(255), random(255), random(255));
    //rect(random(width), random(height), 25, 25);
    rect(width/17*13, height/2, 25, 25);
  } else if (key=='i'||key=='I') {
    file[13].play(0.5, 1.0);

    fill(random(255), random(255), random(255));
    //rect(random(width), random(height), 25, 25);
    rect(width/17*14, height/2, 25, 25);
  } else if (key=='o'||key=='O') {
    file[14].play(0.5, 1.0);

    fill(random(255), random(255), random(255));
    //rect(random(width), random(height), 25, 25);
    rect(width/17*15, height/2, 25, 25);
  } else if (key=='p'||key=='P') {
    file[15].play(0.5, 1.0);

    fill(random(255), random(255), random(255));
    //rect(random(width), random(height), 25, 25);
    rect(width/17*16, height/2, 25, 25);
  }
  //// If the key is between 'A'(65) to 'Z' and 'a' to 'z'(122)
  //if((key >= 'A' && key <= 'Z') || (key >= 'a' && key <= 'z')) {
  //  int keyIndex;
  //  if(key <= 'Z') {
  //    keyIndex = key-'A';
  //    letterHeight = maxHeight;
  //    fill(colors[keyIndex]);
  //  } else {
  //    keyIndex = key-'a';
  //    letterHeight = minHeight;
  //    fill(colors[keyIndex]);
  //  }
  //} else {
  //  fill(0);
  //  letterHeight = 10;
  //}

  //newletter = true;

  //// Update the "letter" position
  //x = ( x + letterWidth );

  //// Wrap horizontally
  //if (x > width - letterWidth) {
  //  x = 0;
  //  y+= maxHeight;
  //}

  //// Wrap vertically
  //if( y > height - letterHeight) {
  //  y = 0;      // reset y to 0
  //}
}
Arduino code:
#include
#include "SerialRecord.h"

#define LED_PIN 12
#define NUM_LEDS 60
#define BRIGHTNESS 64
#define LED_TYPE WS2812
#define COLOR_ORDER GRB
CRGB leds[NUM_LEDS];


#define UPDATES_PER_SECOND 100

// This example shows several ways to set up and use 'palettes' of colors
// with FastLED.
//
// These compact palettes provide an easy way to re-colorize your
// animation on the fly, quickly, easily, and with low overhead.
//
// USING palettes is MUCH simpler in practice than in theory, so first just
// run this sketch, and watch the pretty lights as you then read through
// the code.  Although this sketch has eight (or more) different color schemes,
// the entire sketch compiles down to about 6.5K on AVR.
//
// FastLED provides a few pre-configured color palettes, and makes it
// extremely easy to make up your own color schemes with palettes.
//
// Some notes on the more abstract 'theory and practice' of
// FastLED compact palettes are at the bottom of this file.


CRGBPalette16 currentPalette;
TBlendType currentBlending;

extern CRGBPalette16 myRedWhiteBluePalette;
extern const TProgmemPalette16 myRedWhiteBluePalette_p PROGMEM;

SerialRecord writer(16);
int pinValue[16];
int preValue[16];
bool notePlay[16];

void setup() {
  Serial.begin(9600);
  delay(3000);  // power-up safety delay
  FastLED.addLeds<LED_TYPE, LED_PIN, COLOR_ORDER>(leds, NUM_LEDS).setCorrection(TypicalLEDStrip);
  FastLED.setBrightness(BRIGHTNESS);
  for (int i = 0; i < 16; i++) {

    preValue[i] = 0;
    notePlay[i] = false;
  }
  currentPalette = RainbowColors_p;
  currentBlending = LINEARBLEND;
}


void loop() {
  for (int i = 0; i < 16; i++) {
    preValue[i] = pinValue[i];

    // Serial.print(writer[i]);
  }
  pinValue[0] = digitalRead(A0);
  pinValue[1] = digitalRead(A1);
  pinValue[2] = digitalRead(A2);
  pinValue[3] = digitalRead(A3);
  pinValue[4] = digitalRead(A4);
  pinValue[5] = digitalRead(A5);
  pinValue[6] = digitalRead(10);
  pinValue[7] = digitalRead(11);
  pinValue[8] = digitalRead(2);
  pinValue[9] = digitalRead(3);
  pinValue[10] = digitalRead(4);
  pinValue[11] = digitalRead(5);
  pinValue[12] = digitalRead(6);
  pinValue[13] = digitalRead(7);
  pinValue[14] = digitalRead(8);
  pinValue[15] = digitalRead(9);


  for (int i = 0; i < 16; i++) {
    writer[i] = pinValue[i];

    // Serial.print(writer[i]);
  }
  // Serial.println("next");
  writer.send();

  // This delay slows down the loop, so that it runs less frequently. This can
  // make it easier to debug the sketch, because new values are printed at a
  // slower rate.
  delay(17);


  if (pinValue[0] == 1) {
    for (int i = 1; i < 16; i++) {
      if (pinValue[i] == 1 && preValue[i] == 0) {
        notePlay[i] = true;
        //int value2 = serialRecord.values[1];
      }
    }
  }
  if (pinValue[0] == 0 && preValue[0] == 1) {
    for (int i = 1; i < 16; i++) {
      notePlay[i] = !notePlay[i];
      if (notePlay[i] == true) {
        leds[i-1] = CRGB::Yellow;
        leds[i+15*2-1] = CRGB::Yellow;
        leds[i+15*3-1] = CRGB::Yellow;
        leds[i+15*4-1] = CRGB::Yellow;

        FastLED.show();
        // delay(500);
        // Now turn the LED off, then pause
      } else {
        leds[i-1] = CRGB::Black;
        leds[i+15*2-1] = CRGB::Black;
        leds[i+15*3-1] = CRGB::Black;
        leds[i+15*4-1] = CRGB::Black;
        FastLED.show();
        // delay(500);
      }
    }
  }
  ChangePalettePeriodically();

  static uint8_t startIndex = 0;
  startIndex = startIndex + 1; /* motion speed */

  FillLEDsFromPaletteColors(startIndex);

  FastLED.show();
  FastLED.delay(1000 / UPDATES_PER_SECOND);
}

void FillLEDsFromPaletteColors(uint8_t colorIndex) {
  uint8_t brightness = 255;

  for (int i = 0; i < NUM_LEDS; ++i) {
    leds[i] = ColorFromPalette(currentPalette, colorIndex, brightness, currentBlending);
    colorIndex += 3;
  }
}


// There are several different palettes of colors demonstrated here.
//
// FastLED provides several 'preset' palettes: RainbowColors_p, RainbowStripeColors_p,
// OceanColors_p, CloudColors_p, LavaColors_p, ForestColors_p, and PartyColors_p.
//
// Additionally, you can manually define your own color palettes, or you can write
// code that creates color palettes on the fly.  All are shown here.

void ChangePalettePeriodically() {
  uint8_t secondHand = (millis() / 1000) % 60;
  static uint8_t lastSecond = 99;
  int isNotesPlaying = 0;
  // while
  // while isNotesPlaying=0

  if (lastSecond != secondHand) {
    lastSecond = secondHand;
    if (secondHand == 0) {
      currentPalette = RainbowColors_p;
      currentBlending = LINEARBLEND;
    }
    if (secondHand == 10) {
      currentPalette = RainbowColors_p;
      // currentPalette = RainbowStripeColors_p;
      currentBlending = NOBLEND;
    }
    if (secondHand == 15) {
      currentPalette = RainbowColors_p;
      // currentPalette = RainbowStripeColors_p;
      currentBlending = LINEARBLEND;
    }
    if (secondHand == 20) {
      SetupPurpleAndGreenPalette();
      currentBlending = LINEARBLEND;
    }
    if (secondHand == 25) {
      // SetupTotallyRandomPalette();
      SetupGreenAndBluePalette();
      currentBlending = LINEARBLEND;
    }
    if (secondHand == 30) {
      SetupBlackAndWhiteStripedPalette();
      currentBlending = NOBLEND;
    }
    if (secondHand == 35) {
      SetupBlackAndWhiteStripedPalette();
      currentBlending = LINEARBLEND;
    }
    if (secondHand == 40) {
      currentPalette = CloudColors_p;
      currentBlending = LINEARBLEND;
    }
    if (secondHand == 45) {
      currentPalette = PartyColors_p;
      currentBlending = LINEARBLEND;
    }
    if (secondHand == 50) {
      currentPalette = myRedWhiteBluePalette_p;
      currentBlending = NOBLEND;
    }
    if (secondHand == 55) {
      currentPalette = myRedWhiteBluePalette_p;
      currentBlending = LINEARBLEND;
    }
  }
}

// This function fills the palette with totally random colors.
void SetupTotallyRandomPalette() {
  for (int i = 0; i < 16; ++i) {
    currentPalette[i] = CHSV(random8(), 255, random8());
  }
}

// This function sets up a palette of black and white stripes,
// using code.  Since the palette is effectively an array of
// sixteen CRGB colors, the various fill_* functions can be used
// to set them up.
void SetupBlackAndWhiteStripedPalette() {
  // 'black out' all 16 palette entries...
  fill_solid(currentPalette, 16, CRGB::Black);
  // and set every fourth one to white.
  currentPalette[0] = CRGB::Green;
  currentPalette[4] = CRGB::Green;
  currentPalette[8] = CRGB::Green;
  currentPalette[12] = CRGB::Green;
}

// This function sets up a palette of purple and green stripes.
void SetupPurpleAndGreenPalette() {
  CRGB purple = CHSV(HUE_PURPLE, 255, 255);
  CRGB green = CHSV(HUE_GREEN, 255, 255);
  CRGB black = CRGB::Black;

  currentPalette = CRGBPalette16(
    green, green, black, black,
    purple, purple, black, black,
    green, green, black, black,
    purple, purple, black, black);
}

void SetupGreenAndBluePalette() {
  CRGB blue = CHSV(HUE_BLUE, 255, 255);
  CRGB green = CHSV(HUE_GREEN, 255, 255);
  CRGB grey =0x808080;
  CRGB black = CRGB::Black;

  currentPalette = CRGBPalette16(
    blue,grey, green, black,
    blue, grey, green, black,
    blue, blue, grey, grey,
    green, green, black, black);
}
// This example shows how to set up a static color palette
// which is stored in PROGMEM (flash), which is almost always more
// plentiful than RAM.  A static PROGMEM palette like this
// takes up 64 bytes of flash.
const TProgmemPalette16 myRedWhiteBluePalette_p PROGMEM = {
  CRGB::Red,
  CRGB::Gray,  // 'white' is too bright compared to red and blue
  CRGB::Blue,
  CRGB::Black,

  CRGB::Red,
  CRGB::Gray,
  CRGB::Blue,
  CRGB::Black,

  CRGB::Red,
  CRGB::Red,
  CRGB::Gray,
  CRGB::Gray,
  CRGB::Blue,
  CRGB::Blue,
  CRGB::Black,
  CRGB::Black
};

const TProgmemPalette16 myRedWhiteBluePalette_p2 PROGMEM = {
  CRGB::Green,
  CRGB::Gray,  // 'white' is too bright compared to red and blue
  CRGB::Blue,
  CRGB::Black,

  CRGB::Green,
  CRGB::Gray,
  CRGB::Blue,
  CRGB::Black,

  CRGB::Green,
  CRGB::Green,
  CRGB::Gray,
  CRGB::Gray,
  CRGB::Blue,
  CRGB::Blue,
  CRGB::Black,
  CRGB::Black
};


// Additional notes on FastLED compact palettes:
//
// Normally, in computer graphics, the palette (or "color lookup table")
// has 256 entries, each containing a specific 24-bit RGB color.  You can then
// index into the color palette using a simple 8-bit (one byte) value.
// A 256-entry color palette takes up 768 bytes of RAM, which on Arduino
// is quite possibly "too many" bytes.
//
// FastLED does offer traditional 256-element palettes, for setups that
// can afford the 768-byte cost in RAM.
//
// However, FastLED also offers a compact alternative.  FastLED offers
// palettes that store 16 distinct entries, but can be accessed AS IF
// they actually have 256 entries; this is accomplished by interpolating
// between the 16 explicit entries to create fifteen intermediate palette
// entries between each pair.
//
// So for example, if you set the first two explicit entries of a compact
// palette to Green (0,255,0) and Blue (0,0,255), and then retrieved
// the first sixteen entries from the virtual palette (of 256), you'd get
// Green, followed by a smooth gradient from green-to-blue, and then Blue.
Sources:
The 16 notes of music box was recorded by Folkman on the wibsite of Free Sounds.
“I recorded 16 notes from a music box. I waited for the motor to loose juice then I wound it forward manually so I could record each separate note chromatically. There are two octaves plus one note. Begins with D and climbs up the scale ending with E. ” described by Folkman!
