2022 Fall Ix lab Midterm Project: Hunting Camp
Mingxuan Xie-Individual
Margaret Minsky-Instructor
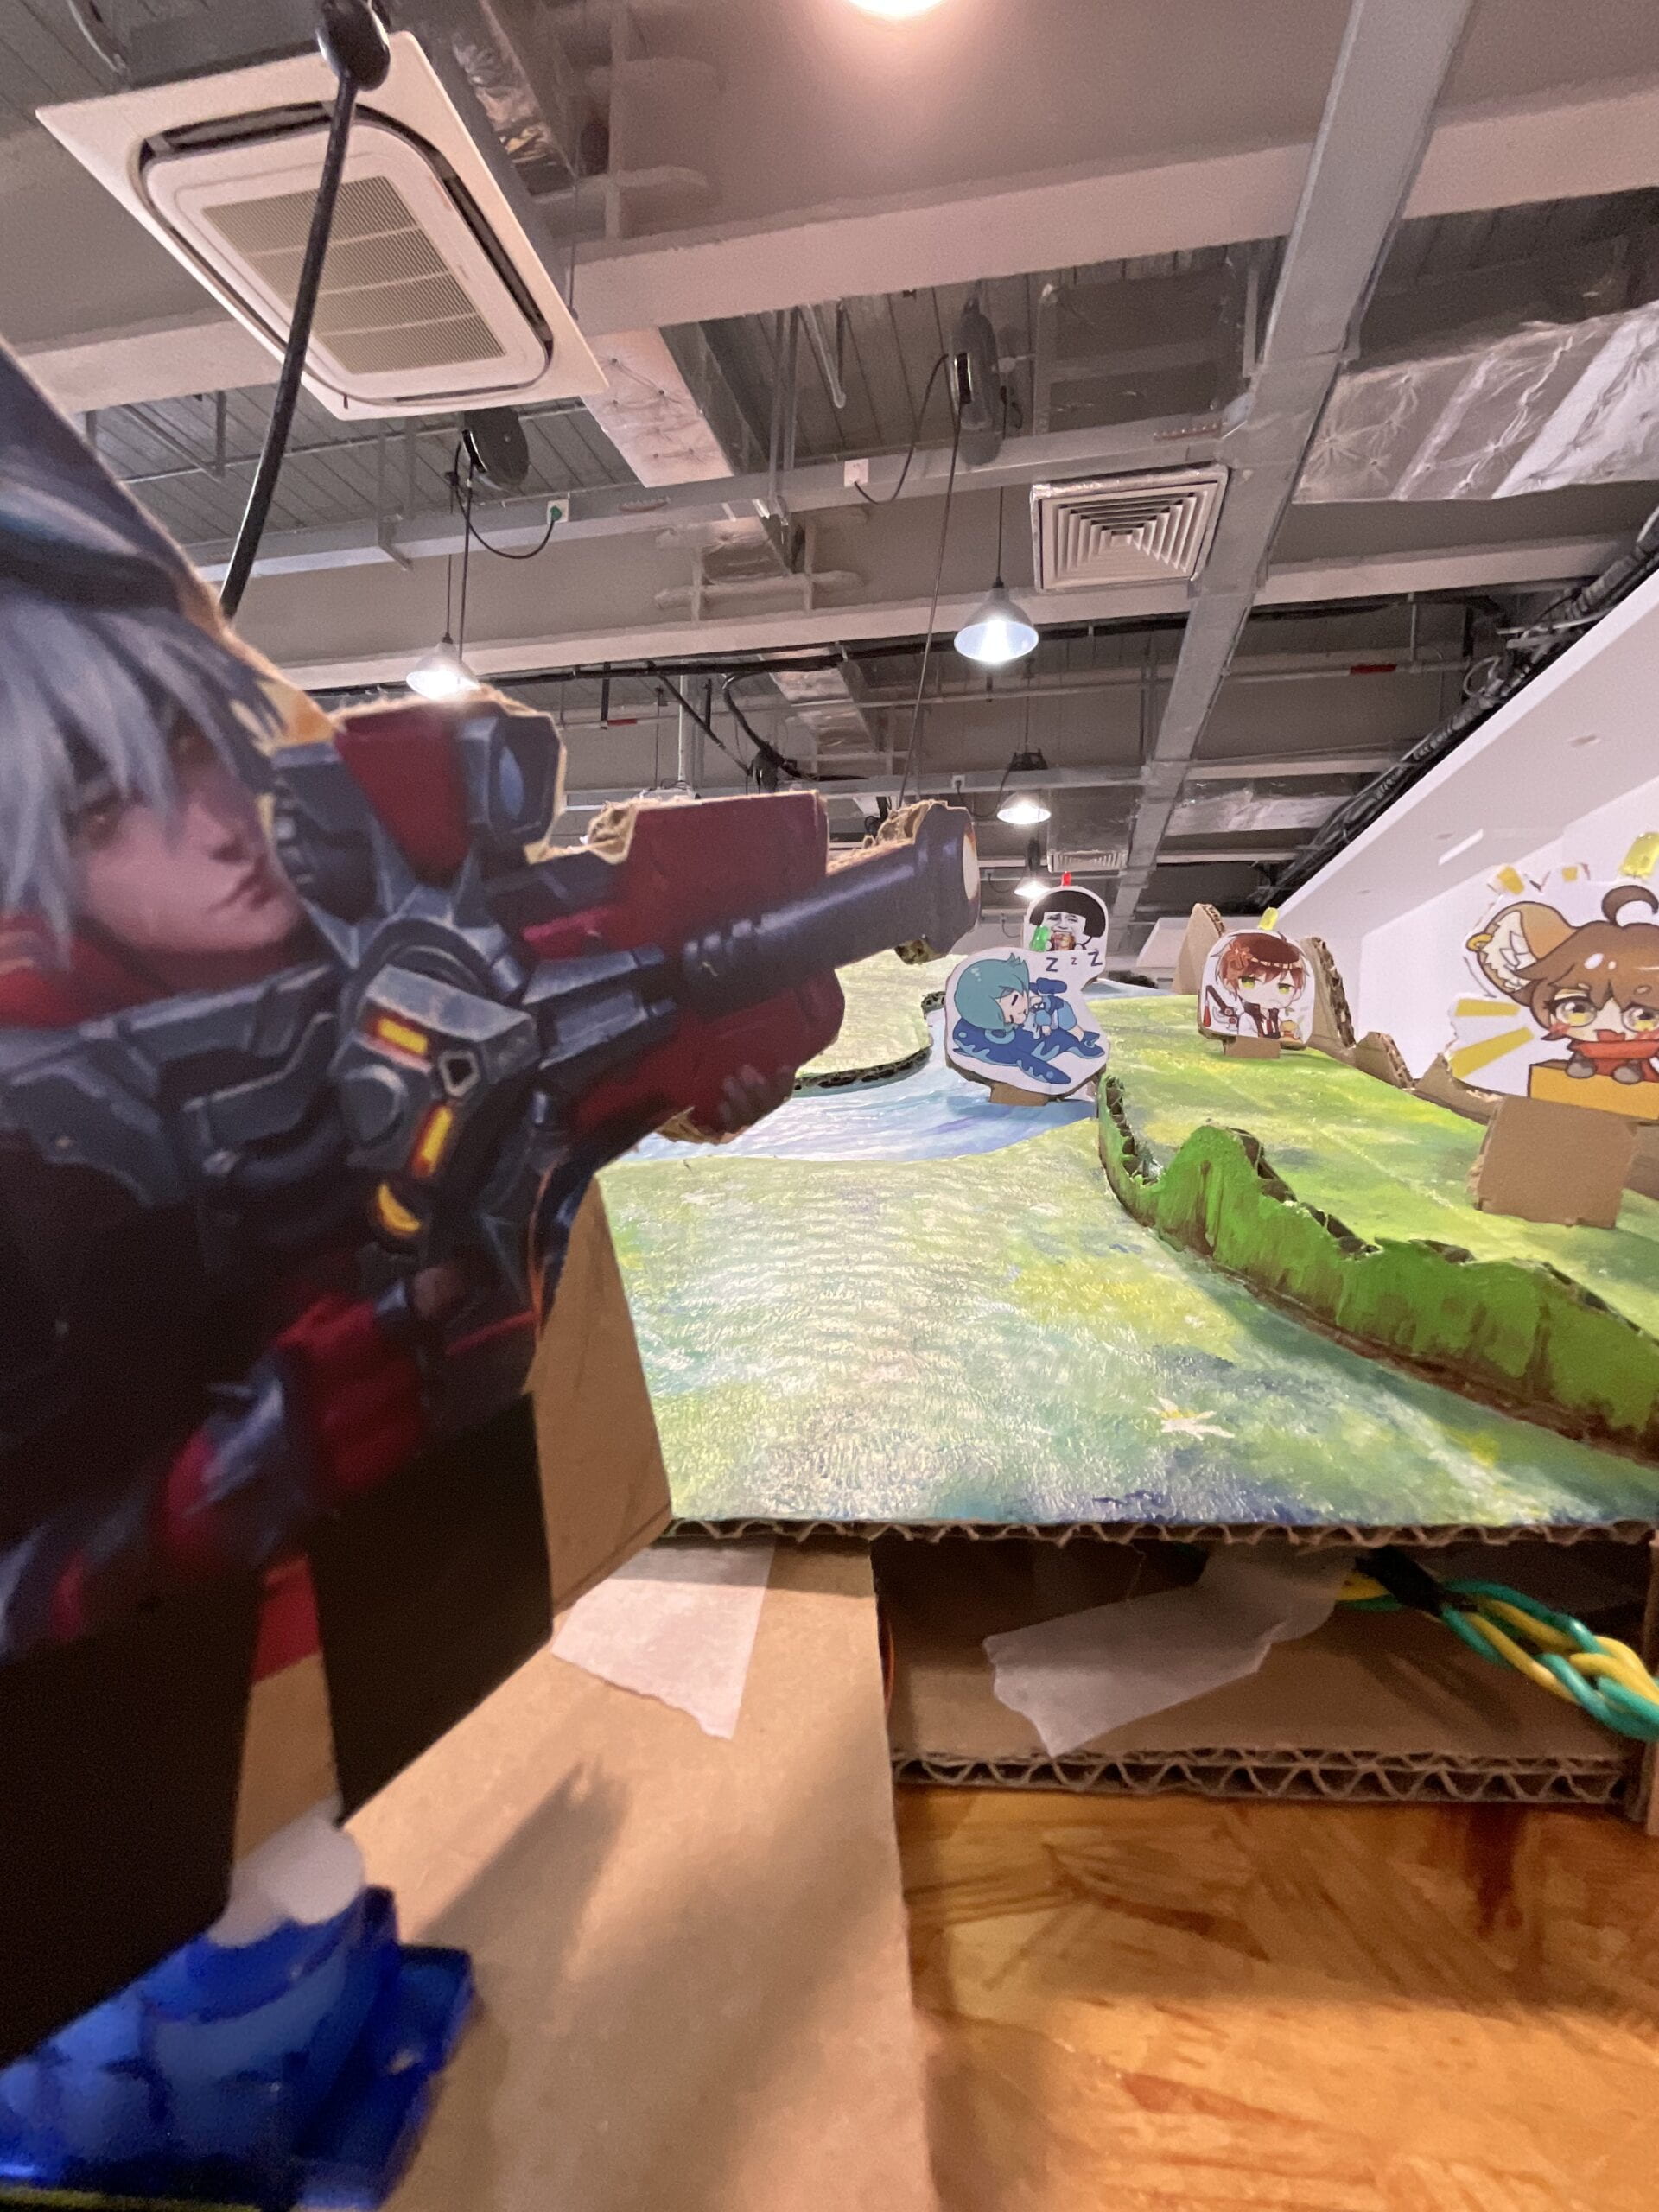
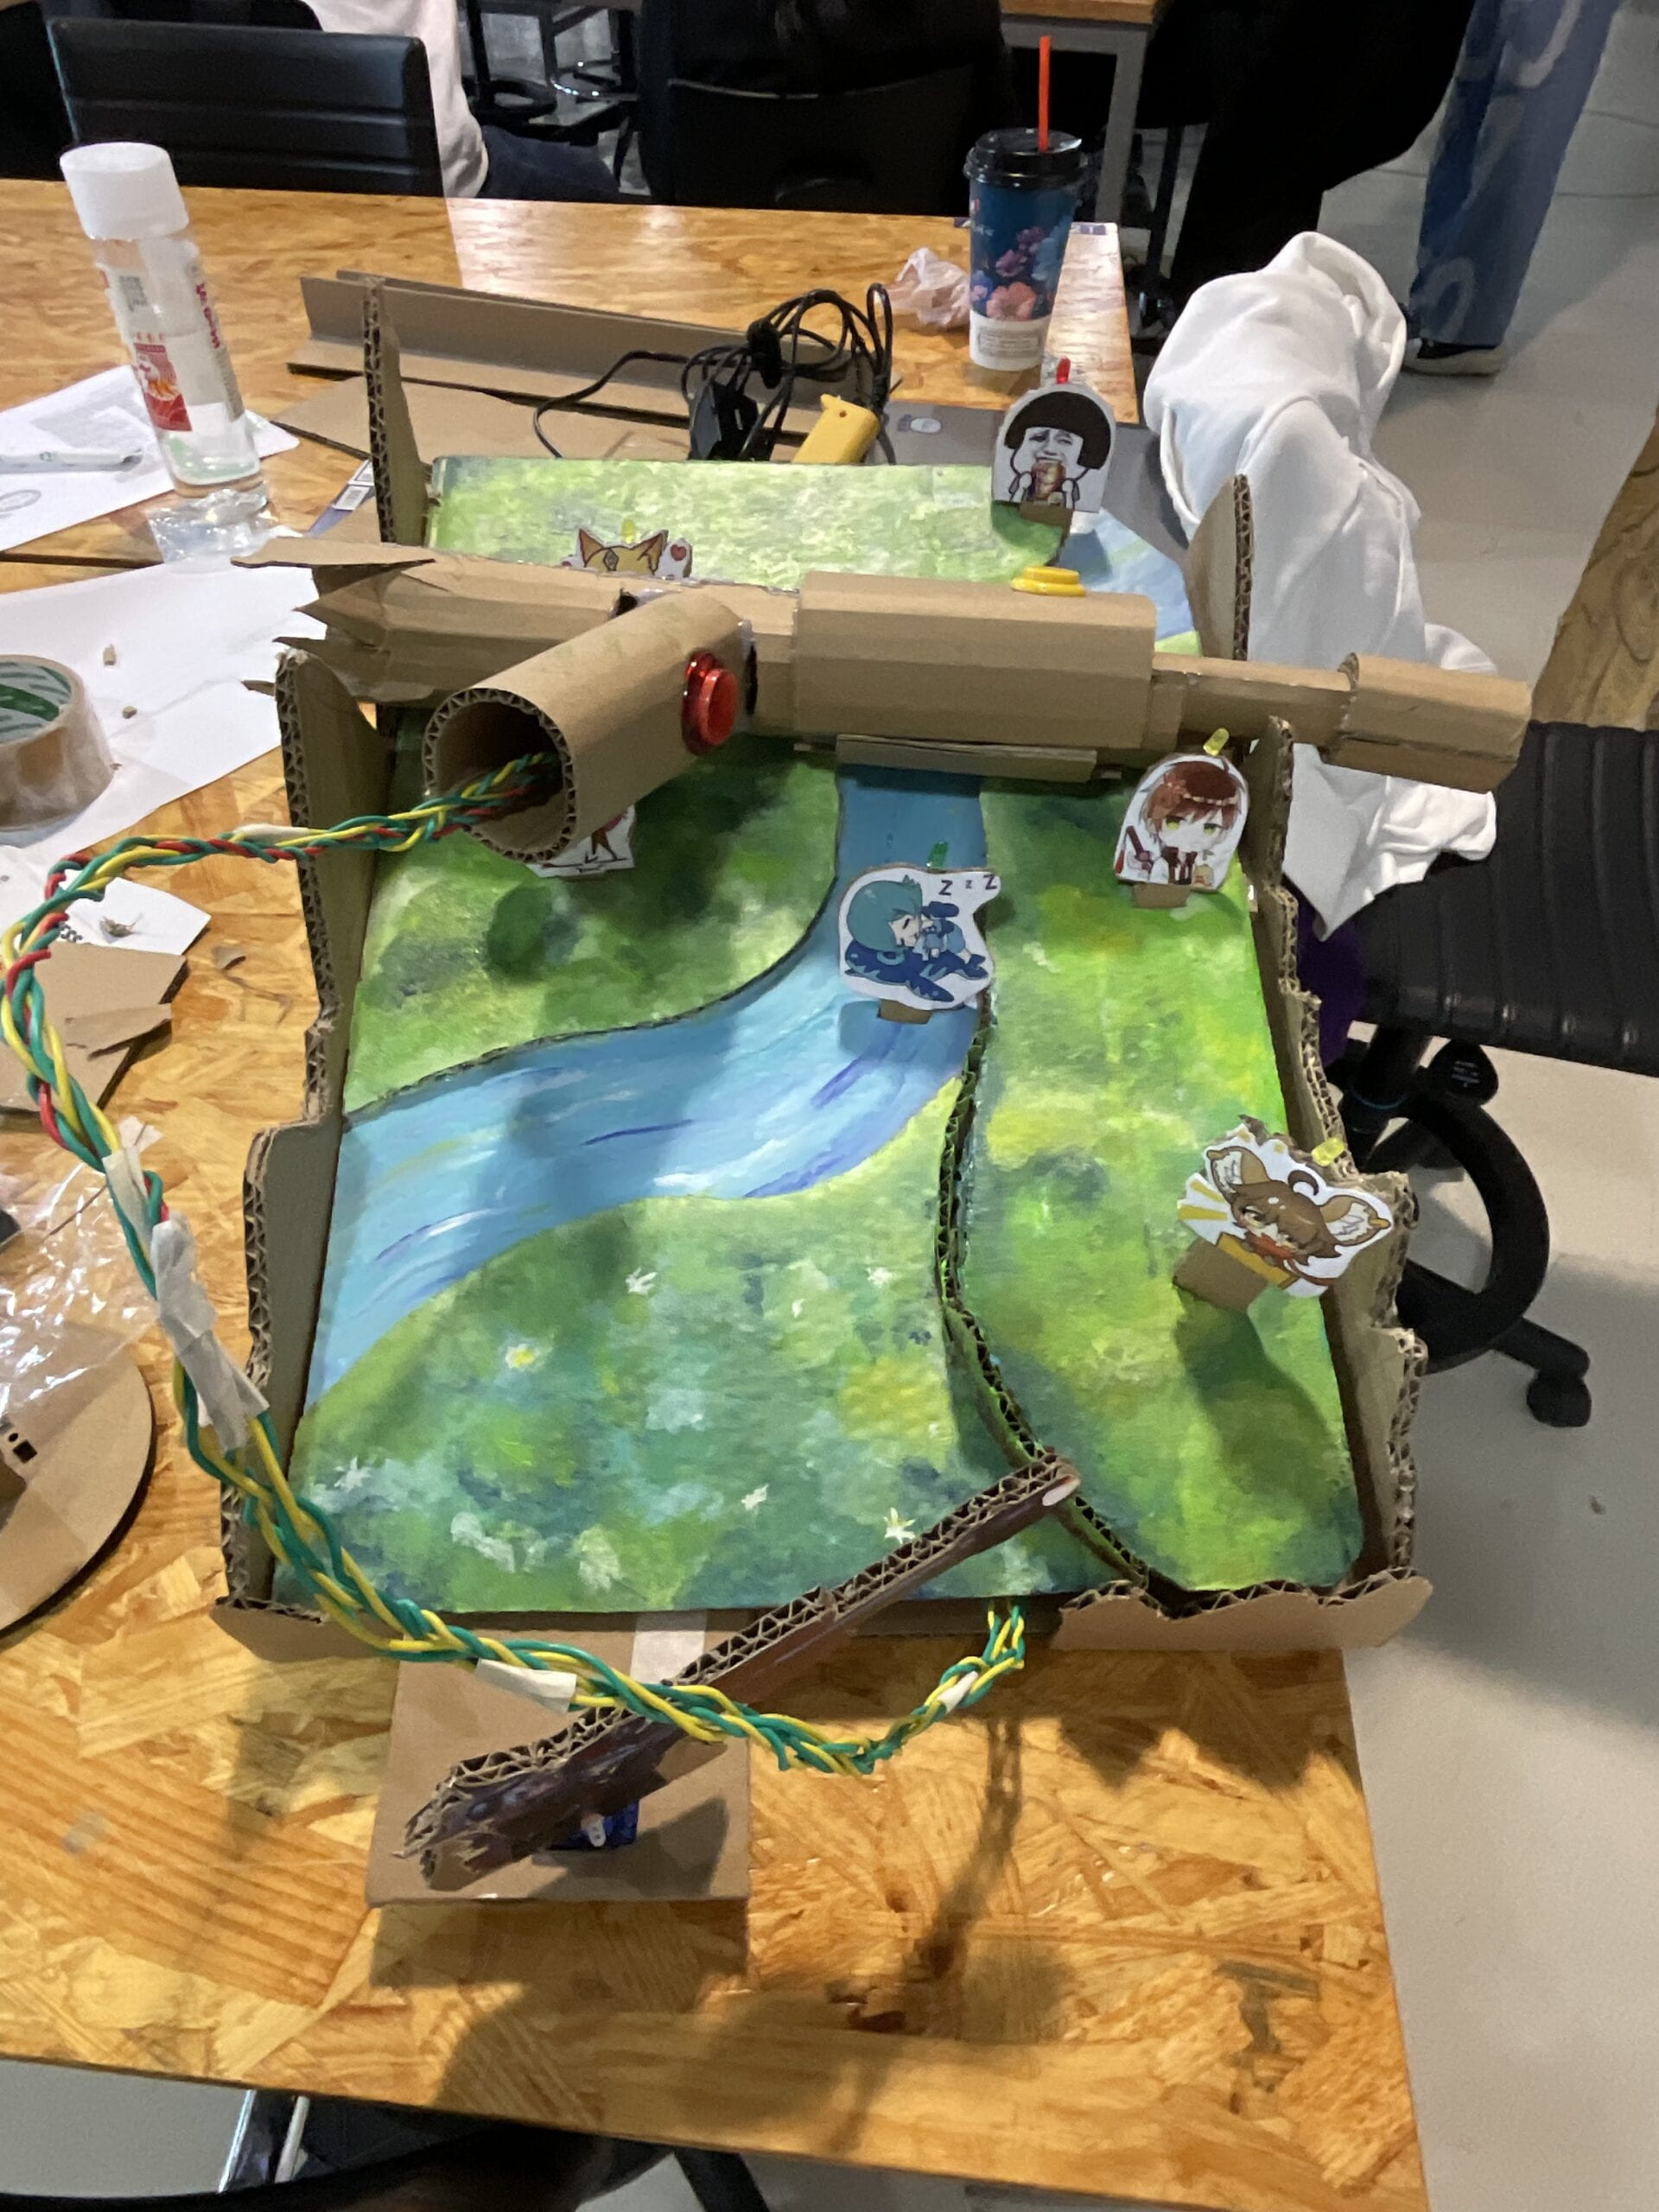
CONTEXT AND SIGNIFICANCE
Address how your previous research (Group Project) impacts or inspires your midterm project. Analyze the previous projects and interactions that you have researched. Point to what specifically in those projects triggered your understanding of interaction, and then your definition of it. What is unique and/or significant about your project? If you re-created something that already exists, explain what your take is on that existing project and what your contribution is to its development? For who is your project intended and why is it of special value to its targeted audience?
To begin with, the idea of making a shooting game came from my interests in games with aiming and powering.
In this kind of games, I can cultivate my attentions and body control(Coordinating hands and fingers, eyes and brain), which reminds me of the project Time’s Up (by Gravitron, 2005 ) I was impressed in the last assignment. It hits me with the idea of calling on biomechanics which is greater than any other mechanics from devices.


Another project from a previous research inspired me of the interaction of different senses–Interaction can be considered in different angles–as for the tech part, it’s about sensors and linkage, while for the users, it’s more about feelings and experiences–the latter might be closer to the user experience design. Therefore, considering the workload and rest time I had, I chose to make a “fake” interaction with coding data detection, letting the computer to make reaction to users motions, instead of using distance and infrared sensors.
CONCEPTION AND DESIGN:
In what ways did your understanding of how your users were going to interact with your project inform certain design decisions you made? Account for several such decisions. In addition, what form, material or elements did you use? What criteria did you use to select those materials? Why was it/were they best suited to your project purpose, more than any other one/s? What might have been another option? But you rejected it—why?
As for the idea and plan:
For the idea:
The original idea is to simulate the process of aiming and powering. Only move the gun at certain direction and wait the power in a certain range, the corresponding target can be shot–the LED extinguishes(or simply change the state–light to dark or dark to light, depending on the game mode). (from the proposal post: https://wp.nyu.edu/shellyxuan/2022/10/18/midterm-project%ef%bc%9aproposal/)
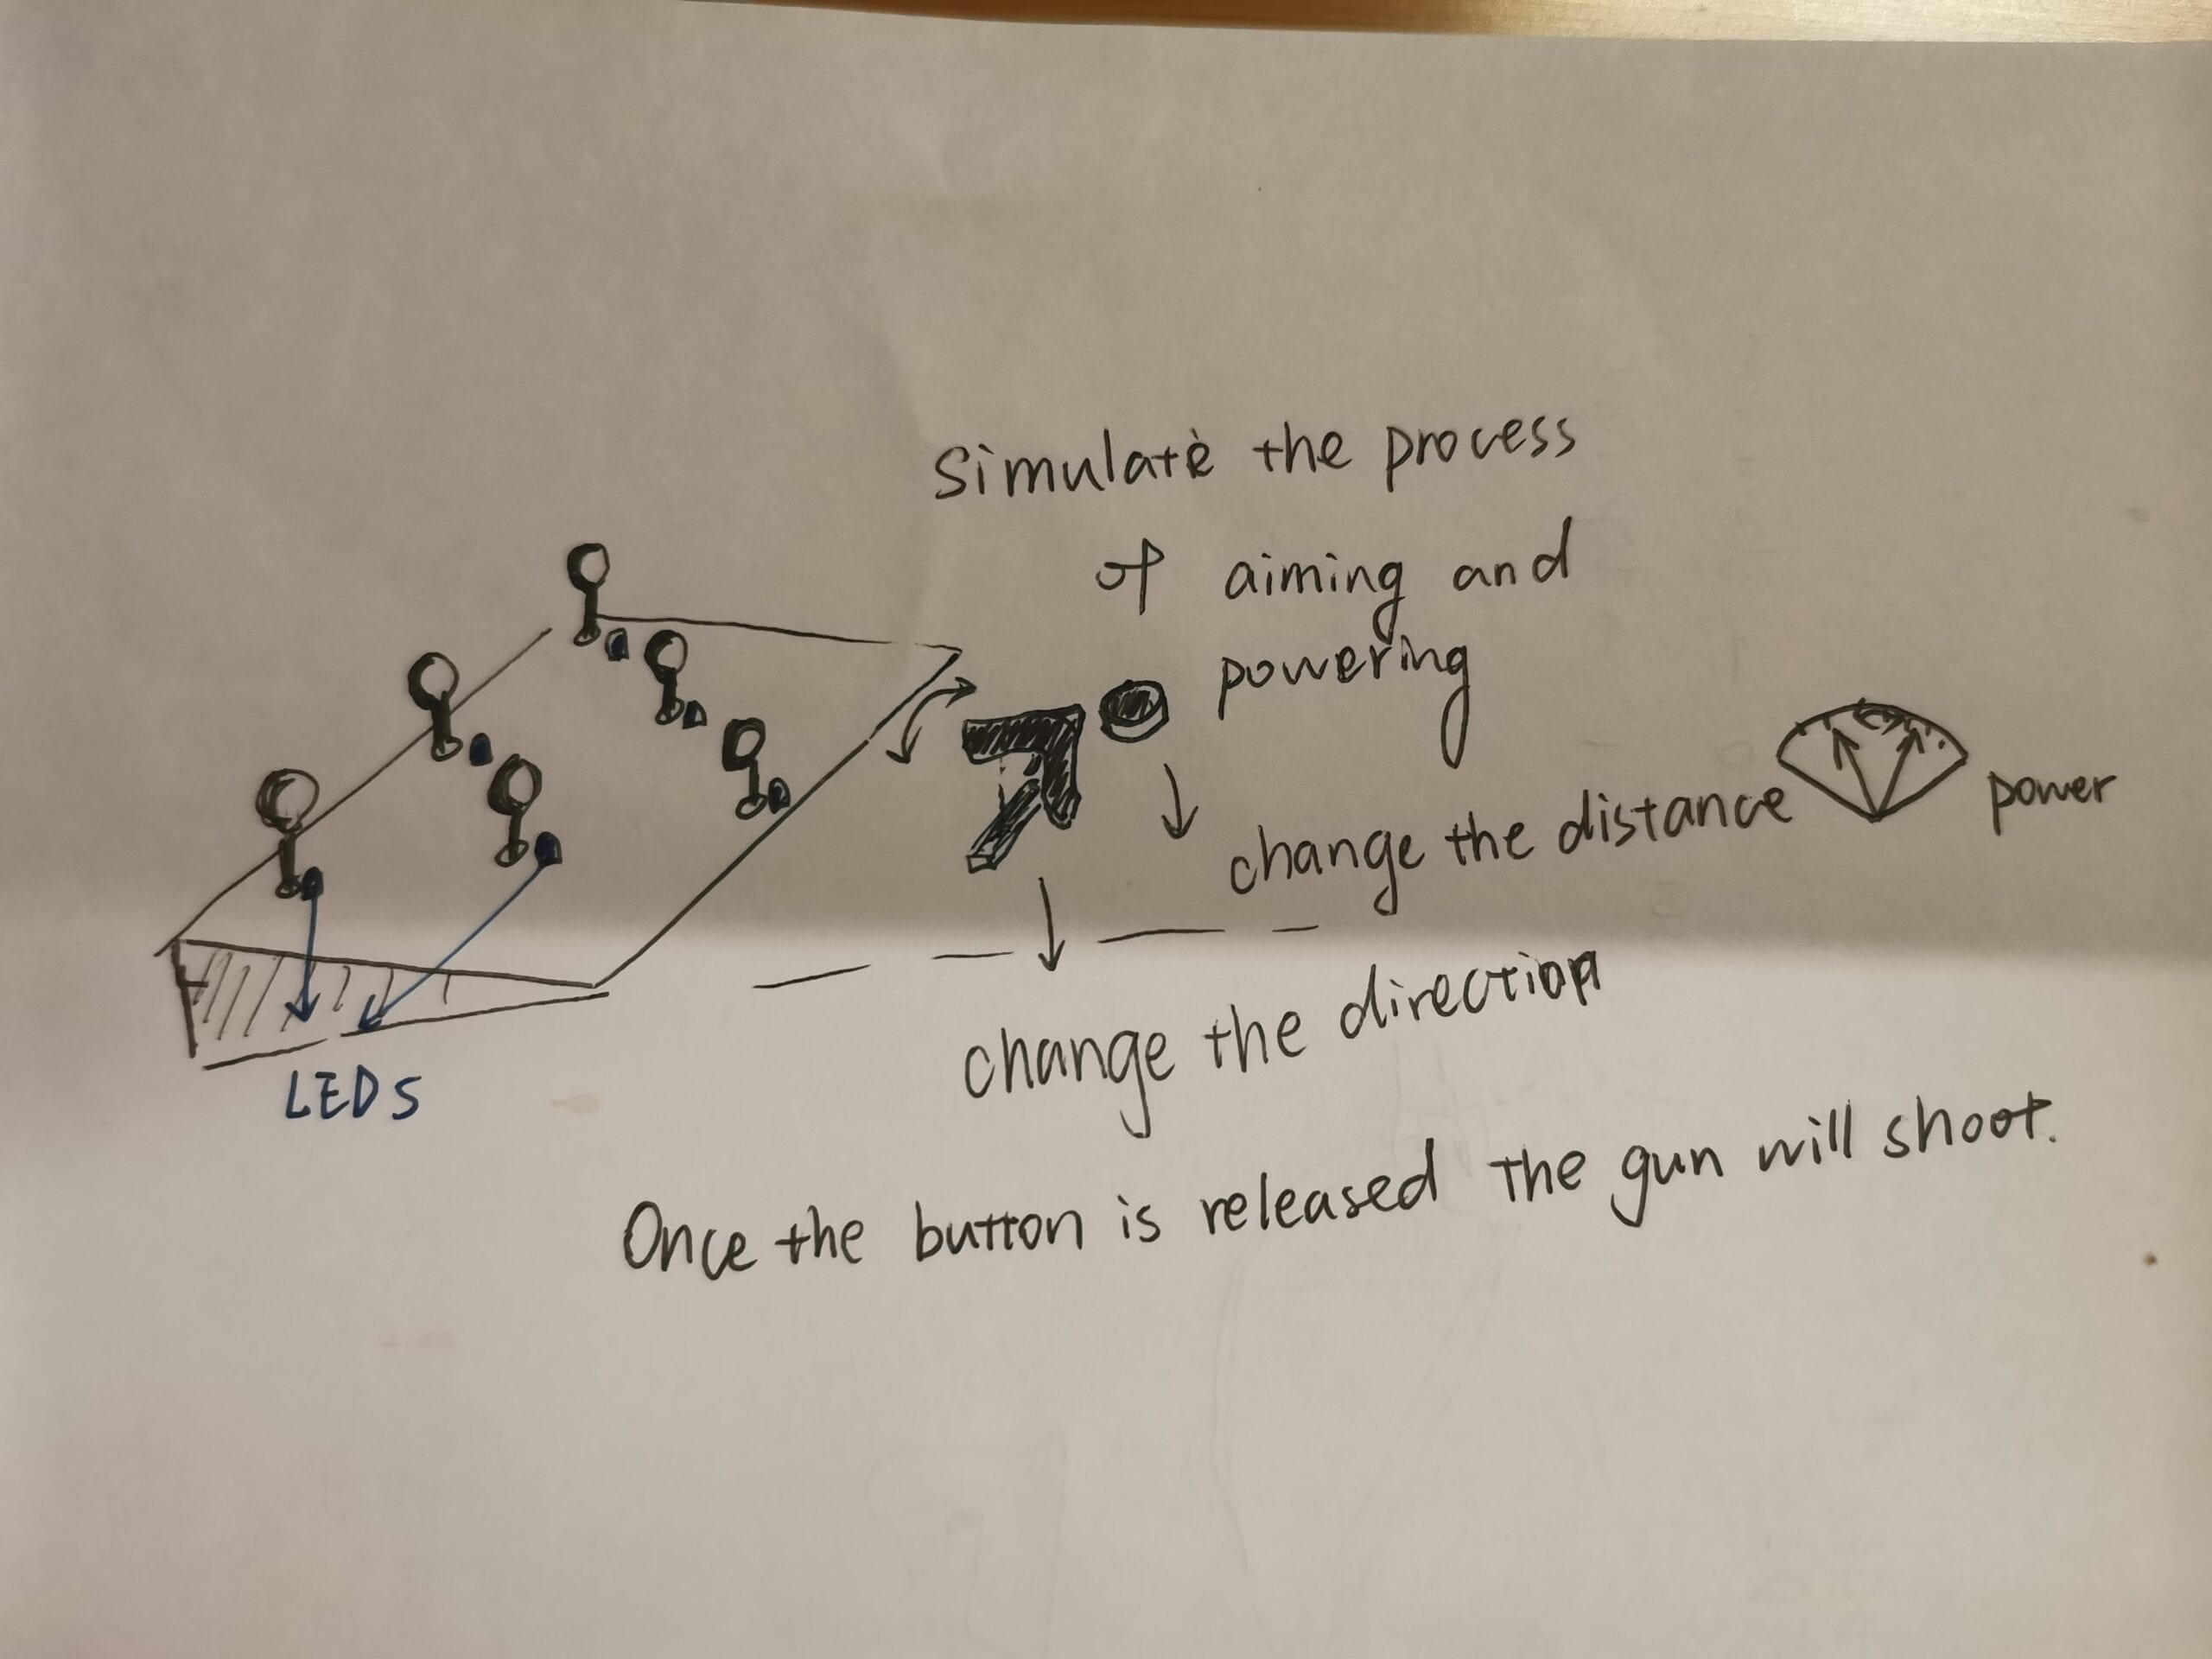
It took me long time to determine the interaction part.
First, for the shooting motion, I considered using sensors like infrared induction, so that user can hold the “gun” with infrared ray and have great freedom of the aimming direction. The problem was the difficulties to create the feeling of powering and aiming(the user need to take seconds to wait until shooting ). Here is a sample project using infrared ray, from which I found the game stops too quick. Because the device reacts immediately once the ray make a contact with the sensor–
Therefore, I decided to make a limitation of the direction, so that the user should carefully control “gun” and adjust to aim. My approach was to use a setted servo and a direction indicator on it, controlled by a button and adjusted by how long the button is pressed. In that way, I won’t use a sensor for direction; instead, the judgement could be made entirely by the computer/arduino.
Here, what I really wanted to add on is that, I felt a bit shameful becaure no sensor was used here and it was a “fake” interaction to some extend. Gratefully, I received great encouragements from my users in the test. I could still remember our LA Iris told me, as a user, she could really enjoy playing with device because there was a real interaction between users and the device. It dawns on me that the definition of the interaction is more about the user and the device rather than focusing on the technology/sensor part, though technology is pretty cool!
Also, in this sample, came another problem–how will the targets react if they are “shot”. Since I want to make the project a feeling of powering and aiming like real sniping, I preferred more tartgets and to create a scenery a bit complex–like a stage, or a real camp. I really wanted to use servos to make targets down when they are shot.
[ABOUT TEAMWORK] Unfortunately, at that moment, the pin with “~” is not enough to connect 5 or 6 targets as expected; and I met great problem on teamwork. I posted invitation on class’s general chat channel and was contacted by one of my classmates. However, I was sorry to hear from my partner that she was not well thesedays with many doctor appointmens. So I decided to wait for her to discuss the idea part and start together as the professor Minsky instructed, until two days after the proposal due. Because the user test was around corner, we had to start as soon as possible. But she was not on campus that evening and hadn’t told here personal ideas or proposal(was seldom reply my WeChat or Slack messages), so I determined to start on my own proposal individually, in case we couldn’t catch the user test. However, in the next morning(one day before the user test), after I finished building the basic circuit and code(judgement of direction and distance, reactied by the status of LEDs

), I had thought she would join me when we met in the morning class, but I was informed that I had to continue it as an individual work.
It made those colorful ideas above limited by time and great workload. So I had to give up many things such as sticking targets on servos and use mp3 players. It’s an unforgettable pity for me QAQ.
FABRICATION AND PRODUCTION:
In this section, describe and assess the most significant steps in your production process, both in terms of failures and successes. Please clarify exactly what contributions and roles you personally made to the process and project along the way, and describe the process your group used to work together. What happened during the User Testing Session? How did your user testing process influence some of your following production decisions? What kind of adaptations did you make? Were they effective? In short, keeping in mind your project goals, how do you account for and justify the various production choices you made for your project? Include sketches and drawings.
[the basic circuit and code]
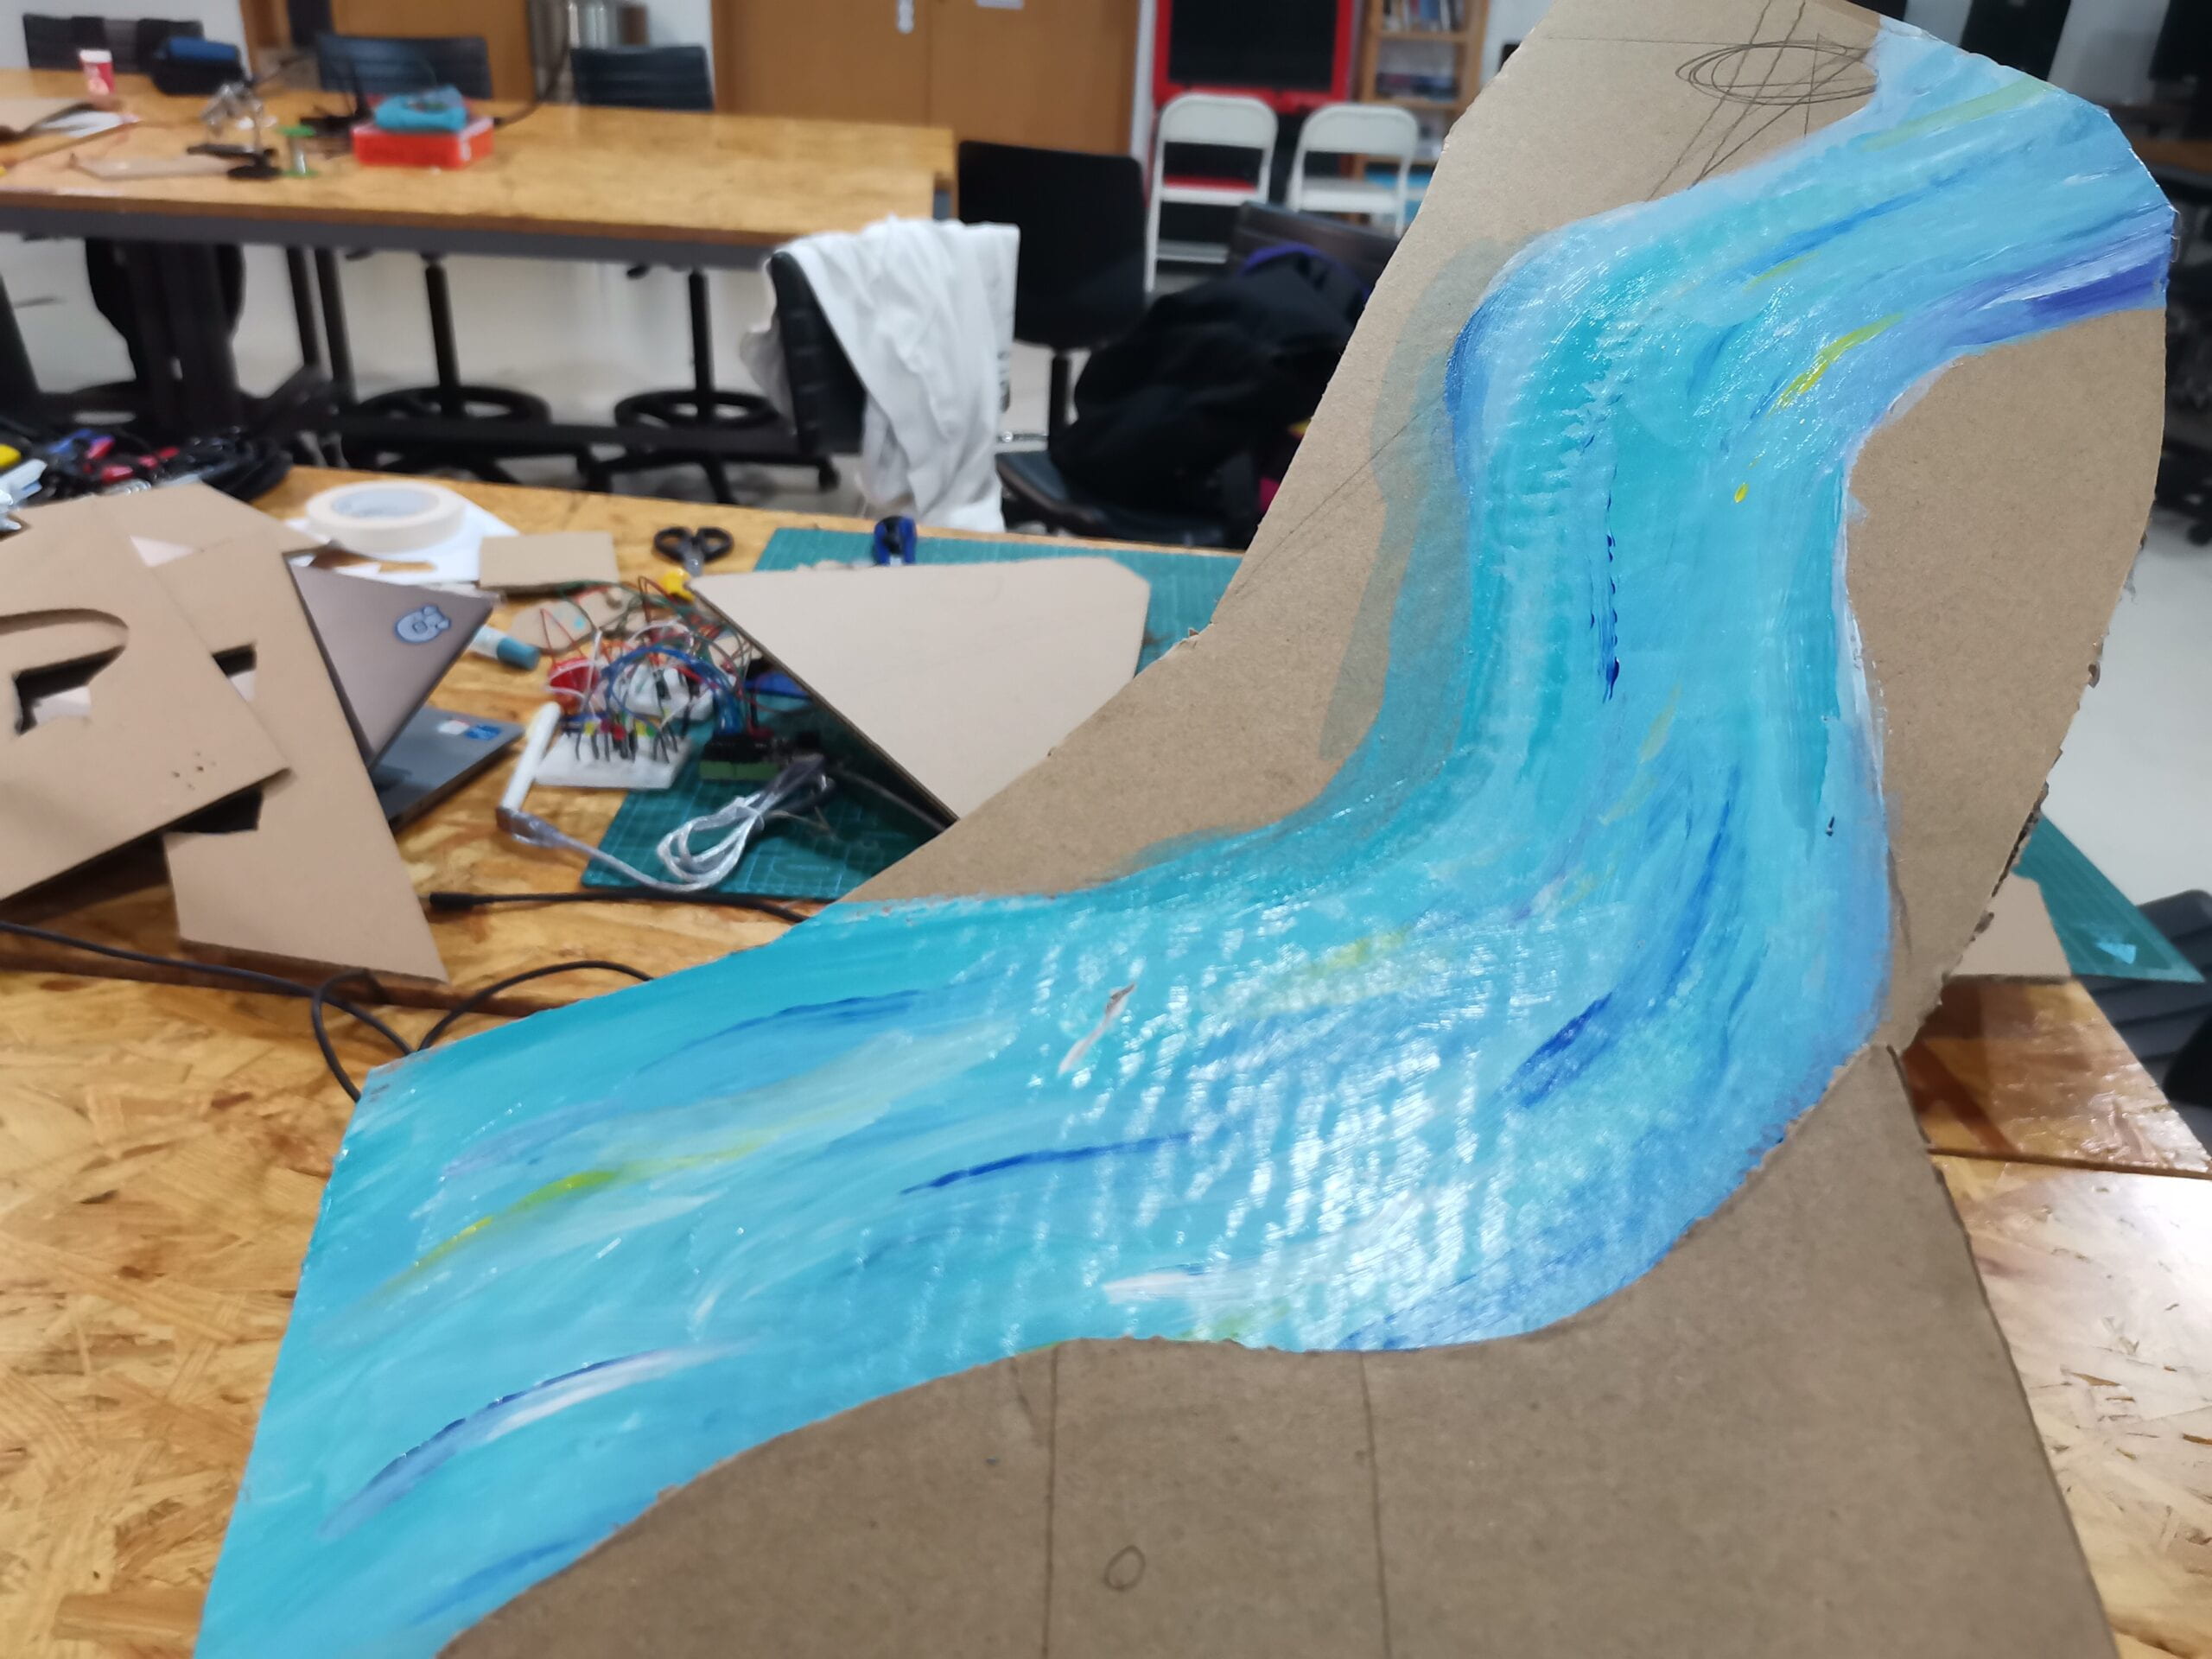
I failed to get enough big card board to make a entire background on it. Considering scene of a shooting game that can give user good experience, I came up with the idea to use pieces of cardboards and glue them together, showing the effect of high and low, different landforms. The final effect really fitted my imagination of the scene!
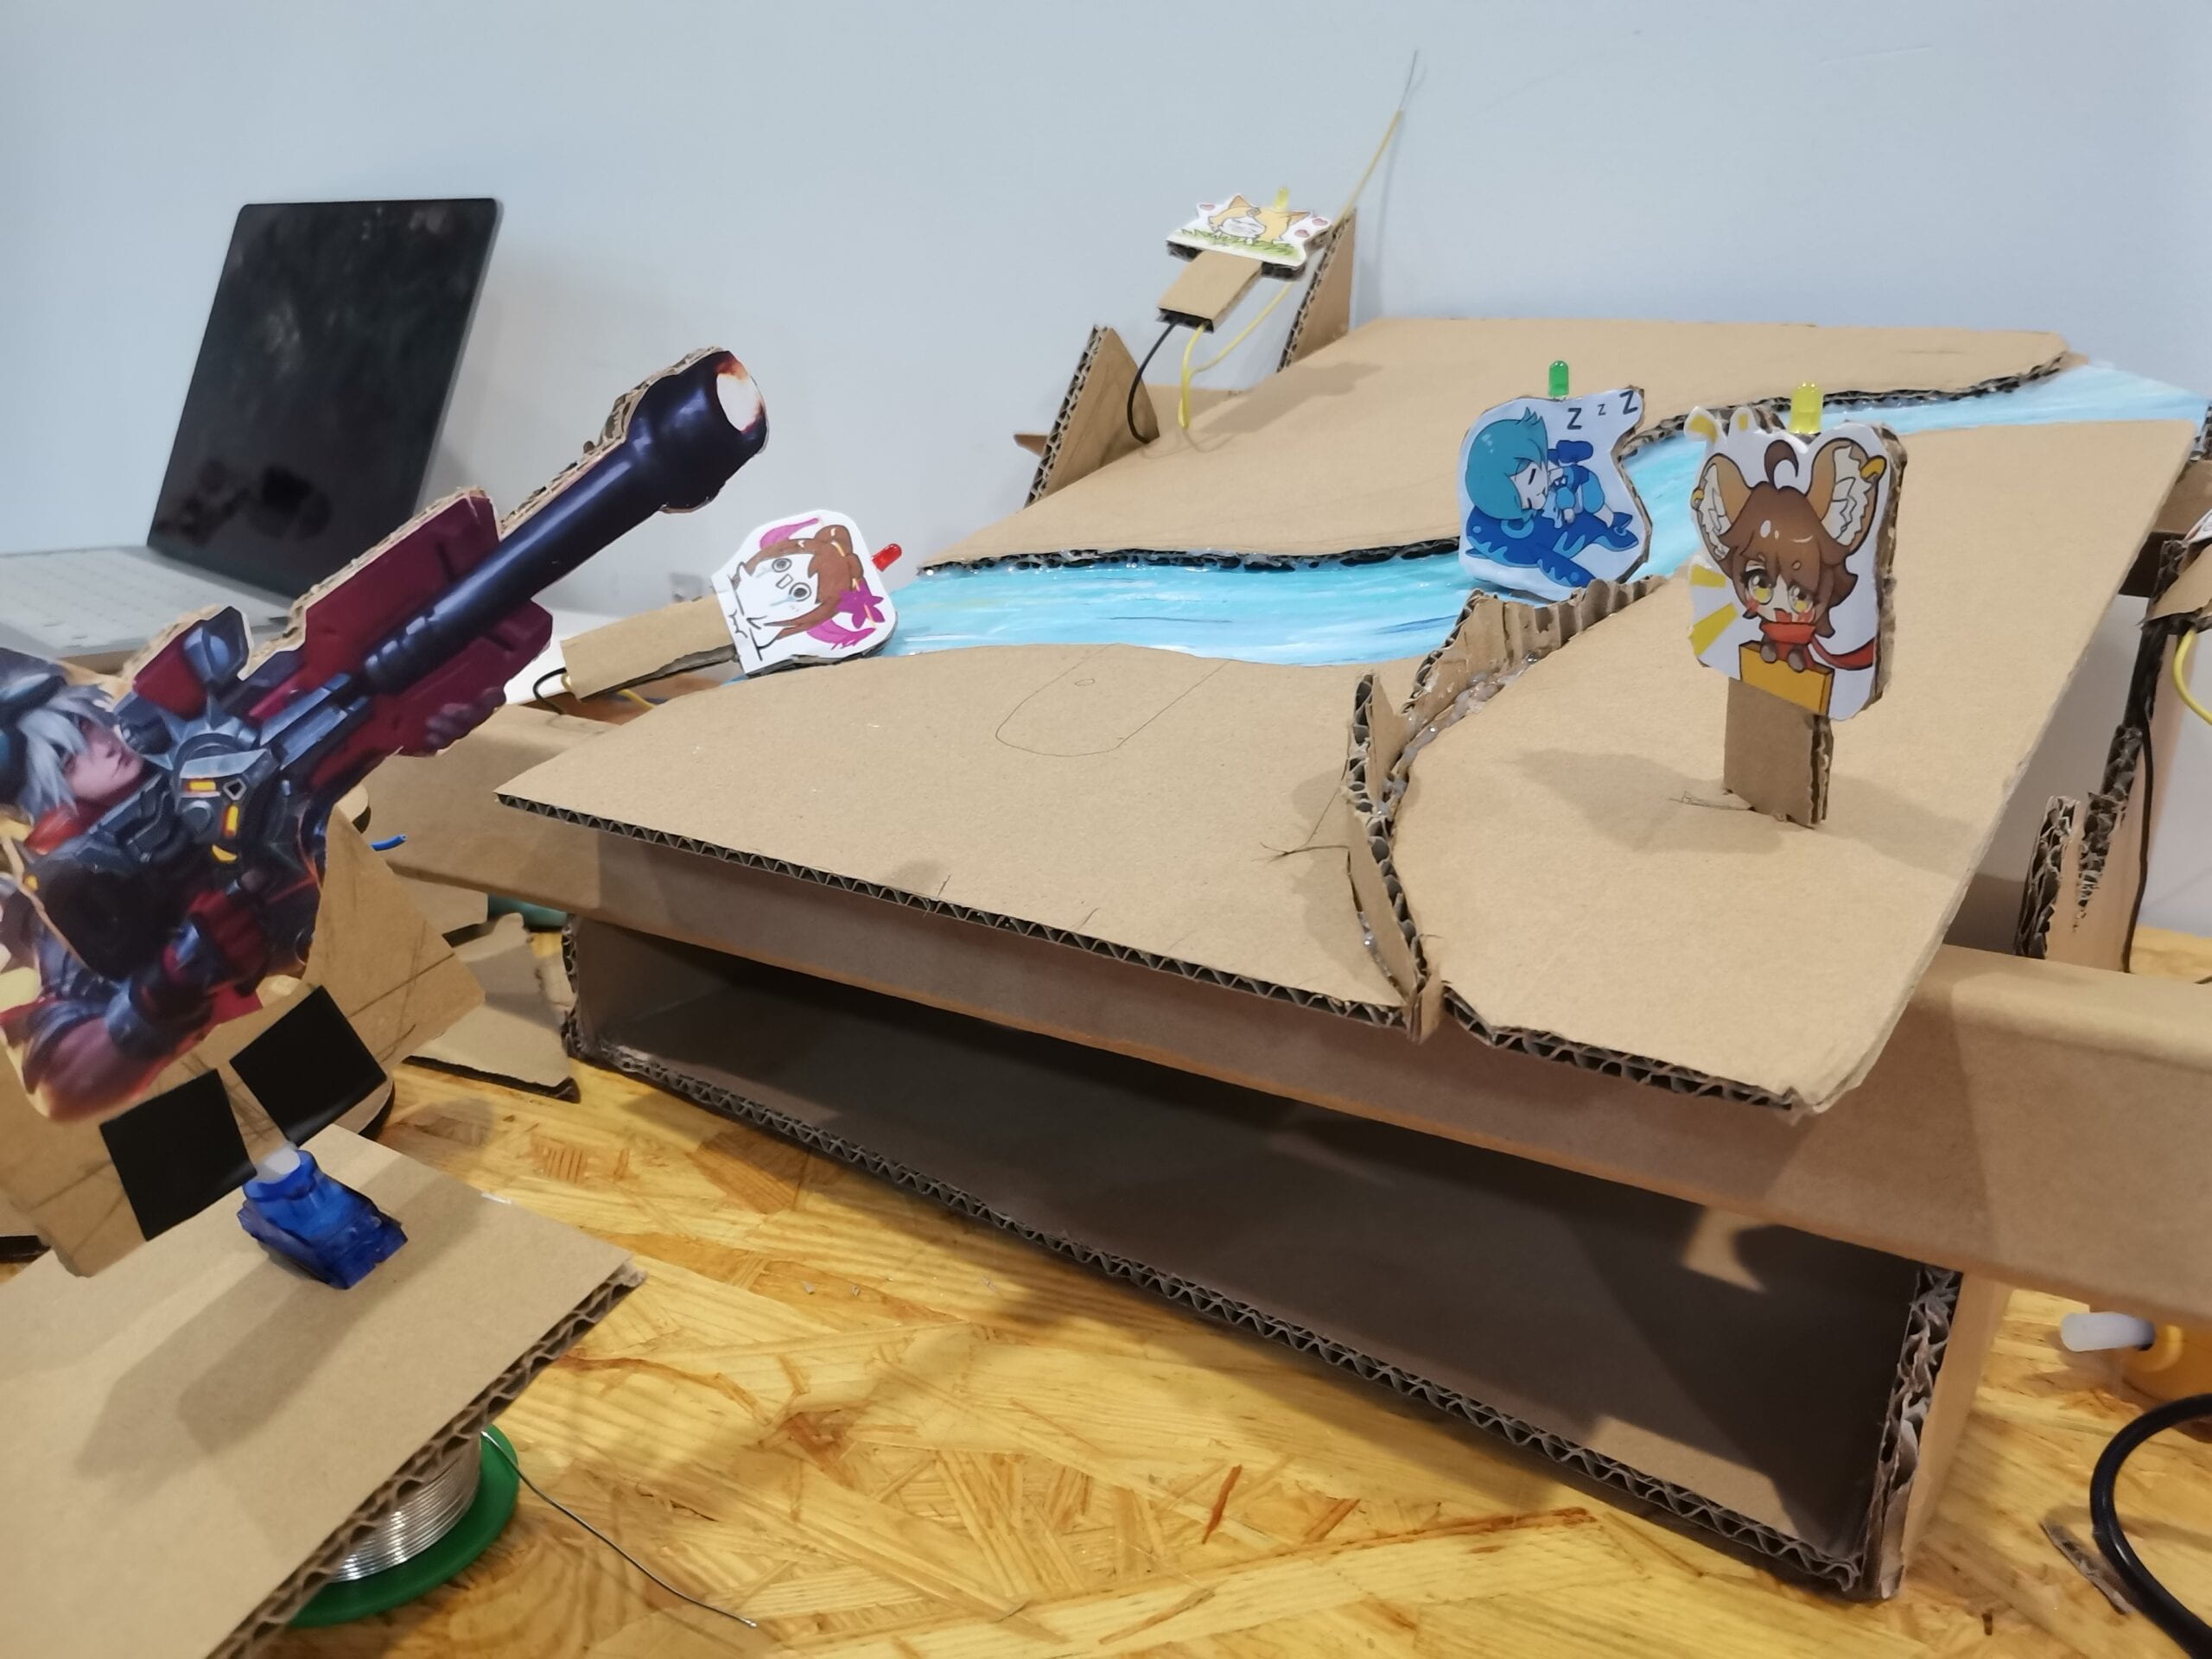

One thing I am proud of is that I put my hobby of painting into my project. I used the acrylic paint in 826 and buried myself in painting the board for a long time. Although I clearly knew I could print pictures of grass(or other background) and stick them onto the card board, I was still driven by my deep desire of painting with such limited colors.

There is a coincidence, that when I was going through my photo album, I found a picture of a famous stream in Kanas similar to the river I draw on a freestyle haha.

[For the target cards]
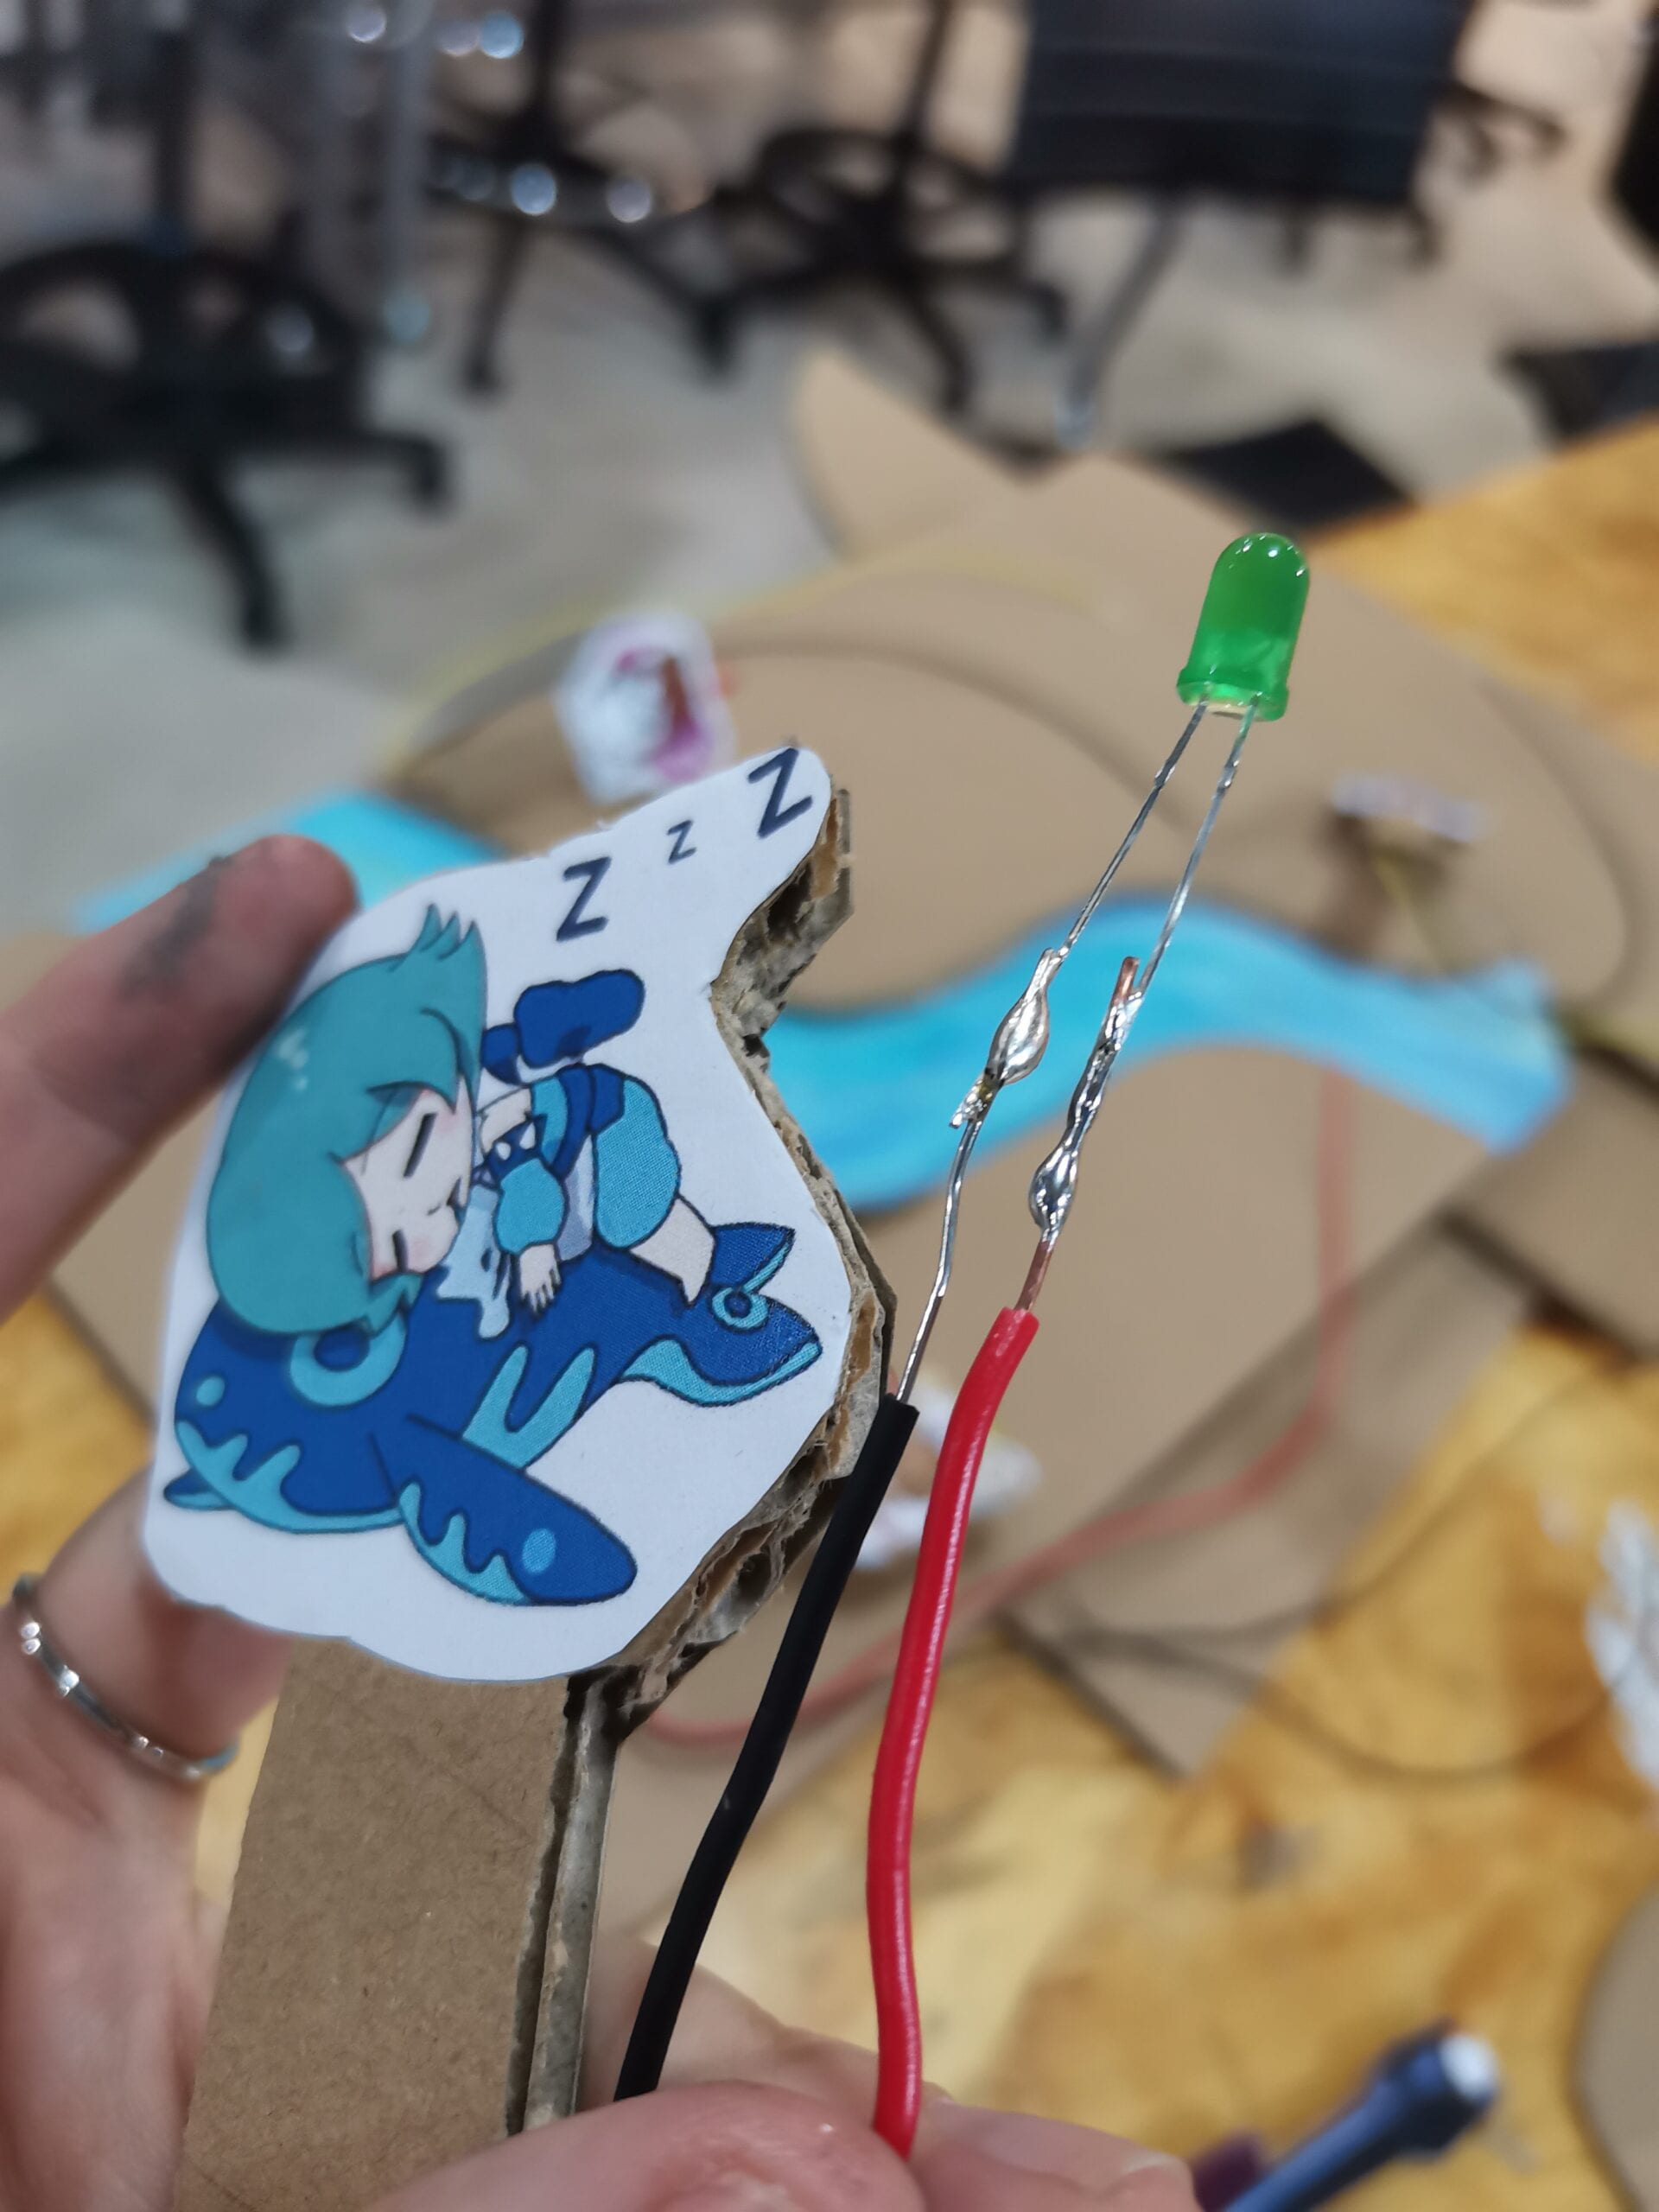
I kept the LEDs to make reaction, but there was still an expection that one day meybe I can add servo or other reaction methods. Therefore, I took advantage of the holds/columns’ space inside the cardboard which allows wires going through. Additional, in that way, it’s convenient for me to take LEDs off and change another one, if one or some of them were broken. The fact turns out I was right, because LED is easily broken, especially when building and adjusting the circuits inside the “box”.(sometimes the ends of wires somehow leave the breadboard, and easily connect with the LED with 5V and GND ). Later, one of the LEDs did break.
So, always think one step more, leave space to make up, and prepare a plan B, when doing a project.
There is a special motion worth recording when I put the LED in to the target card:
The LED looks funny and was just like a dancing character, reminding me of a picture taken a month age, when we first worded on LEDs and Arduino.
[For the circuit and organization]
To deal with the circuit beneath the upper cardboard, I mainly found to methods to work on. The first one is to put wires in order, for which I sennit the wires in paris and used tape to fix them and to write down the serial numbers(circled in purple) as labels. Another way is to leave the upper cardboard getting stuck by columns(holders), so that the board is movable and easy for me to build and adjust the circuit under it.

[Additional part: the button]
I got some suggestions about the two buttons(direction and powering) during the user test. It would be better for user experience to make a shape/handle instead of simply two buttons with exposed wires. Therefore, I decided to make a hand shank like PSP. Obviously, it is easy to put buttons on a flat card board and later build it on a “3D” handle. But considering it is a shooting, though the indicator work has nothing to do with the buttons, makeing buttons into a gun-shaped controller was pretty good and impressive.
Therefore, I tried to put buttons on cardboard columns and glued them together.
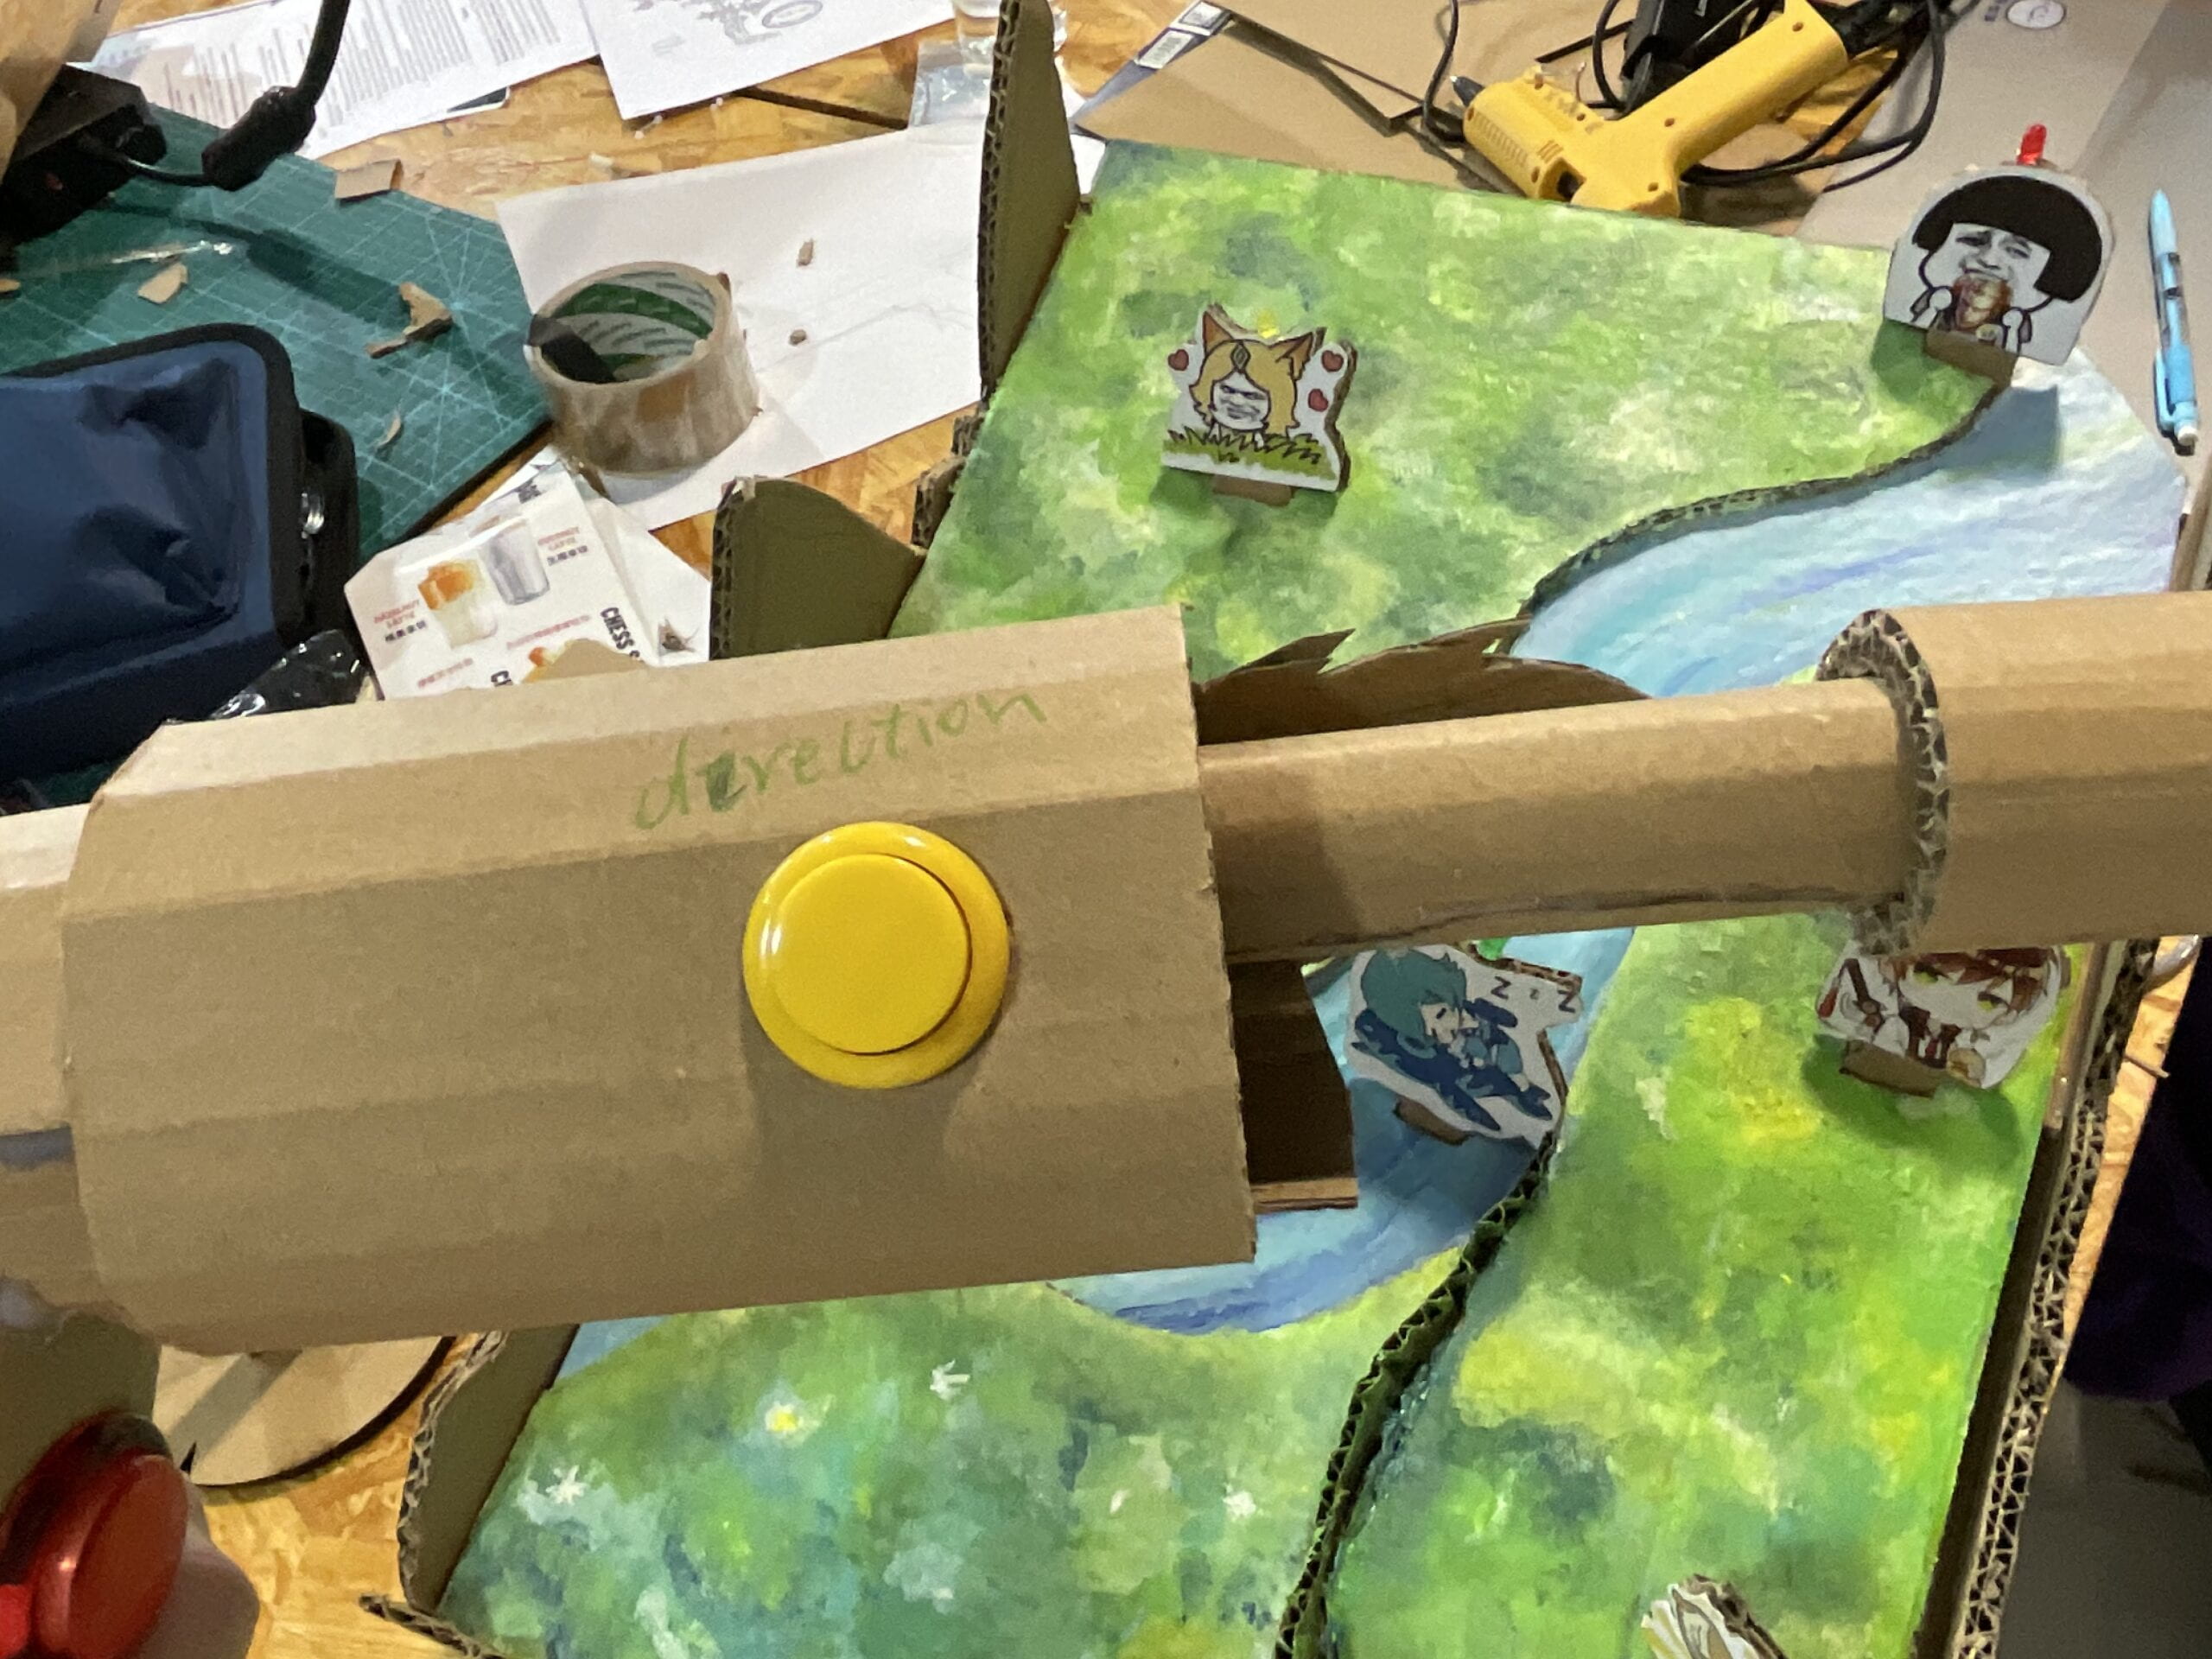
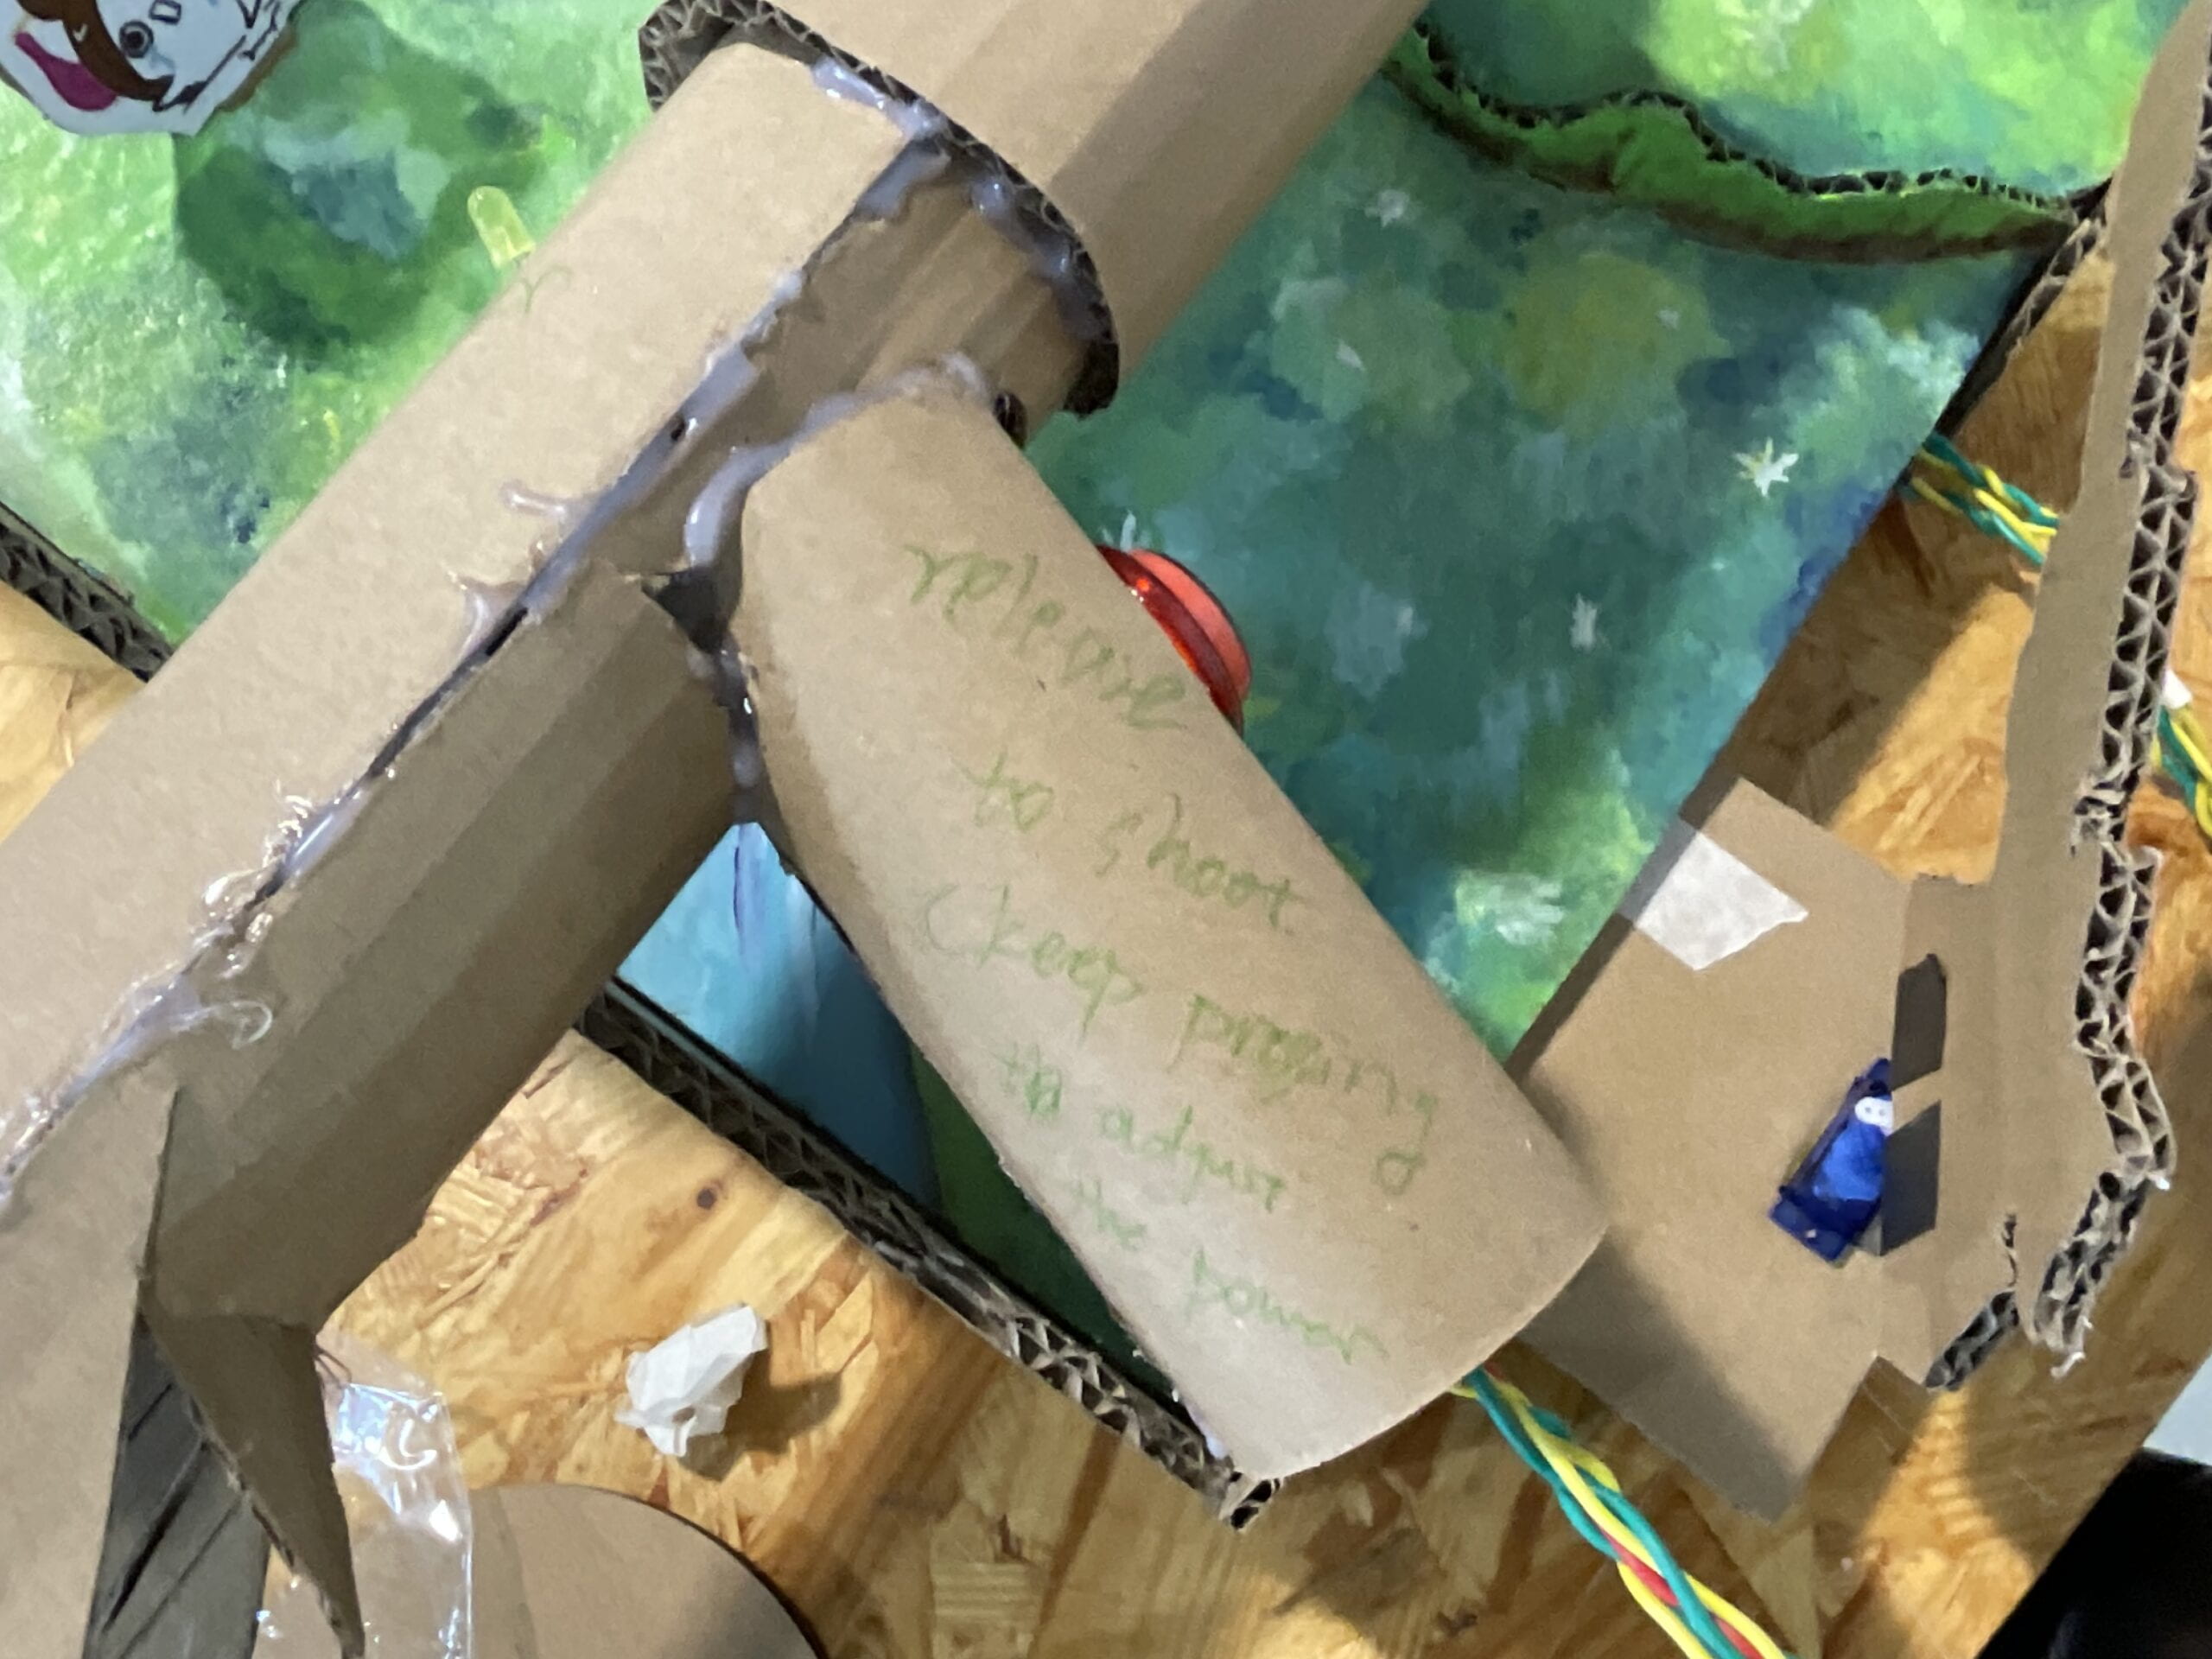
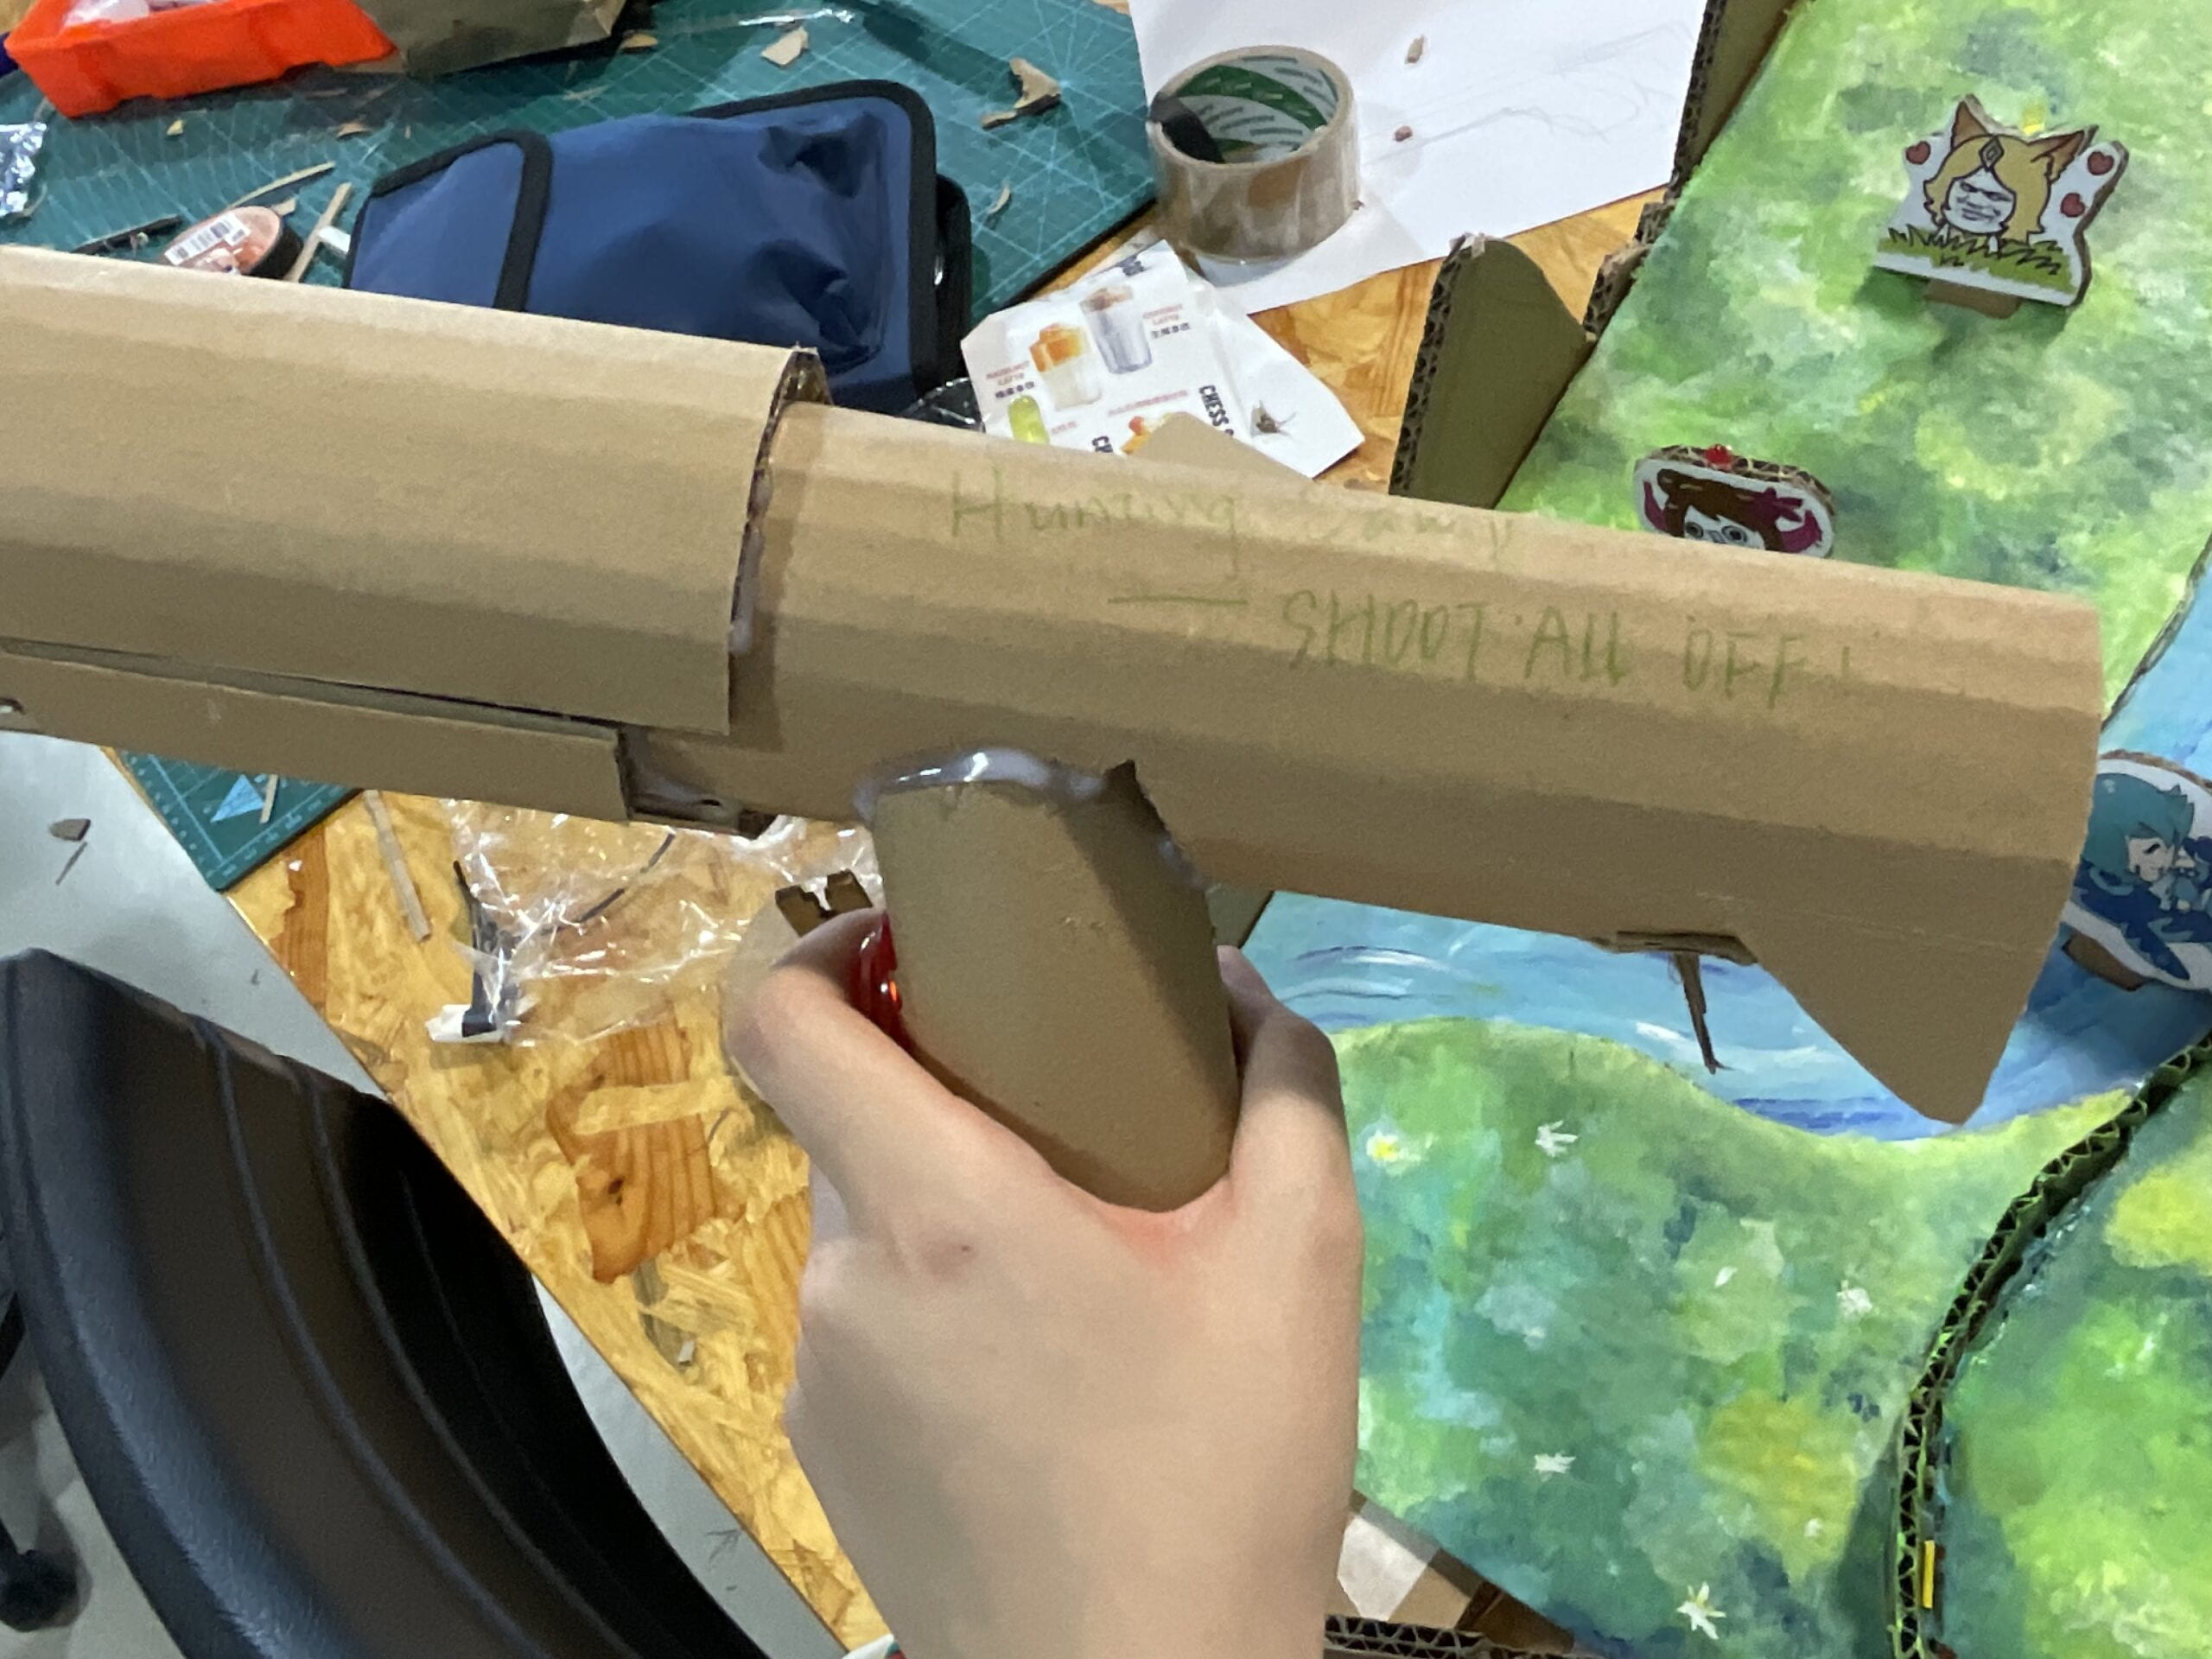
the right hand holds the hand shank with the red button for powering and shooting; the left hands holds the gun’s body with the yellow button for aiming(changing the direction of the real indicator); there is a LED on the body reflecting the power, which the user looks at similar to look at the gun sight. (recommanded action as follows)
[Here is the code recorded at the presentation day, though it’s not good enough and has great space to improve.]
int led1 = 6;
int led2 = 9;
int led3 = 13;
int led4 = 7;
int led5 = 12;
int led6 = 8;
int buzzerPin = 10;
int status[]={HIGH,HIGH,LOW,HIGH,HIGH,LOW};
int starttime;
int end=false;

// pressureButton
int led_react = 3;
// float rad_sin;
// int degree = 0;
int ibrightness = 1;
int brightness = 1;
int pre_p_Button = LOW;
int p_Button = A5;
//directionButton
int d_Button = A4;
int pre_d_Button = LOW;
#include
Servo myservo;
int servoPin = 5;
int angle;
int iangle = 2;
int angle_time = 40;


void setup() {
  // put your setup code here, to run once:
  pinMode(led1, OUTPUT);
  pinMode(led2, OUTPUT);
  pinMode(led3, OUTPUT);
  pinMode(led4, OUTPUT);
  pinMode(led5, OUTPUT);
  pinMode(led6, OUTPUT);
  pinMode(buzzerPin, OUTPUT);
  // buttons
  pinMode(led_react, OUTPUT);
  myservo.attach(servoPin);
  pinMode(A4, INPUT);
  pinMode(A5, INPUT);
  //test
  Serial.begin(9600);
  //test lighting
  digitalWrite(led1, HIGH);
  digitalWrite(led2, HIGH);
  digitalWrite(led3, HIGH);
  digitalWrite(led4, HIGH);
  digitalWrite(led5, HIGH);
  digitalWrite(led6, HIGH);
  tone(buzzerPin, 500);
  delay(800);
  tone(buzzerPin, 600);
  delay(800);
  tone(buzzerPin, 700);
  delay(800);
  noTone(buzzerPin);
  // delay(1000);
}

void loop() {
  // noTone(buzzerPin);
  //pressure--reacting led
  // pressureButton = digitalRead(p_Button);

  // if (digitalRead(p_Button) == HIGH && digitalRead(d_Button)==HIGH) {
  //   if (millis()-starttime>=5000){
  //     resetFunc(); //call reset
  //   }
  // }else(
  //   starttime = millis();
  // }
  analogWrite(led_react, brightness / 4);
  if (digitalRead(p_Button) == HIGH) {

    // version 1
    // delay(50);
    // degree=(degree+idegree)%180;
    // rad_sin=sin(radians(degree));
    // brightness=rad_sin*70;

    // verion 2
    // move(brightness,ibrightness,38);
    brightness += ibrightness;
    if (brightness >= 100 | brightness <= 0) { ibrightness *= -1; } pre_p_Button = HIGH; } else { pre_p_Button = LOW; } // Serial.println(brightness/4); // direction if (digitalRead(d_Button) == HIGH) { angle_time = angle_time + iangle; if (angle_time >= 150 | angle_time <= 40) {
      iangle = -1 * iangle;
      delay(10);
    }
    myservo.write(angle_time);
    Serial.println(angle_time);
    pre_d_Button == HIGH;
  } else {
    pre_d_Button == LOW;
  }
  // // if (digita)
  delay(20);
  // if (digitalRead(d_Button) == LOW & digitalRead(p_Button) == LOW & pre_p_Button == HIGH) {
  // if (digitalRead(d_Button) == LOW & digitalRead(p_Button) == LOW) {
  if (digitalRead(p_Button) == LOW & pre_p_Button == HIGH) {  //甩狙distance

    if (brightness<20 && brightness>10){
      tone(buzzerPin, 200);
      delay(600);
      noTone(buzzerPin);
    }else if(brightness>=20 && brightness<40){ tone(buzzerPin, 300); delay(700); noTone(buzzerPin); }else if(brightness>=40 && brightness<70){ tone(buzzerPin, 400); delay(800); noTone(buzzerPin); }else if(brightness>=70 && brightness<90){ tone(buzzerPin, 500); delay(800); noTone(buzzerPin); }else if(brightness>=90){
      tone(buzzerPin, 600);
      delay(800);
      noTone(buzzerPin);
    }

    if (angle_time > 125 && angle_time <= 132 && brightness > 70) {
      //128
      // inverse(led3);
      digitalWrite(led3, !digitalRead(led3));
      Serial.println(digitalRead(led3));
      // digitalWrite(led3,LOW);
      inverse(led4,4);
    } else if (angle_time > 132 && angle_time < 140) {
      inverse(led3,3);
    } else if (angle_time <= 125 && angle_time > 118 && brightness > 70) {
      inverse(led4,4);
    } else if (angle_time > 100 && angle_time <= 114 && brightness > 20) {
      //108
      inverse(led2,2);
      if (brightness >= 90) {
        // inverse(led6);
        digitalWrite(led6, LOW);
        status[5]=LOW;
      }

    } else if (angle_time > 78 && angle_time <= 90 && brightness > 40) {
      //82
      inverse(led5,5);
    } else if (angle_time > 58 && angle_time <= 70 && brightness > 10) {
      //64
      inverse(led1,1);
    }
  }
}

void inverse(int ledPin,int i) {
  if (digitalRead(ledPin) == HIGH) {
    digitalWrite(ledPin, LOW);
    delay(120);
    digitalWrite(ledPin, HIGH);
    delay(20);
  }
  digitalWrite(ledPin, !digitalRead(ledPin));
  status[i-1]=!status[i-1];

for(i=1;i+=1;i<6){
  if (status[i]=HIGH){
    end=false;
  }else{
    end=true;
  }
}
if (end==true){
  tone(buzzerPin, 700);
  delay(800);
  tone(buzzerPin, 600);
  delay(800);
  tone(buzzerPin, 700);
  delay(800);
  tone(buzzerPin, 800);
  delay(800);
  tone(buzzerPin, 900);
  delay(800);
  noTone(buzzerPin);
}
}
void inverse_2(int ledPin,int i) {
  // if (digitalRead(ledPin) == HIGH) {
  //   digitalWrite(ledPin, LOW);
  //   delay(120);
  //   digitalWrite(ledPin, HIGH);
  //   delay(20);
  // }
  digitalWrite(ledPin, !digitalRead(ledPin));
  status[i-1]=!status[i-1];
}

void (*resetFunc)(void) = 0;  //declare reset function at address 0
[The final effect]
CONCLUSIONS:
Begin your conclusion by restating the goals of your project. How do your project results align with your definition of interaction? How do your project results not align with your definition of interaction? Based on both your definition of interaction and your expectations of your audience’s response, how, ultimately, did your audience interact with your project? How would you improve your project if you had more time? What of value have you learned from any setbacks and/or failures? What do you take away from your accomplishments?
The target is to make a shooting game with experience of powering and aiming, like a real snipe or archery camp. To catch up the timeline, some great ideas were sacrificed but the final effect was not too bad.
At least, luckily, at the final presentation, users could use the “gun” to control the directions, fire a round(the buzzer played tones), and see if they successfully shoot a target(the light status changed).
[For potential improvement]
There are still many pities. For example, the user experience of shooting is not deep enough–they were not easy to enjoy the effect of shooting without an mp3 player playing the shooting sounds, as I expected before. In my imagination, there will be two effects react to firing–One sound of fire, and one for succesful shooting. It means when the user successfully shoot a target, there will be two sounds playing in tandem.
Another one is using servos to push targets down when they are shot.
There was another idea to fire–add a tilt sensor on the gun–the user uplifts the gun to fire, simulating the recoiling.
There can be a slide to change speed of direction changing, to control the difficulties of playing.
//reference
The pictures of cartoon characters are from the video game Honor Of Kings (“HOK”).

*/
