step1:
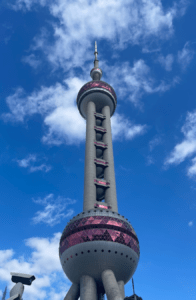
I chose this photo as a reference:

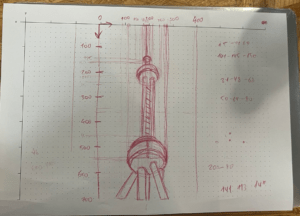
step 2: image on paper:

step 3:
As could be seen in the picture, I took me way to much time to figure out the numbers and position of the objects that by the end of the recitation I didn’t have that much done. But I had added some details at home.

if i had an opportunity to spend a bit more time on this, i would’ve added a bit more shadows/volume to this.
In the code, i used vertex(), strokes() and ellipse() to create this. It was pretty effective to divide the Pearl in these shapes.
the code:
int i = 0;

void setup(){
  size(400, 700);
  background(40, 120, 212);
}

void draw(){
  fill(141, 145, 150);
  noStroke();
   ellipse(200, 125, 30, 30);
   stroke(50, 64, 80);
   strokeWeight(20);
   line(200, 130, 200, 150);
    fill(141, 145, 150);
    noStroke();
  ellipse(200, 200, 100, 100);
  strokeWeight(20);
  stroke(141, 145, 150);
  line(185, 220, 185, 460);
  line(215, 230, 215, 460);
  noStroke();
  ellipse(200, 540, 160, 160);
  strokeWeight(30);
  stroke(141, 145, 150);
  line(160, 600, 90, 700);
  line(180, 580, 180, 700);
  stroke(50, 64, 80);
  line(240, 600, 240, 700);
  stroke(141, 145, 150);
  line(210, 560, 260, 700);
  stroke(0);
  strokeWeight(10);
  beginShape();
  vertex(120, 550);
  stroke(141,113, 140);
  strokeWeight(40);
  quadraticVertex(200, 480, 280, 550);
  endShape();
  //upper curve
  beginShape();
  vertex(150, 210);
  stroke(141,113, 140);
  strokeWeight(30);
  quadraticVertex(200, 150, 250, 210);
  endShape();
}