This blogpost will unite all the things I have done through the past two weeks in preparation for the Spaghetti Incident experiment.
The glue that I had available was a glue gun glue. In the beginning, I had no precise idea of how the bridge is going to look, however I knew that I am going to need some kind of rods as they are the parts that could be easily (relatively) created using any amount of spaghetti (from 1 to basically any number). Plus, as the length of logical to strive and create batches of the different same-length rods (the 1/2 of length could be achieved relatively easy (my tip: break it when creating a plane, instead of trying to break them as a bunch)). After making these pointless (at this time) conclusions I started to actually make stuff.
As for the rods, there was a way to make them that professor showed to us in class, so I decided to give it a try. This way is basically about putting the spaghetti in a row, creating a flat surface. (picture pending) However, it was much harder than it looked as it took me way too much glue gun to do that. Plus, the glue had to almost spread throughout 1/3 of the rod from both sides (leaving only 1/3 of the glue-free rode in the middle), which although made the rod quite stiff, I believe in long-term would result in construction’s weight being like 50% glue. Nevertheless, this first rod inspired me to try and experiment with the amount of glue on spaghetti (and places I put it on).
And began that with the experimentation with the ways glue could be put on spaghetti rod (that is just a bunch of spaghetti that create a circular rod) and how it affected construction’s elasticity:
- the glue is being put solely on the ends
- the middle becomes quite “jumpy”. I bends simply, however not too much. Plus this doesn’t involve much spaghetti. Spoiler alert! That is the way I am going to end up glueing those. side note: if i was still using the rode that creates a plane, the bending would be much more evident, but it would be considerably easier to break.
- the glue is being put on the ends and in the middle
- this way of glueing makes the rod mode stiff. However, as I was applying pretty much the same pressure on the option 1 and 2, turns out, because of those “unglued” parts on the rod, it was much easier to break it, while the united front of unglued spaghetti in the middle and everywhere except for the corners was able to withstand the same pressure.
- the glue is being put everywhere. and i mean all over the place.
- surely, this makes the rods much more resistant. However, it has such detrimental limitations as notably increased weight, the messiness and the time it takes to glue it all together. As we are striving to use as less material as possible, not turn my desk into a cemetery of displaced glue, while actually finishing the work in time, this option seemed unreasonable.
so yeah, in the end, the first, and, i would argue, the most obvious way to apply glue on rods turned out to be the most efficient and appropriate. Moreover, for some rods, I kind of twisted the spaghetti around each other, crating spiral-like rod that turned out to be even stiffer than before.
Moving on to the next stage: manufacture. As I said, I adapted the strategy of created (almost) identical pieces that would later be assembled into the prototype.
For this stage I have been just gluing the spaghetti together into rods (4 long ones a a lot of 1/2 spaghetti ones). Took me a while (mostly because I didn’t have glue sticks for some time in the middle).
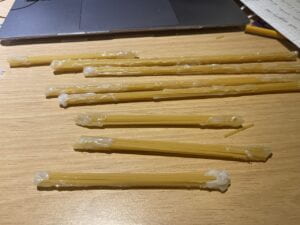
side note: i lied. for the long spaghettis (as they are the main parts and need to be v stiff, i both twisted them around when glueing + added some glue in the middle and all over.)
so now as i had quite a bunch of them (in the picture i have like 1/2 of them or less), I moved on to the actual assembly.
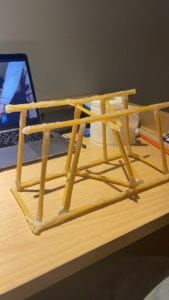
basically I adapted the triangle strategy for the base (at is it of high importance to make it as unmovable as possible). However s for the rods that hold on to the upper frame, it wasn’t really working out as intended: the rods turned out to be uneven. So, I improvised. The construction in the photo endured 1.5 liter water bottle and even more. I will probably experiment a bit more in the next two or so days. But I believe this is quite successful. I still don’t really get how are we going to apply pressure (on which spot) during the experiment, but I hope to find out that soon.
_______
Nope, still no test. Just a couple of days before the experiment I found out that my bridge is too short (not to self: read the instructions, don’t skim). Anyway, in light of that, I decided to create a new bridge cause there was no point in trying to prolong the one I had as, firstly, I didn’t really have much faith in it as I saw hoe the experiment is actually going to be conducted, and secondly, creating a new one will all the experience I have now seemed like a better idea. And I was write.
As I am now quite profession in gluing spaghetti, I decided that I could revisit the plane-rods idea as I could create them with less material (hence less weight) per piece. So I started my bridge vol.2.
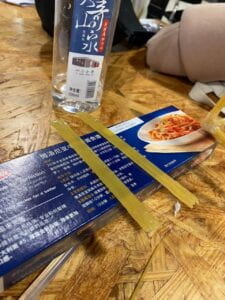
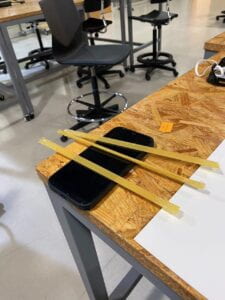
created bout a million of those.
found out a perfect way of breaking spaghetti: using table as a “cutting corner” when being the spaghetti. This time, my rods looked better and neater. So there was a certain advantage to my bridge vol.1 failure!
So, after about 6-7 hours, I had this in my possession:
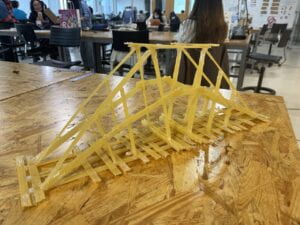
Yes, big change from the last one. This one looks more promising.
Some details about construction:
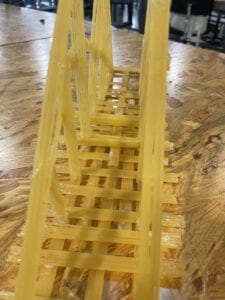
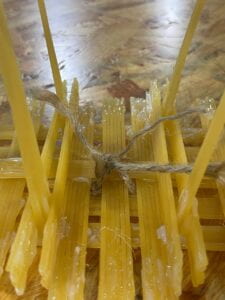
a lot of horizontal half-pieces that prevent the first level from bending. + “2 rows of cables” that hold “towers” together.
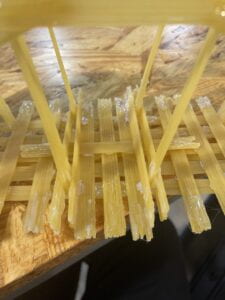
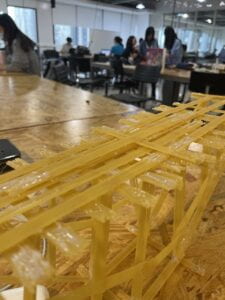
There are also some strengthening rods that presumably will save my bridge during the experiment. i attached a rope on the base indeed looks promising. Waiting for the class to begin and find out!
________
Experiment went great! The set up was perfect (thanks a lot to Andy). My bridge endured ≈ 4088.1 grams with ≈ 271.1 grams of its own weight! Hence, the efficiency ≈ 15.08.
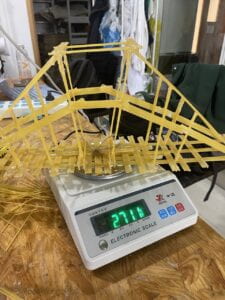
I was very glad and, to be honest, somewhat surprised it handled that much! I thought the max is going to be like 2 kg.
Anyway, I am very proud of it, however, of course there are some things I would change about it (especially given the way it broke down). These are the pictures that show how it got broken: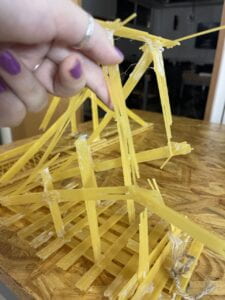
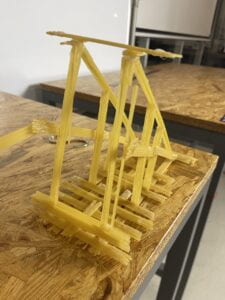
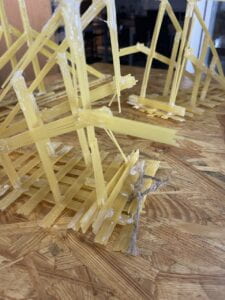
As it is shown, it kind of tilted and then crashed right in the middle. If I was creating the bridge again, I would have probably tried to substitute the plane-rods that I used for the towers with the bunch-of-spaghetti-rods to make it a bit more stiff (however, as I think about it, it would probably been hard to attach other rods to them. Also, I would probably make a bit more precise cables as they weren’t really symmetrical (thats way it was easier to tilt and crash). So yeah, a couple of things could be done differently, however I am still very proud and happy!
Plus, it was a lot of fun to test and very nice to see as much people in person as possible from our class! Again, thanks to our Prof and Andy for organizing all this!