this series of exercises will help you to practice your drawing skills, relax, and have fun.
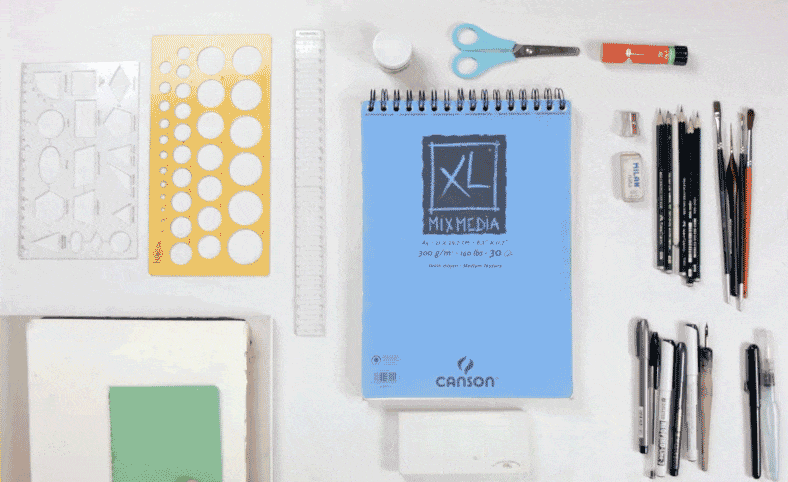
You can use pretty simple materials, but if you want to continue drawing you can experiment with different and more sophisticated materials depending on the technique you want to use. You might want to just doodle, or practice with zentangle, or maybe water color paints. Anyways, we will start with the basics, so collect your drawing materials and let’s start!
Exercise 01
This first exercise is pretty simple, you need a white paper or notebook, pencil, and sharpies. (If you are at home and don’t have sharpies you can use a pen during the whole exercise)
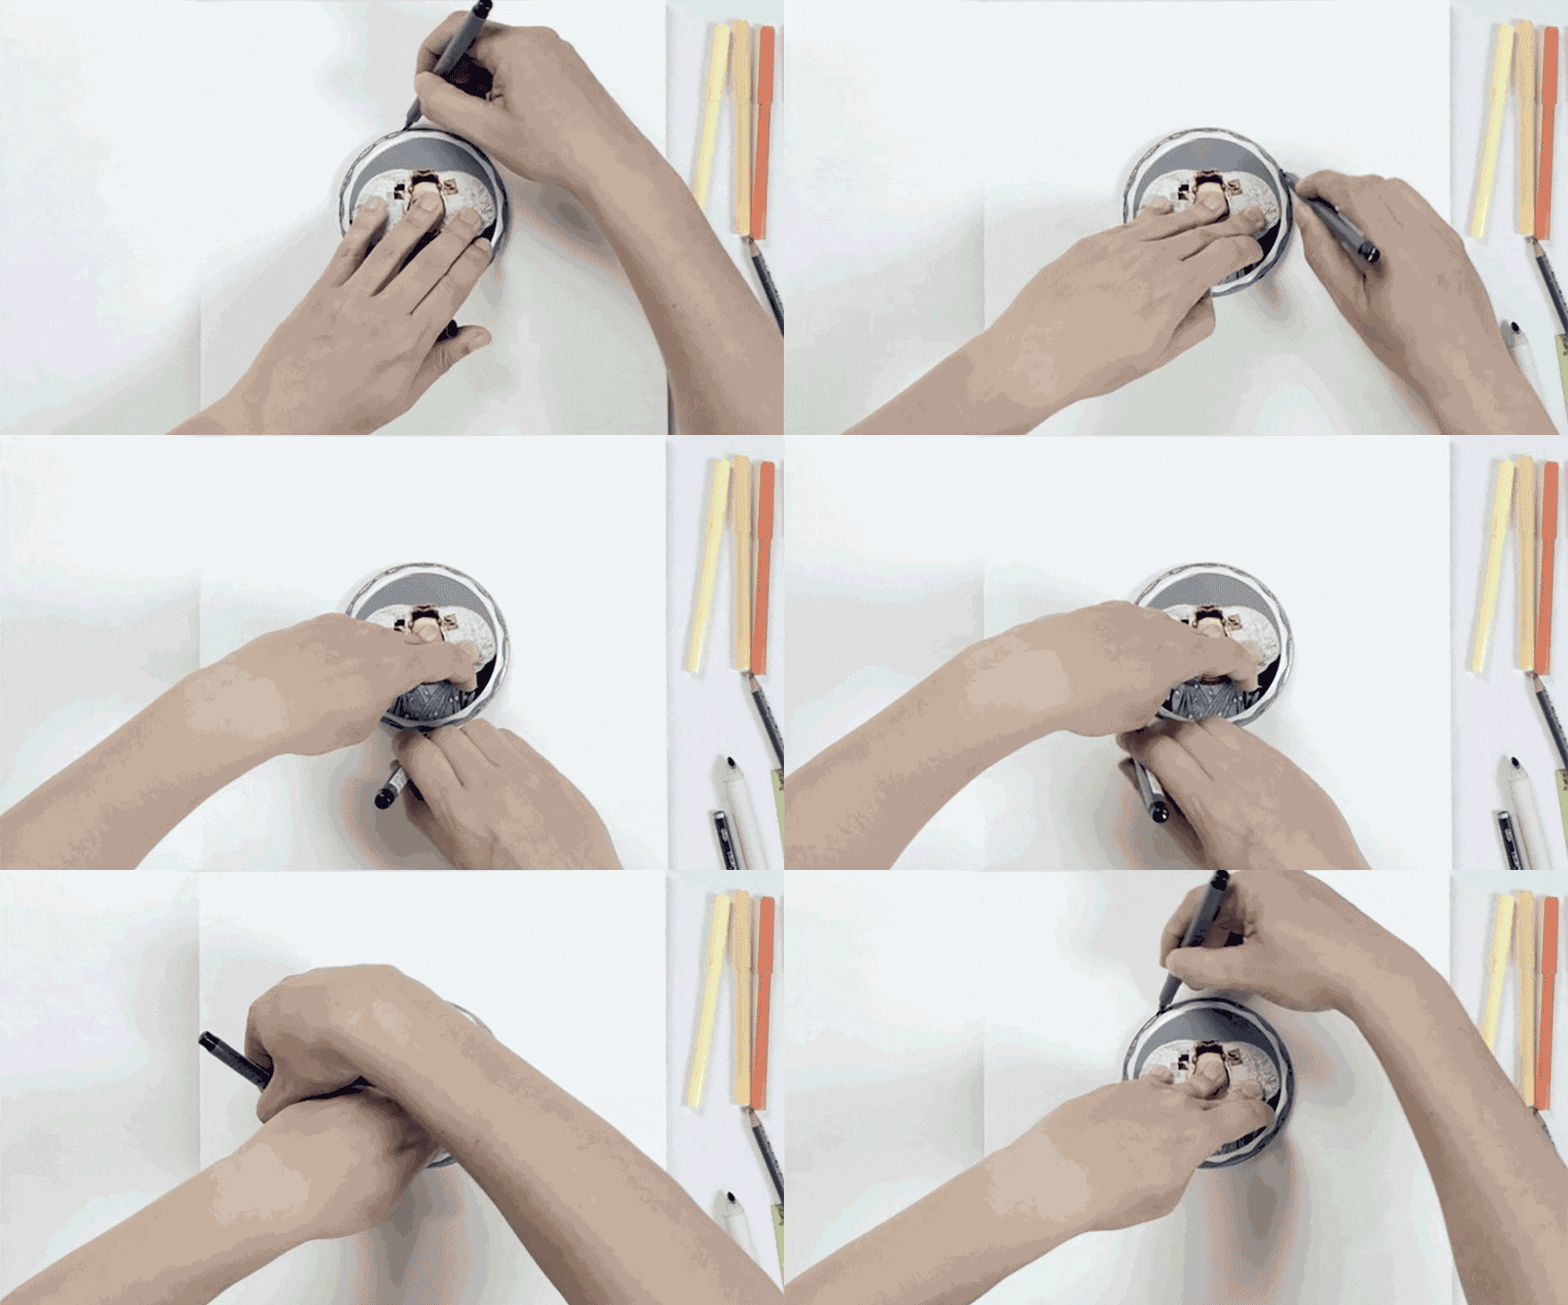
Start by using your hand as a pattern to draw it on a white paper using a pencil.
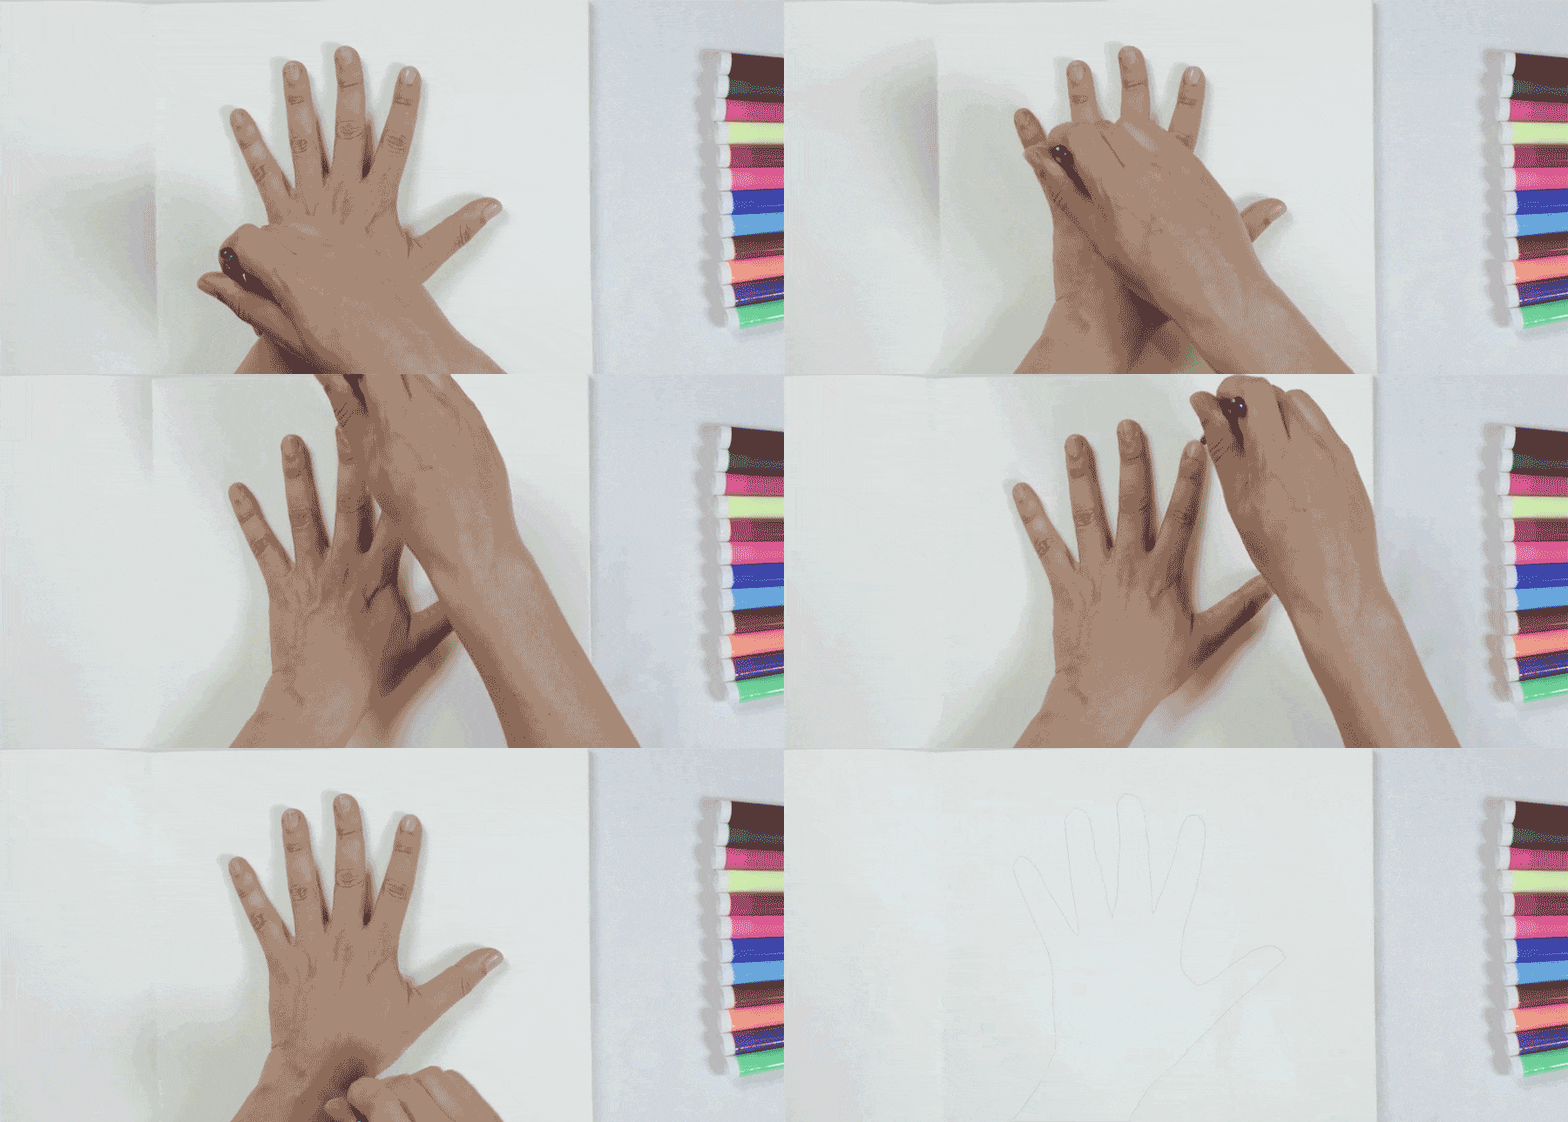
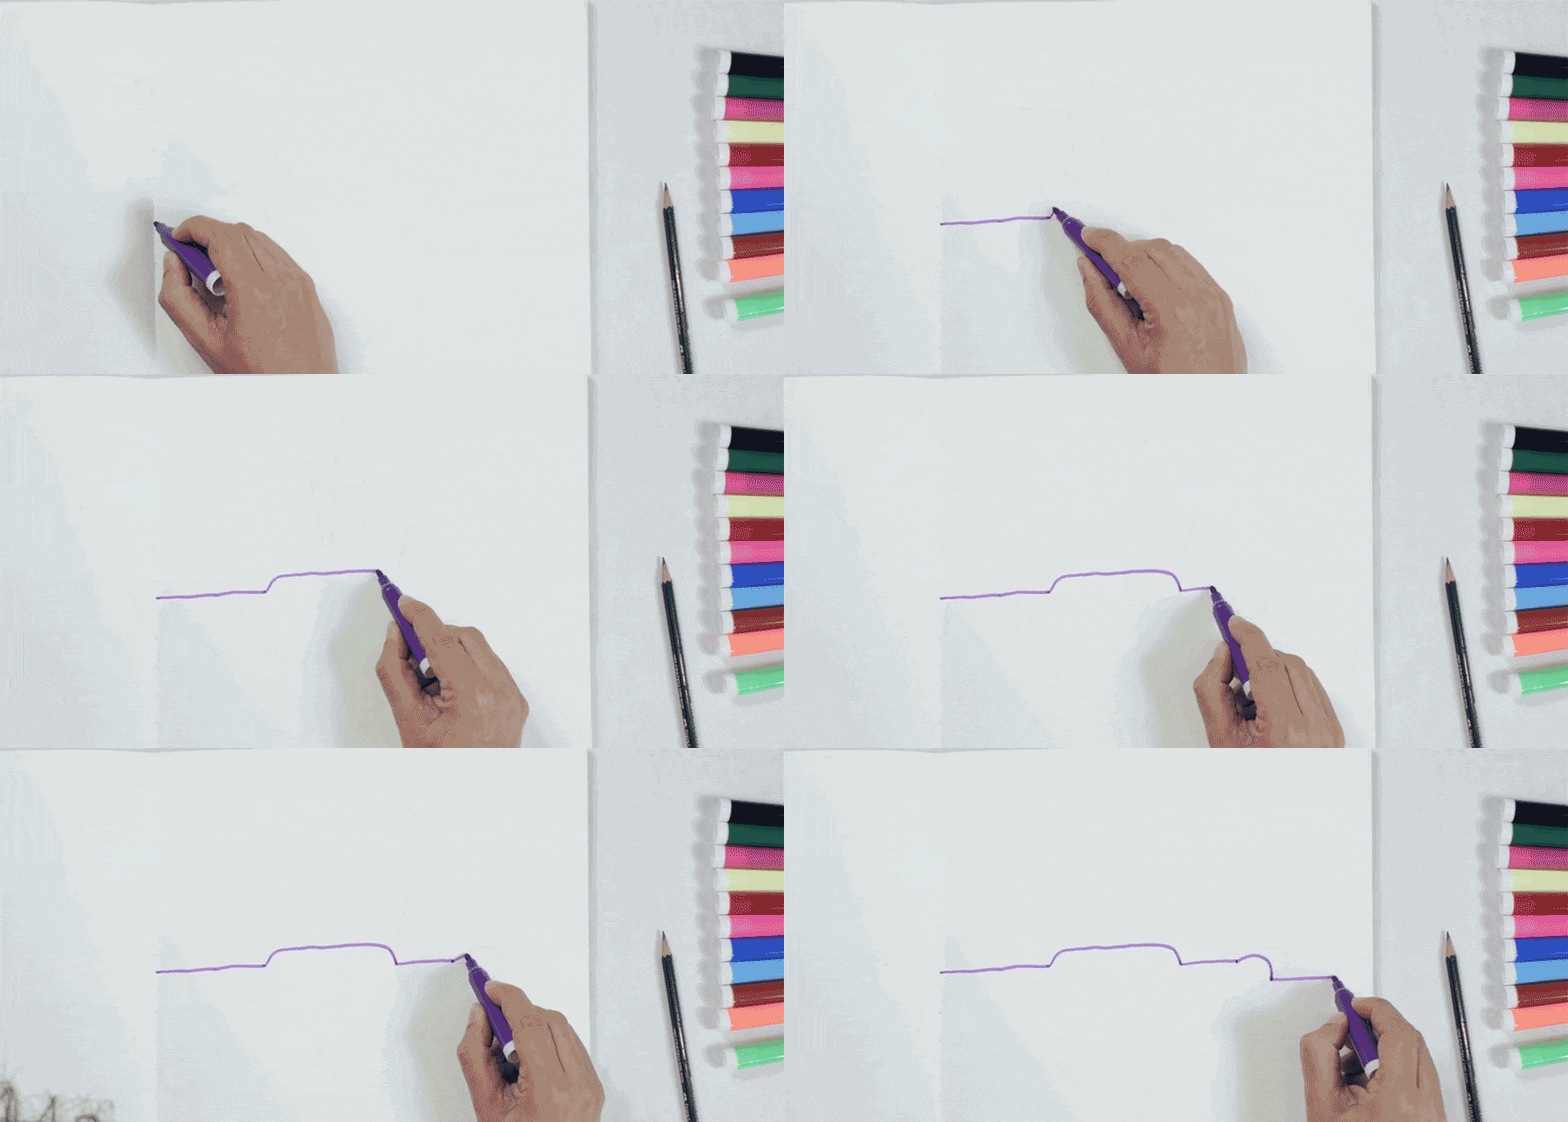
Next, you will use sharpies to draw a horizontal line across the paper. Every time you meet the line of your hand you drew previously you will curve the horizontal line to create a sense of volume. When you meet the line the first time draw a rising curve and when you find it again draw a curve declining.
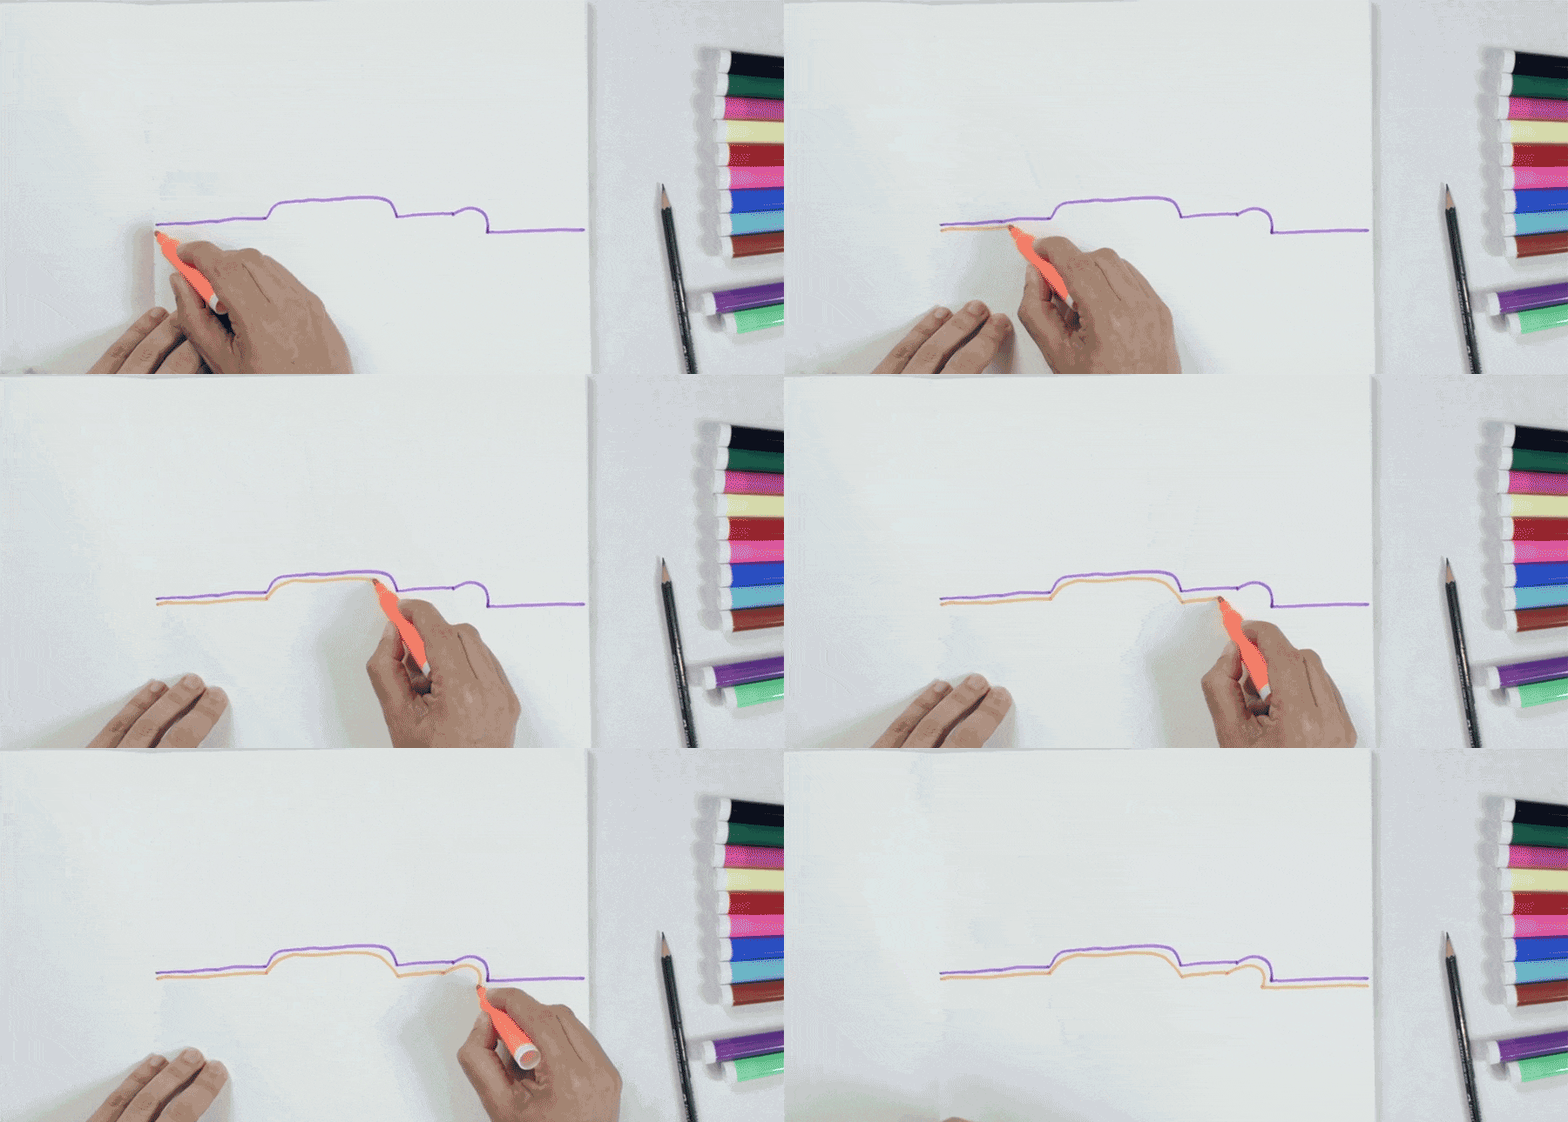
Using different colors continue making parallel lines separated a few millimeters from the previous one. Don’t rush, take your time to draw and try to not draw on top of the line next to it.
During the exercise you might find some problems to follow the rules, you need to find a way to solve them.
Any decision is going to be fine, remember that you always can repeat it. Rules are meant to be broken 🙂
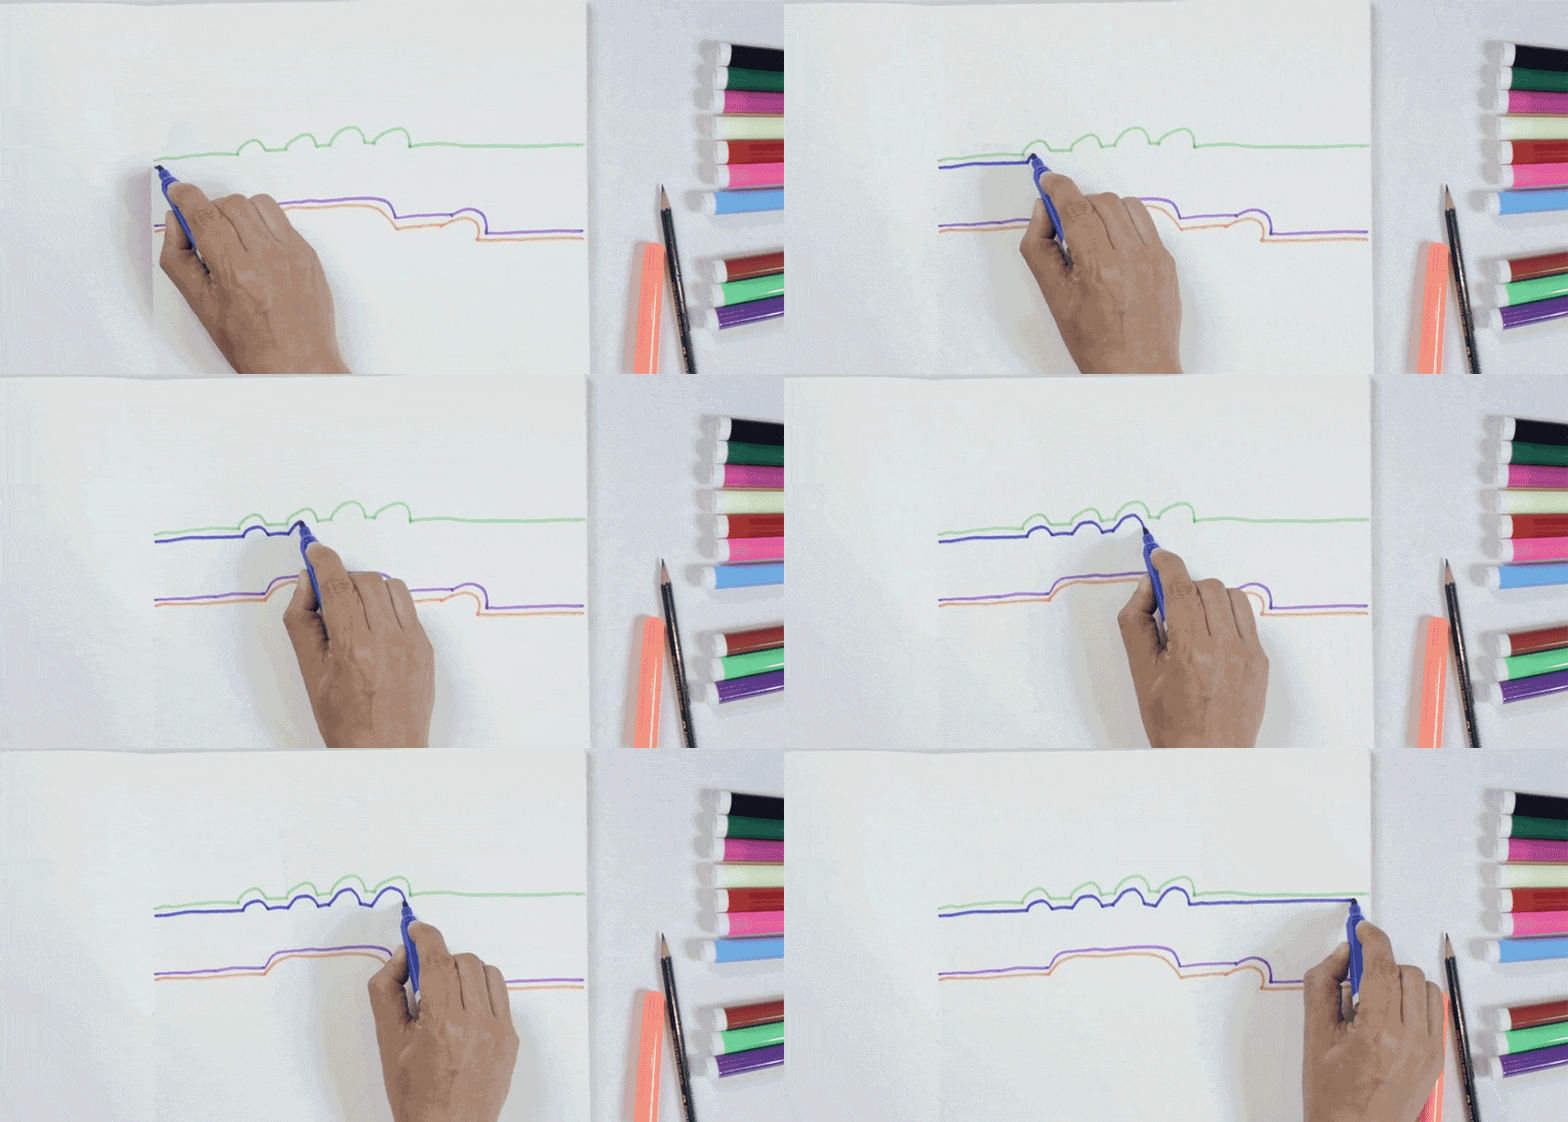
when you finish with the whole page you will have something like this:
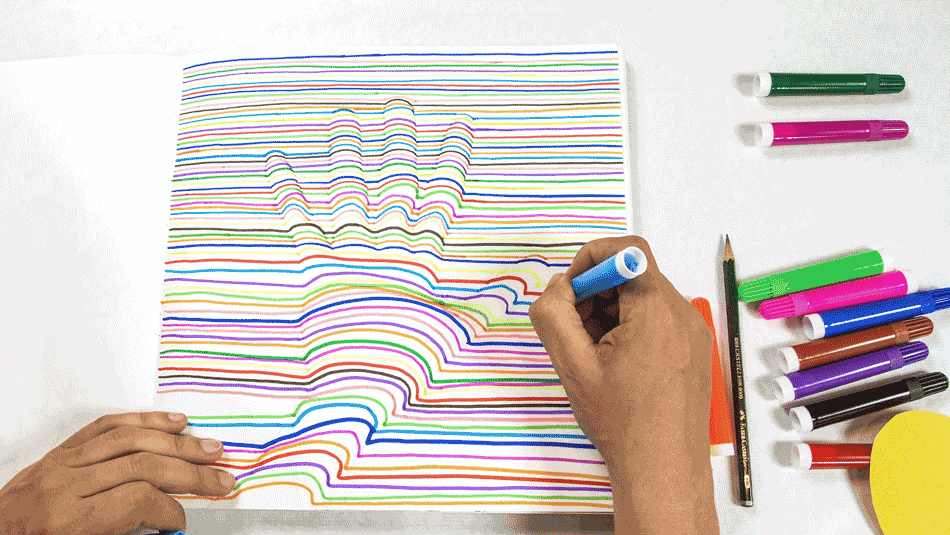
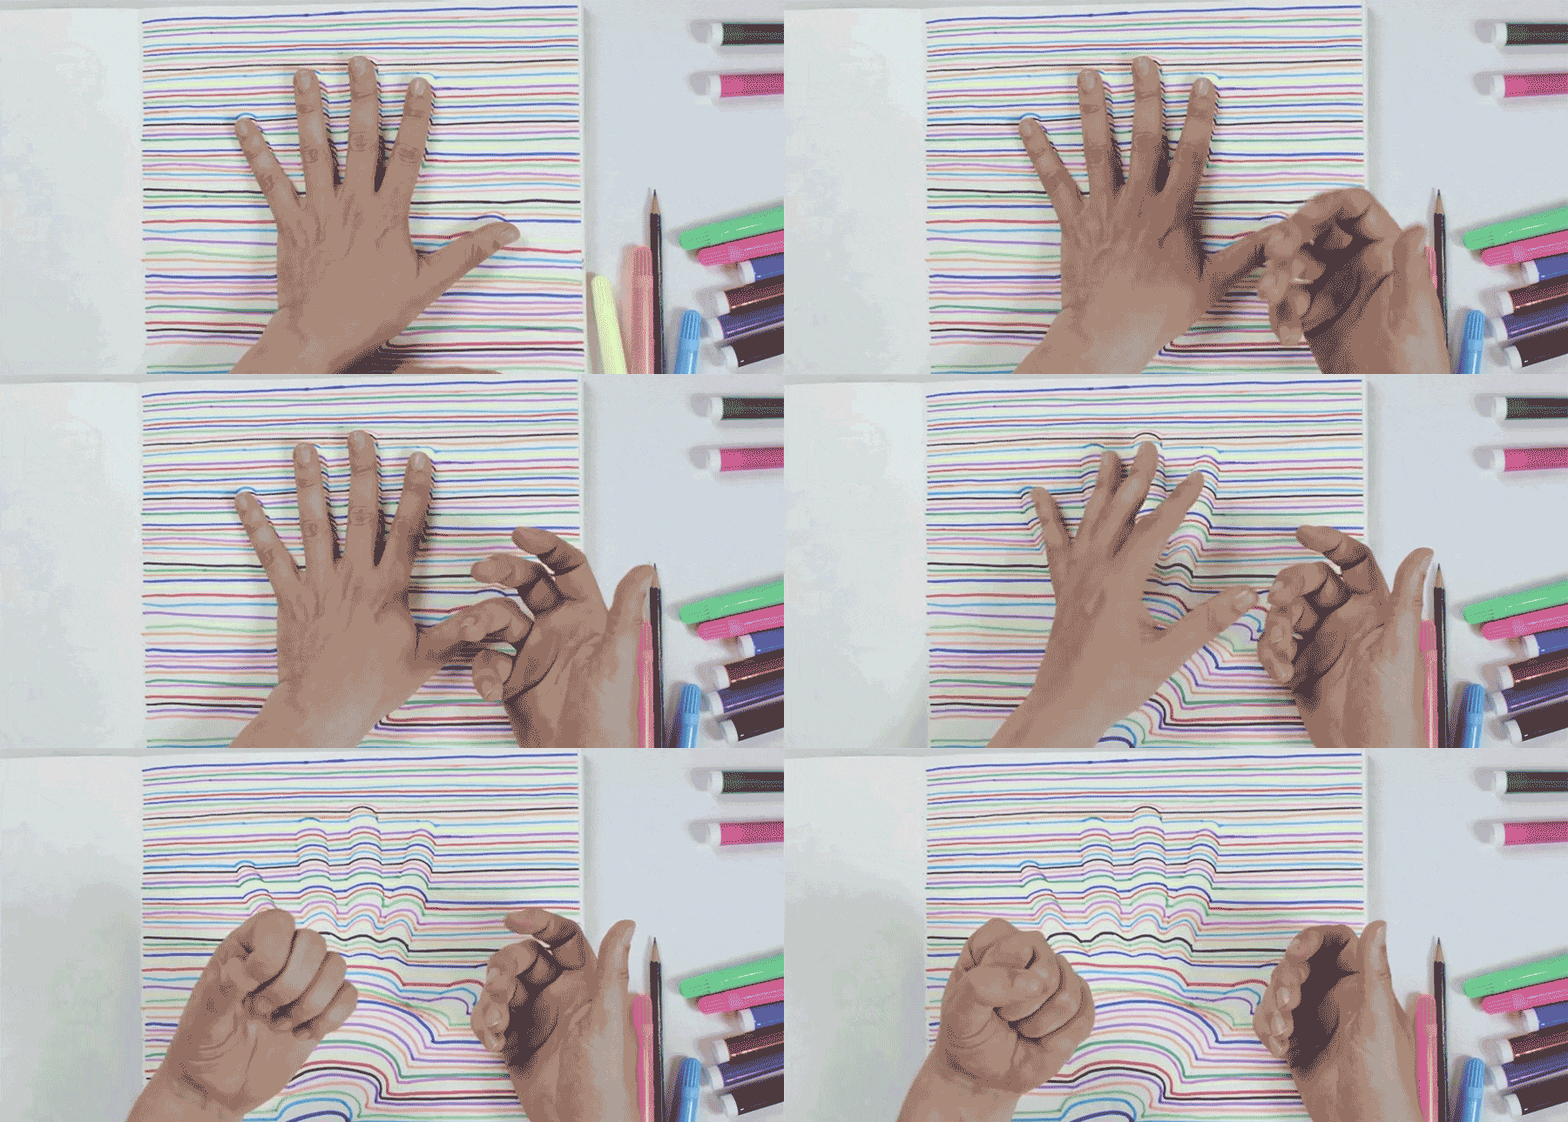
Exercise 02
In this exercise we will use a technique called Zentangle.
Zentangle is an American method for drawing, which not only promotes concentration and creativity but at the same time increases personal well-being.
We will use a ruler, a pencil and a black sharpie or fine liner if you have.
We will start by drawing a grid of 12 squares of 4cm size. We will use these squares or tiles to draw 12 different patterns.
Start from the left top square to not spread the ink with your hand while you continue drawing.
Pattern 1:
From left yo right draw diagonal lines in 45º degrees inside the square. Draw parallel lines separated around 5mm each until you fill the tile of lines, don’t draw outside the tile.
When you fill the first tile continue by drawing diagonal lines perpendicular to the previous ones, like in the image below.
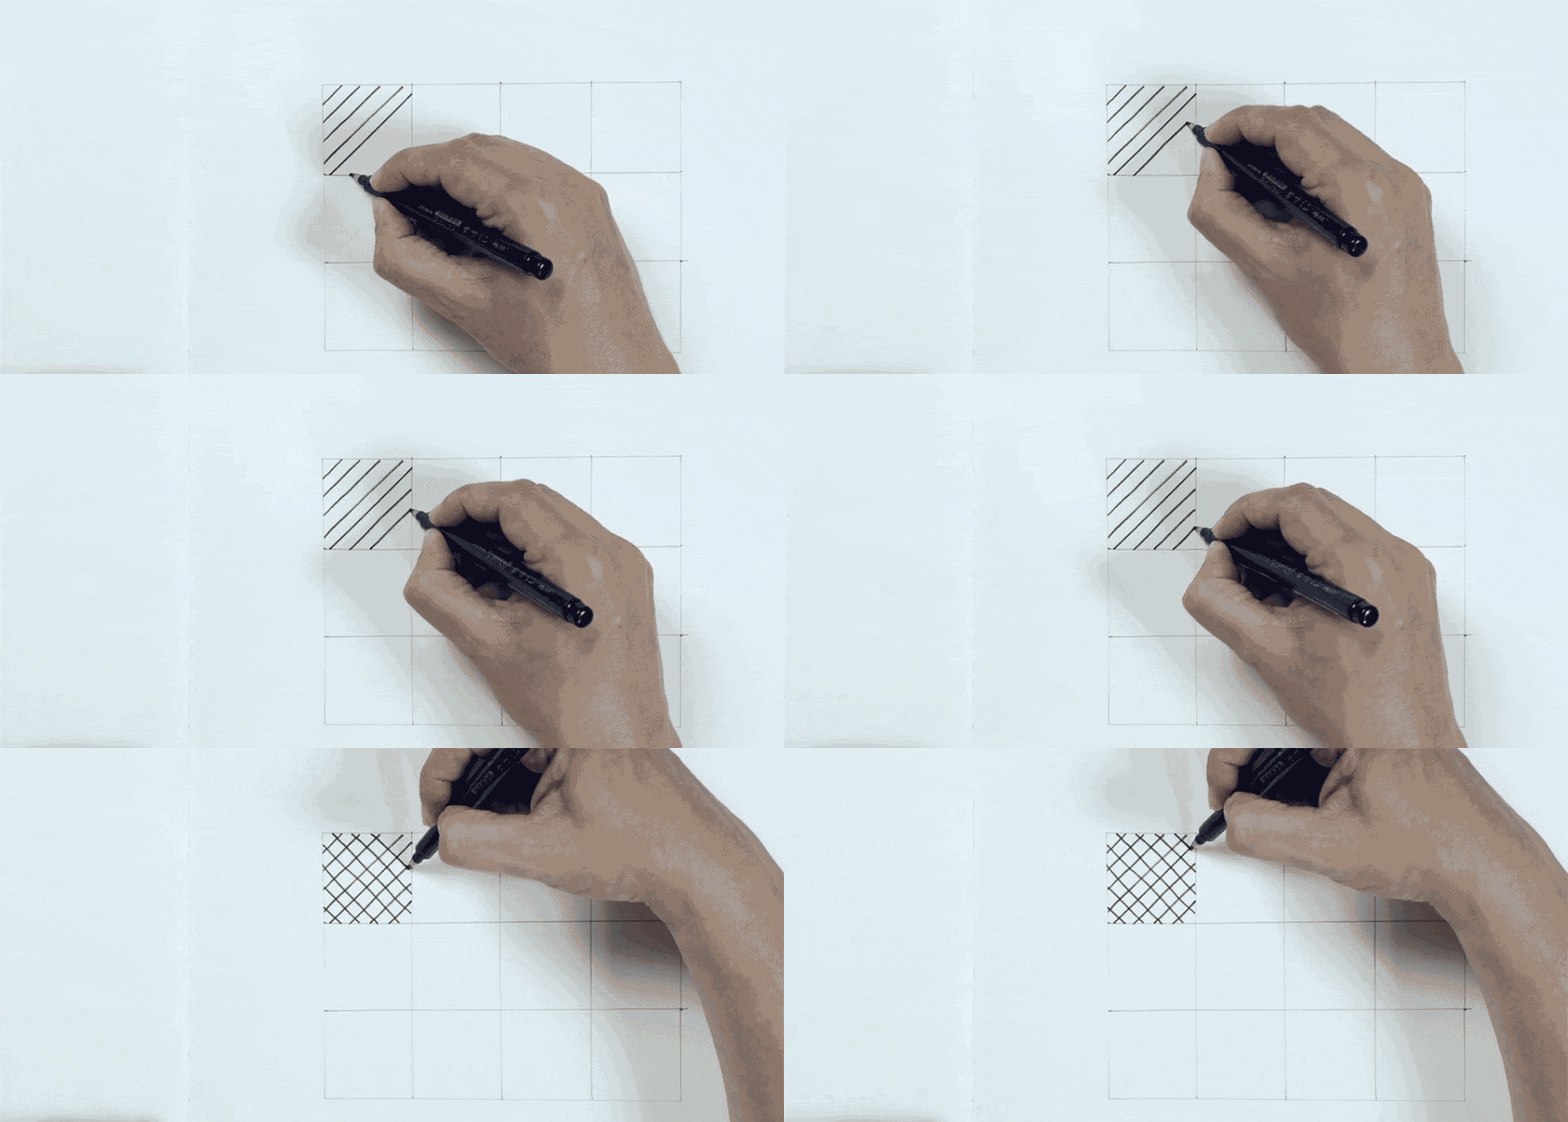
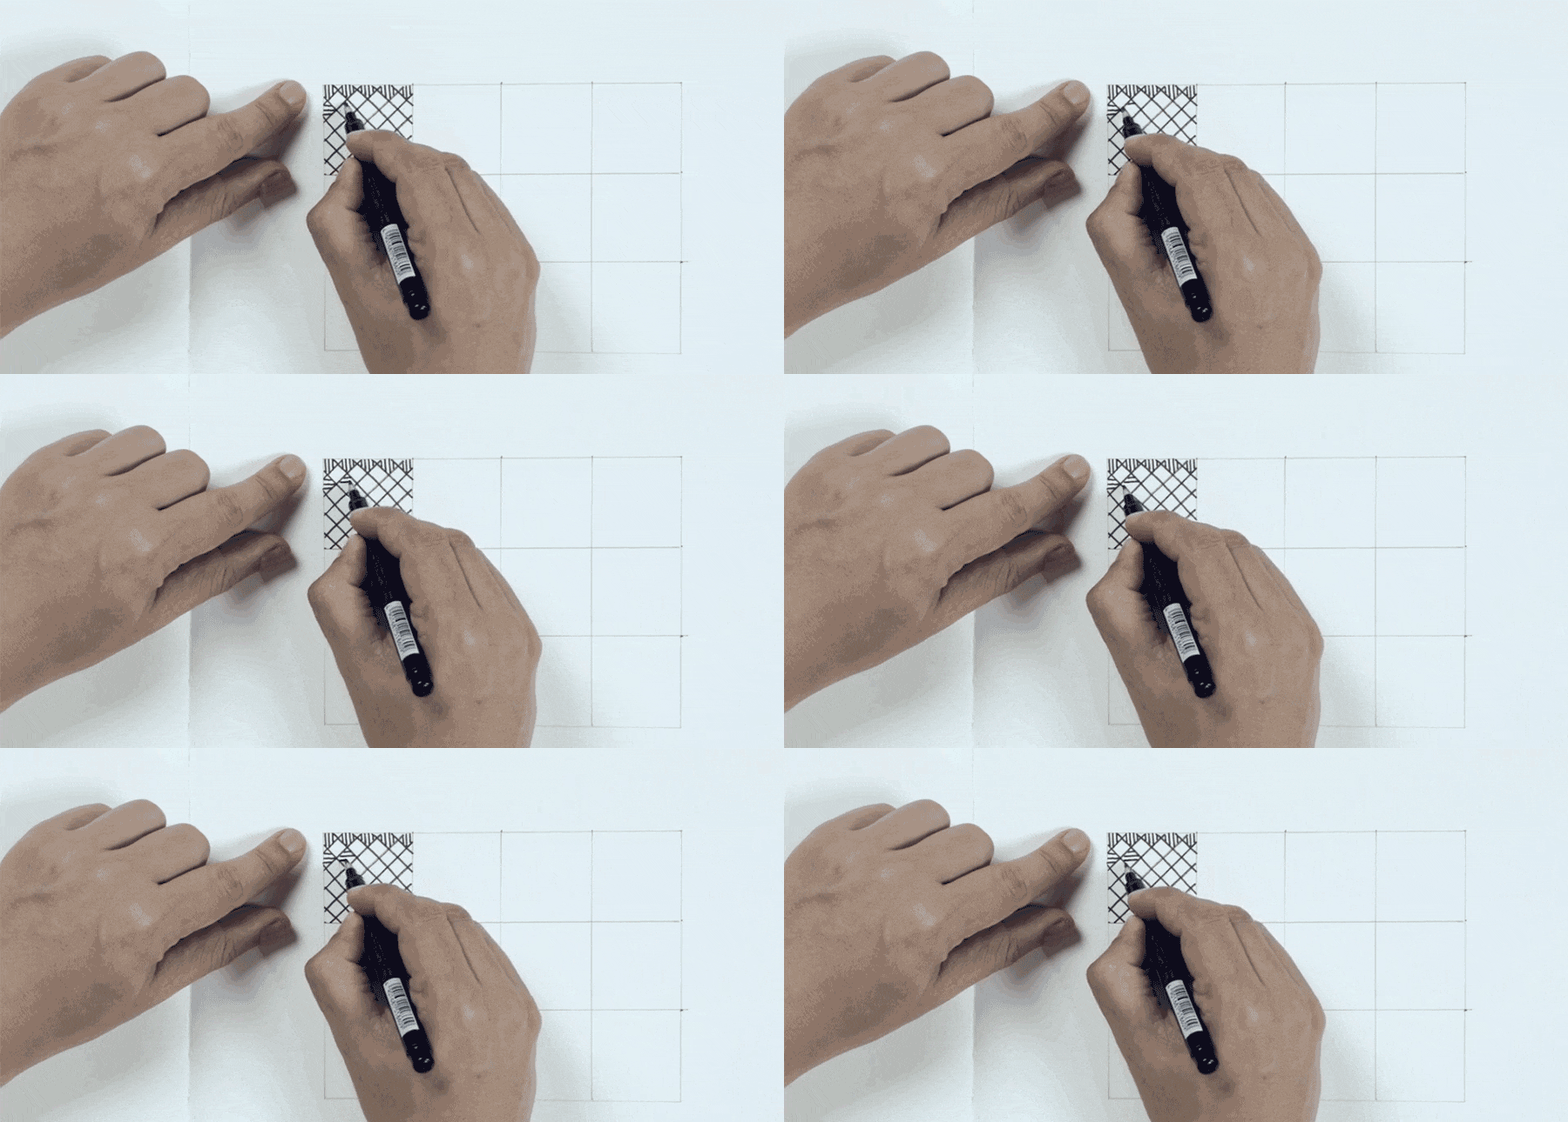
continue drawing perpendicular lines in the inside of every diamond of the top row in your grid.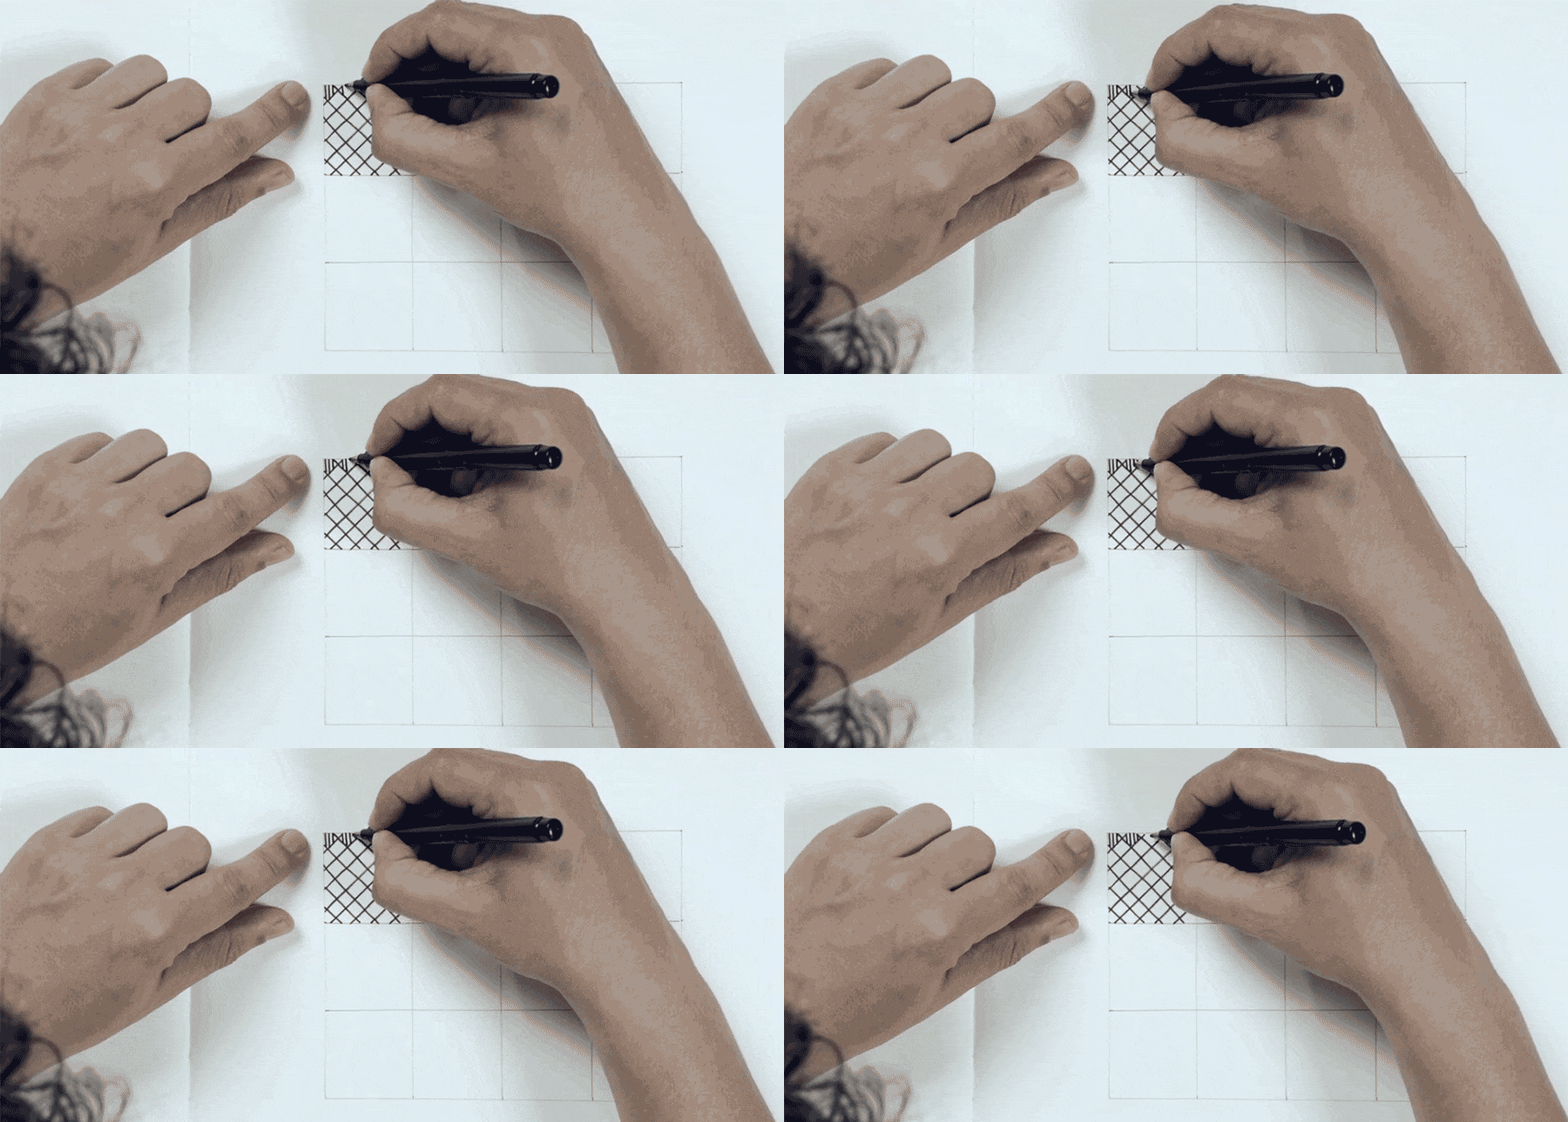
for the next row draw horizontal lines inside the diamonds and vertical in the next one, continue until you finish the rows. Notice that some of the diamonds will remain blank.
Pattern 2:
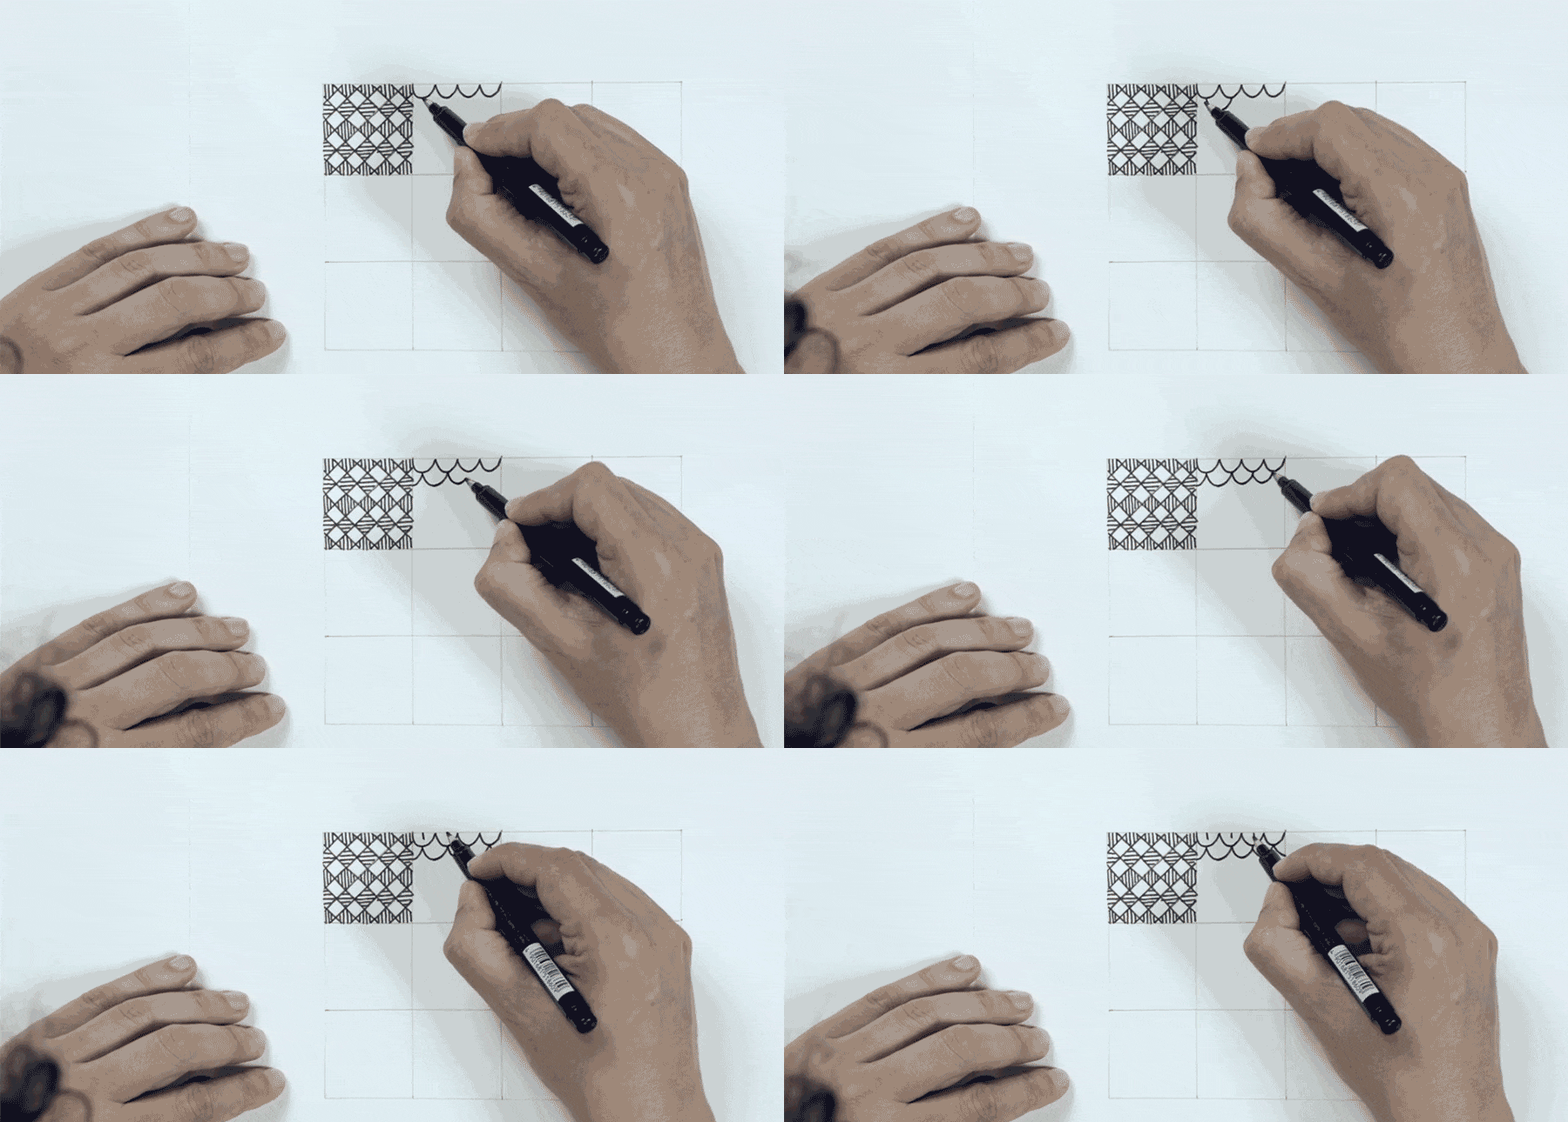
for this pattern you will draw arcs upside down, like a cartoon cat tongue 🙂
For the next row, start from the middle of the first tongue one on top and continue always touching the middle point of the ones from the top row.
Draw a vertical line from top to bottom in the middle of the tongue. The hight of the line should be half of the hight of the tongue.
Continue until you fill the whole square.
Pattern 3:
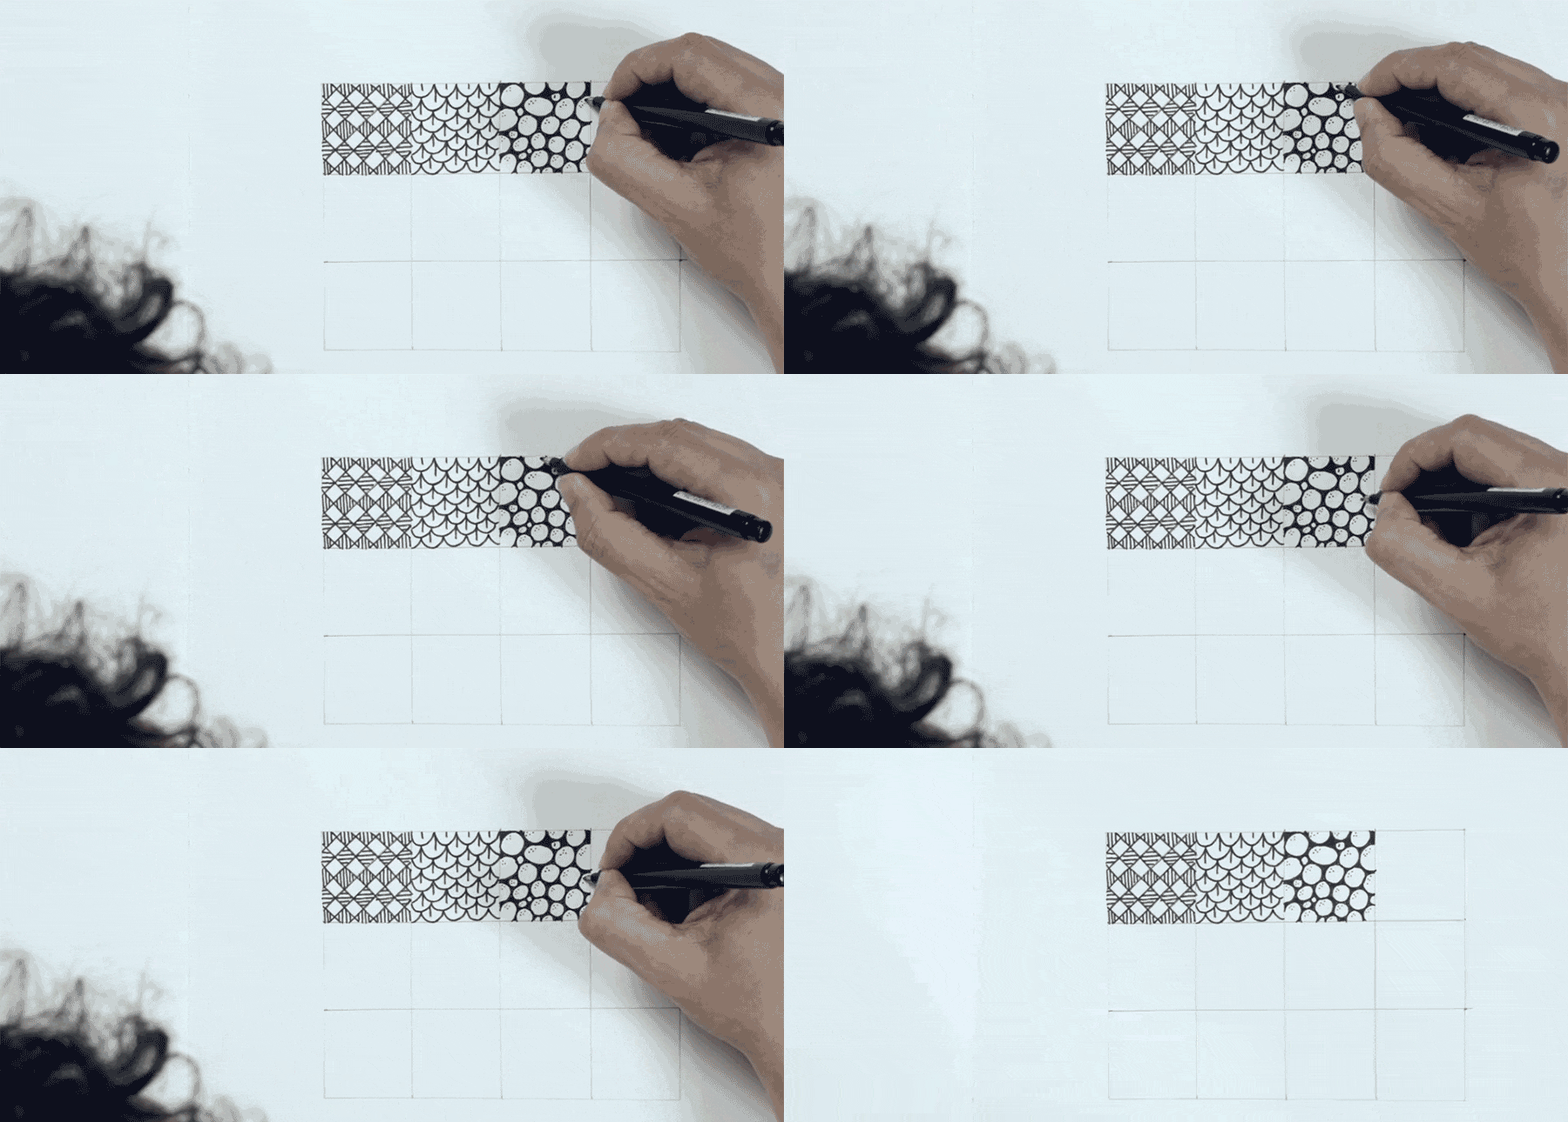
Draw ovals like stones right next to each other, draw them varying their sizes until you fill the tile.
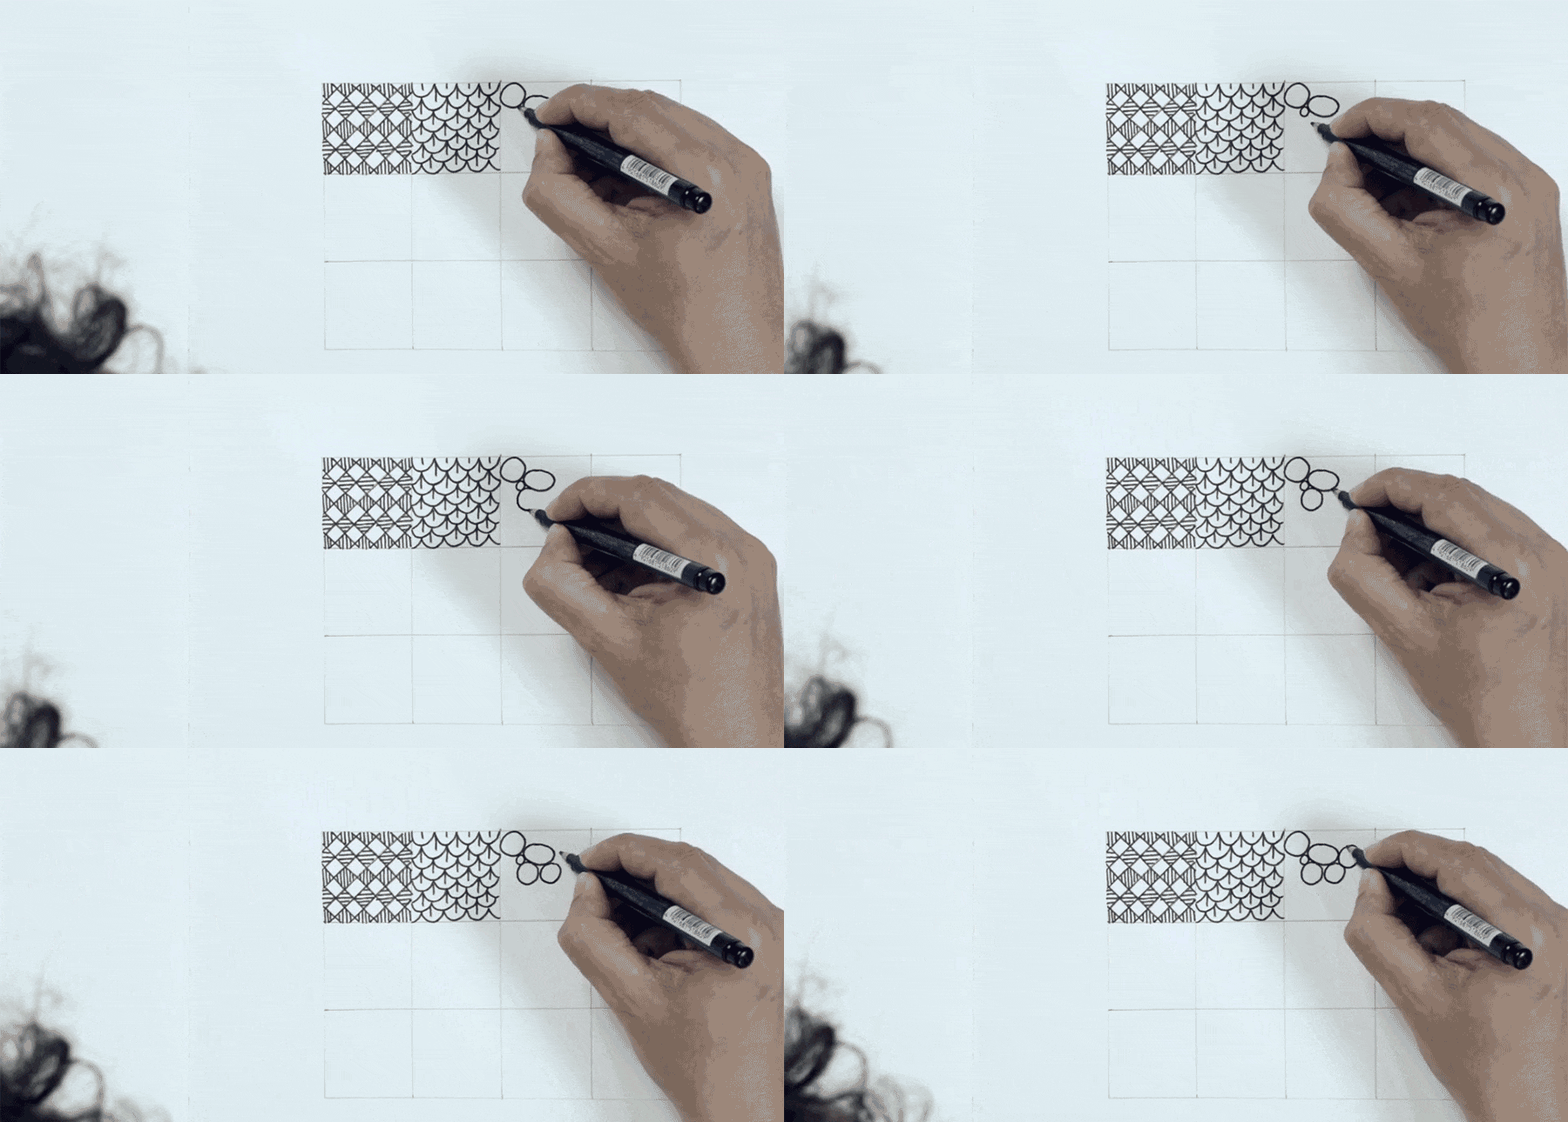
After you finish filling the tiles with this stones, fill black the space between them.
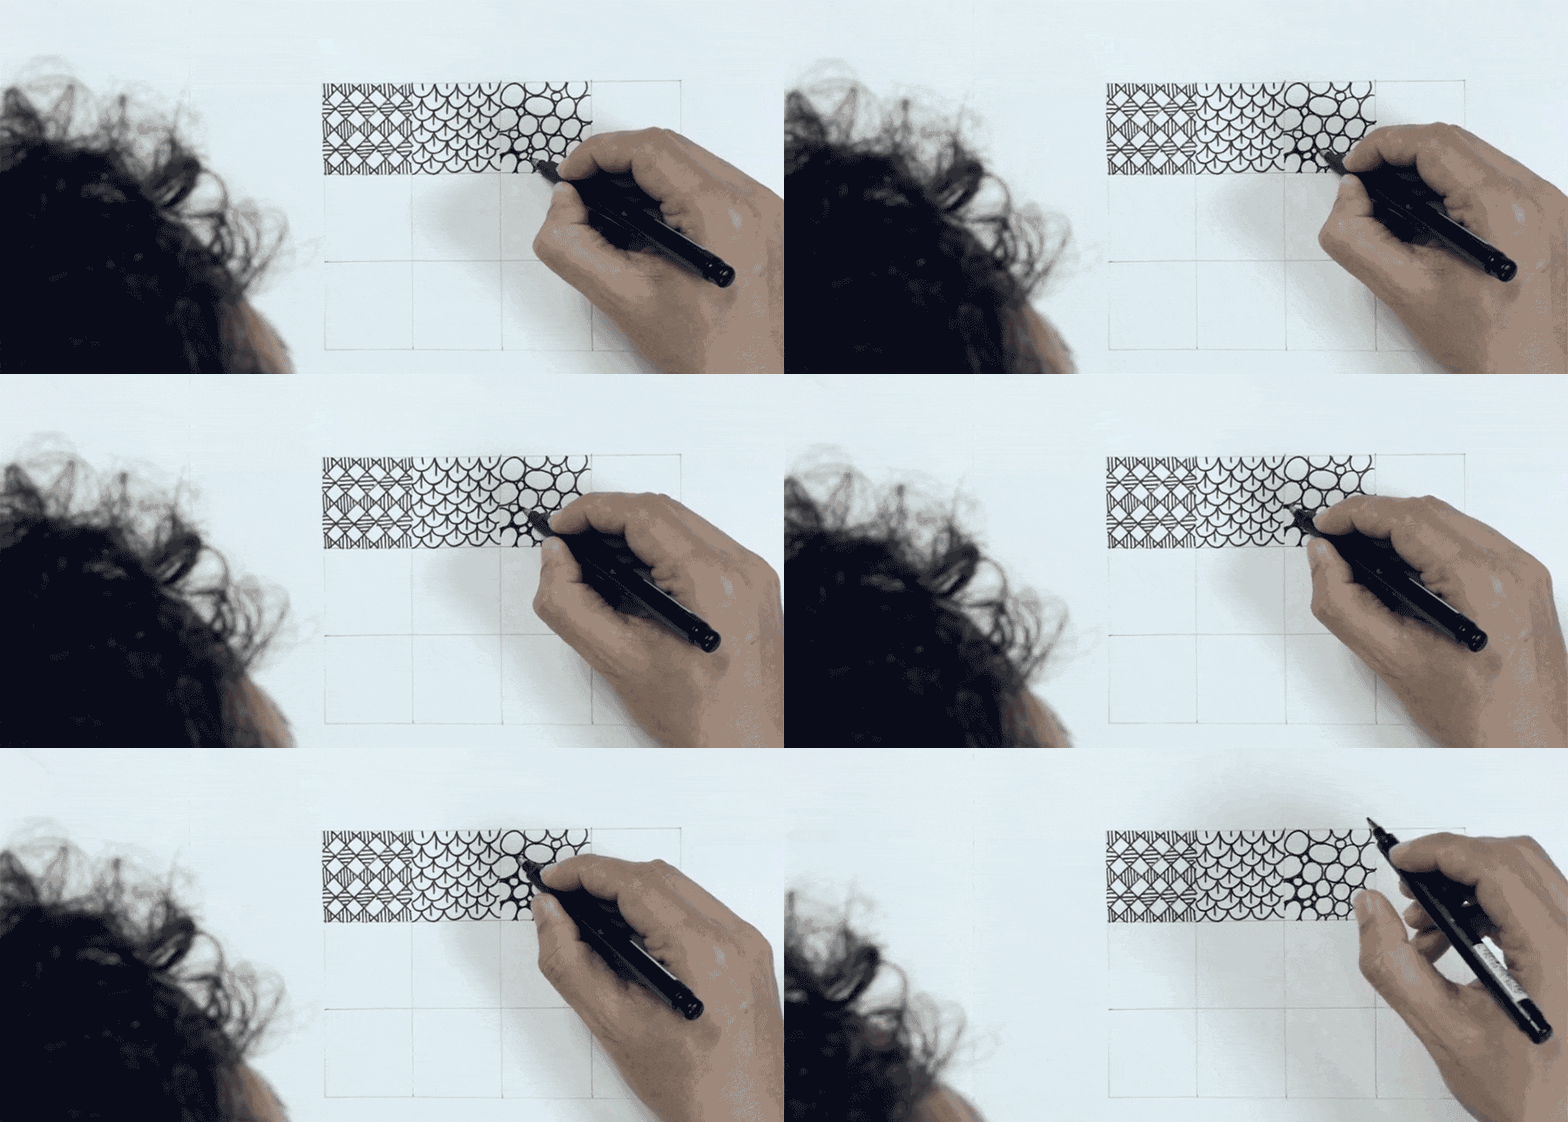
To give them volume, add some random dots on one side of every stone to create a shadow effect.
Pattern 4:
Start your pattern with horizontal lines separated about 1cm distance.
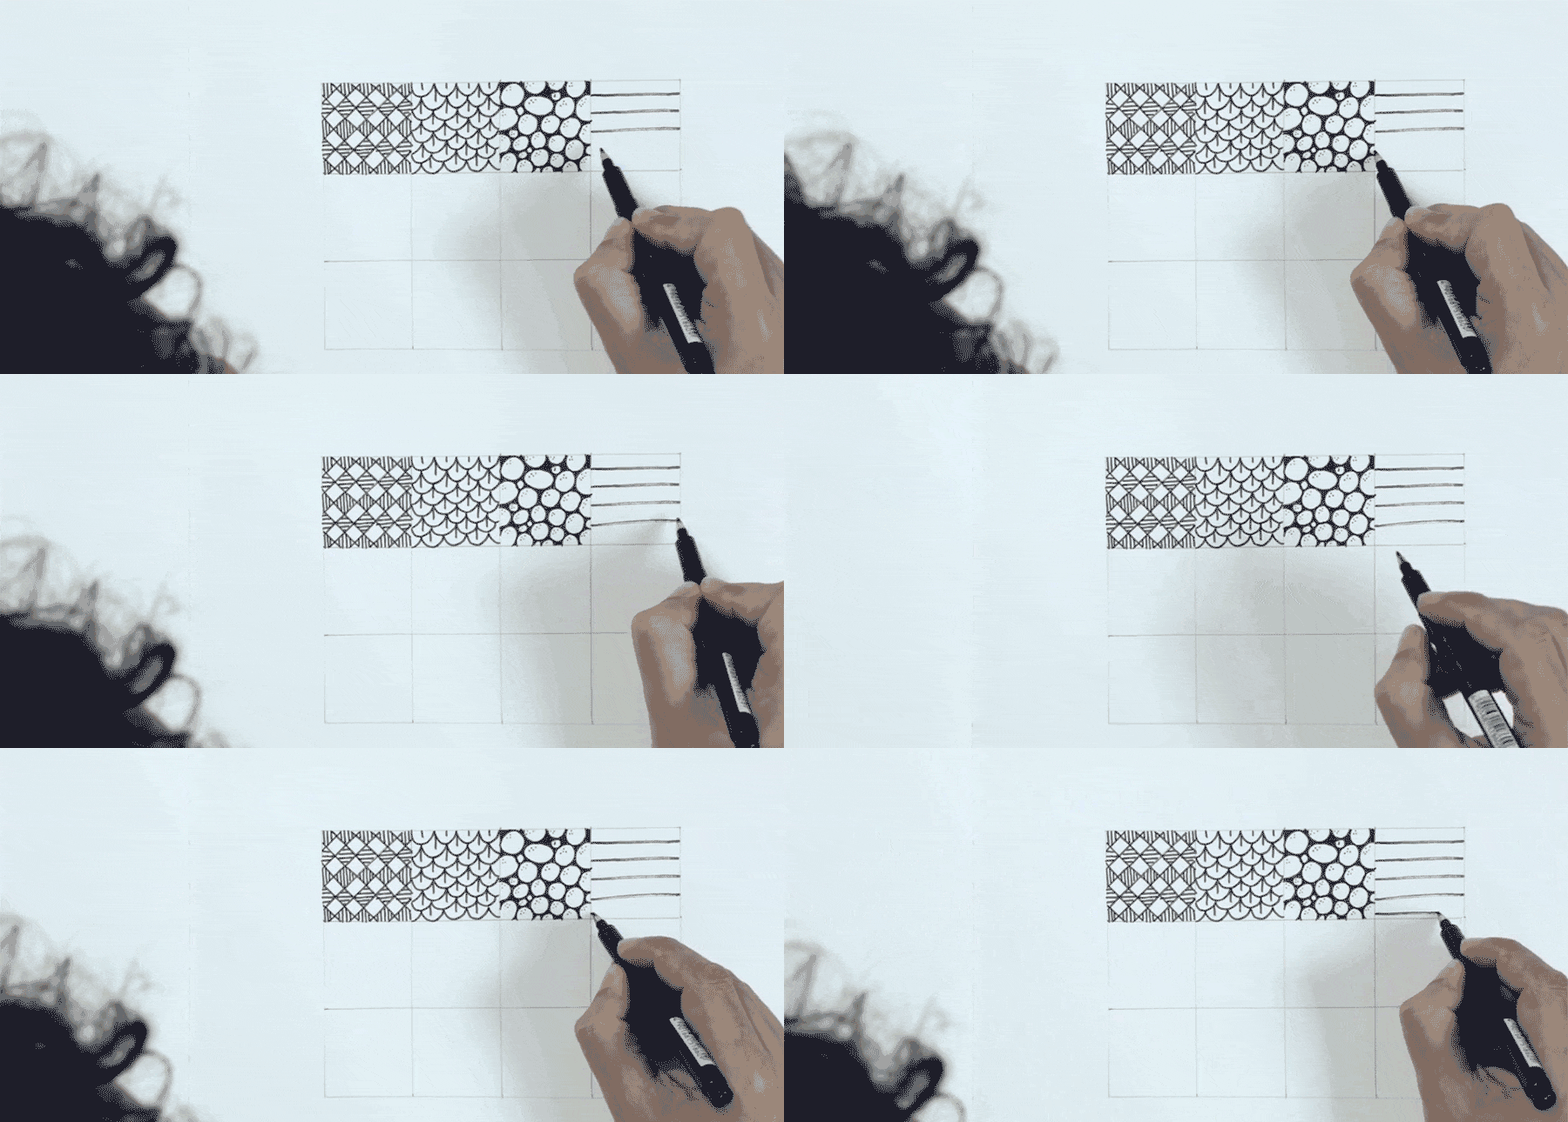
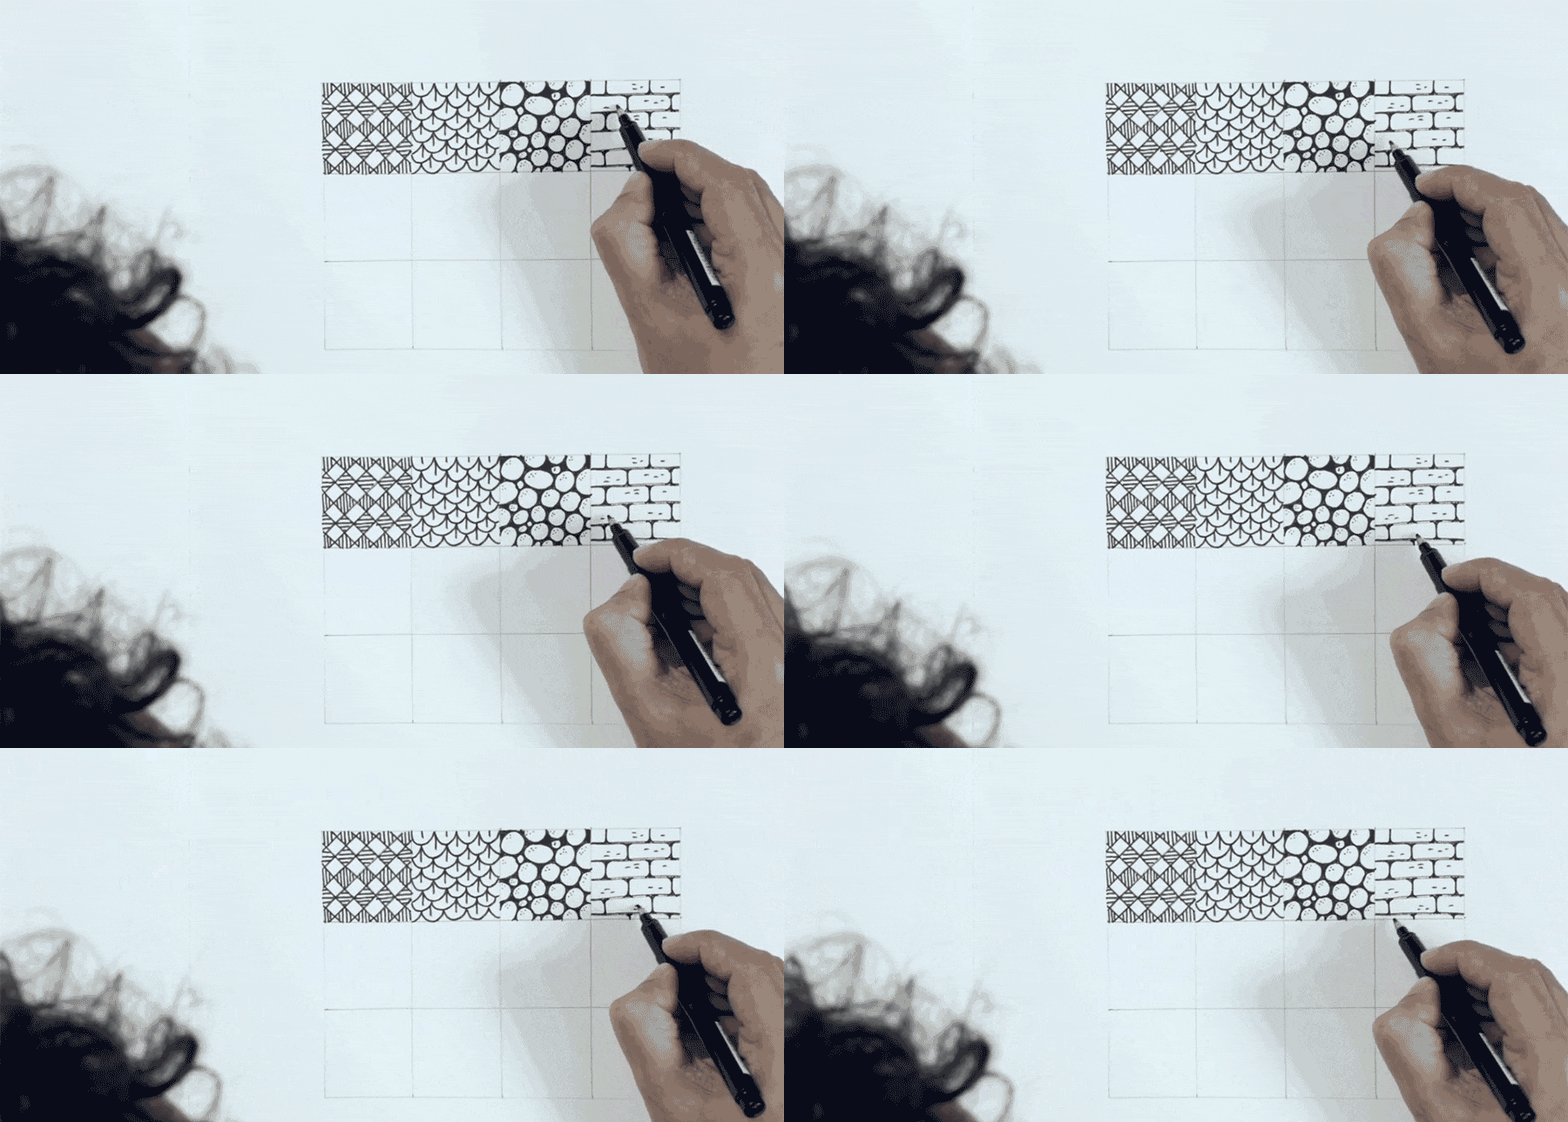
draw vertical lines to draw like a wall of bricks
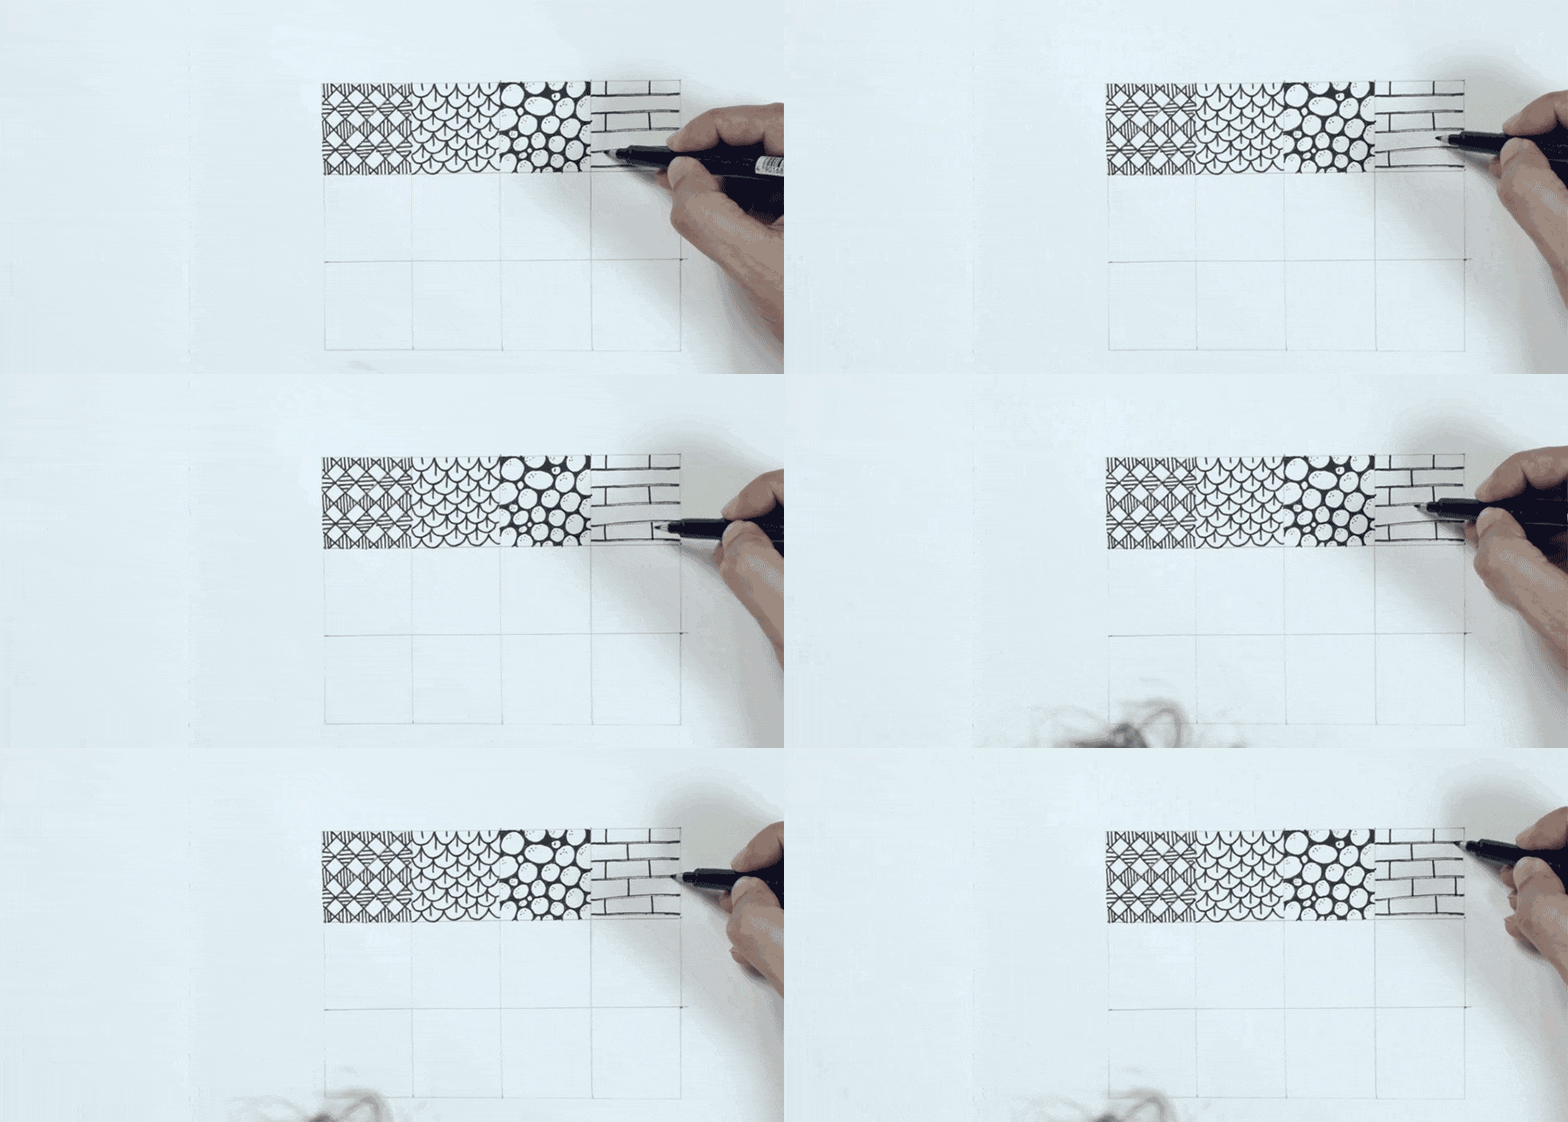
round the corners
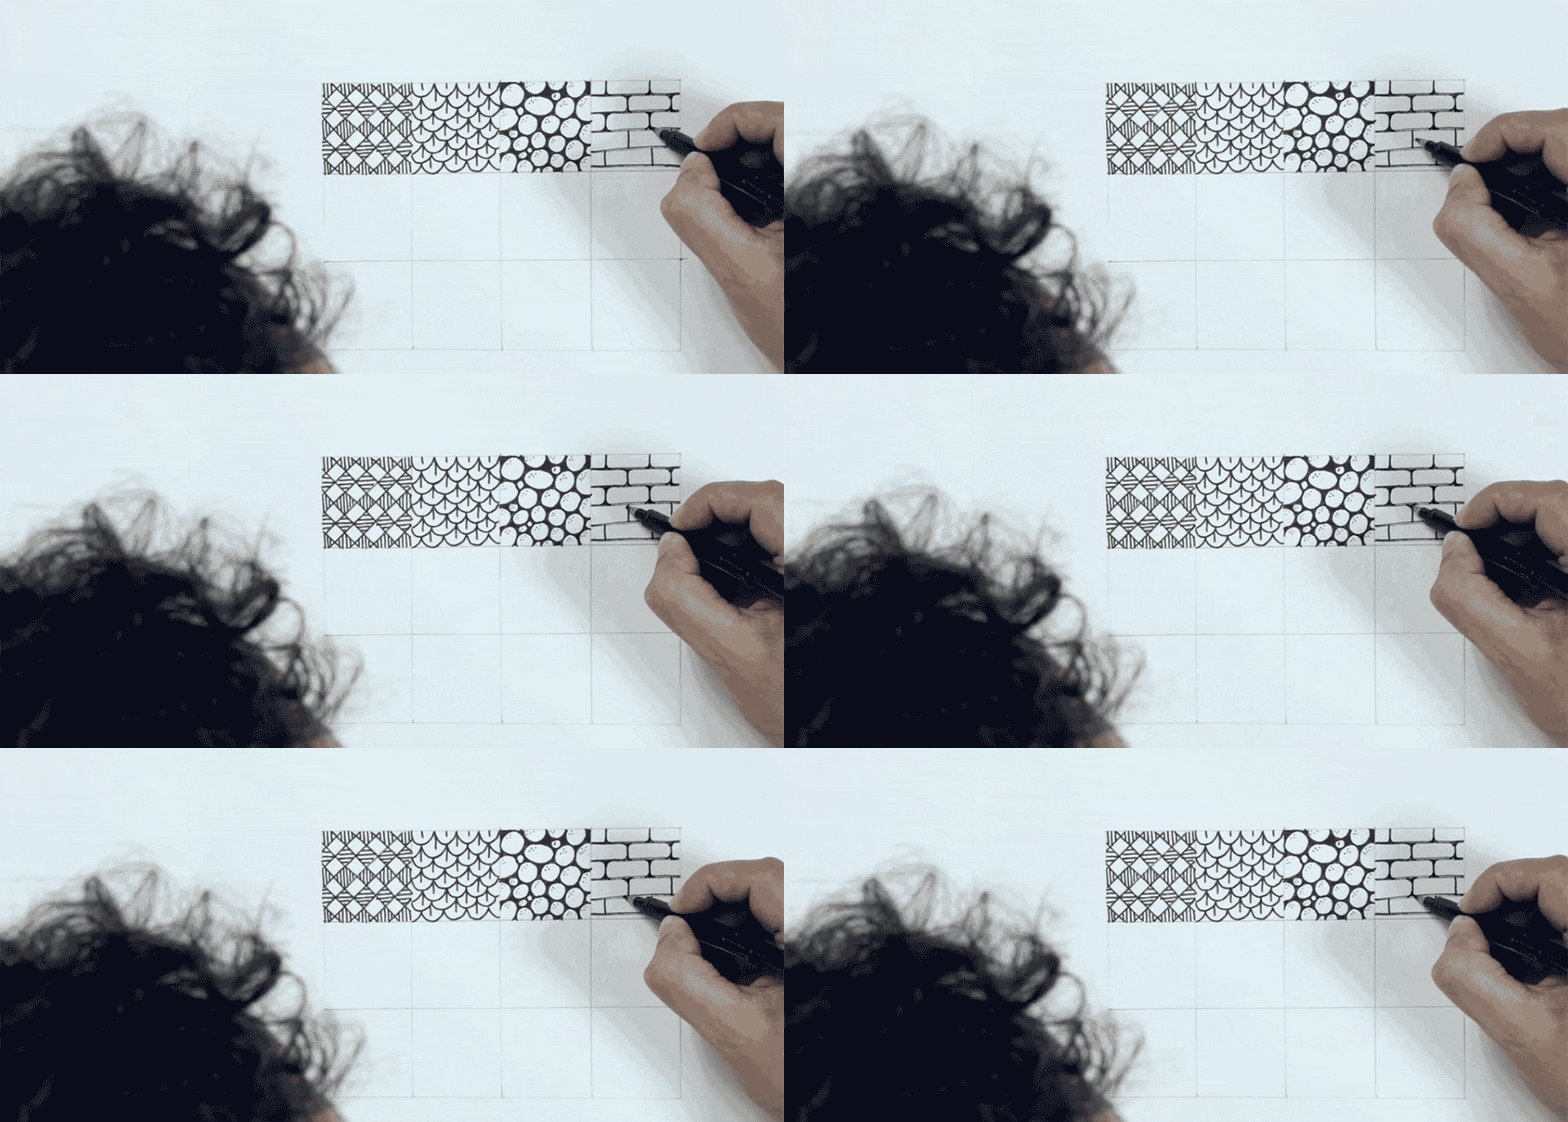
Finally, add horizontal little lines in one of the sides of every brick to give them texture.
Pattern 5:
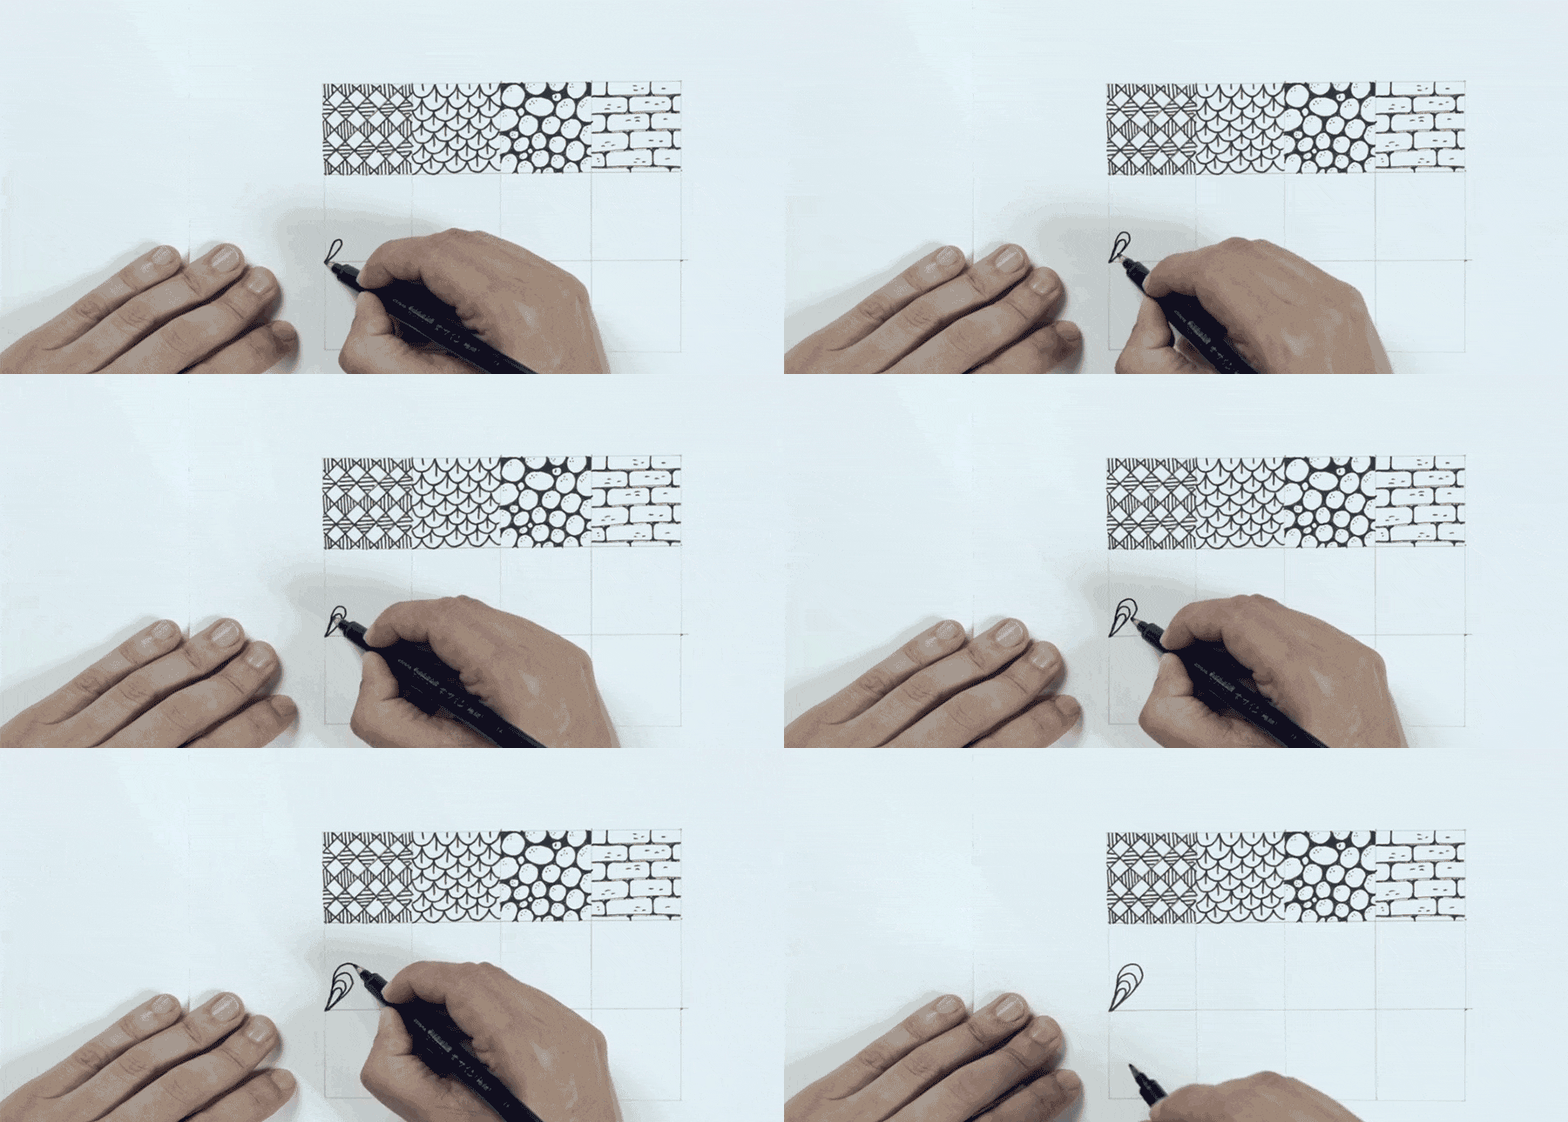
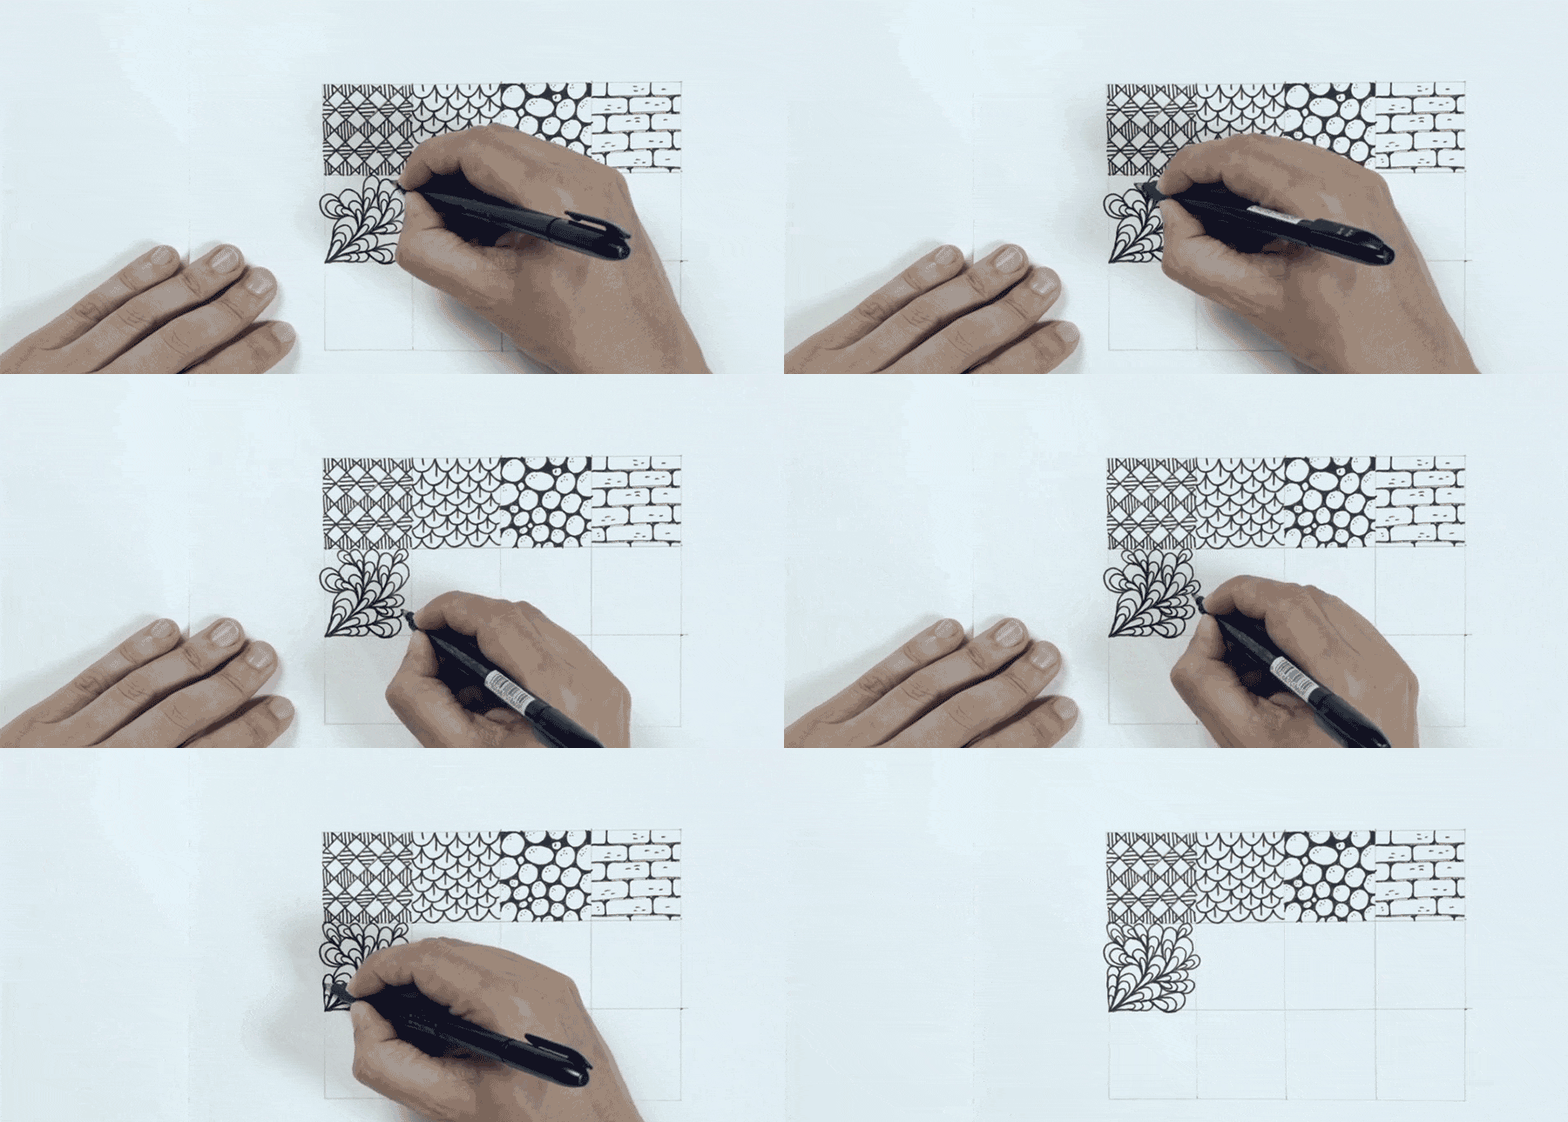
This shape you are going to repeat it as a branch growing. The shape will come up from the bottom left corner and it’s going to branch out. Start drawing a teardrop shape and repeat it three more times a little big bigger every time. Until you have a shape of four overlapped teardrops.
From the same corner repeat the same shape you did before, it can be the same size, smaller, or bigger.
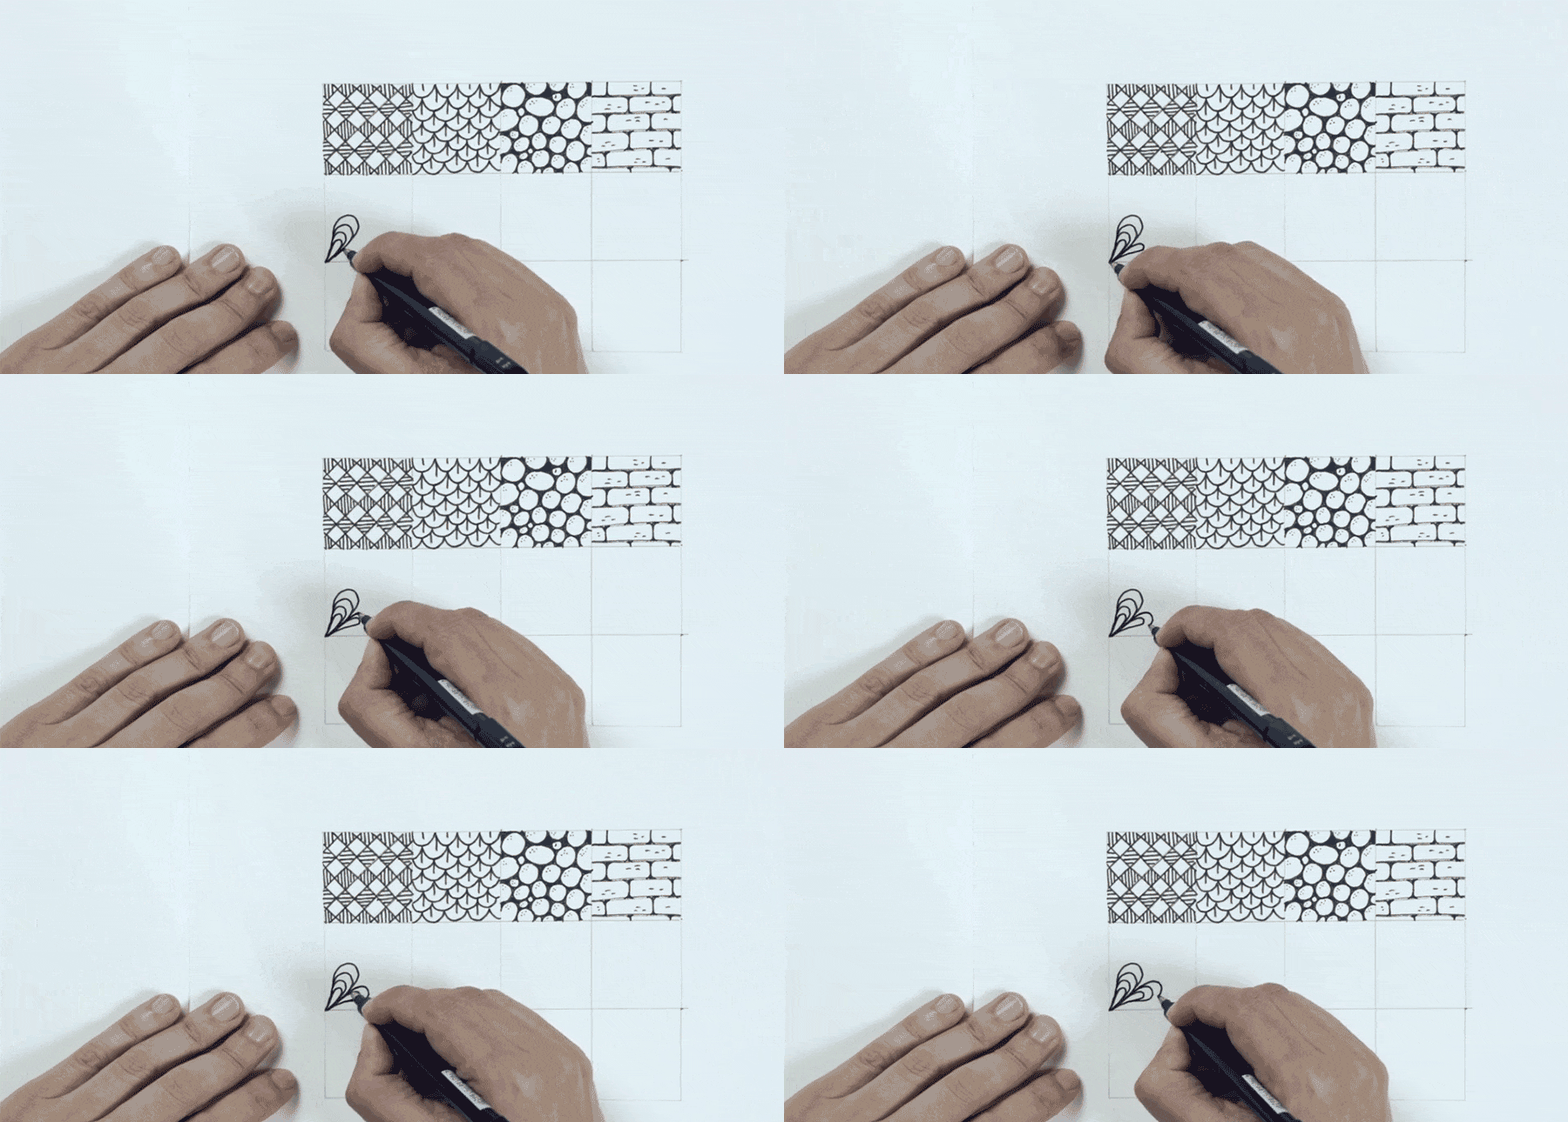
now you can repeat the same shape always starting from the space in between two previous shapes. Continue until you fill the tile.
Pattern 6:
Start from the top-right corner of your tile drawing a line with a small degree angle falling towards the left side of the tile. When you reach the left side, continue with a line perpendicular to the previous one towards the bottom. Continue drawing until you complete an inner square rotated a little angle from your original tile.
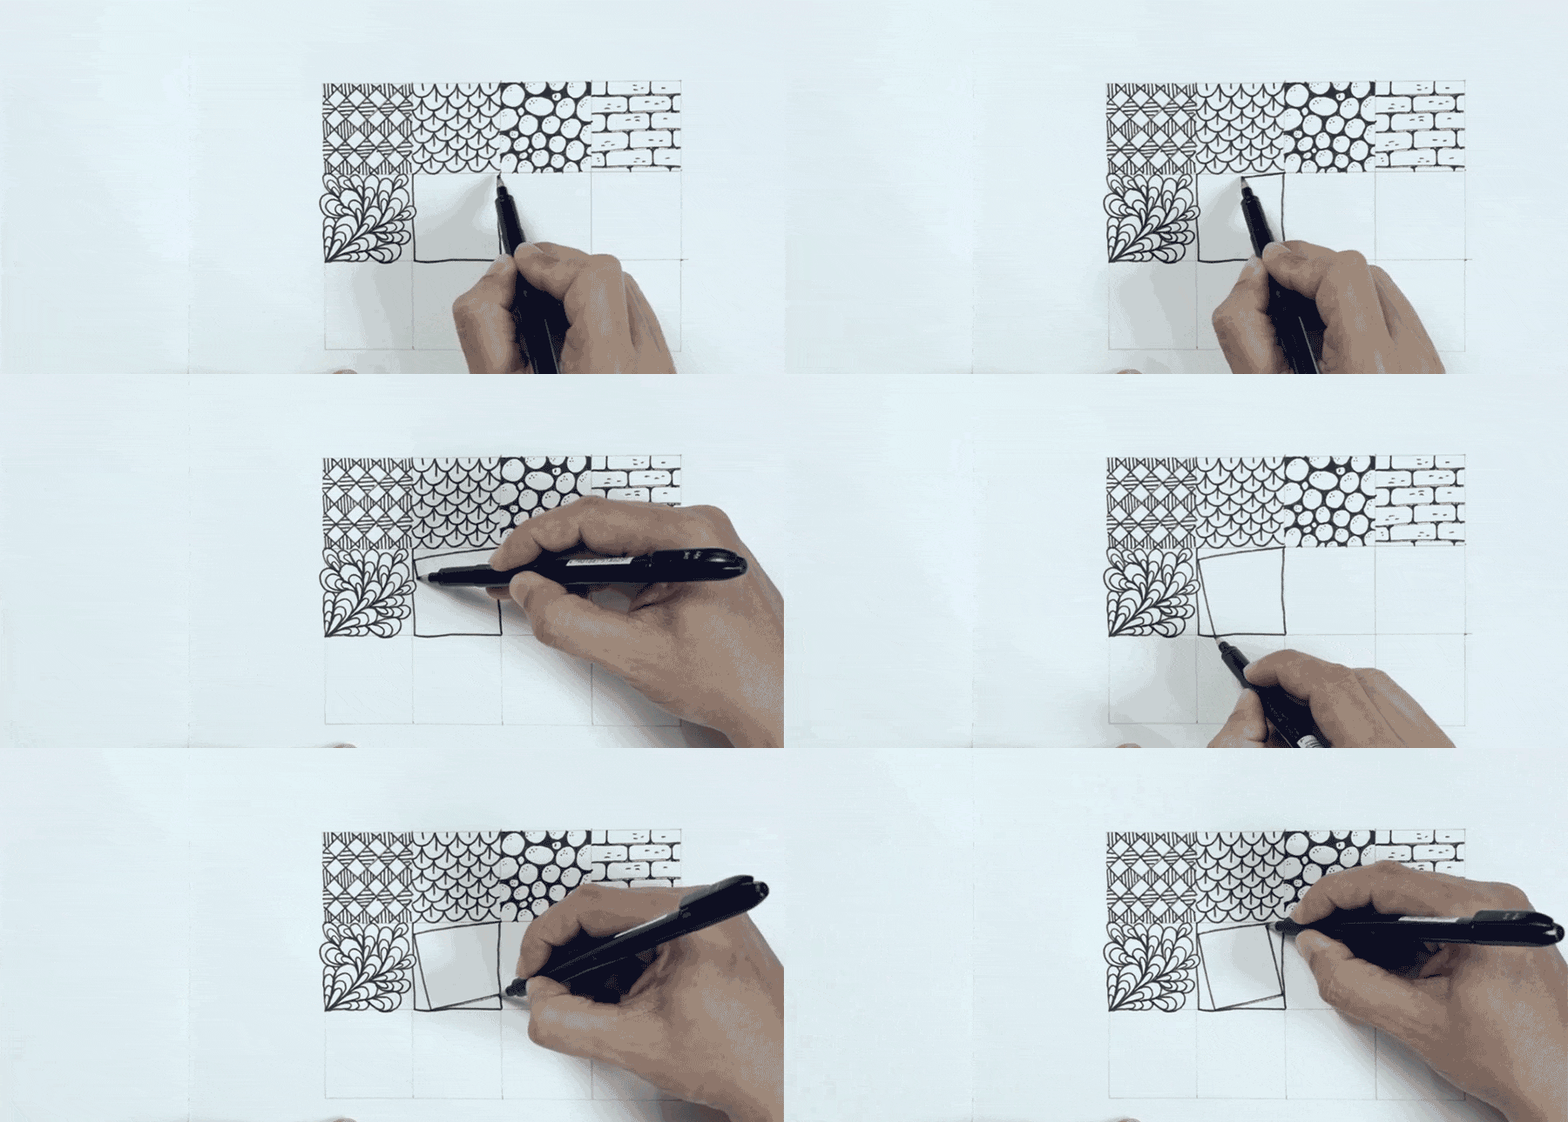
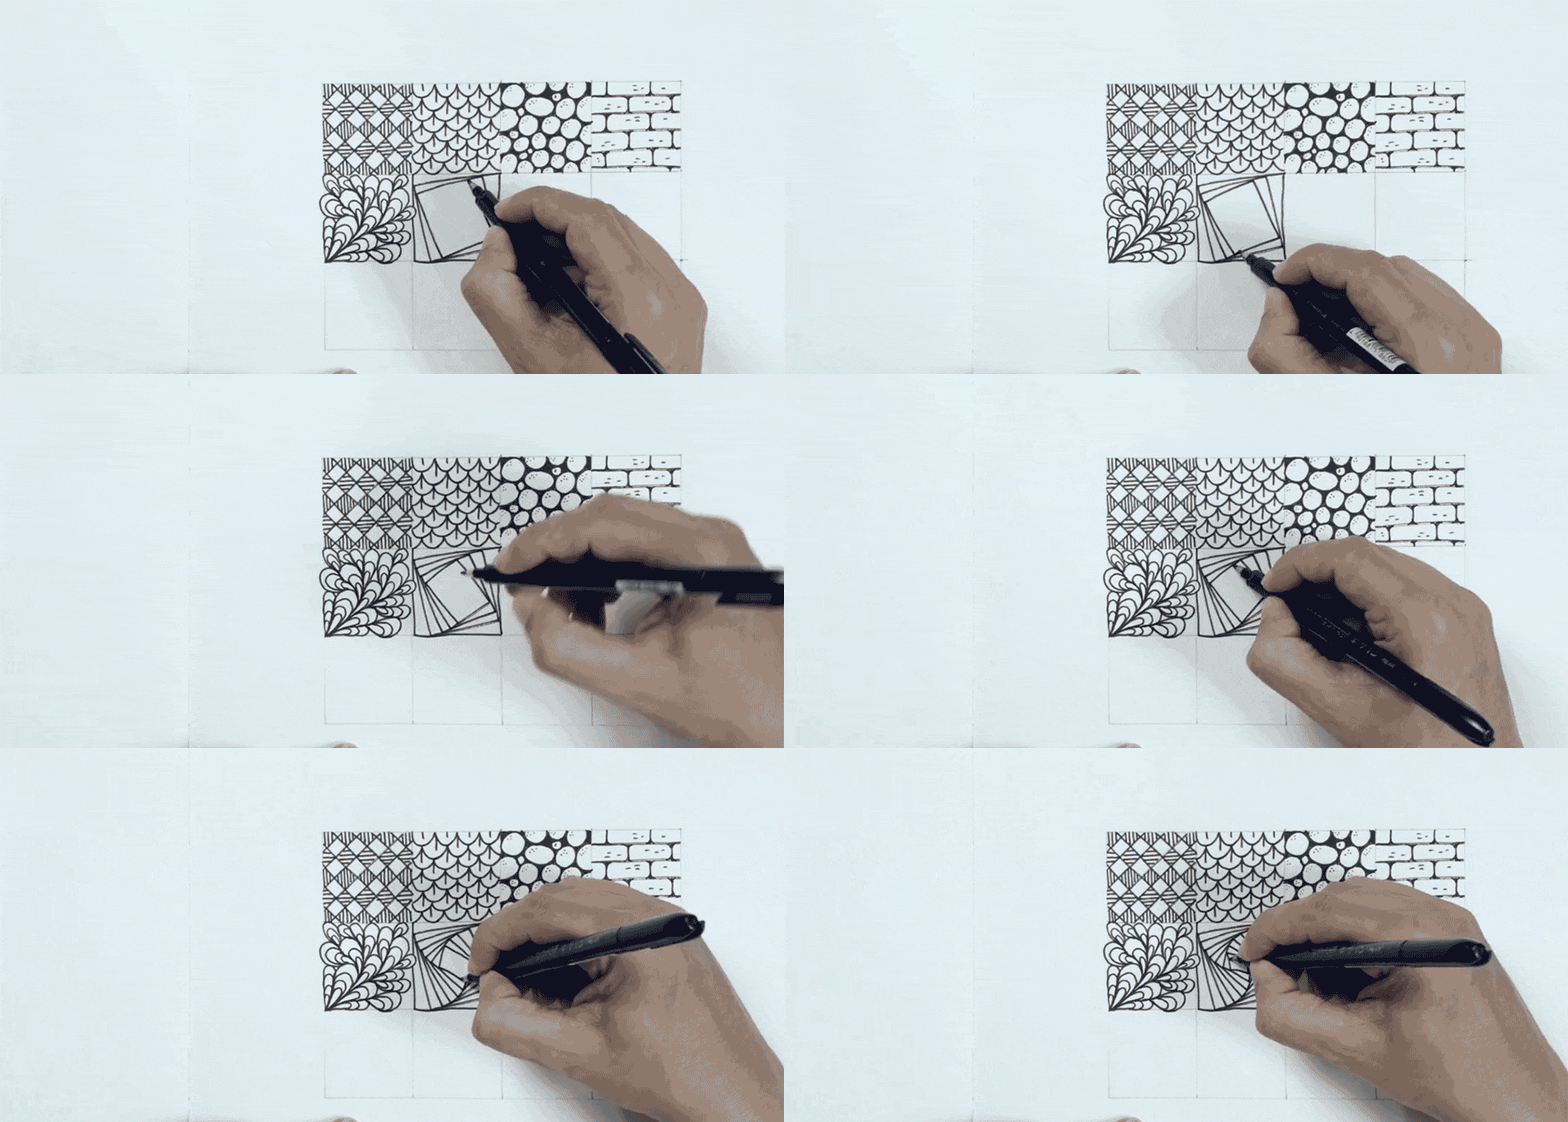
The next square you will draw should be another rotated square following the same previous rules.
Pattern 7:
Start from the left-bottom corner creating a V with two diagonal lines towards the right. Continue by drawing two parallel lines to the previous two, about 2mm far.
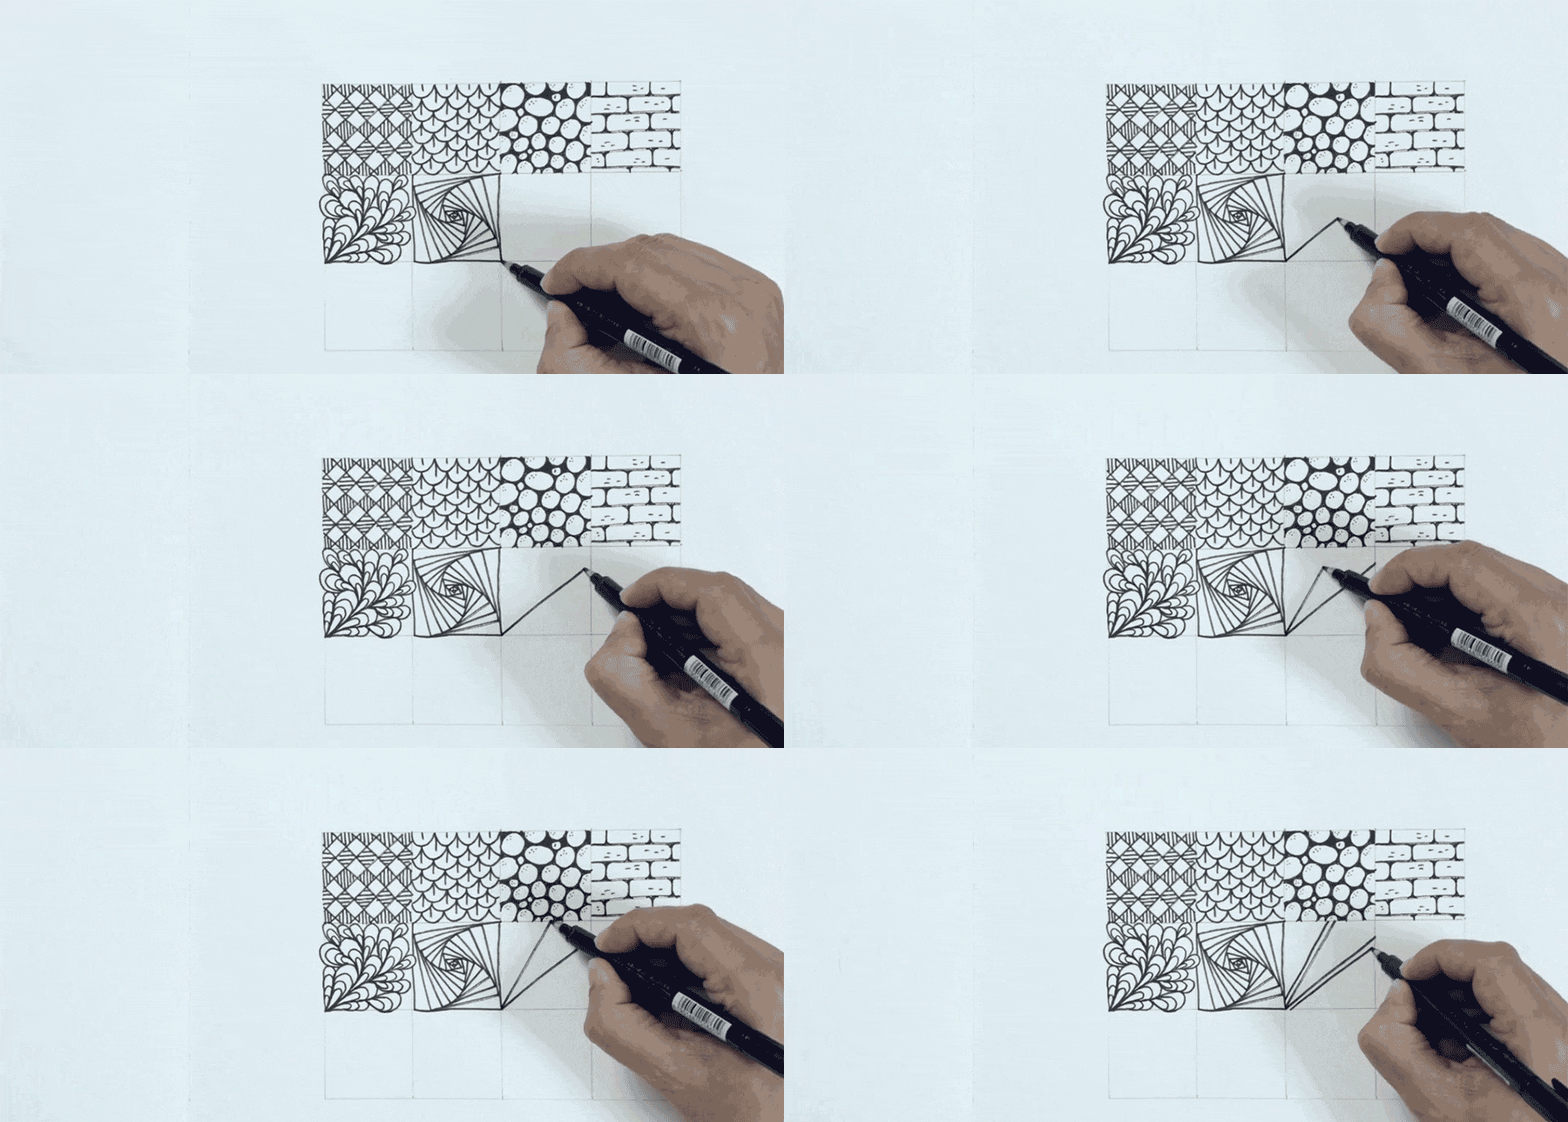
Draw inner circles inside the area formed by your V shape and your tile, one next to the other one increasing the size of them accordingly.
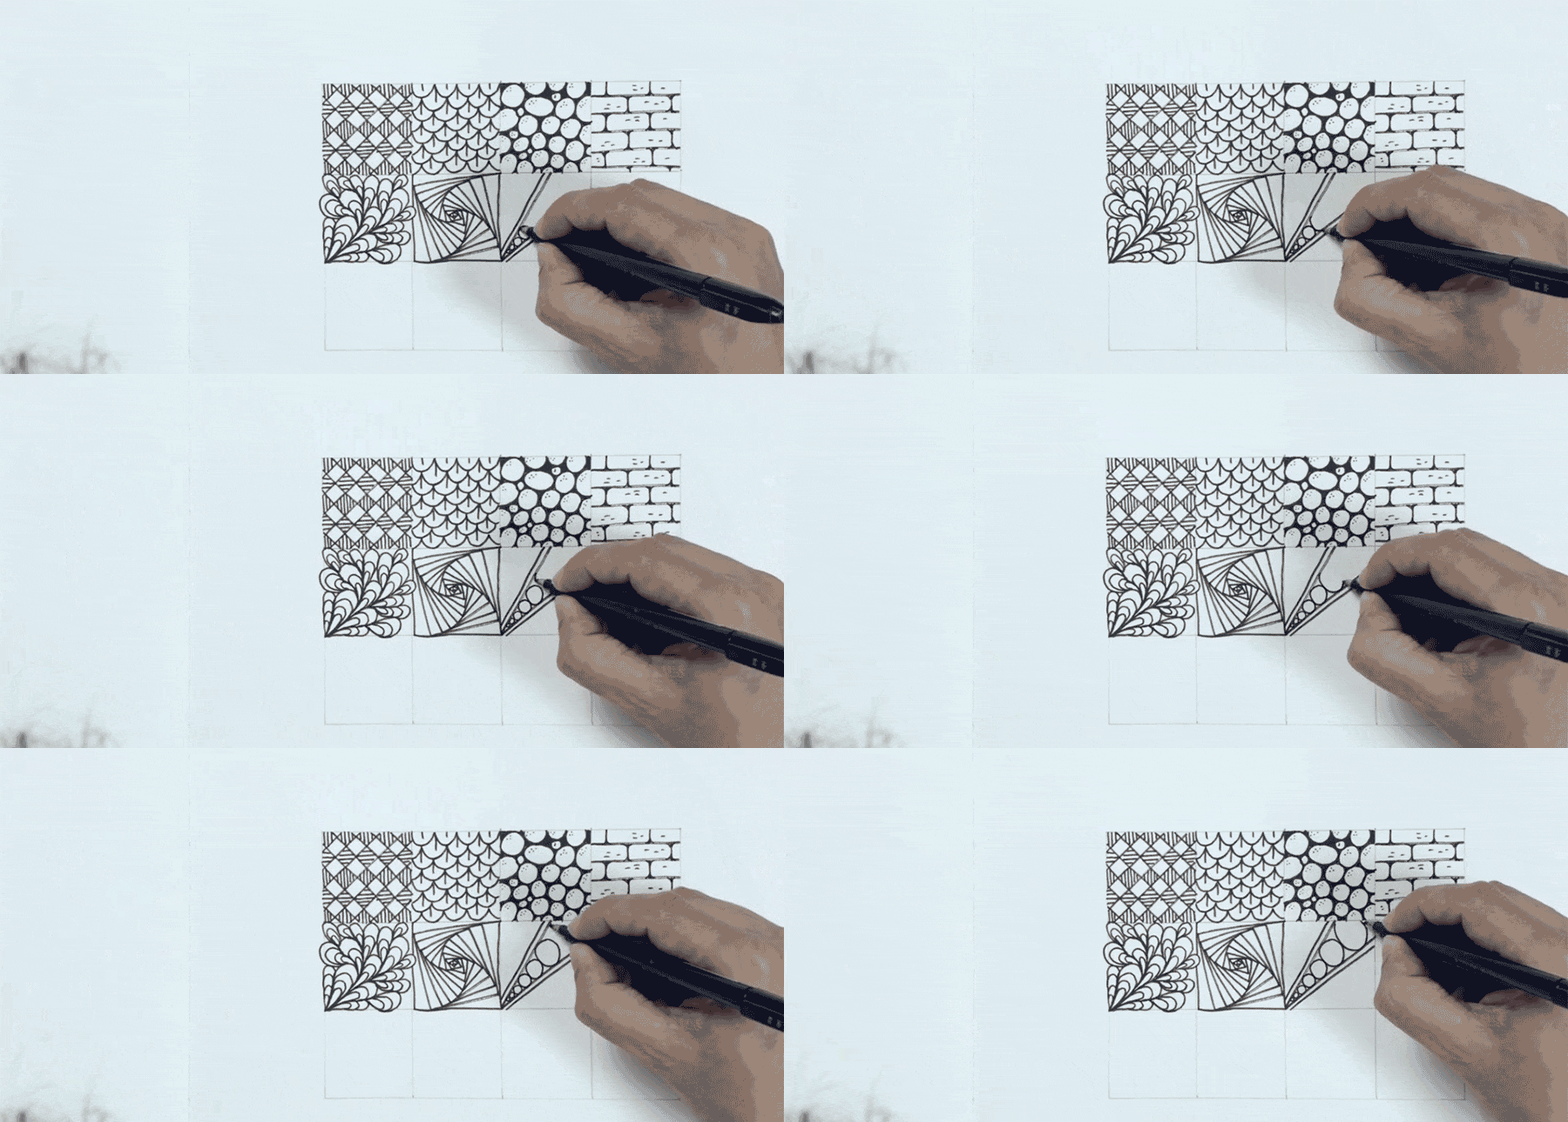
Draw more V shapes from the same corner you started the first one till you fill the tile. Draw the inner circles inside every V shape.
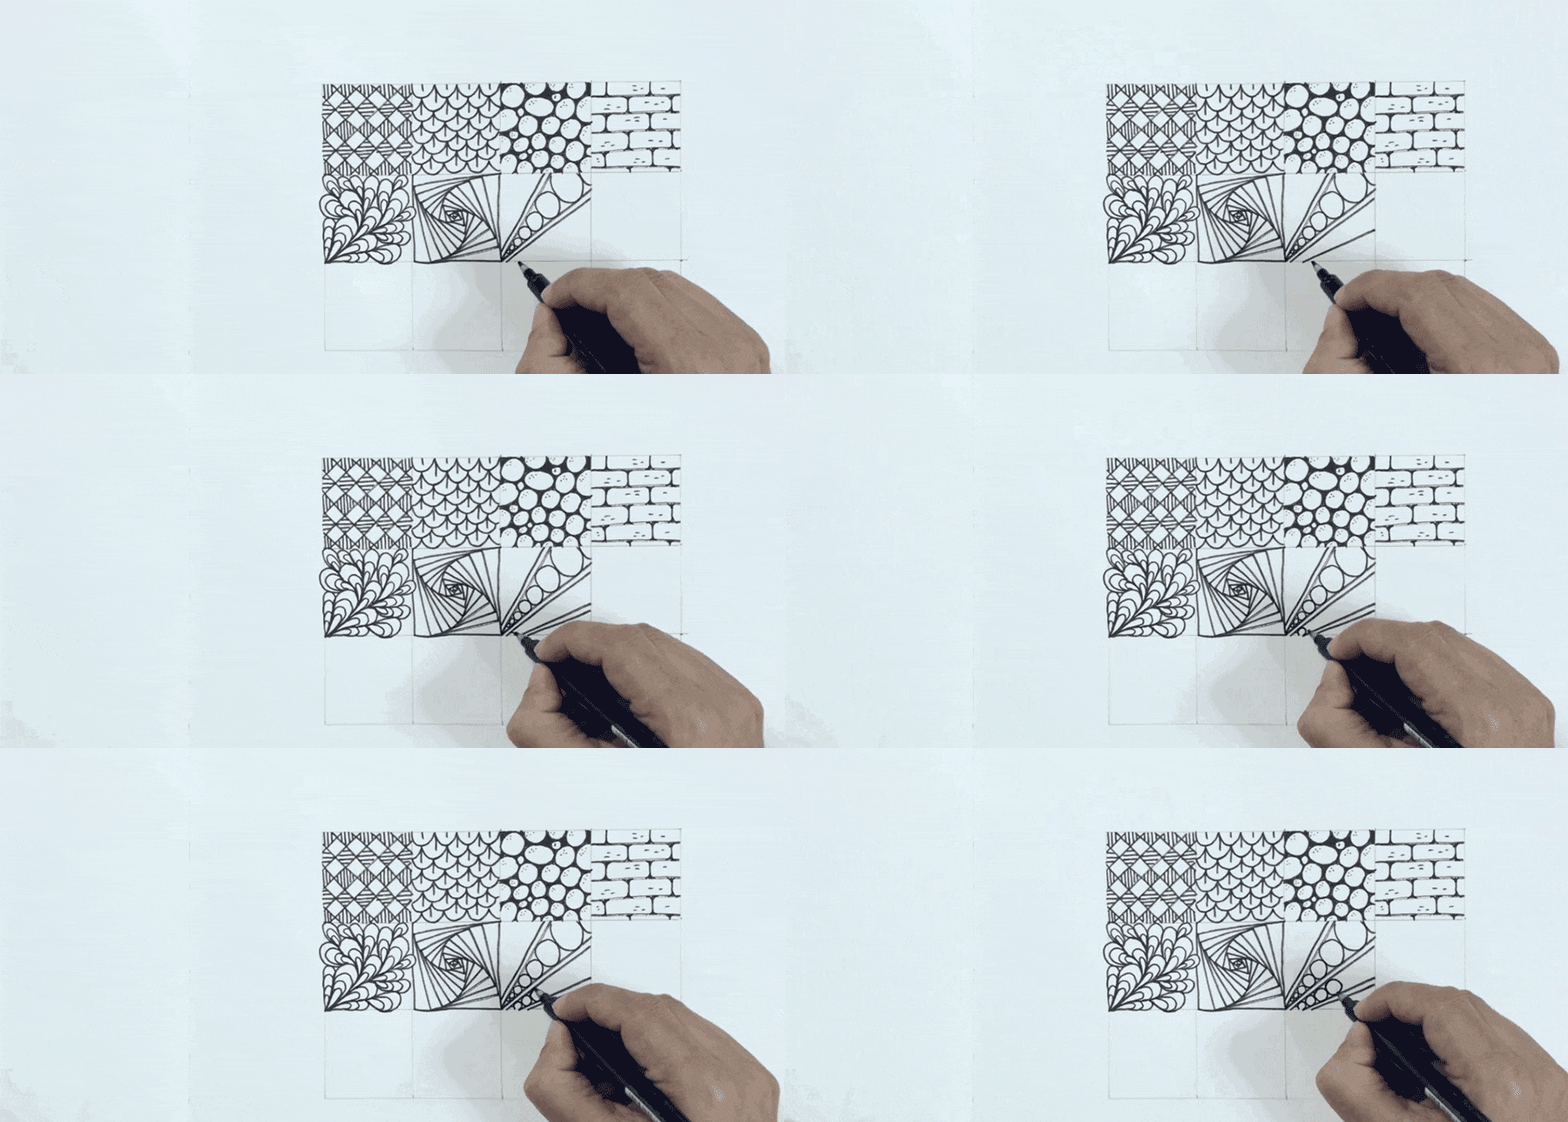
Fill in black the remaining spaces outside the circles and inside the V shape.
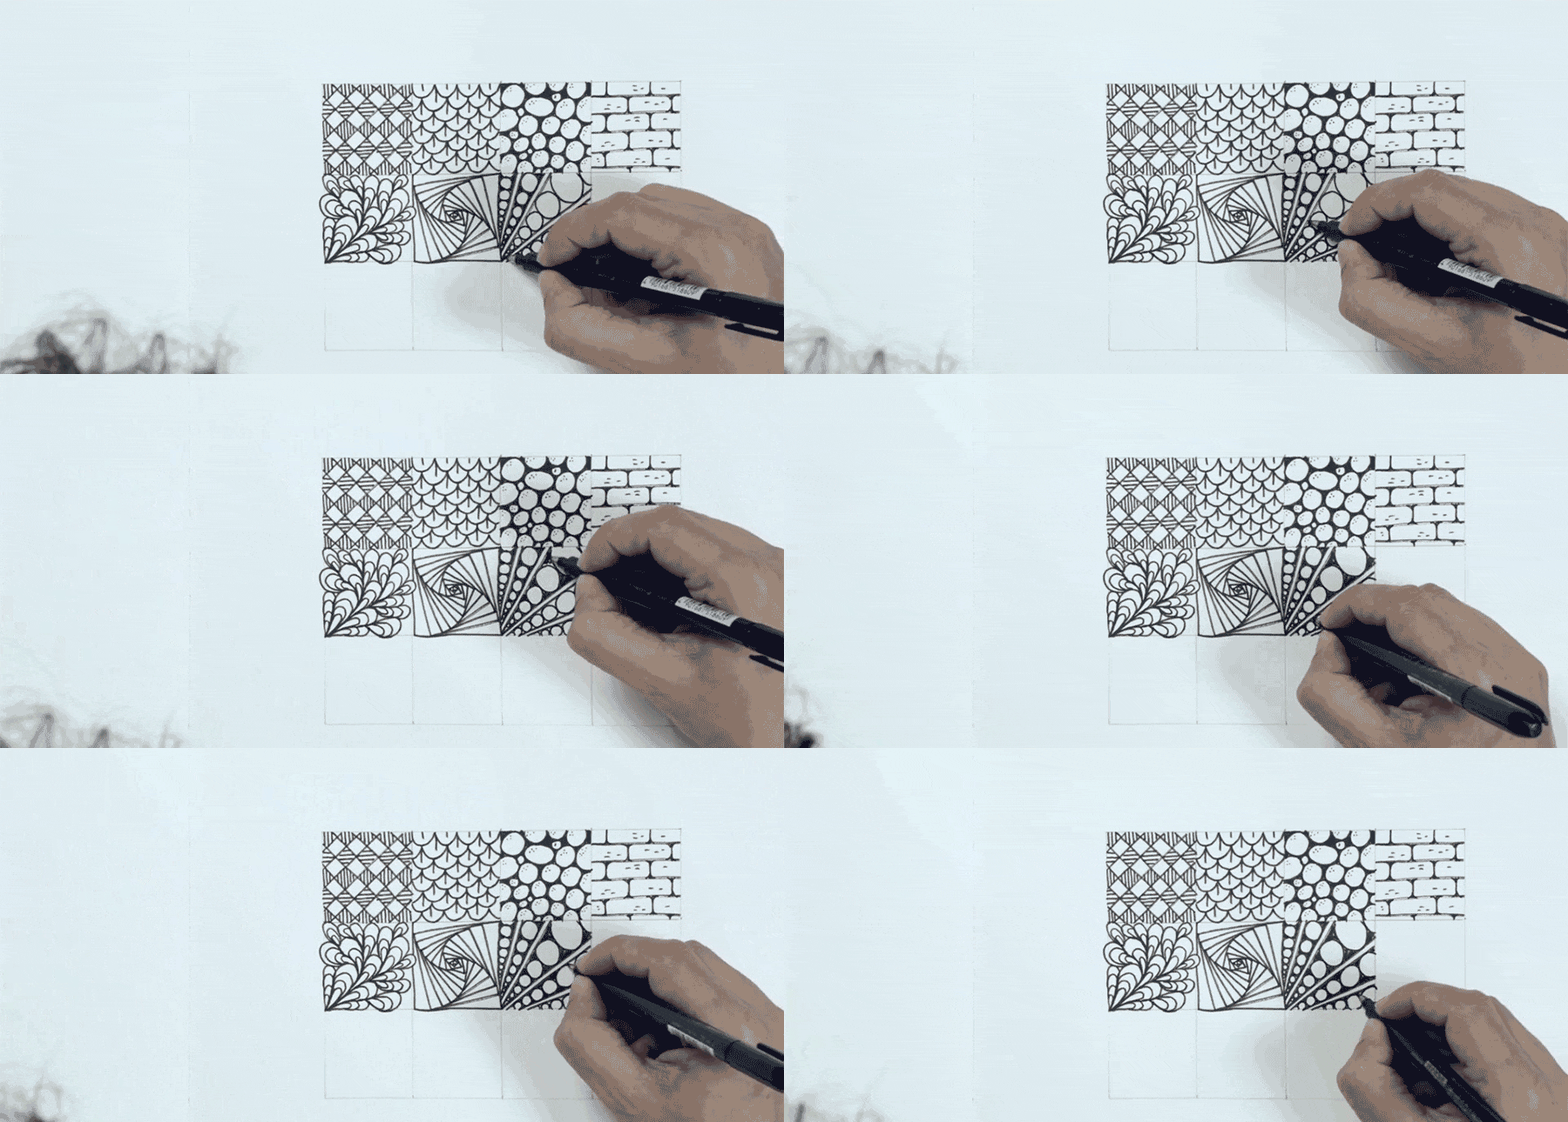
Pattern 8:
The basic shape of this pattern looks like a Christmas cane. Chose a starting point from the top of your tile and draw a line about 1cm long and rotated about 45º degrees.
The next shape will be the Christmas cane, start drawing from the previous line the curve of the cane making sure the stick will touch the end of the previous one with and angle of 45º degrees in the opposite direction of the previous cane.
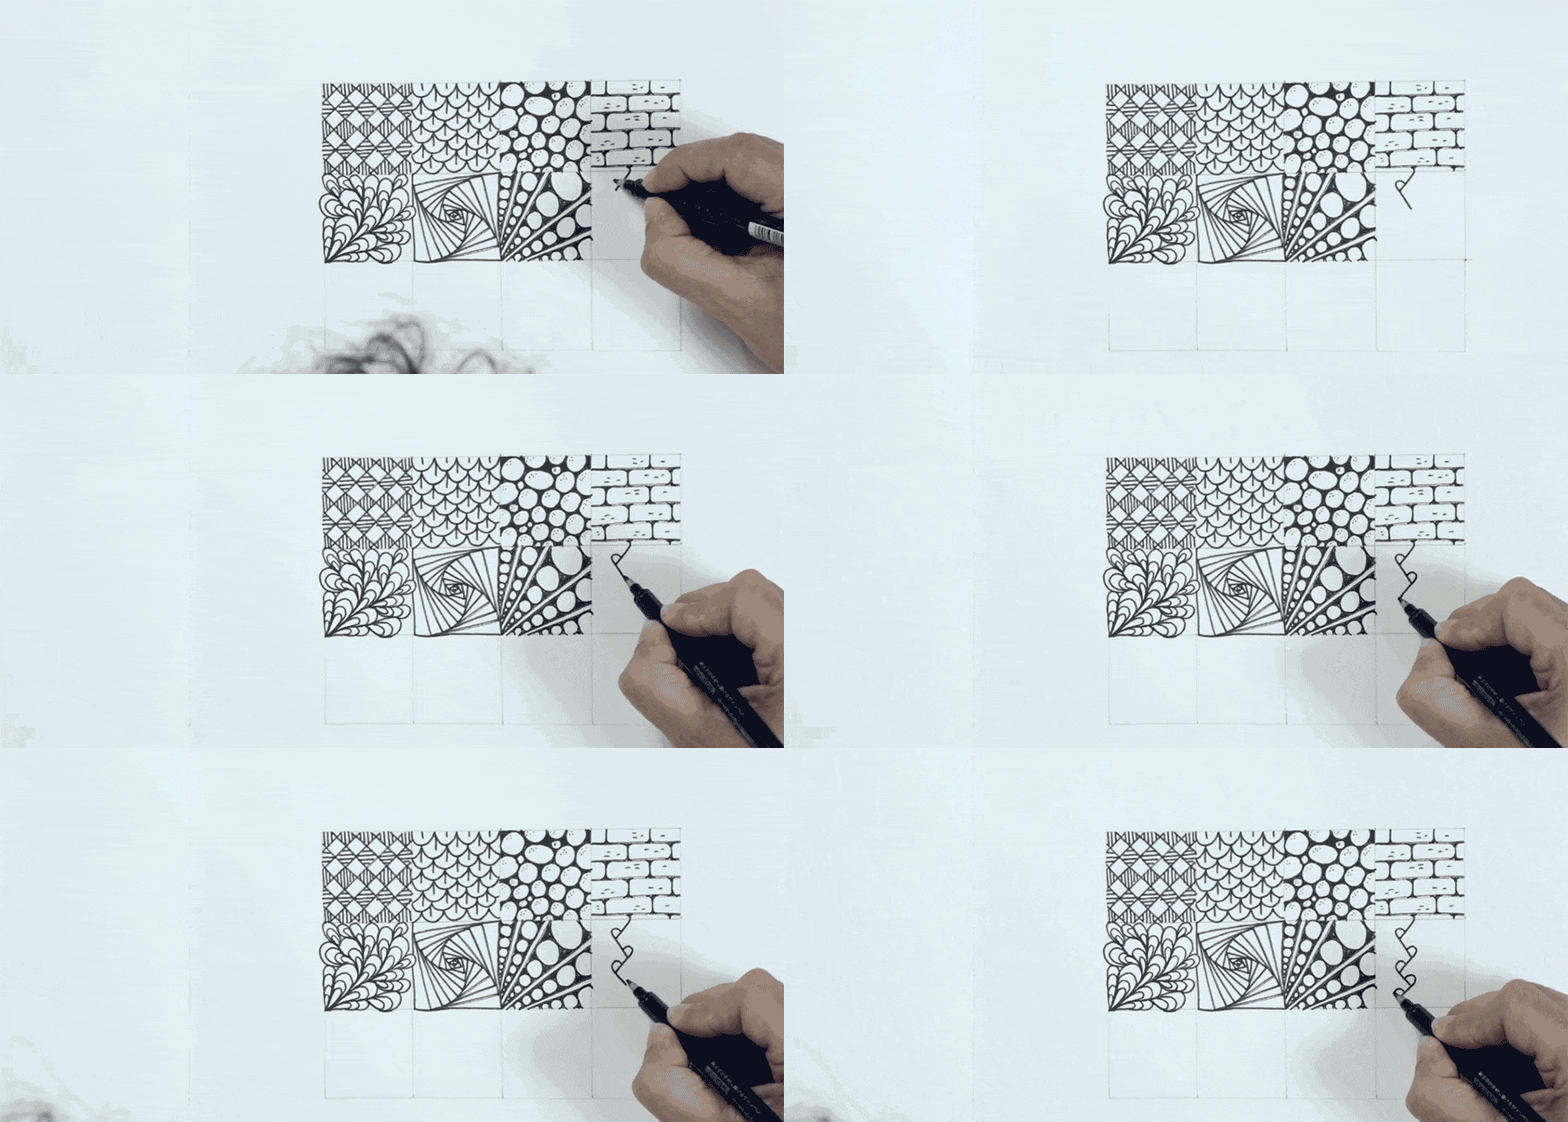
Draw parallel lines to give them a thickness of about 2mm.
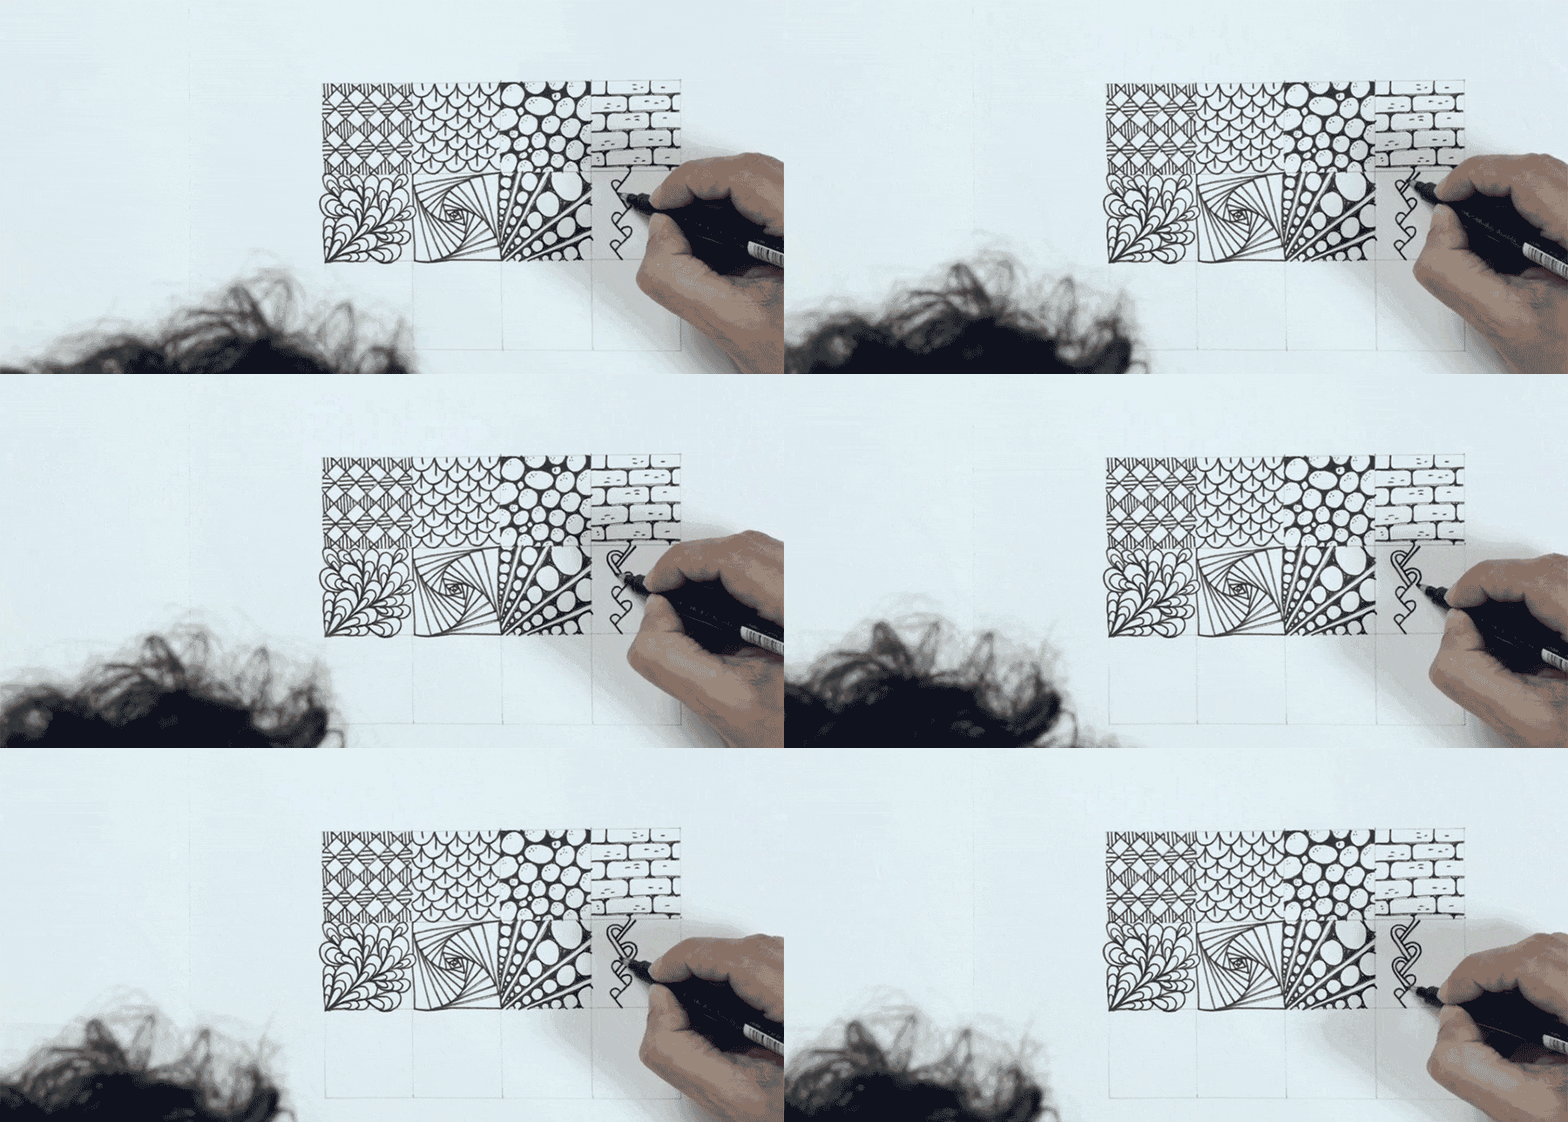
now draw a second parallel line to the previous ones. It’s going to look like a braid now.
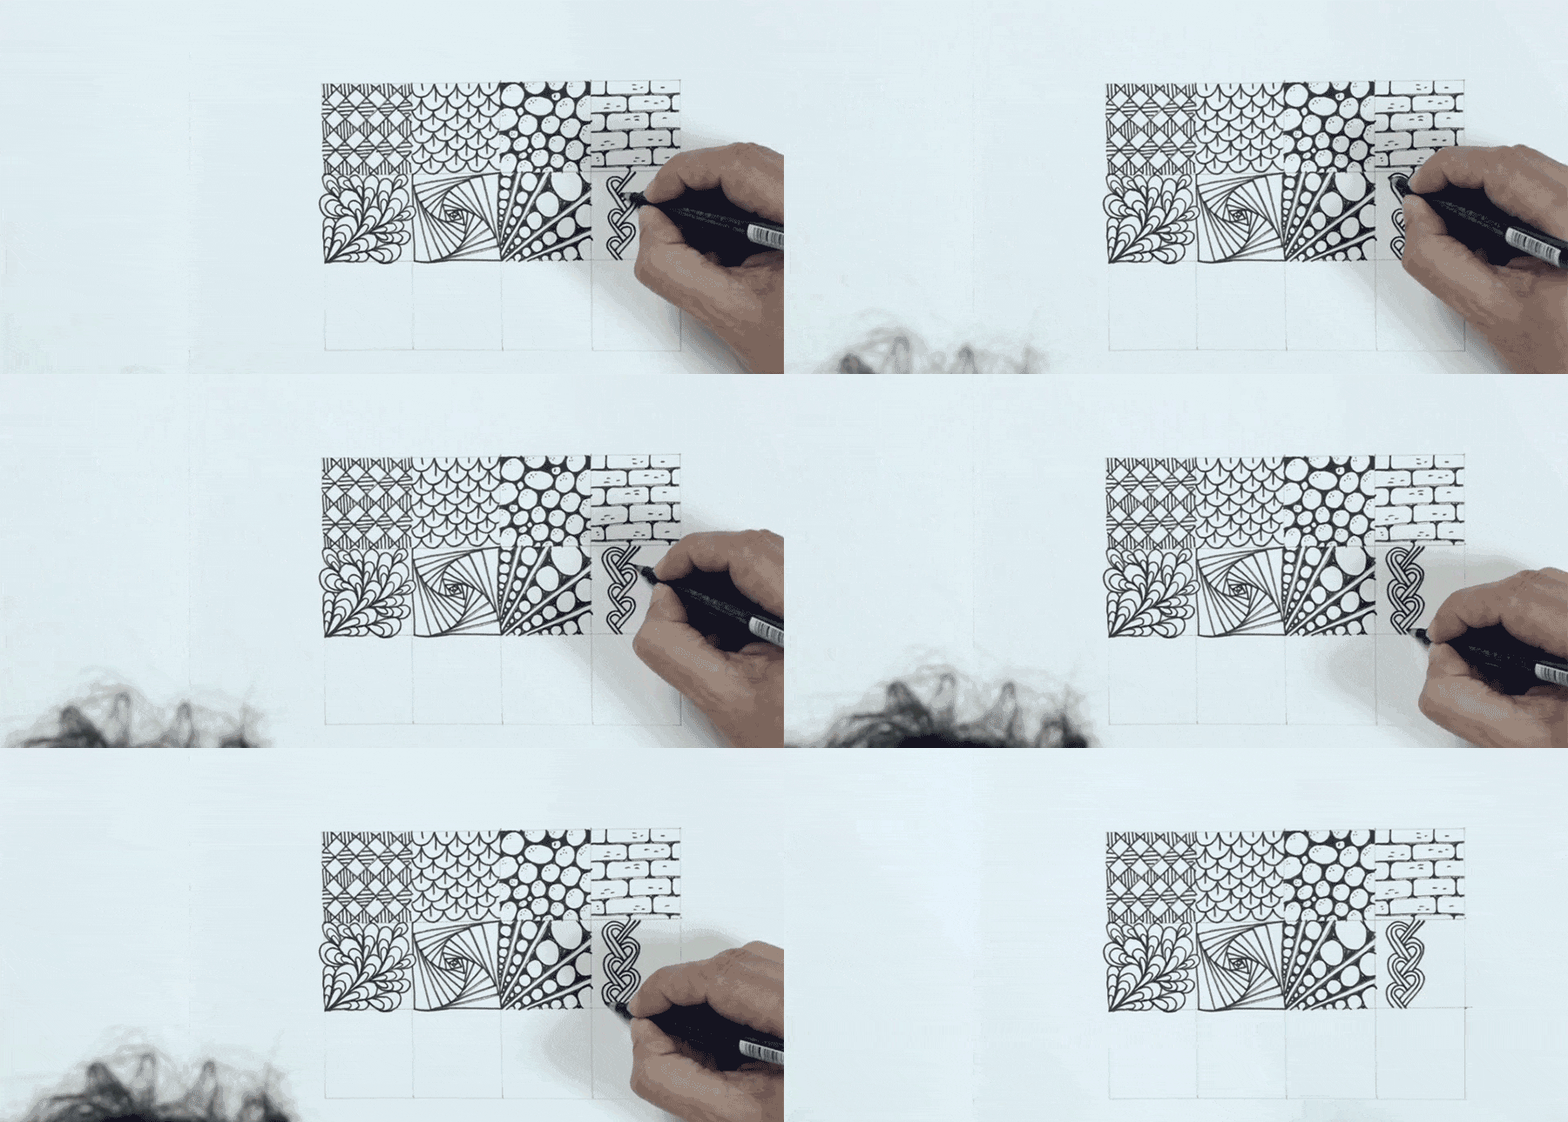
Fill black the semicircle inside of the braid to give them a sense of volume. Draw one or two more shapes like this in the inside of the tile.
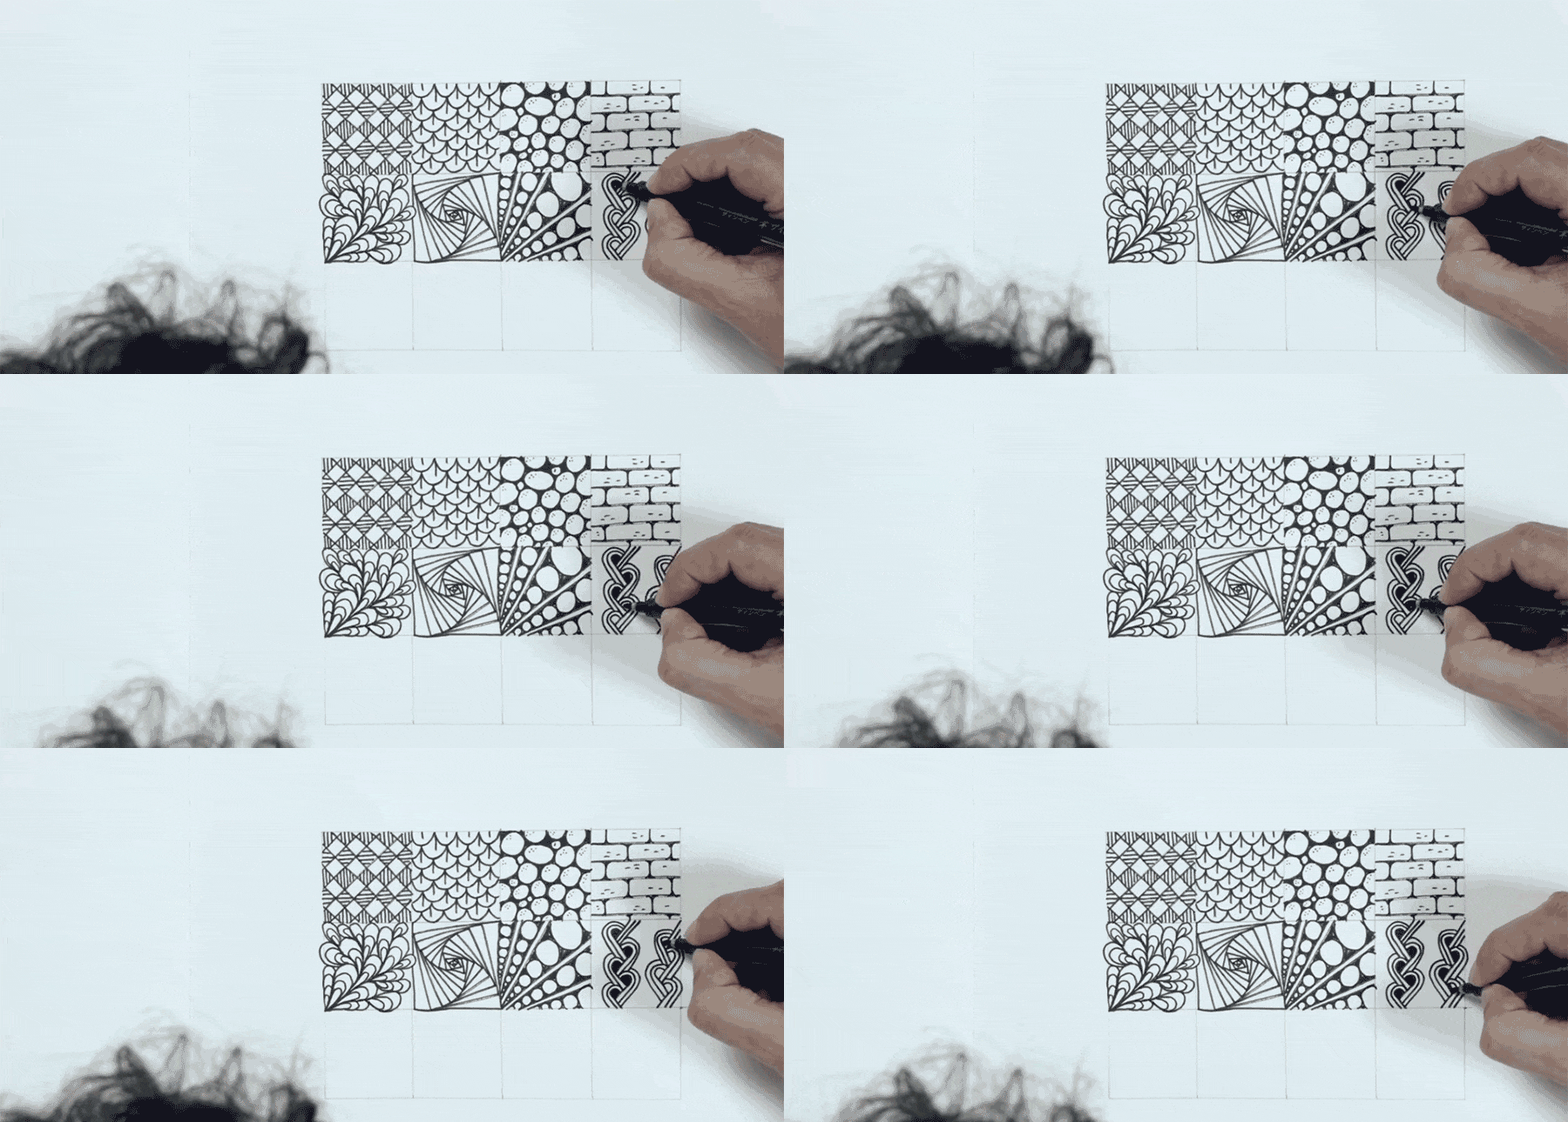
Pattern 9, 10, 11, 12:
Finish the next tiles with any pattern you like. You can repeat and modify one that you already did or practice with a new one from online resources.
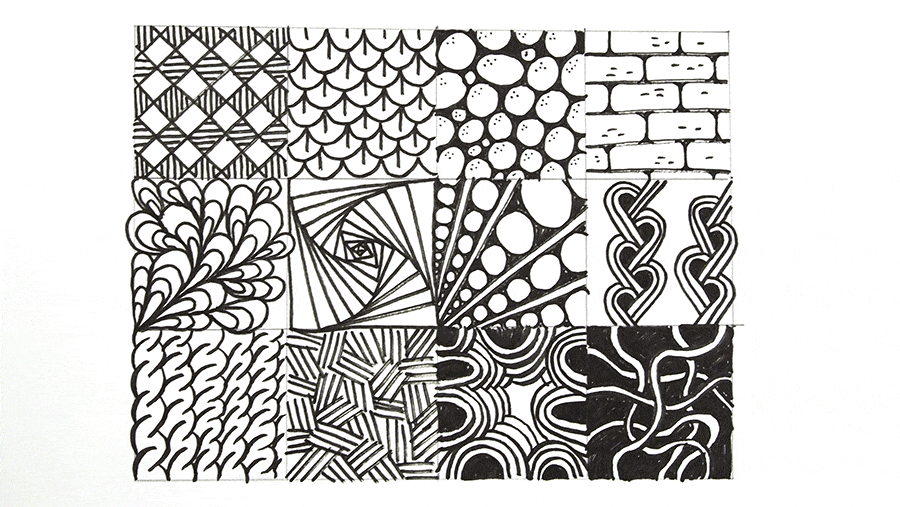
Here you can see more patterns:
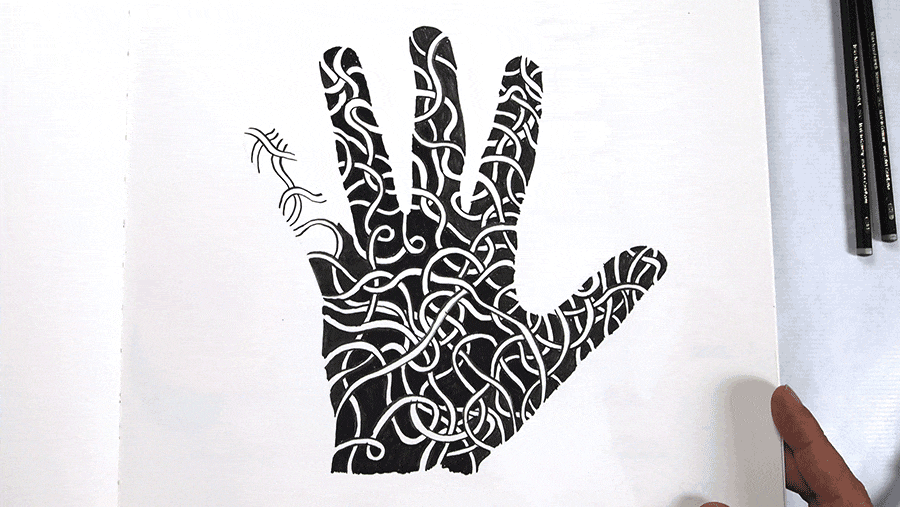
You can also combine the first exercise with zentangle patterns like this:
Exercise 03
Balance stones.
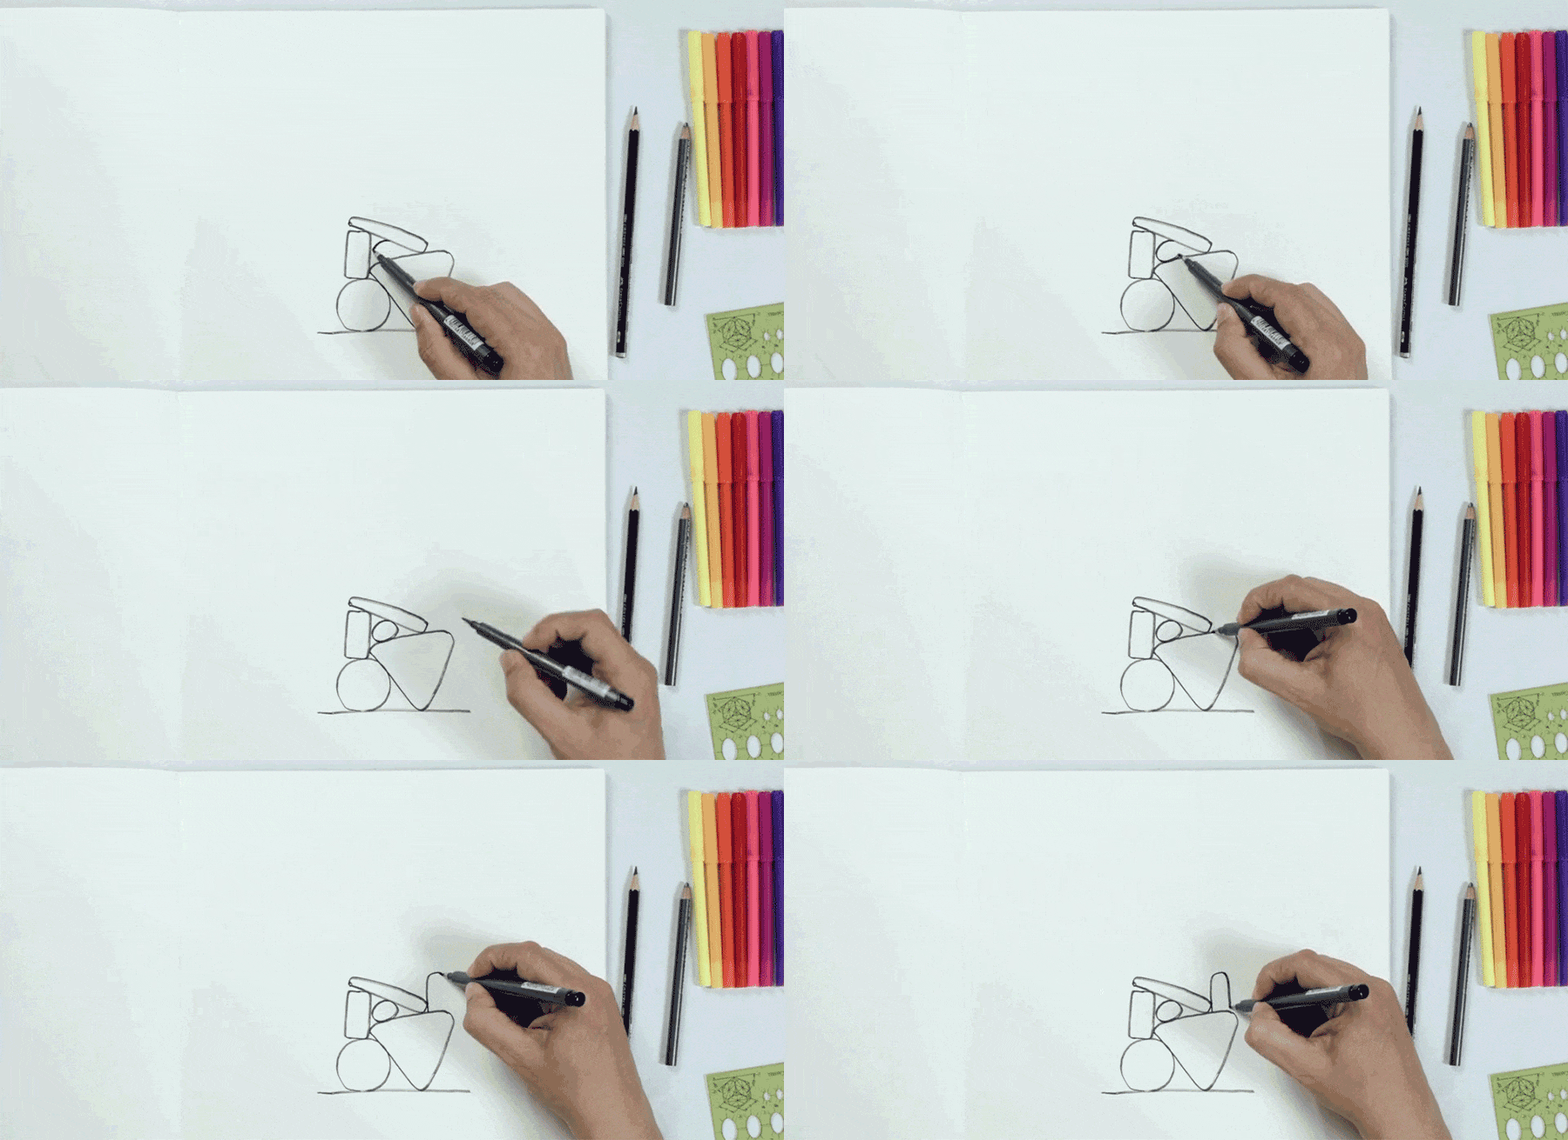
Start with a blank paper by drawing an horizontal line on the bottom of your page.
Then draw rocks of any shape and size, but imagine there is gravity in your composition, you will create a tower of rocks always maintaining the balance between them.
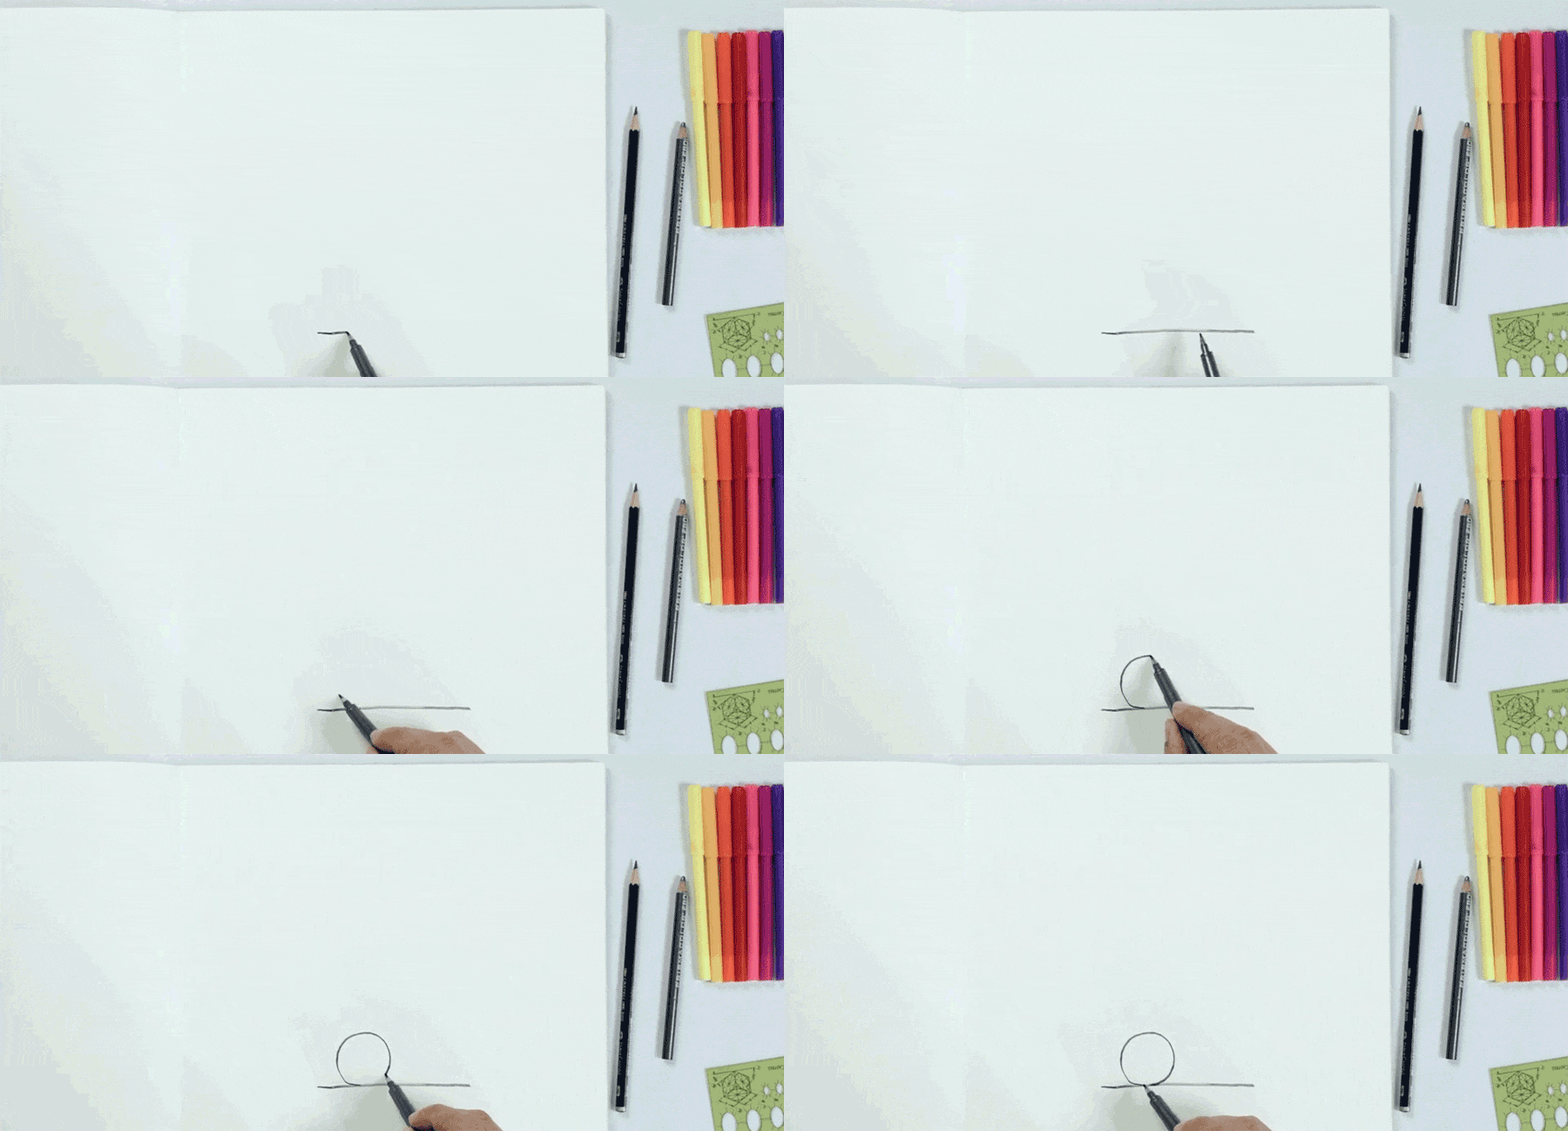
fell free to draw any geometric shape you want. Making the edges round will make them look like good looking stones 🙂
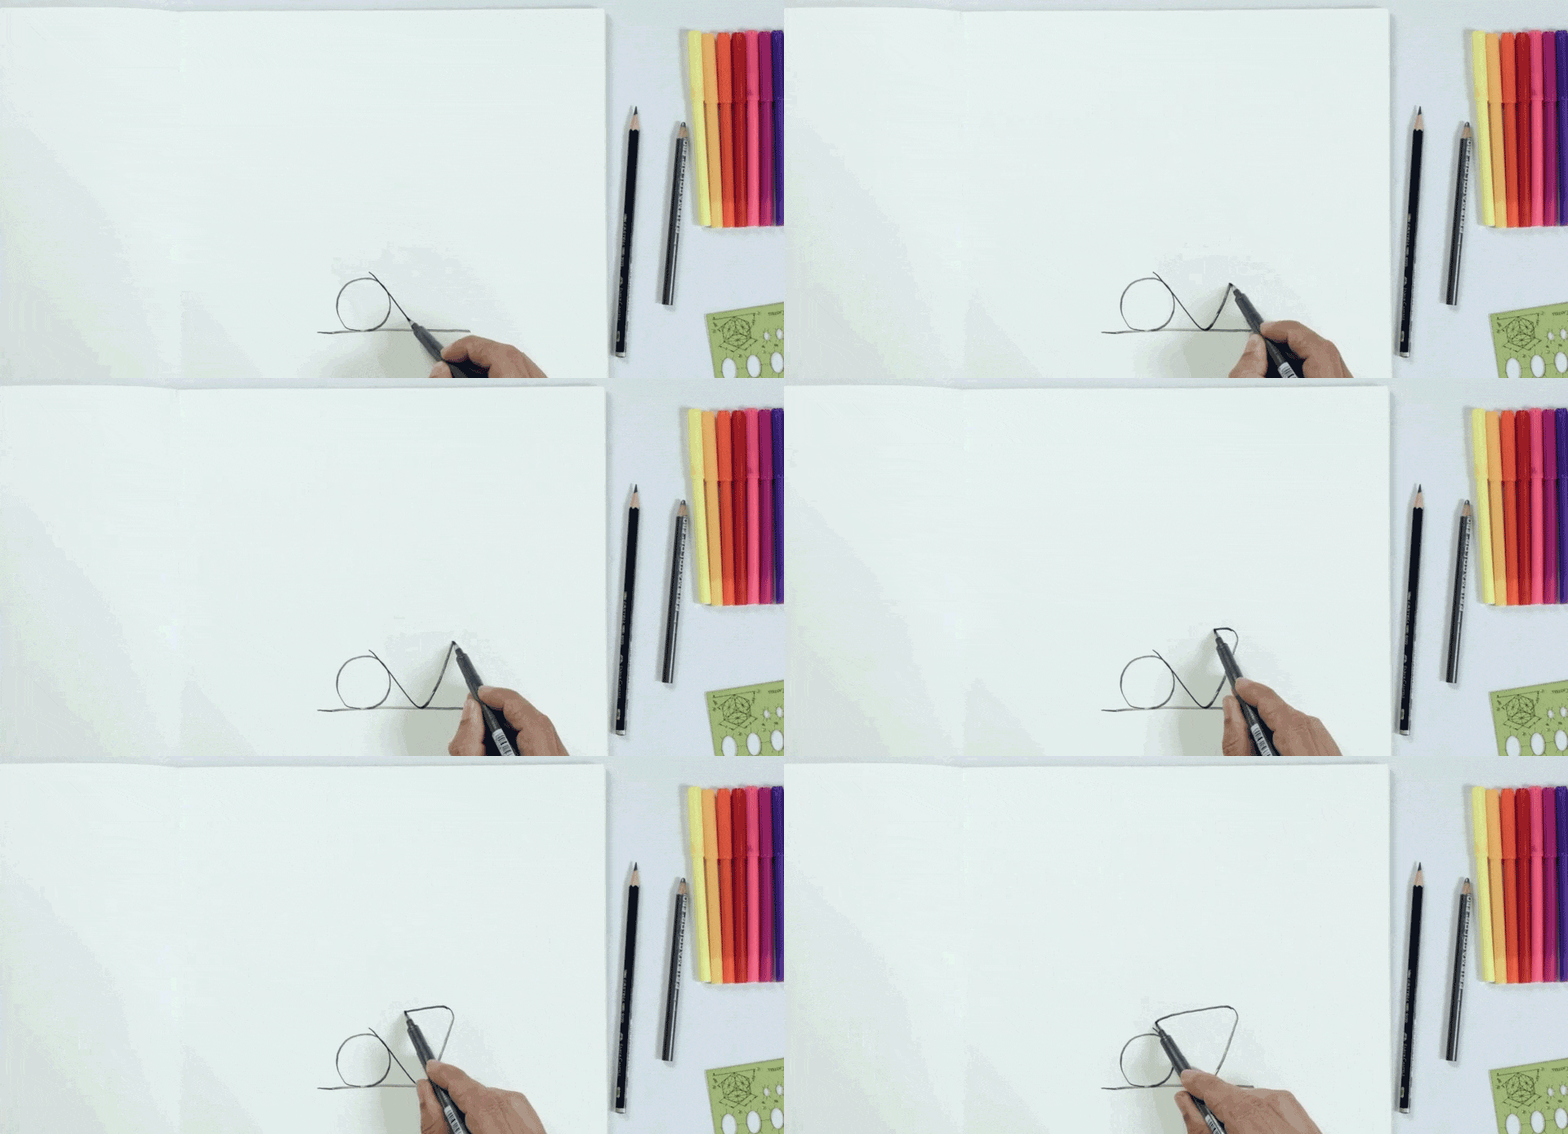
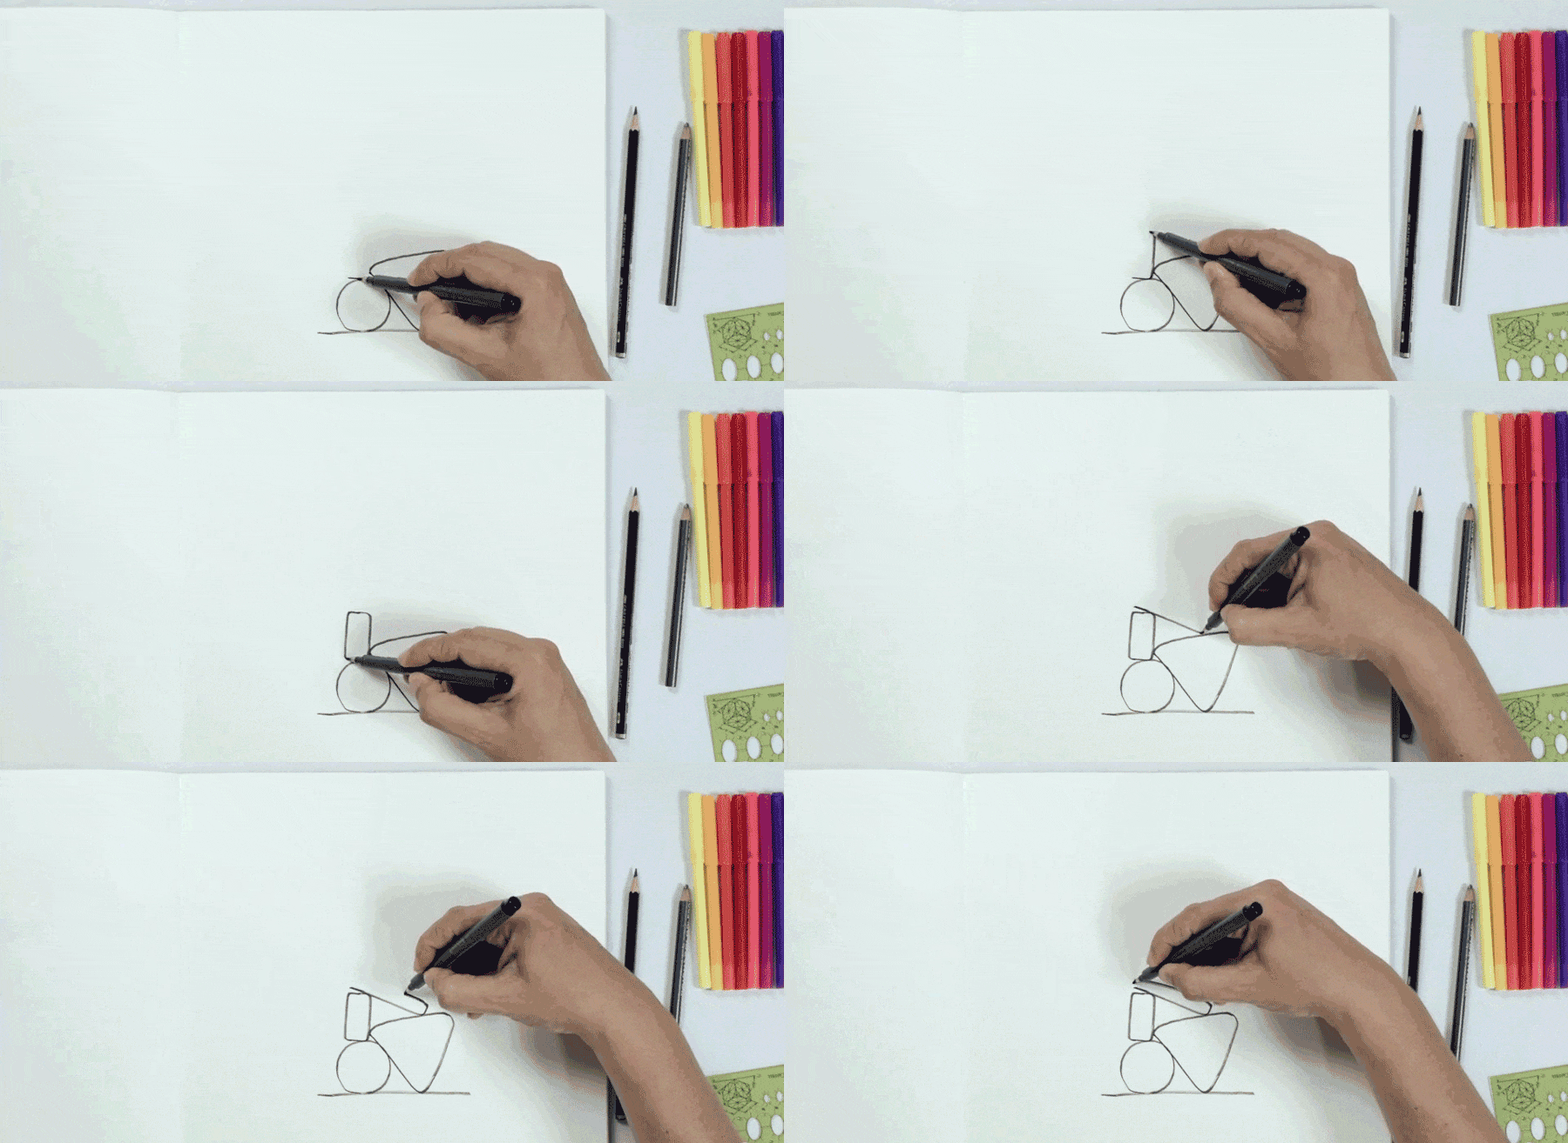
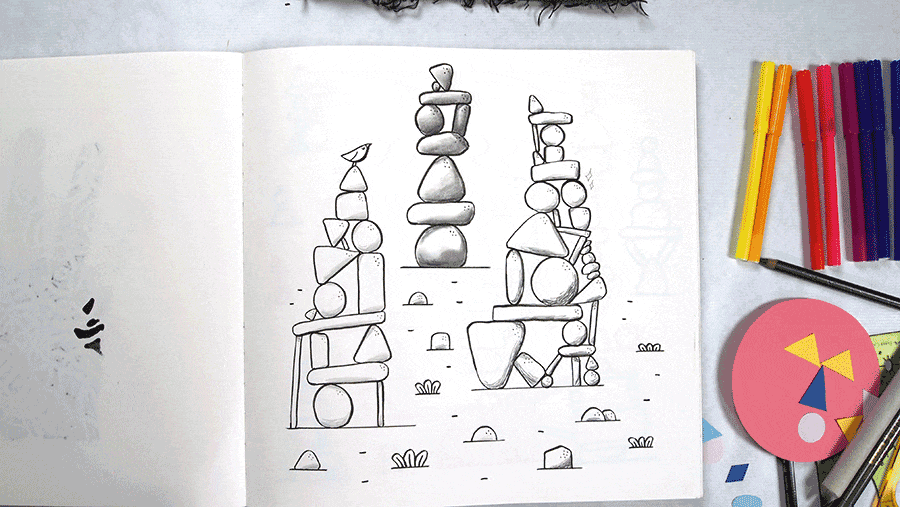
You can add little dots as you did in the previous exercise to add shadows, but you can also try to give them shadow using a pencil.
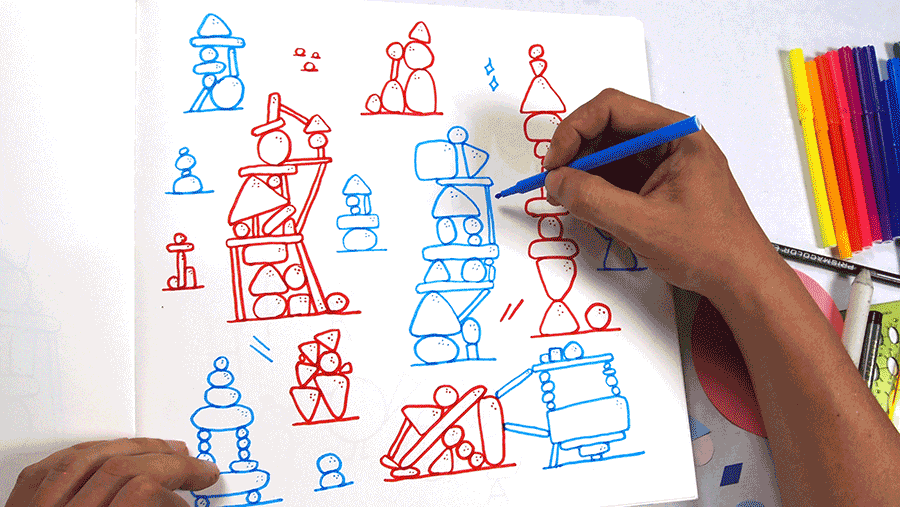
you can also try another variation using sharpies.
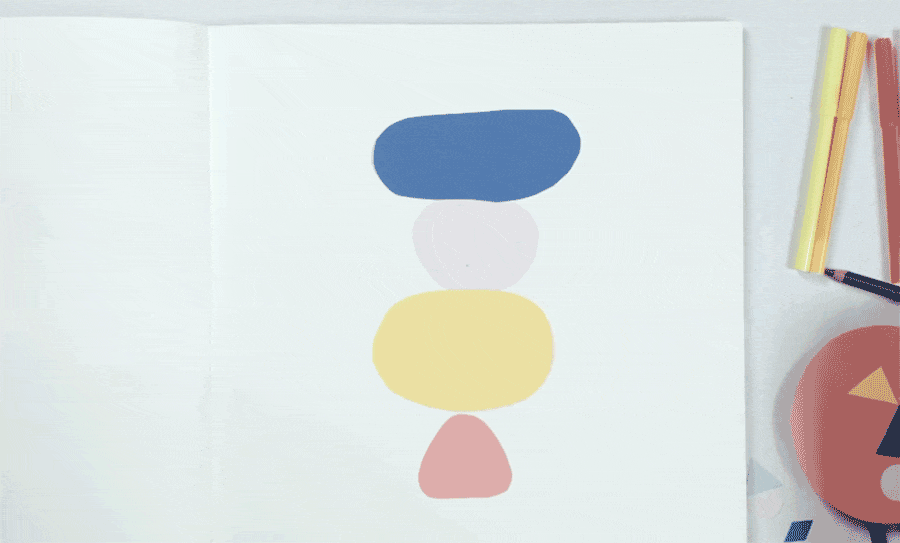
or you can also cut out paper from an old magazine or newspaper to create your stones and then make your composition with them.
Exercise 04
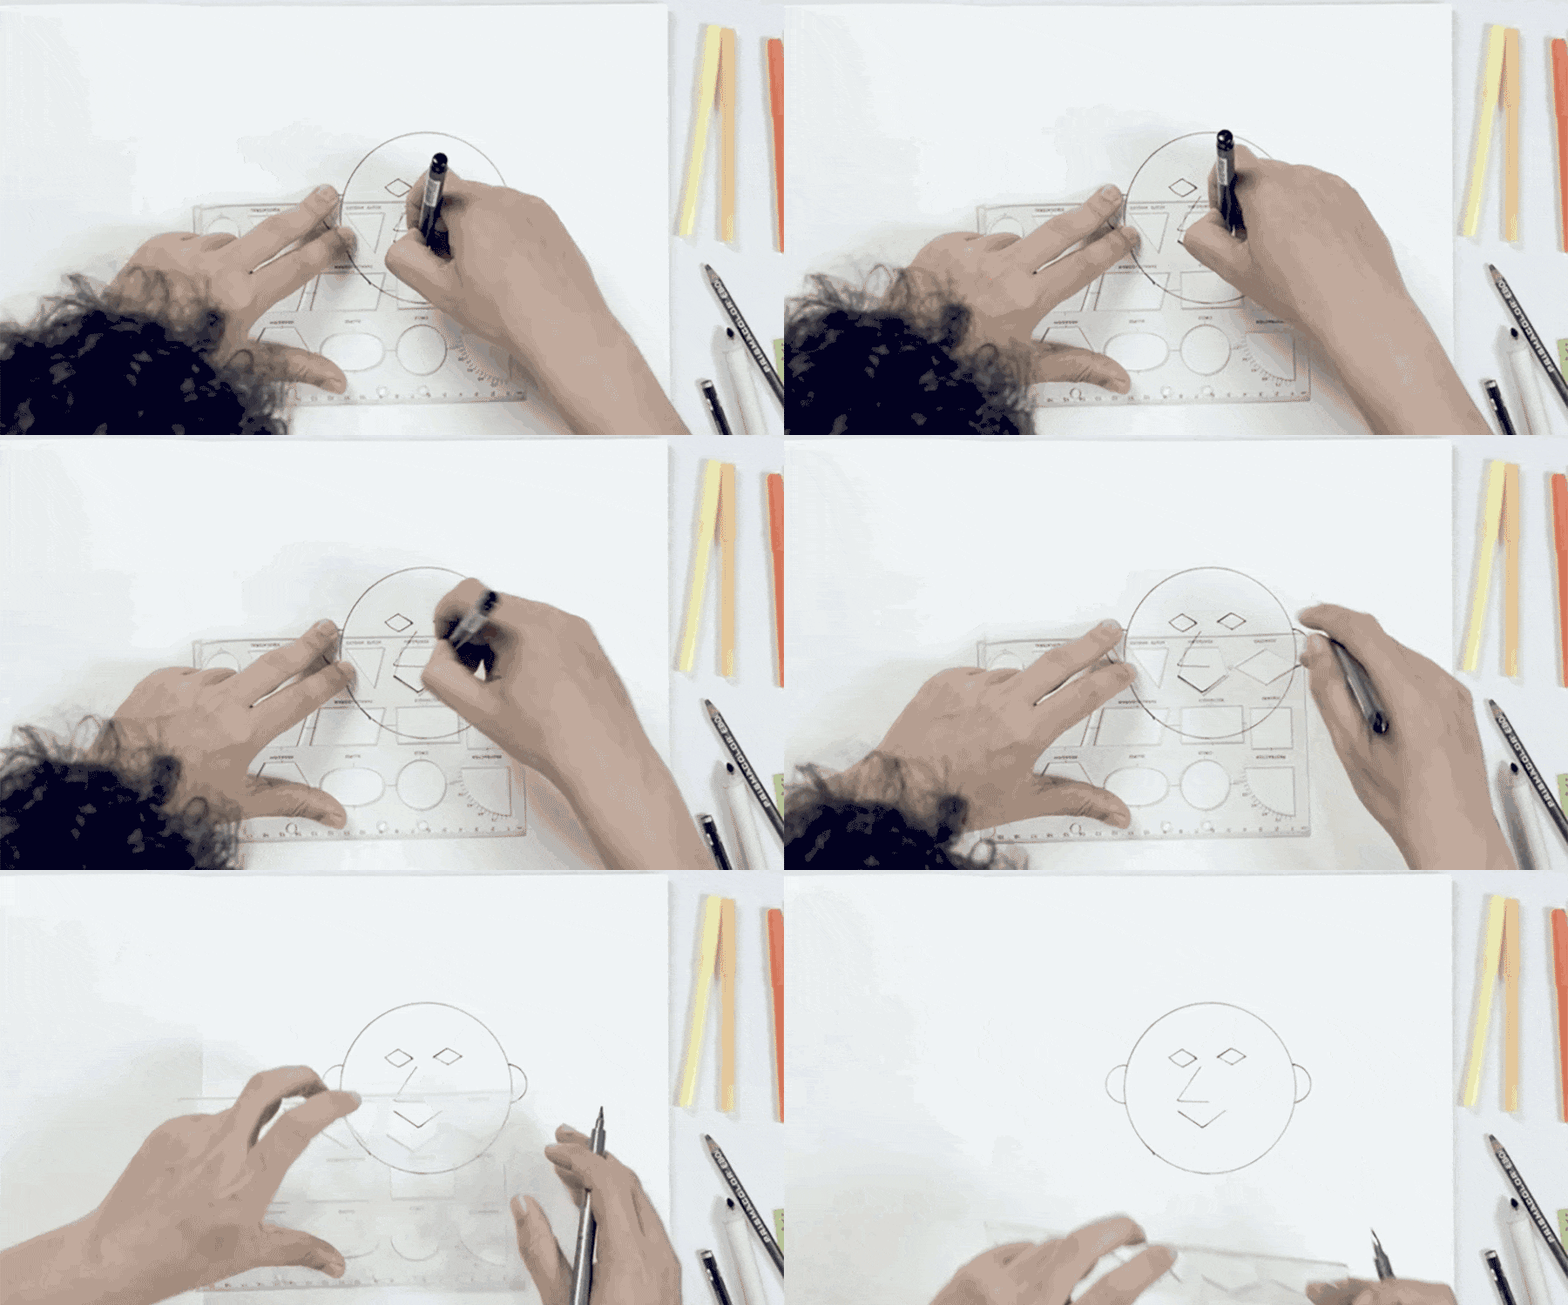
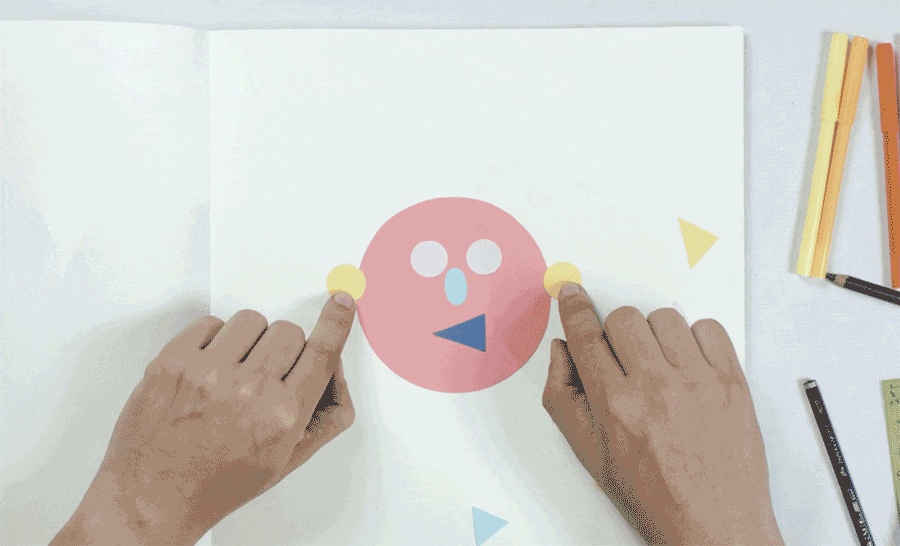
Using the shape template rulers, create different character faces. If you are at home and don’t have shape rulers, use any element that can help you to draw geometric shapes or straight lines, for example a glass to draw a circle, a box to draw a rectangle, etc. Draw every element of the character by using a tool and drawing geometric shapes.
Try different expressions, different facial features, different hairstyle and clothes. Try doing a self portrait.
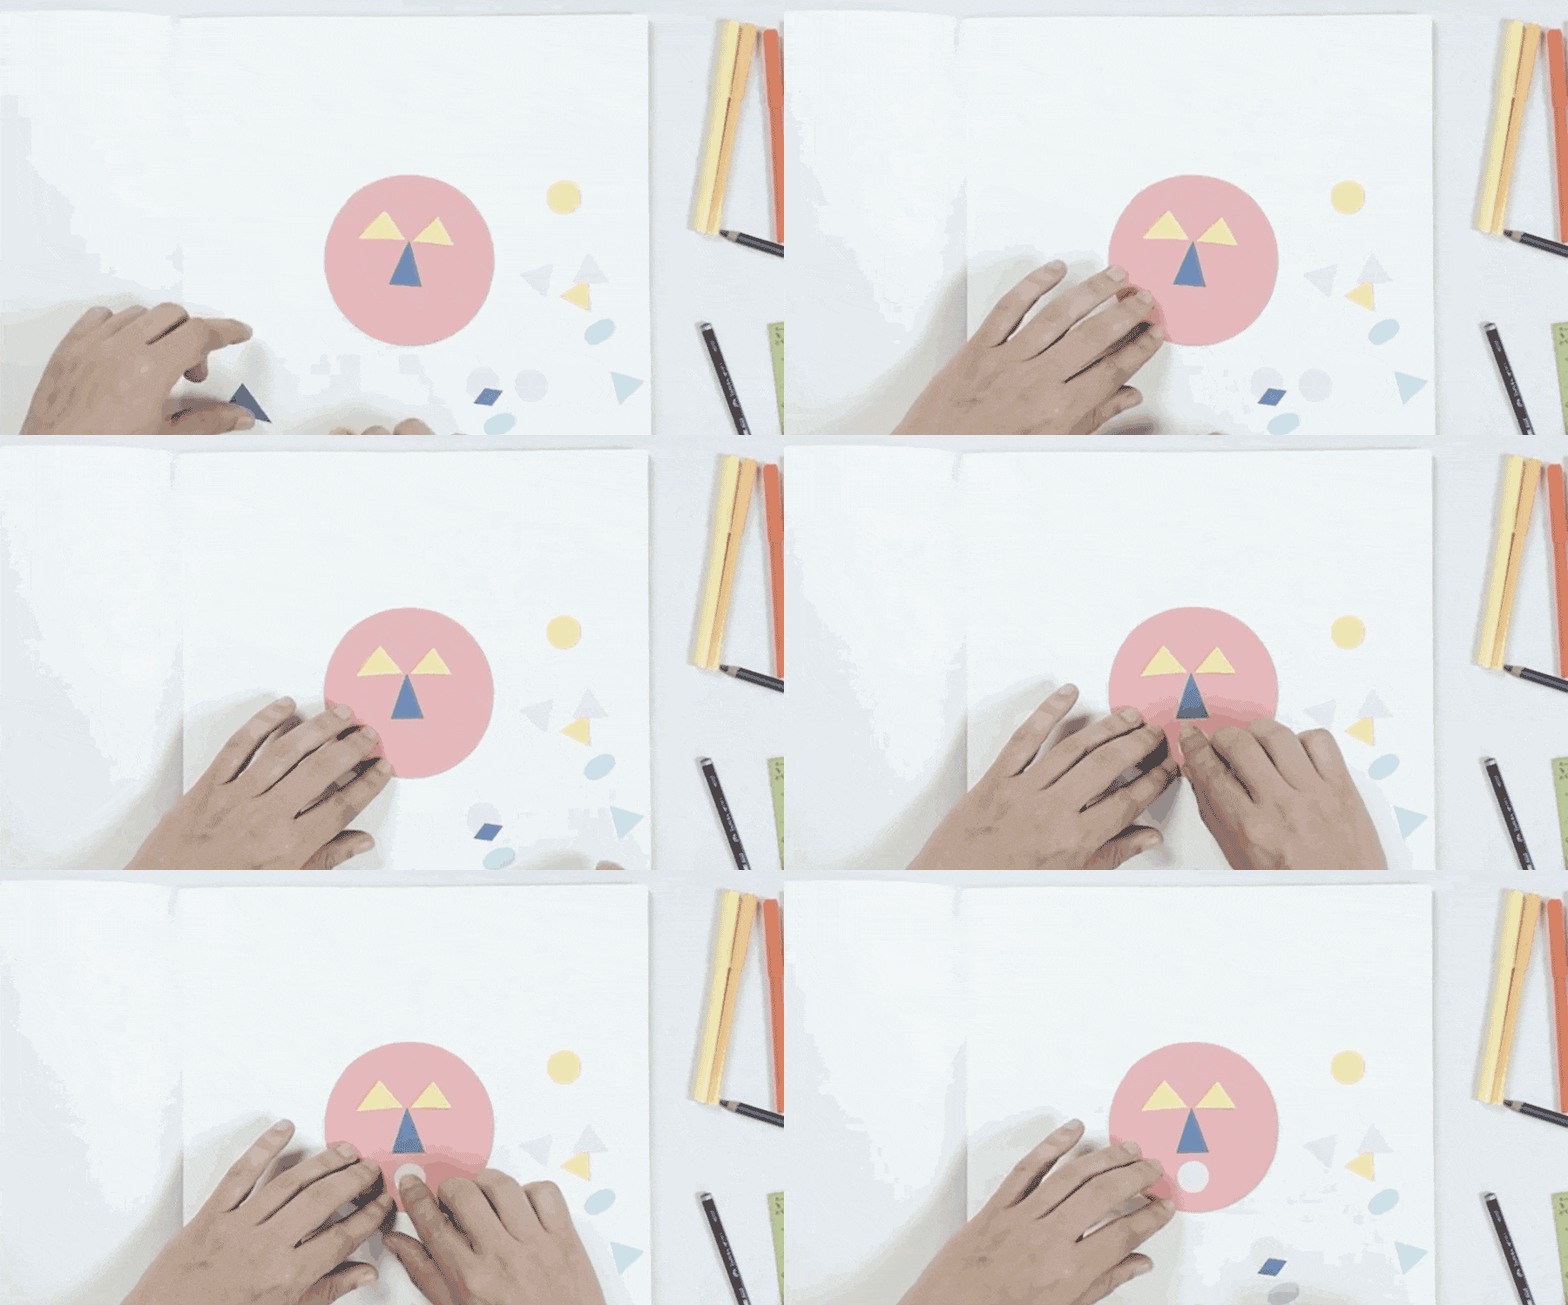
You can also try using discarded paper and cutting geometrical shapes to arrange different characters in that way.
Create different combinations to create different characters and expressions.
Exercise 05
Check out Ed Emberley’s work:
Ed Emberley Drawing Pages
Ed Emberly, Drawing Book of Faces
Now draw every letter of the alphabet using a black sharpie. Next, take a pencil or a sharpie of a different color and start drawing. Every letter of the alphabet will be your starting point for a new drawing. It can be anything, a face, animals, or objects. Use your imagination!
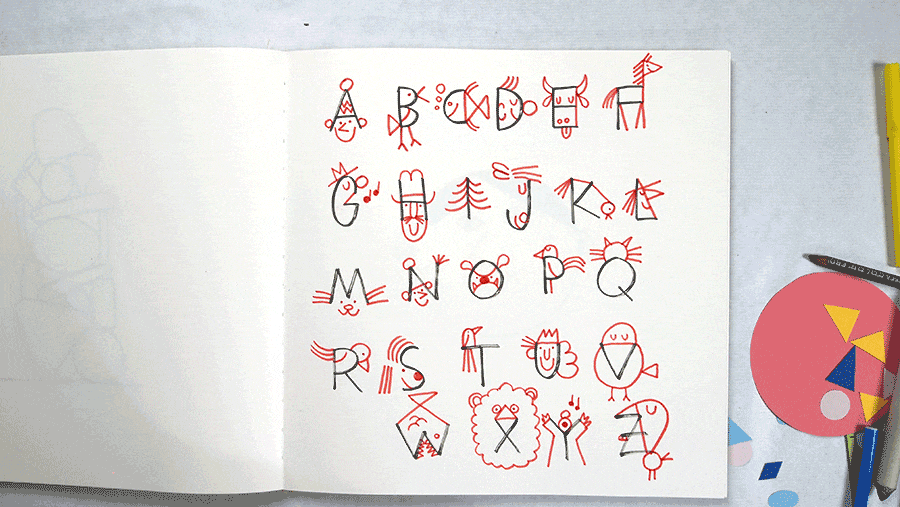
Keep Experimenting and Practicing. Draw something every time you can!
Useful Resources:
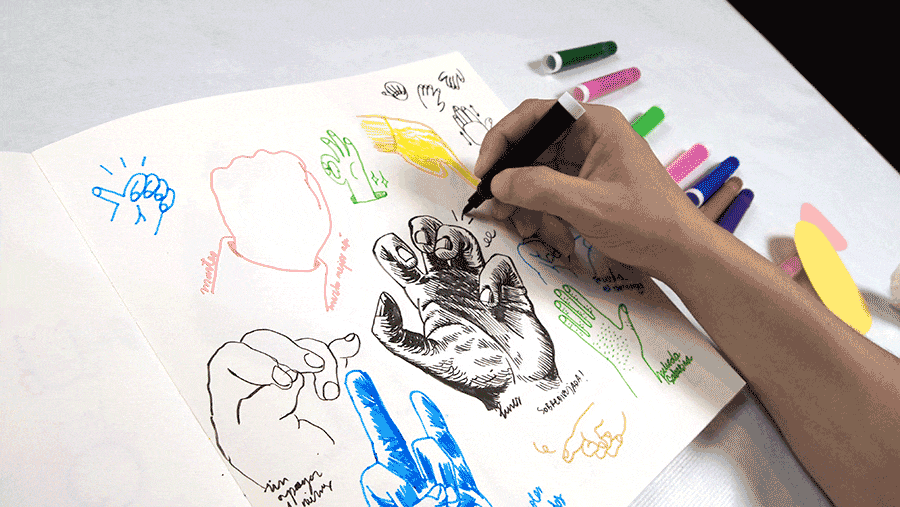
Hands:
http://justhandreference.tumblr.com/
http://black-hands.tumblr.com/
http://kitasite.net/kr/cgkoza/muscle/hand/hand.htm
People:
https://line-of-action.com/
Leave a Reply