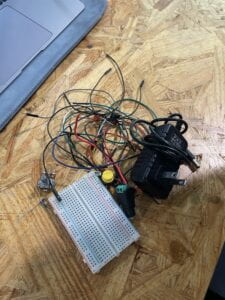
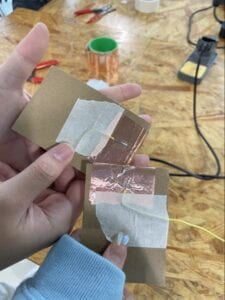
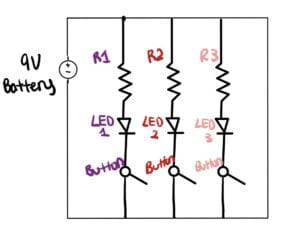
In this recitation, I successfully built and connected three different circuits together. By order, they were Circuit 1: Fade, Circuit 2: toneMelody, and Circuit 3: Speed Game. I then in Arduino, an open-source electronics platform based on easy-to-use hardware and software, ran the circuits using the sample code provided. Following the sequential order, the events happened as follows below:
Circuit 1
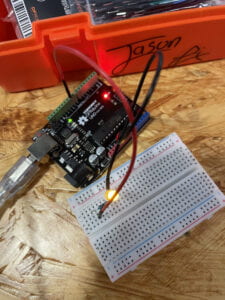
Following the visual example in Arduino, I very quickly assembled the task and lighted the LED. First, the Arduino Uno board needs to be connected to the computer via a USB-C to USB-A. Then, the jumper cables have to be wired correctly, with the goal of powering the LED. After completing this step, I tested the code around and tried to tweak the delay in the LED. Overall, this was a relatively easy but meaningful task!
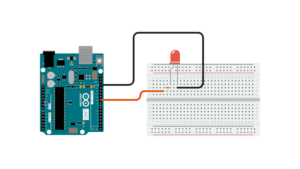
Circuit 2
Again, I followed the visual example to guide me in Arduino. Instead of the LED light now, we replaced it with a buzzer to play sound. I expected this to be easy, however, I ran into a bizarre situation. My buzzer had malfunctioned and did not sound! Upon testing another classmate’s buzzer, this theory was proven. Hearing the buzzer of the entire recitation in unison, it was hilarious yet troublesome to listen to my own tune. In this step, some mistakes and abnormalities appeared, but the code still ran and the buzzer sounded! I attempted to change the code and test if the sound would vary, but I didn’t hear much of a difference.
Circuit 3
For this task, we had to design a minigame where two players would compete by clicking a small button. The game is decided when one side clicks to the value ten first. The winner would be announced by a shining LED light and buzzer. For the code, we had to copy it through a website called Tinkercad. Again, it seemed easy enough, but some issues occurred. Through the help of Kaylee (LA), most of my flawed wiring work was fixed. She even explained the concepts in depth to help me understand the process. I first verified the code on Arduino program, and then uploaded the code to run. Finally, after trial and error, we were able to play the game together. In the first round, I had tactically beat her. However, I lost on the second round after I got cocky. In the end, there was not enough time to play the four-player speed game, so this part was not recorded. Overall, this recitation was entertaining and a fantastic learning experience. I learned a lot about Arduino code, and also the trivial troubles that might affect the whole process!
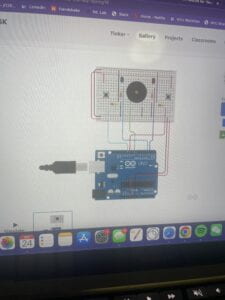
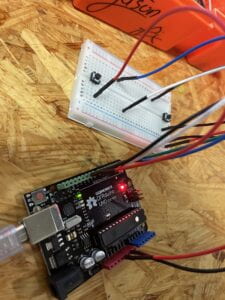
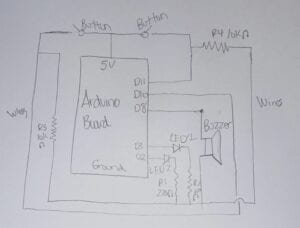
Schematic for Circuit 3
Question 1:
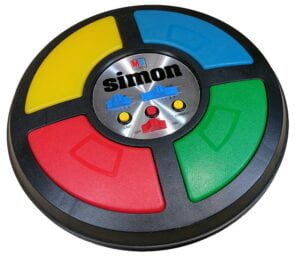
Another creative button that can be added is simply another set of mini buttons. The primary objective of this game was to click the fastest, however, the rules can be altered here. In the first scenario, players could only click with one finger as there’s only so much space. With the addition of two or even more buttons, the efficiency and hand-eye coordination of players would be challenged. Also, the code could be reprogrammed to allow the LED lights to blink in different patterns. Instead of racing to click, players would now play a different game similar to the Simon device. By switching the combinations and play styles, many more layers and ideas could be created. In Tom Igoe and Dan O’ Sullivan’s book, Physical Computing, they said a memorable line: “If you are attempting something very specific and unusual, there will come a time when it’s easier to do it yourself than to find, cobble together, and then work around a bunch of mix-and-match prepared solutions. A combination of working at the highest level, knowing what’s available at lower levels, and knowing when to switch up or down, will yield the best results” (XXIV). This quote brilliantly sums up the point of the limitless interactive creations that can be created with mere wires, mini buttons, a buzzer, and LED lights.
The skill floor is very low, and almost anyone can learn with a little knowledge of how parts work. In contrast, the skill ceiling is very high as various individuals have their own unique ideas. As these games are designed, the difficulty and interactiveness progressively develops. Another quote is, “This description tells you nothing about the technologies that make it work, but it gives you enough description to start to plan how to make it a reality” (Tom & Dan, XXII). Overall, the main takeaway is that little implements and changes to the original game can make a drastic turn. By adding another creative button like an additional LED light, mini- button, or buzzer, the game changes.
Question 2:
In this example, the 10 kOhm resistor served as a pull-down resistor. In other words, the 10 kOhm resistor connects unused digital input pins to ground when the switch is activated. This assists in maintaining and keeping the pins from floating (disconnecting) and overall smoothes the entire process. This resistor can be seen as a traffic guard, ensuring the necessary movements are proceeded and holding down the other side.

Question 3:
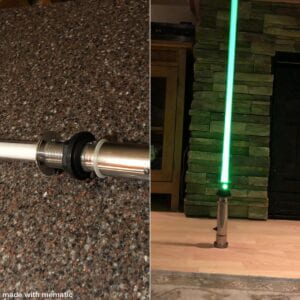
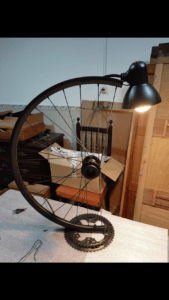
In the book,Getting Started With Arduino, chapter 2 covers a significant concept that helps introduce how innovations are started. It covers the main ideas of prototyping, tinkering, & patching. The author states, “We believe that it is essential to play with technology, exploring different possibilities directly on hardware and software— sometimes without a very defined goal” (Banzi, Massimo, & Michael Shiloh, 6). They recommend that aspiring creators mess around and tweak toys/junk to learn more. Browsing the internet, I stumbled across a website filled with inventions using old objects. Nearly all of the examples are interesting, creative, and/or just over the top funny. I have picked out two that I think demonstrates the Arduino Way. Both of them have spinned a useless object, into something interactive and valuable. The first example depicts a half broken bike wheel combined with a desk light. By itself, the bike wheel cannot be used and is trash. However, it got refined into an antique piece that projects a ray of light on the table. The second piece is even more impressive, as the creator managed to create a working lightsaber. Using an old pipe and some modern technology, a fully-functioning lightsaber had come to life. These all follow the concepts of tinkering, prototyping, and patching. From scratch, these separate creators were able to innovate and design genius products just by combining old objects.
Cite: McFadden, Christopher. “13 Cool Ways People Reuse Old Tech Stuff.” Interesting Engineering, Interesting Engineering, 25 Feb. 2020, https://interestingengineering.com/science/13-cool-ways-people-reuse-old-tech-stuff.
