All-Around the Corner – Jason Li – Professor Gottfried
Partner: Calvin Lin
CONCEPTION AND DESIGN:
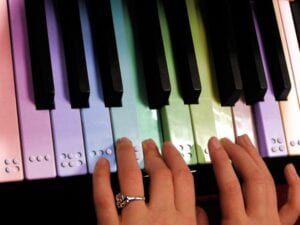
Originally, this concept was not meant for our final project. We had planned to build a ‘magic piano’ with keyboards that triggered floating bars on the Processing screen. We spent a short amount of time on this project, before scrapping it altogether. We felt that this magic keyboard, while aesthetically pleasing, did not bend the conventions of what already has been created. Therefore, we switched our focus to something more cute & relevant — a Christmas photo booth.
As this is the month of December, we wanted to do something Christmas-themed. In our project, every little detail revolved around the holiday spirit and contributed to the theme of Christmas. Our project title emphasized the closeness of the actual date, & how our project looked figuratively. We spinned (like in the potentiometer) the phrase ‘Christmas is just around the Corner’.
Our project has several tasks that connect together into one aspect — Christmas. In our project, we envisioned a ‘self-automated’ Christmas-themed photobooth that users could operate by themselves ( more details will be shared later in the blog). We thought about making the fabrication aspect very intricate & special, as it coats another cute aesthetic layer onto the project. Then, they would follow a Christmas list that tells them the guidelines that they need to follow. This allows users to experience the journey, similar to opening a present. Upon users performing several tasks in a roll, it would result in the whole Christmas device lighting up Disney style.
During the user testing session, everyone was quite amazed at the fabrication aspect. People asked how everything was constructed and took lots of pictures! Furthermore, they moved around presents and observed the beautiful 3-D display in the glass case. Also, the Processing seemed to work well — other than one significant problem. Before our final presentation, users did not have a Christmas list on-site on view instructions. Therefore, we observed many of the users to frequently confused about what to do, or which corresponding steps to take. We patched this by making an instruction list, which showed a positive impact. It became easier for users to commit and follow the instructions, eventually leading them to success. Also, another small issue was in Coding. The code was extremely slow, as it combined every single element into one computer. Professor Margeret helped us modify the code (i.e. adding a delay function on Arduino), which significantly increased the smoothness of the project.

Overall, user testing was without a doubt helpful to us in polishing our final piece. The in-person feedback was instant & reminded us that creators know everything behind the design, but users often don’t. It is our purpose to make sure that this is reduced as little as possible, so users play the device smoothly. This was our concept + design, everything was pieced together step by step.
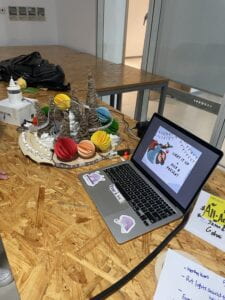
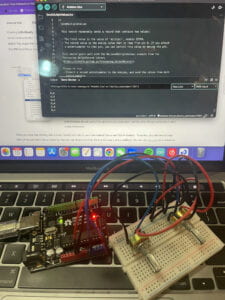
(Original Piano Prototype)
FABRICATION AND PRODUCTION:
Here, I will explain in detail every single process of fabrication & production that went into this project. My partner and I spent over tens of hours on this project, with a large majority of it fabricating the design itself. Below, I will explain in-depth how each item was created & its intended purpose. I will go in sequential order, with what we first started to make, with how it combined all together to make an aesthetically pleasing display.
Christmas Tree:
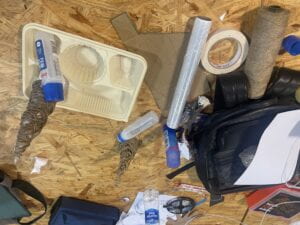
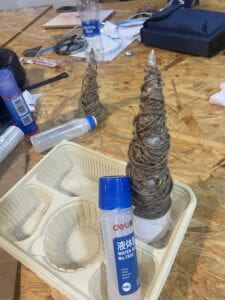
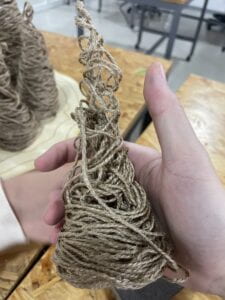
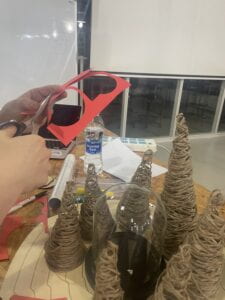
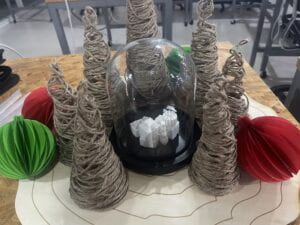
First, we made Christmas trees as we expected them to take up a large majority of the platform. This inspiration came from a creative Youtube video. Following this, my partner and I began to sculpt our first final pieces together. Using wood-fibered ropes gathered from the fabrication lab, we tied + glued this to pre-made coned paper. Then, we tied and formed the Christmas tree’s shape from the base to the tip. This allowed for better foundation & stableness. After the shape was adjusted, we took this into the fabrication lab, and used what I discovered the ‘heater gun’ to quickly dry it. Unwrapping it carefully, we now had our first wood-fibered Christmas tree! This process would be repeated, with different sizes of coned paper for different sizes of the actual tree. Altogether, this took a couple of precious hours. Below, I will show some examples of this in document. 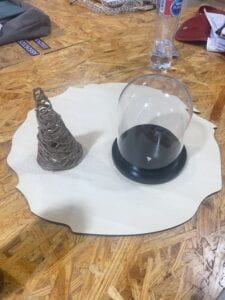
 .
. 
Platform:
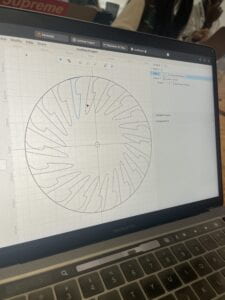
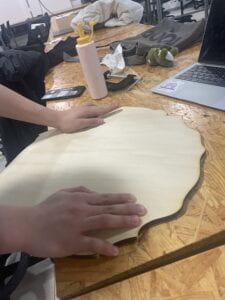
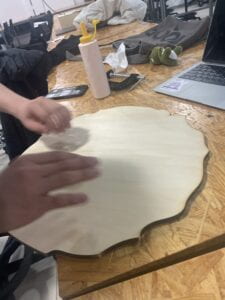
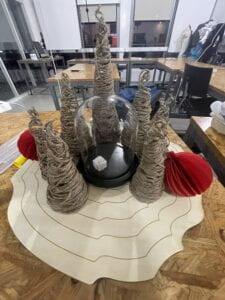
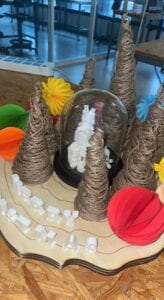
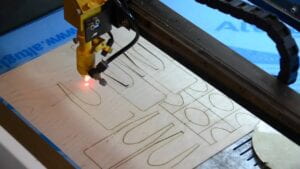
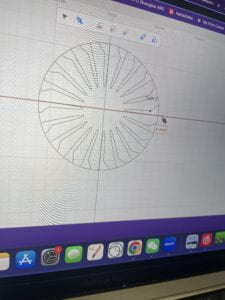
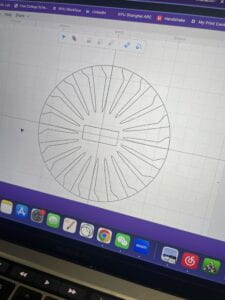
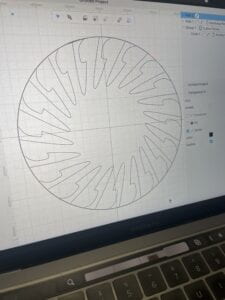
Secondly, we wanted to make a wood-like platform to complete the ‘forest’ natural look. To create the wood ridges, a simple circular platform could not suffice. On cuttle.xyz, this was extremely difficult to do. Therefore, with the help of a learning assistant (Evelyn), she used Photoshop to help me create this design. In the end, we laser-cutted three separate layers of wood. Along with a ‘snowglobe’ found, the platform would combine with the trees to make a simple layout. Below, this is what we had at this point.
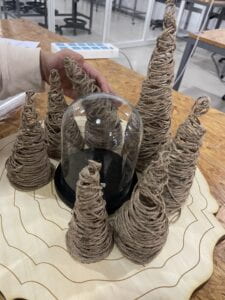
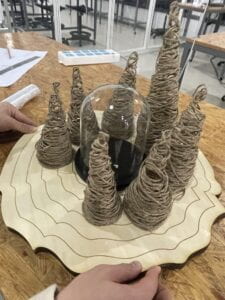
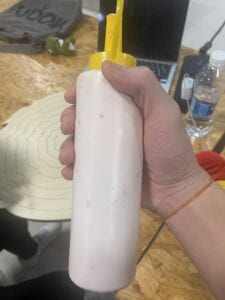
To attach the platform together, we used wood glue and carefully closed the gap. This took trial and error, as the glue sometimes did not stick all the way. Now, we had a platform that looked clean yet Christmas-themed!
Ornaments:
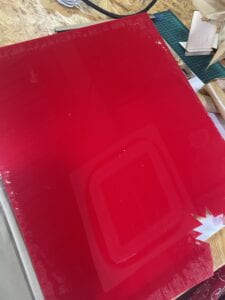
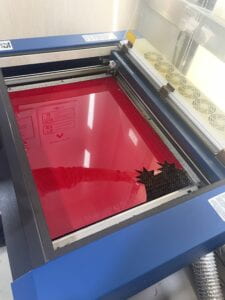
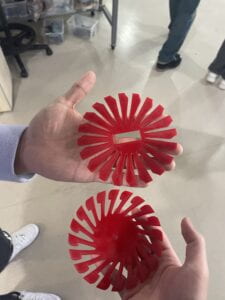
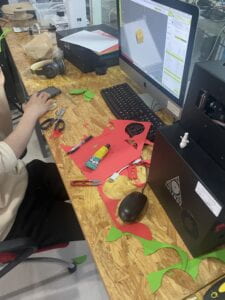
Next, we began perhaps one of the most time-consuming tasks in this project. This took several hours to make, staying overnight at the Academic Building to finish. While it took a strenuous amount of time, we were both very satisfied with the final result. First, we laser-cut the template for the ornament, a half wooded-plate. Buying a color paper online, we traced each part hand by hand. Then, we began cutting and cutting. To make both large ornament balls & small ornament balls, this process had to be endlessly repeated. In the end, we had 6 large ornaments & 4 small ornaments. Each ornament contained 21 pieces, combined together to be 210 individual pieces of paper crafted ourselves. To achieve the ornament look, we glued the middle part of the individual cut-out pieces together. Then, we glued the top + bottom of the ornaments together, leaving the middle open. By doing the above steps, the ornament pattern was successfully accomplished.
3-D Printing:
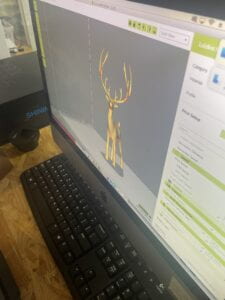
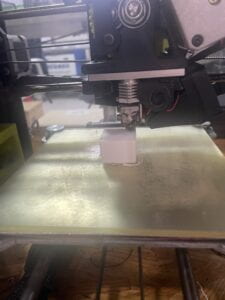
Along with the ornaments, we also wanted to the maximum our work efficiency. As we stayed overnight at the Academic Building, the 3-D printers were free to use. Therefore, we came up with several useful designs, & implemented them on the printer. Waiting for the objects on the 3-D printer, we simultaneously crafted the ornaments. As I had previous knowledge of Tinkercad, I took over this part quite easily. I decided to use Tinkercad as our printing interface, as it was easy to use with many pre-built models. Along the project way, I learned more and more about 3-D printing itself. For example, I needed to know the correct measurements, along with its print density, generation of support, etc. At the end, I even figured out how to use the Ultimaker, which looked menacing before.
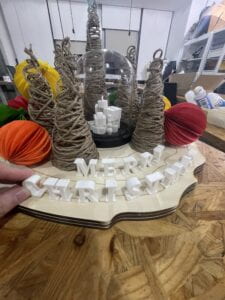
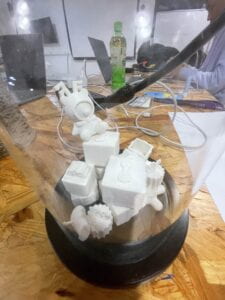
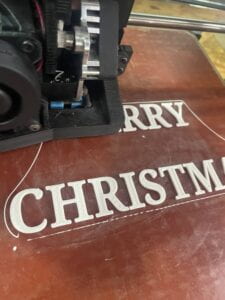
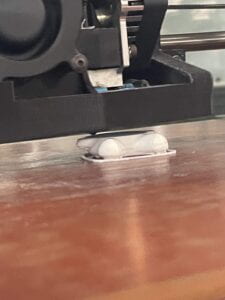
To start with, we wanted to print all Christmas-themed gifts. Our first present was to be a Christmas reindeer, which we attempted to print. However, we realized that the horns of it were too unstable, & the machine had major difficulties printing this. Therefore, we scrapped this and decided to go for more reliable options. After a couple of hours, we had plenty of pure-white designs! This is arranged in small sizes/variety of presents, snowman, teddy bear, a full ‘Merry Christmas’ sentence, & a Christmas tree! Our project is filled with self-designed paper, along with 3-D printing. Piecing them together overnight, we had quite a display to show. Though, we progressively added 3-D designs throughout the entire project. In the other sections, I will indicate when another object became 3-D printed. Below, I will show the progress we had on that night.
Neo-Pixel Strips:
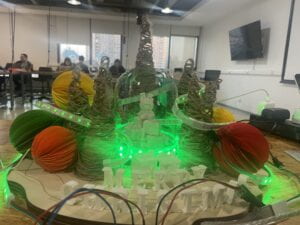
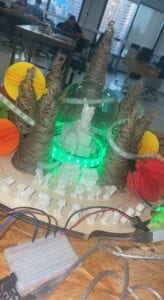
For the main part, our fabrication has been completed. Therefore, we could now finally begin to incorporate the usage of Arduino & Processing. First, we started with the Arduino aspect. Of course, a traditional Christmas look cannot be complete without the implementation of aesthetic lights. Therefore, we Neo-Pixel strips & proceeded to light everything up. Thinking of which color to enter, we debated on several Christmas-themed shades (green, red, etc.). However, as our 3-D printed shapes were white, we decided to make the board more ‘monochromatic’ in this aspect.
Therefore, we carefully wrapped the Neo-Pixel strips around our project, resembling a Christmas roller-coaster’. This symbolizes our project title of ‘All-Around the Corner’, as the lights projected everywhere across the platform. The code for this was rather straightforward, as we’ve worked with Neo-Pixel lights for our midterm. Therefore, entering such values wasn’t so difficult. It was frustrating that times when the Neo-Pixel strips did not light up all the way or lagged. Also, we connected each individual strip to the power source rather than linking everything together to smooth the link. Nonetheless, here is a peak of what it looked like with different colors & our chosen variation!

Midpoint–
This will serve as a quick summary of what was done up to this point. For the most part, we have everything on the board mostly finished. We felt the fabrication looked pretty amazing & extremely polished. We wanted to add snow, which I got permission to take some from the 3F cute Christmas tree. Also, we got some cotton balls from our friend Steve’s old midterm project. However, we decided to not use this in the end, as it covered too much of our hard-working display. The Neo-Pixel strips are also running in the background.
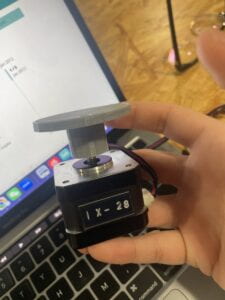
Now, we just needed to focus on the interaction — via Processing & other user-testing elements. We wanted to build a potentiometer, which spun to light up the Christmas board & start the testing process. A motor, with a cute starred Christmas tree on top, was thought of during this process as a quick indication to users that the potentiometer was properly working. Then, users would be able to grab a letter from one of the presents. They would press the corresponding button on the computer keyboard which activated the camera + filter. Finally, another screen on Processing would appear prompting users to yell ‘Merry Christmas’. Completing this step, Mariah Carrey’s ironic All I Want For Christmas is You would start playing. Taking this idea into mind, we began constructing on making this come to light.
Potentiometer + Motor:
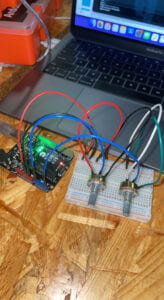
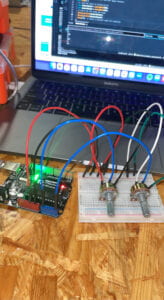
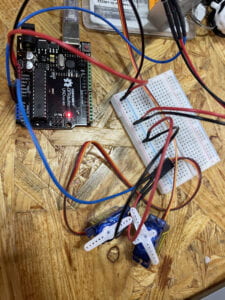
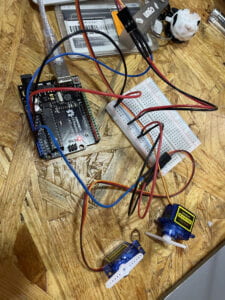
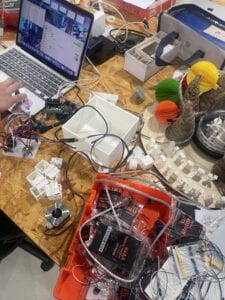
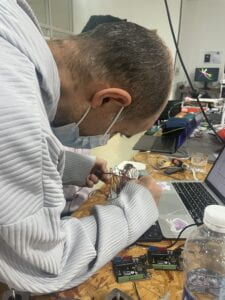
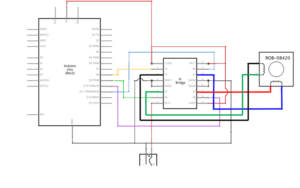
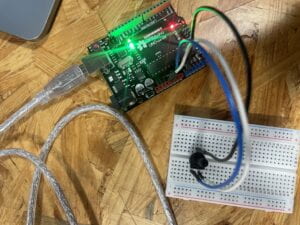
Like stated above, the purpose of the potentiometer is to notify the users that the Christmas spirit has started, but also add a ‘beginning to end’ stage to the project. For the code, we set that users would have to twist to a certain extent, for the linked-motor to properly spin. This would add an element of discovery to our project, as users could need to twist continuously to figure out the correct flow. This was linked to a stepper motor attached to a platform that spun our Christmas tree. For these, we used old codes that we learned from previous recitations and combined these two parts together. Though, this was a pretty-last minute decision. I believe that the planning could’ve been better, but I think that this sudden implementation succeeded in the end. Another frustrating part was the stepper motor always not spinning properly or even starting up at all. This was due to a variety of factors such as a combination of over-coding, loose wires, etc. Stepper motors have always been our weakness, as something always seemed to malfunction. Luckily, Professor Rudi helped us make some code adjustments!
More 3-D Printing + Letters:
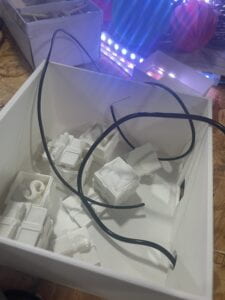
To allow users to pick a box containing letters, I once again used 3-D printing to create presents. This time, the lid was separately printed from the actual box. Also, we printed the five letters ‘NYUSH’ to represent the five filters we eventually had. During the presentation, we didn’t really explain this aspect really well. Therefore, users didn’t know what each of the letters added up to represent, which we should’ve clarified as a ‘fun fact’. Also, I printed the white 3-D boxes to fully cover the Arduino wires, breadboard, and stepper motor/potentiometer. To create the hole for the potentiometer to poke through, I drilled a small opening through the Arduino box in Fabrication Lab. This made our project more visually appealing, as there are no excess wires on display. This was a valuable lesson that we learned from our midterm project. Below, I will show all the new 3-D printed objects that we added.
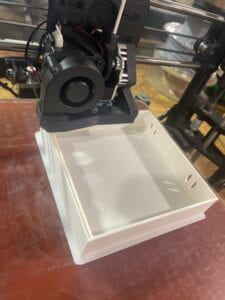
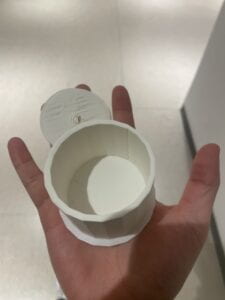
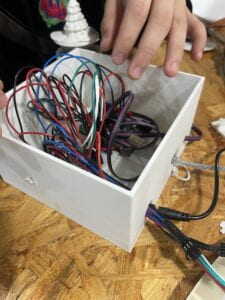
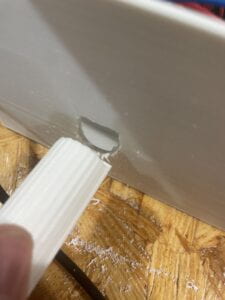
Processing:
For the Processing aspect, it was very complicated yet executed together to create wonderful commands. It took several days, with the help of multiple people (friends, LA’s, professors (you!), etc.) to finally compile everything. For this, I would like to shout out my wonderful partner Calvin for his resilience on continue to crack out new discoveries. We investigated the code together with each step along the way & talked through the interpretations.
First, we had the code take a simple selfie. When this worked, we began to add a Christmas filter onto the screen. With extensive research and work, we were able to program a selfie with multiple filter capabilities, like how we envisioned a proper photo booth to be. Then, we used amplitude to direct users to say ‘Merry Christmas’, which was in one of the example files in a previous lecture. We set the value to .2, so it wasn’t too loud or too quiet. Additionally, there are also multiple ‘if’ statements stating that if a certain letter was pressed (true), the screen would prompt the start. Lastly, there is the Christmas music, which we quickly were able to implement. All these different elements were extremely hard to program for beginners, but once fully learned, we were able to easily replicate the rest. Some examples of this would be the key pressed, filters, & border reset. Below, I will include all of the code in the annex. At this point, we’ve completed all steps of our project!
Conclusion:
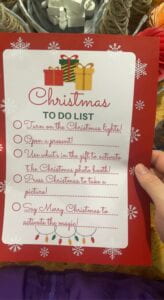
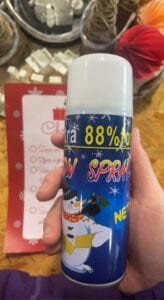
This project was meant to bring Christmas joy to everyone & allow people to relieve themselves before the finals. The name, All-Around the Corner, suggested that the holidays/finals was very very soon. Therefore, why not celebrate & have fun for the festivals? Ultimately, I believe that we did successfully achieve our goal. The last piece we added was a Christmas List, tying everything together. Also, we sprayed non-harmful snow to fully embrace the Christmas experience. This allowed the users to successfully discover their joys by following the manual if needed, & re-experiencing the excitement of a Christmas unboxing.
During the final presentation, everyone was awed and simply enjoyed what was there. It was very peaceful, cheerful, & merry. A couple of months ago, I stated my definition of interaction to be, “The sequential process of an actor, man or machine, delivering a primary signal. Then, the other actor after carefully listening — and thinking, responds to the original subject in some shape/form”. Evaluating our current final project in this rubric, I think that it successfully represents this cause. Every piece of our project was designed to be interactive: from touching the fabrication of presents, trees, and ornaments — to opening the presents, twisting the potentiometer, pressing the keyboard, choosing a filter, taking a picture, saying ‘Merry Christmas’ — to the entire project responding by lighting itself & playing Christmas music. I believed that every single aspect was designed to be explorative, fun, & simple.
We wanted our project to ‘last’ & continue to generate new results. I think that our concept of the photo-booth wrapped this idea, as endless people can come to take pictures & try our project. If we had more time, I would’ve personally asked if users wanted to receive their photos. As our code saved each photo, we could’ve given them this. Also, I would’ve wanted to use actual buttons instead of 3-D printed letters. Another implementation would’ve been to allow the snow globe to shake, using a stepper motor. Regardless, I believe we worked efficiently with the time we had available.
Throughout this project, I’ve learned to be more flexible & resourceful. Some of the elements were too hard for us to add within the provided time (inserting Arduino buttons instead of 3-D printed letters), so we simplified the idea. I think that certain aspects can be more flexible and tweaked around. If we are hard-struck on a small factor, it may impact the progress of the entire project. This is the main reason why we scratched our old piano project, as it was too hard to change its flexibility + scope. Furthermore, I learned to be more resourceful of my peers around me. Even though many of them were also working on the final project, we helped each other solve problems. For example, while I knew how to make a 3-D model, I didn’t learn how to use the machine. With the help of classmate Steve, he taught me how to operate one. Eventually, I can even use the more advanced 3-D printing machine ‘Ultimaker’.
In return, I gave this Christmas joy back by helping my other peers print. As some of them did not know how to, I taught them the same process. Professor Andy, a frequent Fabrication Lab visitor, helped me non-stop through our entire fabrication process as well. This made me realize how supportive everyone in the IMA department is, from peers, instructors, lab assistants, fellows, etc. I truly love the environment that was constantly provided, as no one was left behind! I believe our project excels because it combines interaction and takes into consideration the current state of everyone. The pandemic, online semester, & legislative days have continued to beat down people’s emotional states. Thanksgiving Break was only one day, followed directly by a legislative day. To bring light upon people’s faces again, our Christmas photo-booth project was to users simple and light-hearted.
In conclusion, we wanted our project to be memorable and festive. It would my first — and last time at the IMA floor at Century Avenue. To document this wonderful Christmas, our photo booth captures everyones’ joys and memories left here. Mariah Carey adds the cherry on top, as her hit song ‘All I Want for Christmas is You’ is ironic and immediately draws people into the holiday spirit. The final message to takeaway would be: Christmas/Finals is All-Around the Corner. Enjoy the holidays, enjoy the Academic Building, & enjoy everything that interaction lab offered this semester!
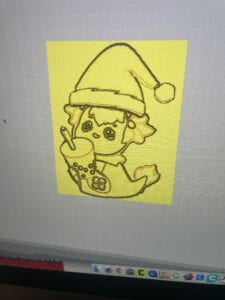
Here is a Qilin with a Christmas Hat that I designed via photoshop & wanted to 3-D print, even though it did not intact, I still want to send this as a sign of Christmas luck 🙂
Annex:
Materials Used –
- 3 Neo-Pixel Strips
- Stepper Motor
- H-bridge
- Power-Jack
- 12 VDC Power Supply
- USB Protector
- Motor Platform
- Wood Platforms
- 3D-Printing
- Glue (Wood Glue)
- Wood Ropes
- Paper
- Plastic Wrap
- Color Paper
- Wires
- Snow Globe
- Misc. (snow, cotton balls, etc.)
Arduino Code (sent to Processing):
This Arduino code combines a potentiometer, servo motor, & Neo-Pixel lights. It sends these values to Processing for the next step:
#include <FastLED.h>
#include "SerialRecord.h"
#include <Servo.h>
#include <Stepper.h>
#define NUM_LEDS 60
#define DATA_PIN 3
#define CLOCK_PIN 13
const int stepsPerRevolution = 200;
CRGB leds[NUM_LEDS];
Stepper myStepper(stepsPerRevolution, 8, 9, 10, 11);
int c = 0;
// SerialRecord reader(1);
SerialRecord writer(1);
void setup() {
Serial.begin(9600);
myStepper.setSpeed(20);
FastLED.addLeds<NEOPIXEL, DATA_PIN>(leds, NUM_LEDS); // GRB ordering is assumed
FastLED.setBrightness(50);
}
void loop() {
int sensorValue = analogRead(A0);
writer[0] = sensorValue;
writer.send();
if (writer[0] > 500) {
for (int i = 0; i < NUM_LEDS; i++) {
leds[i] = CRGB::White;
}
FastLED.show();
myStepper.step(stepsPerRevolution);
} else {
for (int i = 0; i < NUM_LEDS; i++) {
leds[i] = CRGB::Black;
}
FastLED.show();
}
delay(20);
}
Processing Code (Received from Arduino):
The detailed explanation has been already discussed above! With the help of professors + fellows, we used some boolean functions to strengthen our statements. This code allows the process to be repeated continuously, which is what we aimed for.
Code:
import processing.video.*;
import processing.sound.*;
import processing.serial.*;
import osteele.processing.SerialRecord.*;
//Value For File:
int x = 1;
int y = 1;
int state = 1;
//Statement Of Completion Of Task:
boolean keyPressed = false;
//Christmas Border Filter:
PImage Border1;
PImage Border2;
PImage Border3;
PImage Border4;
PImage Border5;
//Christmas Frame For Picture Taken:
PImage Page;
//Image Taken From Task 2:
PImage TakenPic;
PImage Introduction;
PImage End;
String[] cameras = Capture.list();
Capture cam;
SoundFile file;
AudioIn microphone;
Amplitude analysis;
Serial serialPort;
SerialRecord sender;
SerialRecord receiver;
void setup() {
size(960, 720);
//Camera Setup:
cam = new Capture(this, "pipeline:avfvideosrc");
cam.start();
//Music File Setup:
file = new SoundFile(this, "AllIWantForChristmasIsYou.mp3");
//Amplitude Setup:
microphone = new AudioIn(this, 0);
microphone.start();
analysis = new Amplitude(this);
analysis.input(microphone);
//Send + Receive Setup:
String serialPortName = SerialUtils.findArduinoPort();
serialPort = new Serial(this, serialPortName, 9600);
//sender = new SerialRecord(this, serialPort, 1);
receiver = new SerialRecord(this, serialPort, 1);
Border1 = loadImage("border10.png");
Border2 = loadImage("border1.png");
Border3 = loadImage("border8.png");
Border4 = loadImage("border11.png");
Border5 = loadImage("border12.png");
Page = loadImage("Page.png");
Introduction = loadImage("Introduction.png");
End = loadImage("End.png");
}
void draw() {
receiver.read();
int value = receiver.values[0];
println(value);
if (value > 500) {
//Camera On:
if (cam.available()) {
cam.read();
//Center Camera:
imageMode(CENTER);
image(cam, width/2, height/2, width, height);
if (keyPressed == false) {
//Buttons For Filter Change:
if (key == 'n') {
Border1.resize(960, 720);
imageMode(CENTER);
image(Border1, width/2, height/2);
} else if (key == 'y') {
Border2.resize(960, 720);
imageMode(CENTER);
image(Border2, width/2, height/2);
} else if (key == 'u') {
Border3.resize(960, 720);
imageMode(CENTER);
image(Border3, width/2, height/2);
} else if (key == 's') {
Border4.resize(960, 720);
imageMode(CENTER);
image(Border4, width/2, height/2);
} else if (key == 'h') {
Border5.resize(960, 720);
imageMode(CENTER);
image(Border5, width/2, height/2);
}
}
if (keyPressed == true) {
//Picture Frame For Picture Taken:
Page.resize(960, 720);
imageMode(CENTER);
image(Page, width/2, height/2);
delay(500);
TakenPic.resize(384, 288);
imageMode(CENTER);
image(TakenPic, 300, 255);
state = 2;
if (state == 2) {
////Amplitude Analysis;
float volume = analysis.analyze();
if (volume > .2) {
file.stop();
file.play();
state = state + 1;
delay(500);
keyPressed = false;
}
if (state >= 3) {
state = state - 2;
file.stop();
file.play();
}
}
}
}
} else {
End.resize(960, 720);
imageMode(CENTER);
image(End, width/2, height/2);
file.stop();
}
}
void keyPressed() {
if (key == ' ') {
keyPressed = true;
saveFrame("data/MerryChristmas" + x + ".jpg");
x = x + 1;
TakenPic = loadImage("MerryChristmas" + y + ".jpg");
y = y + 1;
}
}
Final Presentation Video/Pictures (thanks Wendy for testing):
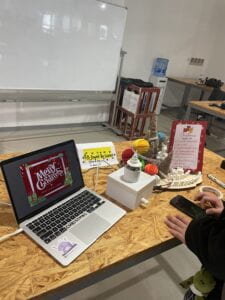
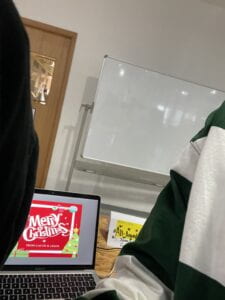
Final Pictures:
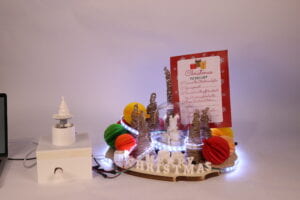
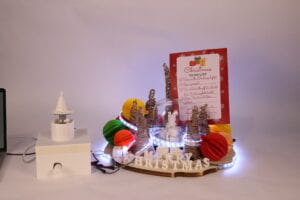


 .
. 