Penta–Musical Lamp – Jason Li – Professor Gottfried
Context & Significance
– In the midterm proposal, we had already begun developing an innovative idea. We envisioned a “modern Disco ball that spins and generates shining lights, and potentially programmable to users through the use of an interactive button-pad”. In retrospect, I believe that we achieved this objective! In the brainstorming stage, we thought about the very basic concept of a simple aesthetic lamp that emitted various colors when activated via a button. Though, this was quickly disregarded as it failed to truly serve the intended definition of interaction.
Eventually, the idea of an interactive disco ball suddenly shined into the minds of me and my wonderful partner (Calvin). He pictured it through a vibrant clubbing lens, whereas I thought of a disco skating rink. Fusing our raw ideas together, we strived to create a project that would fit the criteria of interactivity & look visually stunning! We wanted a lamp that could change color/sound with clicks on a designed buttonpad. The sound would be similar to a piano, & play different notes depending on the button clicked. Moreover, the LED would ideally correspond with the note and light up when prompted.
In the past documentation, I stated that ‘My definition of interaction is the sequential process of an actor, man or machine, delivering a primary signal. Then, the other actor after carefully listening — and thinking, responds to the original subject in some shape/form”. Under this guideline, it would seem that our Penta-Musical lamp successfully passes this definition. As the user testing would deliver one signal, the lamp itself would listen, & cleverly respond by a correlating form of sound/color. As the user is able to test various buttons and create their own desired melodies, the possibility of this type of interaction becomes quite endless!
To be honest, this sort of concept is definitely not anything revolutionary. This kind of mechanism can be seen in basic kid toys & gadgets. However, we sought to redefine it using the element of cardboard. Cardboard can be perceived as very basic & too hard to manipulate. However, it is this very aspect that magnifies its beauty. Through its rigid pentagon shape, it projected a type of imagery that no other material could manage. Our intended audience was of course everyone! This inclusivity extends to kids, teenagers, adults, elders, music lovers, gamers, bored individuals, and/or animals. From creating a rehearsed musical piece or solely for entertainment, our Penta-musical lamp has the capability to cover it all.


Conception & Design
– Ironically, this section directly carries on my personal thoughts from the last part. As proposed in the midterm brainstorm, our goal for the Penta-Musical lamp was always the visual art, NIME (New Interfaces for Musical Expression), & hands-on (to play, for fun) aspect. Therefore, our design had to be revolved around this logical concept. Cardboard was really the only material that was easy to access and use. It is scattered all over the 8th floor and Academic Building! Not only is it cheap, but very flexible. It can be cut, folded, and/or reworked. Otherwise, resorting to other materials such as metal/wood would be extremely tedious & near-impossible for us currently.
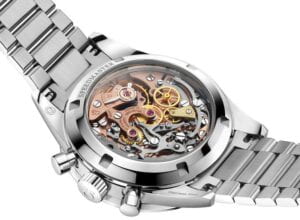
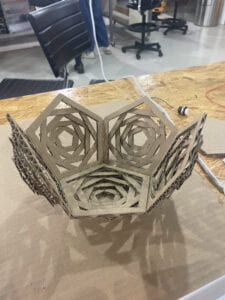
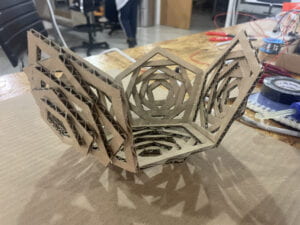
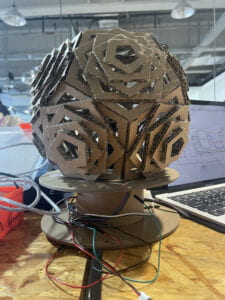
We decided to try something new to twist up & reform the cardboard stereotype of standard flat surfaces and shapes (rectangles, circles, squares, etc.). We judged cardboard candidates very carefully and only selected the most talented cardboards! By using a distinct pentagon shape & stacking it on top of each other, it subtly creates a matryoshka-doll effect. Also, it allows the users to directly see inside the lamp, which displays its work and intricacy. This can be compared to mechanical watches, as their glass display (aka exhibition case) allows wearers to see its beautiful work & project a feeling of awe. Overall, we wanted a visual piece that isn’t so hidden! Though, the wires would have to be hidden due to potential messes (explained later).

Fabrication & Production
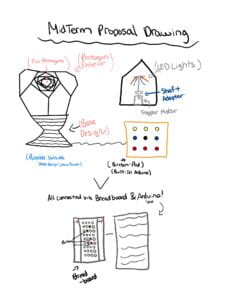
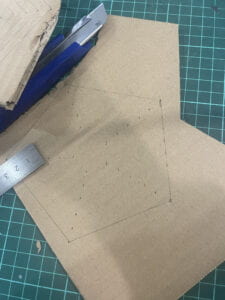
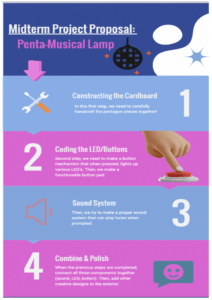
– Using this very very rough draft from the midterm proposal, this was our original idea. First, to even have a working lamp, the structure itself had to be constructed. Though, this would surprisingly prove to be the most time-taking part. In order to perfect the visually appealing look, we desperately treated each pentagon piece with tender care. We had to manually cut each piece with precision and sharp intention. We downloaded a pentagon outline online, & began crafting our midterm!
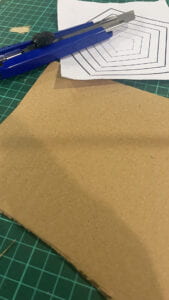
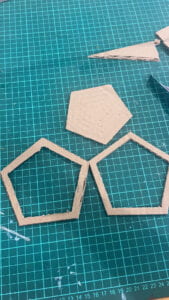
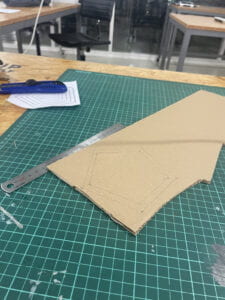
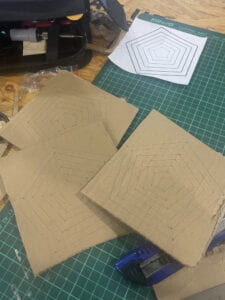
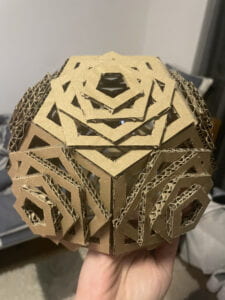
-After a couple of long hours, the piece was finally intact. The Penta-Musical Lamp now contained nearly 55 total pentagons. They ranged from small to large, with five pentagons combined into one. Using hot glue, the structure was elegantly put together with minimum flaws. At the end of this session, we also spent a few minutes peeling hot glue off of the pentagon. We were proud of ourselves of the design, but we knew that there was still a long-way to go. Below, we tested how light would reflect off of the lamp. As we didn’t have LED lights yet, we used the flashlight on our Iphones as an alternative source. When the lights were turned off, it created a glimpse into the future of our project! It was very mesmerizing and pretty.
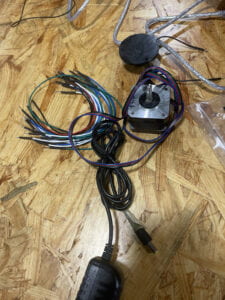
– As the main structure of our project was done, we moved on to the next vital part – coding/tool assembling. Borrowing a shaft adaptor and stepper motor, we began curiously playing/experimenting using the different concepts taught in class. We wanted it to turn continuously and not in a dull 180 motion. Therefore, we tried and tinkered with the coding for many attempts. This paid off and eventually, the motor spun to our favor. Here, I would say a frustrating scenario is the different items often failing to respond. Many times, the Arduino program would suddenly stop working. This was due to many different factors, as we determined below:
- Fried H-Bridge
- Broken Stepper Motor
- Broken Arduino
- Coding Problems
- Over-heating components
- Disconnected wires
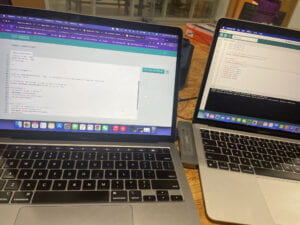
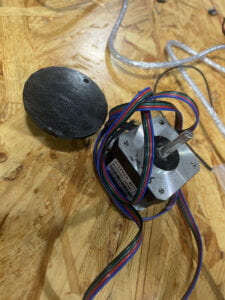
– It has now been a couple of days since we started our project. I’d call our progress smooth, & even-paced. With the stepper motor working, the last aspect was to think of a way to connect the sounds/LED lights together. Going into the IMA studio, we gathered some buttons that were larger (rather than the small four-legged buttons) & resembled arcade buttons. Then, we tested and modified different codes/wiring diagrams learned in recitation. Eventually, we reached a point where clicking the button would successfully activate the LED light! However, something seemed to be missing . . .
– To hold the Penta-Musical Lamp, we originally wanted to create a DIY platform ourselves. However, we realized that we had a cardboard crisis. This is one of the aspects that I wished we could’ve improved on. I remember that I even asked the super super nice cleaning lady and Professor Andy to escort me to the garbage pile in B2, where they threw away excess cardboard. After this, we decided to not use the cardboard collected as a personal lesson. Instead, our platform was found by complete luck in the studio. As no one wanted it, its circular design served as a perfect combination to our piece. This taught us a valuable lesson to preserve things, & we began to treat the little number of jumper wires we had with more care than ever.
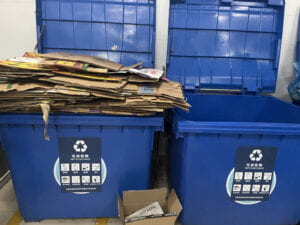
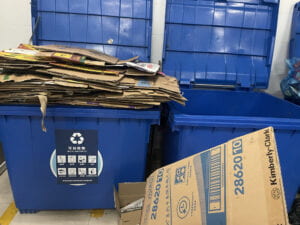
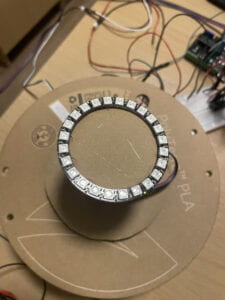
– After consulting with fellows, LA’s, & the professors, we decided to further one-up our project and develop it. Instead of the dimly lit LED lights, we replaced them with the Neo-Pixel Ring to bring out our project’s full capabilities. To ensure that the piece would be returned in its original condition, we hot-glued the Neo-Pixel onto cardboard, then that cardboard onto our platform. Now, we had a working stepper motor, shining lights, & a pre-built cardboard lamp!
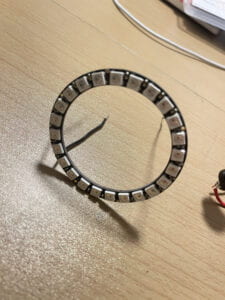
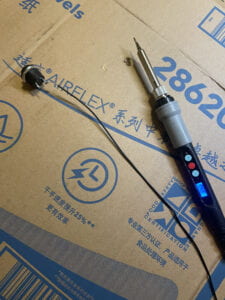
– The last component missing was the buttons. We found a neat gift box that fitted our criteria of a button-pad. Then, we created holes in the box to fit the buttons. To make sure that the wires would be easily maneuverable, I soldiered longer pieces of wires to the buttons. Sometimes, the buttons would not work. As the quantity of these was limited, I had to double-check and ensure that each of them worked undoubtedly. Also, we attached a piece of tape and wrote the musical note that we wanted each button to correlate with. Now, the final part was to combine everything together!
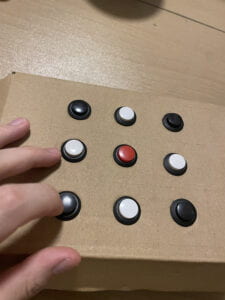
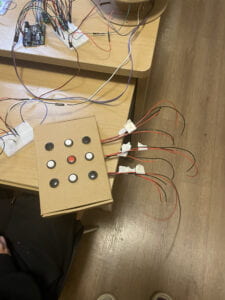
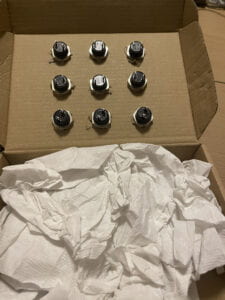
– We continued to mess with the code & add new aspects to it! For example, we added ‘pitches.h’ for the sound, ‘buttonState’ for buttons, & the Neo-Pixel library. At this stage, we were one day away from showing off our prototypes! Me and Calvin were proud of how much we’ve accomplished in a short span of time. Let’s speed fast-forward and see what happened during prototyping day!
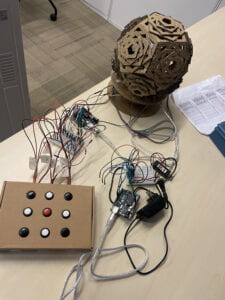
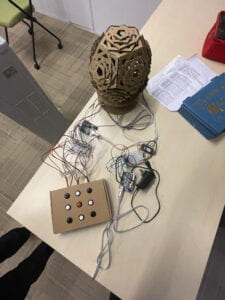
– The user-testing recitation was very interactive and fun! Everyone presented their works, finished & unfinished. I enjoyed going around each group and giving critical feedback! I feel like each of the projects had its unique objectives behind it, and all spurred with excitement. My personal favorite was the Tom & Jerry (Hit Me If You Can) project. I gave them feedback on how they can slightly change their project to improve it, and it really paid off in their final work. For our Penta-Musical Lamp, people were really interested and amazed at our creation. Also, we got significant advice/suggestions such as covering the wiring more (exhibits usually don’t show the wiring of the device). Another piece of advice was to amplify the sound, as it was too quiet. Looking at Morgan & Lesley’s workout device with speakers, this item seemed too useful to not use. We wanted to display the project in a darker room, however, this was not able to be done as too many projects were on display.
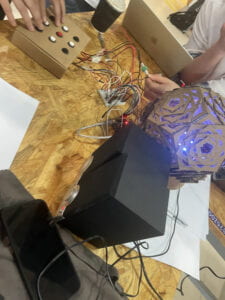
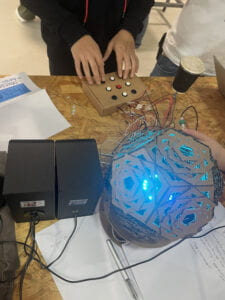
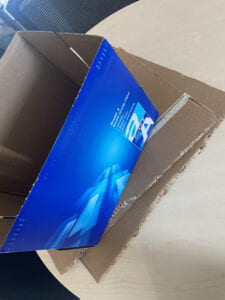
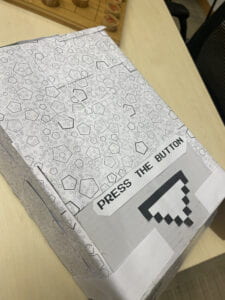
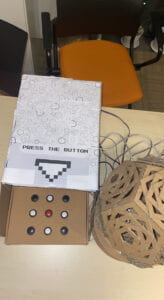
– Taking all the suggestions into consideration, we went home and continued to change our project. First, my partner borrowed a speaker from the studio. This successfully allowed the piano sounds to be projected across the room, which is more eye-catching. Second, I found a printer box that could be used to cover the wires. I then glued pentagons all around the box, along with simple instructions, to give the users a ‘gaming feel’. I specifically used the Arcade font, to provide an enhanced sense of emotion. Additionally, we modified and changed the code a bit more. I would definitely say that these suggestions were effective in cleaning up our project. With the help of Professor Gohai (yay), a lot of misunderstandings and spaghetti codes were cleared. When presentation day came, everything went smoothly! We presented our Penta-Musical Lamp in a dark room, and users were able to experience a sort of fireworks.
Conclusion
– As stated previously, our goal for this project was to design a creative musical device that allowed everyone to create tunes to their liking, integrated with a constantly spinning Neo-Pixel light source. My definition of interaction was achieved in our project (a user/machine speaks, and the other side listens & responds in some shape/form). The testers were on one side, & the buttons with the lights/music were on the opposing side. If we had more time, there will definitely be some parts that could’ve been improved. First, the sound source was loud but irregular. It wasn’t very elegant as planned, which was disrupting our original idea. Also, I would’ve created a song/songs that users could play if they followed the correct button pattern. By doing this, the concept of a ‘game device’ can truly be tested.
I have learned from this project to preserve and be resourceful. As running out of cardboard was the main issue, we should’ve carefully planned out cardboard portions better. Also, I learned to never give up and continue to strive for better things. This project seemed far-fetched at first, with many concepts being stretched. However, as my partner truly showed passion and dedication for this project, I didn’t want to scratch those ideas so easily. I assisted him through the entire project, and we both created a reasonable end result that we were satisfied with. Looking back, I would say that we accomplished our midterm proposal. I am very proud of what me and my partner has done!
Sometimes, expectations are drastically different from reality. However, as creators, we must not falter. Instead of scraping project concepts as a whole, try thinking of an alternative or a simplified version! Also, group work can sometimes be frustrating. People have different schedules, deadlines, interests, etc. Only by understanding each other as a student & person, could the intention behind the invention be truly meaningful. The invention itself is great, but the hard work behind it is even greater. Though, if anyone ever wants to bring more light into their lives, feel free to try out our Penta-Musical Lamp!
Annex
Original Poster:
Materials Used:
- Stepper motor
- L293D chip (H-bridge)
- Power Jack
- 12 VDC power supply
- USB protector
- Motor Platform
- Neo-Pixel Ring
- Wires
- 9 Buttons
- Arduino Uno
- Breadboard
- Cardboard
- Soldering Iron/Metal
- Buzzer
- Speaker
- Electrical Clamps
CODE: Neo-Pixel Lights, Buttons & Tone (Combined)
#include "pitches.h"
#include <Adafruit_NeoPixel.h>
#ifdef __AVR__
#include <avr/power.h> // Required for 16 MHz Adafruit Trinket
#endif
// Which pin on the Arduino is connected to the NeoPixels?
// On a Trinket or Gemma we suggest changing this to 1:
#define LED_PIN 6
// How many NeoPixels are attached to the Arduino?
#define LED_COUNT 24
Adafruit_NeoPixel strip(LED_COUNT, LED_PIN, NEO_GRB + NEO_KHZ800);
int buzzer = 12;
int button1 = 2; // Button 1,4,7 are connected to first LED light // Button 1 will be connected to A4 note
int button4 = 5; // Button 4 will be connected to D4 note
int button7 = 9; // Button 7 will be connected to G4 note
int button2 = 3; // Button 2,5,8 are connected to second LED light // Button 2 will be connected to B4 note
int button5 = 7; // Button 5 will be connected to E4 note
int button8 = 10; // Button 8 will be connected to ?4 note
int button3 = 4; // Button 3,6,9 are connected to third LED light // Button 2 will be connected to C4 note
int button6 = 8; // Button 6 will be connected to F4 note
int button9 = 11; // Button 9 will be connected to ?4 note
int buttonState1 = 0;
int buttonState2 = 0;
int buttonState3 = 0;
int buttonState4 = 0;
int buttonState5 = 0;
int buttonState6 = 0;
int buttonState7 = 0;
int buttonState8 = 0;
int buttonState9 = 0;
void setup() {
pinMode(button1, INPUT_PULLUP);
pinMode(button2, INPUT_PULLUP);
pinMode(button3, INPUT_PULLUP);
pinMode(button4, INPUT_PULLUP);
pinMode(button5, INPUT_PULLUP);
pinMode(button6, INPUT_PULLUP);
pinMode(button7, INPUT_PULLUP);
pinMode(button8, INPUT_PULLUP);
pinMode(button9, INPUT_PULLUP);
pinMode(buzzer, OUTPUT);
#if defined(__AVR_ATtiny85__) && (F_CPU == 16000000)
clock_prescale_set(clock_div_1);
#endif
// END of Trinket-specific code.
strip.begin(); // INITIALIZE NeoPixel strip object (REQUIRED)
strip.show(); // Turn OFF all pixels ASAP
strip.setBrightness(100); // Set BRIGHTNESS to about 1/5 (max = 255)
// initialize the serial port:*/
Serial.begin(9600);
}
void loop() {
Serial.println("Loop");
// Button 1:
buttonState1 = digitalRead(button1);
buttonState2 = digitalRead(button2);
buttonState3 = digitalRead(button3);
buttonState4 = digitalRead(button4);
buttonState5 = digitalRead(button5);
buttonState6 = digitalRead(button6);
buttonState7 = digitalRead(button7);
buttonState8 = digitalRead(button8);
buttonState9 = digitalRead(button9);
if (buttonState1 == LOW) {
tone(buzzer, 440);
strip.clear(); // Set all pixels in RAM to 0 (off)
for (int c = 0; c < strip.numPixels(); c += 1) {
strip.setPixelColor(c, strip.Color(255, 0, 0));
}
strip.show(); // Update strip with new contents
} else if (buttonState2 == LOW) {
tone(buzzer, 494);
strip.clear(); // Set all pixels in RAM to 0 (off)
for (int c = 0; c < strip.numPixels(); c += 1) {
strip.setPixelColor(c, strip.Color(0, 255, 0));
}
strip.show(); // Update strip with new contents
} else if (buttonState3 == LOW) {
tone(buzzer, 262);
strip.clear(); // Set all pixels in RAM to 0 (off)
for (int c = 0; c < strip.numPixels(); c += 1) {
strip.setPixelColor(c, strip.Color(0, 0, 255));
}
strip.show(); // Update strip with new contents
} else if (buttonState4 == LOW) {
tone(buzzer, 294);
strip.clear(); // Set all pixels in RAM to 0 (off)
for (int c = 0; c < strip.numPixels(); c += 1) {
strip.setPixelColor(c, strip.Color(255, 255, 0));
}
strip.show(); // Update strip with new contents
} else if (buttonState5 == LOW) {
tone(buzzer, 330);
strip.clear(); // Set all pixels in RAM to 0 (off)
for (int c = 0; c < strip.numPixels(); c += 1) {
strip.setPixelColor(c, strip.Color(0, 255, 255));
}
strip.show(); // Update strip with new contents
} else if (buttonState6 == LOW) {
tone(buzzer, 349);
strip.clear(); // Set all pixels in RAM to 0 (off)
for (int c = 0; c < strip.numPixels(); c += 1) {
strip.setPixelColor(c, strip.Color(255, 0, 255));
}
strip.show(); // Update strip with new contents
} else if (buttonState7 == LOW) {
tone(buzzer, 392);
strip.clear(); // Set all pixels in RAM to 0 (off)
for (int c = 0; c < strip.numPixels(); c += 1) {
strip.setPixelColor(c, strip.Color(255, 255, 255));
}
strip.show(); // Update strip with new contents
} else if (buttonState8 == LOW) {
tone(buzzer, 277);
strip.clear(); // Set all pixels in RAM to 0 (off)
for (int c = 0; c < strip.numPixels(); c += 1) {
strip.setPixelColor(c, strip.Color(100, 100, 255));
}
strip.show(); // Update strip with new contents
} else if (buttonState9 == LOW) {
tone(buzzer, 311);
strip.clear(); // Set all pixels in RAM to 0 (off)
for (int c = 0; c < strip.numPixels(); c += 1) {
strip.setPixelColor(c, strip.Color(100, 255, 100));
}
strip.show(); // Update strip with new contents
} else {
noTone(buzzer);
}
// Button 1:
buttonState1 = digitalRead(button1);
if (buttonState1 == LOW) // D1 Port
{
tone(buzzer, 440);
}
// Button 2:
buttonState2 = digitalRead(button2);
if (buttonState2 == LOW) // D2 Port
{
tone(buzzer, 494);
}
// Button 3:
buttonState3 = digitalRead(button3);
if (buttonState3 == LOW) // D3 Port
{
tone(buzzer, 262);
}
// Button 4:
buttonState4 = digitalRead(button4);
if (buttonState4 == LOW) // D4 Port
{
tone(buzzer, 294);
}
// Button 5:
buttonState5 = digitalRead(button5);
if (buttonState5 == LOW) // D5 Port
{
tone(buzzer, 330);
}
// Button 6:
buttonState6 = digitalRead(button6);
if (buttonState6 == LOW) // D6 Port
{
tone(buzzer, 349);
}
// Button 7:
buttonState7 = digitalRead(button7);
if (buttonState7 == LOW) // D7 Port
{
tone(buzzer, 392);
}
// Button 8:
buttonState8 = digitalRead(button8);
if (buttonState8 == LOW) // D8 Port
{
tone(buzzer, 277);
}
// Button 9:
buttonState9 = digitalRead(button9);
if (buttonState9 == LOW) // D9 Port
{
tone(buzzer, 311);
}
}
// Neo-Pixel Library
void colorWipe(uint32_t color, int wait) {
for (int i = 0; i < strip.numPixels(); i++) { // For each pixel in strip...
strip.setPixelColor(i, color); // Set pixel's color (in RAM)
strip.show(); // Update strip to match
delay(wait); // Pause for a moment
}
}
// Theater-marquee-style chasing lights. Pass in a color (32-bit value,
// a la strip.Color(r,g,b) as mentioned above), and a delay time (in ms)
// between frames.
void theaterChase(uint32_t color, int wait) {
for (int a = 0; a < 10; a++) { // Repeat 10 times...
for (int b = 0; b < 3; b++) { // 'b' counts from 0 to 2...
strip.clear(); // Set all pixels in RAM to 0 (off)
// 'c' counts up from 'b' to end of strip in steps of 3...
for (int c = b; c < strip.numPixels(); c += 3) {
strip.setPixelColor(c, color); // Set pixel 'c' to value 'color'
}
strip.show(); // Update strip with new contents
delay(wait); // Pause for a moment
}
}
}
// Rainbow cycle along whole strip. Pass delay time (in ms) between frames.
void rainbow(int wait) {
// Hue of first pixel runs 5 complete loops through the color wheel.
// Color wheel has a range of 65536 but it's OK if we roll over, so
// just count from 0 to 5*65536. Adding 256 to firstPixelHue each time
// means we'll make 5*65536/256 = 1280 passes through this loop:
for (long firstPixelHue = 0; firstPixelHue < 5 * 65536; firstPixelHue += 256) {
// strip.rainbow() can take a single argument (first pixel hue) or
// optionally a few extras: number of rainbow repetitions (default 1),
// saturation and value (brightness) (both 0-255, similar to the
// ColorHSV() function, default 255), and a true/false flag for whether
// to apply gamma correction to provide 'truer' colors (default true).
strip.rainbow(firstPixelHue);
// Above line is equivalent to:
// strip.rainbow(firstPixelHue, 1, 255, 255, true);
strip.show(); // Update strip with new contents
delay(wait); // Pause for a moment
}
}
// Rainbow-enhanced theater marquee. Pass delay time (in ms) between frames.
void theaterChaseRainbow(int wait) {
int firstPixelHue = 0; // First pixel starts at red (hue 0)
for (int a = 0; a < 30; a++) { // Repeat 30 times...
for (int b = 0; b < 3; b++) { // 'b' counts from 0 to 2...
strip.clear(); // Set all pixels in RAM to 0 (off)
// 'c' counts up from 'b' to end of strip in increments of 3...
for (int c = b; c < strip.numPixels(); c += 3) {
// hue of pixel 'c' is offset by an amount to make one full
// revolution of the color wheel (range 65536) along the length
// of the strip (strip.numPixels() steps):
int hue = firstPixelHue + c * 65536L / strip.numPixels();
uint32_t color = strip.gamma32(strip.ColorHSV(hue)); // hue -> RGB
strip.setPixelColor(c, color); // Set pixel 'c' to value 'color'
}
strip.show(); // Update strip with new contents
delay(wait); // Pause for a moment
firstPixelHue += 65536 / 90; // One cycle of color wheel over 90 frames
}
}
}
Code for Stepper Motor:
/*
Stepper Motor Control - one revolution
This program drives a unipolar or bipolar stepper motor.
The motor is attached to digital pins 8 - 11 of the Arduino.
The motor should revolve one revolution in one direction, then
one revolution in the other direction.
Created 11 Mar. 2007
Modified 30 Nov. 2009
by Tom Igoe
*/
#include <Stepper.h>
const int stepsPerRevolution = 100; // change this to fit the number of steps per revolution
// for your motor
// initialize the stepper library on pins 8 through 11:
Stepper myStepper(stepsPerRevolution, 8, 9, 10, 11);
void setup() {
// set the speed at 60 rpm:
myStepper.setSpeed(10);
// initialize the serial port:
Serial.begin(9600);
}
void loop() {
// step one revolution in one direction:
myStepper.step(stepsPerRevolution);
// step one revolution in the other direction:
myStepper.step(-stepsPerRevolution);
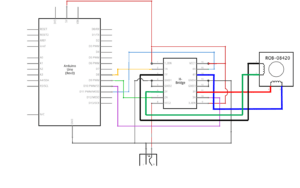
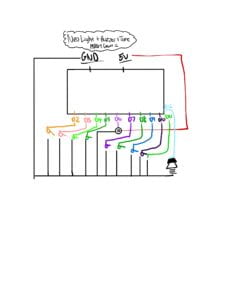
Circuit Diagrams: Stepper Motor & Neo-Pixel Lights/Button/Tone
Works Cited
/**
* An Neo-Pixel Ring that turns ON and OFF
* This was adapted from the tutorial found here:
* https://www.arduino.cc/reference/en/libraries/adafruit-neopixel/
* https://github.com/adafruit/Adafruit_NeoPixel
*https://wp.nyu.edu/shanghai-ima-interaction-lab/
*https://wp.nyu.edu/shanghai-ima-interaction-lab/recitation-4-actuators-and-mechanisms/
*https://www.instructables.com/Geometric-Cardboard-Lamp/
*https://wp.nyu.edu/shanghai-sleepy/2022/10/15/midterm-project-individual-proposal/
[…]
*/
Leave a Reply