I got the inspiration for this project from a 1.5L water bottle in my dorm. I first experimented with my cellphone flashlight, and because the water in a cylindrical clear bottle acts like a convex lens that concentrates light, and because there’s also some index that makes the surface a bit uneven, the projection of light on the wall would have a ripple-like shape and shifts and swirls when I turn the bottle.
So I first had the idea to put the light source in the bottle by putting a smaller bottle inside the 1.5L one, but me and my partner later gave up on this idea because (a it looks a bit too poorly crafted if we only have some cut plastic bottles and (b I realized that it might be different if the light source is inside the water battle because it would then be the equivalent of a index lens that diffuses light and would not achieve the same visual effect as I had with a flashlight outside of the bottle. But still we gave it a try and here’s a video of what it looks like.
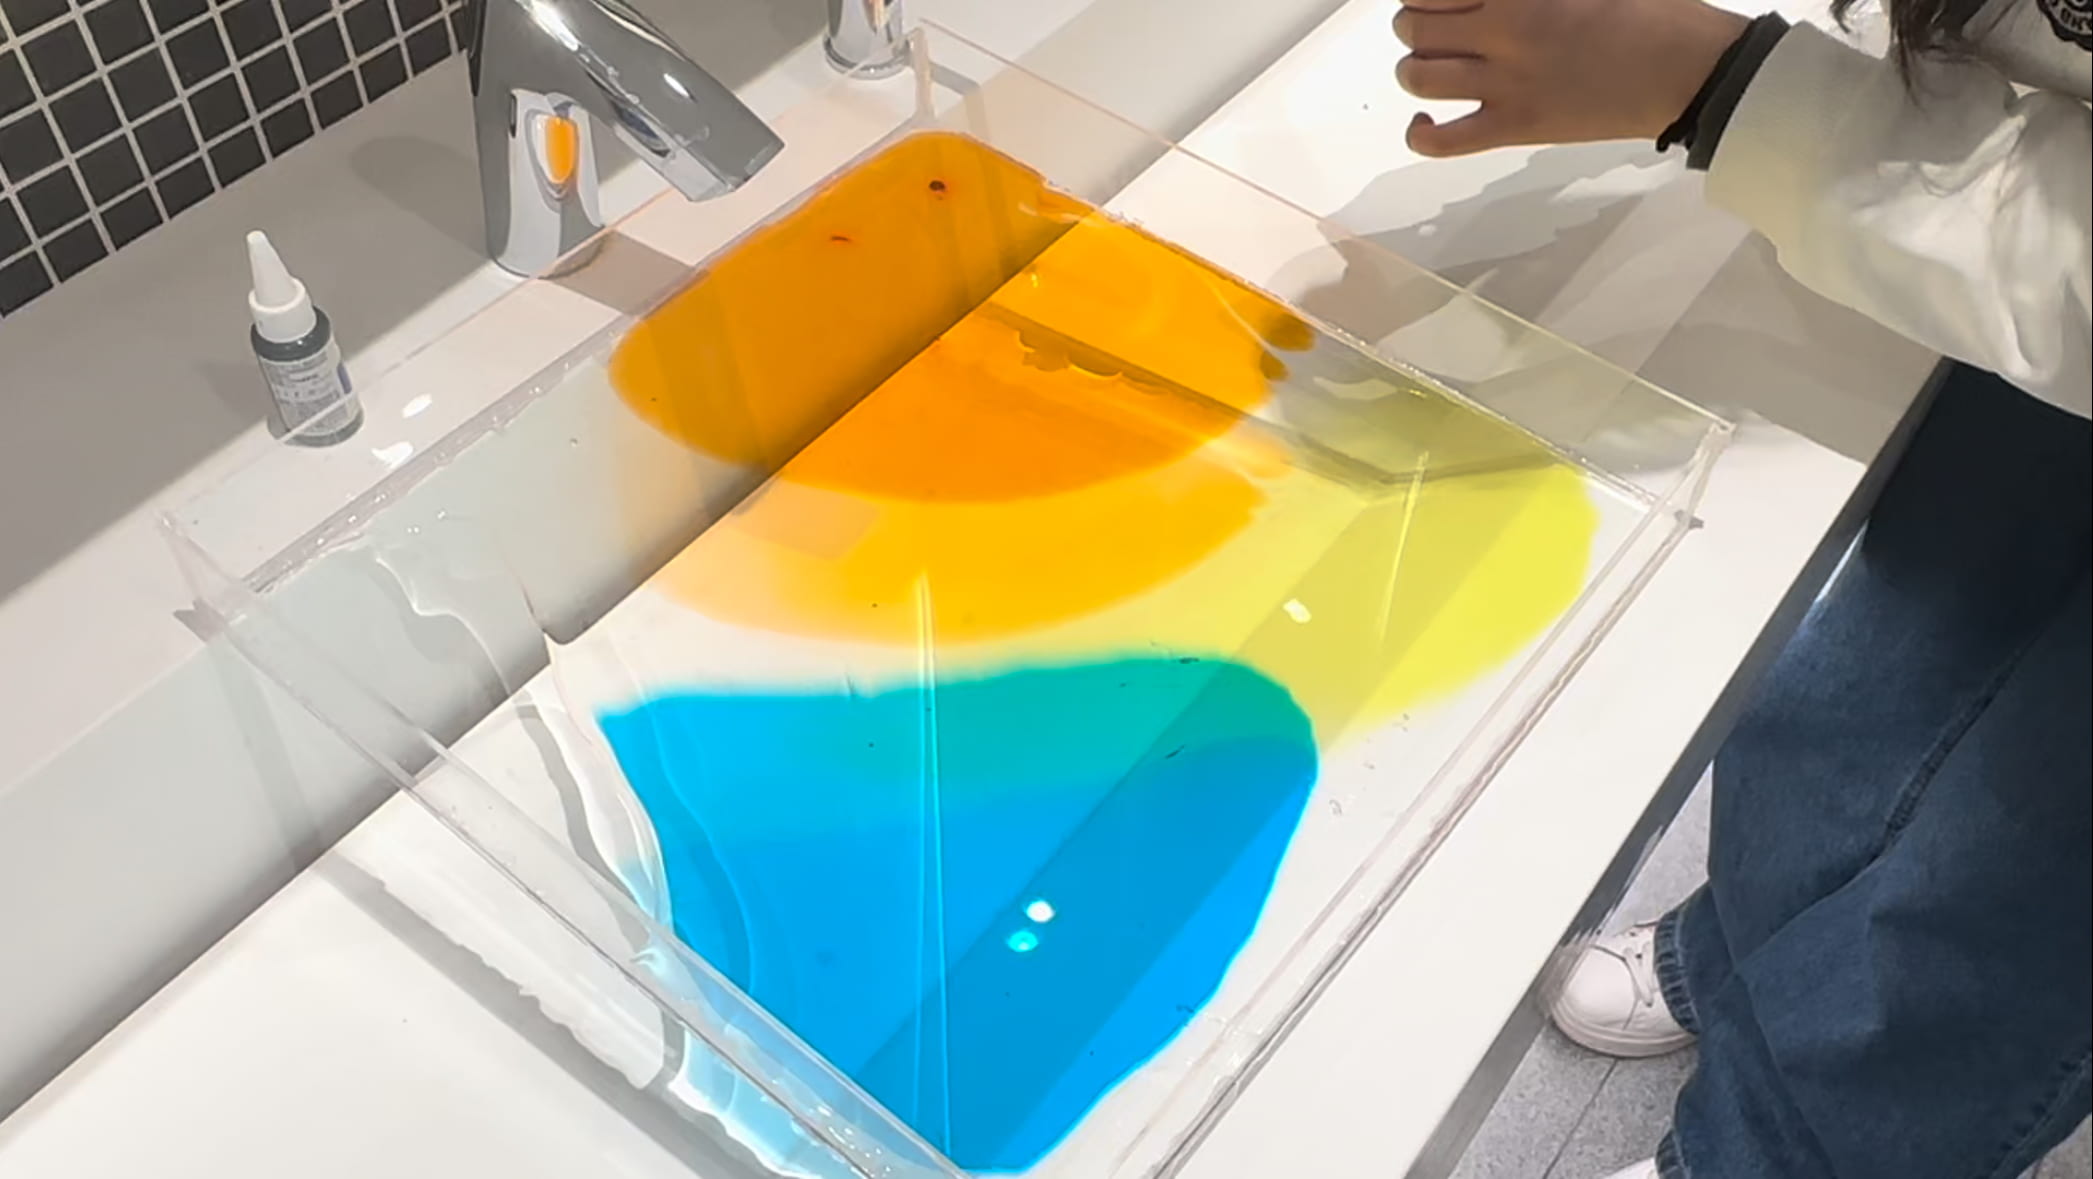
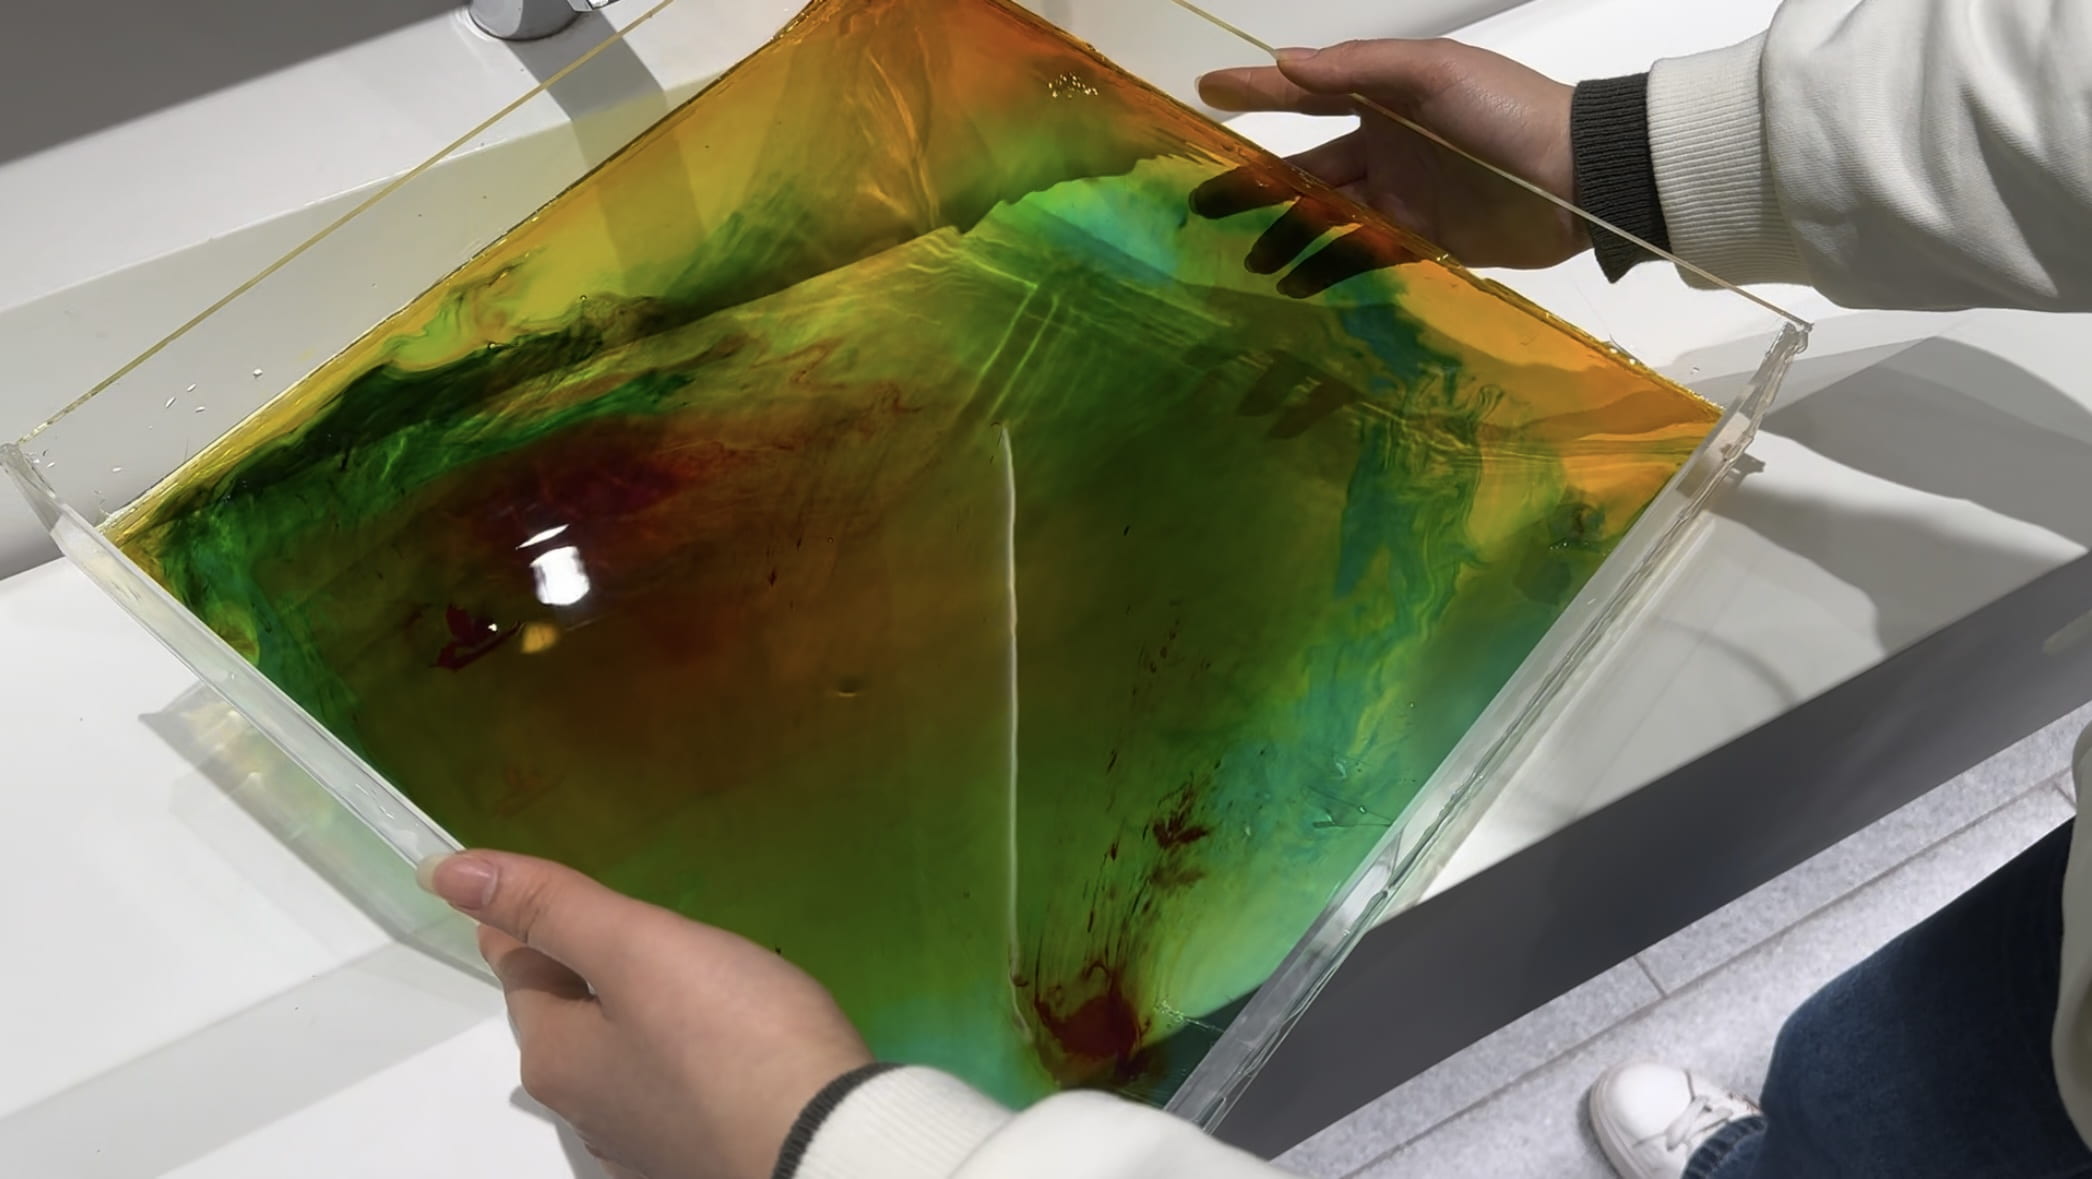
So I then proposed the idea of creating the projection through a thin layer of water, and to add variation, motion, and interaction to it, I purchased some food coloring and prepared straws to create different colors of projection and ripples.
My partner helped draw the laser cut template and we glue-guned the pieces together. We built a lidless box to put the lights and a tray with a bottom the same size as the box to fill water in with clear acrylic. The tray will then be put on top of the box to create the shadows.
Because we shift our project to creating water ripples with a box quite late during the process, so we did not incorporate the halogen light bulb until the last minute. We first planned to just use the analog LED strip for light but realized later when testing that the light is too faint to create visible projections of ripples on the ceiling. But luckily we managed to get everything in place before presenting and the finishing result looks satisfying enough for us lol.
Here’s a video of the final version of our project.
If we had more time we should add a white canvas above our project because we overlooked the fact that the ceiling in our classroom is not an ideal surface to project anything on, and with an even white cloth maybe the colors form the food coloring would also be a lot more obvious.
The code is only to let the LED strip light up in blue, and I modified it last minute based on the example codes in class. For the halogen light bulb we just directly connected it to the 12v power supply via breadboard.
#define REDPIN 4
#define GREENPIN 6
#define BLUEPIN 7

#define FADESPEED 5

void setup() {
  pinMode(REDPIN, OUTPUT);
  pinMode(GREENPIN, OUTPUT);
  pinMode(BLUEPIN, OUTPUT);
}


void loop() {
  int r, g, b;

  // fade from blue to violet
  for (r = 0; r < 256; r++) { analogWrite(REDPIN, r); delay(FADESPEED); } // fade from violet to red for (b = 255; b > 0; b--) {
    analogWrite(BLUEPIN, b);
    delay(FADESPEED);
  }
  // fade from red to yellow
  for (g = 0; g < 256; g++) { analogWrite(GREENPIN, g); delay(FADESPEED); } // fade from yellow to green for (b = 255; r > 0; r--) {
    analogWrite(BLUEPIN, r);
    delay(FADESPEED);
  }
  // fade from green to teal
  for (b = 0; b < 256; b++) { analogWrite(BLUEPIN, b); delay(FADESPEED); } // fade from teal to blue for (g = 255; g > 0; g--) {
    analogWrite(GREENPIN, g);
  }
}