Playdate With Rodrick The Rat

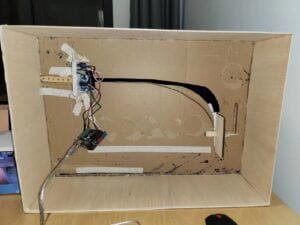
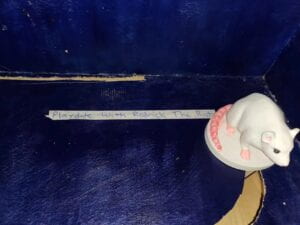
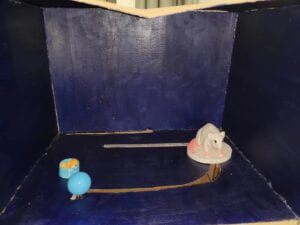
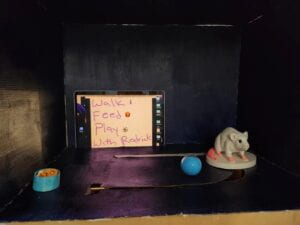
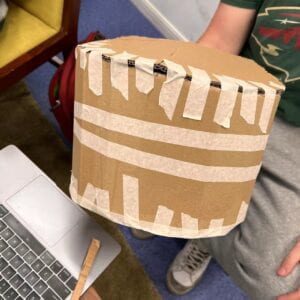
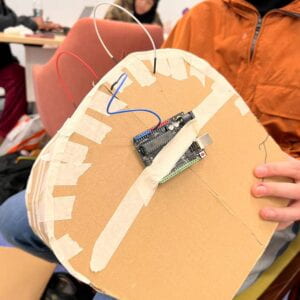
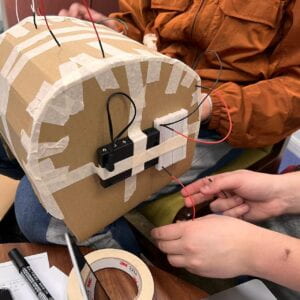
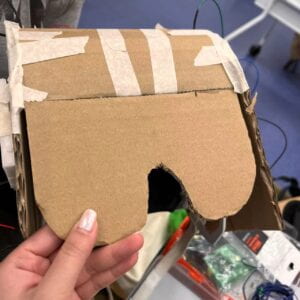
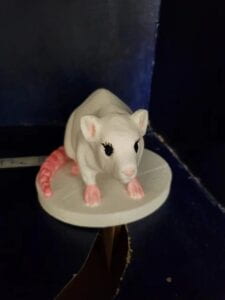
     Playdate With Rodrick The Rat is a project where you interact with a rat, in a pet simulator. The biggest difference is that the pet simulator wouldn’t be digital it would be physical and it would have outputs for every motion. You can play with the rat by giving it a ball, you can feed the rat the food in the bowl, and walk it by dragging it from one end to another(only one end can sense a complete walk, this was purposely done). The preparatory research is actually what gave me the idea. During my preparatory research, I saw multiple stages with an object/animal model you can do something with. In these projects I researched they only had one output and one sensor and I decided to improve it by adding more outputs and using more sensors.

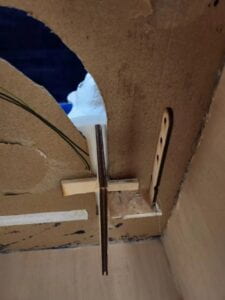
     The way the user was going to interact with the project made me make sure I had some sort of instructions to show up. I implemented this by adding an output that says play, feed, and walk Rodrick when all the sensors weren’t interacted with in a way that would affect the output, basically when the project was at rest.  Another decision it affected was to give my project a base so that users can smoothly walk my rat. During User Testing Session the sensors work but the base didn’t work well since it was made out of cardboard so I allowed users to do the moves the project was meant to encourage, then I let them see how the sensors work separately, as the sensors didn’t detect the movements well inside the box. The user testing process influenced my following decisions by making me change my base from cardboard to plywood. I also colored my 3D rat for better visuals. Another adaptation I did was to connect a man-made plywood handle to the rat to press the button which signifies it completed a walk. The adaptations I made, I think they were effective my 3D rat was able to move without the user having to hold onto the base, the rat looked nicer, and the button was being pressed each time the rat completed a walk reliably.

     The most significant steps in my production process were building the base, installing the rat, and installing the circuit in the model. Building the base was a failure at first because the rat wouldn’t move unless you hold down the base which in my opinion negatively affects the interactivity of it. I believe the user should be able to easily use the project. It ended up being a success once I got advice during the User Testing Session and changed my cardboard with a water bottle-made base to plywood, it was so stable I was able to rigorously test the stability of the base by adding things to it. This was a success because I was now able to easily manipulate things on it without worrying about the base breaking and then being able to move the rat easily. Installing the rat was a success with the minor setback of it not accurately marking a walk by pressing the button when it would get to the end of the path. This was easily fixed by changing where the handle attached to it was located. I am very proud of the installment of the rat as I was able to tightly secure it. I justify the production choices I made because they were all motivated by making the project most interactive and physically based as possible. This is the reason I 3D printed a ball for the rat and a food bowl. So that the user can physically do these activities with the rat. This aligns with the reason I made my rat 3D model as it wouldn’t be what I saw if the program is digital. I believe that to obtain the most interactivity the user should do physical stuff and not just click a button or mouse. 

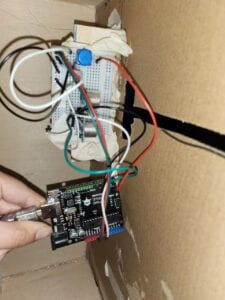
     The sensors I used were an ultrasonic one and a button. I used an ultrasonic sensor as it could measure distance and what I ended up doing was calculate the distance of how far feeding and playing with the rat is which is about 12, based on this if the value was equal to 12 or below the code knew that someone was either feeding or playing with the rat. I used a button because it was the only way I could think of where the rat itself would be able to mark that it completed a walk. I think they were better suited than others because these sensors were movement based and my project was all about the movement of the rat or the user near the rat. Another option could have been a pointmeter because I know how to use it well and the way it marks values is similar to a button except instead of clicking you twist. I rejected it because I don’t think it had anything to do with the scope of my project and what I wanted for physical interactions I don’t see how it could have been smoothly incorporated. I didn’t want the user to have to twist a sensor in order to get a result/mark an action I don’t think it would have been as a smooth experience as a button, as the only sensor it could have replaced would be the button.

Sketch:
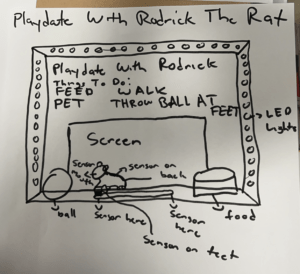
    The goal of my project was to make an interactive experience that would simulate having a rat as a pet by being able to feed, walk, and play with the rat. I think my project did achieve that as the users were able to interact with the rat. The audience did not interact well in the final testing as the ultrasonic sensor wasn’t working well. My project aligns with my definition of interaction because it uses physical actions near the rat(on the project) and to the rat in order to receive an output and once that isn’t done it gives a set of instructions. I would improve my project by either getting another sensor or keep testing the ultrasonic sensor. I did test the sensor a lot and it worked after my presentation, it worked based on the angle is what I have come to conclude. As long as you keep it at the right angle it perfectly works. I think my sensor didn’t properly work during class because the sensor worked on and off despite how big I cut the hole for it to work. I thankfully was able to show the professor the working project so he could see how it functioned.  From my ultrasonic sensor failure, I learned that I should either change my sensor to a more accurate one or give it a lot of space for error, by this I mean to make a hole two times as big as the sensor so that it could accurately work at all times. I take away design improvement from my accomplishments as I do think the design of my project was very good. The way the rat was installed the walking pathway was made, the button was installed, and the computer hole was made for maximum interaction. 

Below is a video of the working project:

Rodent In The Works

Full Material List:

Cardboard

Hot Glue

Arduino Uno

Breadboard

220k ohm resistor

Buzzer

Ultrasonic Sensor

Jumper Cables(M/M wires)

3D Printed Rat/Ball/Food Bowl

3D Food Stickers

Plywood

Tape

Markers

Paint

Box Cutter

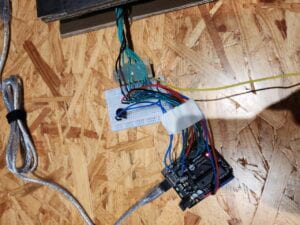
Below is the circuit:
Pictures Of Project:
 

Below is the full code(Arduino and Processing):

Arduino Code(Used Example Button and Ping code on Arduino as baseline):

/*
Button
Turns on and off a light emitting diode(LED) connected to digital pin 13,
when pressing a pushbutton attached to pin 2.
The circuit:
– LED attached from pin 13 to ground through 220 ohm resistor
– pushbutton attached to pin 2 from +5V
– 10K resistor attached to pin 2 from ground
– Note: on most Arduinos there is already an LED on the board
attached to pin 13.
created 2005
by DojoDave <http://www.0j0.org>
modified 30 Aug 2011
by Tom Igoe
This example code is in the public domain.
https://www.arduino.cc/en/Tutorial/BuiltInExamples/Button
*/
// constants won’t change. They’re used here to set pin numbers:
const int buttonPin = 2; // the number of the pushbutton pin
const int ledPin = 13; // the number of the LED pin
// variables will change:
int buttonState = 0; // variable for reading the pushbutton status
const int trigPin = 7;
const int echoPin = 8;
// defines variables
long duration;
int distance;
void setup() {
// initialize the LED pin as an output:
pinMode(ledPin, OUTPUT);
// initialize the pushbutton pin as an input:
pinMode(buttonPin, INPUT);
pinMode(trigPin, OUTPUT); // Sets the trigPin as an Output
pinMode(echoPin, INPUT); // Sets the echoPin as an Input
Serial.begin(9600);
}
void loop() {
// read the state of the pushbutton value:
buttonState = digitalRead(buttonPin);
// Clears the trigPin
digitalWrite(trigPin, LOW);
delayMicroseconds(2);
// Sets the trigPin on HIGH state for 10 micro seconds
digitalWrite(trigPin, HIGH);
delayMicroseconds(10);
digitalWrite(trigPin, LOW);
// Reads the echoPin, returns the sound wave travel time in microseconds
duration = pulseIn(echoPin, HIGH);
// Calculating the distance
distance = duration * 0.034 / 2;
// Prints the distance on the Serial Monitor
//Serial.print(“Distance: “);
Serial.print(distance);
Serial.print(“,”);
// check if the pushbutton is pressed. If it is, the buttonState is HIGH:
Serial.println(buttonState);
}

Processing Code:

import processing.serial.*;
import processing.video.*;
//PImage photo;
Movie myMovie;
Movie myOtherMovie;
Movie startingMovie;
Serial serialPort;

int NUM_VALUES_FROM_ARDUINO = 2;

int arduino_values[] = new int[NUM_VALUES_FROM_ARDUINO];
int old_arduino_values[] = new int[NUM_VALUES_FROM_ARDUINO];
int gameState = 0;

void setup() {
  myMovie = new Movie(this, "happyrat.mp4");
  myOtherMovie = new Movie(this, "ratwhite.mp4");
  startingMovie = new Movie(this, "startingrat.mp4");
  myMovie.loop();
  myOtherMovie.loop();
  size(1200, 900);
  image(myOtherMovie, 0, 0);
  printArray(Serial.list());
  serialPort = new Serial(this, "/dev/cu.usbmodem14301", 9600);
}


void draw() {
  getSerialData();
  if (myMovie.available()) {
    myMovie.read();
  }
  if (myOtherMovie.available()) {
    myOtherMovie.read();
  }
  if (startingMovie.available()) {
    startingMovie.read();
  }
  if (arduino_values[0]<12 && old_arduino_values[0]>=12) {
    //myMovie.read();
    //image(myMovie, 0, 0);
    gameState = 1;
    
  } else if (arduino_values[0]>=12 && old_arduino_values[0] <12 && arduino_values[1] != 1){
    gameState = 0;
  }
  if (arduino_values[1]==1 && old_arduino_values[1]==0) {
    //myOtherMovie.read();
    //image(myOtherMovie, 0, 0);
    gameState = 2;
    
  }else if (arduino_values[1] == 0 && old_arduino_values[1] == 1 && arduino_values[0] >=12){
    gameState = 0;
  }
  
  if (gameState == 0) {
    myMovie.pause();
    myOtherMovie.pause();
    background(0);
    //photo = loadImage("Instructions.jpeg");
    //image(photo, 0, 0);
    startingMovie.play();
    //image(startingMovie, 0, 0);
    image(startingMovie, -360, -10);
  }else if(gameState ==1){
    
    myOtherMovie.pause();
    startingMovie.pause();
    background(0);
    myMovie.play();
    image(myMovie, 0, 0);
  }else if(gameState ==2){
    myMovie.pause();
    startingMovie.pause();
    background(0);
    myOtherMovie.play();
    image(myOtherMovie, 0, 0);
  }
    
  
  for (int i=0; i<NUM_VALUES_FROM_ARDUINO;i++) {
 old_arduino_values[i] = arduino_values[i];
  }
}

void getSerialData() {
  while (serialPort.available()>0) {
    String in = serialPort.readStringUntil(10);
    if (in!= null) {
      print("From Arduino: " + in);
      String[] serialInArray = split(trim(in), ",");
      if (serialInArray.length == NUM_VALUES_FROM_ARDUINO) {
        for (int i=0; i<serialInArray.length; i++) {
          arduino_values[i] = int(serialInArray[i]);
        }
      }
    }
  }
}
Memory Game

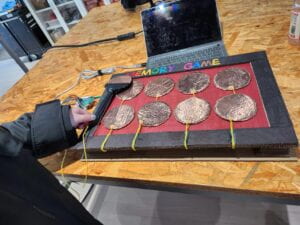
        The previous research I did for my group project didn’t significantly impact my midterm project as it wasn’t really software based.  I would say that the research I did while planning for my group project did have some effects on my midterm project, as it showcased different forms of interactivity with users. An example of this is the Mind the “Uuh” a product meant to help the user improve their speech patterns by letting them know how many times and when a user says uhhh. The thing from this project that triggered my understanding of interaction is the fact that the product and user interact with each other. The user must do something in order for the product to react or do something back. From this product and the readings earlier in this course, interactivity is between the user and the product. The user must do something(input) in order for the product to reach the final result(output). My project was based on one concept, games. When narrowing this down I choose to go down the memory game route as I believe it is the most compatible option with sensors. I added my own twist to the concept of memory games by combining the concept of Simon Says and bop it. Simon Says is a game where a person tells a person to do something with the phrasing “Simon says…” and they have to do it otherwise they will lose. Bop it! is a handheld game where the user or users hold the machine and have to physically do the motion on the machine they are told to do otherwise they lose. As it can be seen both of these games have the concept of one having to do an action they are told otherwise they lose. I took this concept and added the element of memory to it. I did this by creating a game where there are 8 buttons and the first user has to touch the buttons 8 times in any order they want, while it plays a certain melody for aesthetics. The second user would then have to memorize the order and try to recreate the concept of Simon Says but with memorization and the physical aspects of Bop it! My own twist is added as they would have to do the 8 moves in one go. My project is intended for people who enjoy games, the target demographic being people aged 13-22 as they are people who would be interested in more physically demanding games.


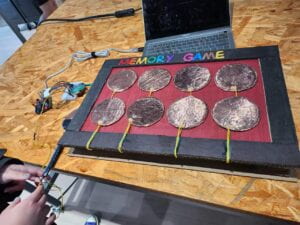
        My understanding of how users were going to interact with my project informed certain design decisions I made such as changing my concept design from one to wear on your body to one on a “board” as seen below.

I had originally used tape to put the buttons on parts of the person’s body, so then they could touch either their head, right shoulder, left shoulder, right arm, left arm, stomach, right leg, or left leg. We were going to make a one-size shirt in order to make the putting-on process easier but after showcasing my project the first time I got told the wiring was hard to look at and that it would be better in a different format. So based on that, I decided to make it on a stable board where the wiring could be contained together, so that my project would be easy to the eye and the wires wouldn’t be a mess, as an issue with my project was the wires coming out of the Arduino as it wasn’t stabilized at first. The board was made with a carton, hot glue, and paint/marker. For the buttons themselves, we used cardboard, copper tape, hot glue, and wires to connect them to the Arduino. These items were the most suitable since they were the strongest, most stable and copper tape conducts electricity. Other options such as paper or liquid glue would have been too weak.


        I mostly worked on the code and built the entire circuit. I learned how to code the buttons from 

/**

* Button

* This was adapted from a the tutorial found here:

https://www.arduino.cc/en/Tutorial/BuiltInExamples/Button

*/

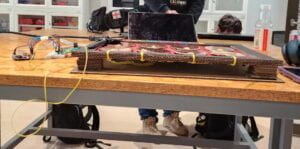
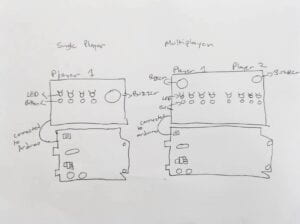
My partner did the physical components(like the buttons and board) and helped finalize the code as I wasn’t able to figure it out. Our process of making our project was working in the lab at the same time on our own parts and at points individually working on it once at a time. My partner did not attend the User Testing Session so it was difficult demonstrating the product, since I wasn’t able to discuss ideas with them. During the User Testing Session, I was told to make the game into levels, make visually obvious what the project is, and get rid of wires. Based on this when making the board the wires were adjusted nicely as seen below and we named our project so people would know it was a game. There will also be a sketch that inspired this model except that we transferred it from an Arduino to a board as our buttons are quite big and we needed the paddle to touch the button to work instead of the user’s fingers. 

The level concern wasn’t addressed as we weren’t able to figure out how to make it into levels. I do think these new adaptations were effective as people could now tell what the project was and now it wasn’t messy to look at. During the User Testing Session, I had some difficulties with the code as it would only record the movement of the first person but wouldn’t play any sounds and would end directly after the first person ended. I was able to quickly modify the code once I realized this and it was able to play the sounds of when user one would tap and record the movements. I did this by removing the conditions for noTone as seen below, the commented-out lines are what I removed. 

} else {

       noTone(13);

      // if (i = buttonNum){

       //if (i = 8) {

         //Serial.print(“You are done!”);

      // }

     }  //print  you are done

The code overall was quite hard to work on, it took a lot of adapting and adjusting. Originally I was supposed to make a code where there would be two different sets one person would use the first set then the second person would use the second set. The purpose of this was to make the user more convenient and comfortable playing with each other. I wasn’t able to get it to do that so we just made the code work for one set that would compare the movements of the first person and then the second person. I do think these changes to the code and code structure(one set vs two) were justified as it made the code work for what we wanted. 


        The goal of our project was to make a game where one person pressed a random order of 8 buttons and the second person would imitate it and if they did it correctly the second person would win. If the second person did it incorrectly the first person would win. My project results did align with my definition of interaction as not only did my project record every move but it also made a sound letting the user know the movement was recorded. So this shows how the product responds to the user’s actions. In order for the product to do something the user has to do something to it. My audience interacted with my object by pressing the buttons with the paddle. I would improve my project if I had more time by writing clear instructions on the board. I would also install two separate LEDS, one that is next to player 1 sign and another next to player 2 sign, in the scenario that one would light up when the user wins. I would also add a 3rd LED next to a done sign that would light up after player 1 would finish so that player 2 would know to start, as feedback from the professor was to transfer the serial messages to the board to make the product itself more interactive. One final fix I would do is to make it so that my project wouldn’t be sensitive to faux double tapping by adjusting the code. I learned that clear instructions and signs should be on one’s product for the user to be immersed in it and know what to do. I will keep this in mind when making new products. A positive thing I take back from this project is learning how to use Arduino code in a more extensive way. Also, I learned more about buttons and how circuits work in depth as I had been having trouble with that. I now understand how electricity conducts by Arduinos. 


Full Material List:

Cardboard

Hot Glue

Arduino Uno

Breadboard

220k ohm resistors

Buzzer

Jumper Cables(M/M wires)

Copper Tape

Markers

Paint

Wires

Wire cutters


Below is the circuit:


Below is the full code:

/*

 DigitalReadSerial

 Reads a digital input on pin 2, prints the result to the Serial Monitor

 This example code is in the public domain.

 https://www.arduino.cc/en/Tutorial/BuiltInExamples/DigitalReadSerial

*/

// digital pin 2 has a pushbutton attached to it. Give it a name:

// int SequenceV;

// char SeqArr[10] = “”;

//1. complete l

//2. make the second the total

//3. save player 2 > second total

//4. compare total w total 2

//5. save results

//6. lose / win

//second total for second player

// for loop checking both totals

//for

// for (i < buttonNum)

//total[i] == total2[i]

//save that is the same(save result)

//check how many out of ten they get right

const int buttonNum = 8; //first one 3, 5,7(make levels) timeout new input within certain time , get rid of wires, make it visually obvious what it does, make it recor

int total[buttonNum];

int total2[buttonNum];

int counter = 0;

int leftShoulder = 2;

int rightShoulder = 3;

int leftLeg = 4;

int rightLeg = 5;

int leftArm = 6;

int rightArm = 7;

int head = 8;

int stomach = 9;

int button0;

int button1;

int button2;

int button3;

int button4;

int button5;

int button6;

int button7;

int Pbutton0;

int Pbutton1;

int Pbutton2;

int Pbutton3;

int Pbutton4;

int Pbutton5;

int Pbutton6;

int Pbutton7;

// the setup routine runs once when you press reset:

void setup() {

 // initialize serial communication at 9600 bits per second:

 Serial.begin(9600);

 Serial.println(“start”);

 // make the pushbutton’s pin an input:

 pinMode(leftShoulder, INPUT);

 pinMode(rightShoulder, INPUT);

 pinMode(leftLeg, INPUT);

 pinMode(rightLeg, INPUT);

 pinMode(leftArm, INPUT);

 pinMode(rightArm, INPUT);

 pinMode(head, INPUT);

 pinMode(stomach, INPUT);

 for (int i = 0; i < buttonNum; ++i) {

   total[i] = 0;

   total2[i]= 0;

 }

}

// the loop routine runs over and over again forever:

void loop() {

 while (counter < buttonNum) {

   //Serial.println(counter);

     // left shoulder button

 button0 = digitalRead(leftShoulder);

 //delay(1);  // delay in between reads for stability

 // right shoulder button

 button1 = digitalRead(rightShoulder);

 //Serial.println(button1);

 //delay(1);

 // left leg button

 button2 = digitalRead(leftLeg);

 //Serial.println(button2);

 //delay(1);

 // right leg button

 button3 = digitalRead(rightLeg);

 //Serial.println(button3);

 //delay(1);  // delay in between reads for stability

 // left arm button

 button4 = digitalRead(leftArm);

 //Serial.println(button4);

 //delay(1);

 // right arm button

 button5 = digitalRead(rightArm);

 //Serial.println(button5);

 //delay(1);

 // head button

 button6 = digitalRead(head);

 //Serial.println(button6);

 //delay(1);

 // stomach button

 button7 = digitalRead(stomach);

 //Serial.println(button7);

 //delay(1);

     if (button0 == 1) {  // left shoulder

       tone(13, 261);

       if (button0 != Pbutton0) {

         total[counter] = 1;

         counter++;

         delay(50);

         //total2[counter] = 1;

         //counter++;

       }

     } else if (button1 == 1) {  // right shoulder

       tone(13, 294);

       if (button1 != Pbutton1) {

         total[counter] = 2;

         counter++;

         delay(50);

         //total2[counter] = 2;

         //counter++;

       }

     } else if (button2 == 1) {  // left leg

       tone(13, 311);

       if (button2 != Pbutton2) {

         total[counter] = 3;

         counter++;

         delay(50);

         //total2[counter] = 3;

         //counter++;

       }

     } else if (button3 == 1) {  // right leg

       tone(13, 311);

       if (button3 != Pbutton3) {

         total[counter] = 4;

         counter++;

         delay(50);

         //total2[counter] = 4;

         //counter++;

       }

     } else if (button4 == 1) {  // left arm

       tone(13, 311);

       if (button4 != Pbutton4) {

         total[counter] = 5;

         counter++;

         delay(50);

         //total2[counter] = 5;

         //counter++;

       }

     } else if (button5 == 1) {  // right arm

       tone(13, 311);

       if (button5 != Pbutton5) {

         total[counter] = 6;

         counter++;

         delay(50);

         //total2[counter] = 6;

         //counter++;

       }

     } else if (button6 == 1) {  // head

       tone(13, 311);

       if (button6 != Pbutton6) {

         total[counter] = 7;

         counter++;

         delay(50);

         //total2[counter] = 7;

         //counter++;

       }

     } else if (button7 == 1) {  // stomach

       tone(13, 311);

       if (button7 != Pbutton7) {

         total[counter] = 8;

         counter++;

         delay(50);

         //total2[counter] = 8;

         //counter++;

       }

     } else {

       noTone(13);

      // if (i = buttonNum){

       //if (i = 8) {

         //Serial.print(“You are done!”);

      // }

     }  //print  you are done

     Pbutton0 = button0;

     Pbutton1 = button1;

     Pbutton2 = button2;

     Pbutton3 = button3;

     Pbutton4 = button4;

     Pbutton5 = button5;

     Pbutton6 = button6;

     Pbutton7 = button7;

   }

     noTone(13);


       //if (i = 8) {

   Serial.println(“P1 DONE!”);

   //for (int i = 0; i<8; i++) {

     //Serial.print(total[i]);

     //Serial.print(“,”);

   //}

   counter = 0;

   delay(1000);

   while (counter < buttonNum) {

   //Serial.println(counter);

     // left shoulder button

 button0 = digitalRead(leftShoulder);

 //delay(1);  // delay in between reads for stability

 // right shoulder button

 button1 = digitalRead(rightShoulder);

 //Serial.println(button1);

 //delay(1);

 // left leg button

 button2 = digitalRead(leftLeg);

 //Serial.println(button2);

 //delay(1);

 // right leg button

 button3 = digitalRead(rightLeg);

 //Serial.println(button3);

 //delay(1);  // delay in between reads for stability

 // left arm button

 button4 = digitalRead(leftArm);

 //Serial.println(button4);

 //delay(1);

 // right arm button

 button5 = digitalRead(rightArm);

 //Serial.println(button5);

 //delay(1);

 // head button

 button6 = digitalRead(head);

 //Serial.println(button6);

 //delay(1);

 // stomach button

 button7 = digitalRead(stomach);

 //Serial.println(button7);

 //delay(1);

     if (button0 == 1) {  // left shoulder

       tone(13, 261);

       if (button0 != Pbutton0) {

         total2[counter] = 1;

         counter++;

         delay(50);

         //total2[counter] = 1;

         //counter++;

       }

     } else if (button1 == 1) {  // right shoulder

       tone(13, 294);

       if (button1 != Pbutton1) {

         total2[counter] = 2;

         counter++;

         delay(50);

         //total2[counter] = 2;

         //counter++;

       }

     } else if (button2 == 1) {  // left leg

       tone(13, 311);

       if (button2 != Pbutton2) {

         total2[counter] = 3;

         counter++;

         delay(50);

         //total2[counter] = 3;

         //counter++;

       }

     } else if (button3 == 1) {  // right leg

       tone(13, 311);

       if (button3 != Pbutton3) {

         total2[counter] = 4;

         counter++;

         delay(50);

         //total2[counter] = 4;

         //counter++;

       }

     } else if (button4 == 1) {  // left arm

       tone(13, 311);

       if (button4 != Pbutton4) {

         total2[counter] = 5;

         counter++;

         delay(50);

         //total2[counter] = 5;

         //counter++;

       }

     } else if (button5 == 1) {  // right arm

       tone(13, 311);

       if (button5 != Pbutton5) {

         total2[counter] = 6;

         counter++;

         delay(50);

         //total2[counter] = 6;

         //counter++;

       }

     } else if (button6 == 1) {  // head

       tone(13, 311);

       if (button6 != Pbutton6) {

         total2[counter] = 7;

         counter++;

         delay(50);

         //total2[counter] = 7;

         //counter++;

       }

     } else if (button7 == 1) {  // stomach

       tone(13, 311);

       if (button7 != Pbutton7) {

         total2[counter] = 8;

         counter++;

         delay(50);

         //total2[counter] = 8;

         //counter++;

       }

     } else {

       noTone(13);

      // if (i = buttonNum){

       //if (i = 8) {

         //Serial.print(“You are done!”);

      // }

     }  //print  you are done

     Pbutton0 = button0;

     Pbutton1 = button1;

     Pbutton2 = button2;

     Pbutton3 = button3;

     Pbutton4 = button4;

     Pbutton5 = button5;

     Pbutton6 = button6;

     Pbutton7 = button7;

   }

     noTone(13);


       //if (i = 8) {

   Serial.println(“P2 DONE!”);

   for (int i = 0; i<8; i++) {

     Serial.print(total[i]);

     Serial.print(“,”);

   }

   Serial.println();

   for (int i = 0; i<8; i++) {

     Serial.print(total2[i]);

     Serial.print(“,”);

   }

   delay(1000);

   bool p1Win = false;

   for (int i = 0; i<buttonNum; ++i) {

     if (total[i] != total2[i]) {

       Serial.println(“PLAYER 1 WINS”);

       p1Win = true;

       break;

     }

   }

   if (!p1Win) {

     Serial.println(“PLAYER 2 WINS”);

   }

   delay(50000);

     //if (counter > buttonNum && counter < buttonNum * 2) {  //save p2

       //counter = 0;

     //}

   //compare outside

 /*int oneElementSize = sizeof(total[0]);

 if (sizeof(total2[0] == oneElementSize) {        // Are the sizes of the elements the same?

   if (sizeof(total2) == sizeof(total)) {   // Are the number of elements the same?

       if (memcmp(total2, total, sizeof(total2) * oneElementSize) == 0)

     Serial.println(“Player 2 Won!!!!”);

     delay(1000);

           // do this if they are equal

       }else{

         Serial.println(“Player 1 Won!!!!”);

         delay(1000);

           // do this if they are different

       }*/


 }


Treasured Dreams

My team and I were inspired by “The Ones Who Walk Away From Omelas” by Ursula K. Le Guin. This story got us to think more about our dreams since it can be said their entertainment(the room) was somewhat like a dream state. Based on this as a group we decided to make our artifact a helmet that replays your dreams, this is for people who often forget their dreams or want to relive their dreams. The individual would be relieving their dream in real-time. This helmet also saves people’s dreams permanently. This intertwines with my definition of interaction as I said it was something that acts or is controlled by what the user does, in this case if the user puts the helmet on their head the artifact interacts with the user by replaying a dream of the user’s choice. Our invention is unique and imaginative as this does not exist in real life and is only featured in sci-fi movies. So with a concept like this, it is really up to us what this helmet is like. In real life I do think, it may be possible but not as a replay maybe as words or a hard sketch of the main idea as I don’t think technology can get into someone’s brain like that. This is a very foreign concept far from reality at the moment. With this invention, a problem I see is that someone with a very weak mental condition or PTSD has a nightmare that they don’t remember and the helmet can help them vividly remember and relive it. This wouldn’t be good as it would negatively impact their mental health. In a more farfetched scope, it can be used to reveal one’s secrets or emotions as dreams can be about personal things in our lives, which can be used against us in a discriminatory and persecuting manner.

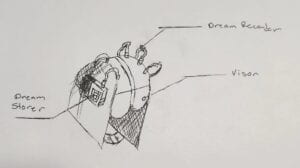
Below is a sketch design:

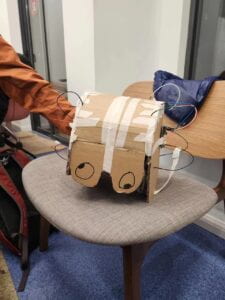
This is the sketch that showcases our ideas, we decided to go with our first model because to us it was very straightforward. We added a visor to the helmet in the theme of being asleep. We also added wires to it to showcase how it senses what goes on in the brain and we added boxes on the sides(Arduino and battery holder) to show that the dreams are being stored. 

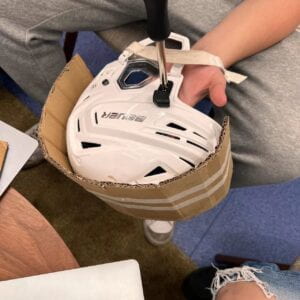
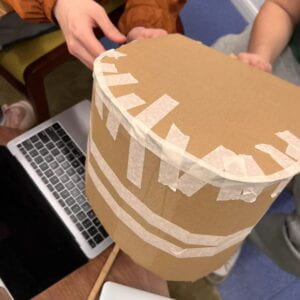
Below is the artifact throughout the building process:

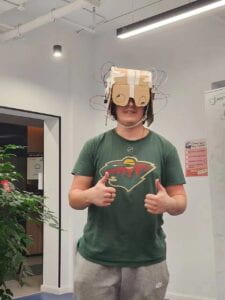
Below is the final product and a teammate wearing it:

A failure of the artifact would be the lack of decoration, by that I mean that it wasn’t painted over to make the design sleeker but my team didn’t have access to supplies to do this. The successes of this artifact are the sci-fi look, the fit of the helmet, and the creativity of the design. When asking outside individuals they could tell in which realm our artifact is supposed to be. I contributed to this process by giving my opinion and helping with the design of the helmet to make it better fit people’s heads. I also helped create the sketches and script. The process my group used to work together is meeting multiple times and having discussions, then creating our craft. All of our roles intertwined as we all worked on each thing to an extent, as everything was done as a group and in a group. No one has been tasked with one thing to do alone.

Below is our script, my team did go a bit off script as we had intended for only two people to put on the helmet but during the performance, we realized it would be too time-consuming and boring:

Script Interaction Lab Group Project

I will now be providing a critical analysis and assessment of the performance of the group who had a mind control helmet set during the Black Plague and inspired by “The Plague” by Yan Leisheng. The artifact is not that relevant to the story in the fact that they could have made something to control the spread of the plague or assist those with the plague. I did like the way they connected mind control to people’s will and the black plague, it was a different scope as it was more about having to do necessary things that can be immoral to you. This perspective on this artifact can help people be more successful in life, although as shown in the skit can have drawbacks. I do think they meet the criteria of the assignment as they were able to showcase what the artifact does and how it could go wrong. Although in the feedback one of the instructors said that the performance didn’t showcase the positives of the artifact I would disagree. As said before being able to give someone the will to do things can help their growth. I think the design was very aesthetically pleasing and showcased what it does I was able to assume in what realm the artifact would be. Through the wires and circles in the helmet, it showed the themes of mind control. An improvement I would suggest is something on the artifact to activate it.

James Dyson And Philippe Starck Comparison/On Dieter Rams

Philippe Starck and James Dyson are two very big names in the design industry, their views on design are very different. Meanwhile, Starck believes in isolating himself and leading a monk life in order to achieve good and original designs, Dyson believes in the power of designing for people.

Strack’s and Dyson’s work fit the Dieter Rams 10 principles of good design. At first, I thought James Dyson followed these principles more strongly but then after further research, I realized they both follow all the principles. They do this by focusing on making long-lasting useful but simple products that are environmentally friendly. By simple, I also include their want to make their products understandable and not deceiving. I would say that Dyson pays closer attention to the aesthetic and innovation of product as he will always be ahead and releases products with new technology, which take other companies years to even develop a similar product. He also focuses on making his products simple in an aesthetic way in order to not make them seem more valuable than they actually are. Meanwhile, Starck hits this approach by making unique long-lasting products that have some use with creativity and uniqueness in mind. He prides himself in making his designs environmentally friendly and the most affordable possible taking into account the design process, he is not willing to harm the quality of the product to lower the price.

One product that I use that fits some of Dieter Ram’s 10 principles of good design is the instant pot from Belk. This product imposes most of the principles of Dieter Ram’s 10 principles of good designs. The instant pot was designed to cook faster and can sauté, unlike conventional cookers, making it innovative and useful. The creator used an approach to make it environmentally friendly by saving electricity. The instant pot is also aesthetic, easy to look at, and has its features laid out for very easy use, anyone can learn how to use it. It is also very simple leaving no space for the possibility of it being overhyped. 

On James Dyson And His Design Work

I think James Dyson is an example of what a designer should be. Despite Dyson being a billionaire, he still hasn’t forgotten about meeting demands and works hard to make his products the best they can be. He makes his products with a purpose and intended audience. I think designers should make their products for the people, taking people’s wants and needs into consideration, if not what is the purpose of making a product. Isn’t innovation meant to help others?

I think one thing that makes him a great designer is that he isn’t afraid to fail and found power in failure. He is always thinking about how to improve his products, even after they have been released. It is admirable that he makes thousands and thousands of prototypes of the same object, such as with the Dyson Airblade. Others might think that making that many prototypes is a failure but to Dyson this is one step closer to the perfect product. I think many can take Dyson’s mindset beyond prototyping and apply it in everyday life.

On Philippe Starck And His Design Work

I think Philippe Strack is a very unique designer as he goes against what you are taught when making designs. When making prototypes you are taught to seek out your clients’ ideas and observe them so that based on your target audience you can perfect your product. On the other hand, Strack avoids any contact as he doesn’t want to be influenced when making designs, he doesn’t even know other designers’ work. 

I think his methods are shocking. He lives in abstraction, his life is his projects. I think it’s a bit extreme that but it does show his passion for his work and his commitment to his creativity.  He goes as far as not communicating or keeping up with what’s going around him, he lives like a monk. I don’t think many can manage to be as committed to their work to cut off contact with the whole work, as most people work to enjoy their own life. I wonder how does he know how and what to design if he doesn’t keep in contact with the outside world.

 I find it interesting how he doesn’t think he is that big of a deal in the world of design as he is such a big name and he can come up with designs immediately, not everyone can do that. The professional process is the last step for him when designing, unlike conventional designers, which makes him a special designer and brings him so much attention. I think a reason for this is because he does not think he is intelligent and he believes to be a good designer you have to be intelligent. He goes through these extreme methods, such as living a monk-like life, in order to make up for his “lack of intelligence” as he believes it’s the only way he can get the results.

As a final remark, I am surprised that he is so committed to his work yet he states multiple times that design can help life but not save a life in a negative tone. Like what motivates him to still work and believe in this field if it doesn’t save a life, as he believes that is what matters.

Industrial Design Response – Week 5

Before watching these videos I thought that when making an industrial design it didn’t need much thought and was more about aesthetics. I also believed that products would be made for the average person to reach a bigger market since they would be usable by most. After watching these videos I learned that industrial design isn’t about aesthetics but comfort and usability.  I also learned that there was no such thing as targeting the average person during the industrial design process. Products should be made to combat a problem other designs or versions of that product could create then adapt it to make it easy to use for everyone, bringing in a bigger market versus just targeting the average person. Due to this is important to have the industrial design process because our products would be inconvenient and possibly even impossible to use for some users. The industrial design makes everyone’s life easier even in small tasks such as washing dishes as all physical products we use went through some industrial design.

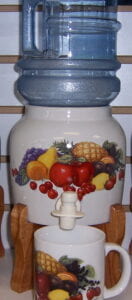
One product I enjoy using on a daily basis would be a porcelain crock(water dispenser). I enjoy using this because it allows me to instantly fill my water bottles or cups. I also don’t have to filter the water since the water in the gallon is already filtered so I can instantly drink it without thinking about it. I think it is more convenient than more modern water dispensers since you can always see when the water is about to run out which can avoid dehydrating situations.

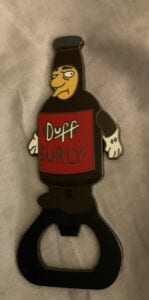
Another product that I enjoy using is my bottle opener. I enjoy using it because it gives a safe, quick, and convenient way to open my favorite glass bottle drinks. When I first when to university I didn’t have a bottle opener to open my favorite drink so after attempts of people trying to open it, my drink just sat in the refrigerator for months until I saw someone with a bottle opener. It can be very dangerous to attempt to open a glass bottle without a bottle opener as it can break and cut you. I am glad that I have a bottle opener once again.

Week 3: Not My Problem

User Interview:

My application is for Melissa Palacios a university student. The problem she wants to solve is to stop missing school deadlines which is caused by her playing games and being on social media instead of working on schoolwork. I think that Melissa suffers from a lack of time management and see an opportunity to create an application in order to monitor and improve her time management so that she can get her schoolwork done in time. My user’s problem can be solved with a time management app that gives her a daily schedule and limits her time on leisure applications. The measurable outcome she wants to achieve is being able to complete all her homework of the day and then be able to play games or go on social media.

Design:

Application Icon:

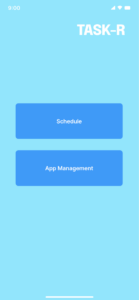
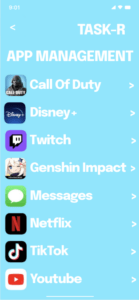
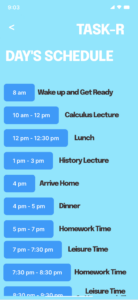
Application Screens:


Description:

TASK-R is an app to help with time management and avoid unnecessary time on leisure apps that can lead to disruptions in your schedule. The app does this by giving you the feature to limit the time you can use an app every day, alongside a daily schedule in order to keep up with your daily tasks.

Prototype Link: https://framer.com/projects/TASK-R-Prototype–pMkkF7nYvgsJiegsPqd9-1Sox1

Presentation:

I presented my application to Melissa, the university student whose problem gave me the app idea. By presenting my application I hoped to get a better insight into what screens needed improvement design-wise and if my app was easy to use. While Melissa used the app in the test I noticed that the design of the app catered to her taste and it didn’t seem tedious for her to use. When getting feedback she said she liked the ability to scroll in the app management section and the schedule design. She also said it was hard to navigate through the days when having to choose one in the weekly schedule. As a result of this presentation, I will change the day selection from a drop-down list to buttons.


Talking to Humans Book Reflection

1) Prior to reading the book, how important would you consider talking to people to be when designing an application? Did that change at all after reading the book? Why?

Prior to reading the book, I didn’t think it was important to talk to people when designing an application. I thought this because I believed that the creator had to develop the app to their preference, focusing it more on what they think instead of others. After reading the book my perspective has changed because it showed me that in order to have a marketable application you need to start with your vision as a base point then incorporate the target audience’s vision and combine them. Talking to people when designing an application is also important because you will get to know what a suitable design style and app purpose would be for the target audience.

2) How has your understanding of a “Prototype” changed after reading this book (if at all)?

My understanding of a “Prototype” has changed. Before reading this book I believed when making a prototype it had to be general and cater to everyone. I also believed when making an app it had to be based on individual thinking without others’ input. I realized after reading the book that when making a prototype the app needs to target a specific group at first and then expand the target audience. This is because not everyone is willing to try new products and you need to find the demographic most willing to try them out which is referenced as early adopters in the book.

3) What specific techniques did you use from this book to help you in your client interviews for Challenge 1, Part 3?

Get Stories, Not Speculation

Ask Open-Ended Questions

The Magic Wand Question

Disarm My Own Biases

Understanding Priority

Overslept!

Overslept!

Icon:

Screenshots:

Description:

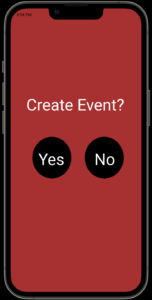
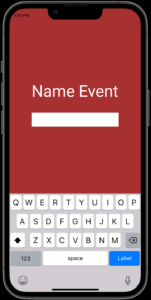
Do you ever miss events due to oversleeping? Do people get mad at you for missing events without notice? Don’t worry, Overslept! has your back!

Overslept! will contact the person or people 30 minutes before the event next time with an automated or customized text message. 

Flowchart: link

Prototype: link

Why Overslept!?

Due to my hectic schedule, bad sleeping schedule, and online classes I have been missing work, appointments, and meet-ups with my friends due to oversleeping. It doesn’t matter how many alarms I set I sleep through. The app is meant to notify the party involved that I won’t be making it with a 30-minute notice instead of having them wait for me and wonder where I’m at. The event that inspired this app idea was me missing work due to oversleeping this week since you are supposed to notify if you won’t make it with a heads up and not just leave the staff hanging. This can be said with non-work-related events since it isn’t a good look not showing up without notifying the other person, especially if the other person shows up and it’s only a meeting between you two. I chose a red color for the app design because red keeps you awake and can remind you to be alert, as the ideal would be that the user wouldn’t have to use the app. The reason I decided to focus this app on communicating to the other party that the user can’t attend is so that the user can oversleep with fewer consequences.