CIRCUIT
Circuit is the complete path of wires and equipment along which an electric current flows. The current flows from the positive pole to the negative pole.
IN THE 1ST RECITATION
We tried different materials to create circuits. We used electronics like breadboard, buzzer, LED, wires, button, and so on. Also, we soldered to make a DIY paddle button and used it in the circuit.
Task 1: Build the circuits
We were asked to build circuits on the breadboards, and we have 3 steps to follow. Each step was more complex than than the last one.
step1
At first, we thought that this task was easy. However, our first attempt failed. We checked the circuit for many times and didn’t find anything wrong. The wires connected the buzzer and the button, and we powered the whole circuit. We also paid close attention to the connection of the button and connected the wires to the opposite side of the button. As for the buzzer, we checked the positive pole and the negative pole of it and it was connected correctly. We had no idea about what’s going on.
A few minutes later we thought that there might be something wrong with some of the electronics. So we changed a buzzer and then it worked.
step2

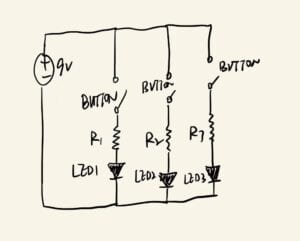
With the previous experience, we finished task 2 easily by adding a LED and a resister into the circuit. According to the diagram, we used parallel connection system.
step3

This circuit is a little complex, and we have trouble understanding how to use the ohm Variable Resistor. After consulting the assistant, we figured out how to connect the ohm Variable Resistor into the circuit and finally finished the task. We can use the ohm Variable Resistor to change the resistance value of itself and then change the current value in the circuit thus change the brightness of the LED.
Task 2: Build a switch
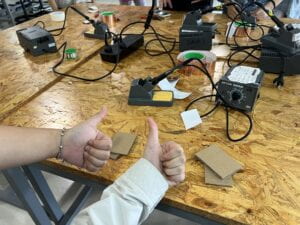
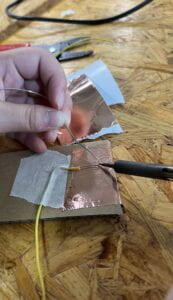
We used cardboard, copper tape, and wires to build a switch. We did the task at the soldering stations, since we need to weld the wires and copper tape together so that they could conduct electricity.
We used a special scissor to handle the wires. We have to expose the metal part of the wire. Otherwise, they cannot be correctly connected to the copper tape and form a circuit.
SOLDERING IS SO FUN!

Task 3: Switch the switches and send a message
We were excited to find that the switch we built could be used in the circuit. It functioned as a button. When we switched the switches, the circuit was switched on, so the LED began to light and the buzzer sounded.
QUESTION 1
LED has a current rating that can not be exceeded. By using resistors, the current can be limited so that the current won’t be above the maximum allowable current.
QUESTION 2
QUEATION 3
We “input” by pressing the button or the switch we built, and the circuit itself “process”, then there comes “output” and the LED began to light and the buzzer sounded. The whole process is like listen, think and speak. Also, this process has two actors, me and the circuit. The degree of interaction is low, because although it has the three processes of conversation, the whole conversation is simple and not very entertaining.
QUEATION 4
Interaction Design and Physical Computing can be used to create Interactive Art in many ways. As is mentioned in Zack Lieberman’s video, artists can use them to let people see the live version of what artists are drawing. Also, they can allow audience to try creating art by themselves. For example, the eyewriting project allows people who cannot write with their hands to draw and write by their eyes, which is amazing.