Category Archives: Interaction Lab

Midterm Individual Post:True Colors

A.

Project title –

True Colors

My name –

Jessie Nie

My instructor’s name-

Rudi

B. CONTEXT AND SIGNIFICANCE

Our previous group project focused on the fiction called “The Plague,” which was set in a virus-infested city where everyone was at great risk of infection. The robot we made was a hospice robot to deliver the last ride for these unfortunate people who were infected. This group project inspired me to do health-related topics for my midterm project with Sid, who is my fantastic partner.

We wanted to use this project to make people around us more aware of their health. It just so happened that we were browsing the equipment website and came across the temperature sensor and the heartbeat sensor, so we started thinking about whether we could use these two sensors to make our project. But we went to the equipment room and asked about it, and they told us they didn’t have the temperature sensor we wanted, so we opted to just use the heartbeat sensor. But how to create interaction between our project and our testers is what we were thinking about, and we saw the neopixel led light on the web, so we decided to combine it with the heartbeat sensor to visualize people’s heartbeats. We planned to use the image in the shape of a heart to represent the heartbeat, and the heart on the neopixel would flash once for each heartbeat, so that people could clearly feel their heart rate.

While thinking about this, we felt that our project would definitely be less accurate and intuitive than the professional medical report like an EKG. So there was no point in just doing the health theme. Then, we started to think about the special features of our project, and we thought we would visualize the heartbeat more tangibly, and we also planned that the hearts on the neopixel screen could be in different colors when the heartbeat speed was different.

So we realized that our project was actually bringing the heartbeat (a kind of physiological activity), which people usually ignore, to our life in a concrete way. Our body never lies to us, which means our heartbeat doesn’t lie as well. In fact, the speed of our heartbeat changes at all times depending on different situations. Sometimes because of our moods, sometimes because of our physical activities, our heartbeat can actually reflect many, many things that we overlook.

The point of our project is to let people feel their inner authentic feelings by actually seeing the changes in their heart rate and feeling the changes in their emotional or physical state. Your heart would never lie, so through our project, you can see your “true colors,” which means how you really feel, who you really are. Our project was designed for everybody, everyone can see their own heartbeat and trace their inner activities while using our project.

C. CONCEPTION AND DESIGN:

Considering that what we needed to do was an interactive device, and our original vision was that the user would just wear a heartbeat sensor and then see their heartbeat flashing on the neopixel screen. But we later felt that with such a design, there was too little human interaction with the machine, and the user was only passively receiving information. So we planned to improve our device and we decided to let the user actively start the heartbeat visualization process. So we added a press switch, and we’re going to make a flexible, user-controlled switch out of cardboard (drawing on the experience of the solder switch taught by Professor Minsky in the first recitation class). I will describe the design of this interactive switch in detail later. This switch let the user decide by themselves when to start their heartbeat visualization journey. We initially designed the hearts with only one color, but to add further interaction to the user’s experience, so we wanted to show them their heart rate more visibly, so we decided to add the color variable. We decided to program the flashing hearts with different colors, and the difference in color reflected the difference in the speed of their heartbeat.

As for what materials and forms to use to represent this interaction, I actually mentioned it above. We used heartbeat sensor to track the heartbeat, neopixel light screen to visualize the heartbeat, and cardboard to create the basic shape of the project and control its switch. In fact, we have thought about using other sensors before, such as sound sensors, but we feel that the heart rate is more easily ignored by us, and is also more truly, unconsciously responsive to our physiological and psychological state. So in the end, we chose the combination of heartbeat sensor and neopixel.
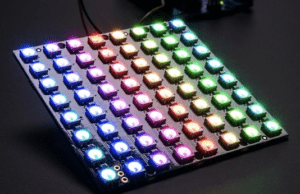
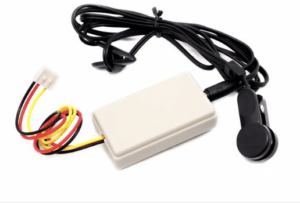
D. FABRICATION AND PRODUCTION:

  • The Mechanism Part:

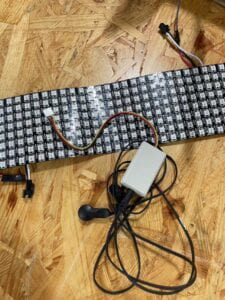
I was mainly responsible for this mechanical engineering part, I was responsible for making the whole appearance of the device and the cardboard button. I also needed to connect the neopixel to the whole project to make our project look integrated. I initially thought of folding the neopixel device around a cylinder of cardboard to form a ring, and here’s my original sketch:
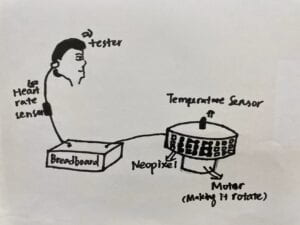
But then we felt that this would instead make it difficult for the user to see the flashing hearts on the screen, so we still planned to have the neopixel screen placed straight up. 

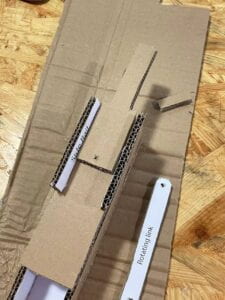
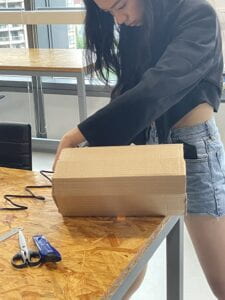
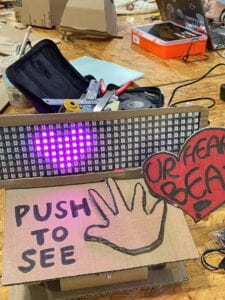
I used cardboard to make a button as the main part of this project. In fact, the design of this switch was very smart and not difficult at all. I folded a piece of cardboard twice, and because of the sturdiness of the cardboard itself, it will spring back to its original shape after being pressed, just in the right way to become a button.
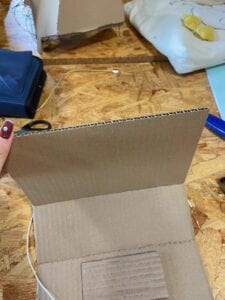
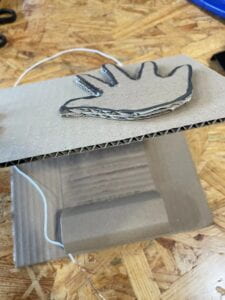
 

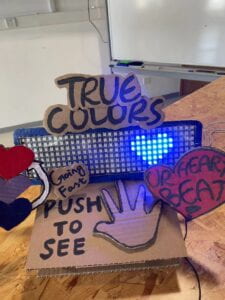
I put another palm made of cardboard on the button as a clear instruction, and I also wrote a line around this palm with the instruction “Push to see your heartbeat,” so that users know exactly what they need to do.
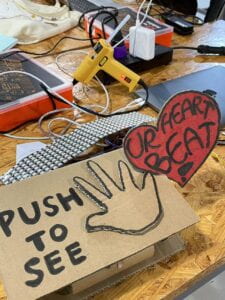
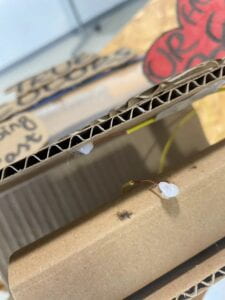
How did I get this cardboard to connect to the Arduino circuit? It was actually quite simple, as taught in the first recitation class, using two wires. I used hot melt glue to fix them on the cardboard, and when the button was pressed, the metal of the two wires collided and the circuit was connected.

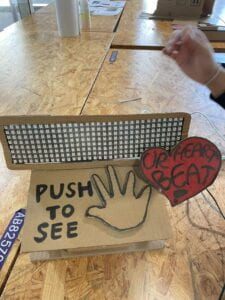
Then I fixed the neopixel screen on top of this cardboard button, so that the whole project looked like a whole again and was clearly visible to the user.
  • The Wiring and Coding:

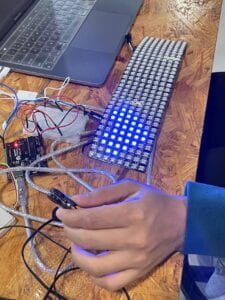
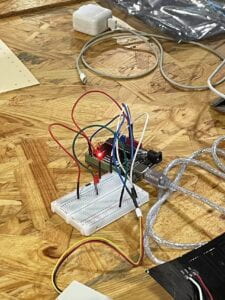
Sid and I designed the wiring together, and we connected neopixel and the heartbeat sensor to the breadboard and the Arduino. The wiring was not very hard, since we didn’t apply many elements. The whole wiring’s like this:
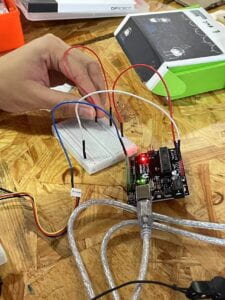
And my partner Sid was in charge of the coding part. At first, he coded two red hearts, which would appear separately depending on the frequency of the heartbeat. But we felt that this was too monotonous for the whole picture. So we decided to change the red hearts that appear alternately at the two ends of the screen to moving hearts that flash from the left side of the screen to the right side of the screen, which would be a little more dynamic. Then later, after we decided to add a different color element, we decided to set some numerical dividers for the heartbeat speed with code. When the heartbeat speed is below a certain value, the displayed heart is blue. And when it is higher than that value, the hearts are red and purple.

As for some coding details, I found it a bit hard for me. But Sid worked with me and he taught me how to code and how it worked. And now I understood the code very well too. 

So basically the whole process was like this:

Since the output of the heartbeat sensor is a digital signal, we initially tested its functionality with a simple LED before moving on to the coding portion. After determining it, we sought to determine the beats per minute. To put this into practice, we calculated the interval between two heartbeat signals using the millis() function, and then we used math to calculate how many heartbeats would occur in a minute if each beat lasted the same amount of time as the interval between two beats. As for the Neopixel coding part, Sid discovered some code that produced simple patterns and then modified it to produce a heart. The heart would then move with each beat utilizing for loops and a variety of patterns, repeating as long as a signal from the heartbeat monitor was provided. The color of the hearts was the next thing we wanted to adopt.At first, there were only pre-selected colors, but subsequently, we decided to alter the color of the hearts based on how quickly they beat. We converted the range of a person’s heartbeat to the Neopixel’s color range of 0–255 using the map() method. The hue of the heart changes depending on how quickly or slowly the heart beats, with red being more prevalent and blue being more prevalent. Finally, we added the cardboard button to activate the display.
  • User testing and the adjustment we made:

During the User Testing session, the overall feedback on our project has been quite good. We would ask them to check their pulse and they would find that the frequency at which the heart flashes appeared was indeed the exact frequency of their heartbeat. They would also slow down their heartbeat by taking deep breaths, or perform jumping movements to make their heartbeat speed up instantly, and in the process they would actively interact with the device to observe the change in color of the hearts on the Neopixel screen. Here are some videos:

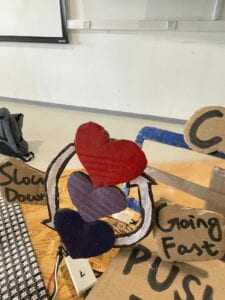
They also made a lot of useful suggestions, such as the fact that although the colors of the hearts on the Neopixel screen were changing, they couldn’t get a very intuitive sense of what the different colors meant, so they suggested that we add an indicator sign. And some people suggested that as well as visualizing the speed of the heartbeat, it could also be displayed through sound, so we later added a buzzer that sounds according to the frequency of the heartbeat.

The color instruction sign:
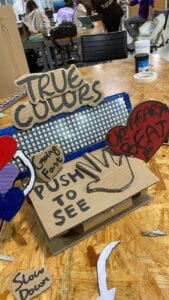
The project’s final format is like this:
A video showing the whole process:

E. CONCLUSIONS:

The goal of our project is to allow users to see and hear their own heartbeat and actively pay attention to their own heartbeat and mental and physical state through the interaction between the device we design and the user. We hope that through our device, users will begin to think about how their own bodies and their heartbeats reflect their mental and physical states. 

“Your heartbeat doesn’t lie.” The interactivity of this device lies in the fact that users consciously wear a heartbeat sensor as well as actively choose to start the procedure, and more importantly, people will actively change their heart rate through some actions, and then they will see on the Neopixel screen the color and blinking speed of the heart that changes according to their changing heart rate. From there, they will perceive that their physical or mental activity is actually changing their heartbeat in a tangible way.

I think our program is pretty interactive to a large extent, but I think if we want to do better. We can learn “manipulate conditions” from psychology class, we can create some fixed scenarios (for example, let the user wear headphones to listen to different music,) and the user will unconsciously according to these different scenarios produce heartbeat changes. This way they can feel the change in their heartbeat more intuitively. As well as our buzzer sound is a bit small and monotonous, our project would also be better if we could further adjust this sound that imitates a heartbeat.

F. ANNEX:

pictures and videos:
The Code:

#include <Adafruit_NeoPixel.h>
#include <Adafruit_GFX.h>
#include <Adafruit_NeoMatrix.h>
#include “pitches.h”

#define FACTORYRESET_ENABLE 1
#define PIN 6

int melody[] = {
NOTE_C4
};

int noteDurations[] = {
4
};

int pushButton = 2;
int pushButton2 = 9;
int previousState = LOW;
int heartCount = 1;
int c;
long startTime;
float endTime;
float heartRate;
bool test;
bool turnOn = false;

Adafruit_NeoMatrix matrix = Adafruit_NeoMatrix(32, 8, PIN,
NEO_MATRIX_TOP + NEO_MATRIX_LEFT +
NEO_MATRIX_COLUMNS + NEO_MATRIX_ZIGZAG,
NEO_GRB + NEO_KHZ800);

// the setup function runs once when you press reset or power the board
void setup() {
// initialize digital pin LED_BUILTIN as an output.
pinMode(3, OUTPUT);
pinMode(pushButton2, INPUT);
Serial.begin(9600);
pinMode(pushButton, INPUT);

matrix.begin();
matrix.setBrightness(100);

matrix.fillScreen(0);
matrix.show(); // This sends the updated pixel colors to the hardware.

}

// the loop function runs over and over again forever
void loop() {
int pushButtonState = digitalRead(pushButton2);

int buttonState = digitalRead(pushButton);

if (pushButtonState == HIGH) {
turnOn = true;
}

if (previousState != buttonState && turnOn == HIGH) {

digitalWrite(3, buttonState);
previousState = buttonState;

if (buttonState == HIGH && test != true) {
for (int thisNote = 0; thisNote < 1; thisNote++) {

// to calculate the note duration, take one second divided by the note type.
//e.g. quarter note = 1000 / 4, eighth note = 1000/8, etc.
int noteDuration = 1000 / noteDurations[thisNote];
tone(8, melody[thisNote], noteDuration);

// to distinguish the notes, set a minimum time between them.
// the note’s duration + 30% seems to work well:
int pauseBetweenNotes = noteDuration * 0.40;
delay(pauseBetweenNotes);
// stop the tone playing:
noTone(8);
}
c = map(heartRate, 60, 130, 0, 255);
if (heartCount == 1) {
matrix.fillScreen(0);
Heart1(matrix.Color(c, 0, 255-c));
matrix.show();
heartCount++;
}
else if (heartCount == 3) {
matrix.fillScreen(0);
Heart3(matrix.Color(c, 0, 255-c));
heartCount++;
}
else if (heartCount == 5) {
matrix.fillScreen(0);
Heart5(matrix.Color(c, 0, 255-c));
heartCount++;
}
else if (heartCount == 7) {
matrix.fillScreen(0);
Heart7(matrix.Color(c, 0, 255-c));
heartCount = 1;
}
else if (heartCount == 2) {
matrix.fillScreen(0);
Heart2(matrix.Color(c, 0, 255-c));
heartCount++;
}
else if (heartCount == 4) {
matrix.fillScreen(0);
Heart4(matrix.Color(c, 0, 255-c));
heartCount++;
}
else if (heartCount == 6) {
matrix.fillScreen(0);
Heart6(matrix.Color(c, 0, 255-c));
heartCount++;
}
matrix.show(); // This sends the updated pixel colors to the hardware.
startTime = millis();
test = true;

}

else if (buttonState == HIGH && test == true) {
for (int thisNote = 0; thisNote < 1; thisNote++) {

// to calculate the note duration, take one second divided by the note type.
//e.g. quarter note = 1000 / 4, eighth note = 1000/8, etc.
int noteDuration = 1000 / noteDurations[thisNote];
tone(8, melody[thisNote], noteDuration);

// to distinguish the notes, set a minimum time between them.
// the note’s duration + 30% seems to work well:
int pauseBetweenNotes = noteDuration * 0.40;
delay(pauseBetweenNotes);
// stop the tone playing:
noTone(8);
}
endTime = millis() – startTime;
heartRate = (1/endTime)*60000;
Serial.println(heartRate, 0);
if (heartCount == 1) {
matrix.fillScreen(0);
Heart1(matrix.Color(c, 0, 255-c));
heartCount++;
}
else if (heartCount == 2) {
matrix.fillScreen(0);
Heart2(matrix.Color(c, 0, 255-c));
heartCount++;
}
else if (heartCount == 4) {
matrix.fillScreen(0);
Heart4(matrix.Color(c, 0, 255-c));
heartCount++;
}
else if (heartCount == 6) {
matrix.fillScreen(0);
Heart6(matrix.Color(c, 0, 255-c));
heartCount++;
}
else if (heartCount == 3) {
matrix.fillScreen(0);
Heart3(matrix.Color(c, 0, 255-c));
heartCount++;
}
else if (heartCount == 5) {
matrix.fillScreen(0);
Heart5(matrix.Color(c, 0, 255-c));
heartCount++;
}
else if (heartCount == 7) {
matrix.fillScreen(0);
Heart7(matrix.Color(c, 0, 255-c));
heartCount = 1;
}
matrix.show(); // This sends the updated pixel colors to the hardware.

test = false;
}

}

}

void Heart1(uint32_t c){
matrix.drawLine(1, 1, 2, 1, c); // x0, y0, x1, y1, color
matrix.drawLine(5, 1, 6, 1, c); // x0, y0, x1, y1, color
matrix.drawLine(0, 2, 7, 2, c); // x0, y0, x1, y1, color
matrix.drawLine(0, 3, 7, 3, c); // x, y, color
matrix.drawLine(1, 4, 6, 4, c); // x0, y0, width, height
matrix.drawLine(2, 5, 5, 5, c); // x0, y0, x1, y1, color
matrix.drawLine(3, 6, 4, 6, c); // x0, y0, x1, y1, color
}

void Heart2(uint32_t c){
matrix.drawLine(5, 1, 6, 1, c); // x0, y0, x1, y1, color
matrix.drawLine(9, 1, 10, 1, c); // x0, y0, x1, y1, color
matrix.drawLine(4, 2, 11, 2, c); // x0, y0, x1, y1, color
matrix.drawLine(4, 3, 11, 3, c); // x, y, color
matrix.drawLine(5, 4, 10, 4, c); // x0, y0, width, height
matrix.drawLine(6, 5, 9, 5, c); // x0, y0, x1, y1, color
matrix.drawLine(7, 6, 8, 6, c); // x0, y0, x1, y1, color
}

void Heart3(uint32_t c){
matrix.drawLine(9, 1, 10, 1, c); // x0, y0, x1, y1, color
matrix.drawLine(13, 1, 14, 1, c); // x0, y0, x1, y1, color
matrix.drawLine(8, 2, 15, 2, c); // x0, y0, x1, y1, color
matrix.drawLine(8, 3, 15, 3, c); // x, y, color
matrix.drawLine(9, 4, 14, 4, c); // x0, y0, width, height
matrix.drawLine(10, 5, 13, 5, c); // x0, y0, x1, y1, color
matrix.drawLine(11, 6, 12, 6, c); // x0, y0, x1, y1, color
}

void Heart4(uint32_t c){
matrix.drawLine(13, 1, 14, 1, c); // x0, y0, x1, y1, color
matrix.drawLine(17, 1, 18, 1, c); // x0, y0, x1, y1, color
matrix.drawLine(12, 2, 19, 2, c); // x0, y0, x1, y1, color
matrix.drawLine(12, 3, 19, 3, c); // x, y, color
matrix.drawLine(13, 4, 18, 4, c); // x0, y0, width, height
matrix.drawLine(14, 5, 17, 5, c); // x0, y0, x1, y1, color
matrix.drawLine(15, 6, 16, 6, c); // x0, y0, x1, y1, color
}

void Heart5(uint32_t c){
matrix.drawLine(17, 1, 18, 1, c); // x0, y0, x1, y1, color
matrix.drawLine(21, 1, 22, 1, c); // x0, y0, x1, y1, color
matrix.drawLine(16, 2, 23, 2, c); // x0, y0, x1, y1, color
matrix.drawLine(16, 3, 23, 3, c); // x, y, color
matrix.drawLine(17, 4, 22, 4, c); // x0, y0, width, height
matrix.drawLine(18, 5, 21, 5, c); // x0, y0, x1, y1, color
matrix.drawLine(19, 6, 20, 6, c); // x0, y0, x1, y1, color
}

void Heart6(uint32_t c){
matrix.drawLine(21, 1, 22, 1, c); // x0, y0, x1, y1, color
matrix.drawLine(25, 1, 26, 1, c); // x0, y0, x1, y1, color
matrix.drawLine(20, 2, 27, 2, c); // x0, y0, x1, y1, color
matrix.drawLine(20, 3, 27, 3, c); // x, y, color
matrix.drawLine(21, 4, 26, 4, c); // x0, y0, width, height
matrix.drawLine(22, 5, 25, 5, c); // x0, y0, x1, y1, color
matrix.drawLine(23, 6, 24, 6, c); // x0, y0, x1, y1, color
}

void Heart7(uint32_t c){
matrix.drawLine(25, 1, 26, 1, c); // x0, y0, x1, y1, color
matrix.drawLine(29, 1, 30, 1, c); // x0, y0, x1, y1, color
matrix.drawLine(24, 2, 31, 2, c); // x0, y0, x1, y1, color
matrix.drawLine(24, 3, 31, 3, c); // x, y, color
matrix.drawLine(25, 4, 30, 4, c); // x0, y0, width, height
matrix.drawLine(26, 5, 29, 5, c); // x0, y0, x1, y1, color
matrix.drawLine(27, 6, 28, 6, c); // x0, y0, x1, y1, color
}
Recitation 4: Actuators and Mechanisms

In the class, I paired up with Sid, and I think the project of this recitation is quite interesting. Basically, there were two parts, the first was about the mechanism; the second one was about the circuit. It was a mechanism that will automatically move up and down.

I’m better at making cardboard and the mechanism part, so I was cutting the cardboard and making the mechanism. Sid volunteered to build the wiring.

  • The cardboard mechanism

.

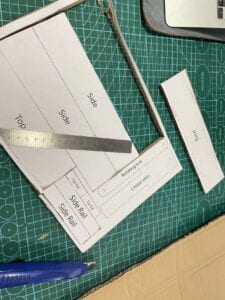
I first attached the paper to the cardboard and followed the instruction picture to cut the pieces off. And I had a look of the example and then it was very smooth to put the different parts of the cardboard together. One thing I almost messed up was that the piece of cardboard that was attached to the motor cannot be glued, it needed to be movable.

  • The circuit

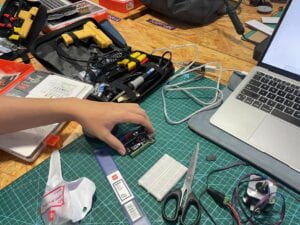
We read the recitation instructions before the recitation class and made an effort to comprehend how the various parts interacted. He started constructing the circuit in accordance with the instructions after we had all the necessary materials and parts ready. Sid placed the chip in the middle of the breadboard after connecting the 5V and GND. After that, He connected the stepper motor to the chip using male-to-male jumper cables. To prevent misconnection, he utilized jumper wires that were the same color as the stepper motor’s cables. He then connected each 5V and GND independently using red and black cables. Last but not least, he used pinMode cables in green and blue. We checked the sample code after that, then Sid uploaded it to the Arduino. Everything was nice and the code worked well. The code and testing video are provided below.

#include <Stepper.h>

const int stepsPerRevolution = 200; 

Stepper myStepper(stepsPerRevolution, 8, 9, 10, 11);

void setup() {
  myStepper.setSpeed(randomSpeed);
  Serial.begin(9600);
}

void loop() {
  Serial.println("clockwise");
  myStepper.step(stepsPerRevolution);
  delay(1000);

  Serial.println("counterclockwise");
  myStepper.step(-stepsPerRevolution);
  delay(1000);
}

So the whole circuit had done, and it was successfully connected to the motor and the cardboard mechanism. It worked pretty well, and the only last step was to design a personalized top.

  • Personalize it

After assembling the template’s components, we had a quick discussion and decided to create a puppy which was my WeChat profile. I like drawing stuff, so basically, I designed how the puppy looked and drew a sketch on the cardboard. And I cut the puppy out of the cardboard, which took me a while. Because it was really hard to cut things on the cardboard. But, after finishing it, we were quite surprised. It was so cute, and we attached it to the mechanism. It worked pretty smoothly!

And when professor Rudi saw our project, he suggested that we could make a box or something else to create a tiny story. Like the puppy can pop up out of the box to welcome you. It can be a device at the entrance, this puppy can pop out of the box to welcome the owner home, which would be very cute.

Question 1: Choose an art installation mentioned in the reading ART + Science NOW, Stephen Wilson (Kinetics chapter). Post your thoughts about it and make a comparison with the work you did during this recitation. How do you think that the artist selected those specific actuators for his project?

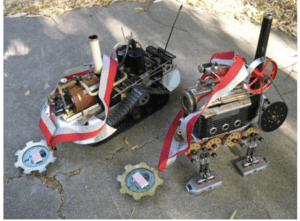
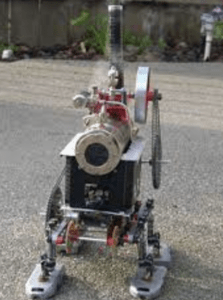
I really like this project because it also has a clever use of motor. We all use particular parts to transmit power, which is a similarity between our project and the work we’ve done on the recitation. I really like the complex transmission motor system. The creator, in my opinion, chose the steam machine to supply the power not only because he or she loves steam engines, but also because the machine can generate powerful power and convey it effectively to the robot’s feet. I really appreciate this design.

Question 2: What kind of mechanism would you be interested in building for your midterm project? Explain your idea using a sketch (conceptual or technical) with a list of materials that you plan to use. Include details about the ways that you expect the user to embrace in a physical interaction with your project. In particular, explain how would your motor (or motors) with a mechanism will be different than using an animation on a digital screen.

For my midterm, I want to combine a rotating motor and a temperature sensor. I want to wrap this Neopixel screen around a cylinder made of cardboard, and when our hand is near the temperature sensor, this cylinder will rotate under the action of the motor. I want to use Neopixel’s screen to show the heartbeat sensor expression, and this motor will be linked to the temperature sensor. I think it will be more direct and intuitive than a 2D animation.

INDIVIDUAL PROJECT PROPOSAL

The project is titled “See Your Heart Beat and Body Temperature,” and I’m Jessie Nie. My professor is Rudi.

Here’s my sketch:    

I wanted to focus on the topic of human body health, and then I found out that we have heartbeat sensors, so I wanted to visualize it. Then I thought that body temperature is also related to human body, so I wanted to combine it with a motor to visualize body temperature as well. I wanted to let people see their biological state through this project.

Group Research Project

The Idea

Our group met twice before the performance, once online via zoom, we initially discussed which story and fictional scenario we wanted to do. Among the three fictions, we decided to choose the third one which is The Plague written by Yan Leisheng. In this fiction, the city has a very susceptible virus, infected people will be gradually petrified in a very short period of time. But after they are completely petrified they are still alive, they just become a concept of time and its slow new life form. There will be a month between the time they are first noticed to be infected and the time they become fully petrified. In light of the virus or pandemic, we reasoned that the city needed to be cleaned immediately. So first we wanted to make a cleaning machine, which looks like a tank and is able to automatically spray cleaning drops or something. But then we thought it was not interactive enough, because basically, that was pretty much a watering machine, which we could easily make today. And since we were not allowed to use any electricity, it was impossible to make an automated robot. After a little more discussion, we came up with an idea which was letting a person play the robot and we just needed to design the functions and appearance of the robot. And considering how to take better care of human beings ourselves, we changed our idea to make a kind of hospice robot. The robot could provide help to people who were infected and being gradually petrified, by identifying the instructions given by people.

Robot Making Day!

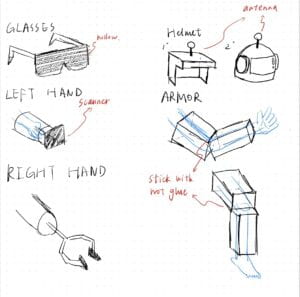
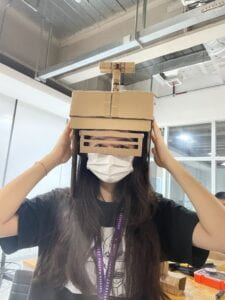
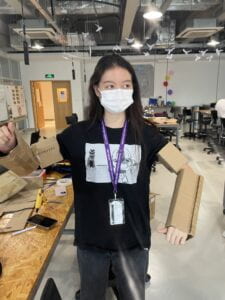
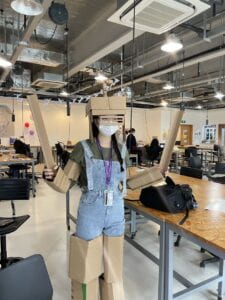
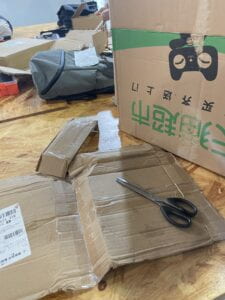
The second meeting of our group was on October 4, and we chose this day to make this robot out of cardboard and discuss the details of the robot’s functions. Here’s the sketch of the robot our fantastic group member Andy drew. We first found some cardboard in the corner of room 826, and we divided the work. Sarah and Smile offered to make the glasses. They measured the width of Smile’s face to make the glasses fit her face perfectly. Chaoyue and I were going to make the arm and leg parts. It wasn’t very hard, but we needed to make several pieces to cover her arms and legs well. Andy and Jason went to do the helmet part!  They were seriously thinking about the construction of the helmet… During the robot-making process, problems appeared inevitably. First, what was each part for? At that time, we only had a relatively brief idea and a sketch. Though we designed many parts, we had no idea what the detailed functions were. And how to make the robot really interactive? That was also something important. Therefore, we listed the crucial parts of the robot and discussed what they can do specifically. After the discussion, we came up with three mean functions of the robot.
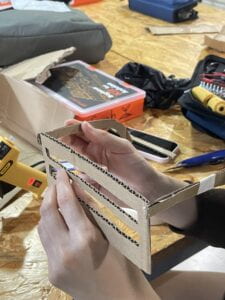
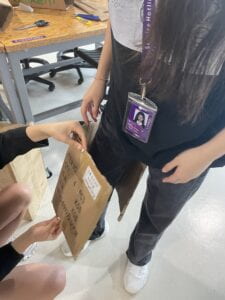
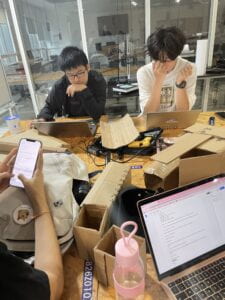
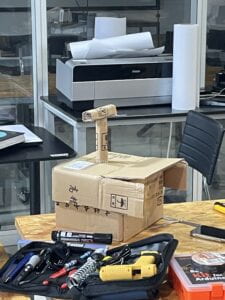
The helmet: There’s a detector installed on the helmet so the robot is able to detect the virus, so when the robot is operating on the streets in the city, it will easily find people who are infected and go help them.

The glasses: The robot wears a pair of glasses, and the glasses can identify peoples’ instructions. For example, a 30% petrified person will use his or her arms to give instructions. And a 70% petrified person will move the head to show the robot the command. As for the 98% petrified person, their eye moves will be identified by the robot’s glasses.

The scanner: The scanner was connected to the robot’s arm. After detecting the infected person, it will use the scanner to identify the level and percentage of petrification to provide specific assistance.  During the whole process, we also encountered problems such as poor hot melt fixing, making things in the wrong size, too limited materials, etc. But since they were only the simplest technical problems, they were quickly solved 🙂

The robot was finally done! Let me then explain in detail the settings and functions of this robot! In the scenario of the third fiction, the whole city is extremely susceptible to a virus and can turn into stone people in a month. So we designed an interactive robot, it will patrol the city, through the sensor on the helmet to sense the infected people. It would then scan the infected people to determine their level of petrification. Next, it will become a hospice robot for the infected person, it will ask the person what help they need, and the infected person will give the robot some instructions through gestures, head twisting, eye blinking, etc. After receiving the instructions, the robot will confirm and then execute them. After the person is completely petrified, the signal of complete petrification will be scanned by the robot, which will then transfer the person to the crematorium.

So how does this robot relates to my previous research and why it fits my definition of interaction?   

As I wrote in my previous blog, I view “interaction” as a circular process of “communicate, receive, react.” Just like the process of “listen, think, speak,” One side has to convey a message, and the other side receives and reacts to it, and this cycle is the process of interaction. Our robot is very interactive. It will scan the infected person and determine the infection level based on the person’s infection signal. More importantly, it will respond to the person’s instructions and interact with the person’s needs and commands. 

Time to perform!

After finishing the cardboard part of making the robot, we considered how to perform and create scenes that the audience will easily understand. To let every group member be involved in the performance, and to better show how the robot identifies the infected level and provides specific help by recognizing different instructions, we decided to create 5 scenes.  Sarah, I, Chaoyue, Andy, and Jason, the five of us played the role of the infected from mild to severe infection, and Smile played the role of the robot to scan us separately and provide us with help. Sarah was the least infected and hadn’t started petrifying yet, so the robot identified no help was needed. My legs were petrified, so I couldn’t move, and the bot judged me as 30% petrified. Chaoyue was more petrified and only her head could be moved, so she turned her head toward the window. Jason was identified as being in a completely petrified state and was transported directly to the crematorium.

Here’s our performing video! 

And of course, this robot has its own advantage, as well as limitations. Our robot has a complete process of finding the infected, offering help, and ending help, and is also very interactive, while fitting in well with the fictional scenario. But it also has its own shortcomings, as Professor Minsky commented after our performance, the robot can provide very limited help for the infected. We could probably think of something more functional or more interactive.

Critical analysis and assessment of “Group Team”‘s project! This group chose the first fiction, the scenario is a very intelligent society, and in the “happy house” everything is interactive. So they designed a sensory interactive device. Wearing this device, the person can immediately come to another world, he can hear, see, smell, and touch anything in this virtual world, and he will have a very real virtual world experience.  Their group’s performance was also very vivid. The student who put on the device performed a scene of coming to the beach, he felt the sea breeze of the virtual world, saw the beautiful sea, touched the seawater, and climbed the coconut tree. Their performance vividly showed the multiple functions of this device. I think their device does fit the setting in the fiction because it’s really intelligent. It also fits the requirements of this assignment, because the person and the device create a connection and interaction. But I think they also have shortcomings, for example, at first I think the device and VR devices are too similar. As well as the fact that people do not give the device too much interaction, basically, it’s always the device bringing people experience. These are my brief comments, but I still really like their creativity and performance!          

Here's our full script (Simplified) 

Role:

Robot: Smile

1st stage 1 day: free to move - Sarah

2nd stage: only upper body can move - Jessie

3rd stage: only head - Chaoyue

4th stage: only eyes - Andy

5th stage: completely solidified - Jason


Script:

Stage1

diii….

Robot: Virus infection detected. 

Target Identified

bibi..

Silicon Percentage:5%

Body status: Free to move. 

No service needed.


1st: freestyle*


Stage2

diii

: Virus infection detected. 

Target Identified

bibi..

Silicon Percentage:30% 

Body status: Legs parralyzed. 

What can I do for you?


2nd: shout and command verbally then lastly point to a tissue


Bi 

receive instruction


Robot: You want the tissue.

Option 1- bring you the object; Option 2: bring you to the object


2nd: show 1 with finger


Roger.

Mission completed. 


Stage3

diii

Robot: Virus infection detected. 

Target Identified

bibi..

Silicon Percentage:70%

Body status: Paralyzed from shoulder down. 

What can I do for you?


3nd: command verbally then turn your head and look at the window


Action Identified.

Would you like to be transported to the window? 

Yes, nod your head. No, shake your head.


3nd nod yes


Roger.

Mission Completed.


Stage 4

Dii

Robot: Virus infection detected.

Target Identified.

Bibi..

Silicon Percentage:98%

Body status: Only eyes can move. 

What can I do for you?


4nd: Move your eyes left for 10 sec


Detected Pupil Movement.

Eyes looking toward left more than 10 seconds. 

Would you like to be transported to the left? 

Yes blink once, no blind twice.


4nd blinks once


Roger

Mission Completed.


Stage 5

Robot: 

Dii

Robot: Virus infection detected.

Target Identified

bibibibibibi

Body Status: Completely solidified. Transferring to petrifaction community.

Mission Completed. 

See you.


THE END.


Recitation 3: Workout

Step1

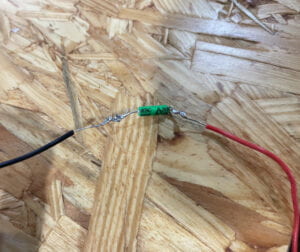
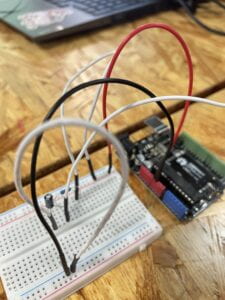
In this recitation class, I paired up with my friend Ragnor! And we started to solder first. The first mistake we made was that we soldered the wrong object because the thing we needed to solder with the wires was the little green sensor, but we thought it was the black tilt switch. But that wasn’t a big deal, knowing how to solder in the first reci class, we easily made two. The picture below shows mine.

Step 2

Then we followed the instruction to build the circuit, and after having tried many times in previous classes. This part wasn’t something challenging for us. We finished this part very quickly. The only point I want to mention is that I was not familiar with the schematic, so though the circuit wasn’t complicated, it still took me some time to figure out how to build it by following the schematic.

And following the instruction, we input the code below, so when we moved the sensor, the serial monitor would constantly show 010101…

int SENSOR_PIN = 2;
int tiltVal;
int prevTiltVal;

void setup() {
  pinMode(SENSOR_PIN, INPUT); // Set sensor pin as an INPUT pin
  Serial.begin(9600);
}

void loop() {
  // read the state of the sensor
  tiltVal = digitalRead(SENSOR_PIN);
  // if the tilt sensor value changed, print the new value
  if (tiltVal != prevTiltVal) {
    Serial.println(tiltVal);
    prevTiltVal = tiltVal; 
  }
  delay(10);
}

Step 3

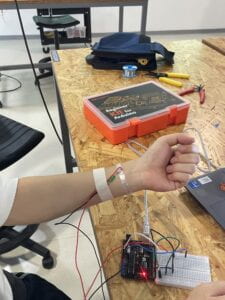
The next step was to wear the circuit, more specifically, to attach the sensor to our arm. And I used tape to put the sensor on Ragnor’s arm. 
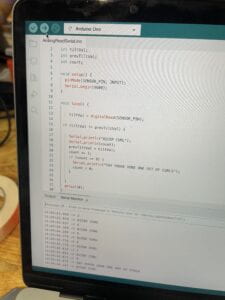
And when we did a biceps curl, the value would turn from 0 to 1.

Here’s the video:

Step 4

Then came the most fun, as well as the most difficult step, which was Bicep Curl Workout! Of course I don’t mean that bicep curl itself was difficult for us, though maybe it was, at least for me, lol. But the whole step required much coding knowledge and practice, and I felt like my basic coding knowledge was still very lacking by doing this step. Because I couldn’t understand what each line was for, I always forgot some elements or even didn’t have any ideas. I felt a bit stressed at that moment, but that was also the motivation for me to study coding and devote more time to the interaction lab.

As for task one–“Add a conditional to your sketch so that it shows  a message on the Serial Monitor ONLY when a full biceps curl has been completed. ”  And we added a condition “if (tiltVal != prevTiltVal && tiltVal == 1) “, and if this condition was satisfied, it would print “A FULL BICEPS CURL.” 

int SENSOR_PIN = 2;
int tiltVal;int prevTiltVal;void setup() {
 // Set sensor pin as an INPUT pin
pinMode(ledPin, OUTPUT);
Serial.begin(9600);
}void loop() {
// read the state of the sensor
tiltVal = digitalRead(SENSOR_PIN);
// if the tilt sensor value changed, print the new value
if (tiltVal != prevTiltVal && tiltVal == 1) {
Serial.println(“A FULL BICEPS CURL”);
}
if (tiltVal != prevTiltVal) {
prevTiltVal = tiltVal;
}
delay(10);
}

Here’s the video to show how it worked:

And task two was a bit more difficult because we needed to code something to make the Arduino count the curl, so we added a variable and named it x, so right after the line “A FULL BICEPS CURL” appeared, we input “Serial.println(x); x = x+1;”. So the number would show with the sentence as well.

And the complete code is: 

int SENSOR_PIN = 2;
int tiltVal;
int prevTiltVal;
int x = 0;void setup() {
// Set sensor pin as an INPUT pin
pinMode(ledPin, OUTPUT);
Serial.begin(9600);
}void loop() {
// read the state of the sensor
tiltVal = digitalRead(SENSOR_PIN);
// if the tilt sensor value changed, print the new value
if (tiltVal != prevTiltVal && tiltVal == 1) {
Serial.println(“A FULL BICEPS CURL”);
Serial.println(x);
x = x+1;
}
if (tiltVal != prevTiltVal) {
prevTiltVal = tiltVal;
}
delay(10);
}

As for step three, it added a limit to the variable we were using to count the curls. It was quite complex because the number we set confused us. And we tried the way we didn’t add another condition but failed, so the only way we came up with was to add one more condition. And finally, it worked!

int SENSOR_PIN = 2;
int tiltVal;
int prevTiltVal;
int x = 0;void setup() {// Set sensor pin as an INPUT pin
Serial.begin(9600);
}void loop() {
// read the state of the sensor
tiltVal = digitalRead(SENSOR_PIN);
// if the tilt sensor value changed, print the new value
if (tiltVal != prevTiltVal && tiltVal == 1) {
Serial.println(“A FULL BICEPS CURL”);
Serial.println(x);
x = x+1;
}
if (tiltVal != prevTiltVal) {
prevTiltVal = tiltVal;
}
if (x == 8){
Serial.println(“Yay, you’ve done one set of curls!”);
x = 0;
}
delay(10);
}

Step 5

And last, my excellent partner added a LED light to the circuit. So when it detected there were 8 full biceps curls, besides the line “Yay, you’ve done one set of curls!“, the LED light on the breadboard would turn on at the same time.

Reflection:

  • At what angle of tilt does it transition between HIGH and LOW

while the tilt sensor was horizontal with respect to the surface.

  • What else did you notice about its behavior?

I can feel that there is a moveable component in the sensor that can produce sound when I shake it.

  • What if you rotate the limb that has the sensor attached to it?

Nothing will change. The value will stay the same.

  • What if you shake it?

The output result will quickly alternate between 1 and 0.

  • What if you hold the wires several centimeters away and tilt it?

There’ll be no changes to the value.

  • Do you think it can be used by any user?

Since it counts for them, it can be used by amateur fitness enthusiasts. In order to motivate them to persist, we may also create a goal and picture the training process.

Recitation 2: Arduino Basics

We had 3 circuits to build in the second recitation class, they were Circuit 1: Fade, Circuit 2: tone melody, and Circuit 3: Speed Game. After getting to know Arduino for the first time in the last recitation, I felt that it wouldn’t be that hard for me this time. And the fact confirms my feeling!

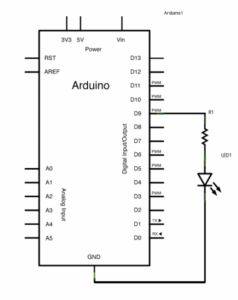
Circuit1: Fade

The first circuit is quite easy, I built it very quickly after seeing the schematic. When I open the Fade page of Arduino and click the run button, the LED light started to alternate between dark and light, then between light and dark, and on and on.

But I have a question that didn’t affect the operation but confused me a bit. Because usually, we connect both the GRN and the 5V power on the Arduino board, but by making this circuit, we just connected the GRN and 10, so I wonder what to provide the power.

Here’s the video: reci2

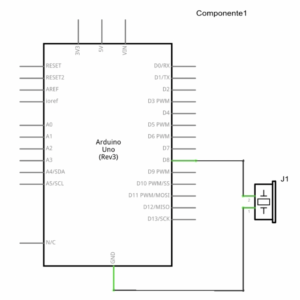
Circuit2: tone melody

The second circuit was not hard as well, the only things we used were jumper wires and the buzzer. But this time we connected the buzzer to Arduino and used code to let it sound melody. All we needed to do was open the melody page and run the code. And the melody tone was decided by the code; I really want to learn the coding part inside. It’s pretty cool!

here’s the video:reci22

Circuit 3: Speed Game

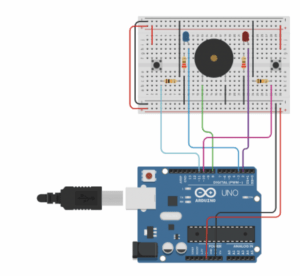
The third circuit was the most complex one, but the most difficult was solely the circuit-building process. Since we already had the schematic, it would be all good if when followed the instruction properly. Because this circuit was finally in the form of a two-player game, it was essentially symmetrical. So I used two 220k resistors, two 10k resistors, two press buttons, 2 LEDs, and a buzzer. It took me some time to build the circuit, but it was pretty smooth. There wasn’t any tricky problem. The only thing was that though I successfully built the circuit, I didn’t truly know exactly what each component was used for, especially the two different resistors.

And then my partner and I copied and pasted the code to the Arduino homepage and ran the code. We played the game and I won! When I won, the buzzer went off and the LED on my side came on to show the result. I felt like I was really doing some interactive project. But the press buttons were too small to press, and that gave me some inspiration for the first thinking question. I’ll illustrate it later.

And here’s the final video: reci24

Question 1: Propose another kind of creative button you could use in Circuit 3 to make the game more interactive. Read and use some material from the Physical Computing, Introduction Chapter (p. xvii – p. xxix) to explain why this button would make this game more interactive.

A1: The innovative button that comes to mind and may be attached to circuit 3 is one that, the player can hammer the doll using two hammers and two dolls; if they manage to hit the doll ten times in the first attempt, they have won. This is because the small button on the circuit does not make the player feel particularly intrigued. So I want to use the pressure sensor installed inside the dolls instead of the little press button.

Question 2: Why did we use a 10 kOhm resistor with each push button? (Psssst… Go back to your slides for this answer)

A2: Each push button may effectively prevent floating pins and short circuits by using a 10K resistor. When the switch is open, the 10k resistor can pull the digital input pin down to GND. By doing so, we can guarantee that the push button will function effectively.

Question 3: In the book Getting Started with Arduino there is a clear description about the “Arduino Way” in chapter 2. Find a project that you find interesting that can be used as an example for these kind of projects. Cite it in adequate manner, include a picture, and explain the reasons that you chose it.

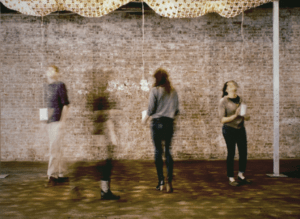
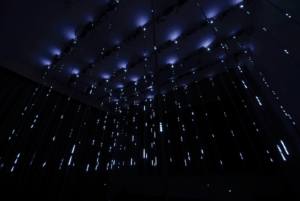
A3: The project I discovered involves moving the ceiling in response to how people move beneath it. I picked it because it demonstrates how an Arduino can get lost while trying to discover a route to C rather than just building roads from A to B. I find it intriguing because of this. The ceiling can move in any direction. Instead, it will sway to the movements of those beneath it.

Reading: Interactive Artifact

The Veldt can be read as a lesson in the perils of technology, particularly when it jeopardizes the bond between parents and their children. In this fiction, George and Lydia Hadley are a married couple that resides in a Happylife Home that is fully automated and can handle all of their household chores for them. Another big part of this story is about the nursery they bought for their children. This nursery can show the conscious activity in people’s own minds in three dimensions, it was originally used to record and study children’s consciousness, but then it was abused by George’s two children and they ended up killing their parents in this place.  I was impressed by some words of this fiction, and it says–One of the original uses of these nurseries was so that we could study the patterns left on the walls by the child’s mind, study at our leisure, and help the child. In this case, however, the room has become a channel toward-destructive thoughts, instead of a release away from them. In order to avoid the tragedy in the ending, I want to design a detector of violent danger awareness.

This interactive device is installed in the nursery, and it will detect the consciousness pattern on the wall because in this room the kids’ consciousness will be projected on the wall. Once the device detects that the wall pattern contains aggressive and violent elements, it will automatically stop the function of the room and report to the parents via mobile phone. And the parents are empowered to decide how long the nursery will be closed. So basically the whole system consists of the person showing emotions and consciousness first, this device detects and then makes interpretation and judgment, and once it detects the awareness of violence, it starts to operate with its stress system so that measures can be taken to prevent the occurrence of violent tragic events.

The Ones Who Walk Away From Omelas depicts an apparently harmonious, beautiful, and happy utopia-like society, but it is not really a utopia; the prosperity and beauty of this society are based on the loneliness and misery of a child. This fiction is an anti-utopian story and also a story related to society and morality. It raises some ethical questions for us to think about–what if the greatest happiness for the majority depended, not merely on a minority being unhappy, but on a minority actively being kept in a perpetual state of misery? What if that were the condition on which everyone else’s happiness and success depended? Would that be morally acceptable, or would it not, rather, strike us as morally repugnant? Although the ending of this fiction is remarkably moving with its subtle acknowledgment that there are some who refuse to give up on the idea that a better world is possible, one of the book’s most moving moments occurs just before the end when the narrator describes the gradual acceptance of the citizens of Omelas to the child’s suffering. People witnessing this child’s suffering are first shocked and outraged. But when they discover that their own happiness is based on his or her very painful experience, they begin to justify evil and start to become insensitive.

In such a circumstance, I hope that something will cause these people to stop being indifferent and once more be able to feel the sorrow and rage over this child’s suffering in order to come up with a better solution. So I want to make a feeling transmission device to correlate this boy’s feelings with people in the whole city. When this boy feels hungry, lonely, or sad, everyone will receive such emotions so that people will feel pain and thus think about how to improve the living conditions and emotions of this child.

The fiction Plague tells the city has a very susceptible virus, infected people will be gradually petrified in a very short period of time. But after they are completely petrified they are still alive, they just become a concept of time and its slow new life form. But most of the uninfected people just burn these petrified people, and this fiction discusses something more than just about the epidemic and the virus, but also about life and ethics.

The interactive device I design for this scenario is a machine which can serve the infected people to let them live in a more comfortable way before they become totally petrified. The petrified people give instructions to the robot with their limbs or eyes, and the robot confirms and helps them complete the instructions.

How do I define Interaction?

Interaction is a process of interconnection, mutual perception, and mutual response. I agree with one concept about interaction in the article What Exactly Is Interactivity, which defines interactivity as a similar process to “listening, thinking and speaking.” One side makes some output, the other side understands and reacts, and the process of this cycle is the interaction. Interaction is an immersive process and an open applied art that is anchored in people’s way of living. Interaction design explains the potential look of objects, which is innately situational and addresses particular issues in a given setting.

  • A good example I wanna share:

This interactive donation machine was created and applied in Europe. I view it as a very successful interactive innovation. When people swipe their credit cards to donate, a piece of bread is sliced off on the screen, and then a hand appeared on the screen to take the bread. This reaction and scene give people who donate with credit cards a real feeling of helping others. They directly know where their money goes and what their money does, so It makes people’s abstract feelings tangible. Its interactivity will make more people feel the meaning of their donation, and more people will be willing to swipe their cards to donate. This machine creates a positive interaction with people. What people do to the machine is swipe their cards to make a donation, and the machine senses this action and then reacts as shown on the screen, where a piece of bread is sliced off, which in turn gives the donors a real sense of helping others.

  • An interactive device that doesn’t meet my definition:

The name of the project is In the rain. I wouldn’t call In The Rain a successful interactive artwork. This gadget may display various rain scenarios with music and light effects so that people can experience various moods and act accordingly. This gadget expresses the designer’s love of rain, it actually shows many sorts of rain over the long run. The project’s and the user’s relationship, however, is fractured and unidirectional. Users are unable to communicate their thoughts to the device, and the device is unable to receive, process, and transmit outside signals. So, in my opinion, this project does not fit my definition. It provides users with an artistic but impractical experience.

Reference:

https://www.creativeapplications.net/member-submissions/in-the-rain-represent-potential-of-rain/


Recitation 1: Electronics & Soldering

During the first week of recitation, I paired with Jason to make a circuit!!

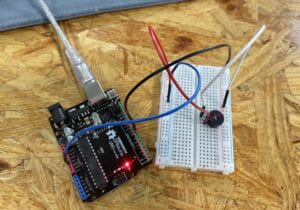
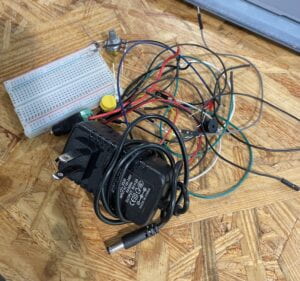
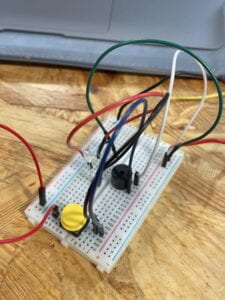
At the beginning of the class, we met some of the fellows and learning assistants, and they gave us the mission to make some circuits with several materials. So basically, what we got is a breadboard, a buzzer, a push-button switch, some resistors, a variable resistor, several jumper cables, a power, and 2 LED lights.

These are what we got:

The first circuit:

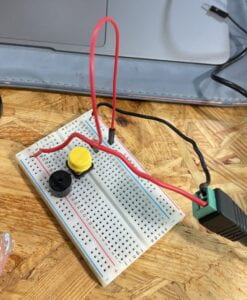
The first thing we did was make a very basic circuit with a switch, a buzzer, a power, and some jump cables. We studied that schematic but failed to operate it. Our main problem was being so confused about the structure of the breadboard. Then we turned to Corina, our learning assistant, and she used a disassembled breadboard to show us its internal structure, and how things worked with the breadboard. After understanding the principles involved, we started our own attempt again.

We connected the red line of the power to the positive side of the breadboard and the black one to the negative. Then install the buzzer and switch. The process wasn’t very complicated, but after we plugged in the power, the buzzer couldn’t be controlled by the switch. So something went wrong, and we found it was about how we connected the switch. Corina showed us a picture of the push-button switch and told us we should connect the A and D poles of the switch, instead of connecting the A and B poles. We then tried to plug the jump cable into the line where the D pole was, and it finally worked.

The Soldering:

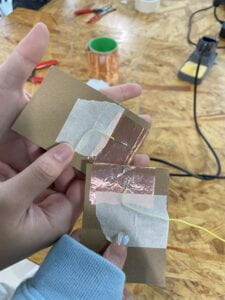
After working out the first circuit, we went to the soldering workshop taught by Professor Minsky. Professor showed us how to use the machine to solder. And taught us how to use cardboard, tape, copper tape, and wire to make a paddle buttom step by step. The professor taught very carefully, other steps are also very simple, the only difficulty is the very step of soldering. It was about controlling and needing practice. My partner Jason tried first, and he did it pretty well, but the soldering wasn’t very strong. Then I started soldering my wire, learning from Jason’s experience, so I melted more material, and it was stronger.

The second circuit:

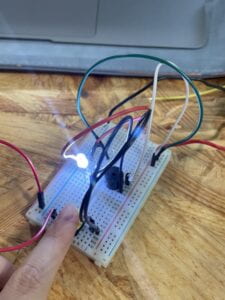
With the experience of making the first circuit, the second circuit was not a difficult task for us anymore. We changed the position of the switch and buzzer a bit to make there’s a bigger space for other materials. Then we added a resistor and a LED to the circuit, but the first attempt only succeeded half. Because our LED light was not connected to the switch, so it was always on. We adjusted the position of the jump cable, then the light was finally able to be controlled by the switch.

The final circuit:

Only 10 minutes left, and we had one last circuit, which was the most complicated one to do. But we already had a lot of experience and had mastered the principle of this circuit, so we just needed to follow the same pattern. But how to connect the variable resistor to the breadboard was a problem for us, there were 3 outputs of the resistor, and it confused us about which output to connect the cable. Then the fellow Iris told us to use the cables to connect the outputs which were the closest. One was to lead and one was to resist. Also, our classmate Sid provided some assistance with us, so we finished the final circuit very fast and smoothly. He helped me take a video as well. The brightness of the red LED could be adjusted by moving the variable resistor, and the white LED and buzzer could be controlled by the switch. I felt a sense of accomplishment when I saw that the circuit we had built was working successfully. And last, we replaced the push-button switch with the paddle switch we made in the soldering workshop!

Here’s the final videos:

Questions:

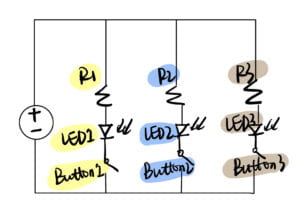
Q1: What is the function of the resistor R1?

A1: R1 is mainly used to stabilize the current and voltage in the circuit. Since the battery provides more current and voltage than the LED1 can carry, so a resistor is needed to avoid a short circuit when it’s connected to a LED.

Q2: Looking at the following circuit, draw its diagram by yourself.

A2:

Q3: After reading The Art of Interactive Design, in what way do you think that the circuit you built today includes interactivity? Which degree of interactivity does it possess? Please explain your answer.

A3: I think there’s interactivity between this circuit and us, and also between the different elements in the circuit. Take the first and simplest circuit for example, after we built the circuit, when we press the switch, the circuit started to operate, which means it started the “thinking” step mentioned in the article, then the current passed through the switch and the buzzer, the buzzer sounded, and the whole process of interaction was finished. I feel like the working circuit formed a benign interaction between information and between people and circuits. 

Q4: How can Interaction Design and Physical Computing be used to create Interactive Art? You can reference Zack Lieberman’s video or any other artists that you know.

A4: Physical computing and interaction design produce mediums and platforms where people may relate to the digital environment, giving interactive artists the means to change data about human behavior. It may capture the focus of the line of sight and use the eyes as a brush to write and draw, similar to a human-computer interaction tool called Eyewriter introduced by Zack Lieberman, to allow paralyzed people more effectively express their individual requirements and to foster engagement. the making and improvement of art. Interaction design and physical computing applications broaden usable human tools, enabling people to produce more vibrant art.

Reference

O’Sullivan, Dan, and Tom Igoe. Physical Computing. Course, 2004.