Mindful Illumination
PROJECT TITLE – YOUR NAME – YOUR INSTRUCTOR’S NAME
Mindful Illumination – Jianing Li – Gottfried Haider (instructor)
CONTEXT AND SIGNIFICANCE
In previous classes, we learned how to use Arduino to control LEDs, buzzers, capacitive sensors, etc. So, I tried to conceptualize my work by thinking about what I could make with these basic components. The project includes many basic codes, we learned how to use them in the previous classes. We used many basic components in the previous projects and tried to interact with the projects. An example of people interacting with a fridge by opening the door, and the light in the fridge would light up triggered my understanding of interaction. My definition of it is that machines can give people responses according to their actions. What’s more, in a recitation class, my group made a flower that could grow slowly and fade fast. We elicited thoughts about natural phenomena by controlling the speed at which flowers moved in different directions. So, an interactive project also needs to be capable of triggering people’s reflections or inspirations. My project has many unique sides. First, we used the Neo Pixel RGB and the heart rate sensor, which are very sophisticated components. Second, we try to use this project to help people to meditate, which is an innovative topic. Finally, we decorated it with cotton to make it dreamy. Also, we put a heart with a red LED inside in the darkroom, so that people could see their heartbeats directly. If I re-created it, I would use the brain wave sensor instead of the heart rate sensor. Because the heart rate sensor works by detecting our veins, the results can be affected by how hard we press on it and whether there is something that can also be detected, so this kind of sensor is not accurate enough. Brain wave sensor is much more complex and much more accurate. If I have enough cardboard, I will enlarge its size so that it can enable a person to sit in it. Being immersed in a darkroom, the project will be more immersive and effective. My project is intended for everyone who wants to relax themselves for a while. As people are paying more and more attention to work and study, it can be helpful to appeal to people to slow down and emphasize how they feel. It has never been more important than ever to pay attention to our mental health.

CONCEPTION AND DESIGN
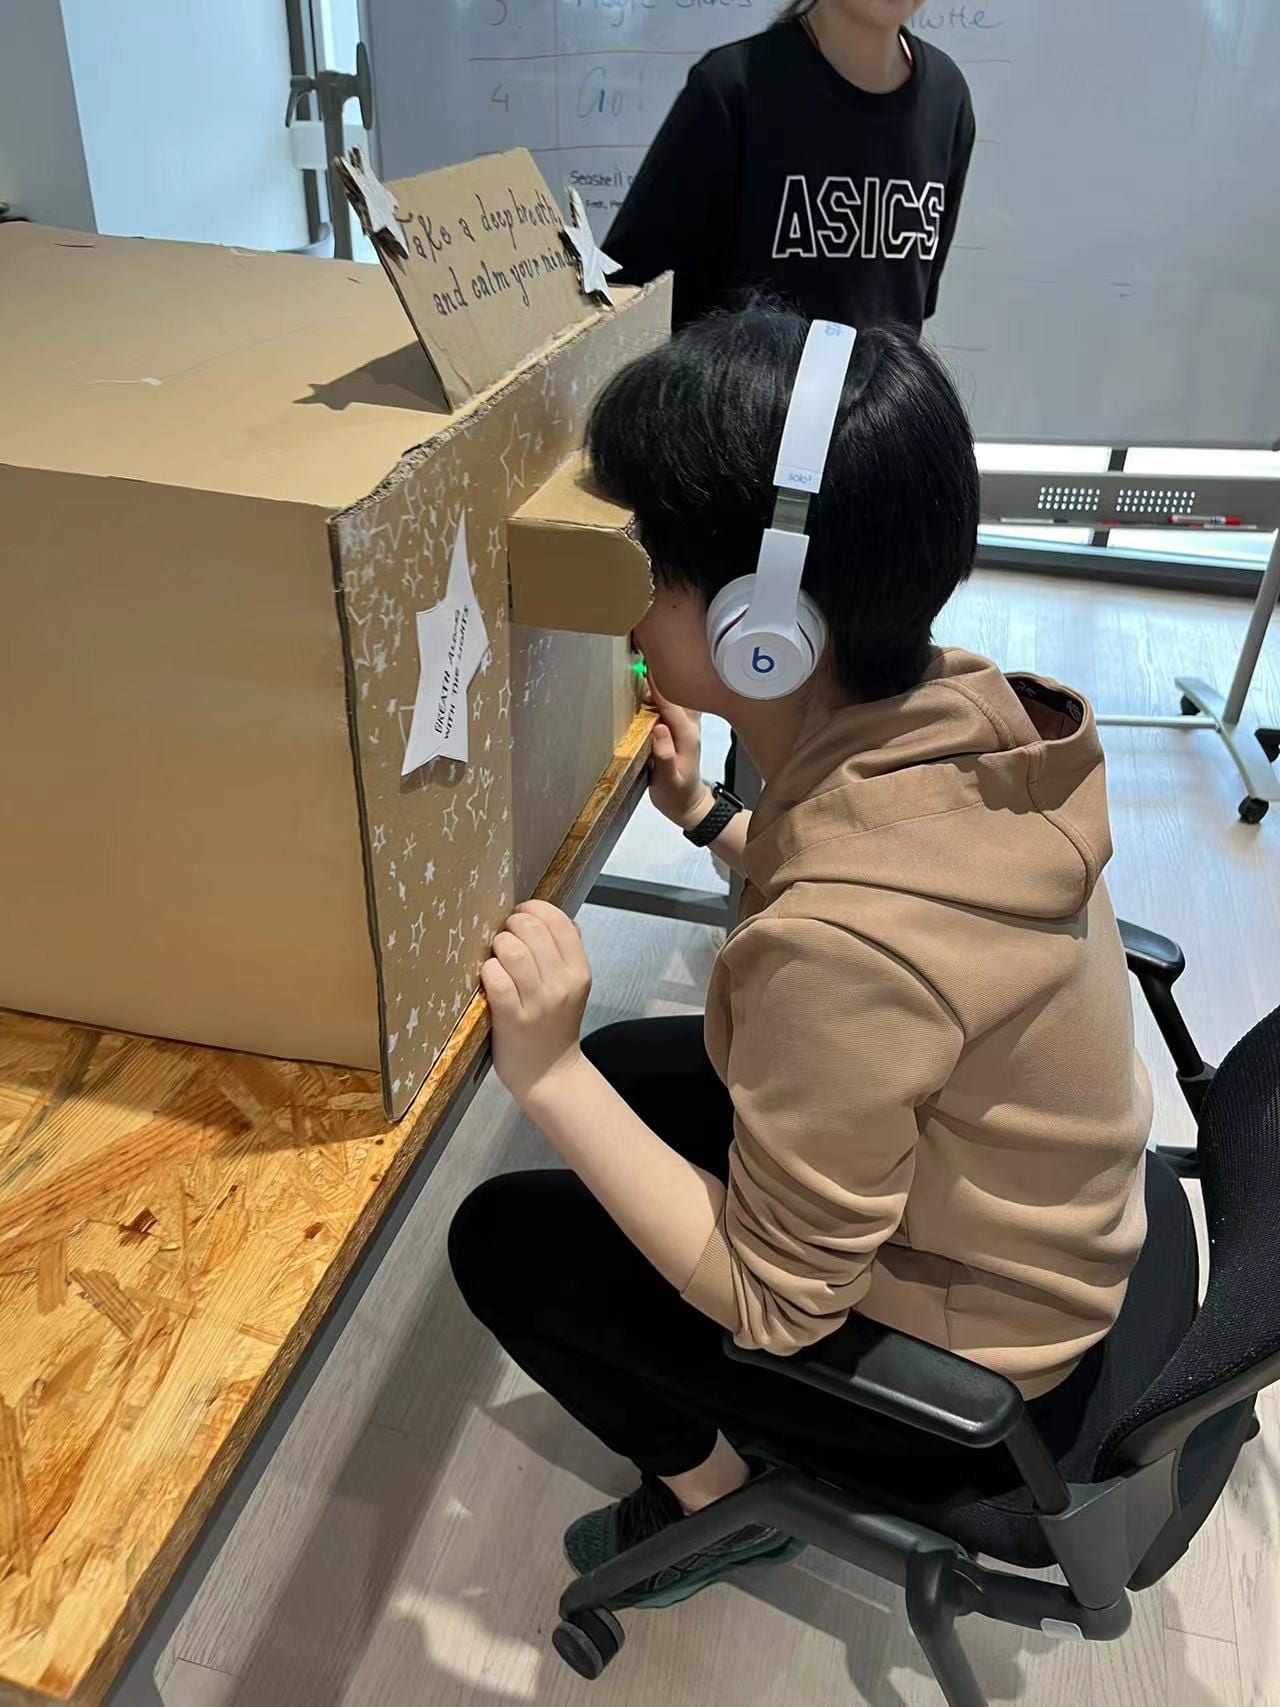
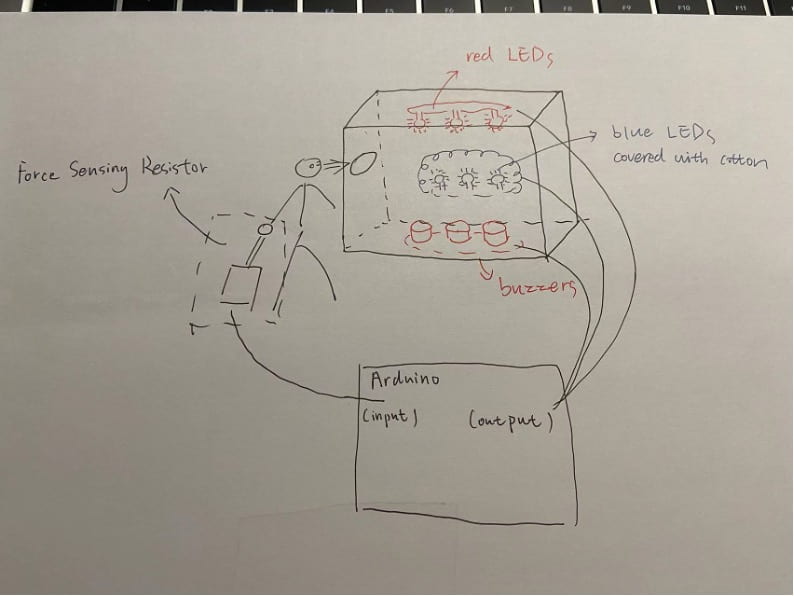
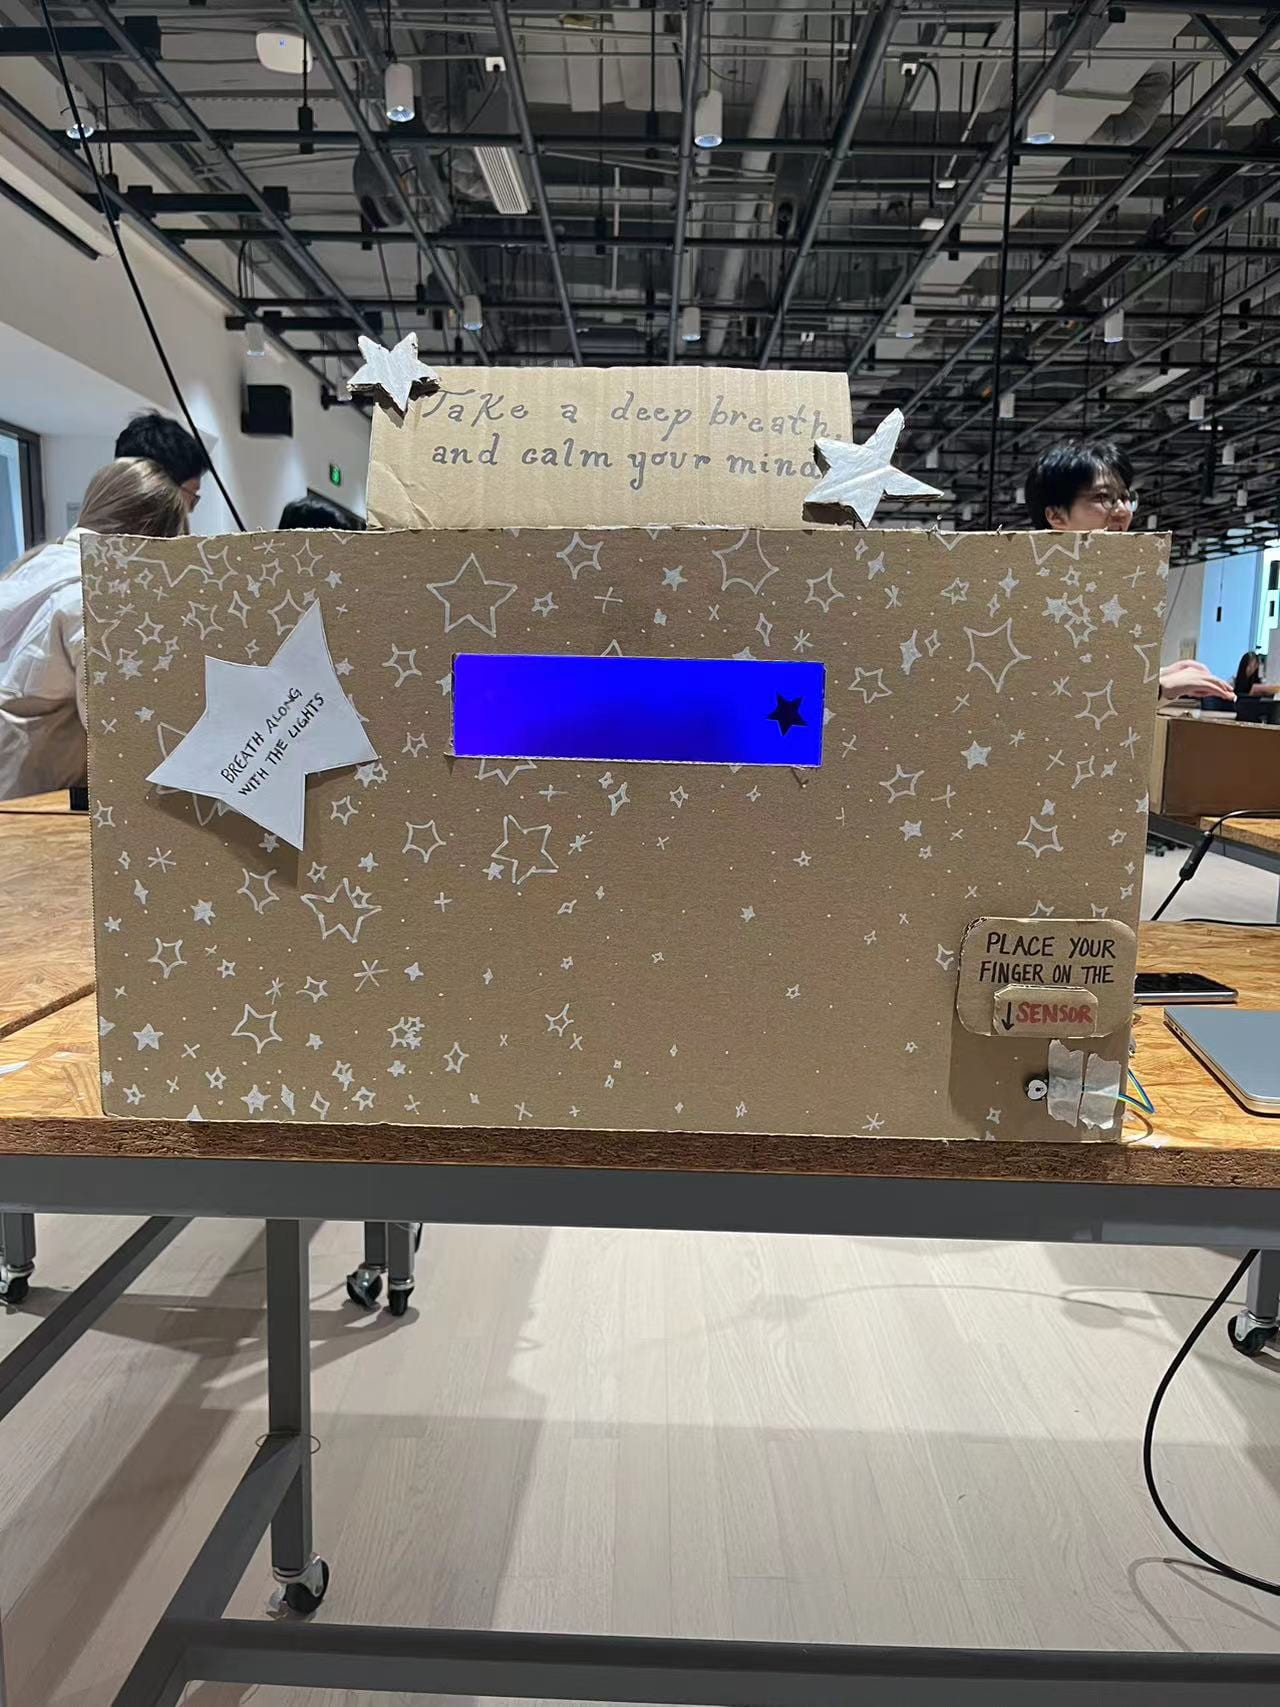
My users are going to breathe along with the lights with their fingers put on the heart rate sensor. I think it’s quite hard to understand what our project is about without any signs. So, I put a sign on it that says: “Breathe along with the lights.” and a sign on the top of the box says: “Take a deep breath and calm your mind.” So that the users can understand what to do with my project. Also, I put the red LED, which glows according to the user’s heartbeat, in a paper-made heart, so that people can understand they can know their heart rate from it. What’s more, I put some little stars in the box and covered the whole box with cotton. Because I hope people can get a dreamy feeling and be relaxed. Considering that people may not realize that we want them to detect their heart rate, we also put a sign aside it to let our users know what to do. In addition, I used a box to build a darkroom and give the users a headphone to listen to a mindful song list, so that it can be more immersive. At first, I planned to use the pressure sensors and LEDs. However, my instructor suggested I use a heart rate sensor, which can reflect people’s moods more directly, and the Neo Pixel RGB looked better than the LEDs, so I took his suggestions. The elements of stars and clouds are used to let people calm down. To shield light, we added cardboard and sponges on the hole after we tested it. Those materials were all easy to use and had a good effect. They were best suited to my project purpose because all the materials were chosen according to how to complete my project and enabled people to get the meaning of the project. In my project, the components worked as a whole, while many other projects had only one component. They looked like a demonstration of how to use a certain component, rather than a completed project. There was another option in that I could make the buzzer sound to let the user know that his heart rate was high. But it was like an alarm, which would scare the user, and he would never calm down, so I rejected it.

FABRICATION AND PRODUCTION
In our production process, both my partner and I brainstormed some ideas and chose our favorite one to be submitted to our instructor. He gave some comments to both and recommended we use my proposal. As I had already drawn sketches, our first step was to build it. We found a box whose size was appropriate and put the Neo Pixel RGB into it. Then my partner started to code, and I decorated the box with cotton. However, the coding was not successful, so we decided to find a heart rate sensor first. However, the two sensors we borrowed from the equipment room were all broken, so we finally got a good one from our instructor. Then I tried the example codes for the heart rate sensor to enable it to show the heart rates on the screen. After that, we coded together with lab assistants. They helped us to simplify our code and complete it. As the code was too sophisticated, our instructor corrected and optimized it. The final thing to do was to find a headphone and play the “Morning Focus” song list.


I provided the idea, made sketches, did part of the decoration, and helped with the coding. During user testing, the users told us that they wanted to observe their heart rate directly and they also needed something to shield the light. So, we added a red LED that could flash according to the heartbeat, and we put it in a paper-made heart to simulate the heart. We also used more cardboard and sponges to shield the light. It was the last version of our project. These adjustments were simple but very effective.
Materials list: cardboard, cotton, Arduino, wires, breadboard, heart rate sensor, red LED, paper, neo Pixel RGB, scissor, tape.

CONCLUSIONS
My project enables people to know how they feel directly and finally helps all of them to adjust their breathing and enjoy their meditative moments. My project can show different patterns to people whose heart rate is beyond or below 90 per minute. It well aligns with my definition of interaction. But there is still a thing that doesn’t meet the definition. Most of the instructions were delivered in words, so it would be better if the users could understand what to do just by playing with the project. The users interacted with my project well and they were immersed in meditation. If I had more time, I might try to use the brain wave sensor, which could be much more accurate than the heart rate sensor. The hardest part of the whole process was the coding part. I learned to collect different example codes and test each single part. If every part can run well, then I can put them together. Because it became extremely hard to debug when I put all the codes together from the very beginning. I also learned that I only need to connect one top of the Neo Pixel RGB.
The full code:
/**
* Codes for the heart rate sensor.
* This was adapted from a the tutorial found here:
* A Library of Examples! – World Famous Electronics llc. (pulsesensor.com)
*/