important!
Please choose your topic of your Case Study presentation in this document by this week:
https://docs.google.com/spreadsheets/d/1ZuRBNSmV1Ahq5FRNVMeF4xsZ6fQfVSWXd1oj_upR16Y/edit?usp=sharing
If there are people missing, I will randomly assign you one.
This week you will work in pairs to connect a regular circuit and a wireless circuit using sensors and actuators.
Each group will use:
Equipment needed:
Equipment |
Qty |
Pic |
Notes |
| Arduino Lilypad USB | 1 |  |
The LilyPad Arduino USB is a microcontroller board based on the ATmega32u4. It has 9 digital input/output pins (of which 4 can be used as PWM outputs and 4 as analog inputs), an 8 MHz resonator, a micro USB connection, a JST connector for a 3.7V LiPo battery, and a reset button. It contains everything needed to support the microcontroller; simply connect it to a computer with a USB cable or power it with a battery to get started. |
| sensor | 1 | 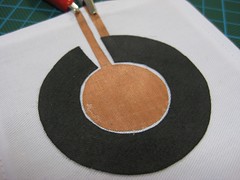 |
The one you made in the previous class. |
| 10K ohm resistor | 1 |  |
|
| micro:bit | 2 |  |
The Micro Bit (also referred to as BBC Micro Bit or stylised as micro:bit) is an open source hardware ARM-based embedded system designed by the BBC for use in computer education in the United Kingdom. |
| micro:bit battery | 1 |  |
KittenBot 400mAh Rechargable Lithium Battery Pack for Meowbit |
| Neopixels | 1 |  |
You will be using FastLED Library.(or Neopixel Library if you know how to use that one) |
| Breadboard | 1 |  |
This is just for prototyping. If you were sewing the sensor on the wearable , you can use conductive thread or wires as we have been doing it in the previous exercises. |
| Micro USB cable | 1 |  |
This is a cable to connect the Lilypads and Microbit to the computer |
| Aligator Clips |  |
When working with unusual non-header-friendly surfaces, these handy cables will be your best friends! | |
| MakeCode editor | software | https://makecode.microbit.org/ https://makecode.microbit.org/reference
Note: There are two official editors for Micro:bit; MakeCode and Python. They are browser-based, meaning they work on Windows, Mac, Chrome OS, Linux and no software installation is necessary. |
|
| Arduino | software | https://docs.arduino.cc/software/ide/ |
Today you will only be working on connecting your sensor to a LilyPad and use it to control the light of a Neopixel strip. After this, you will work with Micro Bit to set up a circuit to transmit information and receive it. In this way, you will be controlling now the Neopixel strip wireless, through radio communication. Wireless connections might be useful when you have wearables that interact with each other.
Exercise 1: Lilypad
-
Connect the sensor to the lilypad and Read the sensor values:
You did this last class!

Now, check out the values of your sensor by using AnalogReadSerial example in Arduino. Remember to use the serial monitor to read what the sensor is detecting. -
Connect the Neopixels to the same Lilypad and do not disconnect the sensor:

-
Program the Neopixels:
For controlling Neopixels, you can use the library from Adafruit. Install the library in your Arduino IDE and then write a code to control the neopixles with the sensor. Here there is an example: Example Adafruit Neopixels Library
If you don’t know how to instal libraries in Arduino, check the instructions here: https://docs.arduino.cc/software/ide-v2/tutorials/ide-v2-installing-a-library/If you want to try another library, you can use FastLED: Here is an example with FastLED library.
Exercise 2:
For this exercise you will be using two micro:bit, one for sending signal and another one for receiving signal.
-
Setting up the sensor and the first micro:bit:
The circuit:

The code:For programming the micro:bit you need to go to https://makecode.microbit.org/ and create a new project. You can find there a lot of tutorials as well.
This is the code to send the values to the other micro:bit. Make sure your radio set group is unique of your group.
To upload the code to your micro:bit connect it to your computer and press download.

The option Show data Device should appear once a program that is outputting serial data is successfully flashed on the micro:bit. Click on Show data Device to view the output.

Connect the sensor to the micro:bit the same as you did with the lilypad and use the pin 0 as the analog pin (in this board, all the pins work are analog and digital)
Read the values that you are getting by pressing Show data Device:

-
programming the second micro:bit to receive values and use them to control the Neopixels:
The circuit:

The code:For using Neopixels you will need to add the library to the editor. Go to the menu on the right top corner and find extensions. Search for neopixel and select the neopixel extension. Go back to the editor and you should have a new Neopixel set of blocks will appear in your menu 


Now you should be able to use the code for Neopixel code:

You can find this code here: https://makecode.microbit.org/S43846-03916-56601-73755
But adjust it according to the values from your sensor.Final result:


If you have more time:
try experimenting controlling the neopixel with the accelerometer of micro:bit
SUGGESTED READINGS:
- Andrew Brooks ‘Ethical clothing myths and realities’ p207-p232 | Clothing Poverty: The Hidden World of Fast Fashion and Second-Hand Clothes
- Kate Hartman, Make : wearable electronics
- Chapter 9, Wireless
- Sewing for Fashion Designers by Anette Fischer
ASSIGNMENT 3
Document and post to the blog this exercise. Remember to take videos of the circuit working.
Investigate how animals/plants communicate with each other and write about an interesting form of communication that you could use in a wearable to communicate with others. How do you imagine you could use what you learned today for a wearable?
Enjoy your break!