/* (!) Disclaimers:
1. This recitation requires you to work with higher voltages. If the circuit is not built properly in accordance with the provided schematics, there is potential to damage your computer if you are not using USB protection. If you choose to use your computer for this recitation, please notice that you are doing so at your own risk. If you do not feel comfortable using your own computer, you can check out an IMA laptop from the Equipment Room.
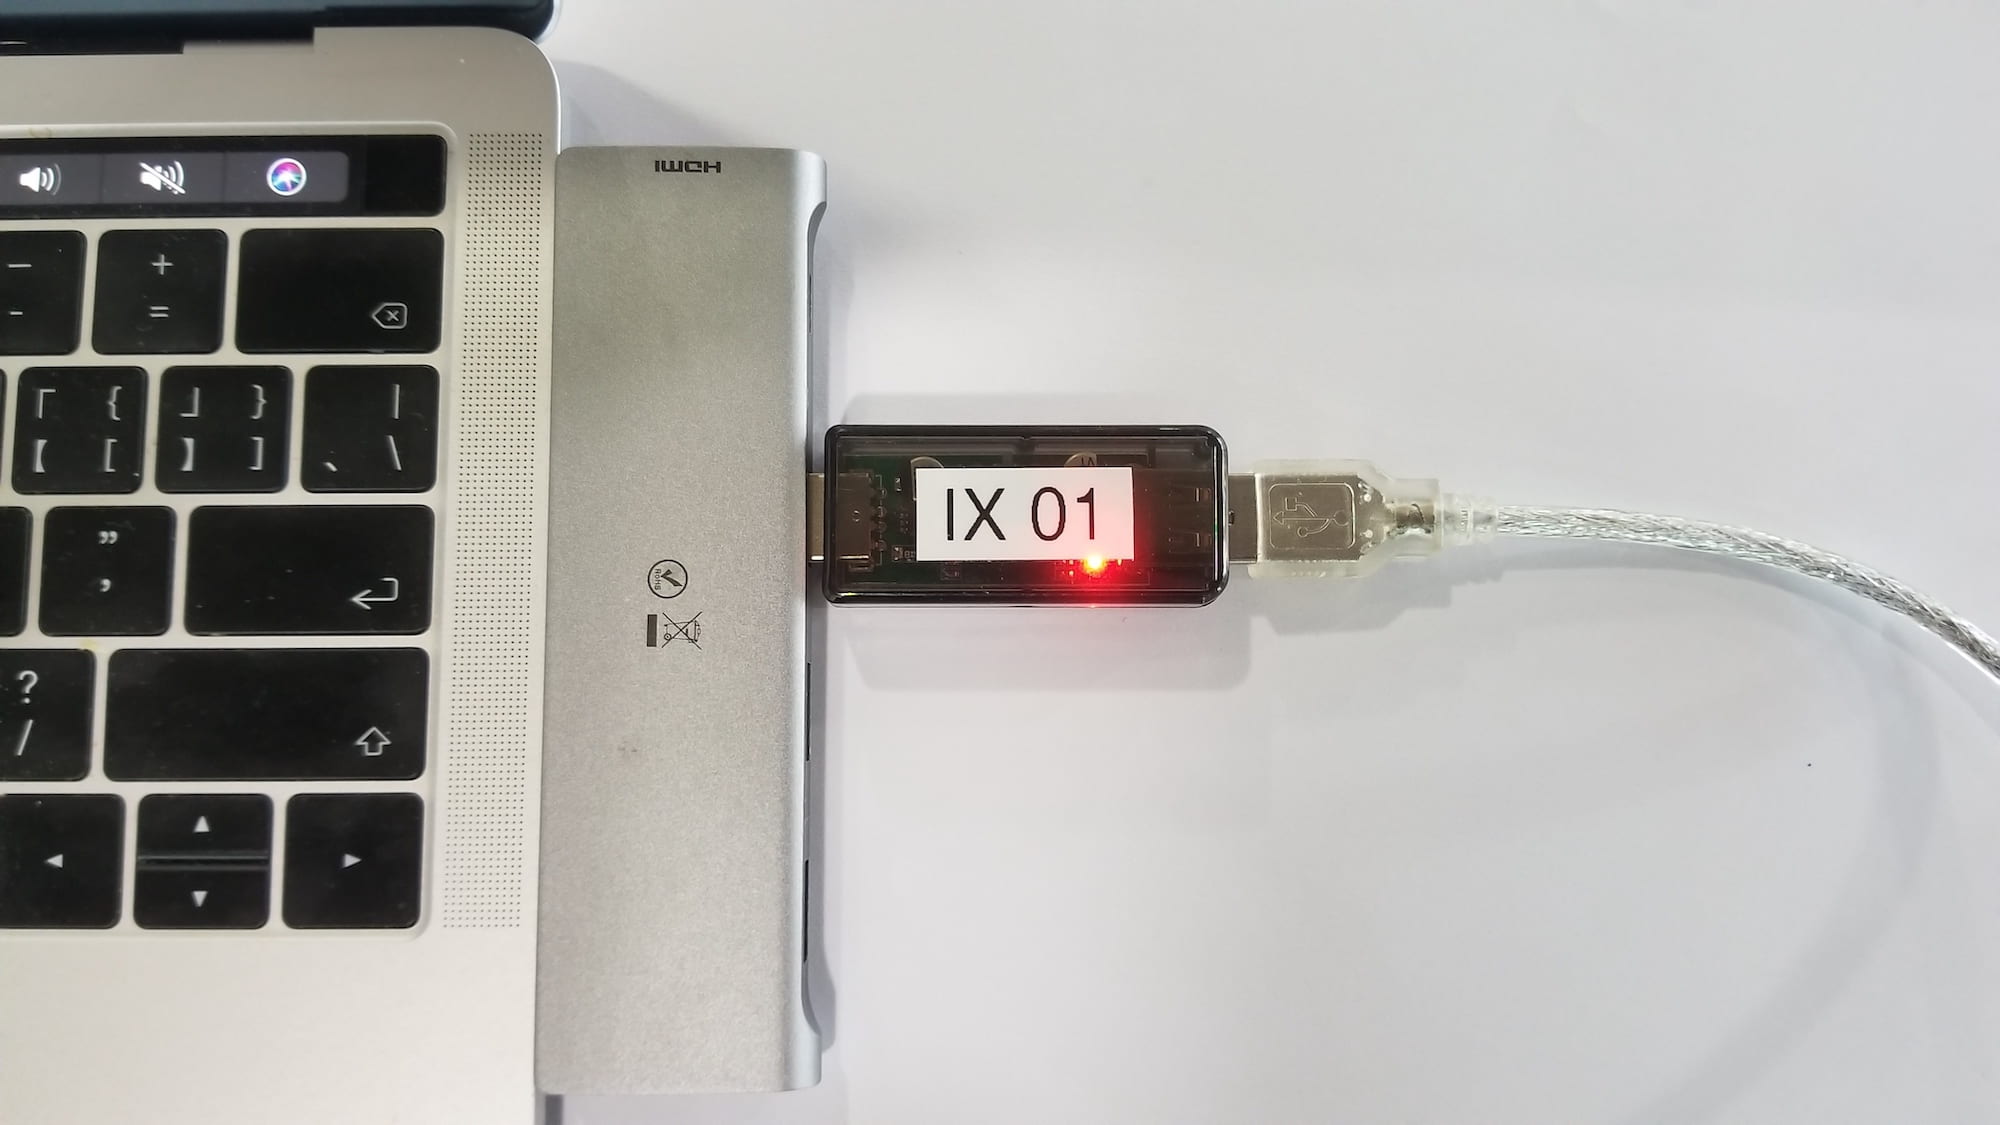
2. To prevent your computer from accidental damage, therefore use the provided USB protector, which plugs in between your computer and the Arduino.
3. The components in this recitation (the IC and Stepper Motor) will get hot, so please be mindful and do not touch these components when they are powered. */
This week, we will be creating a mechanism out of cardboard. You will work together with a partner. You only need to build one mechanism and one circuit, so you should make sure that you help each other to complete all the steps.
Step 1: Build the circuit
Materials needed for your circuit:
| Qty | Equipment | Photo |
| 1 | 42STH33-0404AC stepper motor | 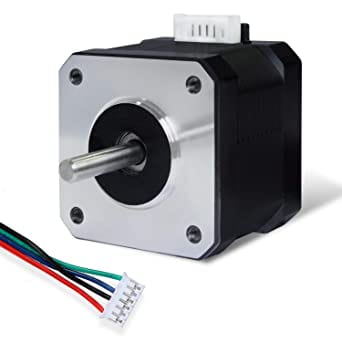 |
| 1 | L293D chip (H-bridge) | 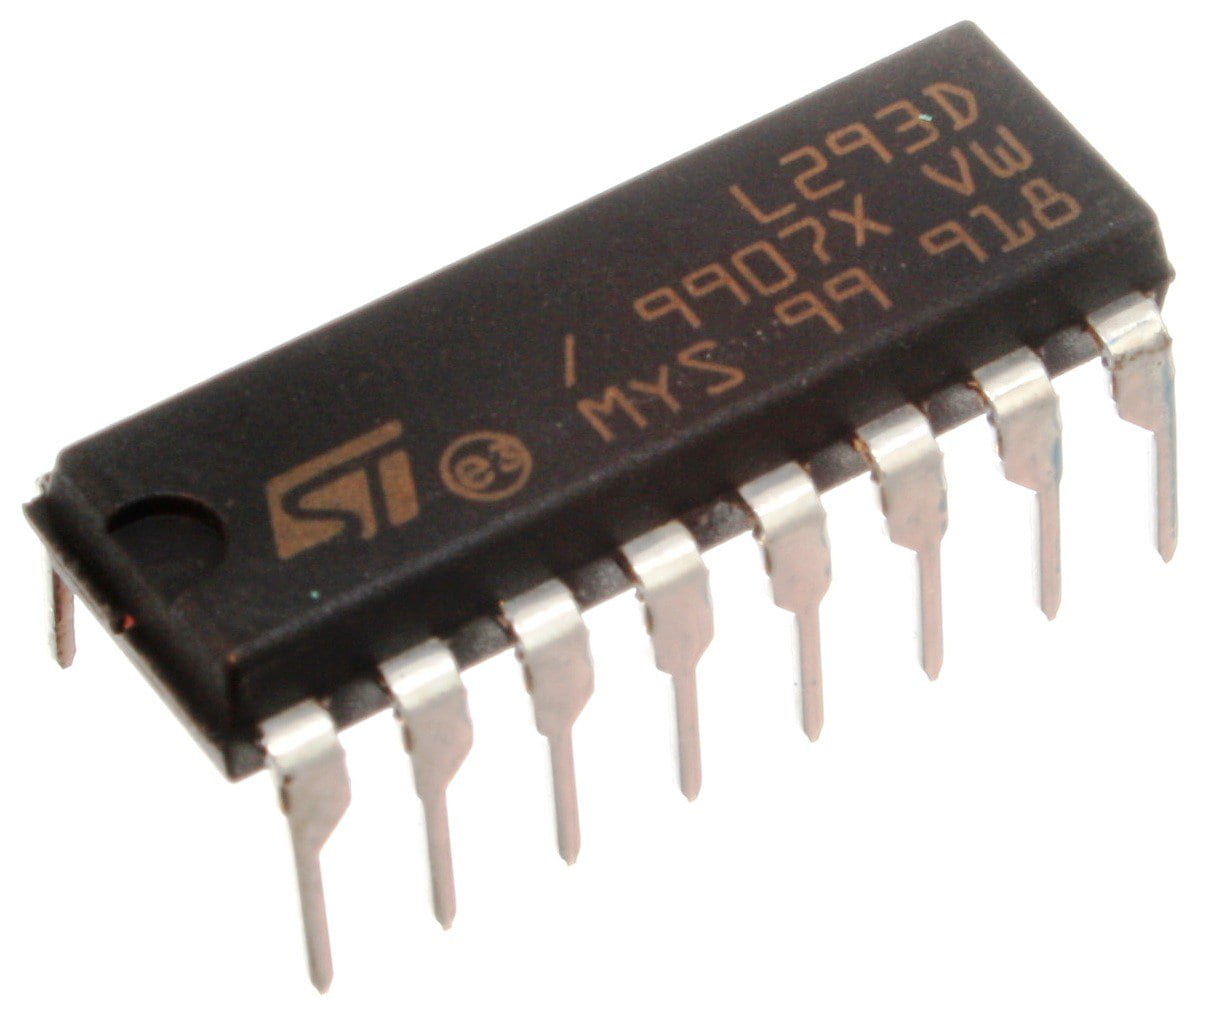 |
| 1 | Power jack | 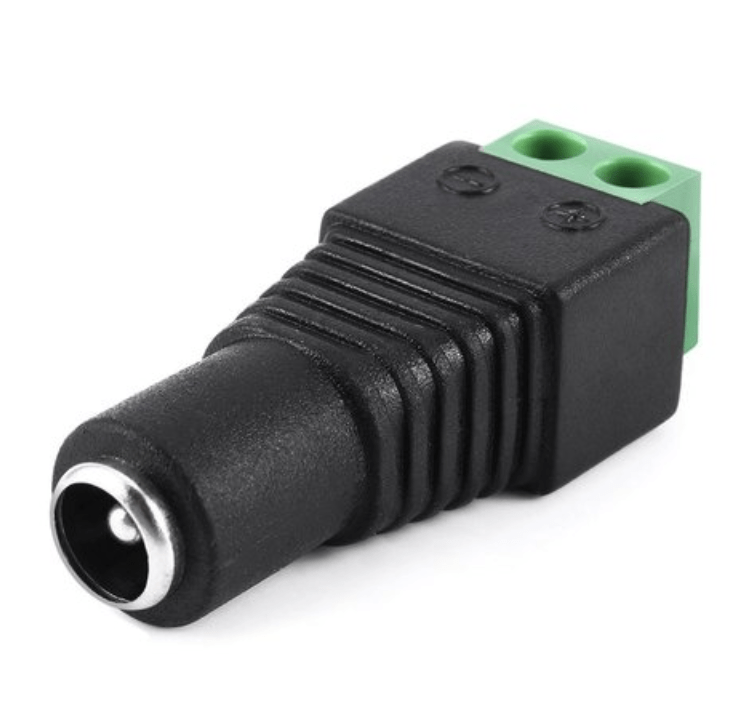 |
| 1 | 12 VDC power supply | 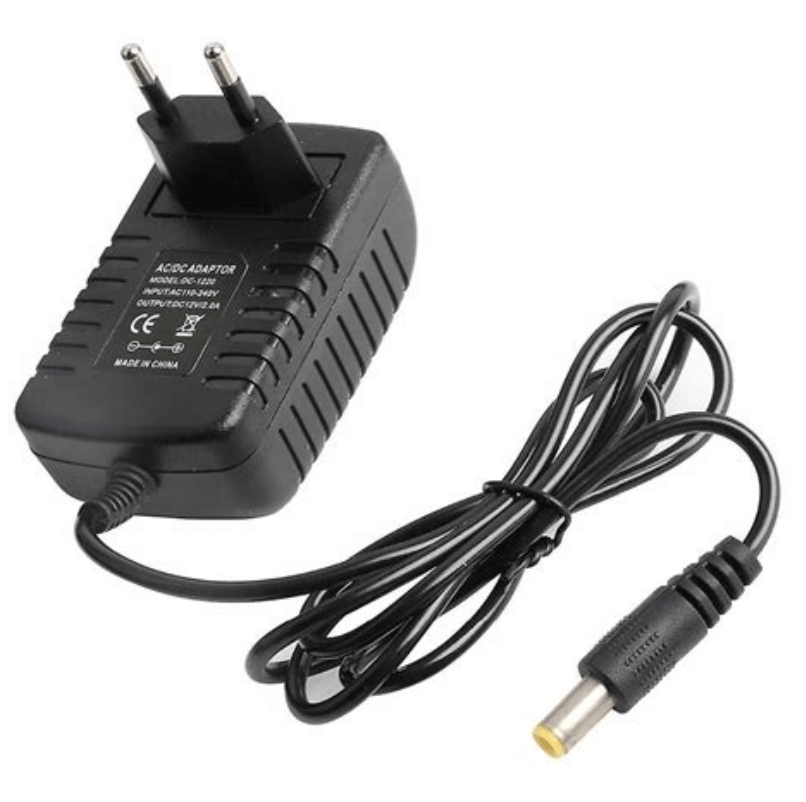 |
| 1 | USB protector |  |
| 1 | Arduino UNO, USB cables, jumper cables, and breadboard | (included in your Arduino kit) |
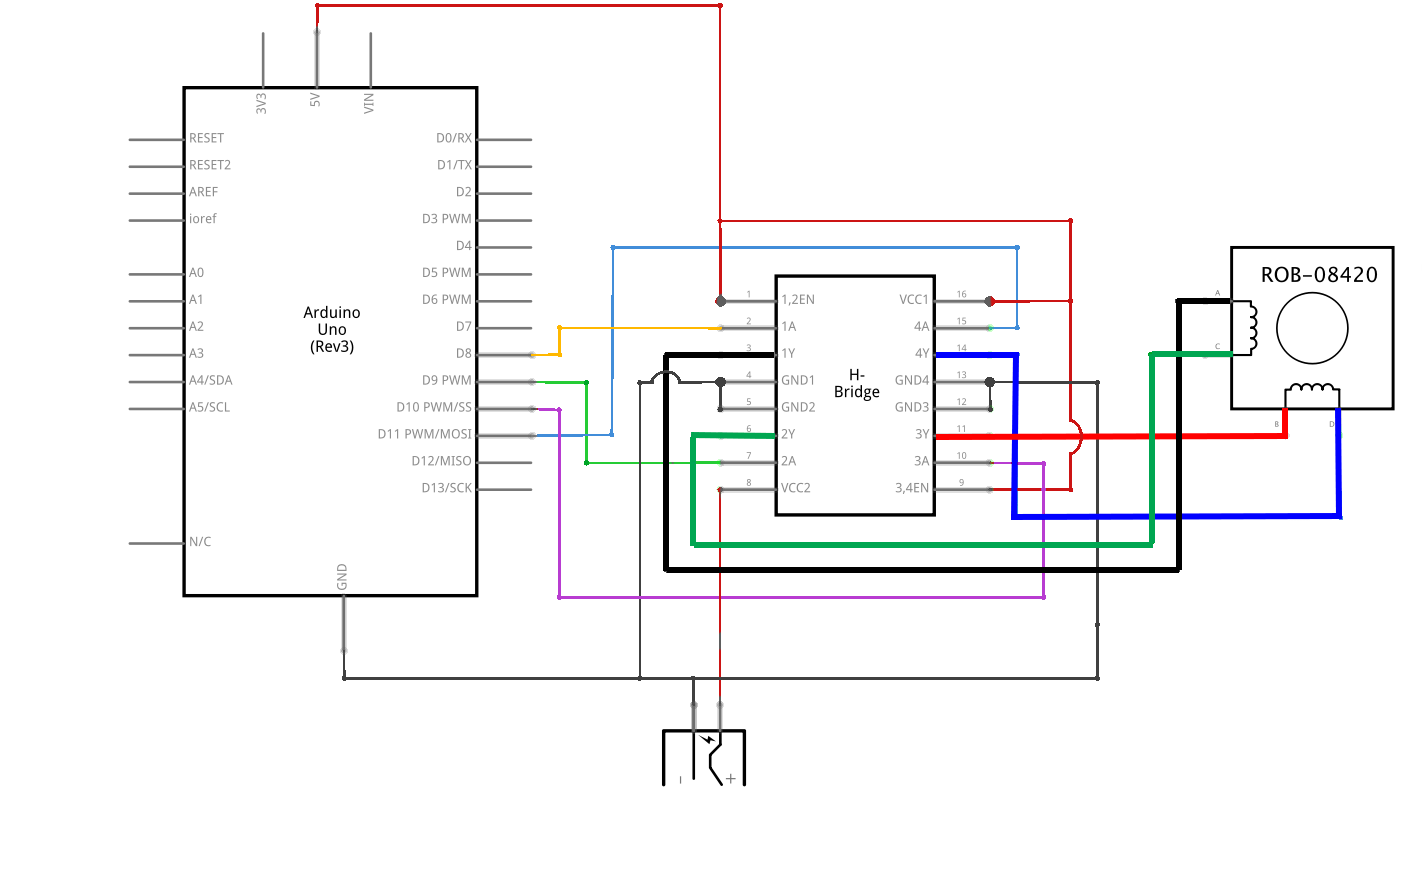
You will be making the bipolar circuit for the example code Stepper > stepper_oneRevolution (the same code is also available online for you to copy). First, build the following circuit to control the stepper (click to enlarge).
To protect your computer from possible damage, use the USB Protector to connect the Arduino to your computer:
 */
*/
/* 
Make sure you orient the IC in the correct position; The IC has a front and a back. A semicircle indicates where the front of the IC is. The pin to the left is pin 1, and the diagram beside depicts how the other pins are numbered.
*/
If your wiring is correct, and you have programmed your Arduino with the Stepper > stepper_oneRevolution example (also available online) sketch, your motor should rotate smoothly and make one revolution. Only if your motor rotates evenly, you should continue with Step 2.
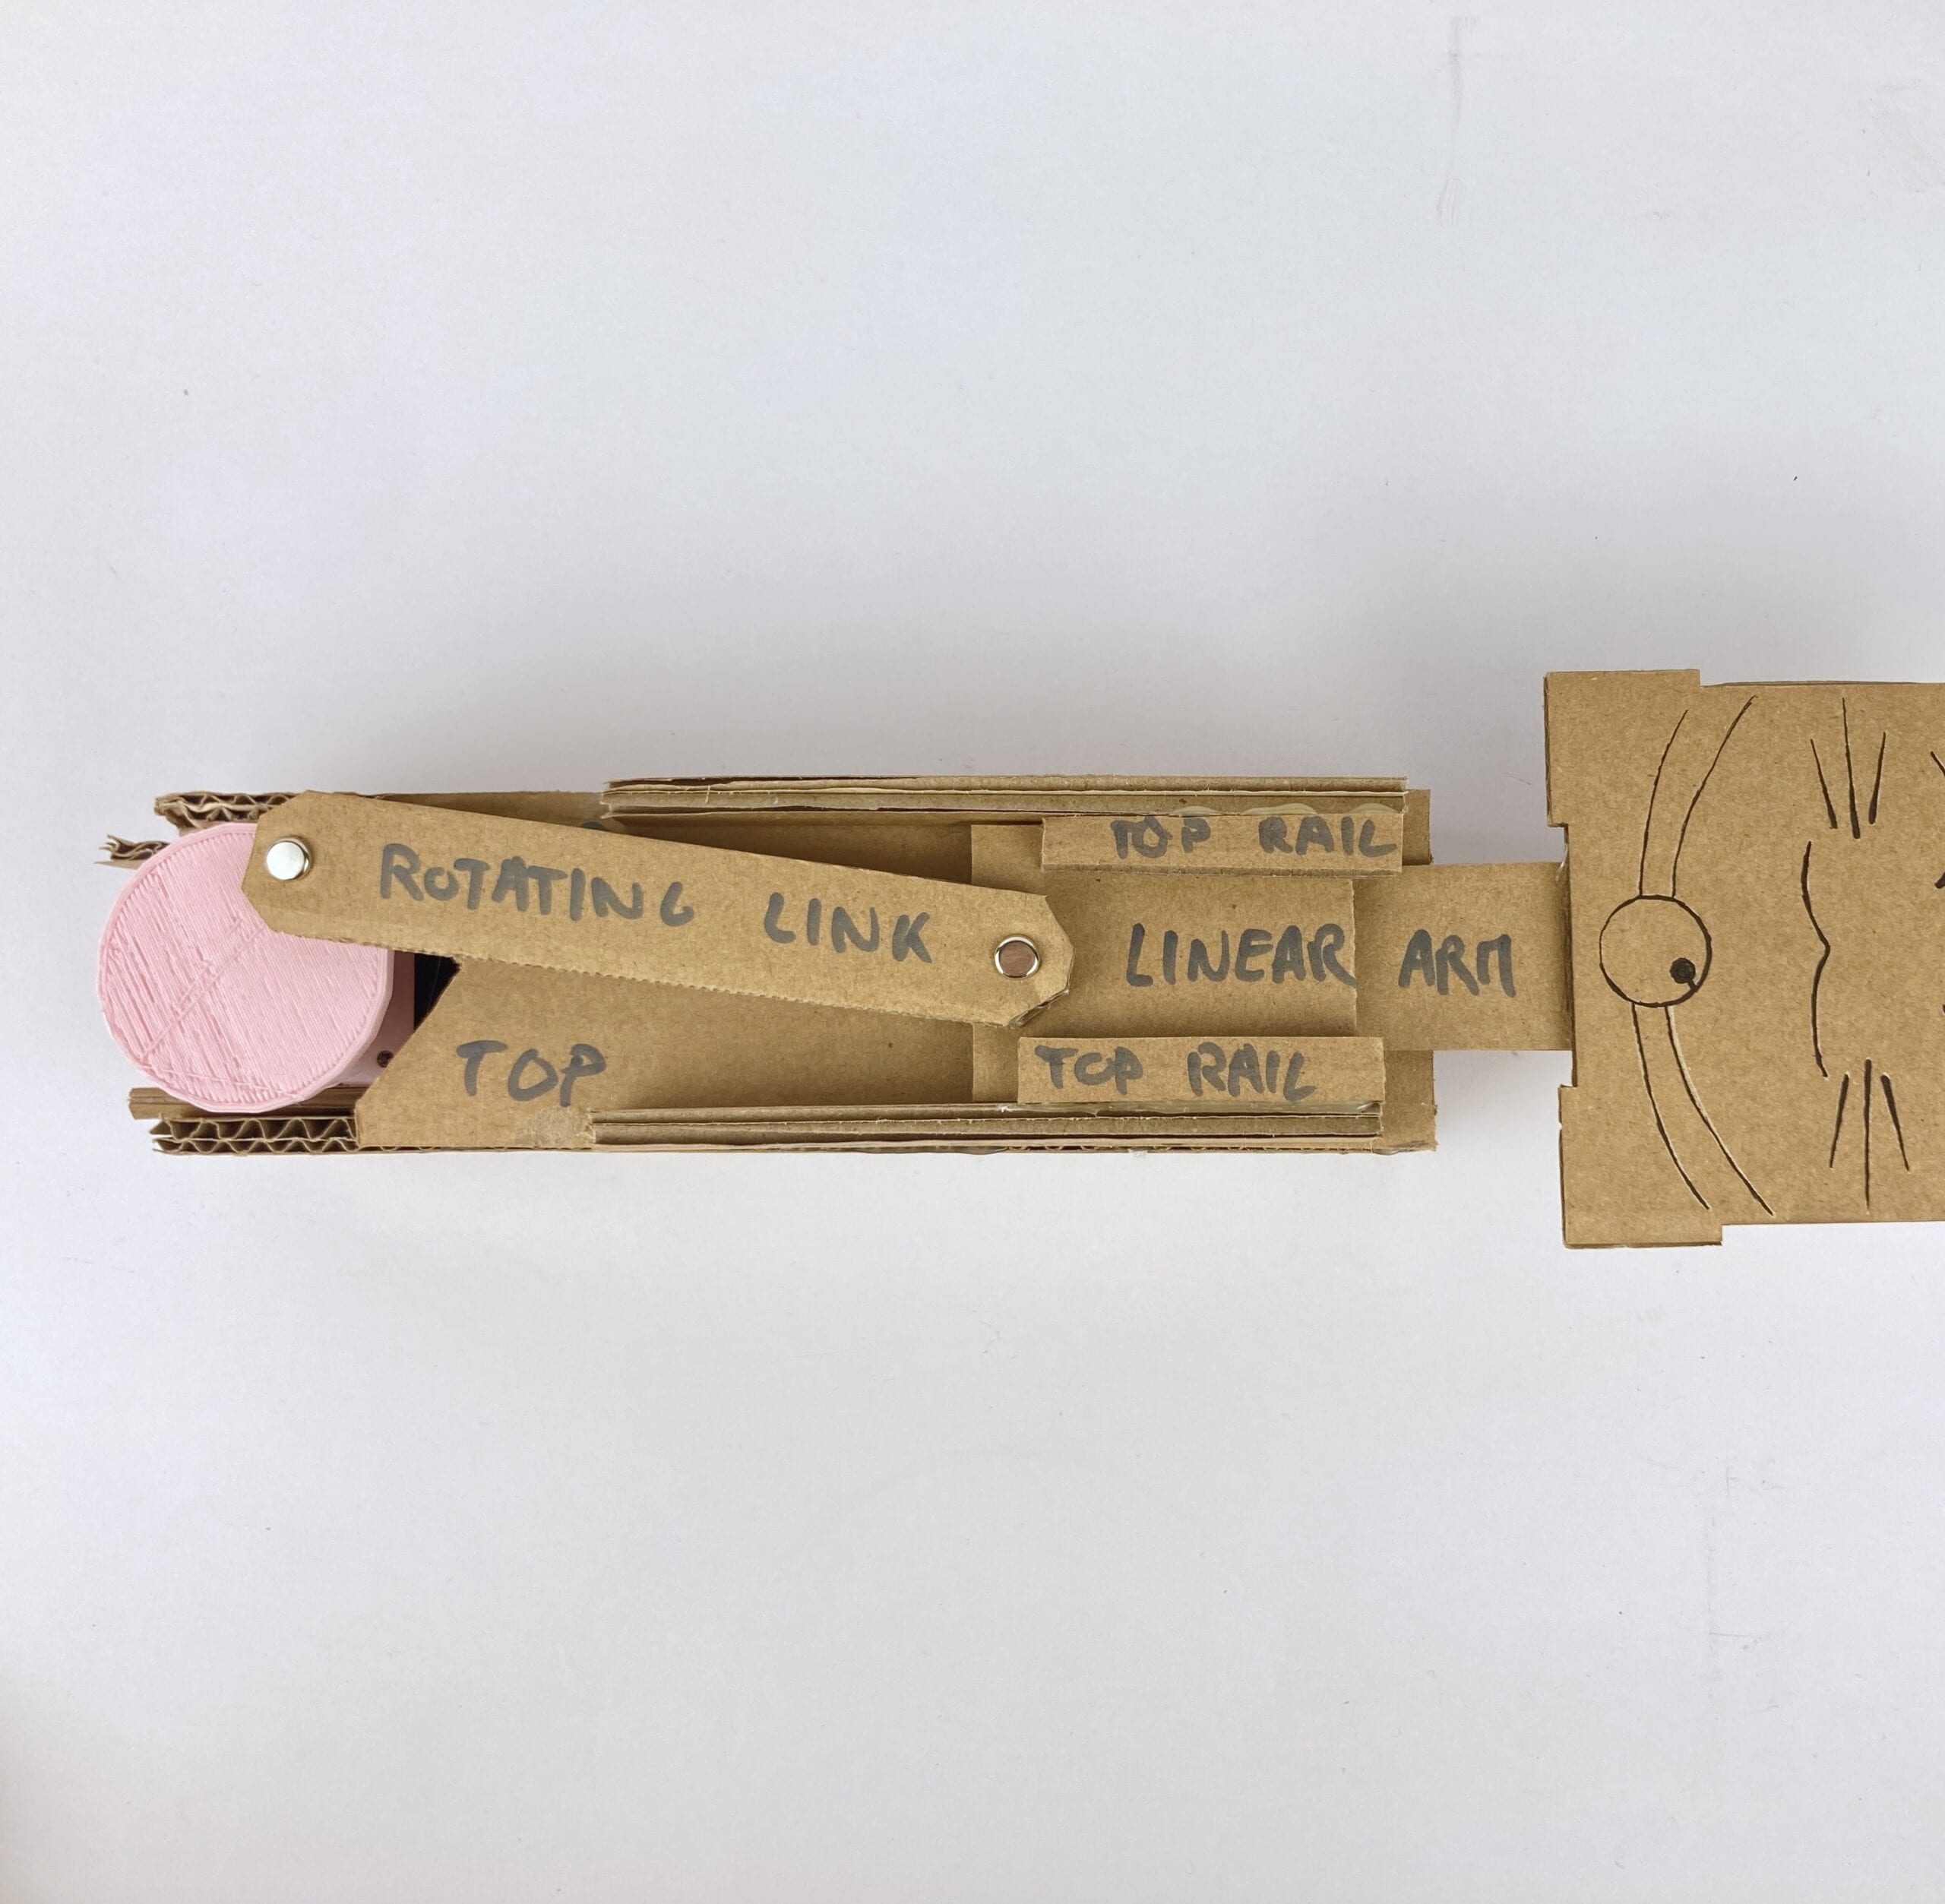
Step 2: Build a cardboard mechanism!
Materials needed for your cardboard mechanism:
| Qty | Equipment | Photo |
| 1 | Template | 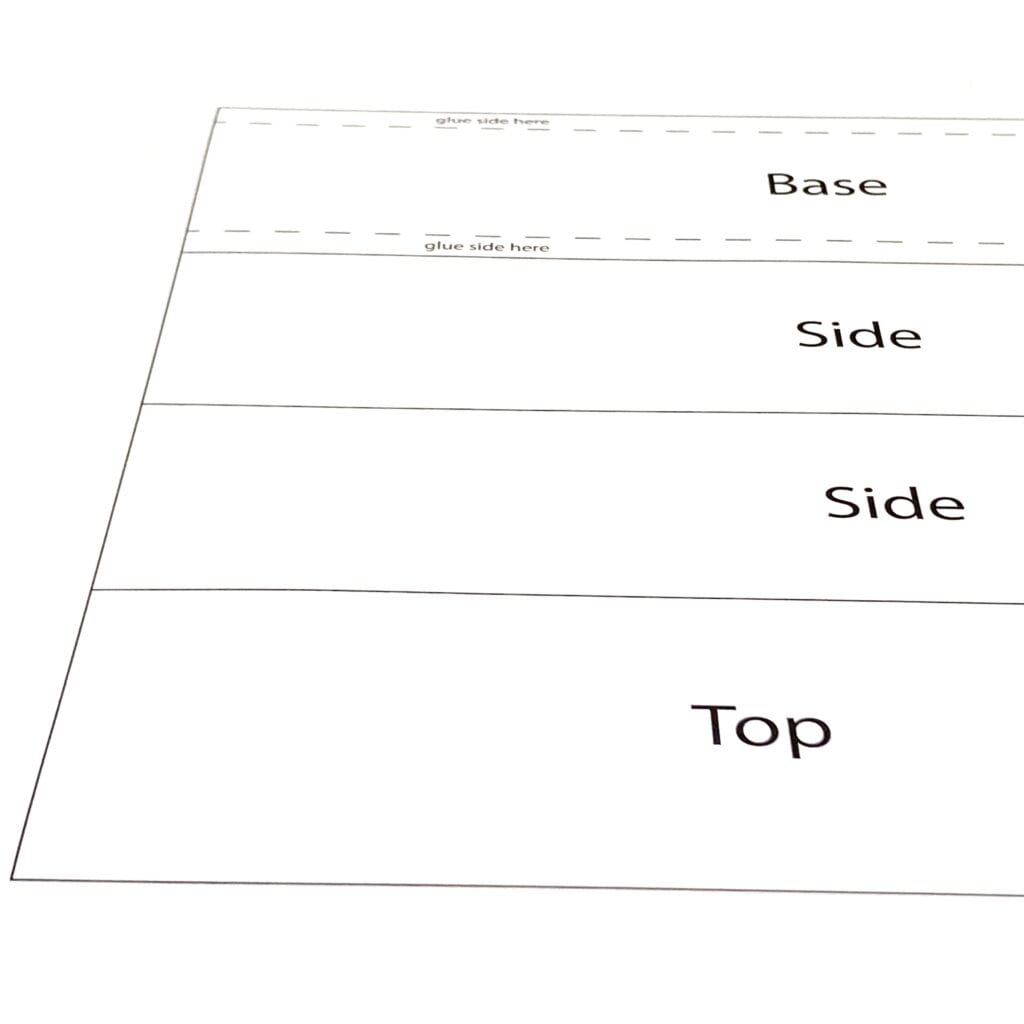 |
| 1 | Cardboard sheet | |
| 1 | Shaft adaptor | 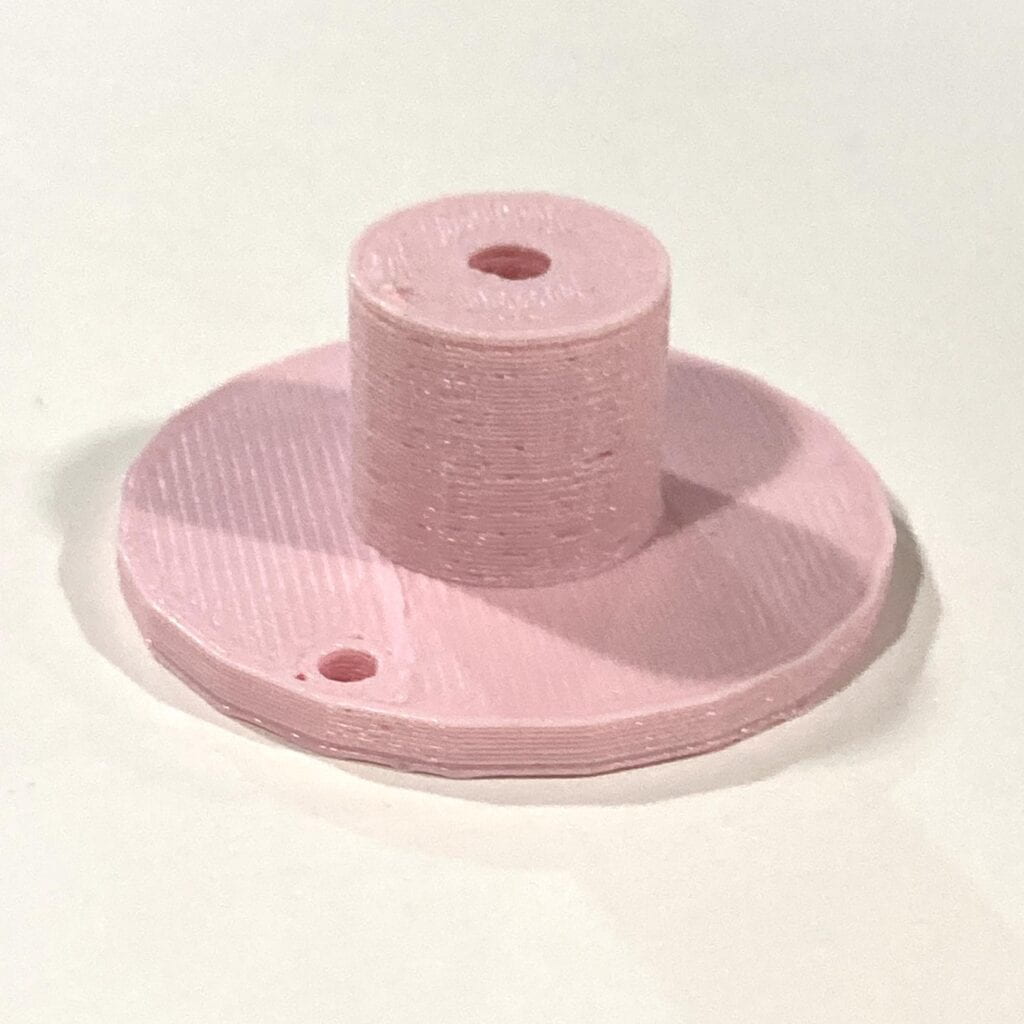 |
| 2 | Rivets | 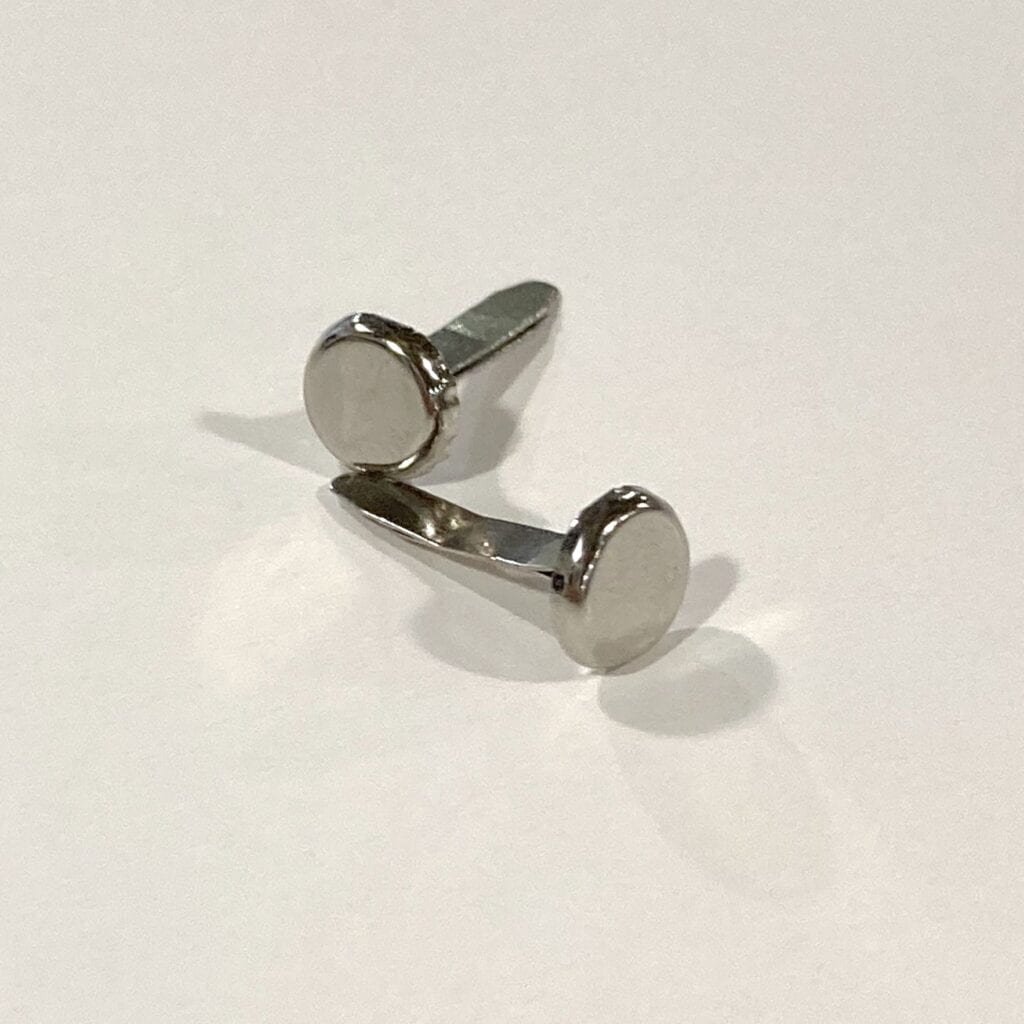 |
| 1 | Hot glue gun + glue sticks | (included in your toolkit) |
| 1 | Box cutter (or utility knife) |
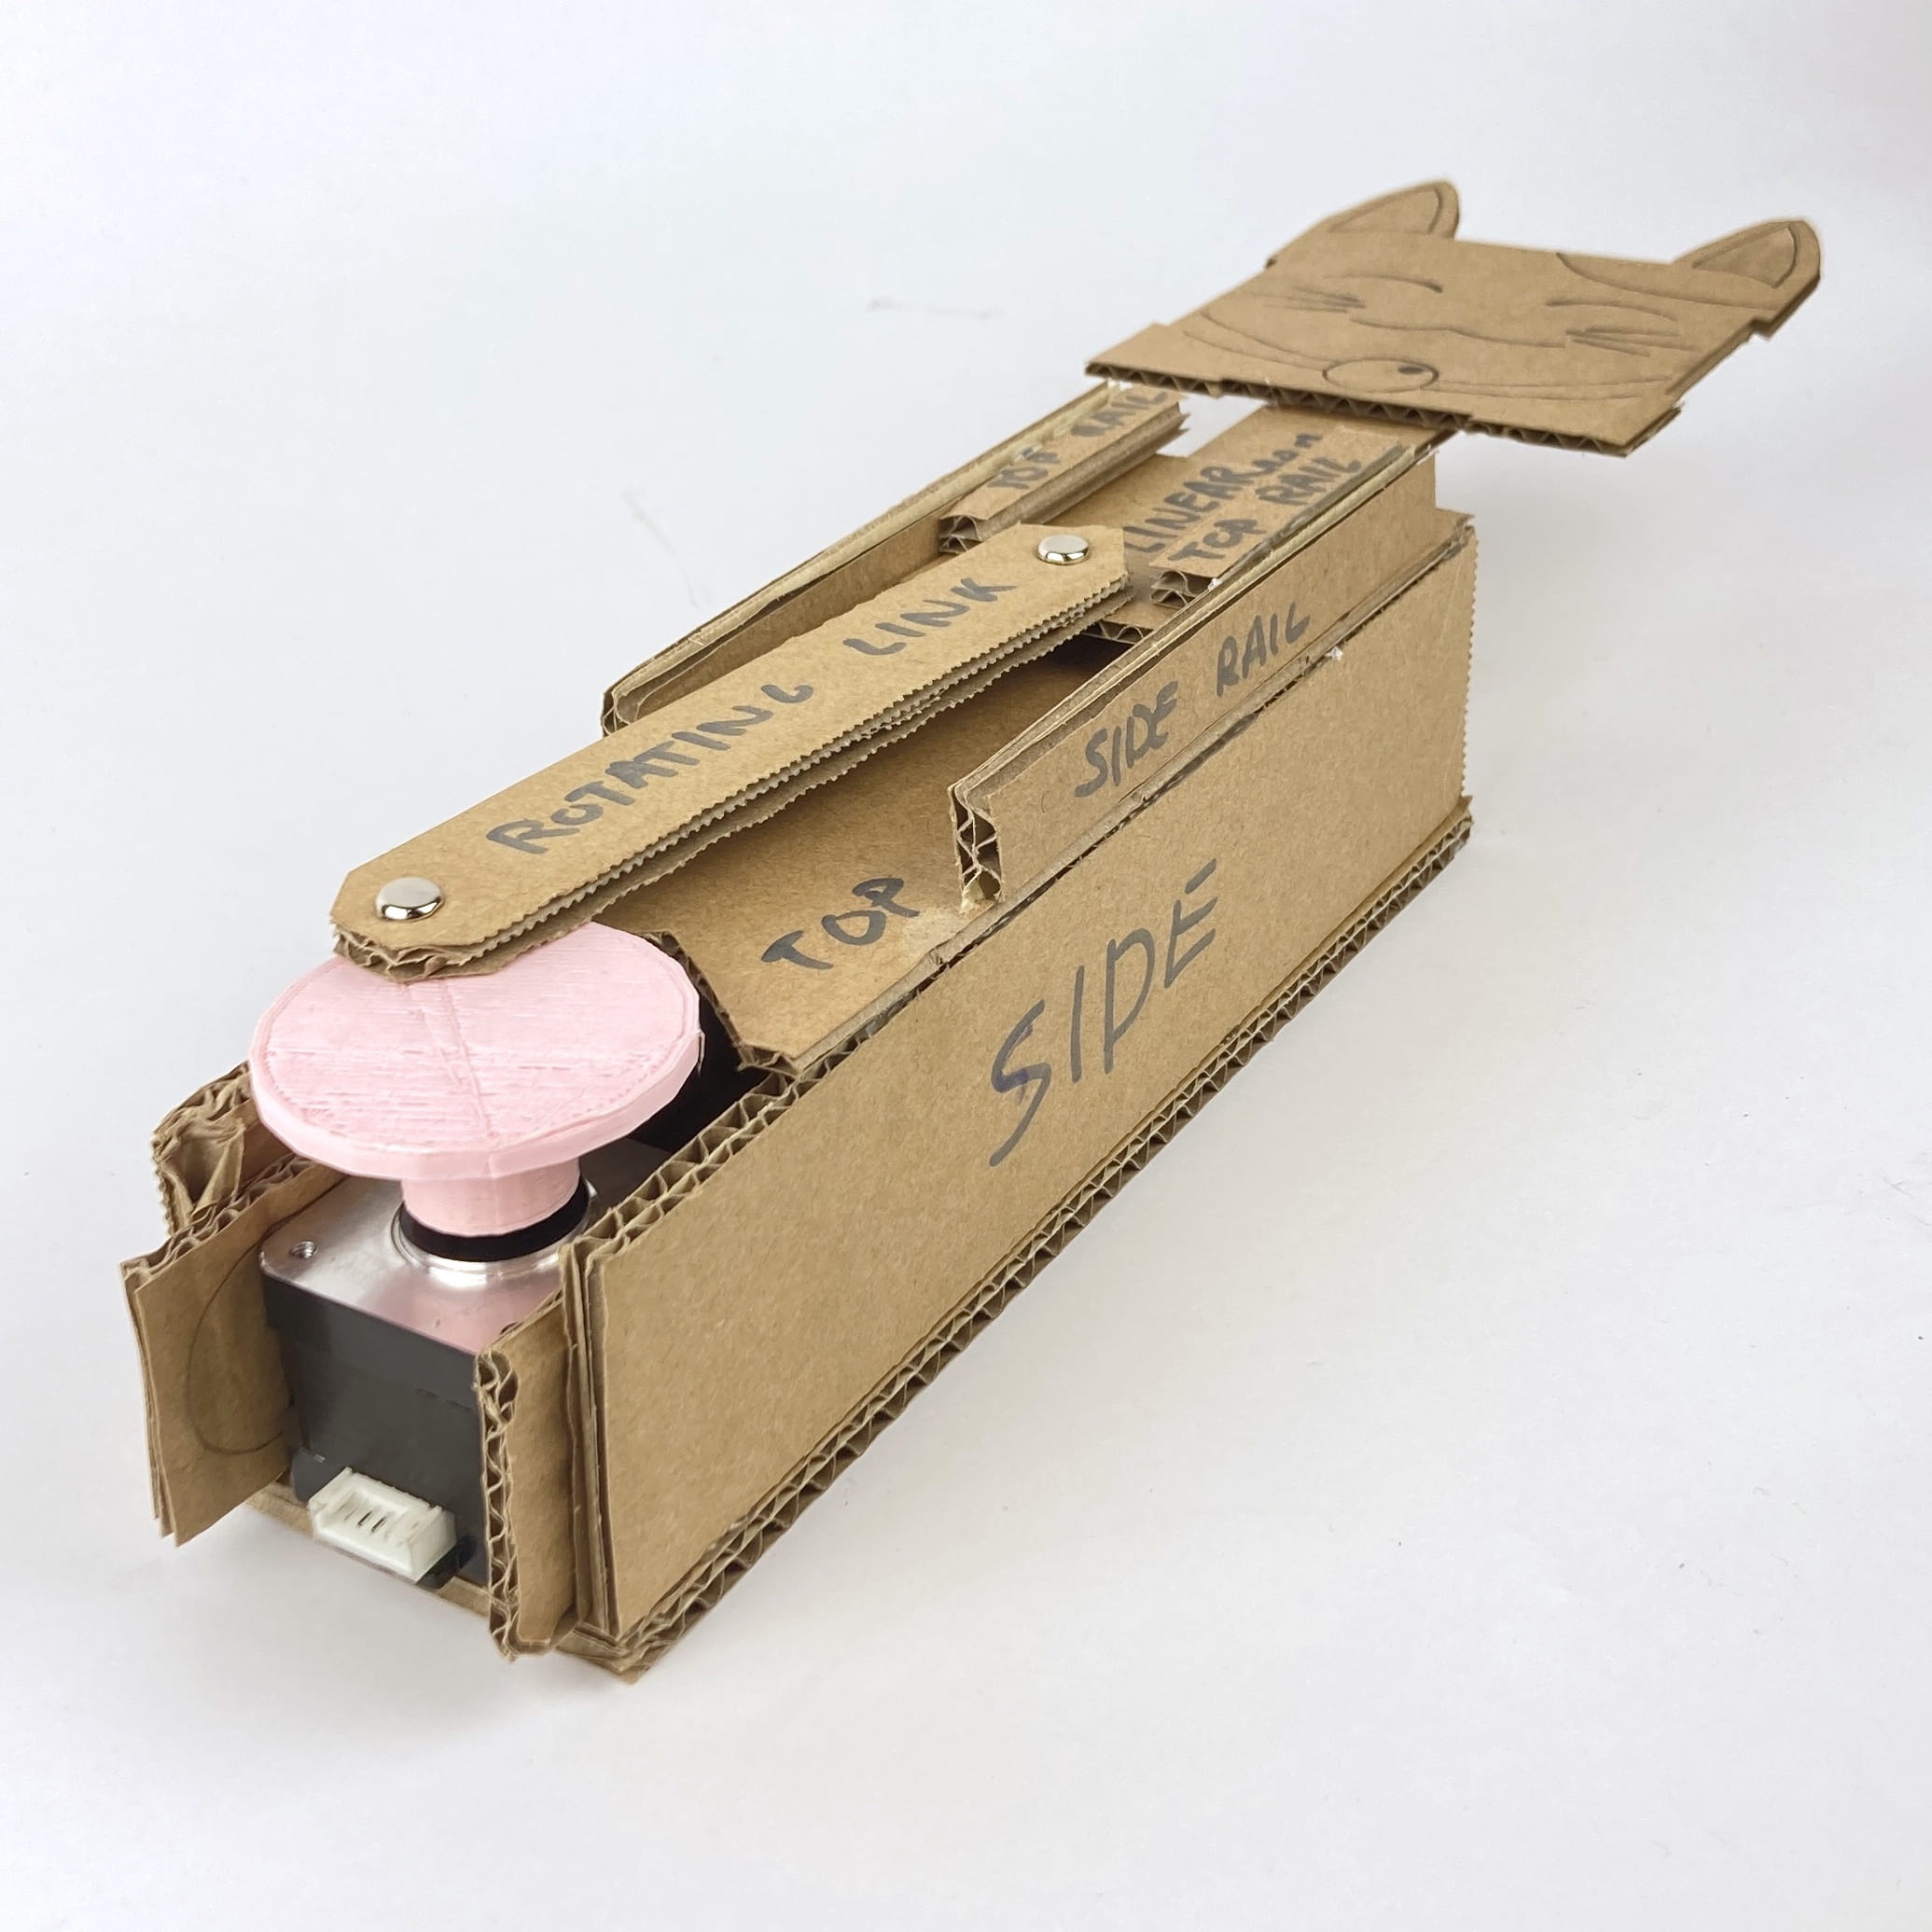
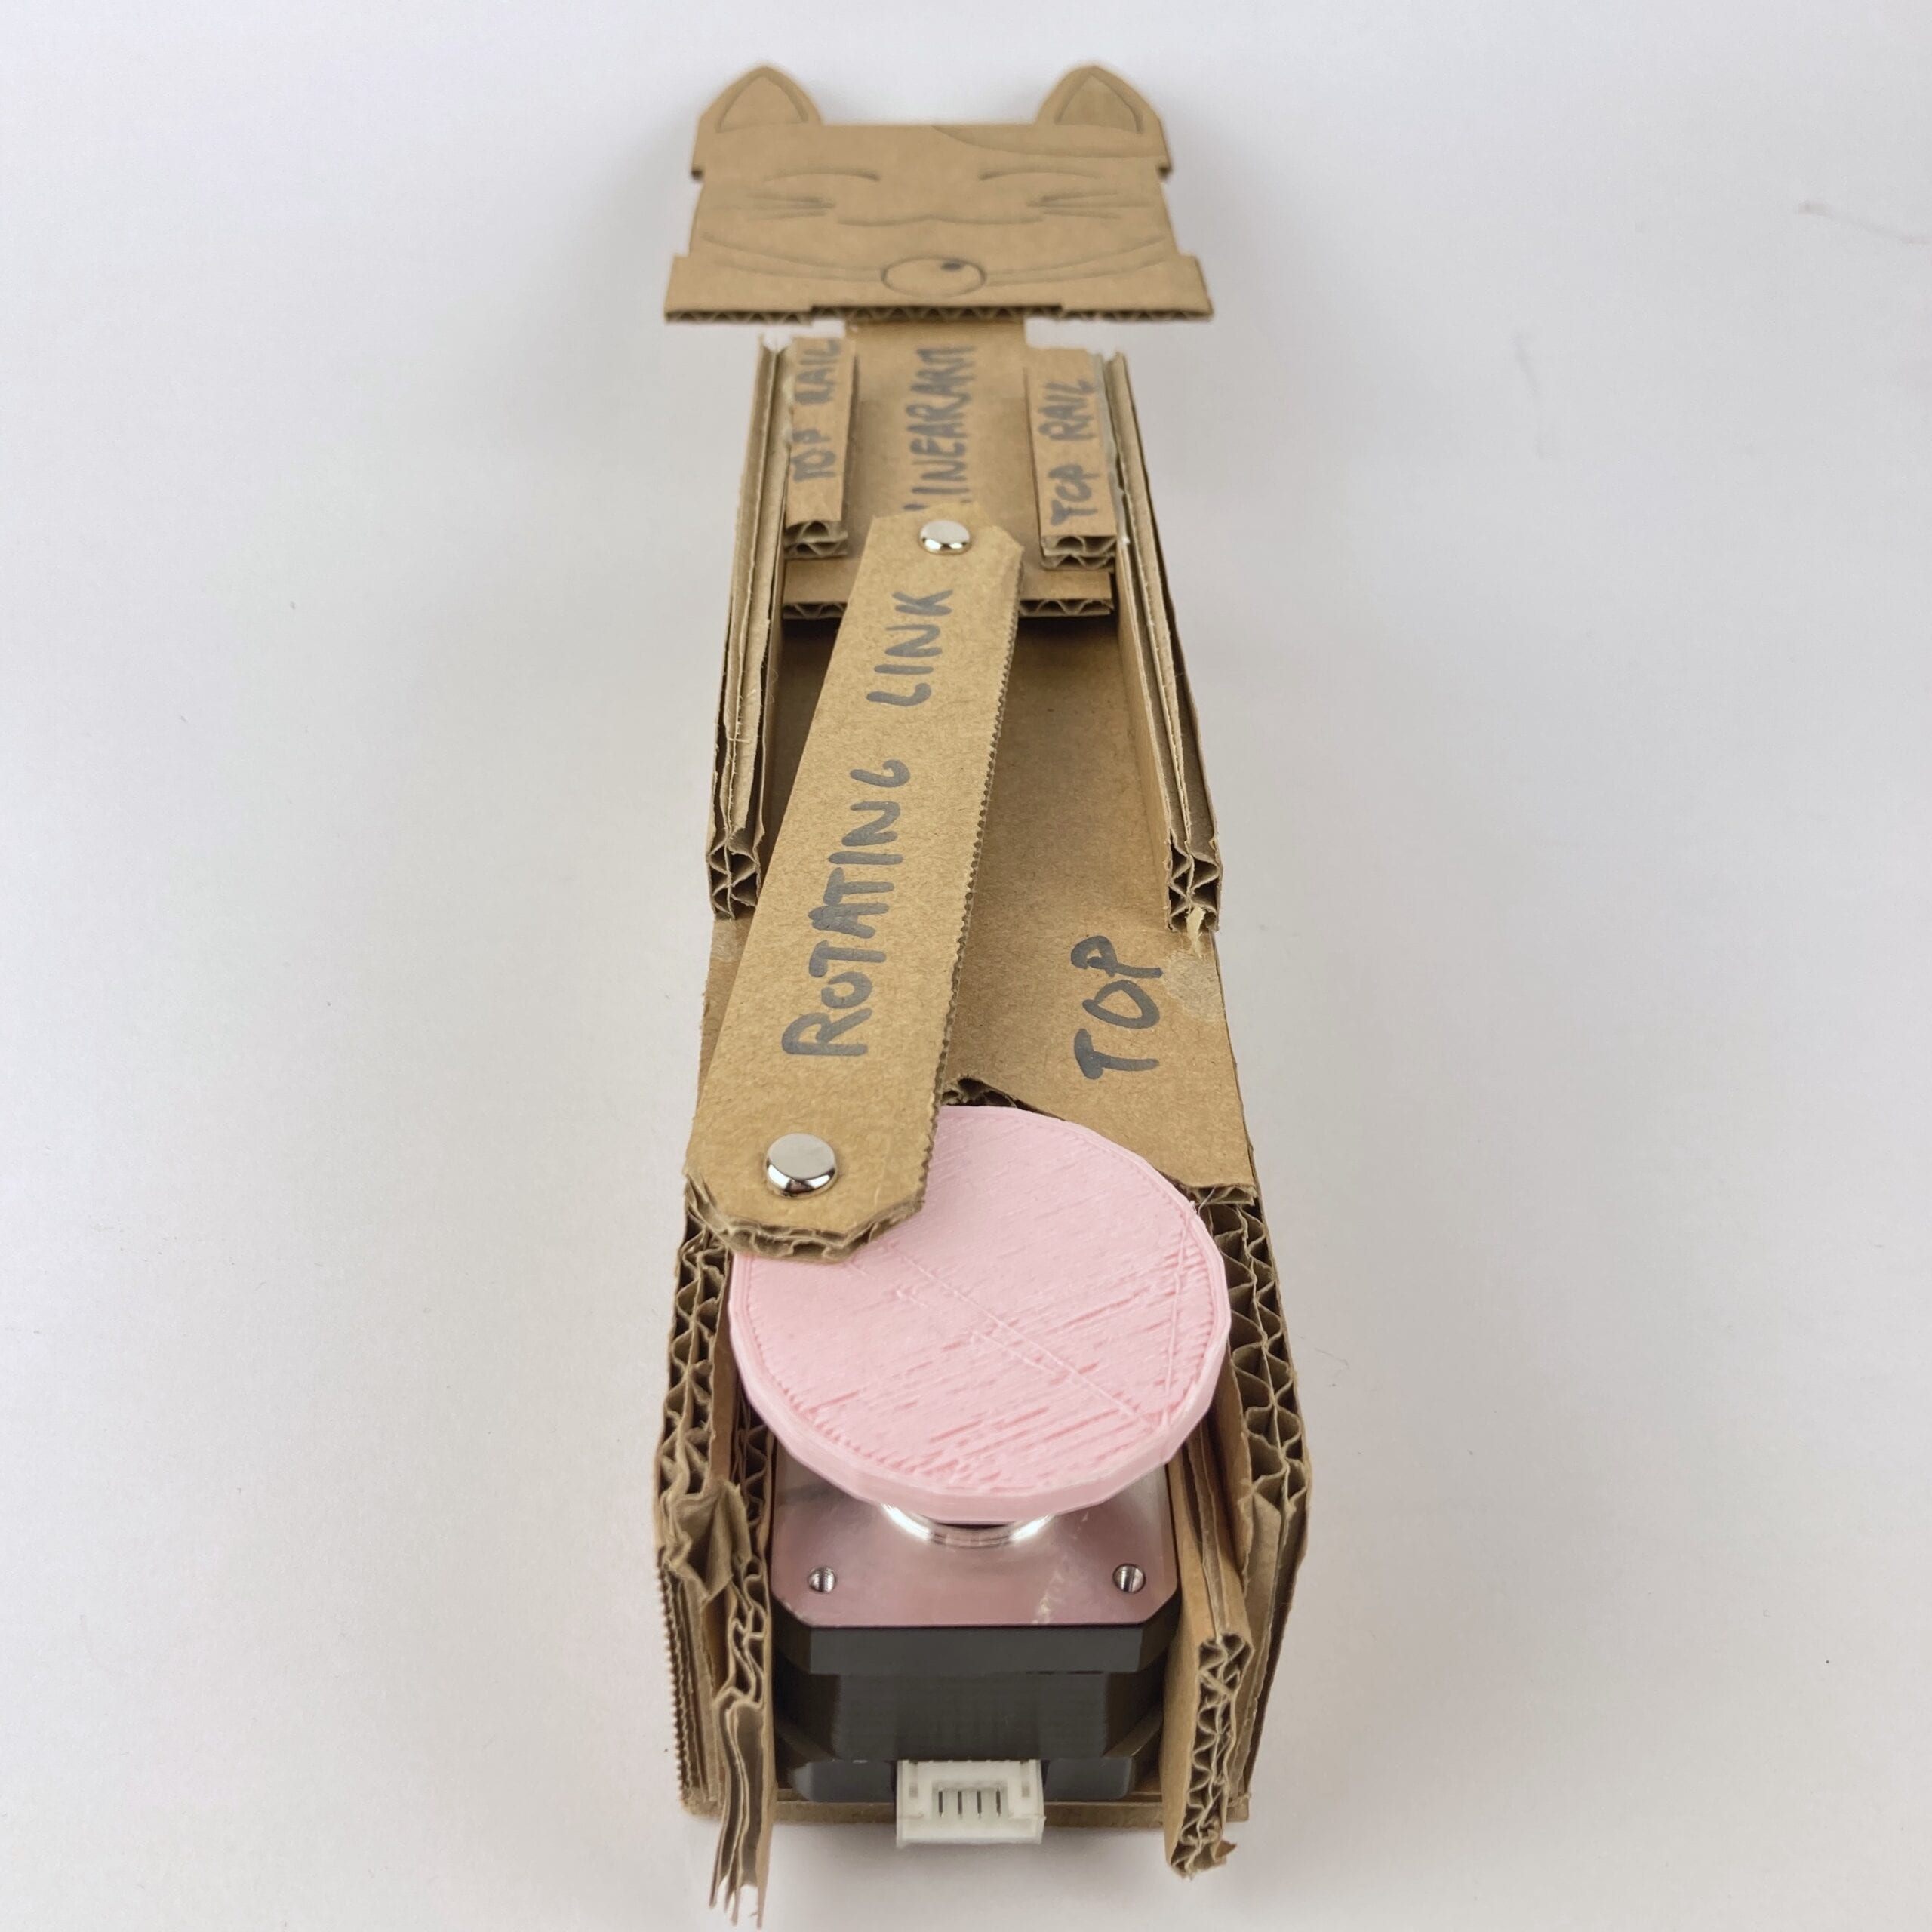
Once you and your partner have finished Step 1, pick up one template and a sheet cardboard for your mechanism building activity. Since the stepper motor will be embedded in your cardboard mechanism, unplug it from your breadboard while you build (and reconnect it later to test).
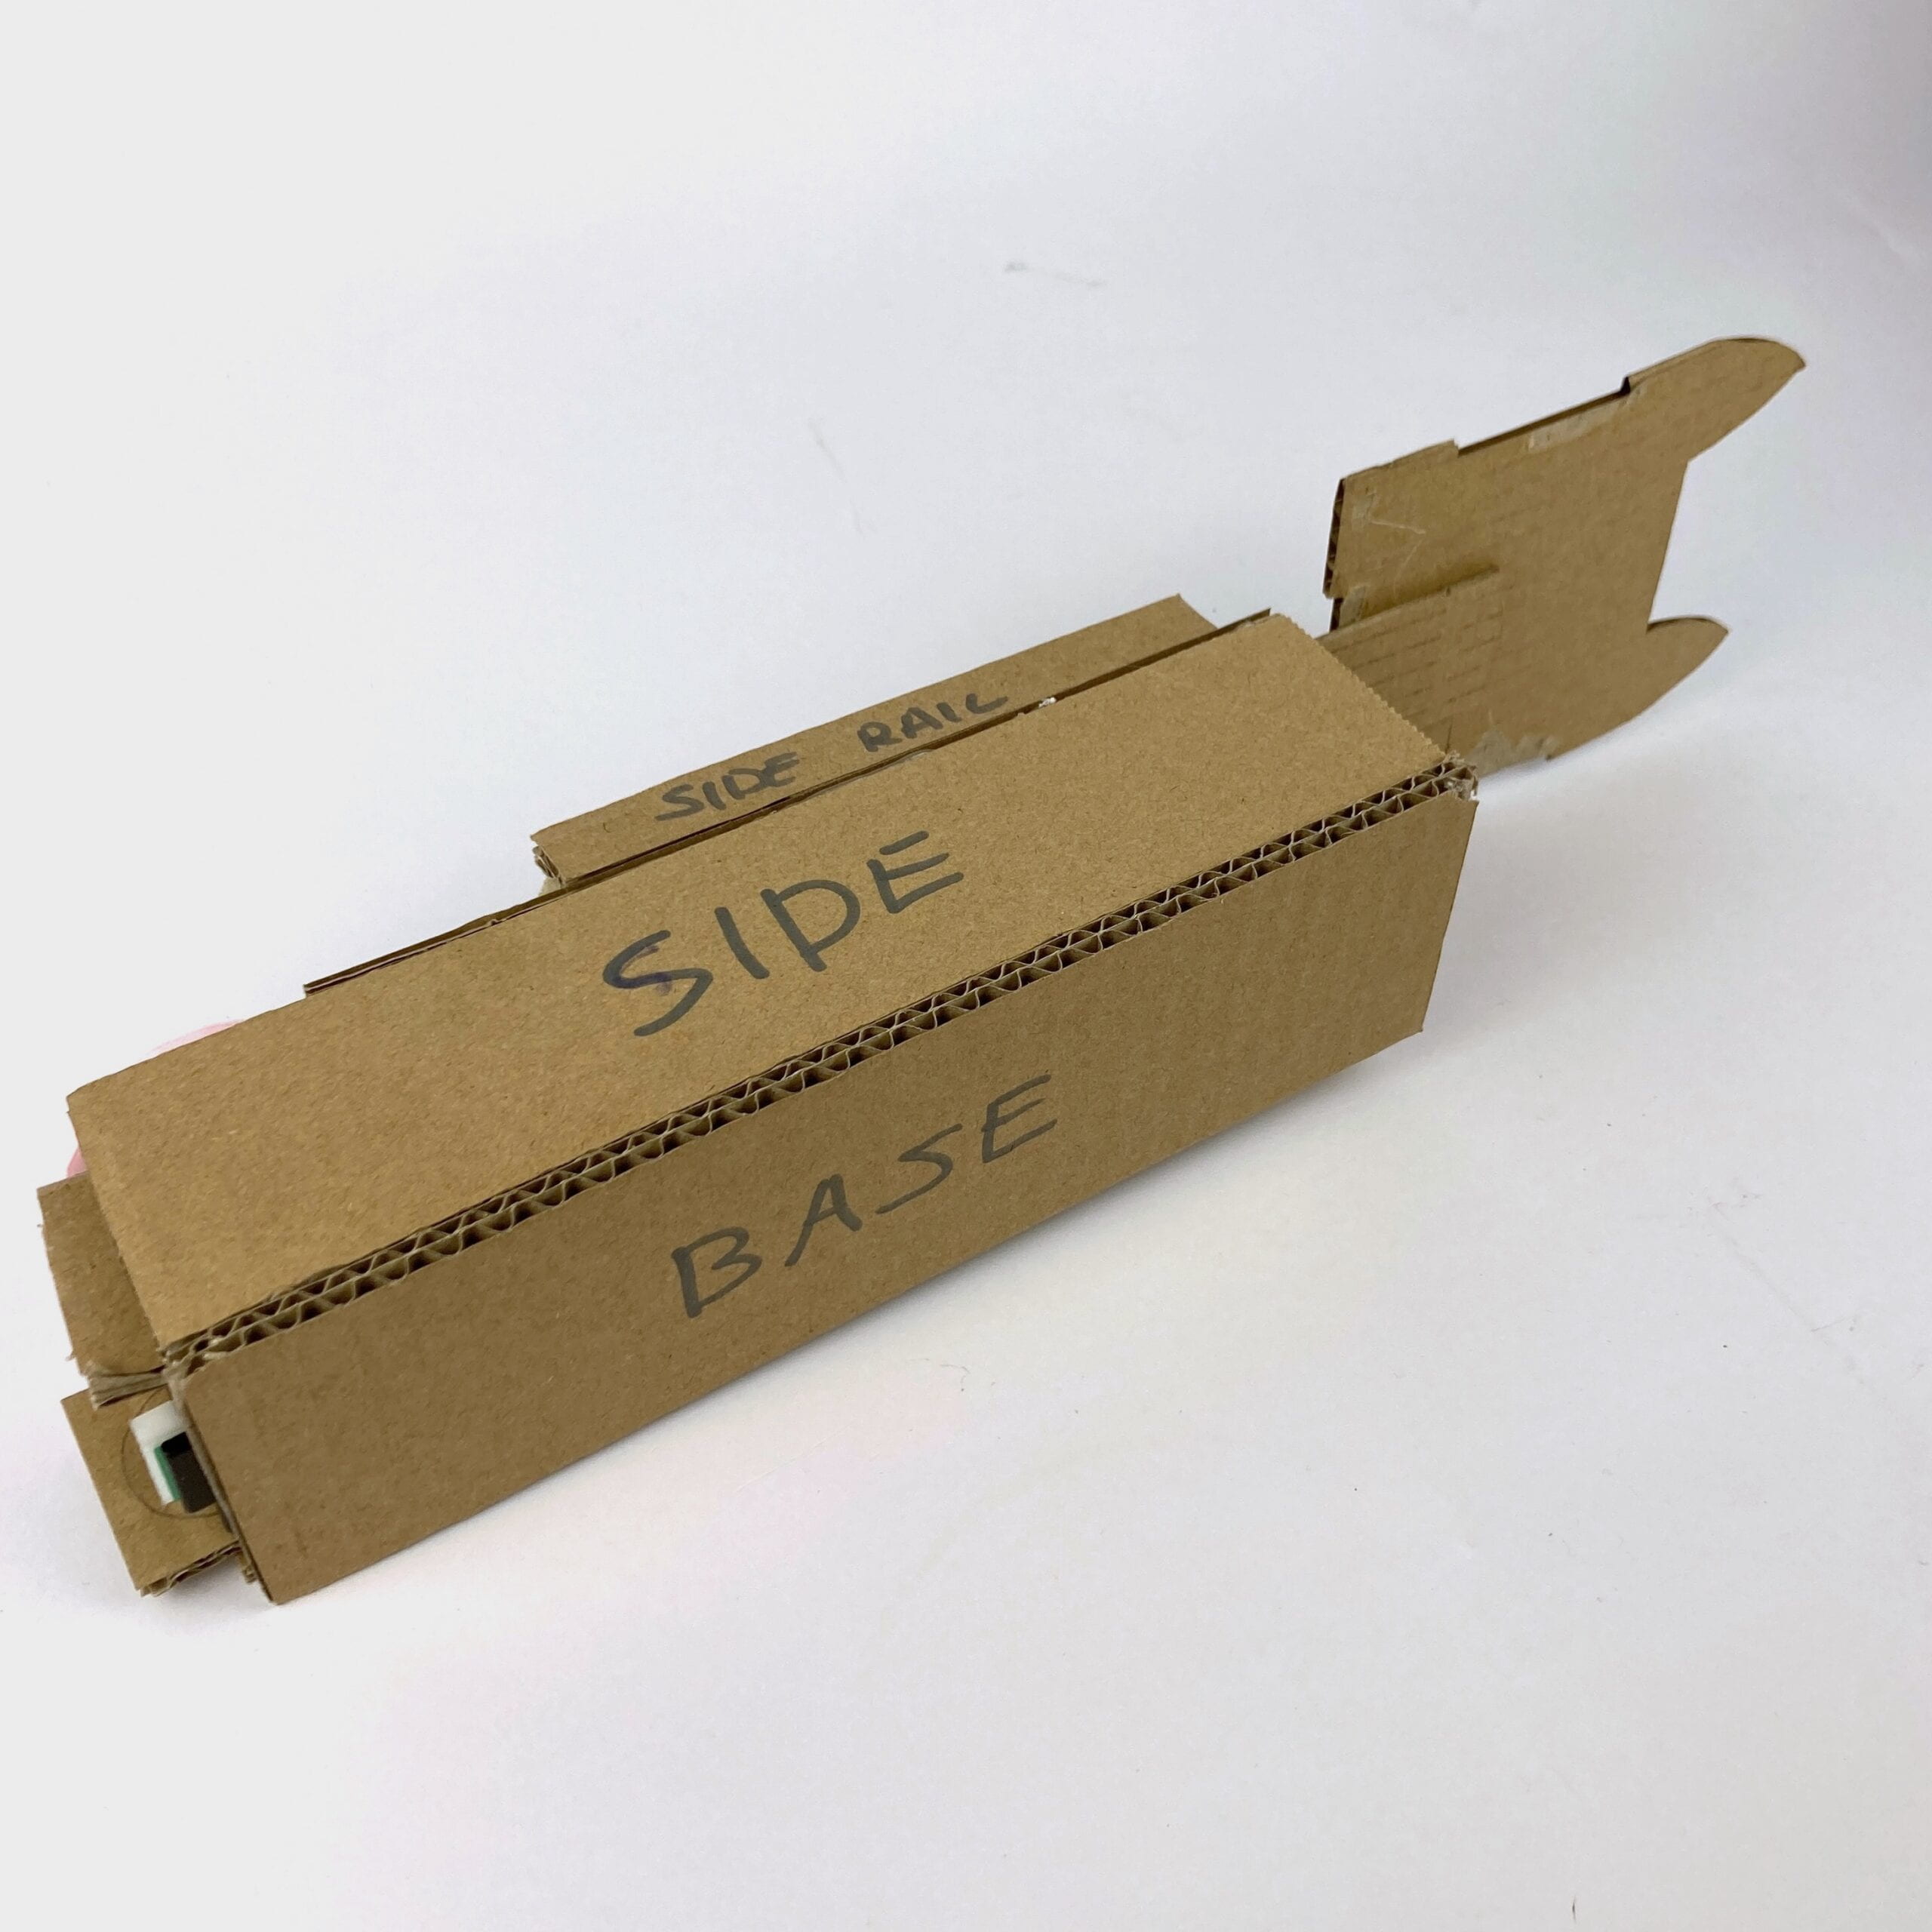
Start by attaching the template onto the textured (“bad”) side of the cardboard using the glue stick. Now you can can cut out the different parts using the ruler and the box cutter in your toolkit. A few parts require you to punch a small hole through the cardboard through which rivets will go, connecting two pieces of cardboard. The pointy tip of your soldering iron makes a good hole.
/* Important note:
1. If you are unfamiliar with a tool, ask how to use it to any instructor, fellow researcher, or learning assistant.
2. You will need to use a cutting mat under the surface you cut. Do not damage the tables of our studio!
3. Place a paper or cardboard under your hot glue gun. Pay special attention because it might damage belongings (and fingers!). */
Next, glue together the different cardboard pieces using the hot glue gun. (Feel free to remove the paper template at this point, if you like, once you know where the part will go.)
 |
 |
 |
 |
Step 3: Personalize it
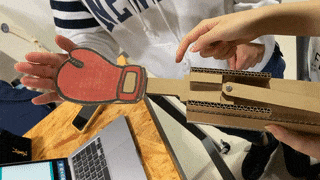
Together with your partner, modify your mechanism to tell a tiny story. What could it represent? A boxing glove that punches? A piston in an engine that moves? Consider adding appendages to your mechanisms – add paper or cardboard – use it sideways – etc.
Modify the code so that the movement is coherent with your chosen narrative. E.g. the arm of a boxer will move forward much more quickly, before stopping, and pulling back. Use delay(), myStepper.setSpeed(), myStepper.step() , and random() to this end.
Don’t forget to continue using the USB protector as you’re working on this! Document the motion you came up with in a video.
Documentation
Make sure you document the process and the result of your circuit and mechanism building. Additionally, answer the following questions your answers:
Additional Questions
Question 1: Choose an art installation mentioned in the reading ART + Science NOW, Stephen Wilson (Kinetics chapter). Post your thoughts about it and make a comparison with the work you did during this recitation. How do you think that the artist selected those specific actuators for his project?
Question 2: What kind of mechanism would you be interested in building for your midterm project? Explain your idea using a sketch (conceptual or technical) with a list of materials that you plan to use. Include details about the ways that you expect the user to embrace in a physical interaction with your project. In particular, explain how would your motor (or motors) with a mechanism will be different than using an animation on a digital screen.