/* * * * * * * * * * * * * * * * * * * * * * * *
Welcome to the 1st Interaction Lab recitation!
Here are a few things to help you get started:
1. At the beginning of each recitation, please carefully read through all the instructions,
 material list,  and references (if any).

2. While you are reading, you will be called upon to take attendance(with your campus card)
 and collect materials for the tasks.


3. It is very important to document your work properly.
 For each task, you should take pictures and/or videos of the finished circuit working,
as well as the important steps of the building process, such as problems you encountered,
and how you fixed them. Take notes on questions you had and lessons you learned.

4. If you have any questions, eagerly seek help and ask questions from  professors, fellows,
or learning assistants. Documenting the questions you have and the help you get with them
is useful in your written documentation.

5. Return all materials you have borrowed at the end of recitation. If you finish the tasks
early, don’t leave unless you buy bubble tea for everyone.

6. If you aren't able to finish the tasks, you can come to the 826 studio during the opening
hours to continue working. The fellows, learning assistants or any professor can help you to
check out materials you need.

Have fun!
* * * * * * * * * * * * * * * * * * * * * * * */
Recitation #1 Materials:
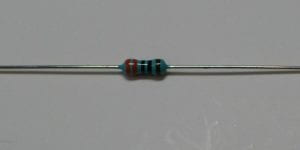
Collect these materials from the bins provided. For clarification on what components look like, please consult the Reference section at the end of the instructions.
- 1 * Breadboard
- 1 * Buzzer
- 1 * Push-Button Switch
- 2 * 220 ohm Resistor
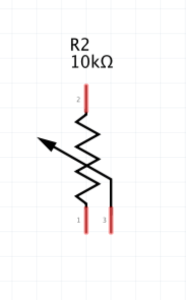
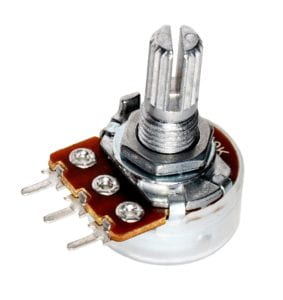
- 1 * 10k ohm Variable Resistor (Potentiometer)
- 2 * LED
- 1 * 5 volt power supply
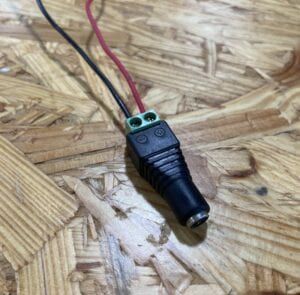
- 1 * Barrel Jack (Power)
- 1 * Multimeter
- 1 * DIY Paddle Button
- Several Jumper Cables (M/M Wires)
You will make this during the recitation:
- 1 * DIY Paddle Button
Recitation #1 Tasks:
For these tasks, find a partner and work in pairs to complete the following tasks:
Task 1: Build the circuits
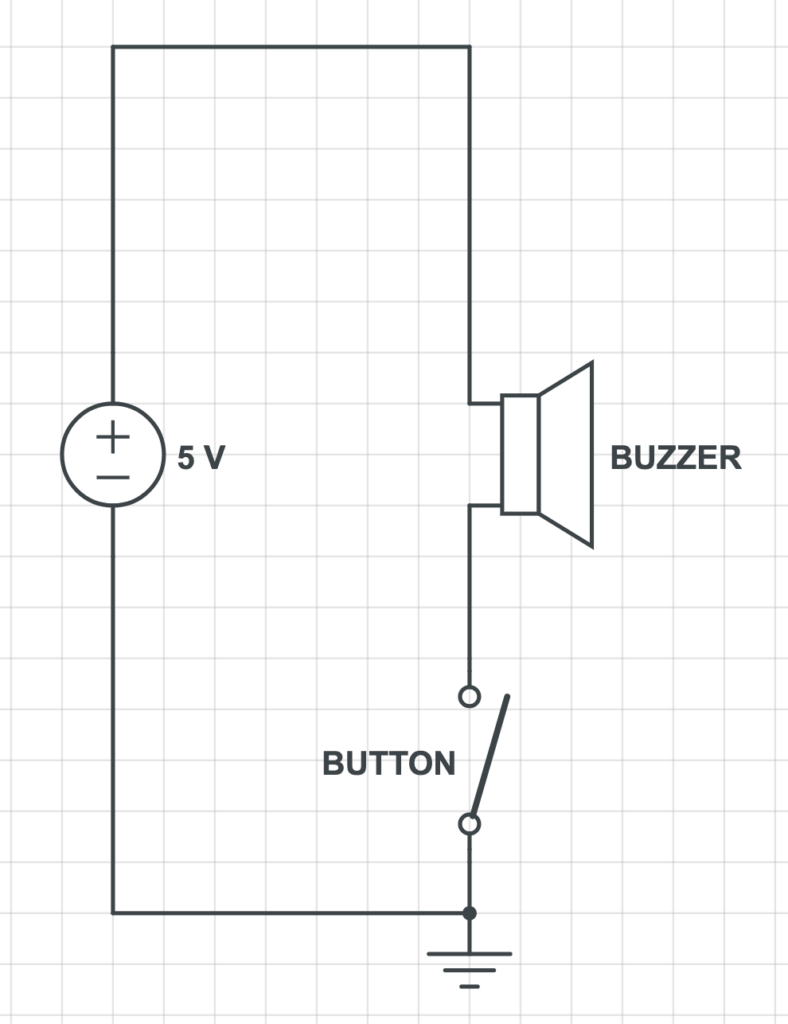
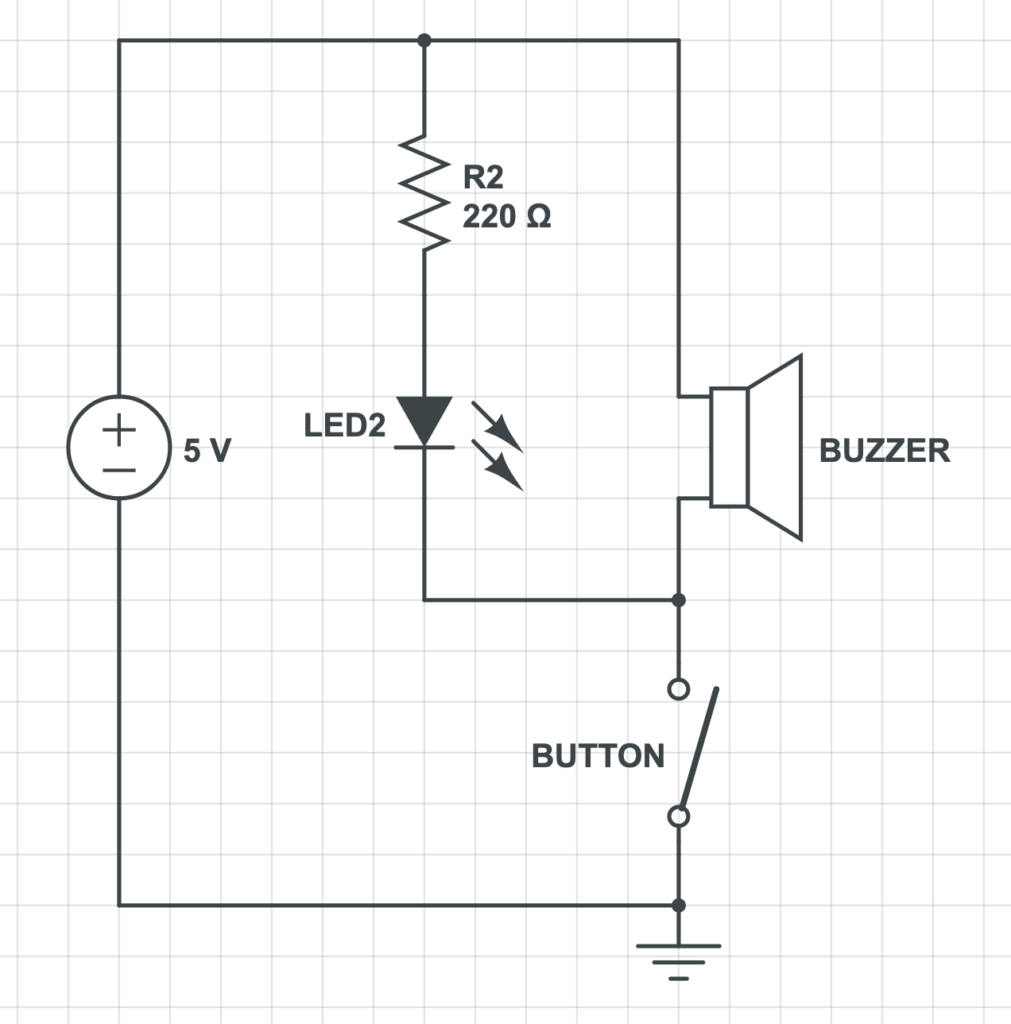
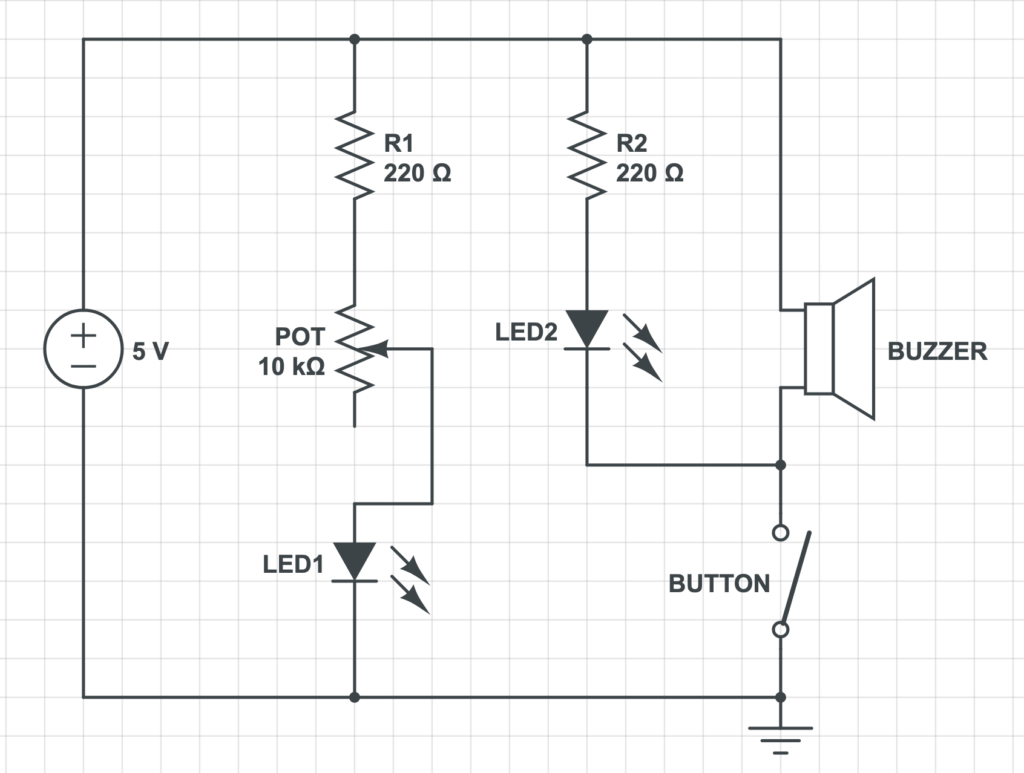
With your partner, build each circuit on a breadboard based on the provided schematic. To simplify the process, you will build the circuit incrementally step by step. When you’ve finished, take pictures and a video of the finished working circuit. Record notes about the building process, such as problems that you encountered, and how you fixed them.
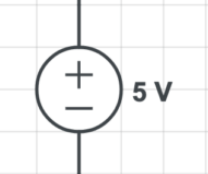
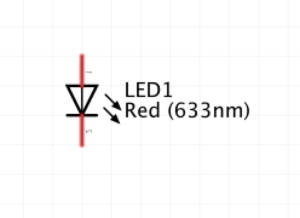
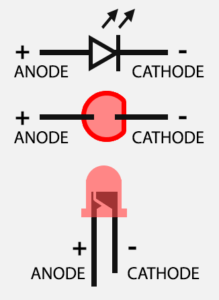
Note: To help you read the schematics for the circuits, look at the components and their symbols at the end of this document in the section “Reference: Components and Diagrams”, or refer to the diagrams in this reading.
Step 1:
Step 2:
Remember to document the circuit you have built in Step 1, and continue building with the following diagram:
Step 3:
Task 2: Build a switch
Individually, use cardboard, copper tape, and wires to build a switch. You will be brought to soldering stations to complete this task. There, each of you will make one DIY paddle with long wires and copper tape that you will combine into a cardboard switch.
Task 3: Switch the switches and send a message
Once you have completed the DIY paddle switch, replace the push button with the newly soldered DIY paddle.
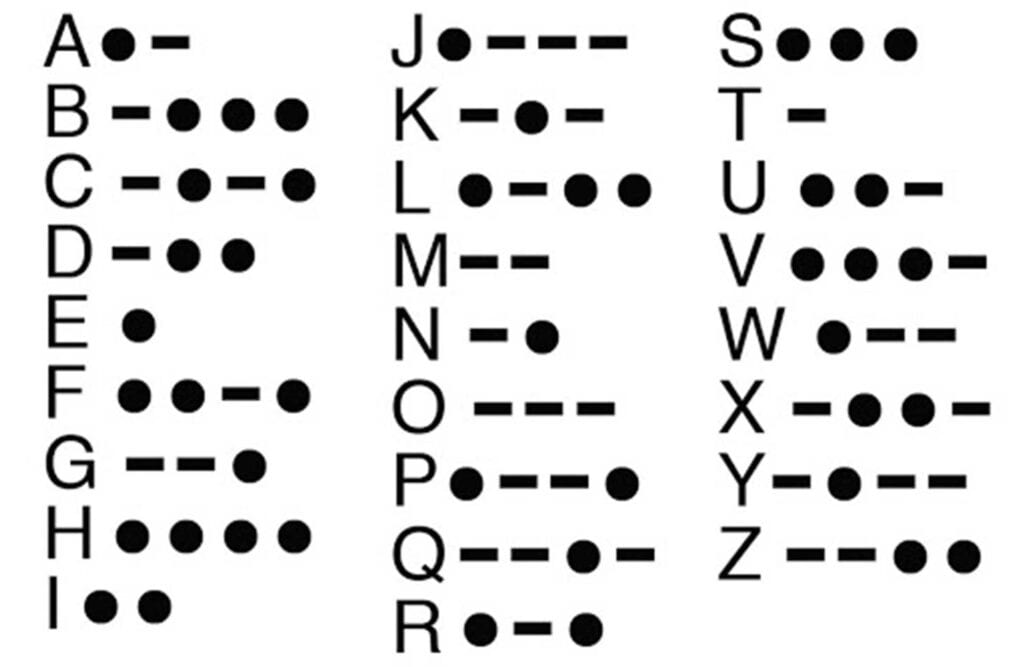
Using the morse code* chart below, choose a 4-letter secret word and send it to another team on the table next to you. Take advantage of the paddle’s switch long wires and don’t let them hear your secret word! In turns, you will need to decode each other’s secret word to succeed.
* Morse code is a method used in telecommunications to encode text characters as standardized sequences of two different signal durations, called dots and dashes, or dots (1 unit of time) and dash (3 units of time).
* Morse code is a method used in telecommunications to encode text characters as standardized sequences of two different signal durations, called dots and dashes, or dots (1 unit of time) and dash (3 units of time).
Documentation:
For your documentation, create a blog post that includes the following items based on your experience in this recitation. Include all of these elements in your documentation:
For each of the three steps in Task 1:
-
- Write what the circuit does, and some observations on how the components accomplish this.
- Include pictures and or videos of the completed circuit working
- Describe the process of building the circuit: Did the circuit work? Were there any moments where something failed? How did you solve the problem? Write down what worked and what didn’t. What was the process of working with your partner?
For Task 2:
-
- Describe your process in task 2, highlighting things you learned, any difficulties you had, any comments about what you made and how you made it. Include a photo.
For Task 3:
-
- Describe what you did in task 3, and how you worked with your partner. Include relevant photos or videos.
Additional Required Questions: Take time to reflect on this week’s readings and the recitation exercise to answer these questions:
-
- Question 1: What is the function of the resistor R1? (You can read about the reason why LEDs need resistors here)
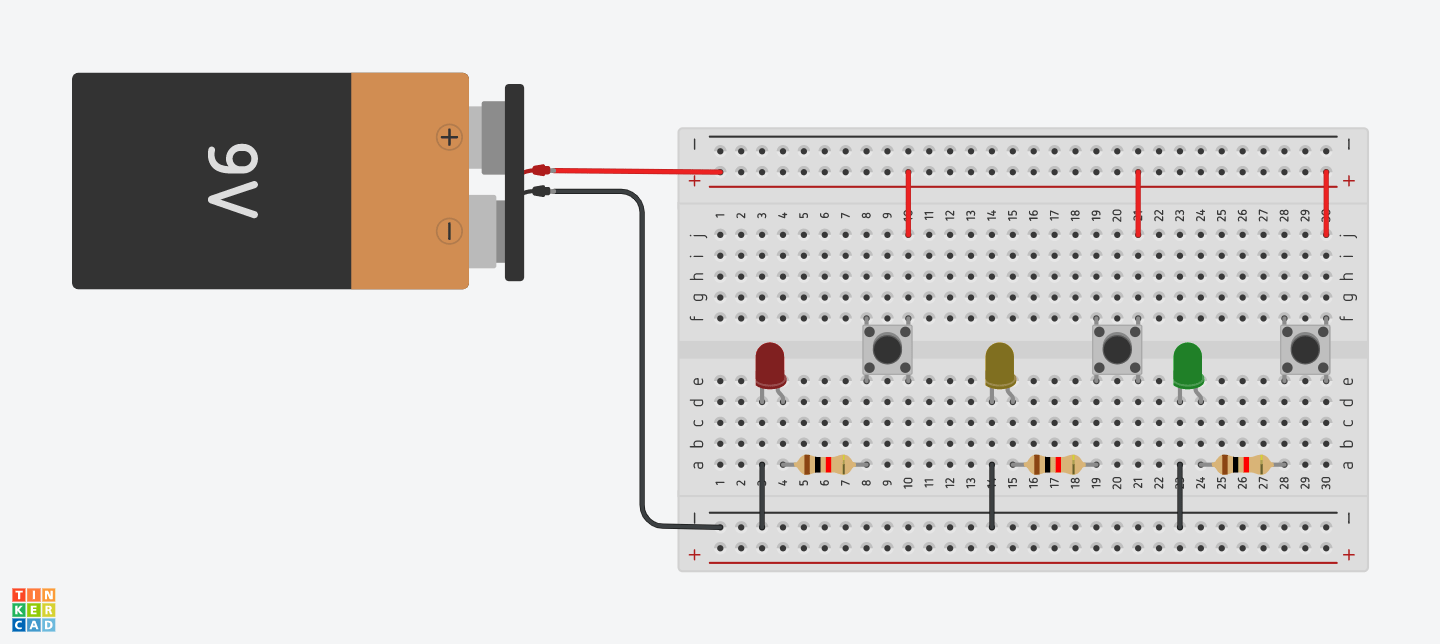
- Question 2: Looking at the following circuit, draw its diagram by yourself.
-
- Question 3: After reading The Art of Interactive Design, in what way do you think that the circuit you built today includes interactivity? Which degree of interactivity does it possess? Please explain your answer.
-
- Question 4: How can Interaction Design and Physical Computing be used to create Interactive Art? You can reference Zack Lieberman’s video or any other artists that you know.
- Question 4: How can Interaction Design and Physical Computing be used to create Interactive Art? You can reference Zack Lieberman’s video or any other artists that you know.
Reference: Components and Diagrams
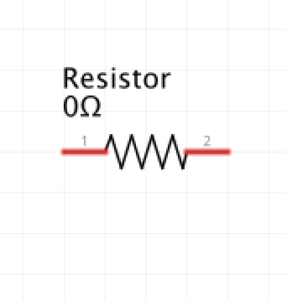
Resistor:
LED:
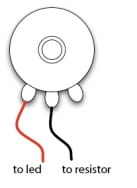
Potentiometer (POT) /Variable Resistor:
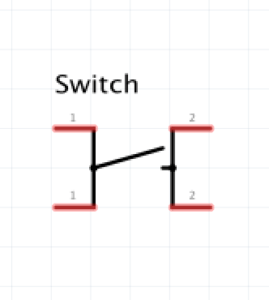
Push Button (Switch):

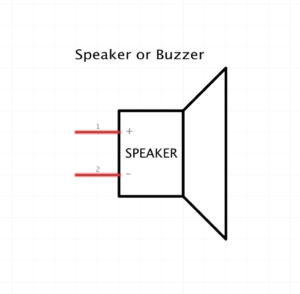
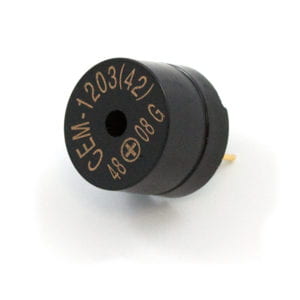
Speaker (Buzzer):
Power:
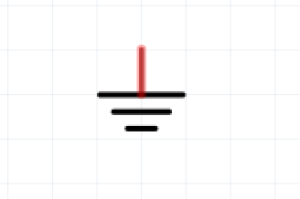
Ground (GND) symbol
Breadboard:
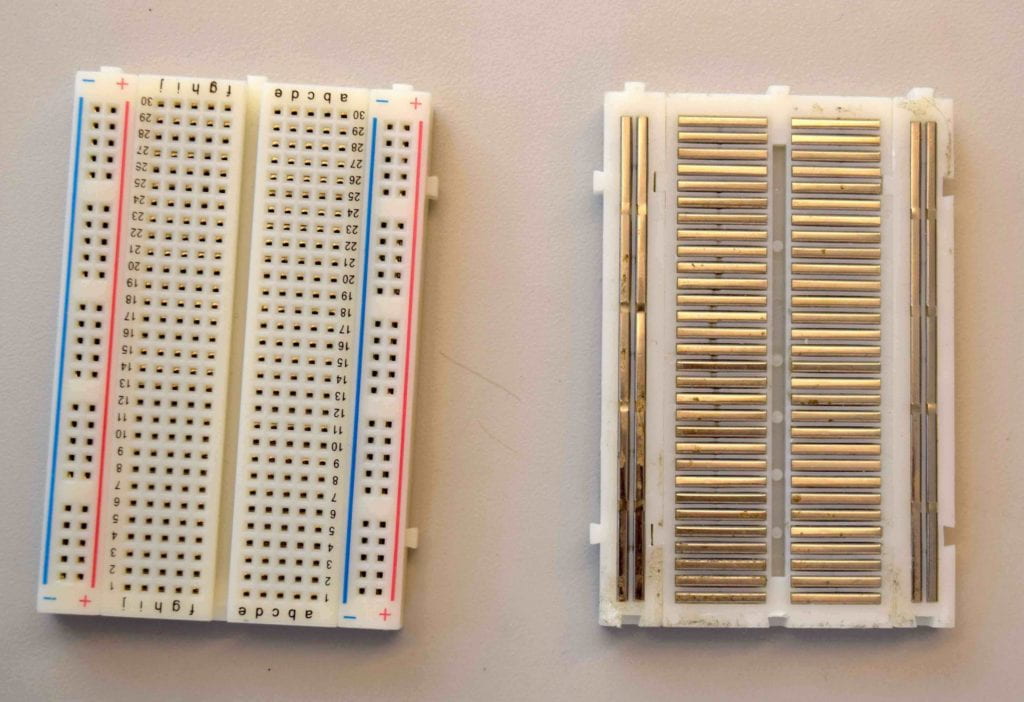
The breadboard has wires inside of it. You can read more about it in the article Making prototype circuits using a solderless breadboard. You can see the pattern if you remove the adhesive paper from the back of the breadboard. But don’t remove it completely – The wires might fall out!
