In this tutorial, we will learn two ways of using a button (digital input) to control an LED (digital output). You have learned in class how to turn an LED on by pressing down a button, and off by releasing the button. But sometimes you might not want to hold a button to keep an LED on (if you want it to be on for hours!). How do we press a button to turn a light on, and again to turn it off?
How to detect a moment of a trigger (a key/mouse/button gets pressed) is actually a common issue you might encounter not only in Arduino, but also in other programming circumstances like Processing, Unity, and MaxMSP. Once you understand the logic of the examples below, you will be able to achieve the same goal in other software.
For the two examples below, we will be using the same circuit. Here is a diagram of the circuit that I made with Tinkercad:
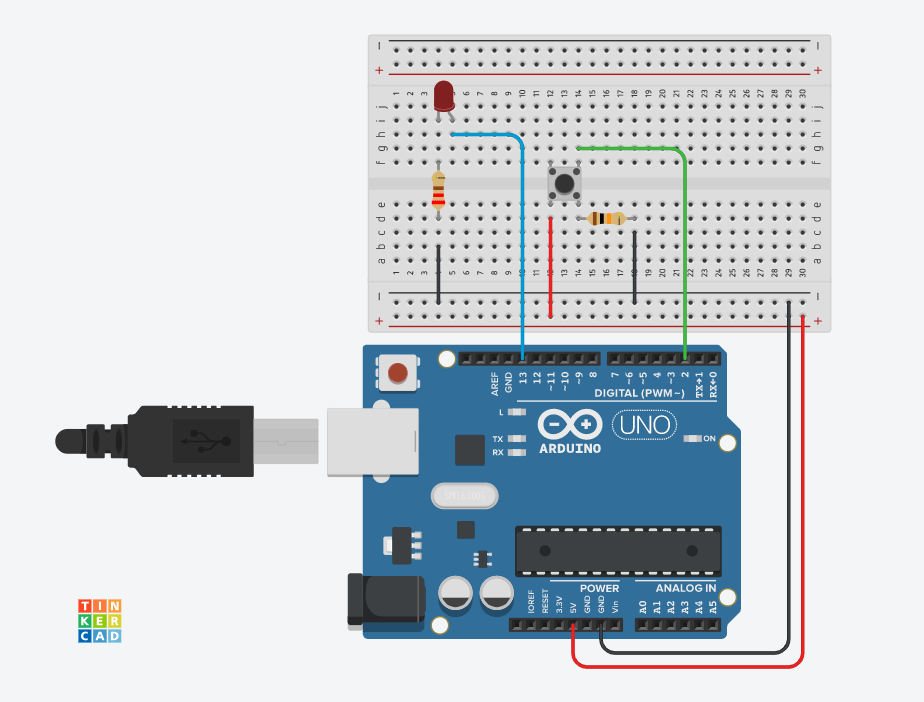
You can find the circuit and code of the two examples here in Tinkercad.
Example1 – Push for on, release for off:
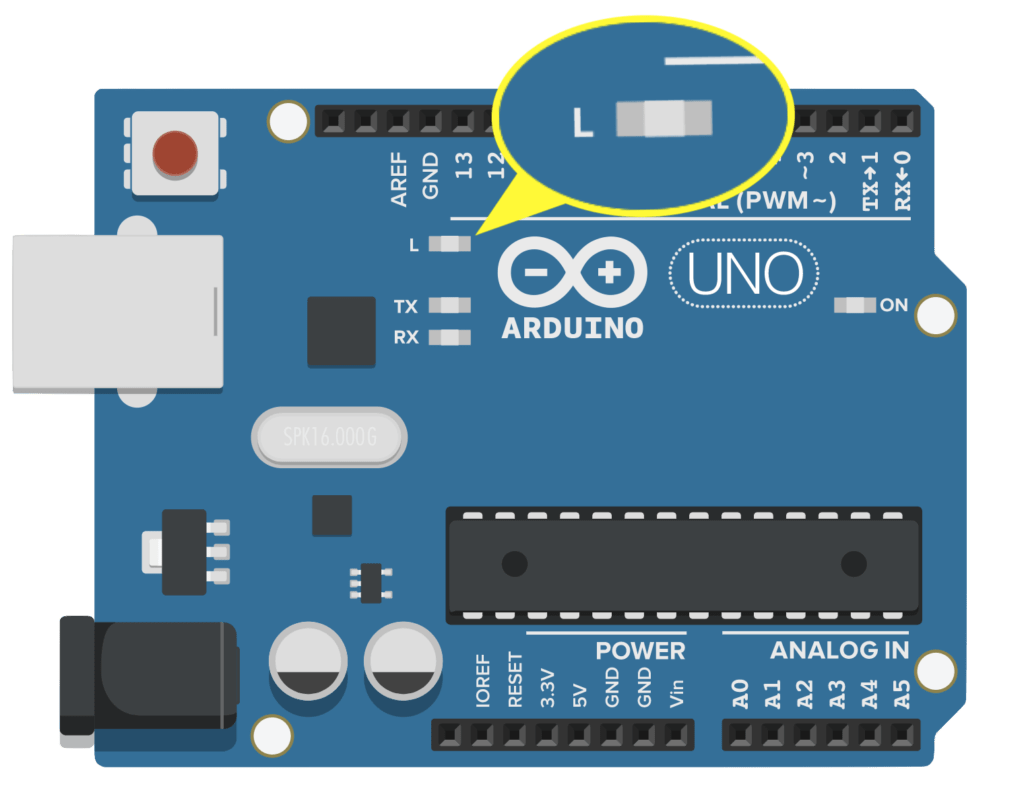
You have probably learned this example in class — the “Button” example(Arduino>File>Example>Digital>Button) in Arduino shows how to use a button to control the built-in LED on Arduino (digital 13) by synchronising the state of the input and the output. (You can also connect an external LED to digital pin 13, as I did in the diagram above. The external LED will basically behave the same as the built-in one, controlled by the same code that’s controlling the built-in LED.)
/*
  Button

  Turns on and off a light emitting diode(LED) connected to digital pin 13,
  when pressing a pushbutton attached to pin 2.

  The circuit:
  - LED attached from pin 13 to ground
  - pushbutton attached to pin 2 from +5V
  - 10K resistor attached to pin 2 from ground

  - Note: on most Arduinos there is already an LED on the board
    attached to pin 13.

  created 2005
  by DojoDave <http://www.0j0.org>
  modified 30 Aug 2011
  by Tom Igoe

  This example code is in the public domain.

  http://www.arduino.cc/en/Tutorial/Button
*/

// constants won't change. They're used here to set pin numbers:
const int buttonPin = 2;     // the number of the pushbutton pin
const int ledPin =  13;      // the number of the LED pin

// variables will change:
int buttonState = 0;         // variable for reading the pushbutton status

void setup() {
  // initialize the LED pin as an output:
  pinMode(ledPin, OUTPUT);
  // initialize the pushbutton pin as an input:
  pinMode(buttonPin, INPUT);
}

void loop() {
  // read the state of the pushbutton value:
  buttonState = digitalRead(buttonPin);

  // check if the pushbutton is pressed. If it is, the buttonState is HIGH:
  if (buttonState == HIGH) {
    // turn LED on:
    digitalWrite(ledPin, HIGH);
  } else {
    // turn LED off:
    digitalWrite(ledPin, LOW);
  }
}
EXAMPLE2 – Press once to turn on, press again to turn off:
Sometimes we don’t want to hold a button in order to keep an LED on. Things like light switches in our daily life work in the way that we push a button once to turn it on, and again to turn it off. How do we realize this?
In order to do so, we need to detect the moment of a button getting pressed down, instead of counting on the state of it. In other words, we need to detect the moment when the value of the digital input changes from 0 to 1. The key to realizing this is to create a pair of booleans: prevButtonStateand currentButtonState in which keep records of the previous state of the button, as well as the current state. We also need a third boolean LEDstatus to store the state of the LED.
The full code would write as below:
int ledPin = 13; //connect pin 13 to led
int buttonPin = 2; //connect pin 2 to button

// creating variables to store the current and previous button states
//false for not pressed, true for pressed
bool prevButtonState = false;
bool currentButtonState = false;

//creating a variable to store whether the LED is on or not
bool LEDstatus = false;

void setup() {
   //initialize the LED pin as output and the button pin as input
   pinMode(ledPin, OUTPUT);
   pinMode(buttonPin, INPUT);
}

void loop() {
  //read currentButtonState
   currentButtonState = digitalRead(buttonPin);

  //if my current button state is NOT the same as previously, AND the button is being pressed at this moment,
  //then this is the MOMENT the button just got pressed down
  if ( currentButtonState != prevButtonState && currentButtonState == true )  {
    //if the LED is off, then turn it on.
    if ( LEDstatus == false ) {
      digitalWrite(ledPin, HIGH);
      LEDstatus = true;
    }
    //else, turn the LED off.
    else {
      digitalWrite(ledPin, LOW);
      LEDstatus = false;
    }
  }
    //at the end of the loop, store the currentButtonState in variable prevButtonState to update it for the next loop
    prevButtonState = currentButtonState;
}
Variations and simplifications of the code in example2
While the code above can realize the effect we want, it is not the most optimized version. There are variations and simplifications that could be done for certain parts of the code. Some are simply another way to write the code without optimizing it, for example —
//false for not pressed, true for pressed
bool prevButtonState = false;
bool currentButtonState = false;

//can also be written as --

//0 for not pressed, 1 for pressed
bool prevButtonState = 0;
bool currentButtonState = 0;
Some can make the code a bit shorter —
  if ( currentButtonState != prevButtonState && currentButtonState == true )

//works in the same way as --

  if ( prevButtonState == false && currentButtonState == true )
Some help shorten the code massively. The farthest thing you could do to the code is probably to rewrite the section below —
  if ( currentButtonState != prevButtonState && currentButtonState == false )  {
    //if the LED is off, then turn it on.
    if ( LEDstatus == false ) {
      digitalWrite(ledPin, HIGH);
      LEDstatus = true;
    }
    //else, turn the LED off.
    else {
      digitalWrite(ledPin, LOW);
      LEDstatus = false;
    }
  }
into —
 if ( currentButtonState != prevButtonState && currentButtonState == false )  {
    //when button pressed, reverse the LEDstatus
    LEDstatus = !LEDstatus;
    digitalWrite(ledPin, LEDstatus);
  }
The full code after optimization will look like:
// Defining variables
int ledPin = 13; //connect pin 13 to led
int buttonPin = 2; //connect pin 2 to button

// creating variables to store the cuurent and previous button states
//false for not pressed, true for pressed
bool prevButtonState = false;
bool currentButtonState = false;

//creating a variable to store whether the LED is on or not
boolean LEDstatus = false;

void setup() {
   //initialize the LED pin as output and the button pin as input
   pinMode(ledPin, OUTPUT);
   pinMode(buttonPin, INPUT);
}

void loop() {
  //update currentButtonState
   currentButtonState = digitalRead(buttonPin);

  //if my current button state is NOT the same as previously, AND the button is being pressed at this moment,
  //then this is the MOMENT the button just got pressed down
  if ( prevButtonState == false && currentButtonState == true )  {
    //if the LED is off, then turn it on.
    LEDstatus = !LEDstatus;
    digitalWrite(ledPin, LEDstatus);
  }

  //at the end of the loop, store the currentButtonState in variable prevButtonState to update it for the next loop
  prevButtonState = currentButtonState;
}