For this week’s recitation, you will be using the NeoPixel Led strip to create light animations for your favorite music!
Materials:
From your kit:
- 1 * Arduino Uno
- 1 * USB A to B cable
- 3 * jumper cables M/M
- 1 * NeoPixel strip (WS2812B – Individually Addressable LEDs)
Recitation Exercise:
Task #1: Test the NeoPixel
Step 1: Connect the NeoPixel Led strip to your Arduino like shown on the diagram below:
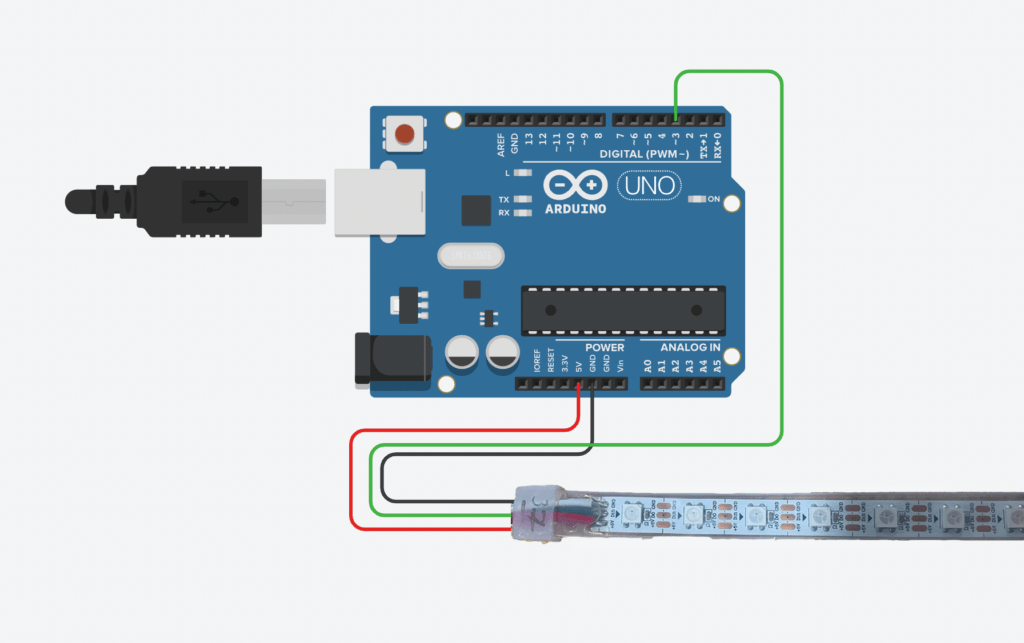
The NeoPixel strips we use at IMA have is 1 meter long and contains 60 LEDs. For this amount of LEDs, you can connect directly to the Arduino 5V pin and supply all the current necessary. However in the future, if you work with more than that you might need an additional power source to light up all the LEDs. More info on that here.
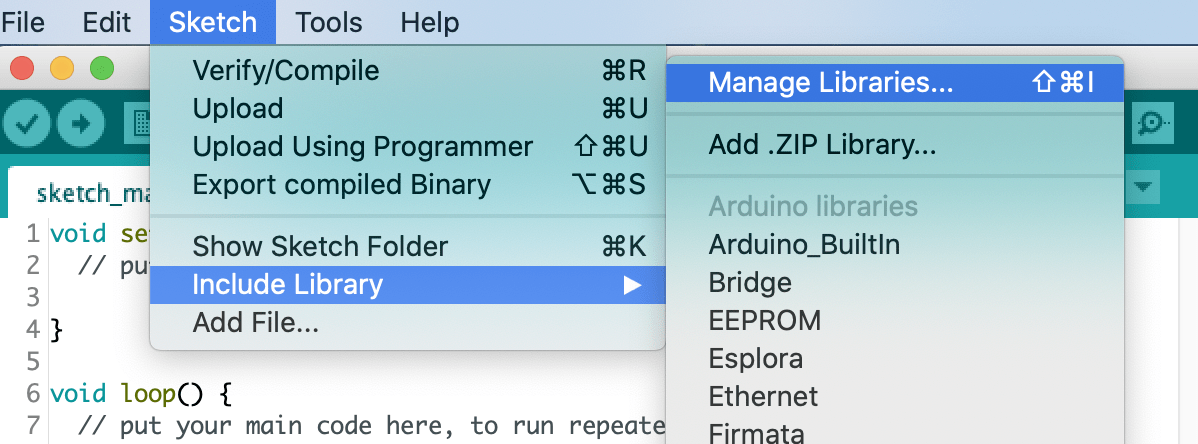
Step 2: Download the library. Just in case you didn’t do this step in class, to control the NeoPixel strip we need to download the FastLED library. To do so go to: Sketch -> Include library -> Manage libraries.
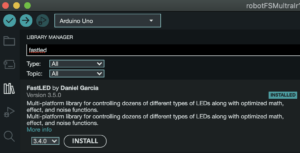
Inside the new library manager window search bar type: fastLED and click Install.
Step 3: Test the NeoPixels to make sure they are working correctly. You can do that with the example FastLED/Blink. Remember to change the DATA_PIN to the number of the pin you connected the cable to the Arduino board (3 in the diagram we provided you).
Task #2: Use your computer to light up NeoPixels
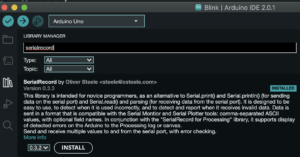
Step 1: Install the SerialRecord library. Similarly to the step you installed for the LEDs. Select from the menu Sketch -> Include library -> Manage libraries, and input SerialRecord. (kudos to Oliver Steele for providing the library)
Step 2: Program your Arduino using the code we used in class, you can copy it from here: IxLab_recitation7_ARDUINO.ino
Make sure you test your code using the Serial Monitor. This program receives four values, so you will need to send them in a Comma Separated Value protocol (CSV). The first parameter will indicate the pixel number, the second the content of red color, then green, and last blue. For example, to turn the second pixel purple, you need to send 1 the values of 255, a 0 for the second value, and a 100 last, you should input in your Serial Monitor: 1,255,0,100
Remember you might need to press Enter, Return, CMD + Enter, or CTRL+ Enter.
Step 3: Program your Processing sketch using the code we saw in class, you can copy it from here: IxLab_recitation7_PROCESSING.pde
Remember to close ALL the Serial Monitor windows you might have opened. Otherwise, it won’t run and it might show an error of “PORT BUSY”. Similarly, you won’t be able to program Arduino while you have any Processing sketch running.
Task #3: Add Music!
Step 1: Download this sketch which plays an audio file (located in the data folder) and analyzes the amplitude. Replace beat.aiff with a song you like.
Step 2: Modify this sketch so that it creates a visualization on the screen AND on the NeoPixel strip. For this, you want to merge code from the Processing sketch from Task into #2 into the current one. Embrace your inner VJ!
Step 3: Add different light effects for the song you have chosen. You can use millis() in Processing to know how long you have been running your sketch. You can use the following sample to do that:
 long t = millis();
 if (t < 1500) {
   background(155);
 } else if ((t>=1500) && t<3000) {
   background(255);
 } else {
   background(55);
 }
Step 4: Have fun with your music visualization! Challenge yourself to add ‘for’ loops, different color visualizations, and finding ways that effects with the NeoPixels complement what is happening with the screen. Tip: you can use the FFT Analysis to let the colors react to the pitch of the music.
Documentation
Document each task thoroughly, including taking a video. Describe your visualization and record the changes you made to the sample code from Task 3. Upload everything to the documentation blog.