Description
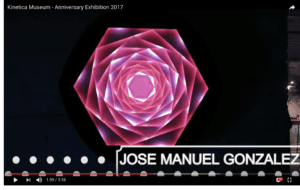
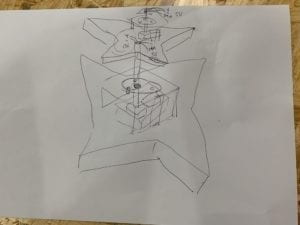
My project is a spinning object that imitates the star lights. I got inspiration from Jose Manuel’s artwork. This art piece is stationary, with different layers lit up at a different time. I want to make a similar sculpture with three layers of stars which can spin. And there are changes of lights in every layer over time.
It was too hard for me to make three layer spin at a different speed since the connection of slip rings and the layers is very complex, so instead I chose to make the whole sculpture with three layers spin as a whole. I also soldered three parts of led strips together so that I will only need one slip ring to connect them to the circuit. Correspondingly, I will use code to control different sections of lights to have varying effects, like bouncing dot or rippling light effects.
Perspective and Context
I want to put the audience in a space-like surrounding where the stars are flashing by. What’s more, I also express that the whole universe is spinning continuously by using a motor underneath the object.
The kinetic part is mostly the spinning of the motor, but actually the changing effect of lights is also a movement visually. So I combine these two parts together in order to achieve a more diverse movement, where the stars are flashing by and they are also asters revolving around us.
Development and Technical Implementation
———————————— Physical Part —————————————-
-
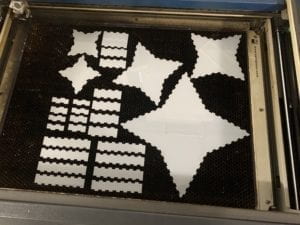
- First I laser cut the smallest star on the top with a sample code with rippling effect online. https://pastebin.com/LfBsPLRn
-
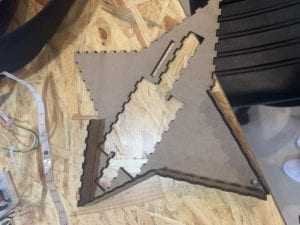
- Then I laser cut the two bigger layers under it. In order not to waste acrylic material, I tested whether it worked on wood pieces. The fingers connected quite well, so I used acrylic material to get the final layers.

- Then I laser cut the two bigger layers under it. In order not to waste acrylic material, I tested whether it worked on wood pieces. The fingers connected quite well, so I used acrylic material to get the final layers.
-
- After gluing every piece together, I tested whether the DC motor I bought fit into the hole I cut. It turned out the layer can move with the motor quite well.
-
- The next step is to solder the three parts of led strips in every layer together. I also counted the numbers of pixels in every part in order to control them separately later in the code. In this way, the three layers can be glued together.
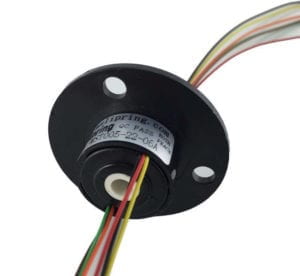
- The last physical part was to connect the strip and the motor to the circuit. I encountered the problem that the wires from the strip would be tangled together unless I use a slip ring. With a slip ring, I can make the side with the motor (the part underneath the whole object) stationary, while the side with the led strip can spin freely. However, I didn’t get the essence of how it functions until Eric explained to me several times and about how to connect it. A huge thanks for his patience.
-
- More importantly, I cut a big acrylic box to hide the circuit and stabilize the slip ring. And there is also a hole on one side of the box to connect the power. Finally, the whole object was able to spin!
———————————— Code Part —————————————-
Since I want three layers to have varying effects, I first added a composition where every separate layer will be lit and fades out in sequence. Then I added a dot bouncing from the bottom to the top of the object. The third effect is accumulating orange and yellow color dots from the top. In the end, I put the edited version of the rippling effect I found online.
The link to the complete code: https://gist.github.com/lilyunverwundbar/99b6c4c0fbabae06896b81a9dc09cffa
The link of the reference: https://pastebin.com/LfBsPLRn
Presentation
When I show this project in class, the best thing was nothing about the circuit or the code went wrong which happened a lot to me. The feedback was mainly about the scratching sound it makes. The sound results from the unbalance of the object which touches the lid of the box beneath it. Nick suggested that I use a ball bearing to lift the downward side up. I used it during the IMA show, the sound was eliminated but the object would be stuck after some time spinning.
What people liked about my project is the light composition, especially when the orange and yellow lights are accumulated gradually toward the bottom. I was glad to know that they thought the change of light was beautiful. I also like it when people gave me different ideas about what the object is since I didn’t think of a certain thing to name it.
Conclusion
-
- Be more realistic about what you are going to make. Initially, I want to make three layers spin at a different speed, so I bought three motors and slip rings. But after I had a long talk with Eric, I decided to merge three layers together instead. Because if I want to do so, I cannot stick three layers together and I don’t know how to display the whole object in that sense. Also, I need to stabilize every slip ring with a small square box.
- Think about details earlier. I didn’t realize I have so many specific things to pay attention to until I talked to Eric. The connection and stabilization of the slip ring, the connecting part between the motor and the slip ring, etc. This also means start doing the important part earlier so that I can encounter the problems earlier.
- Having a production schedule is helpful. Although I adjusted the schedule several times due to the change of my idea, I still benefited from having a clear timeline in the last two weeks. In this way, the work will be more organized.
- What I am most proud of is that I finally figured out how to make the connection of slip ring with the object more stable, using a 3D printed connector and a hole on the lid of the box to let the slip ring wedge into it.
- For future development, I would definitely add more layers to it so that I can play with more changes of light.
- Lastly, I really appreciate IMA fellows for giving me advice, especially Andy who helped me so much with 3D printing. And of course, huge thanks to Eric who helped me with laser cut and suggestions on the physical part of my project and my code.
- Be more realistic about what you are going to make. Initially, I want to make three layers spin at a different speed, so I bought three motors and slip rings. But after I had a long talk with Eric, I decided to merge three layers together instead. Because if I want to do so, I cannot stick three layers together and I don’t know how to display the whole object in that sense. Also, I need to stabilize every slip ring with a small square box.