Introduction:
Get familiar with the components in our Arduino kits and begin to build basic circuits with sensors.
Objectives:
- Learn how to build a circuit while incorporating a buzzer and button
- Get accustomed to the materials in the Arduino kit and how to build the required circuits
Materials (as listed on the IMA website):
From Arduino Kit:
1 * Arduino Uno
1 * USB A to B cable
1 * breadboard
1 * buzzer
2 * LEDs
2 * 220 ohm resistors
2 * 10K ohm resistors
2 * pushbuttons
A handful of jumper cables
From cart:
2 * arcade buttons
1 * Multimeter (optional)
Process:
This week I worked with Sass and we begin by building a circuit which incorporated an LED under the code Fade.
https://drive.google.com/open?id=1EbXupCLWU93ykYfNz-icmRmQRxBCk1TD
The next circuit we built included a buzzer. This code was a little different from the previous ones because this code required an external file for the sound files, so we had to learn how to set up the Arduino window in a way that the code was able to reference this extra file.
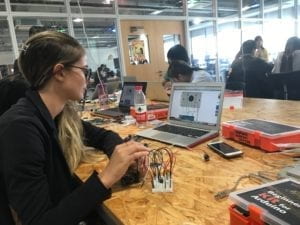
 Sass finishing up the circuit with the buzzer and LED
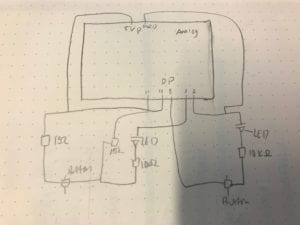
Finally, we began the task of navigating the sea of wires that was the speed game. After finally finding the correct resistors, we were able to build this circuit! The first time we had misplaced the ground wire into the row adjacent to where it should have been; this was an easy fix and then our circuit functioned properly.
https://drive.google.com/open?id=1gd32HQQ314P3S1dIa08y024E8SxEfQLv
Reflection:
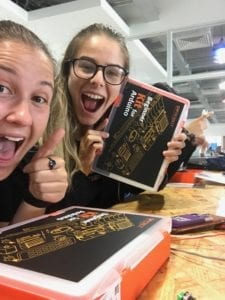
WE FINALLY GOT OUR ARDUINO KITS :)))
After Sass and I played a few rounds, I noticed that my registered reaction speed was not as high as it should have been. I came to find that the wire end of the button that had been soldered last week had not been stripped high enough up the wire and, therefore, it did not have a strong enough connection down into the nodes. After I stripped in a little bit more, the connection was stronger and we got to have a real competition!
Questions:
1. Reflect how you use technology in your daily life and on the circuits you just built. Use the text Physical Computing and your own observations to define interaction.
In this modern age, I am never not surrounded by technology from the lights in our rooms to the watch on my wrist. The results of these circuits are no different in the sense that these basic functions are incorporated into our every day lives from the sound of our alarms in the morning to lights posted at the top of tall buildings at night to alert aircraft of their location. As stated in physical computing, interaction is not simply a + b = c but rather a*b= interaction. The input in combination of the action with which you offered an input results in a completely different action is therefore and interaction.
2. Why did we use the 10K resistor with the push button?
We were required to use the 10K resistor with the push button so that the appropriate voltage was sent to the push button. If more voltage had gone to the button than the circuit would have short circuited, thus we used the 10k resistor.
3. If you have 100,000 LEDs of any brightness and color at your disposal, what would you make and where would you put it?
If I had 100,000 LEDs, I would use them to make an Avatar forest like the one from the movie. Every step, touch, and movement would result in a burst of colors and magic to fill the air.