MATERIALS

Component #1: Resistor
Resist some of the electricity

#2 LED light
light up when the circuit is turned on

#3 Capacitor
Store energy in an energy field

#4 voltage regulator
regulate voltage level

#5 variable resistor
allows the resistance to be changed

#6 Push Button or Switch
can interrupt a circuit; can be opened or closed, preventing or allowing electrons from moving through

#7 Speaker
make noise; can be triggered by pressing a button
SOLDERING
e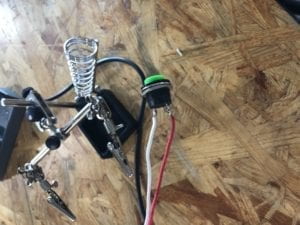
This is the finished product of our soldered button.
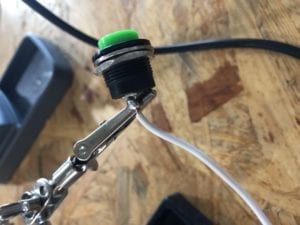
This was in process of soldering the button. We melted the thin metal wires between the long wire and button. We clamped both sides to hold it up and firm so that we could accurately place the melted metal.
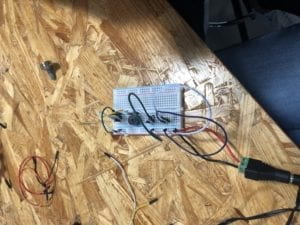
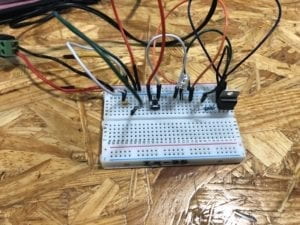
CIRCUIT #1 Doorbell
Pictured is our first successful attempt at creating the doorbell. At first, since both my partner and I had never used a breadboard before, we were completely lost at first. One of the learning assistants had to help us with most of the first circuit. The fact that one line is connected was very confusing at first when we saw people just putting in the wires in lost of different spaces. After we got help though we were able to do the rest of the first circuit and the next one as well.
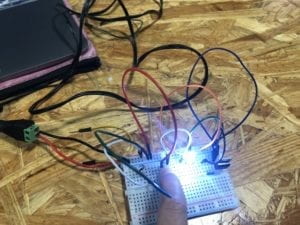
CIRCUIT #2 Lamp
It took us several attempts to be successful with the lamp. Out issue turned out to be that the positive and negative sides on the LED were in the wrong place and we needed to turn it around. After that, everything worked correctly.
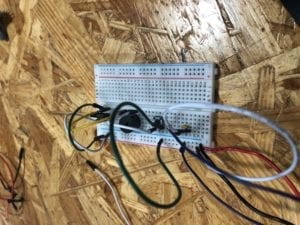
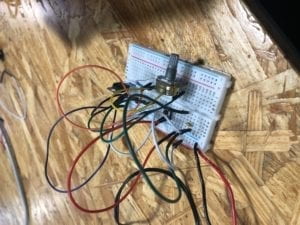
CIRCUIT #3 Dimmable Light
Unfortunately, my partner did not make it to finishing the last circuit. We were able to start it, but when we thought it was done the variable resistor did not have an effect on the brightness of the light. Pictured is what we made it to, but the class ended before we had a chance to fix it.
QUESTION #1
After reading “The Art of Interactive Design,” I do think that our circuits were interactive. As the article said, something can be interactive to an extent. Although it was not super exciting, and probably the equivalent amount as the fridge door opening and closing, the light and speaker could still only turn on once my partner or I had pressed the button. The last circuit was a little bit more interactive because it was not simply turning something on or off, it allowed the user to choose their own brightness and could adjust accordingly.
QUESTION #2
In Zack Lieberman’s project, he made a pair of glasses that followed a person’s retinas and could draw for a disabled artist. It allowed the artist to create an entire artwork without moving his body. The artwork was eventually turned live and projected onto a wall on a building outside, so it really looked like the real thing. The communication between the computer and person exemplifies one way that computing and interactivity can create art.