For this recitation, we first explored the map() function, which changes a range of values into another a range of values. We were to use the map() function within the serial communication workshop. In Arduino, we could use map() for the potentiometers, while in Processing, we could use map() for the horizontal and vertical coordinates of mouseX and mouseY.
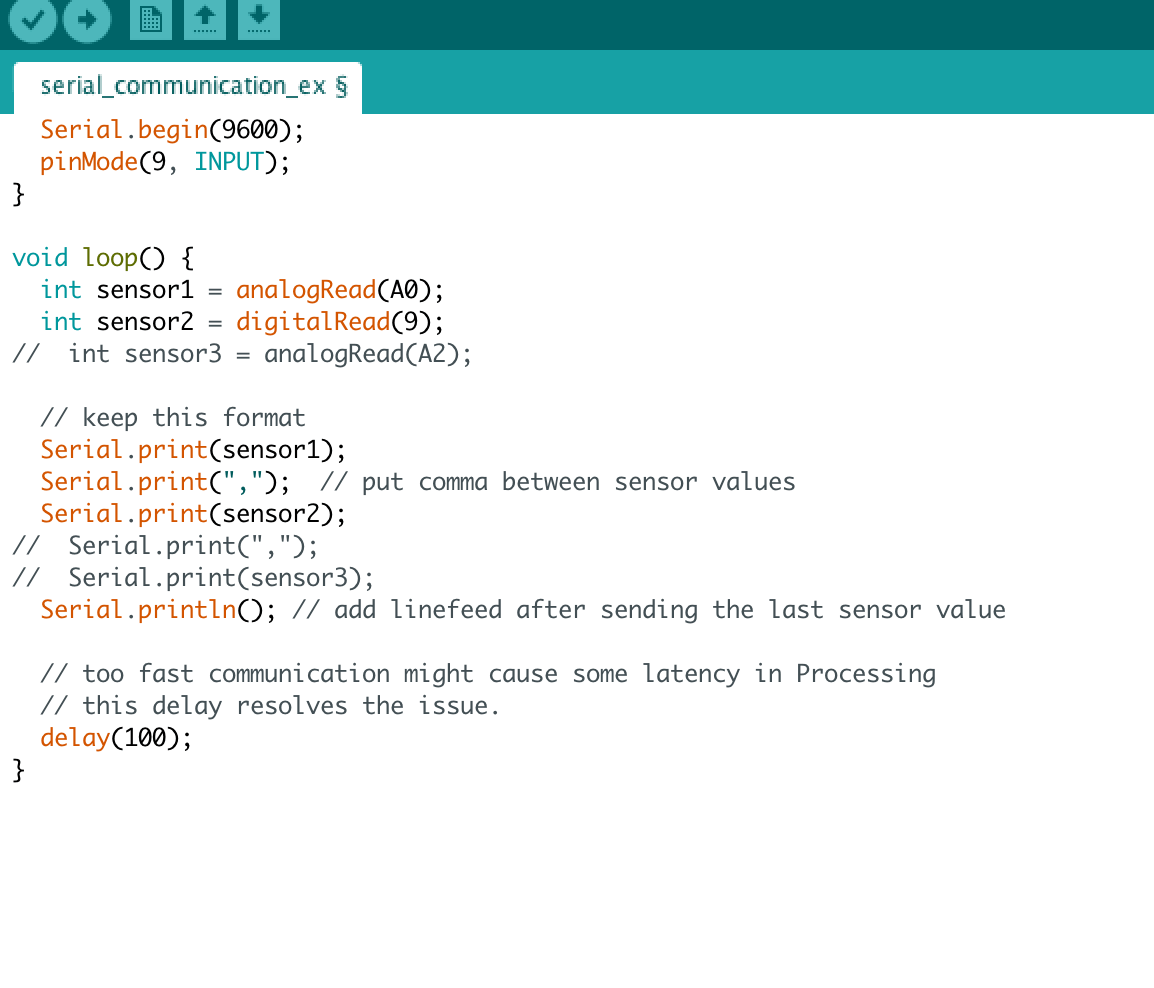
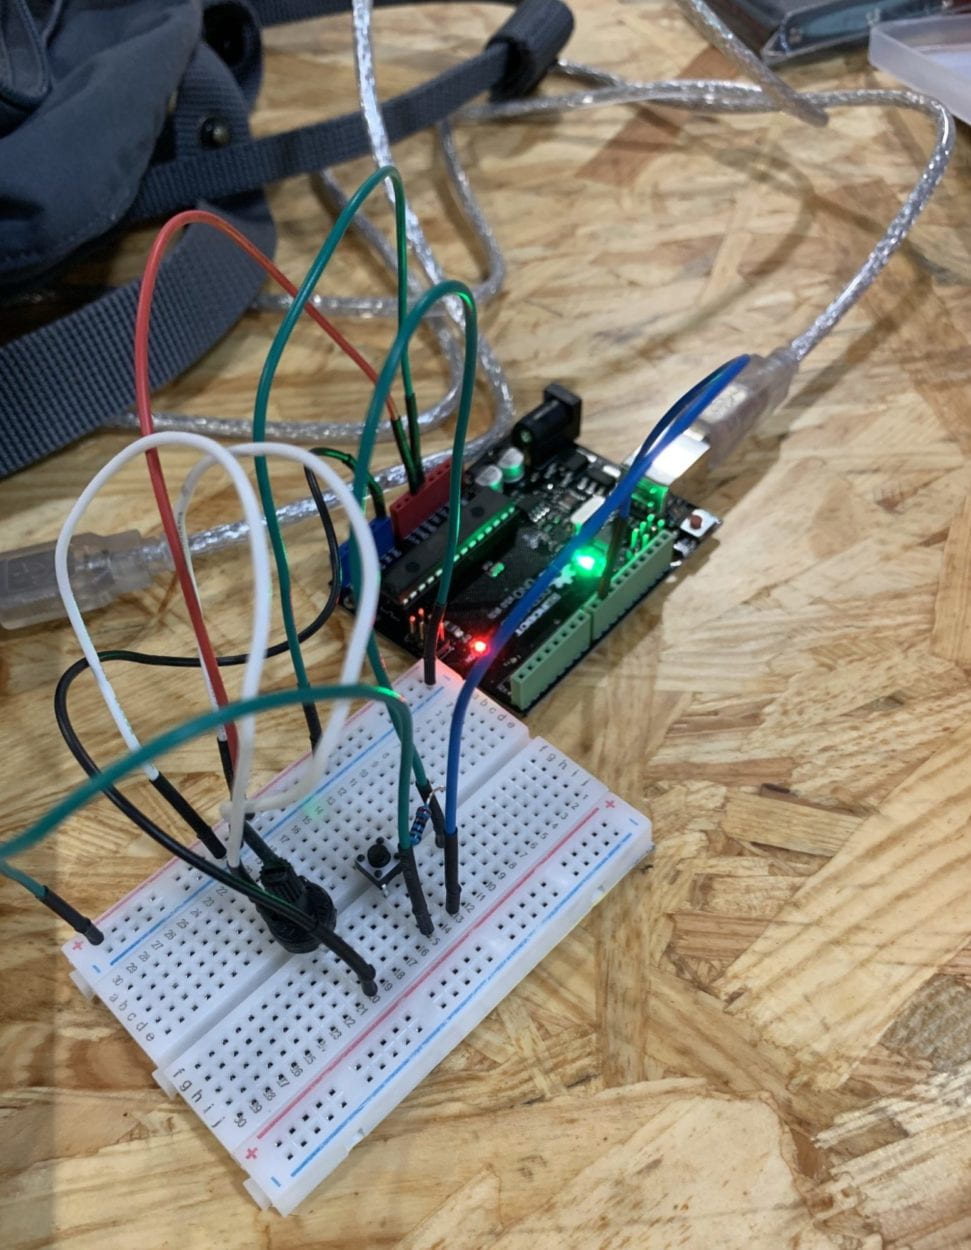
In the serial communication workshop, we first worked on an Arduino to Processing example using a potentiometer, a mini pushbutton switcher, and a resistor. We were to use the potentiometer and button on Arduino to control the location of an ellipse and the size of an ellipse on Processing, respectively. For this, we used the serial_multipleValues_AtoP example, modifying the second analogRead to read digitalRead and removing one Serial.print input. Then, we assembled the circuit with the potentiometer, button, and a resistor. We used float posX to designate the position of the values.
Arduino Code:
Processing Code:
import processing.serial.*;

String myString = null;
Serial myPort;


int NUM_OF_VALUES = 2;   /** YOU MUST CHANGE THIS ACCORDING TO YOUR PROJECT **/
int[] sensorValues;      /** this array stores values from Arduino **/


void setup() {
  size(500, 500);
  background(0);
  setupSerial();
}


void draw() {
  updateSerial();
  printArray(sensorValues);

  background(0);

  // use the values like this!
  // sensorValues[0] : pot 0 ~ 1023
  // sensorValues[1] : button switch 0, 1

  // add your code
  float posX = map(sensorValues[0], 0, 1023, 0, 500);
  int size;
  if (sensorValues[1] == 0) {
    size = 50;
  } else {
    size = 200;
  }
  ellipse(sensorValues[0], 300, size, size);
}


void setupSerial() {
  printArray(Serial.list());
  myPort = new Serial(this, Serial.list()[3], 9600);
  // WARNING!
  // You will definitely get an error here.
  // Change the PORT_INDEX to 0 and try running it again.
  // And then, check the list of the ports,
  // find the port "/dev/cu.usbmodem----" or "/dev/tty.usbmodem----"
  // and replace PORT_INDEX above with the index number of the port.

  myPort.clear();
  // Throw out the first reading,
  // in case we started reading in the middle of a string from the sender.
  myString = myPort.readStringUntil( 10 );  // 10 = '\n'  Linefeed in ASCII
  myString = null;

  sensorValues = new int[NUM_OF_VALUES];
}


void updateSerial() {
  while (myPort.available() > 0) {
    myString = myPort.readStringUntil( 10 ); // 10 = '\n'  Linefeed in ASCII
    if (myString != null) {
      String[] serialInArray = split(trim(myString), ",");
      if (serialInArray.length == NUM_OF_VALUES) {
        for (int i=0; i<serialInArray.length; i++) {
          sensorValues[i] = int(serialInArray[i]);
        }
      }
    }
  }
}
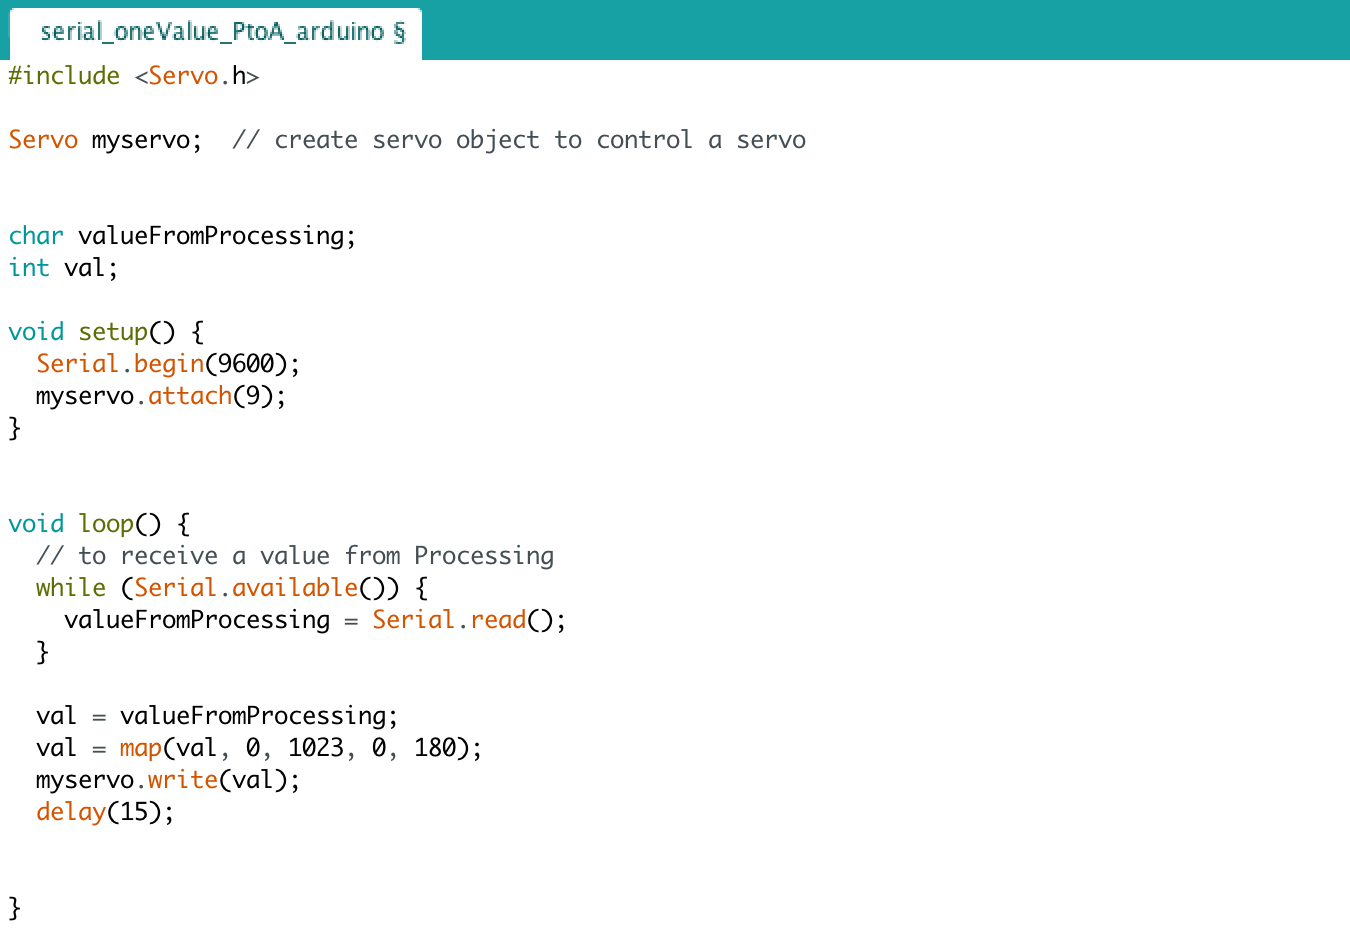
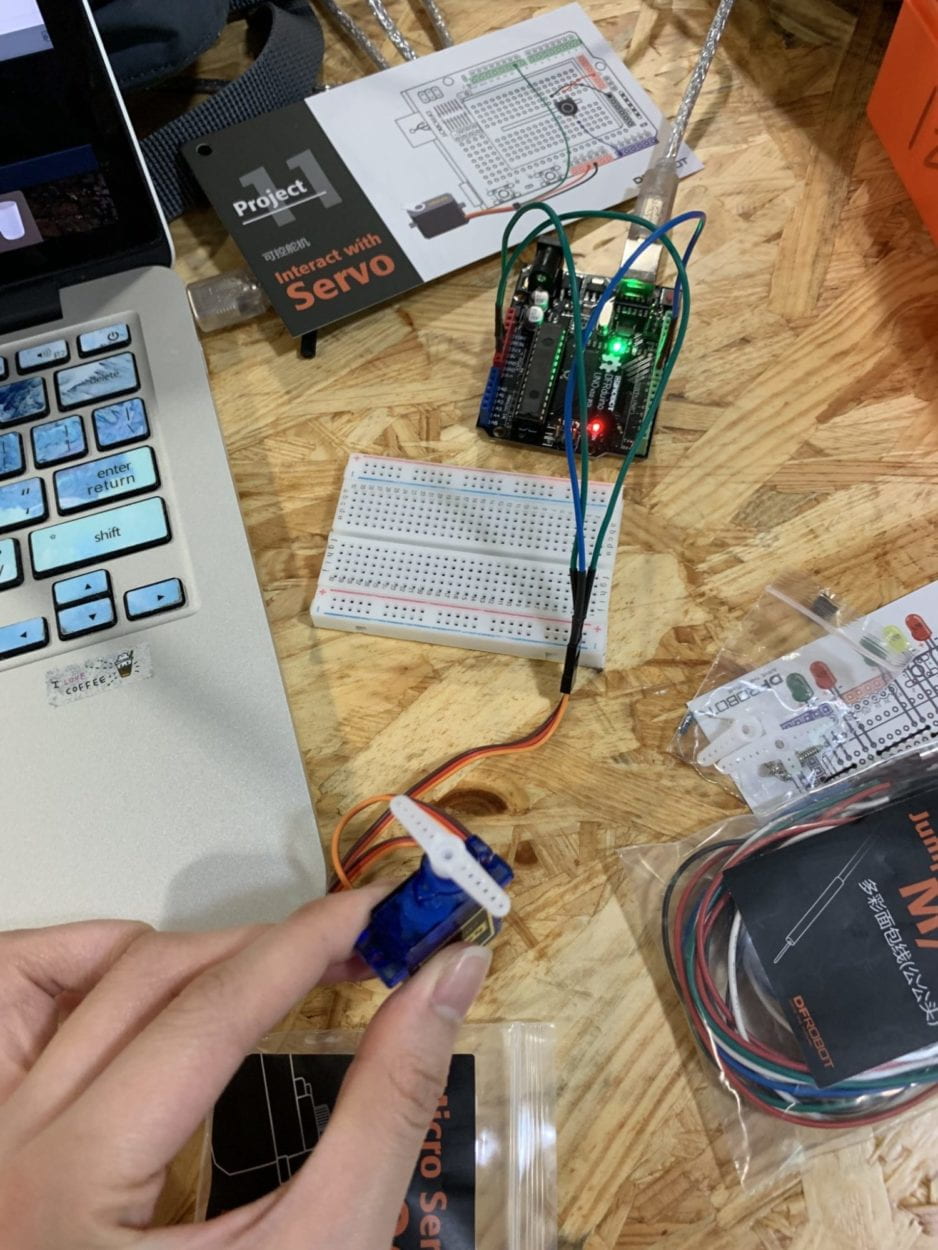
For the second example, we were to use a mini servo motor to be controlled by the keypad being pressed. For this, we used the serial_oneValue_PtoA example to read the input from Processing to Arduino. By pressing the keypard, the servo motor moves in response to its input.
Arduino Code:
Processing Code:
import processing.serial.*;

Serial myPort;
int valueFromArduino;


void setup() {
  size(500, 500);
  background(0);

  printArray(Serial.list());
  // this prints out the list of all available serial ports on your computer.

  myPort = new Serial(this, Serial.list()[3], 9600);
  // WARNING!
  // You will definitely get an error here.
  // Change the PORT_INDEX to 0 and try running it again.
  // And then, check the list of the ports,
  // find the port "/dev/cu.usbmodem----" or "/dev/tty.usbmodem----"
  // and replace PORT_INDEX above with the index number of the port.
}


void draw() {
  // to send a value to the Arduino
  if (mousePressed) {
    myPort.write(mouseX);
  } else {
    myPort.write(0);
  }
}


