Context and Significance:
Smash That Like Button was a project, created by Alex Cleveland and me, intended to bring high striker (a classic staple of the carnival industry) into the modern era. The inspiration to build Smash That Like Button stemmed from (1) our shared love of carnivals, as well as (2) our research conducted during the group projects. The group projects pushed us to theorize what technology could look like one-hundred years from today; we took that prompt and, in a sense, “reverse engineered” it. Instead of looking into the future, my partner and I decided to reach into the past; we aimed to take something timeless and pull it into the present day. It was from these reasons that the idea for Smash That Like Button was born. For those unaware, high striker is a carnival game in which the player is provided a large hammer intended for striking a target situated at the base of a large tower. The tower is outfitted with a small metal apparatus that shoots up when the target is struck. If the target is struck hard enough and the metal apparatus reaches its highest intended point on the tower, it will ring a bell indicating that the player has won the game.
In order to bring high striker into the modern era, we decided to implement a whole sleuth new electronic components aimed at enhancing the overall experience. Before I explain what these components consisted of, one must understand some key aspects of our project; (1) Our project took inputs from a pressure sensor located under a 3D printed model of a like button (hence the name Smash That Like Button), furthermore there are three thresholds the user may fall within depending on how much pressure they apply on the pressure sensor: low, medium, and high. Should the user’s input fall within the “low” threshold, they will be met with a red light accompanied by The Imperial March from Star Wars, moreover they will be given a thumbs-down. Should the user’s input fall within the “medium” threshold, they will be met with a yellow light accompanied as well by The Imperial March from Star Wars, moreover they will be given a “meh” thumbs-up. Should the user’s input fall within the “high” threshold, they will be rewarded with a green light accompanied by the upbeat Cantina Theme from Star Wars, moreover they will be given a thumbs up.

This is a photograph of a high striker
Conception and Design:
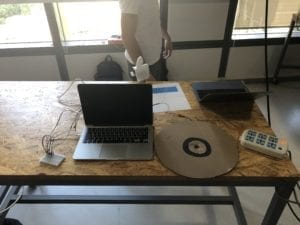
Here is a picture of Smash That Like Button during its user testing
Smash That Like Button is a reference to a popular trend on YouTube in which content creators request that their viewers like their video. YouTubers will typically say something along the lines of “don’t forget to hit that like button”, however the more zealous YouTubers will typically scream “REMEMBER TO SMASH THAT LIKE BUTTON”. This is important to note because, throughout our user testing, we originally had a bullseye as opposed to a like button, which generated confusion among the users as to what they were supposed to hit (some users understandably thought the “like button” intended to provide visual feedback had to be hit in some way). This issue was remedied by replacing the bullseye with a like button intended for smashing.
Another notable complaint we got during user testing was with regards to the pain experienced from smashing the thin and abused cardboard target, moreover users felt that the pressure sensor was not accurately reading there hits as sometimes a noticeably lighter hit would receive a higher rating . We 3D printed a new like button intended for smashing with hopes that the plastic material would make it durable, moreover we added layers of styrofoam to the underside of the like button in order to serve as additional cushioning for we noticed that not only did it alleviate much of the pain that stemmed from smashing that like button, but it helped to give more consistent readings.
Finally we were told that our machine could look “cleaner”. We decided to enhance the overall appearance by laser-cutting a wooden casing that would serve to make Smash That Like Button both more presentable and portable.
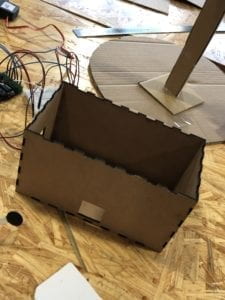
All of the electronics required to make Smash That Like Button a reality would eventually be fit in this clean and compact casing.
Fabrication and Production:
In this section, I will display the step by step process that lead to the creation of Smash That Like Button. Please bare in mind that the captions correspond to the photos above them.
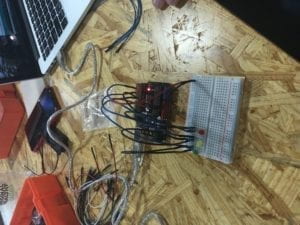
These are the 3 LEDs. Red corresponds to low, yellow corresponds to medium, and green corresponds to high. The lights were tested using blink.
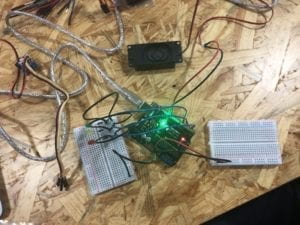
Here is when we attached the speaker. The installation process was simple for this component. We decided to use two breadboards for the sake of organization. The speaker was tested using tone melody.
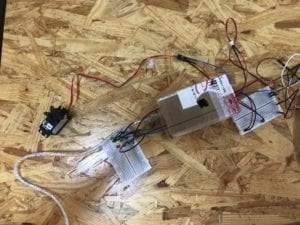
Here is a photo of our prototype. As you can see, we have added both a servo motor (for the thumbs up) and a pressure sensor (for taking inputs). You can also see our first attempt at casing the arduino and speaker. We utilized cardboard for the prototype casing.
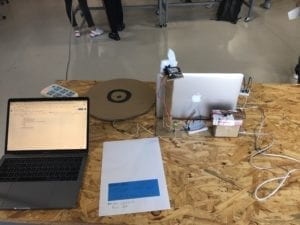
Though not programmed yet, we attached the servo motor with our 3D printed thumb model to a stand. At the time of user testing, the servo motor was not programed; it was simply for show.
Here you can see a bit of our user testing in action. Though the user obtained the highest ranking, it is clear that the prior hit was equally as strong yet yielded a different response. Moreover, the prototype itself looks sloppy.
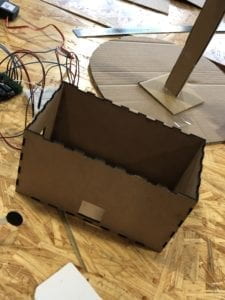
Here is the casing used to hold both the breadboards, the LEDs, the servo motor, and the speaker. We decided to put the speaker outside of the casing in order to amplify the sound. A large complaint during user testing was that the music was difficult to hear.
Here is a video of our casing with everything installed aside from the servo motor. As you can see there is a pillar for the servo to stand on that makes it more visible to the user.
Here was our final test ensuring that the machine worked. As you may notice, the servo motor is different compared to recent photos. This is because we had to change the servo motor because the previous one was broken. This was very annoying to deal with because this issue took us a very long time to resolve. We kept doubting our code when in reality it was the hardware that was lacking. Opening the casing to reinstall the new motor also proved to be a challenge since there is not much space inside to work with.
Here is a video of our final product in action!
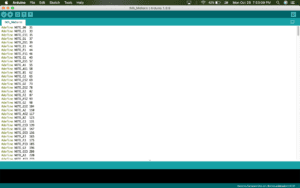
These are the notes for the songs that play depending on what threshold his obtained.
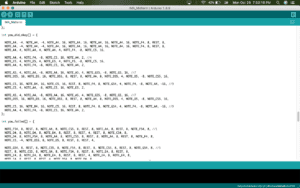
This is the code with which we defined the notes. In this regard, define means to specify the melody as well as duration of each note.
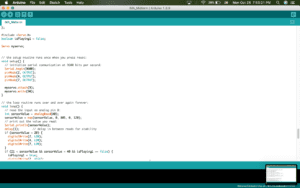
This was the coding that activated one of the 3 LEDs. It is here that you can clearly see our threshold concept.
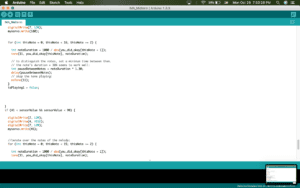
Tied into the coding for the LED’s is also the coding for the speaker. This code tells the speaker to play the appropriate song depending on the threshold obtained.
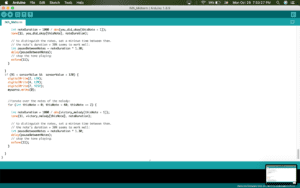
This last bit of code displays the servo motor coding. Thumbs up was defined as a turn to 180 degrees and thumbs down was defined as a turn to 0 degrees.
Conclusions:
In my opinion, the project achieved its goal. We aimed to pull high striker into the modern era through the implementation of additional outputs as well as a pop culture reference. The compact and portable size is a nice plus too. With regards to interaction, we wanted our project to be something that you could come back to and have a different experience every time. We felt a way to measure strength compounded with colorful outputs was an optimal way to achieve such a goal. During user testing, it was very fun to see people compare themselves to one-another in the spirit of friendly competition. The energy that would radiate from getting the green light was fun to both experience and spectate. If I could make the project more interactive, I would find a way to add in additional methods of inputting data. The concept Marcela brought up about a multiple person game was a very strong suggestion, but ultimately could not be implemented due to time constraints. We felt that if such a feature were to be implemented, it should be thought out thoroughly. We felt like our audience enjoyed the project. When a user got a red light, they were instantly determined to do better. Even if the user got the green light on the first try, their human nature urged them to see if they could do it again. I think, though very simple, our project did a good job at bringing out both the curiosity and determination we have within us. Something I learned from this project was to trust myself just a little bit more. My partner and I spent over two hours trying to fix the code of a servo motor that was entirely correct. It turns out that it was the motor itself that was broken. We ended up wasting so much times because we had too much confidence in the hardware, and not enough confidence in our own abilities. I think this project was a good reminder to believe in myself more. Though this was a relatively simple test of strength that lit up and played cool sounds, I think it was the little fire that in sparked in people that makes it worthy of discussion. Giving people a challenge to progress through, no matter the size, can help lead to personal growth. So, next time you watch a YouTube video, remember to smash that like button,