DeepDream, created by Google engineer Alexander Mordvintsev, is a computer vision program that chews up the reality and renders it into trippy, somewhat nightmarish image. With a help from CNN (Convolutional Neural Networks), the effect of deepDream is a result of how the algorithm views images; that’s why this pattern recognition is called algorithmic pareidolia. For this week’s assignment, I tried a number of experiments with varying parameters to see what sort of results it would yield.
Instead of photographs, I drew a self-portrait and took a picture of it. I colored my drawing with Photoshop and Painnt:

Then I uploaded my drawing on this site, which allows its users to easily apply DeepDream effects on their images–without knowing much of how this DeepDream actually works.
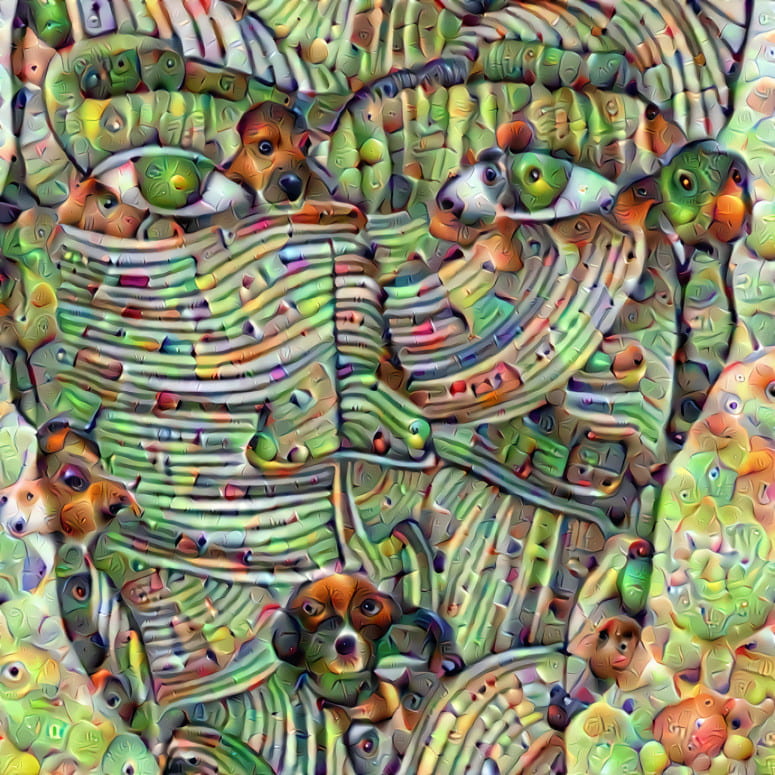
We can see from the generated image above that it warped the original image with mostly animal-related features. We can spot the dog-like and parrot-like visuals, but still the original portrait looks like a human face. To control more parameters of this effect, I used the notebook called “DeepDreaming with Tensorflow” provided by Alex Mordvintsev. I tried different layers to see which one yields the most interesting output.

Those layers are characterized by edges (layer conv2d0), textures (layer mixed3a), patterns (layer mixed4a), parts (layers mixed4b & mixed4c), objects (layers mixed4d & mixed4e).

Mixed 4b created spirals in the background.

And Mixed 4c showed the floral patterns. The way how it transformed the background elements was pretty cool; and yet, my face didn’t change much. I could see there was something interesting going in terms of computer vision. I moved on to the next step: video!
This notebook powered by Google Colaboratory provides a simple yet powerful user environment to generate a DeepDream video. To break it down with several steps, the first thing I had to do was mounting my Google Drive. It allows users to import their own Google Drive and upload an input image and download the output (generated video, to be specific). The next step is to load the model graph–the pre-trained inception network–to the colab kernel. After loading the starting image, we can customize our own neural style by adjusting the sliders (the strength of the deep dream and the number of scales it is applied over). Then we can finally begin generating the video by iteratively zooming into the picture.
Layer: mixed4d_3x3_bottleneck_pre_relu Dreaming steps: 12 Zooming steps: 20 From its thumbnail, we can see some interesting architectural images and dogs. And yet, 32 frames were too small to enjoy a full DeepDream experience.
Layer: mixed4c Dreaming steps: 60 Zooming steps: 20 Dreaming steps were a bit too high compared with zooming steps. At the point where it begins to zoom, the image doesn’t even look like the original portrait. It rather seems a way too deep-fried.
Layer: mixed4c Dreaming steps: 16 Zooming steps: 80 When I added more zooming steps, it goes far deep but the images look a bit too redundant. It would have been better if I tried different layers.
Overall, it was a very exciting tool to play around with. The whole rendering process didn’t take a long time thanks to the pre-trained model. I still don’t have clear idea for my upcoming finals, but DeepDream will be a definitely interesting option.