For this recitation we had to connect sensor Values (using potentiometers) to Processing in order to control some aspect of an image or webcam. The example code for this is the multipleValues Arduino to Processing. I decided to have a 500×500 Panda image and have each potentiometer control something different. The first potentiometer would control the Opacity, the second would control the color:
To do this I added to the setup:
colorMode(HSB);
This made it less complicated to use the tint command later.
So, to add the panda image, I found this special panda on google:
So, I downloaded the image, then added it to the Processing data by dragging it onto the interface.
To pull up the image, I added PImage photo; at the very top before void setup, photo = loadImage(“panda.jpg”); inside void setup, and image(photo, 0 ,0); inside void draw.
After that, I added the tint command:
tint(sensorValues [0], 255, sensorValues [1], sensorValues [1]);
It took a while to test it with HSB, since it was different but it would be a lot less complicated than RGB for sensors, since I wanted one sensor to control the color and the other to control the opacity.
Here is the video of it:
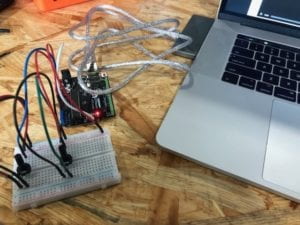
Here is a picture of the circuit:
Here is the code for Arduino:
// IMA NYU Shanghai
// Interaction Lab
// For sending multiple values from Arduino to Processing


void setup() {
  Serial.begin(9600);
}

void loop() {
  int sensor1 = analogRead(A0);
  int sensor2 = analogRead(A1);

  sensor1 = map(sensor1, 0, 1023, 0, 255);
  sensor2 = map(sensor2, 0, 1023, 0, 255);

  // keep this format
  Serial.print(sensor1);
  Serial.print(",");  // put comma between sensor values
  Serial.print(sensor2);
  Serial.println(); // add linefeed after sending the last sensor value

  // too fast communication might cause some latency in Processing
  // this delay resolves the issue.
  delay(100);
}
Here is the code for Processing:
// IMA NYU Shanghai
// Interaction Lab
// For receiving multiple values from Arduino to Processing

/*
 * Based on the readStringUntil() example by Tom Igoe
 * https://processing.org/reference/libraries/serial/Serial_readStringUntil_.html
 */
PImage photo;
import processing.serial.*;

String myString = null;
Serial myPort;


int NUM_OF_VALUES = 2;   /** YOU MUST CHANGE THIS ACCORDING TO YOUR PROJECT **/
int[] sensorValues;      /** this array stores values from Arduino **/


void setup() {
  size(500, 500);
  background(0);
  setupSerial();
  photo = loadImage("panda.jpg");
  colorMode(HSB);
}


void draw() {
  updateSerial();
  printArray(sensorValues);

  // use the values like this!
  // sensorValues[0]
  tint(sensorValues [0], 255, sensorValues [1], sensorValues [1]);
  image(photo,0,0);
  // add your code

  //
}


void setupSerial() {
  printArray(Serial.list());
  myPort = new Serial(this, Serial.list()[ 4 ], 9600);
  // WARNING!
  // You will definitely get an error here.
  // Change the PORT_INDEX to 0 and try running it again.
  // And then, check the list of the ports,
  // find the port "/dev/cu.usbmodem----" or "/dev/tty.usbmodem----"
  // and replace PORT_INDEX above with the index number of the port.

  myPort.clear();
  // Throw out the first reading,
  // in case we started reading in the middle of a string from the sender.
  myString = myPort.readStringUntil( 10 );  // 10 = '\n'  Linefeed in ASCII
  myString = null;

  sensorValues = new int[NUM_OF_VALUES];
}


void updateSerial() {
  while (myPort.available() > 0) {
    myString = myPort.readStringUntil( 10 ); // 10 = '\n'  Linefeed in ASCII
    if (myString != null) {
      String[] serialInArray = split(trim(myString), ",");
      if (serialInArray.length == NUM_OF_VALUES) {
        for (int i=0; i<serialInArray.length; i++) {
          sensorValues[i] = int(serialInArray[i]);
        }
      }
    }
  }
}