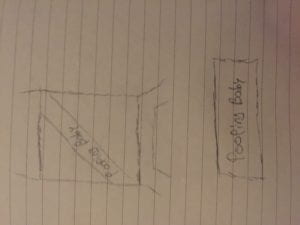
In my documentation for my group’s midterm project entitled, “Pooping Baby”, I will discuss three major topics of importance. The first topic is “context and significance”, where I will talk about my own understanding of interaction and the previous interactive projects I have chosen to analyze and specifically how they shaped our ideas and production around “Pooping Baby”. I will also explain our intentions for creating “Pooping Baby”, as well as the significance behind the project. In the next section of “conception and design”, I will describe my own understanding and decision making behind creating an interaction between my project and the users. I will analyze the materials used to construct the project and why they were specifically chosen as well. In the third and final section of “fabrication and production”, I discuss the most impactful decisions my partner and I made during our construction. I will also refer to the user testing session and the additions we made after it took place to describe how we arrived at our final product.
To begin the first section of this reflection, I refer back to my definition of interaction, which is “communication between objects, whether they be living or not”. I further explain this definition as a continued call and response relationship between the user and another object. Despite my group project, “The Super Box Boo 3000”, fulfilling this definition of interaction, it did not have much influence on our decision making for creating our “Pooping Baby”. In fact, the previous research and reading we have done for recitations, particularly on Zack Lieberman and his car/ driver project, have had the most influence on our ideas for our midterm project.
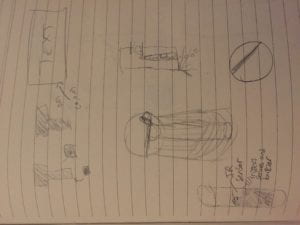
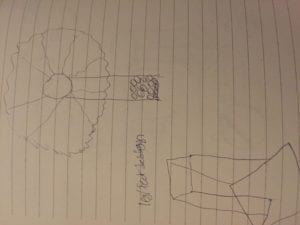
We wanted to create an object that would interact with a user through its movements, so a user would make some sort of action and a car would move. This is similar to the car project in Lieberman’s description of the “open mouth effect”. We extrapolated upon this idea and decided to have a car that would move away whenever a user would try to approach it. We would have some sensors that would pick up the movement of an individual and trigger the car to move in the other direction. Yet, we felt that this idea did not quite satisfy a specific purpose. Why was the car moving away from the user and how does this providing stimulating interaction? Therefore, we decided to add a laser to the top of our car that would rotate and move a light on the ground so an animal, such as a cat, would chase it. This also seemed like a good idea in theory, but then we realized how difficult the user testing would be when obtaining a live animal to test it with and we felt that the chances that a cat would react only to the project and not be distracted by the audience were slim. Thus, we started over from scratch and thought of making another type of interactive toy that humans could use. My partner came up with the idea of a baby design, remembering his home economics classes and their childcare assignments. After much discussion, we decided to create a baby that would eat objects and then release them through its rear when triggered by the user. We felt that this toy would be a humorous way to teach people how to take care of babies and learn about what they do most: eat and poop.
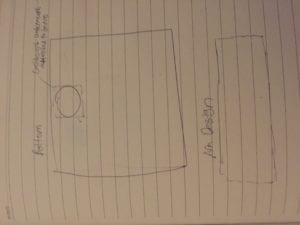
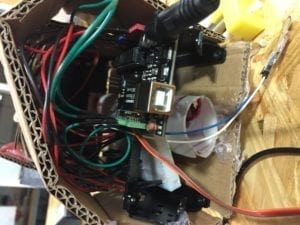
This next section of my reflection focuses on the conception and design phase of our midterm project, “Pooping Baby”. We decided collectively that we wanted our users to have two interactions with this baby: to feed it and then to make it poop. In order to achieve this interaction we chose to use two micro servos that would be each be operating the mouth and butt flap separately. Our design was for the user to try and put food in the baby’s mouth where there would be a chute that would direct the food down to the servo door. This door would open once there was enough food piled up inside the baby to trigger the forceflex sensor inside of it. For this sensor to be triggered, there needed to be a certain amount of force applied to it, as well as code telling one servo to open and the other one to stop moving. In my coding process for this project, I borrowed some of the information from the bildr website on using the forceflex sensor with the Arduino: http://bildr.org/2012/11/flexiforce-arduino/. I then used “if, then” statements and added a speaker so that a once the forceflex sensor was triggered, a ringing noise would emit from the buzzer.
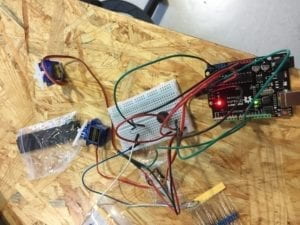
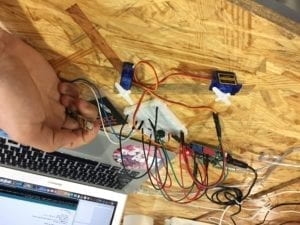
As I was constructing this circuit I ran into one big problem and two smaller problems. The first issue I ran into was that I could not get the micro servos to run off of a 5 volt energy source. Therefore, I needed to switch their power input to the vin pin in the arduino and plug the arduino into a power socket using a barrel jack. The second issue I ran into was that the buzzer would not emit any sound. This problem was swiftly fixed by switching to a 220 resistor instead of a 1k resistor. The final circuit issue we encountered ended up troubling us significantly throughout the design and evaluation process. This pertained to the forceflex sensor and figuring out if we the objects we were using to feed the baby would be enough pressure to trigger it. The answer to the question ended up being, “no”. Therefore, we briefly went back to the drawing board and tried to figure out whether we could use another sensor to trigger the baby to poop. We particularly looked at an LED sensor, otherwise known as a distance sensor and whether installing it into the throat of our baby would work. The goal was to install it in the throat funnel and then have it sense when the funnel filled with objects. Red flags that came with using this sensor ended up having us make the decision to not use it in our project. We were worried that the sensor wouldn’t be able up the minute difference in space with its LED. We were also concerned because the sensor itself would not fit inside the baby’s throat. Therefore, we decided to revert back to the forceflex sensor, but instead of having a more complicated method of having it detect when the baby is full, we threaded it through to the baby’s lollipop that it was holding. Therefore, the user could squeeze the lollipop when they wanted the baby to release the food they fed it.
Links to beginning circuit and final circuit videos
https://drive.google.com/open?id=1Ucv0gzQFOFijD0iHuyyJGJYD4cq-ojpA
https://drive.google.com/open?id=1LqmG9ZSzvAy3PulKAYcdM0qq8IKbHVAo
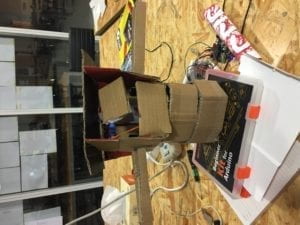
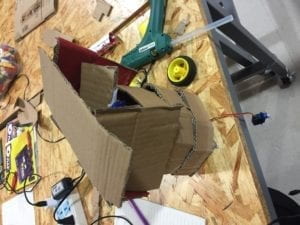
The material that we decided to construct our baby out of was cardboard. The reason we chose cardboard over wood or other materials was that it was much more malleable and we could physically shape it with our hands as we were building. This made the building process much more efficient because we didn’t need to schedule a laser cutting or 3D printing appointment for each body part of the baby. After we threaded the circuitry through the abdomen and put ligaments on the baby, we encountered some balancing issues. This was fixed after we glued a wooden platform to the baby’s feet. This proved to be convenient for the later stages of decorating our project because we laser cut a sign for our project made out of wood that worked well aesthetically. Before we added the baby’s eyes, nose and mouth, our project looked more like a monstrosity than a baby. Initially I was pretty disturbed, but then we realized that we could actually build of that element. Therefore, my partner added alien-like eyes and crazy looking printed lips. This made our project like provide a “trash baby” aesthetic that we were able to work with during future decoration.

Link to video of beginning building stage:
https://drive.google.com/open?id=1lMmFcD_AOsEk9TJ8Xul0ZNyopGmEX-E6
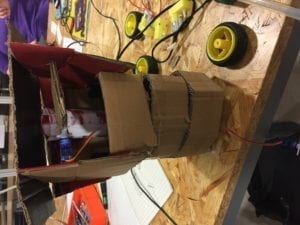
This section of my reflection focuses on the fabrication and production part of our project, as well as our takeaways from the user testing session on Friday. By the time we presented our project for user testing, we had the basics of it up and running. People were able to feed the baby and the “back door” would release the food once the force flex sensor was pressed. We used wasabi peas from family mart as our food and they fit well into the baby’s mouth. Our baby was still relatively naked and there were still some theming elements that were missing in addition to the clothes, such as scenery and its lollipop needed decorated.

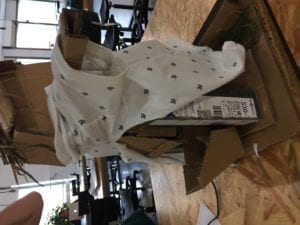
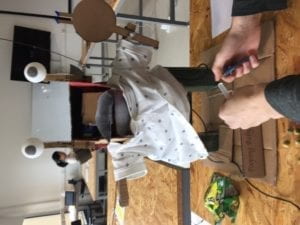
That being said, during the user testing we receive a significant amount of feedback and room for improvement. The largest problems that we encountered during the user testing centered around the two main components of our project: feeding the baby and making the baby poop. When feeding the baby, people were intimidated by the servo moving the baby’s mouth. Either they wanted the mouth to move slower or wanted a larger signal telling them to feed the baby with the peas. There was also an issue about the baby’s throat being too narrow. To our surprise, people didn’t realize that if they didn’t put the peas into the tube that was the throat, then the peas would not come out the other end when the sensor was triggered. To remedy these issues, we slowed down the servo controlling the mouth and expanded its throat to make it easier for people to place the peas inside of it. We also installed a paper mesh that would prevent peas from falling into the baby’s abdomen and getting stuck with the circuitry. Other problems we encountered that pertained to the servo controlling the butt were that every time it opened, the small peas would bounce and roll everywhere after being released. Things got very messy during the user testing and we kept having to gather the peas every time someone would trigger the sensor. To fix this, we added a sort of chamber pot made out of cardboard that filtered the peas into a pile in front of the baby’s feet, minimizing the mess and providing the user with continuous ammo. In addition to addressing these issues, we also added a sign that gave the user directions on how to interact with our project. We also added hair, actual baby clothes, grass to our project. People could also finally see that the baby was holding a lollipop after we decorated the laser cut piece of wood it was holding.
Final Project Demonstration Video:
https://drive.google.com/open?id=18I-bBLjkKl22Xx37R1Ep3l8QW-Lkh8_E
In this last section of my documentation, I make some concluding remarks about the success of our project, “pooping baby”, and reflect on my own feelings towards the terrifying creature. First, I would like to state that I believe our concrete goals for our midterm project were met. We created something that was interactive by my own standards, it amused our users, and it added some significance to our class. Our design was also successful in that our coding and architecture allowed for others to hypothetically feed the baby and trigger it to go to the bathroom. Our project aligned itself with my definition of interaction in that the object responded to user movement or initiation, but it also did not completely fulfill my definition. My definition focused on a continuous interaction and one could argue that our project did not have that since people had to do two separate things to interact with the project, feed it and make it go to the bathroom. If we were to change something about our project to make it truly embody my definition of interaction, we would figure out how to implement a sensor that responds to the baby getting filled up with food and pooping, instead of forcing the user to press a sensor.
Based off of our definitions of interaction and the user testing and final presentation sessions, we believe that the audience interacted fairly well with our project. There was not a lack of curiosity and eagerness to interact with our project and people seemed fairly stimulated while feeding the baby. There was a minor hiccup during our final presentation where one user accidentally knocked off the baby’s mouth with the servo attached, but for the most part, they were able to feed the baby and make it poop much easier than before. The largest improvement we would make to the “Pooping Baby” if we had more time would be to switch the sensor to an LED sensor and then expand the baby’s abdomen and throat to not only fit the sensor inside, but to also make it work properly. Personally, I learned just how valuable the feeling of completing a project that works is, especially after you take hours of planning and deciding how to construct it. I also have more faith in my own building capabilities and have obtained a newfound curiosity towards constructing circuits and interactive projects. I took away from our struggles with the forceflex sensor that sometimes you may need to completely change or redesign your project in order to achieve certain goals and tasks, such as finding a sensor that works exactly how you planned it to in your design process. Overall, I feel like I have grown a lot, as a designer and coder, during this midterm project and I look forward to creating more interactive devices that will provide a the sense of fulfillment I received after completing this midterm.
Further Information About Project
Setup:
Circuit Materials
- Wires
- Micro servers (2)
- 220 Resistors (2)
- Buzzer
- A301 Forceflex
- ArduinoUno
- Breadboard
- BarrelJack
Building Materials
- Cardboard
- Lasercut wood
Schematic Directions
- Buzzer in Digital Pin 11
- Servo (Mouth) in Digital Pin 10
- Servo (Butt) in Digital Pin 9
- Flexiforce Sensor in Analog 3
- Connect barrel jack to ArduinoUno
- Power one side of the breadboard with 5v pin on ArduinoUno
- The Buzzer and Forceflex will be powered by 5v
- Power other side of breadboard with vin pin on ArduinoUno
- The two Micro Servos will be powered by the vin pin
- Make sure that the grounds are connected
Code
# include <Servo.h>
int flexiForcePin = 3;//analpg pin 3
Servo butt;
Servo mouth;
int pos = 0;
const int buzzer = 11;
void setup() {
// put your setup code here, to run once:
Serial.begin(9600);
butt.attach(9);
mouth.attach(10);
butt.write (0);
pinMode (buzzer, OUTPUT);
}
void loop() {
// put your main code here, to run repeatedly:
int flexiForceReading = analogRead (flexiForcePin);
Serial.println (flexiForceReading);
// if someone pushes on the sensor to wear it reads greater than 1
if (flexiForceReading > 1) {
//BUZZER makes noise
tone(buzzer, 2000);
//close mouth
mouth.write(0);
// open butt servo
for (pos = 0; pos <= 180; pos += 1) {
butt.write(pos);
delay (10); //change for speed
}
// wait till food out
delay(1000); // time in between opening and closing
// close butthole
for (pos = 180; pos >= 0; pos -= 1) {
butt.write (pos);
delay (10);
}
} else {
// buzzer is silent
tone(buzzer, 0);
// mouth opens in 90 degree intervals
for (pos = 0; pos <= 90; pos += 1) { // goes from 0 degrees to 180 degrees
// in steps of 1 degree
mouth.write(pos); // tell servo to go to position in variable ‘pos’
delay(15);// waits 15ms for the servo to reach the position
}
//include waiting time
// mouth closes in 90 degree intervals
for (pos = 90; pos >= 0; pos -= 1) { // goes from 180 degrees to 0 degrees
mouth.write(pos); // tell servo to go to position in variable ‘pos’
delay(15); // waits 15ms for the servo to reach the position
}
}
}