Introduction
Start by finding a partner to form a team of three circuits that use Arduino, the software you learned this week, to program and interact with electronic components. If there is time left, you can find other groups to connect the electronic components in parallel to allow four people to interact at the same time.
Materials
From Arduino Kit:
1 * Arduino Uno
1 * USB A to B cable
1 * breadboard
1 * buzzer
2 * LEDs
2 * 220-ohm resistors
2 * 10K ohm resistors
2 * pushbuttons
A handful of jumper cables
From cart:
2 * arcade buttons
1 * Multimeter (optional)
Circuit 1:Fade


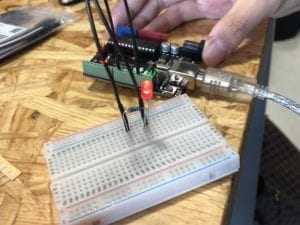
The first circuit took the longest time for me and my partner, even though we originally thought it was the easiest. The problem is that the led light should have a fading effect, but actually it has been flashing without fade.
We first checked the code, and after the judgment of other guides, there was no problem with the code, and the circuit was not connected wrong, which wasted a lot of time to determine where the problem was.
Finally, we found a problem with Arduino Uno. During wiring, pin 13 was selected as the output terminal, but this port could only control such things as the volume increase or decrease, or the turn on and off of lights, but it could not control the gradual weakening. Eventually, we will change the output end to Pin9, this just succeeded in getting the fading effect on the led lights.
Circuit 2: toneMelody
Circuit 2 was very simple, but we still had regrets, because we thought the buzzer was too small, but we couldn’t make it louder, and the professor told us that it would damage the electronics.
Circuit 3: speed game
The third Circuit was very challenging for us. Because we thought that the installation method according to the design drawing would make the wiring messy and ugly, we redesigned it to make the circuit more beautiful in a symmetrical way, which, of course, cost us more time.


During assembly, we found that one of the buttons didn’t work, and we haven’t figured out why so far.
Due to time constraints, we did not make Circuit 4, but we found other team members to play the game together, which is undeniably difficult.
The thing that impressed me most in general was that the output was Pin9, which is responsible for controlling the power and strength. Yiji’s regret about recitation is that we still don’t understand why one of the buttons doesn’t work after we redesigned the circuit.
This is our schematic of how the components are connected

Q1
I think the word “interaction” should be the form between people and machines. When people interact with machines, such as mobile phones, remote controllers, etc., it can be a process of data input and transmission. For example, when I press the button first, the LED light on my side will turn on, and because the light on indicates that I win. Having won the game, this is the simplest interaction. Or a remote control. When I switch channels with a remote control, the TV receives my instructions and changes channels. The significance of interaction lies in the transmission of information to meet human needs.
Q2
The 10K resistor protects the Circuit from burning out or short-circuiting the electronic components and adapts the Circuit by raising or lowering the resistance. And when the number is entered, if there is no resistance, the current itself will not determine which circuit it should go to, which will interfere with the circuit or worse.
Q3
I like the Cyberpunk style very much. If I have 100,000 led lights, I will make them into very fancy billboards, using different colors to give people a sense of technology in the future. Shanghai is the most prosperous city in China, and the Bund is the most famous scenic spot. I hope to put these billboards on the skyscrapers of the Bund to make Pudong more energetic and technological. And the Bund is very close to NYUSH. I hope I can see those billboards at school.