Week 3: Emojify

For the project this week, I decided to have an alternate take on censorship. The post below is the exact same thing that’s on my Github

What is this?

Have you ever felt tired of your face on camera? Do you feel the need to express yourself but without showing your face? Great! This is the perfect solution to your problems.

Meet Emojify! It uses machine learning to read your facial expression and understand what you are feeling. And using the magic of drawing, it covers your face with an emoji instead. Voila!

Examples

You can’t see my face, but you can understand my expression 🙂

neutral face

neutral face

happy face

happy face

surprised face

surprised face

How it works

This project uses face-api.js and p5.js. P5JS provides the video input and the html canvas on which the video is displayed.

All the code that makes it work is in script.js

Face-api.js, which is built on top of tensorflow.js has various pre-trained models that can be used for different purposes. This project uses a mobilenet model trained with faces from the internet (the SsdMobileNetv1 model). Along with face expression classification, the api also provides a bounding box for the face, using the coordinates of which an emoji is drawn on top of the face. The model has seven choices of emotions –

  • Neutral
  • Happy
  • Sad
  • Angry
  • Surprise
  • Fear
  • Disgust

Given an input video image, it recognises the face(s), reads the expression(s) and returns an Array of probabilities of each emotion.

console log

My code loops over this array, finds the maximum probability emotion. I have an image file corresponding to each emotion that is preloaded. Using the x and y coordinates of the bounding box, my code as able to draw the image corresponding to the emotion almost exactly over the face of the person.

Why I did this

I thought this was a really cool way to do something fun with machine learning. I hope that someday, instead of blurring people’s faces out on media when consent is not given, someone could emojify their face instead. At least we’d be able to tell what the person is thinking, as opposed to nothing when there’s a blurred face.

Potential Improvements

  • It’s kinda slow right now, but I guess that’s because of how long it takes to classify the image. Could potentially only classify every nth frame instead of every frame.
  • Use the probabilities to map to different emojis that show the strength of the expression. Something like – 0.7 happy is a smiley face 🙂 where as anything greater that 0.9 probability is a very happy face :D. This could be done for all the different emotions to make it more accurate.
  • Right now, the recognition of expressions is not really that accurate. Maybe retraining the model in some way could help fix this.

All the code is available here

HW2: Try with Feature Extractor Image Classification Model

For the assignment, I intended to make a physical controlled flappy bird. Instead of using a keyboard to control the bird’s movement, I want the users to self-define the commend, it can either be facial expressions, or different objects… So I chose the Feature Extractor Image Classification Model. On the ml5js reference page, it described this model ‘will allow you to train a neural network to distinguish between two different set of custom images’. This feature can perfectly realize the function of using different expressions or different objects to control the game.  Continue reading “HW2: Try with Feature Extractor Image Classification Model”

Week 3: JS Exercise [Ta-Ruedee Pholpipattanaphong (Ploy)]

Link to the Javascript Excercise:  

http://imanas.shanghai.nyu.edu/~trp297/week3/cats.html

I think this assignment wasn’t that hard because it wasn’t such a huge jump. I feel like it builds on what we know from CSS and HTML which makes javascript a little bit easier. At first I was confused about the functions and how to write it out such as the document.getElementById(‘info1’).innerHTML=”Comm Lab”. However, from doing the exercise, I get a better understanding. Since I changed the button styles in CSS, I thought I can change the colour and size of the caption’s font in CSS as well. However, I realized that the caption of the first one doesn’t suppose to be changed. Therefore, I have to apply the change in the javascript. Ultimately, I learned a lot from javascript such as the buttons which are really cool. I’m glad that we covered Javascript as it would be beneficial to my comic project.  

Lab report 3 (Molly)

  1. Assembly

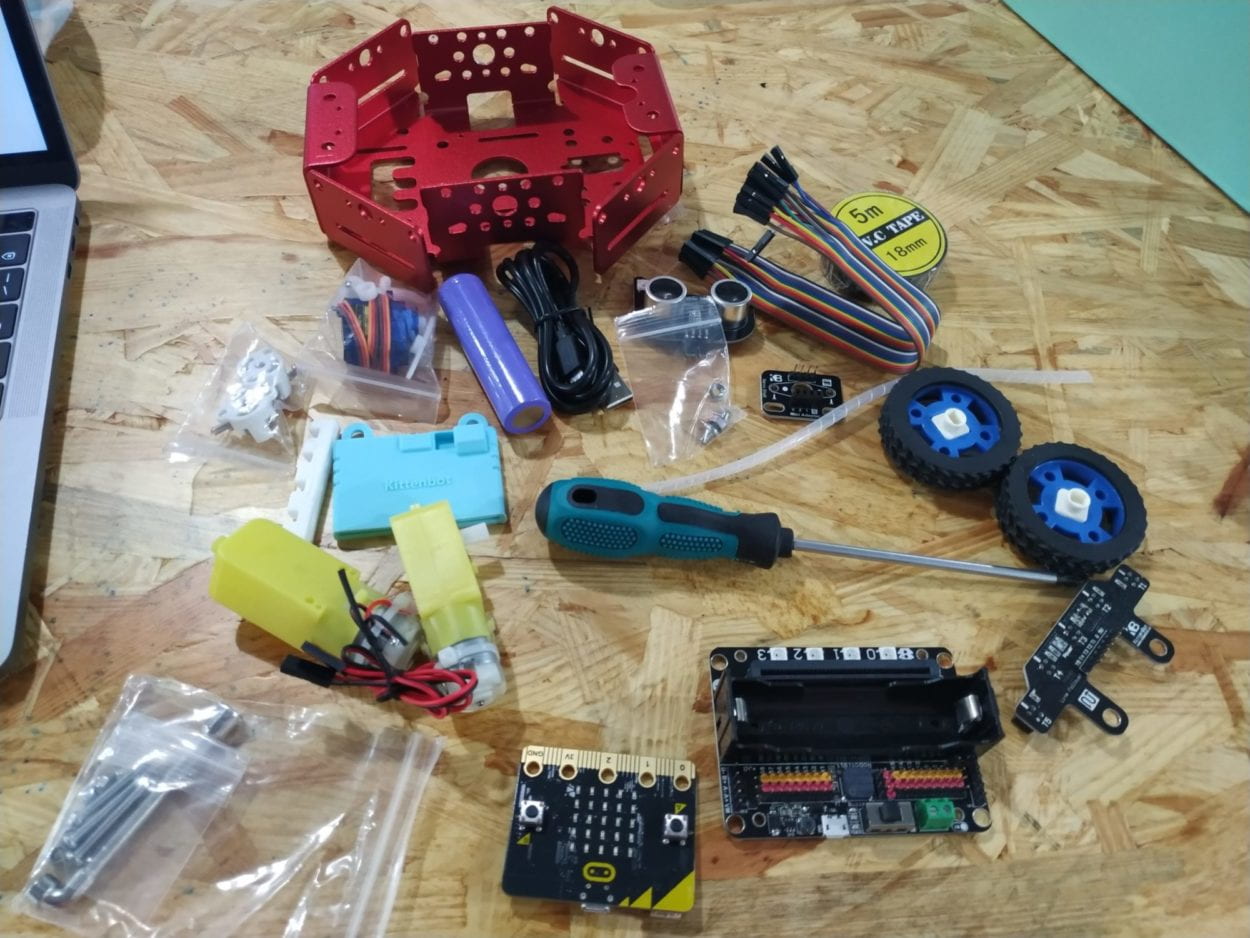
All the components laid out. When I was assembling, one nut wouldn’t catch on and I spent almost half an hour struggling with it with the lab assistant. At last, I figured out that it was broken by default. I ‘m impressed by my perseverance as well as my stupidity of not trying to think that there is something wrong with the nut.

2. Testing sensors

(1)Speaker (on the micro:bot)

(2)Neopixel

(3)DC motors

(4)Servo (of the kitten’s head)

3. Building a robot that can avoid obstacles using ultrasonic

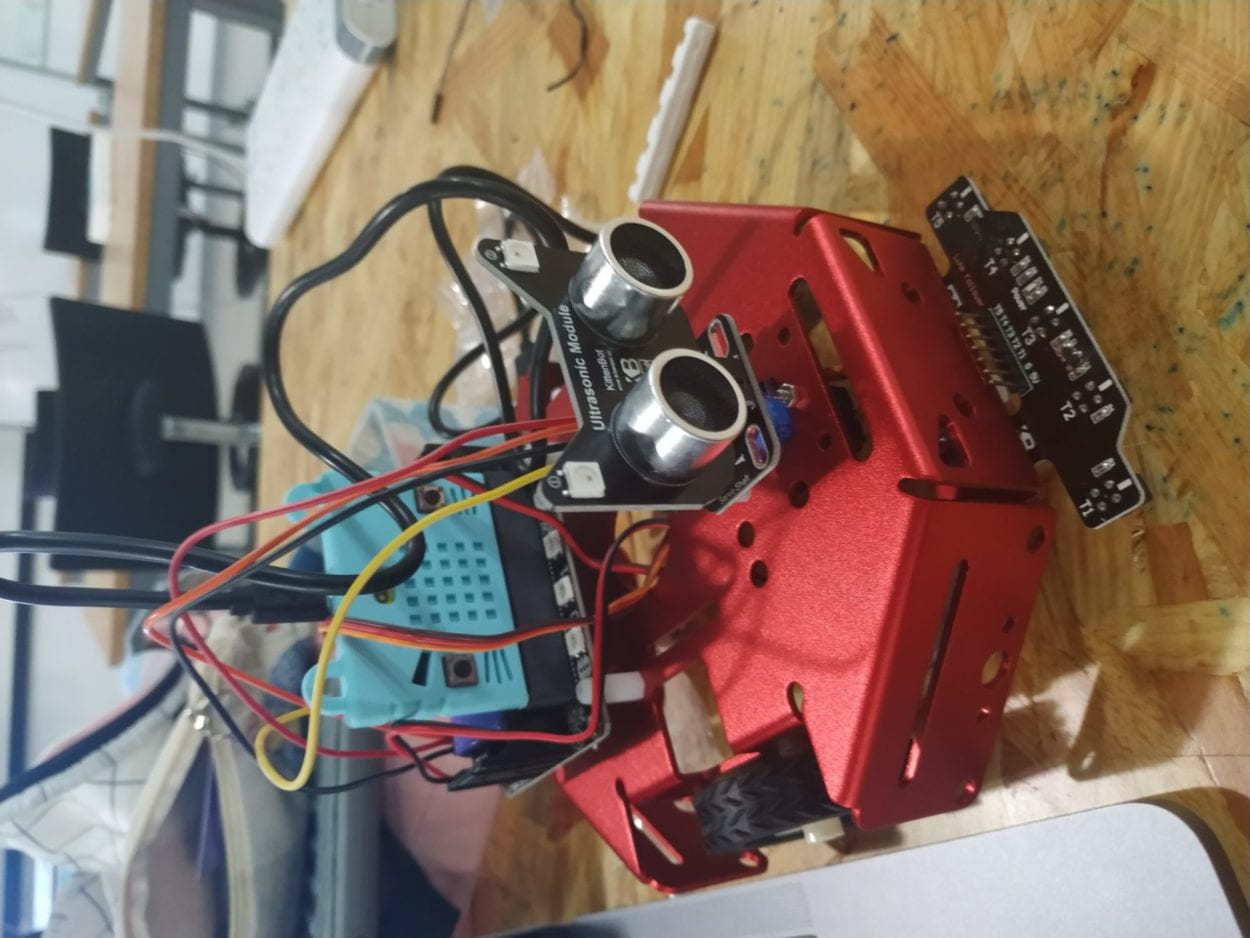
(1) The robot at first could only stop in front of the obstacles. It’s because I copied the code from https://www.kittenbot.cn/products/robotic/. And missed the part of “pause for 500ms”.

(2) I added the command and adjusted it into “pause for 400ms” to allow the robot to turn left 90 degrees every time it meets an obstacle. The adjustment is made because motors’ power is different from each other. The part of the robot stops at the obstacle, shakes its head and turn the green light red is also making it more vivid. 

These are the final codes.


Reflections:

The robot could only turn at a certain degree. It couldn’t find its way through. Moreover, the ultrasonic only guarantees a sight at its parallel, if the obstacle is smaller or taller, it may not detect and thus run into it.

Week 3: Javascript Exercise – Murray Lu

http://imanas.shanghai.nyu.edu/~mwl323/week3/emptyExample-intro-to-js/index.html

This assignment was definitely really challenging for me, but I found that when I was finished, I had already learned so much about coding and it was a great exercise for me. Although it was hinted on the slides to make the html and CSS first, I decided to just start with the html and JavaScript first instead. For some reason, despite learning CSS before JavaScript, I found that applying the JavaScript wasn’t too difficult and was rather pretty straightforward. Perhaps this was why during recitation on Thursday (despite having zero background in coding even though my brother is a computer science major and my father used to be a software engineer), I was able to follow through and understand what was going on for the first time in class when we learned about JavaScript. So for this assignment, creating the JavaScript was the least of my worries. I also felt like I had a much better understanding of html this time because I still remember how on the very first assignment, we were tasked to use html to create a personal portfolio. But this time around, the html part was the least of my worries for this assignment. However, I still had a lot of trouble with the CSS part just like I did for the last assignment. But after a lot of trial and error as well as getting help from the IMA Learning Assistants and using W3School, I was finally able to complete the assignment.