Project Title: Infinity Cube
My Name: Zhuochen Yuan (Ryan)
Instructor: Eric Parren
Individual Reflection
- Context and Significance
My previous research has influenced me a lot, I have found two examples from Tangible Media Group AKA the MIT Media Lab. Both of the projects are using a shape changing interface that can visualize physical objects, these ideas make people manipulate physical objects not from the original way by using computers but using hands in a controllable way, so when users are changing the physical objects by interfere the interface, the interface will shift its shape as an outcome of the user interference. These two project both have utilized the effect of light and gesture, visualizing things that we can hardly touch. So for me, these two projects make me define interaction as using certain gesture or movement to make change of light to visualize something, it involves our body movement as well as our vision, I think this combination will achieve brilliant interaction, and can present various ideas. So my project which is called the infinity cube is basically combining visual effects with gestrue and hand movement. I am inspired by the concept of infinity mirror, an infinity mirror is a pair of parallel mirrors, which create a series of smaller and smaller reflections that appear to recede to infinity. So based on this idea, I think that I can convert this into a cube, which has three pairs of parellel mirrors which will have a better effect. And actually there are already many people doing this online, like on Youtube, but what they have done is just a closed box with neopixels on the edges, the only way to interact with it is to watch it. Based on this, I want to add more interaction to the cube so that I can really interact with the cube and play with the light effect. The basic idea is that, I can use hand movement to control the brightness, the color patterns and the changing speed, and to achieve these interactions, I need several sensors to interact with the user. Considering the value of this project, I think it can be just for entertainment, it is not just a decoration that people will only think that it is cool, but you can do nothing to it, it is something you can really feel and interact with. It can be placed just there, as well as held in hands to interact with. Moreover, being in the environment of such light effects can also give spiritual meditation to the user, the user can feel immersed when interacting with the cube, and will start meditating when looking at the changing of the color patterns and through his own interaction. So all kinds of people are intended for this project, there are no specific intended people for this project, it is something that everyone can play with and feel something from it.
- Conception and Design
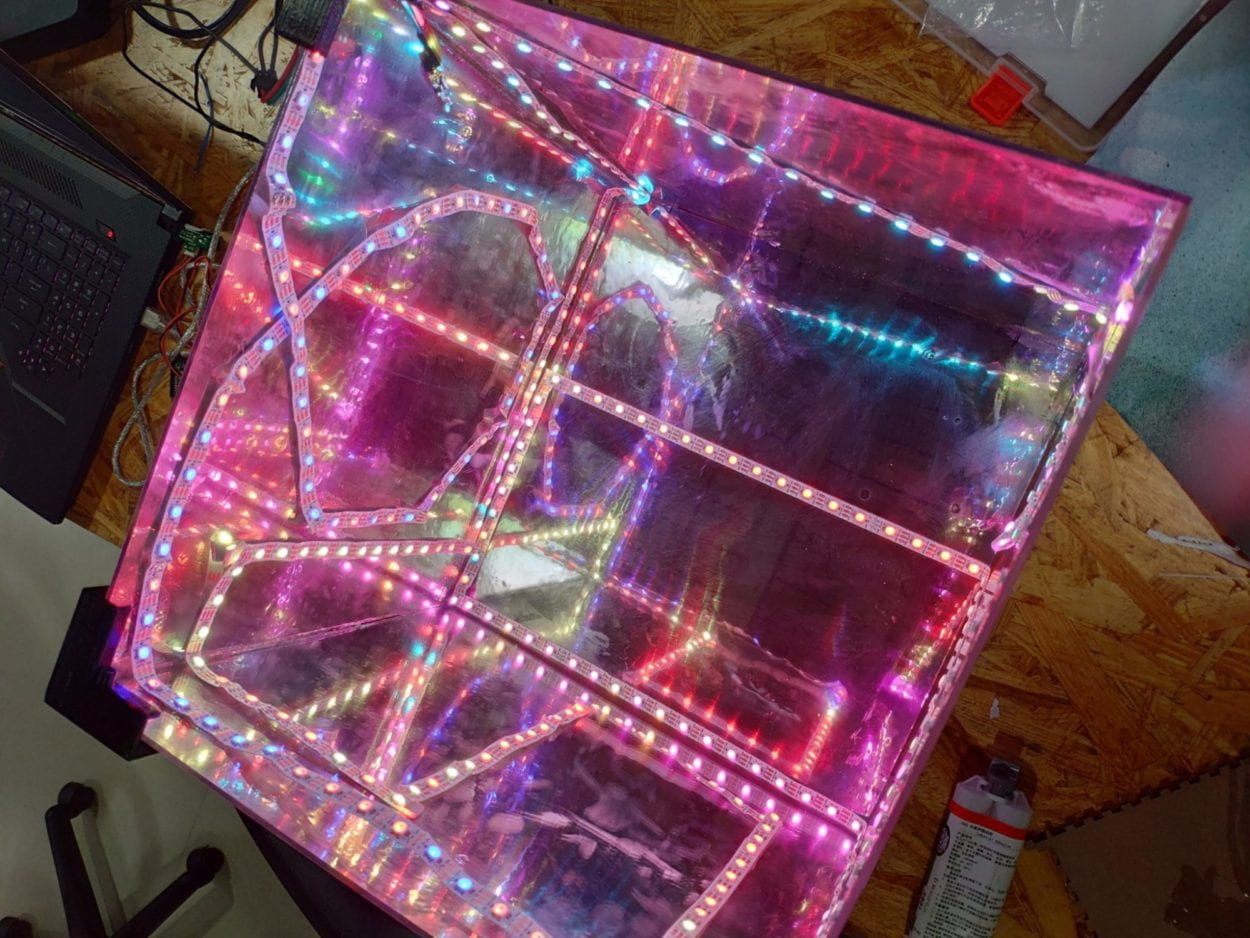
Firstly, the most direct interaction for my user is going to be the visual effects, the effects include how the neopixels look like, how these pixels change, and the visual effect the users see when they observe the cube from outside. Since all its six sides are using the infinity mirror, from all direction will the user see several infinity paths reflecting on each side, and the path is shining and changing which is a brilliant experience to see. Then comes to the hand interaction part, I first decide to use three infrared distance sensors to control the color pattern, the brightness and the changing speed seperately, however, during the user test, I receive a better idea that I can use a gyroscope or an accelerometer to control the effects, combining several interactions on just one sensor. Unfortunately, there is no gyroscope in equipment room, so I finally use the accelerometer. The accelerometer can detect the tilt in three dimensions as well as the change of acceleration in three dimensions. So the changing on the visual effects is one of the most important part of interactions that infroms my users that they have interacted with the cube, since the accelerometer can detect the tilt, so when the user tilts the cube they will see the cube is changing with their interactions which will make them want to discover more about the interactions by themselves. So the many idea of how the users are informed is based on the users themselves, they are the ones who are going to find out the ways of interaction, the cube is just there, the moment you holde it up and tilts it, the interaction will begin and you can start playing with it. I focus on imagination, since the project is rather physical but also imaginary because the changing of light can lead people’s thoughts to different degrees, the users are going to explore the box based on their imagination, this is the part which is really fun.
As what I have mentioned, this is an infinity cube, so the form of the project is going to be fixed in a cube, and a cube is a stereoscopic substance that have three dimensions for me to change which can realize more complex effects than just plain 2D substances. To realize the effect of infinity mirror, I need transparent materials to be the six sides of the cube, there are two options for me, one is glass, the other is acrylic board, both of these are transparent, but considering the safety and how easy it is to cut it into the size I want and how easy it is to get the material, I choose acrylic board at last. Even though it might not be that good as glass perform, considering other factors, the acrylic boards are better choices for me as they can be cut in the fabrication lab and can be easily customized by me. Also I need mirror paper to achieve the effect, because I want the light to reflect inside the cube on all sides of the cube, so I need to make the inner part of the cube like mirrors, but I can also see through all the sides from outside, so I need a special kind of glass paper that is half-transparent which I can see through but still can reflect light. And I choose to buy the glass paper produced by 3M, I think this brand is trustworthy, I buy the material in an alley besides the East Nanjing Road, also the size of the glass paper I need to buy should be larger than what I need in case I have made mistakes. Also the most important part of the materials, the neopixels, I choose type WS2811, for this type, I can seperately code on each pixel on the stripe to realize complex effect, so I collect almost all the neopixels of this kind from the equipment room. The other type of neopixels can also be used, but I can only code on the whole strip which cannot reach my expectation so reject this idea. For the power part, since the total number of my neopixels are 337, the ampere of my circuit is going to be very huge, so I borrow a huge 5V power supply which can hold 60A to meet my need.
- Fabrication and Production
Before the user test, since I do not have the glass paper at that time, I can only test on the coding of the neopixels and do the 3D printing of the joints on each corner of the cube and do the laser cutting of the six sides.
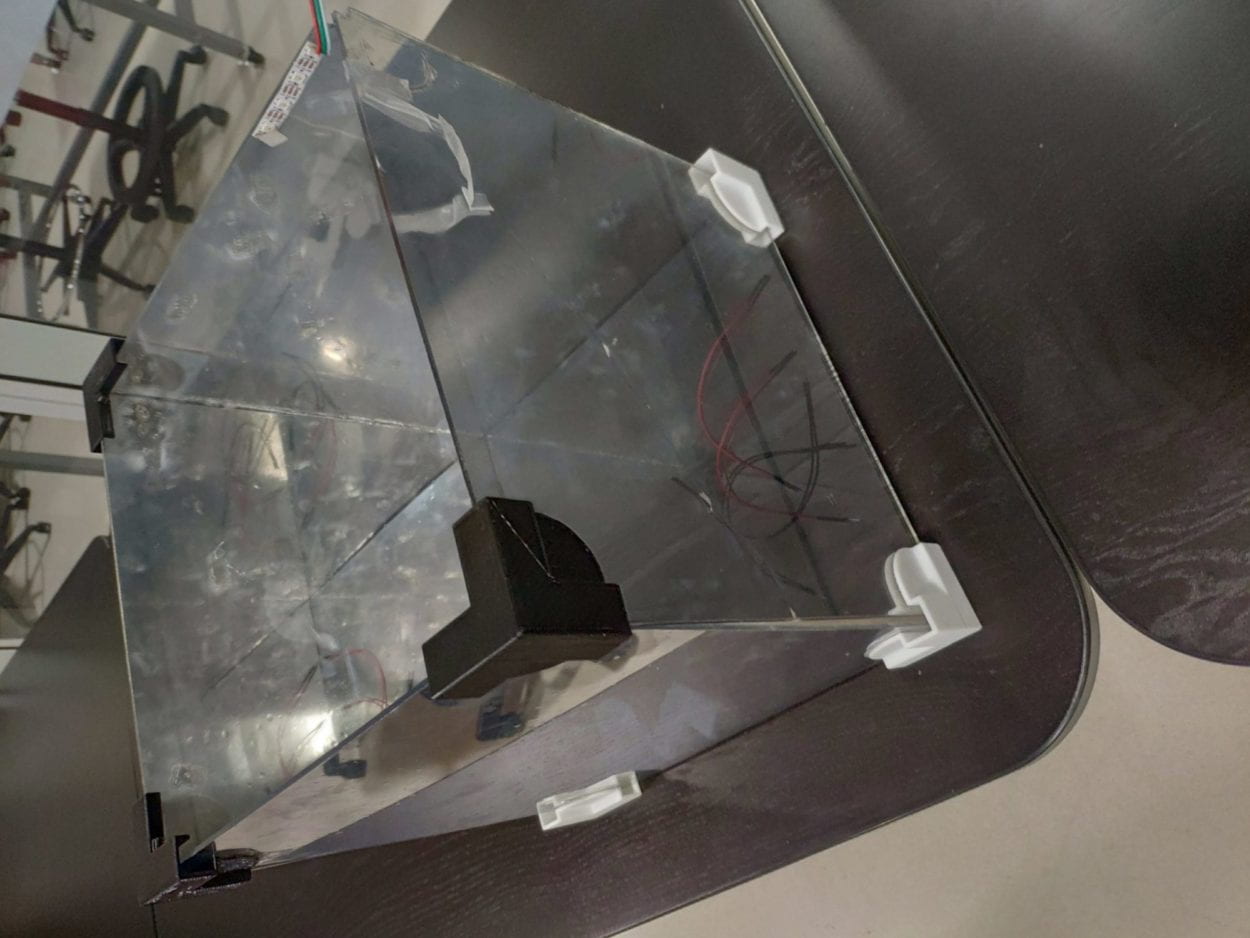
For the fabrication part, laser cutting is rather easy, since I only need six thirty times thirty centimeters acrylic boards with 3 millimeters thickness, I only need to 3D model a square on tinkercad and deliver it to the laser cutting machine. But for the joints they are quite time-consuming, since the laser cutting only takes ten minutes to fininsh all the stuff, for each joint takes a quarter and an hour to finish, and I plan to have a door where I can open my cube and put things inside, but during the printing process, I find out it is so hard to accurately print the things that is too small that I have failed for several times and waste a lot of time so I give up making a door but instead using only five sides of the cube and leave one side open so it is easy get the wires inside out and do manipulations inside. However, there are often accidents during the 3D printing that there might have something wrong during the printing process, I need to keep watching the printing for the first twenty minutes to make sure nothing is going wrong. And also there is one thing that is very important to the 3D printing is that I need to check the support option in the 3D printing software so as not to make my model collapse if there are part is hanged in the air, these parts need supports or the material will just drip down and fail to form into shape. I meet this problem the first time I do the 3D printing and keep this in mind, and I also help others on this problem.
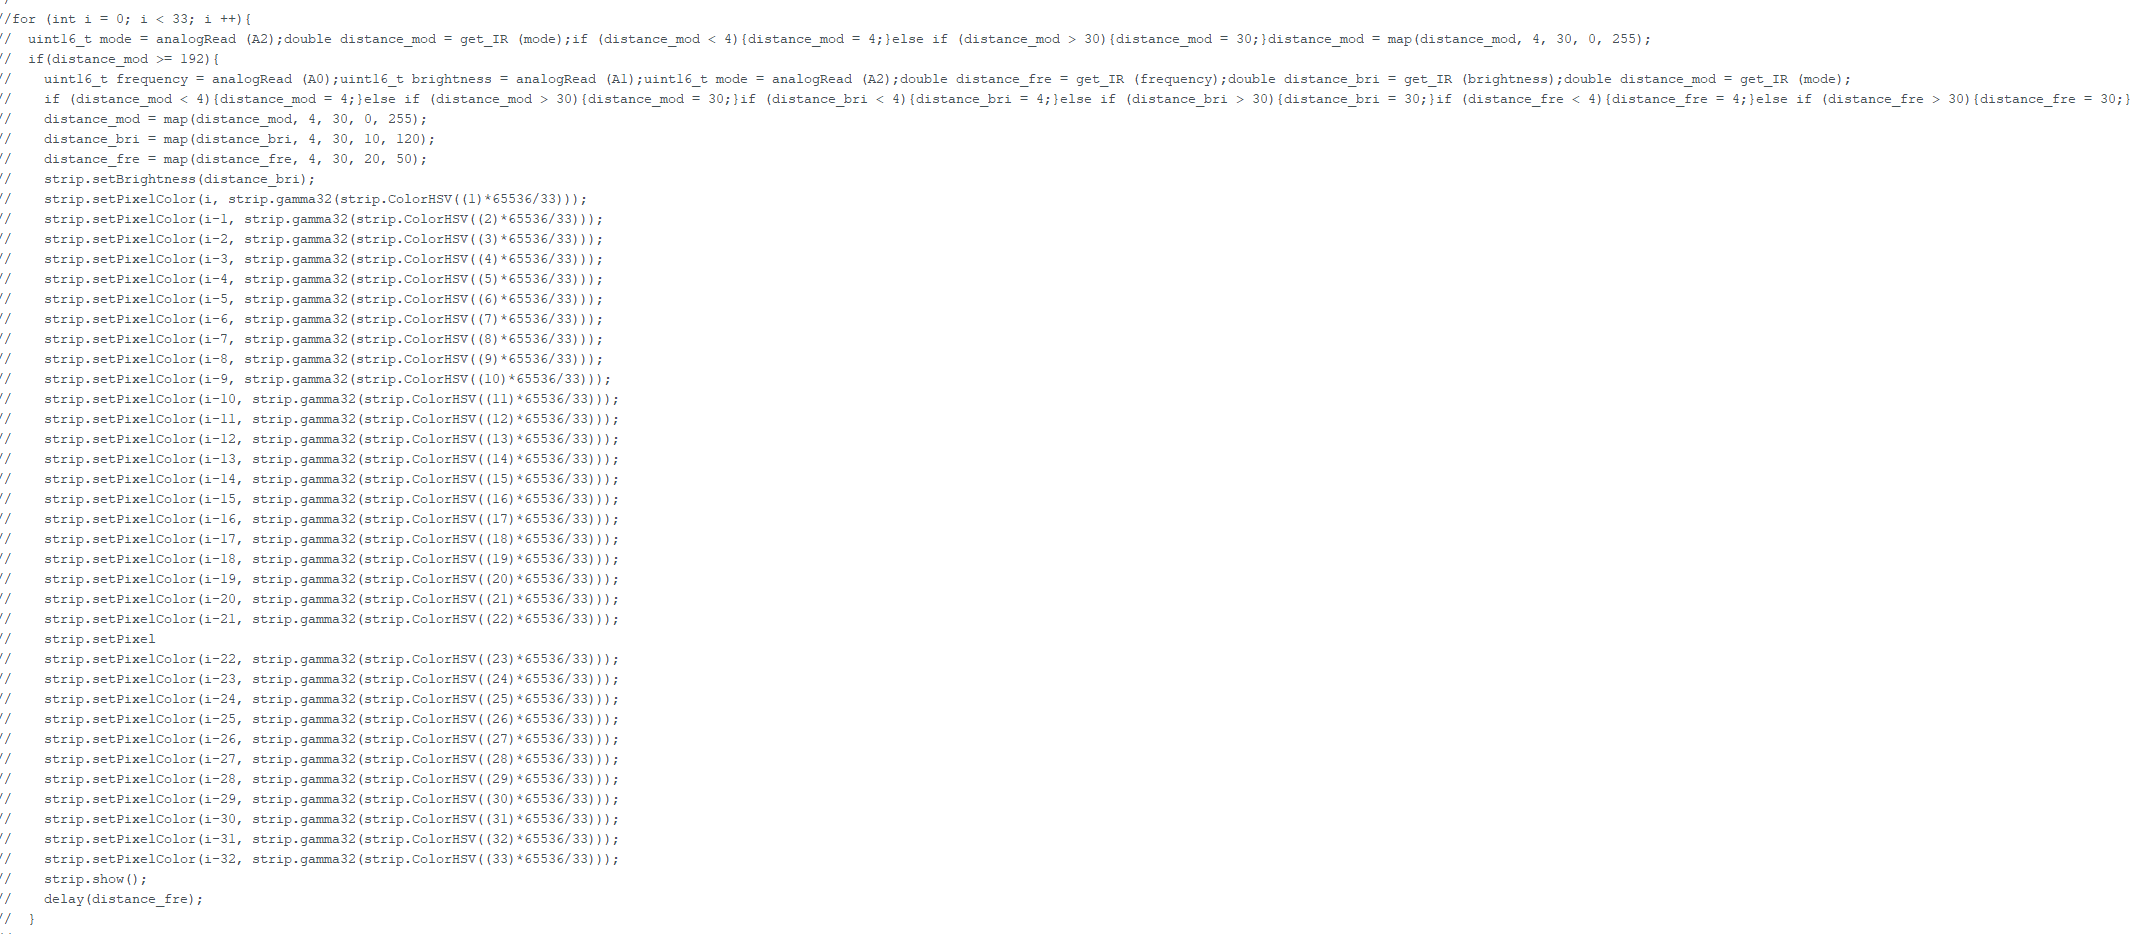
For the coding part, Eric tells me to look for instructions on adafruit, which specifically gives supports for coding for neopixels, so I just imply the code to the neopixels first and tries to understand the codes and give more patterns to the neopixels. It basically have light chasing effect and spectrum effects on it as follow.
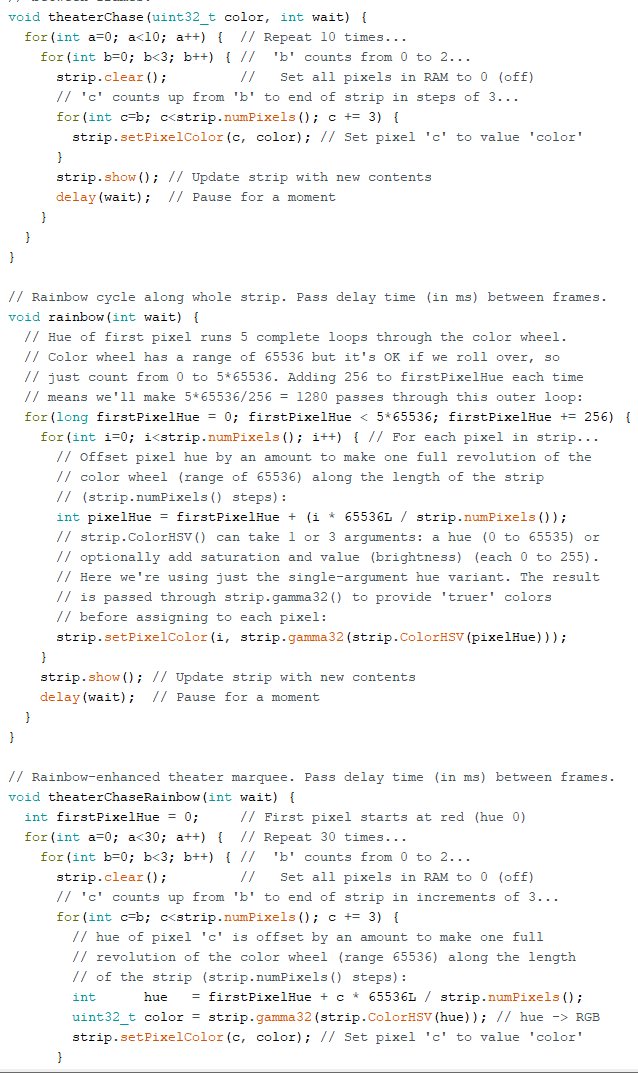
And based on the neopixel reference on adafruit, also the logic used in coding these templates, I find out more patterns which is like groups of points chasing each other, or there are random colors popping up on the strip. The visual effects is impressive, and I set the pattern of the changes into random so you will never know which one is the next. Coding these does not take me much time, but the thing is, these codes are not interactive enough, that is to say, the strip will only interact with me after each loop ends, so there must be a dealy to my interaction especially for the spectrum, as the templates run for five times in a loop, so it will have no interaction with the user during this color mode. These modified code are as follow.
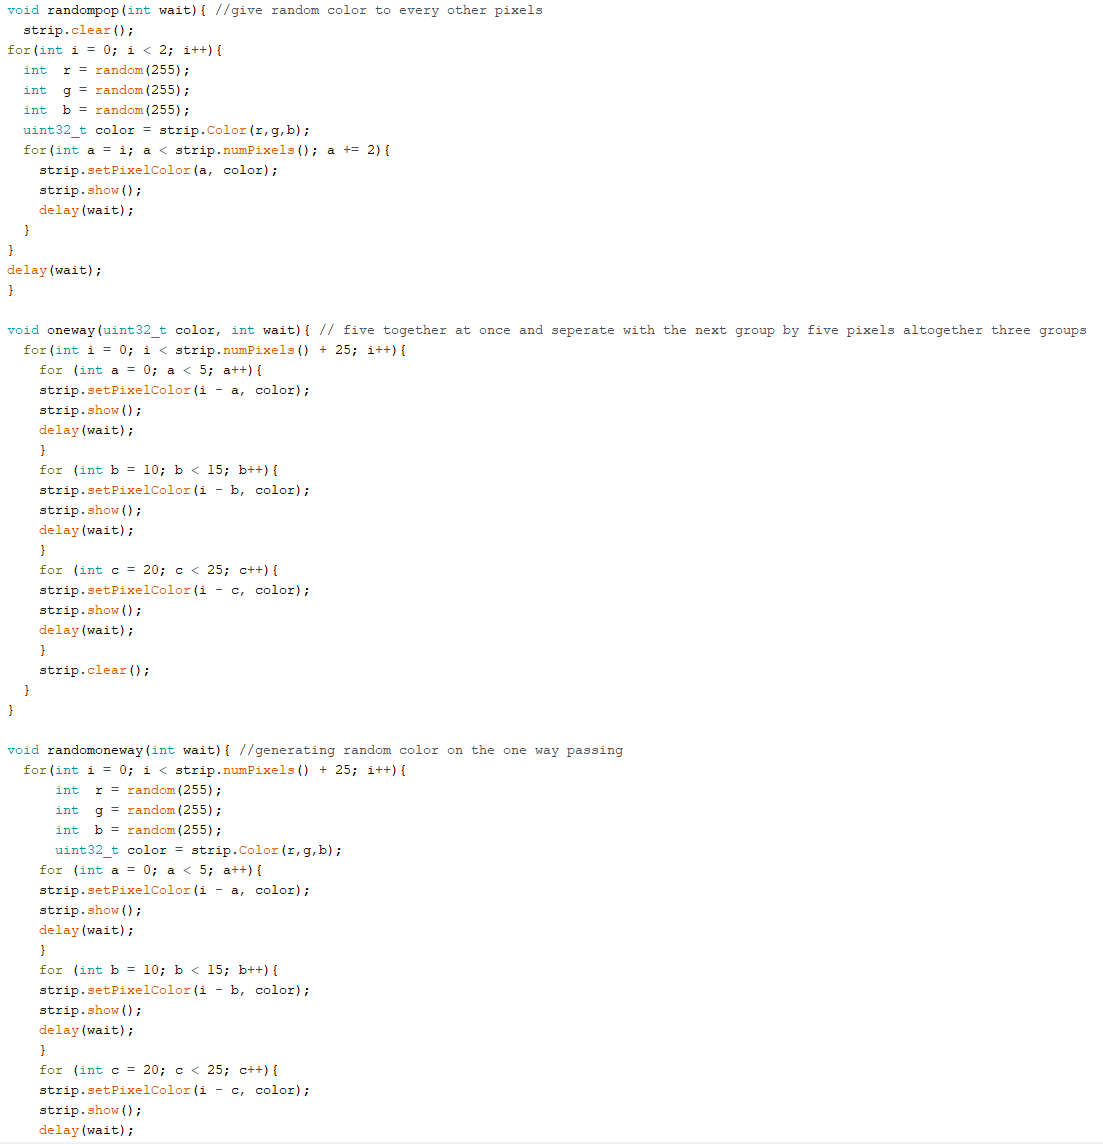
And Eric points this problem out that the project needs instant interactions, and this is the thing I really need to emphasize on, it is not the matter with how many patterns I have, but how interactive this is. So I come up with the new codes which can interact with the user instantly, because I add the condition to judge if there is any changes done by the user at each pixel, and the codes are as follow.
Obviously, I judge whether there is any change of distance throught the sensor every time before the loop begins so the changes will be made immediately, and I also made several levels for the distance sensor that control the color patterns, so when the hand is at different distance with the sensor will come out a different pattern. Also the map() function is very important to realize all these effect, one thing to mention, to choices for color combination for different patterns are based on the color palettes I find on the internet that I think are harmonious. But the reason why these are commented is because of the user testing.
There is also an intersting example that I have messed up with the code is as follow. I hard code everything, but obviously, it is not going to work.
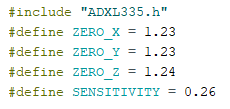
At the end of the user testing, there is a professor who really appreciate the work I have made, but she thinks that I need to make the change simple but direct, so I only need to focus on one kind of color pattern, and the point that I really need to focus on is that to make the user really think that they are interacting with the lights. So I only use the color chase at last, since it is obvious that the change is dealt to each pixels and it is direct that whether you have changed the color or the brightness or the changing speed of the strip. Since I want to use the accelerometer instead of using the infrared distance sensors, I started working on it. The accelerometer is type ADXL335, so I find the library for the coding as follow.

There is an important example here called Calibration, since it is for calibrating, I first need to test with the accelerometer and follow the instructions in the example to calibrate it, then I can get the parameters of three dimensions after the calibration for the accelerometer, and I need to decalre the parameters at the very first of my funcion to make the accelerometer more accurate.
After finishing the calibration, what I need to do is to relate the neopixels with the accelerometer. There are two ways I can use the accelerometer to control the neopixels, tilt and acceleration. For tilt, there are two ways to tilt the accelerometer directly even though theoretically I can have three ways to tilt based on three dimensions, one is to tilt the accelerometer vertically and the other is horizontally. So the two ways can represent to different types of changes, so I decide to use these two to control the pattern and the brightness, so when the user is tilting the cube, he will see the pattern changing as well as the brightness changing depends on the way he tilts the cube.
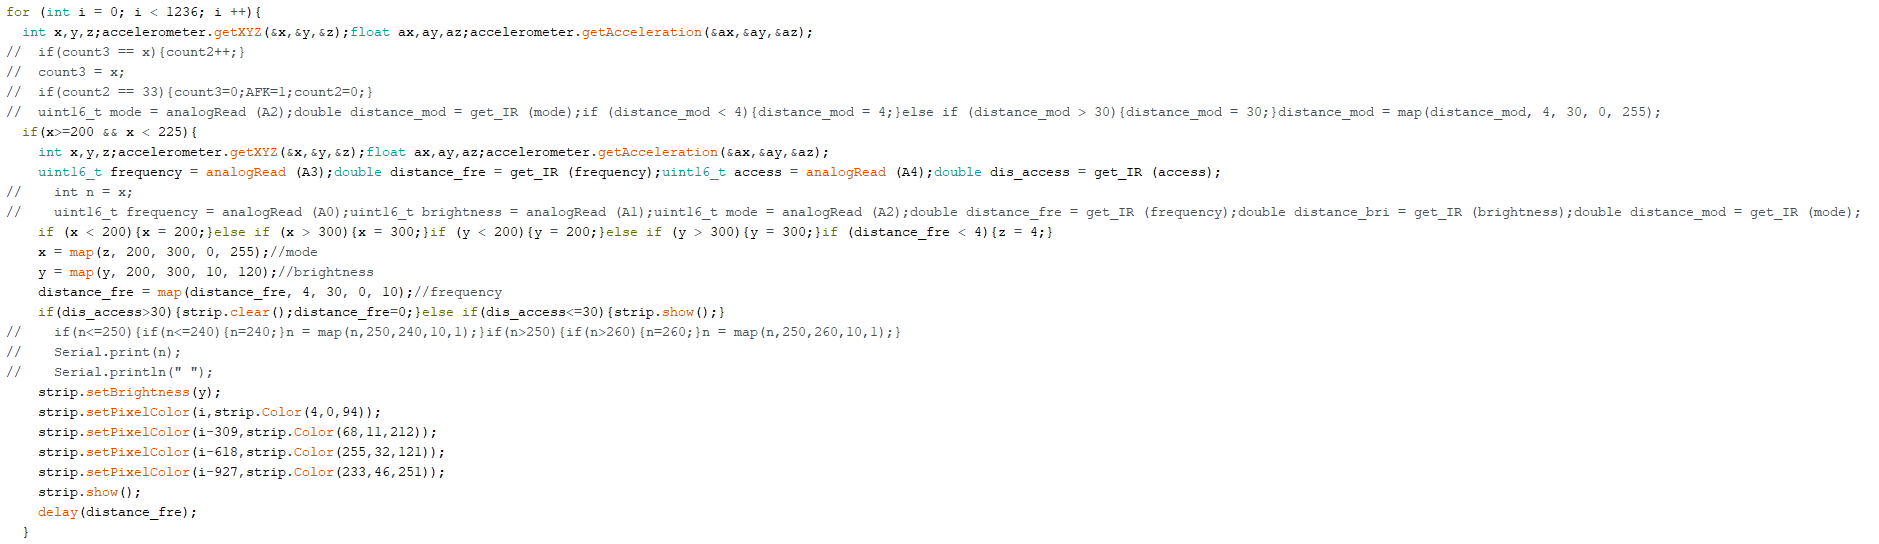
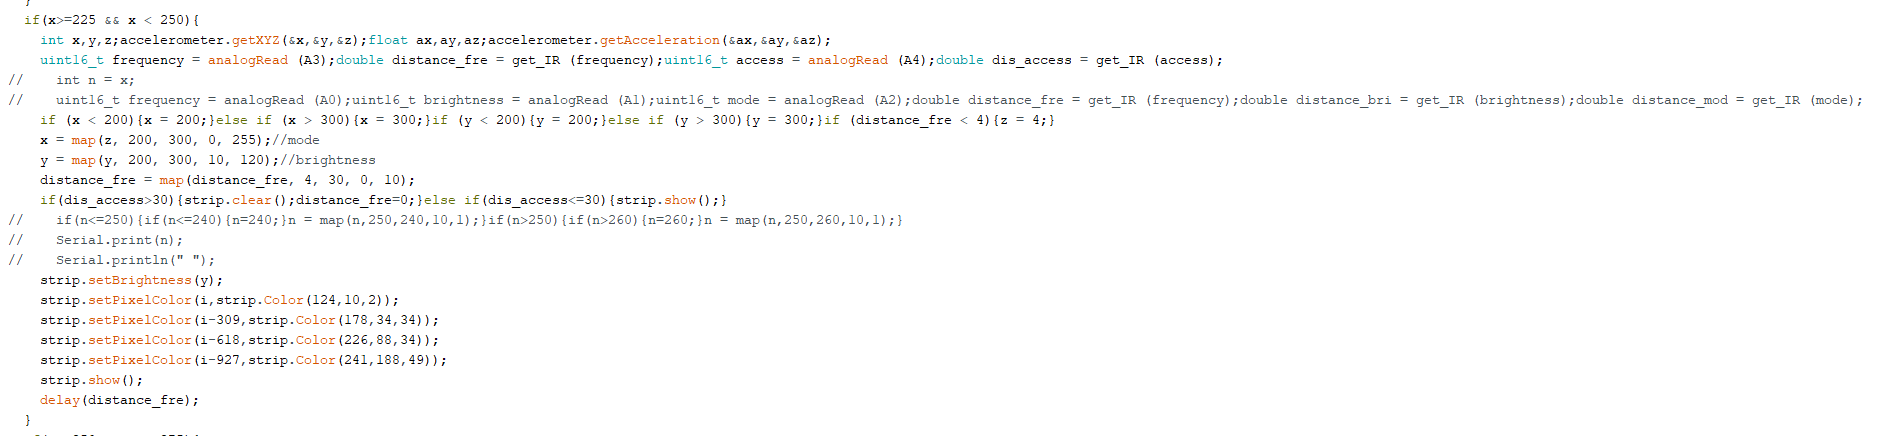
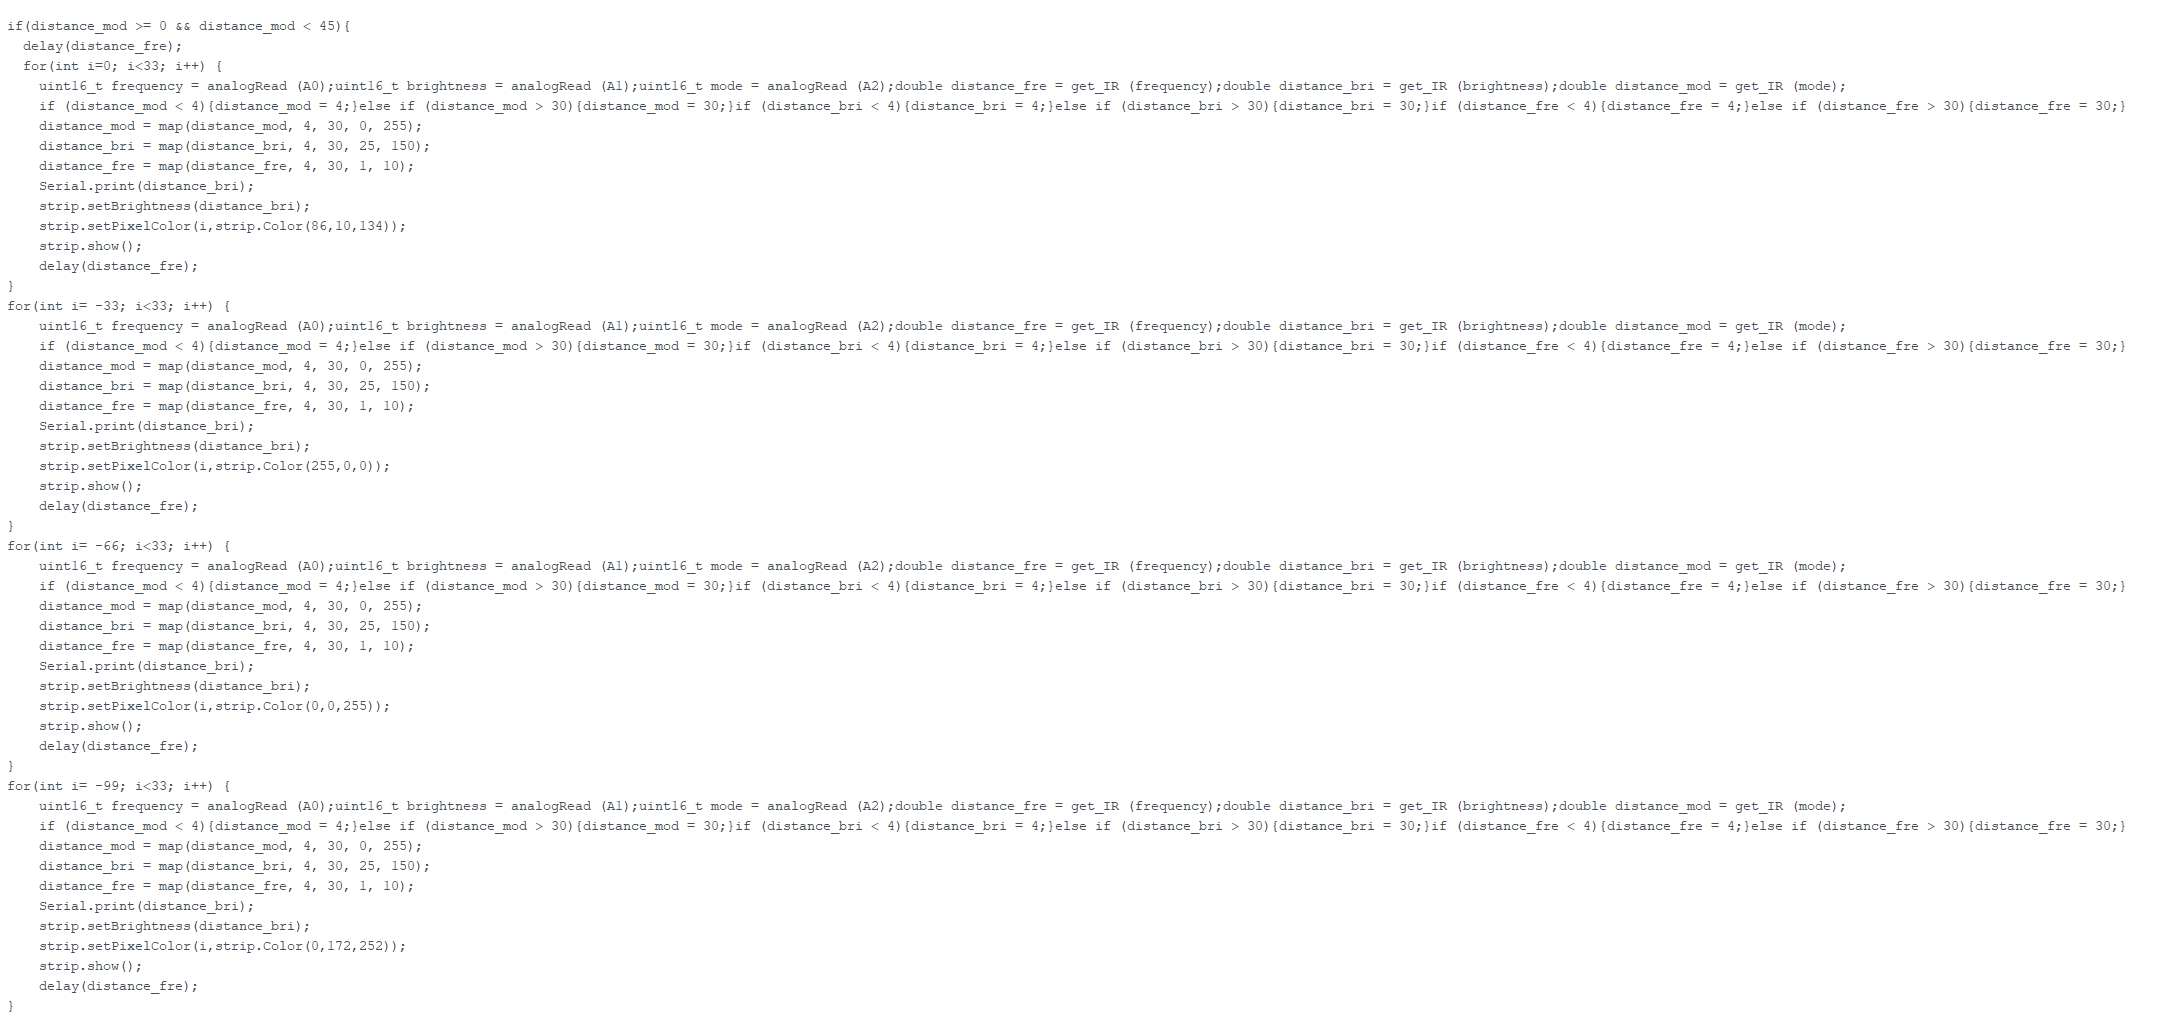
These four are the patterns I programmed for the strip. Based on the idea that I need to rejudge the condition every time the function loops, I imported the accelerometer into it and combined with the infrared distance sensor. One thing to mention about the infrared distance sensor, I just adopt the example codes from the recitation which is about the sensors, and it works perfectly, the only thing I need to do is to map the distance into 0 to 255. There are four conditions for the function and it only ranges from 200 to 300, the reason why the range is so small is that I find out the accelerometer is not that sensitive, and it is comparatively accurate in this range, so I cut it into four sections to set four different patterns. I also test with the acceleration, I want to apply it to change the speed of the strip, but I find out it is not obvious. The effect I want to change is that, if the user accelerates the cube one way, the changes will be accelerated, but I find out that the acceleration the accelerometer detects is only accurate when it is greatly accelerated, which means I have to continue giving acceleration to the cube and this is impossible, so I give up the idea using the acceleration and just use two dimensions except for the z dimension, as x and y axis are already enough for me. So are the pictures show, the commented parts have a lot of my trial to adopt more variables to the functions but not adopted at last. But only playing with the accelerometer is so boring that I still want to add distance sensors to the cube to control other parameters. I decide to use two distance sensors, one is for silence mode, the other to control the changing speed. It is easy to understand how to use the distance sensor to control the changing speed, just to map the distance to 0 to 255, and there is a delay() function in the loop for the neopixel to decide the delay between each loop which decides the changing speed, I find out that from 0 to 10 is already enough for the change or it will be too slow to change, and the user can easily feel the changes when they change their distance from the sensor. What I really want to mention is for the silence mode, when I am building the project, I come up with the idea that when I am putting the cube there, there should be a pattern different from all the four patterns and makes the user want to interact with it.
![]()
So when the cube is there alone on something, there is going to be only one single pixel shining each time the strip loops, the user will see that there is one shining point running inside the cube which will make people curious what is happening. The way to achieve it through the distance sensor is that, I notice that if the sensor is close enough to something that covers it, the distance it detects will only be the maximum range, so I gives the condition that the distance it sensors is larger than 30, the strip will enter the silence mode. That is to say, when I am putting the cube on the table, the sensor will directly be attached to the surface of the table and the distance it sensored will only be over thirty and the cube will automatically enter the silence mode. And all these above are genrally all the idea for my code.
Next comes to the assembly part, which is also very important as it directly decides how the project will look like. After printing all the joints and cutting the acrylic boards, the only thing I need is the glass paper. The purchasing process for this material is the most annoying part, I first order one from Taobao very early, but what I receive is literally “glass” paper that only has one side and cannot see through from the other side. So I immediately order another one, but I wait for four days and is noticed at last that the paper has been returned which has wasted me four days doing nothing. So I finally go out and buy the paper by myself and get one in an alley beside the East Nanjing Road.

The first one is the huge paper that is wrong, the second one is what I need. The difference is obvious as the transparency is totally different.
After I get all the materials I need, I need to assemble them together. First, I need to cut the glass paper into six pieces with exactly the same size as the acrylic boards, this is hard as I need to put the board on the paper and be as close to the edge of the board as I can to cut the paper, since the paper is very slippery, it is very hard to control the board as well as the knife. It takes me a lot of time to do this first step. And next is to stick the paper on the board, the shopkeeper who sell me the glass paper tells me to evenly spray some soap-suds on the board before I am going to stick the paper onto it. I cannot find a sprayer immediately, so everytime I need to do the work, I go to the toilet and wet my hand with water and liquid soap to get hand-made soap-suds and rub it on the board evenly, then I stick the paper onto it. With the help of the suds, I can adjust the position of the paper to fit the board, then I use my card to scrape the bubble and water out to get rid of the gaps between the paper and the board. After repeating the sequence for six times, even though some of them still have bubbles inside which makes the surface not perfect as what I have thought, it still can achieve the effect that I want, reflecting the light while I can see through it. Then comes the step that I need to combine the board together with the joints, it is a mistake that I have not leave grooves inside the joints to fit the board previously, so I need to seperately measure where to stick the board which is hard to control and time-consuming, to avoid doing damage to the acrylic board, I use the acrylic AB adhesive to glue the joints with the boards, as it has a pungent smell, I have to wear a mask to do the work. And to fix the board with the joint when I have glued them together, I use clamps to fix them together, which is shown in the following video.
Also one thing to mention, the viscidity of the glue is super strong, once it has dried, I can hardly tear them apart, so I need to be very sure about the measurement or everything need to be done again. Before finishing the assembly, I have mistaken one of the measurement of a board that results in the misplace of it, I have to tear the board down to fix the problem, and I have to redo many parts of the job which again takes me a lot of time.
After the box is done, I leave one side open to put things inside, and the only thing I need to do is to stick the neopixels onto all five sides of the box, since the number of the neopixels can not fill all the edges of five sides, so I need to figure out another way to make the patterns. Here I make several huge mistakes that result in many problems, first is that I stick the neopixels on five sides instead of just sticking them on some of the edges which will still look good. This results in that when I am looking from outside into it, my vision is blocked by the strips on each side which is very annoying as is shown in the previous video, I do not consider this problem when I am doing the job, this messes up a lot of the effect. Only at that time do I realize the essence of infinity mirror is that the neopixels have to be on the edges that will not influence the visual effect. The next mistake I have made is that, I use super glue to stick the strip to the cube, and since the strip is conductive and the super glue is liquid, it will conduct electronic signals randomly which will distract how the signals flow in the strip, and also the way I tilt the strip to make patterns in the cube also can disable the signals from passing correctly. And I believe these two mistakes I have done lead to the malfunction of the cube the second day I finish it.
The final thing to consider is how I am going to arrange the wires and where to put the sensors. I make a small cut on two sides of the cube to leave space for the wires, and since there are grooves in the joints where I can put the wires, the only thing I need to do is to assembly all the wires together and put them into the cut and the groove which will make it look far better. As is shown in the video, there is a cut for the wires at the farthermost corner, it is a pity that I forget to take a picture of how I arrange the wires. And I also measure where to put one of the distance sensor so that when the box is facing down, the sensor will just be close enough to the surface of the desk, for the other distance sensor, I just stick on one side of the cube, so as for the user himself to discover and play with. The accelerometer is placed inside, when I tilt the box, the pattern and the brightness will change along with the accelerometer.
There is also one interesting thing to mention is that the reason why I finally decide that there is only going to be five sides and there is no boards at the bottom, Dave tries to put his head inside the cube and see around and says it is amazing to look around inside, so I decide to leave one side open so as to let the user to put his head inside when he lifts up the cube and finds out the bottom is open and wants to discover how it looks like when he puts his head into, this is also one way to interact with the cube, but only by the imagination of the user, mayber there are more ways to play with it depends on how the user judges it.
- Conclusions
The result of my project could say reach my expectation, although it just works for one night and fails to function the next morning. I can change the pattern, brightness, changing speed at my will, but from the feedbacks and the actual user testing the night I finish it, I learn that it might be hard for users to understand how to interact with it at their first sight. Because it is just a box there at a silence mode, it looks interesting but they do not know what it is for, and when they move it, the pattern suddenly changes, and when they tilt it, there are more changes, and this is exactly what I want, to make the users confused and feel interested and then discover it by themselves, they are the ones to interact and to think about it, they create the ways of interaction with it, I am only the designer to design the possible ways to interact with the cube, but there can be more ways to be thought about to make the interaction more fun. This perfectly fits what interaction means to me, it is something that will give you reaction when you give some kinds of instructions to something, it is like a communication, but this process involves thoughts and discovery, not only the interaction part is engaging, as well as the process to find out how to interact with it is also engaging, I want to make everything with the project interesting also interactive, not only interacting with your body physically, but with your mind mentally, even more, provoke some profound thoughts based on what you see, what you think and what you feel. The distance sensor and the accelerometer, these two are triggered by just lifting up the cube and tilting it, the one that controls the changing speed actually needs more imagination and sense of discovering to find out what it is for, only when people try to put hands on it and find out the speed has changed, and when they are changing the distance will the speed also be changed, then they will find out a new way of interaction with the box, this process I think really meets what I think interaction is.
If I have more time to improve my project? First, I definitely will redo the whole thing. I will change the acrylic into glass, I will prepare a sprayer, I will make joints that have already made grooves for the glass boards to fit in, I will make cuts on glass for the wires in the modeling software, I will prepare enough neopixels, I will never use super glue again, there are too many parts that I need to improve. Also I think I can make a rotating pedestal to put the cube on, so as to make it more decorative. For the interaction part, I think so far it is satisfying, the only thing I think I need to improve is how I put the sensors, I nned to figure out a better way to arrange the wires and the sensors, it is also an important thing which will influence the interactivity and the appearence.
I think I do have learnt a lot, I need to list all the materials that I need to use for all the processes for the project, always have a back-up plan for the project, get all the materials as soon as possible, there is always going to be accidents that I cannot imagine, always be patient to others’ ideas, they will definitely have better ideas that I have never thought about. Always be confident of myself, I think that is the most important thing for me so far, confidence supports me all the time and keeps me calm.
Now comes to the ending question, so what? I have considered long for the answer, as what I have mentioned, the way users interact with it represents the way how I understand interaction, the project is for users to discover a new understanding of interaction, it involves discovery and thinking, and the surprise to have found out different ways to interact. It can be only for entertainment as the visual effect is really cool and fascinating, however, I think there can be more for the project, as what I have said at the beginning, the project can provoke spiritual meditation, from the changing patterns of lights can users feel something and meditate, colors have its own meaning based on different understanding. I hope the project can bring different meanings to various users, this is something more than cool visual effects, this is an infinity cube connecting the physical word and the mental world with infinity light paths and infinity threads of thoughts.
The following are some documentation for the process.