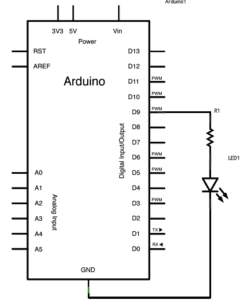
Circuit 1 – Fade
Components:
1 * Arduino Uno
1 * USB A to B cable
1 * breadboard
1 * LED
1 * 220-ohm resistor
1 * Multimeter
A handful of jumper cables
Diagram:
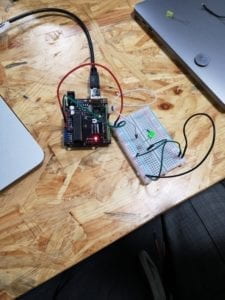
Picture:
Video:
Process:
The circuit was not difficult and we completed it fast, however, in the beginning, the LED didn’t light up. We checked all the procedure but still couldn’t find out where the problem was. Then we asked the faculty for help; he suggested that maybe the problem was the component itself and gave us a button for checking if the LED was damaged. As expected, the LED was exactly the problem itself. After changing a new LED, our circuit ran perfectly.
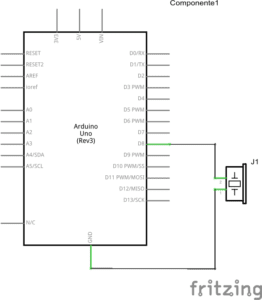
Circuit 2 – toneMelody
1 * Arduino Uno
1 * USB A to B cable
1 * breadboard
1 * buzzer
A handful of jumper cables
Diagram:
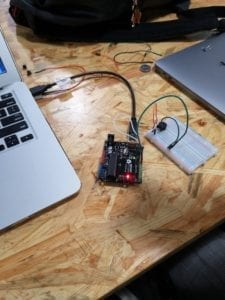
Picture:
Video:
Process:
The process of making circuit 2 went pretty smoothly and it worked perfectly when we gave the first try.
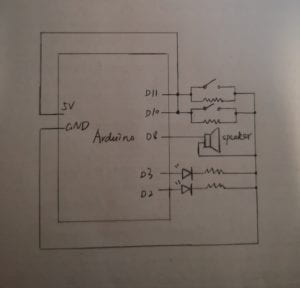
Circuit 3 – Speed Game
1 * Arduino Uno
1 * USB A to B cable
1 * breadboard
1 * buzzer
2 * LEDs
2 * 220-ohm resistors
2 * 10K ohm resistors
2 * pushbuttons
A handful of jumper cables
1 * Multimeter
Diagram:
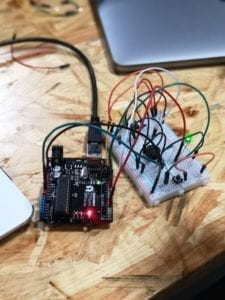
Picture:
Video:
Process:
This circuit was really complicated to make though we had the physical sketch map. The main problem we encountered when we made it was that we often mixed up the cables. We either forgot to connect a component to the ground or connected a component to the wrong polarity. This kind of mistakes caused the failure of our first try – the button which was supposed to be controlled by player two didn’t respond to the press because we forgot to connect it to the ground. After really hard checking, we fixed the cable problem and made the circuit work. (I won the game! :D)
The process this time taught me a lesson that when we try to do a complicated circuit, we’d better select two different colors of cables for connecting two different polarities instead of letting the cables all mixed up together; in this way, it will be much more clear for us to assemble and check the circuit.
Circuit 4 – Four-Player Speed Game
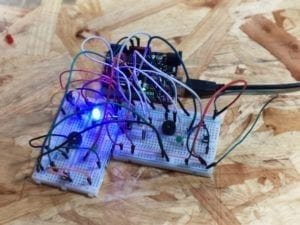
Picture:
Video:
Process:
This circuit was even more complicated than the last one and because we needed to combine the work from two groups, things got harder. We needed to connect two breadboards to one Arduino and add commands in the code. In our first try, two buttons only count the first press in the serial monitor. When we tried to figure out if we connect the two buttons to the wrong pinMode, another problem raised: we couldn’t recognize which buttons on the breadboards are the “play one” or “play four” that didn’t count in the monitor. Thanks to our faculty for that he first checked the code for us and proved it was perfect, then he taught us to update a basic program like “button” to test the position of the buttons on the breadboards. After we figured out which buttons on the breadboards went wrong, we checked the cables connected to them and found that we connected the two buttons to the opposite pinMode, making them couldn’t fit in our code. So we switched their cables to the right pin corresponding to our code and soon fixed the problem. In the next try, we ran the game successfully. At that moment, we were all excited and proud.
Question 1: Reflect how you use technology in your daily life and on the circuits you just built. Use the text Physical Computing and your own observations to define interaction.
For me, technology surrounds me nearly every moment in my daily life. I contact with my friends and family through telephone, complete my assignment through my laptop, get drinking water from a water purifier and so on. It seems like I cannot live without technology in such a modern world. And I think all the technology we use today relies on a basic way like how the circuits we built function: it works with both input and output; after we give an input like code, the input commands circuit to process, then the circuit would give us a response as output such as lighting up the LED or ringing the bell. According to Physical Computing, taking the computer as a sample, interaction can be defined as the process “input, output, and processing”. Therefore, I think the process we use technology every time is the process of interaction, for example, when we press the switch of a table lamp and get light from it, the table time processing with both an input and an output, such a process is just a manifestation of interaction.
Question 2: If you have 100,000 LEDs of any brightness and color at your disposal, what would you make and where would you put it?
I want to use them to build an LED earth model which records the global environmental change in recent years. Recently, I read a piece of news announcing that NASA has released the data of global vegetation change of recent years, and surprisingly, in the recent 20 years, our earth has become “greener”. Inspired by the news, I want to make a model to record the environmental change intuitively, encouraging and alerting people to devote to the environmental protection cause.
I would make a hollow earth model covered by the LEDs and use different colors to represent different kinds of environment on earth: blue is the ocean, rivers, and lakes; yellow and green comprise the land (yellow represents the desert, green represents the green land, more detailedly, I can use dark green to represent the forest, use light green to represent grass, and use yellow-green to represent low growing shrubs in arid regions); white represents the icebergs and ice caps at the South Pole and the North Pole. Then I would put in the data of the global environmental change in recent years, making the LEDs change colors according to the data change each year. By my rough calculations, if each LED is close to 0.5 cm * 0.5 cm, the diameter of the model should be close to 1 m. It would be suitable to put it in the exhibition hall of a science and technology museum for educating visitors.