Electronics & Soldering
In the first recitation class, my partner Cathy and I learned how to solder the metal wire and build the circuits. As a beginner, I found soldering quite fun, especially when I saw the solid solder shining a silver light. I took comm lab last semester where I became familiar with webpage design, which is also a kind of interaction between human and computer. Therefore, physical interaction using diagrams, circuits, and Arduino opens up a novel world to me, still, even though I majored in physics in my high school. After finishing soldering with the help of Prof. Godoy, we began to build the circuits. I admit it was tough for us from the very first beginning.
The components we used with their functions are listed below:
- 1 * Breadboard (a device to connect electronics and to test circuit designs)
- 1 * LM7805 Voltage Regulator ( to maintain a constant voltage level)
- 1 * Buzzer ( like a speaker, sending the audio signal. it will beep when we successfully build the circuit)
- 1 * Push-Button Switch (connect/disconnect the circuit)
- 1 * Arcade Button ( well, a switch with a bigger button )
- 1 * 220-ohm Resistor ( electrical resistance )
- 1 * 10K ohm Resistor ( electrical resistance )
- 1 * 10K ohm Variable Resistor (Potentiometer) ( electrical resistance with a changeable value)
- 1 * LED ( a light that only allows current from one direction)
- 1 * 100 nF (0.1uF) Capacitor ( to store the electric charge, but not sure what’s the function in these circuits)
- 1 * 12-volt power supply (supply the power)
- 1 * Barrel Jack ( in class we use it to connect the power line and breadboard)
- 1 * Multimeter ( It can examine the value of the current, the voltage or the resistance. in class we use it to test the value of resistance )
- Several Jumper Cables (Hook-up Wires)
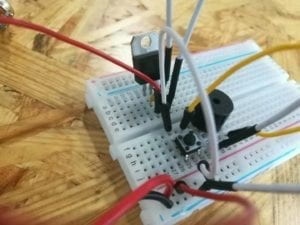
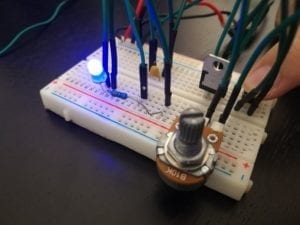
- Circuit 1: Doorbell
We spent a lot of time figuring out how the breadboard works. (Yes we learned hard in class but still got stuck there in practice) We were not even used to connecting the electronics with tons of wires. With the help of one of the fellows, we made it after all. Then, we got a little bit confused about how the switch works, and how the voltage regulator works. Especially for the voltage regulator, since it has three legs, it’s difficult to separate each line of them. For the capacity, I know its function but I’m not sure why it appears in these circuits. After we read the instructions over and over again we finally got to know that the switch will connect the circuit only when it’s pressed.
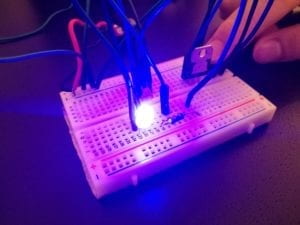
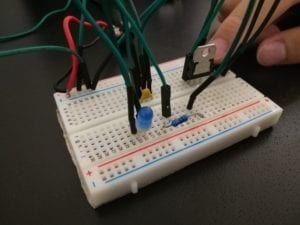
- Circuit 2: Lamp
I made up building this circuit with my partner Shawn today, for I didn’t have enough time to do it in class. The circuit is actually built on the first one and all we need to is to change the buzzer into a resistor and a LED light. it went smoothly except that we got wrong the direction of the LED light.
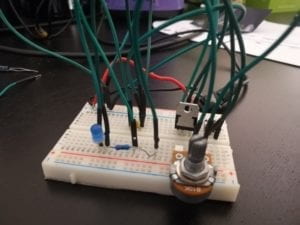
- Circuit 3: Dimmable Lamp
For this one, we simply added a variable resistor into the circuit.
Reading & Video
- Question1:
After reading The Art of Interactive Design, in what way do you think that the circuits you built today include interactivity?
By definition, the interaction is to put two actors into the conversation where they can listen, consider and respond to each other. It seems like there’s an internal hierarchy in regard to interactions, for we, one of the actors, have various interpretations towards the interaction.
In the circuits, the way we connect all the electronics, firstly, is to put them into conversation with each other. For example, when we press the switch button, it sends a “signal” to all the electronics. Then all the electronics are activated and began to work. On the other hand, if we see all the electronics as a whole, we put ourselves into the conversation with the whole circuit. We give the instructions to the circuit ( like turning the variable resistor or pushing the switch button ) so that the circuit can work well.
- Question2: How can Interaction Design and Physical Computing be used to create Interactive Art?
In the video presented by Zach Lieberman, we are introduced to a device in which the interactive arts and high-end technology are involved. Apparently, it brings so much convenience to the disabled to convey information to the outside worlds. Usually, we know people can be engaged in a conversation through facial expression, gestures, posture, etc. But in this case, the testing user only needs to roll his eyes! It seems that Lieberman is devoted to studying the motion and how it can trigger an emotional response. In an interview with Lieberman, he argues that “… for interactive work you always want to make things that are immediately understandable and that have depth.” That’s probably his philosophy of creating the interactive arts. It can be complex itself but it should be easily understood. It’s worth exploring but it should be available to all human beings( or other things). However, Without either Interaction Design or Physical Computing we cannot successfully create interactive arts. Both ideas and technics are important.
Big thanks to Prof. Godoy, my partner(s) and the nice fellows :)))
this is a great documentation Anica!