Exercise 1: Make a Processing Etch A Sketch
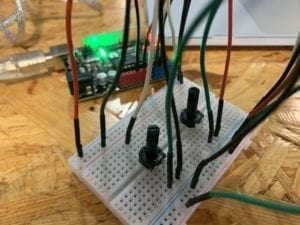
In this exercise, the values of the two potentiometers are transmitted from Arduino to Processing. Firstly, what I drew was continuous dots and each dot appears according to the assigned X, Y position. In this process, I found the processing can not give a quick response. So I adjusted the delay() function and it got better. Secondly, I tried to make lines just as shown in Etch a Sketch. The challenge was about how to locate the previous position. Later I defined them before the UpdateSerial(). It works well. It’s also quite fun.
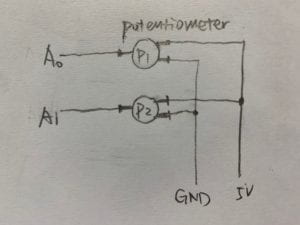
The schematic:
The changes of codes:
– In Arduino:
delay(100); // delay in between reads for stability
– In Processing:
int NUM_OF_VALUES = 2;   /** important. YOU MUST CHANGE THIS ACCORDING TO YOUR PROJECT **/


float px;
float py;
void draw() {
  px = sensorValues[0];
  py = sensorValues[1];
  updateSerial(); ///important. Update the string you got
  printArray(sensorValues);

  strokeWeight(5);
  stroke(255);
  line(sensorValues[0]/2, sensorValues[1]/2, px, py);
}
What I notice is that I need to convert the range of sensorValues from 0-1023 to the actual value (eg. width, height) so that it won’t go out of the edge.
Here’s the final creation:
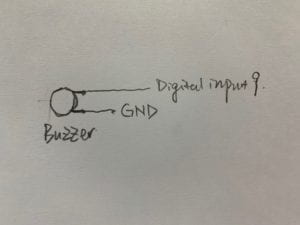
Exercise 2: Make a musical instrument with Arduino
This is relatively easier compared to the first one. I didn’t use potentiometers in this circuit. Instead, I made value mouseX as the frequency of the buzzer and mouseY the duration.
Here’s the schematic:
Here’re the changes I made in the codes:
In Processing:
  values[0] = mouseX;
  values[1] = mouseY;
In Arduino:
  tone(9, value[0],value[1]);
Final creation: