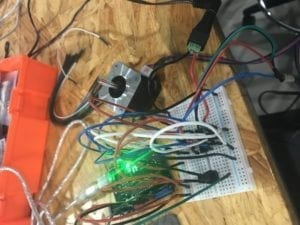
In this recitation, I tried to work individually by building the circuit. I encountered a few problems throughout the process, and I figured them out by myself.
Step 1:
As instructed by the “H-bridge circuit diagram,” it is quite easy to build up the circuit. However, I still encountered two problems.
First, when I tried to put the H bridge to the breadboard, I suddenly realized that it might have a certain direction. However, I forget which side should head up. I searched it online but failed to find it in the first attempt. So I asked another student and got the answer. After the recitation, I spent some time looking up the theory online and got to know how H bridge actually works.
Then, after finishing building the circuit, I tried to upload code to Arduino. However, when I link the Arduino board to the computer, the power of Arduino is not on. I tried to unplug the ground and power from Arduino to the breadboard, and it could be normally powered. I think there must be something wrong with the circuit that I build on the breadboard. Since all the wires are in a mess, I can hardly find out the problem. It turned out that I wrongly connect the power and ground together so that it caused a short circuit. Therefore, I think it would be better if I can use certain colors and link different components more reasonable next time.
Step 2:
After done with the circuit for step 2, I found out that the stepper motor did not respond to the potentiometer correspondingly. Therefore, I opened the serial monitor to get the analog input data from the potentiometer. Then I found out that the data from the potentiometer never changed and stayed 826. I solved this problem by link it to another analog-in pin of the Arduino board. I guess there may be some problem with the poor contact somewhere.

Step 3:
Since we are running out of the time, we did not have enough time to try drawing something meaningful with the drawing machine we built. But it actually works! Also, because I was in a rush, I did not map the input of the potentiometer to a certain range so that it may be easier to control. Maybe I can try to improve it in future works.
Question 1:
What kind of machines would you be interested in building? Add a reflection about the use of actuators, the digital manipulation of art, and the creative process to your blog post.
Answer: We are now familiar with components that can both sense the world (sensor) and also make changes to the world (motor). Therefore, I believe we can make many traditional static arts more dynamic. So I am interested in machines that are meant for human beings to think beyond themselves. We can achieve much more than before where we did not have digital manipulation in the forms of art. By applying these interactive technologies, the audience can feel more involves and more inspired in thinking.
Question 2:
Choose an art installation mentioned in the reading ART + Science NOW, Stephen Wilson (Kinetics chapter). Post your thoughts about it and make a comparison with the work you did during this recitation. How do you think that the artist selected those specific actuators for his project?
Answer: After reading “ART + Science Now,” I am deeply impressed by the project “Waves” by Daniel Palacios Jimenez. The mechanism of this project is similar to the work that I did for this recitation. The two projects may both use a similar motor and algorithm to make the project work. However, the purpose and outcome are completely different. My work during the recitation is a more practical project that is under human’s subjective control, which is useful stuff. “Waves” is art for the audience to feel, think, and reflect on themselves. It inspires people. As described, “waves” may “create complex sound and visual wave oscillations.” Therefore, with these purposes in mind, I believe that the artist was trying to find corresponding actuators that can make certain sounds and images.
Good Job!