Partner: Mimi (Cai Shuyang)
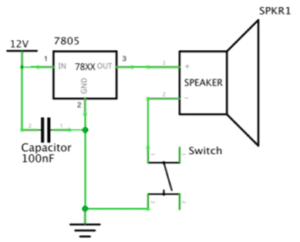
Circuit 1:
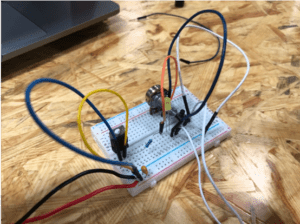
Components: 1 Breadboard: serve as a platform on which we can plug things in.
1 Voltage Regulator: regulate the voltage so the circuit could be served with the correct voltage. (not 220V)
1 Capacitor: store and let out the electricity charge.
A few Hook up wires: connects other components.
1 Buzzer: it serves as the speaker so that the “doorbell” could ring.
1 Push button(switch): to connect the circuit to make the buzzer ring.
⬆️https://wp.nyu.edu/shanghai-ima-interaction-lab/category/recitations/
Process:
The first step was to connect the power source. However, we encountered some problems. Due to the reason that we were not adequately familiar with how the breadboard functioned, we connected it vertically instead of horizontally. In that way, we created a short circuit and that led to our first failure of attempt.
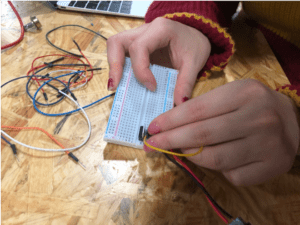
After seeking help from instructor Young, we understood how the metal things were connected inside the board and that the blue line stood for the same thing of “connecting to the ground” as the diagram on the website. After another attempt, we got it right and also positioned the capacitor correctly.

Another problem we’ve encountered was that we failed to connect the switch correctly to the circuit—we didn’t understand the reference on the web page and positioned it in the wrong direction. Again, with Young’s help, we got to know the right way to connect it.
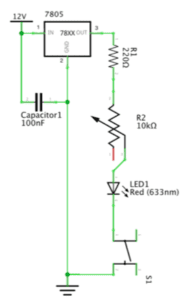
Circuit 2:

⬅️https://wp.nyu.edu/shanghai-ima-interaction-lab/category/recitations/
Components: 1 breadboard, 1 voltage regulator, 1 capacitor, a few wires, 1 push button
1 220-ohm Resistor: reduce the electric current so that the circuit would not be over-loaded.
1 LED: it would give out light when the circuit is connected so the “lamp” could work.
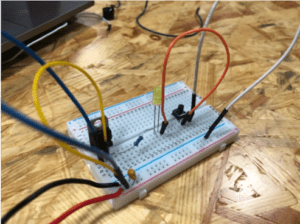
Process: As the process of building the first circuit provided us some great and useful experience, the second one went quite smoothly without any trouble except for reorganizing the components so that they could all fit in the breadboard. We did it after several adjustments.
Circuit 3:
https://wp.nyu.edu/shanghai-ima-interaction-lab/category/recitations/
Components: breadboard, voltage regulator, capacitor, wires, push button, 220-ohm resistor
Variable Resistor: adjust the resistance of the circuit. In this circuit, we can use it to change the luminance of the LED so that the lamp could be dimmable.
Process: we did find it hard to figure out the right direction to position the variable resistor, but eventually we got it right by reading the instruction page and comparing the real component with the reference image.
Question 1:
The interactivity that the circuit includes can be considered from two perspectives.
First, a successful operation of the circuit is based on two condition: a person push the button and the circuit is correctly connected. From this point of view, this process includes two basic components of an interactive action: two actors and a process of alternatively exchanging signals. Though it is a low-level procedure seeing from the degree of interactivity, it does serve as a good start point for a beginner like me and could bring much joy.
Second, there is a certain procedure of input-process-output during the operation, and that is: the operator giving an input signal to the circuit by pushing the button, the circuit being connected and deliver the electric charge, and it giving an output by lightening the LED or making noise using the buzzer.
These processes make the circuit interactive.
Question 2:
Basically, Interaction Design provides creative ideas while Physical Computing figures out the practical plans and turns them into reality.
In everyday life, we are communicating with technology and interact with computer all the time without consciousness. According to Zack Lieberman, computing is also a form of art, a practical art which can help us turn virtual into reality. Considering that, interactive art is related to physical computing tightly. However, without creativity, computing is nothing more than just a vain skill. Interaction design is the core of the interactive art. It could provide the newest and the most thrilling ideas. We can only create interactive art by combining interaction design and physical computing and make good use of both.