Introduction
In the first recitation, we were assigned to build three circuits: a doorbell, a lamp, and a dimmable lamp. I learned some information about the components we used and had an interesting experience in soldering things.
Materials
- 1 * Breadboard
- 1 * LM7805 Voltage Regulator
- 1 * Buzzer
- 1 * Push-Button Switch
- 1 * Arcade Button
- 1 * 220 ohm Resistor
- 1 * 10K ohm Resistor
- 1 * 10K ohm Variable Resistor (Potentiometer)
- 1 * LED
- 1 * 100 nF (0.1uF) Capacitor
- 1 * 12 volt power supply
- 1 * Barrel Jack
- 1 * Multimeter
- Several Jumper Cables (Hook-up Wires)
Soldering
We did soldering first, melting tin to solder two wires onto the switch. We need to cut the wires into the suitable length and peel each side of them first and then threaded them into the holes. After fixed it, we used the iron to melt the tin and used it as glue to solder wires and the switch. My partner and I didn’t have much experience, but we did pretty good this time.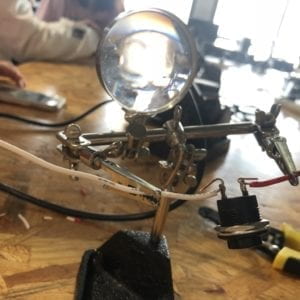
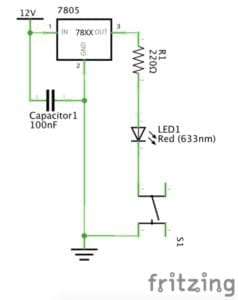
Circuit 1: doorbell
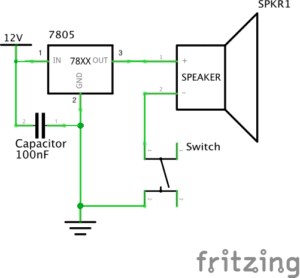
This was my first time to build a circuit like this. Though we learned something about it in high school, we were pretty confused about how to start at the beginning. Especially for the voltage regulator that has three feet, we spent some time to figure it out.
. With the teacher’s help, we gradually understood how the breadboard works and got things right.
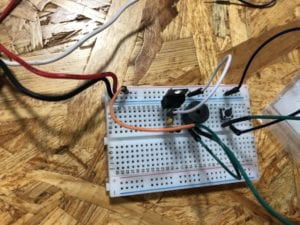 it took us quite a long time, but it was worth since we’ve got more familiar with all the electronics.
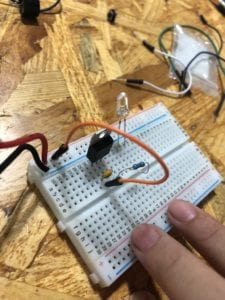
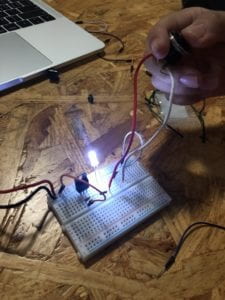
Circuit 2: lamp
 With the experience from the last circuit and teacher’s help, we got this done much quicker.
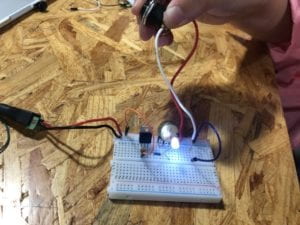
Circuit 3: dimmable lamp
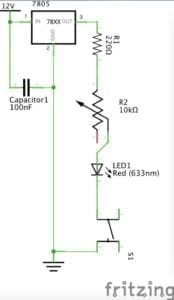 This one was quite similar to the second one but with a variable resistor, which made it more difficult than the last one. We failed the first time because not knowing how the three feet of the variable resistor work, so the LED didn’t light up. Another mistake we made was that we accidentally inserted two wires that weren’t supposed to be together into the same hole, but we corrected it at last.
Reflection
We did meet many problems in the process since it was our first time doing it and were not familiar with it. However, we’ve gained a deep understanding of the circuits and all the components, most importantly, the experience. I believe we can do better next time.
Question 1:
I’d say these circuits shows interactivity at a low level. Take the 3 words(input, process, output ) the author uses as an example, when we input an order(press the button switch), the circuit receives and process(lets the current flow), and then we can see the output(the doorbell ringing or the LED lighting up). So there is interactivity since the circuit responses to us, but it is limited to a very low level as it can’t do a more intelligent or meaningful one.
Question 2:
Interaction design is like a draft, a sketch, imagination with a logical base that only exists in the computer, on the paper, or in somebody’s mind. But with physical computing, it can turn in to something existing in reality and be tangible. They are both important parts of creating interactive art.