FINAL PROJECT VIDEO
https://youtu.be/wsX3pSqLLC0
CONCEPTION AND DESIGN
The design concept of our final project was built upon an interest in art and an evolving understanding about interaction throughout the course. I knew that I wanted to build something related to art at the beginning of the interaction lab course. The conventional way that audiences interact with a visual art piece or a museum space is confined within the visual scope. In a digital era, the way how people interact with art pieces becomes even more alienating. All you have to do is looking at the images of those art pieces on your digital devices. If the audiences are not engaged in a dialogue with a given art piece, with the artist, and the art space, the feelings and emotions from an artwork can hardly be conveyed. Thus, my partner and I decided that we design an unconventional interaction between an art object and its audience. We want to merge seemingly unrelated styles in our creation, and we want the audiences to rethink the interaction and dialogue between creators of art objects and the audiences.
Thus, the design choices we made was to recreate a well-known fine art painting, because we want to create both a sense of familiarity and detachment. We also decided to create a wooden console, enabling our users to convey their thoughts by using a slide potentiometer and a button. Initially, we were thinking about using three joystick switches for users to make their choices. However, we got various feedbacks that joystick switches gave the users too limited choices, whereas a potentiometer opens up more possibilities and interpretation.
FABRICATION AND PRODUCTION
We began our production by figuring out the logical steps in our interactive system. The logic of our code goes as the following: the user presses a start button to initiate the interaction on the screen. Three questions will appear on the computer screen consecutively, and the user will use the potentiometer to slide to position of a chosen answer to each question. When the user finish answering all three questions, a painting will appear on the computer screen, based on the input from user’s chosen values. In our code, we used if statements to We used a timer to record the value for each question. We also used if statements check the state of our button. Isaac also built the circuit connecting one slide potentiometer, one button-switch to the Arduino board.
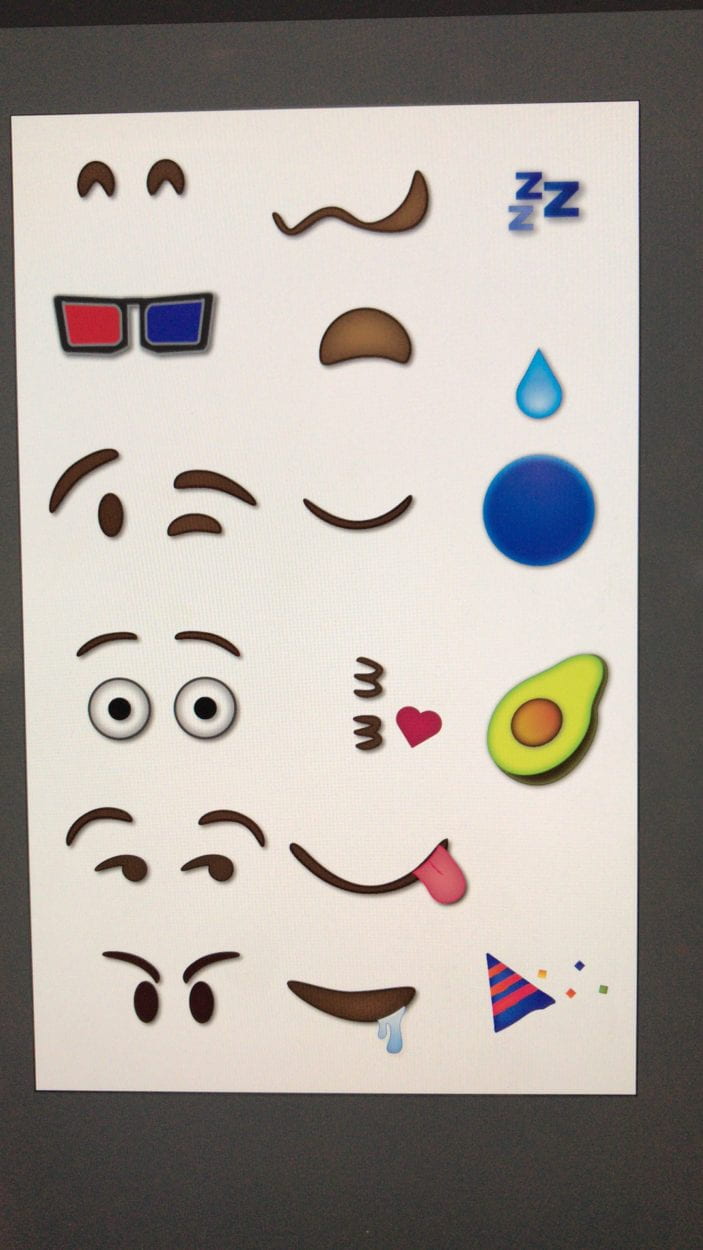
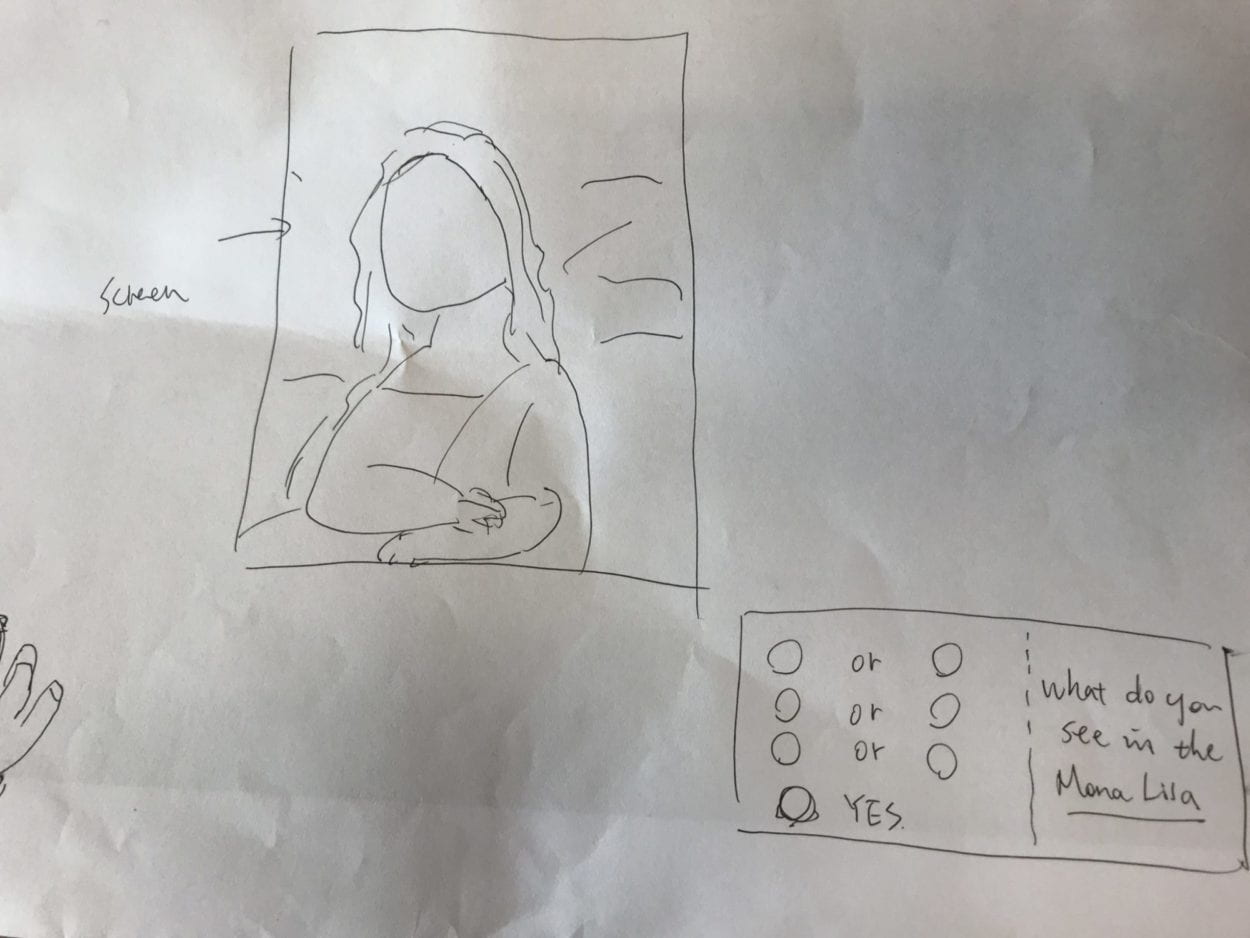
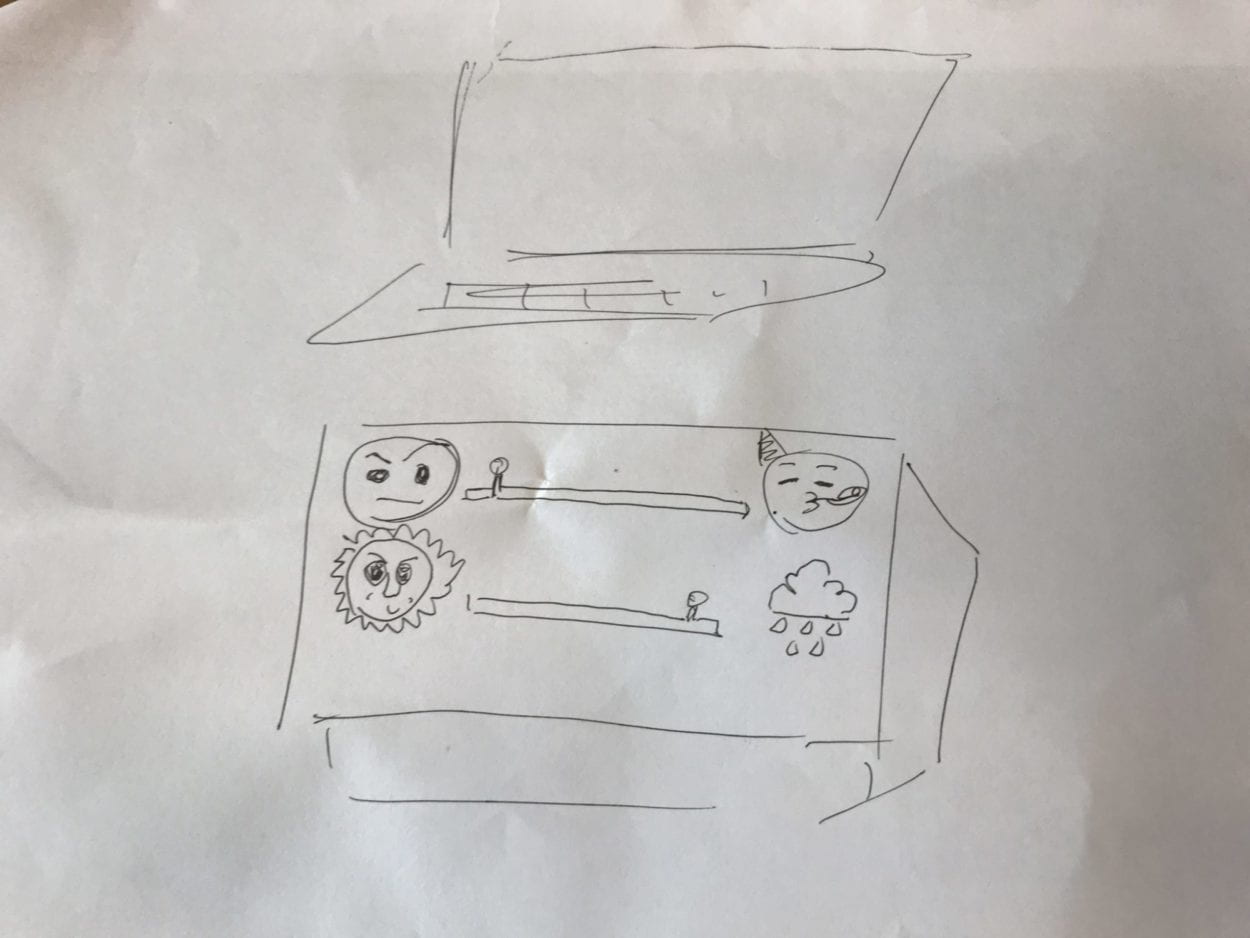
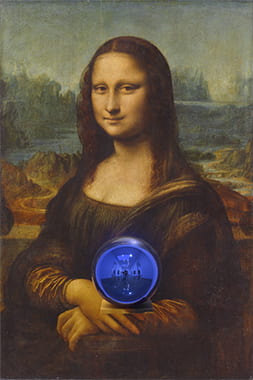
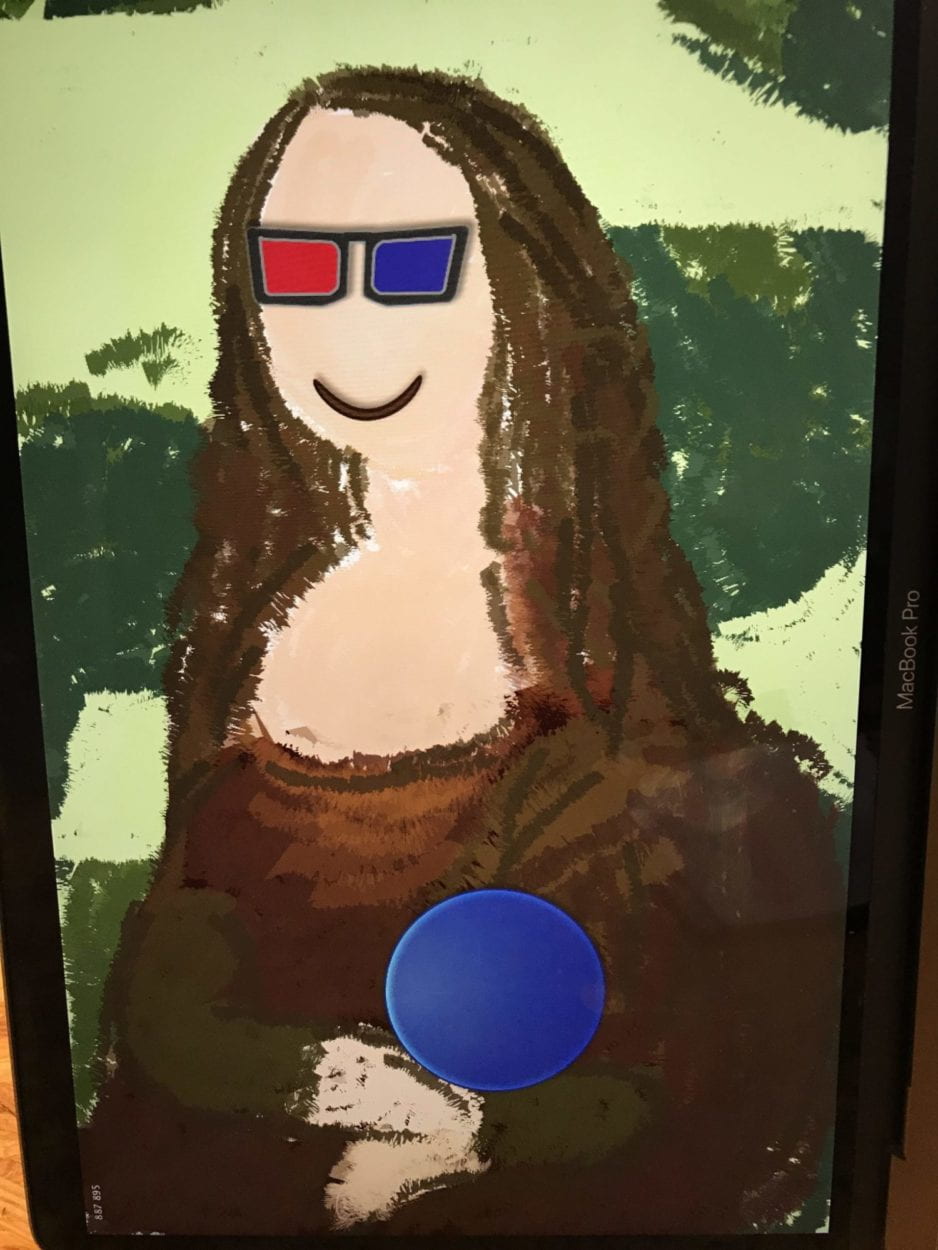
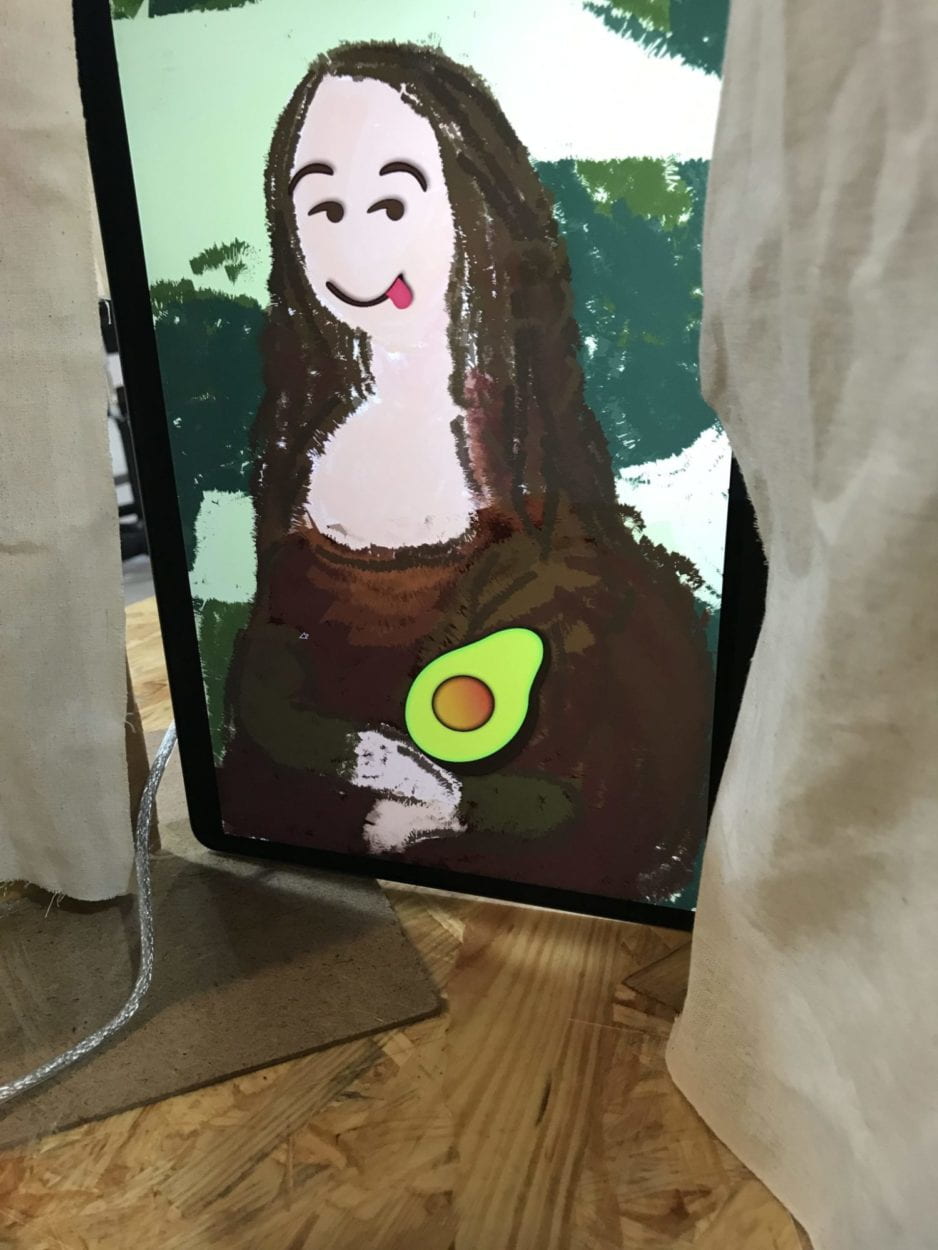
Because we want to make a painting changeable based on the value input from users, I decided to draw a background of a faceless Mona Lisa. Then, I used illustrator to create mouth features and eye features inspired by emoji faces. The mouths and eyes assets range from showing the most negative to the most positive emotions, because we hope that our project can somehow reflect the emotional state of our users. I also created some funky assets like an avocado and a blue crystal ball. My partner, Isaac created three string arrays respectively for mouths assets, eyes assets, and features assets. Each option for the three questions responds to each asset in string arrays. I also created a wooden console through laser cutting, where the users only see the slider, the button; a line of text saying, “When the mind meets the eyes,” and the texts of “Press”. The hardest part of our production was actually figuring out what questions we ask so that we can get to the emotional state of our users. We tried to map six answer values on the range of our potentiometer, but it was hard to think about what questions we can ask so that the users can answer them with a range of options. We began by using questions relatable to students’ college life, including 1) How cheesy do you want your cheesy boi? 2) How often do you fall asleep on GPS lecture? and 3) How do you feel on your first date?
User Testing Version of our Project
https://youtu.be/QOWGVnz4YEg
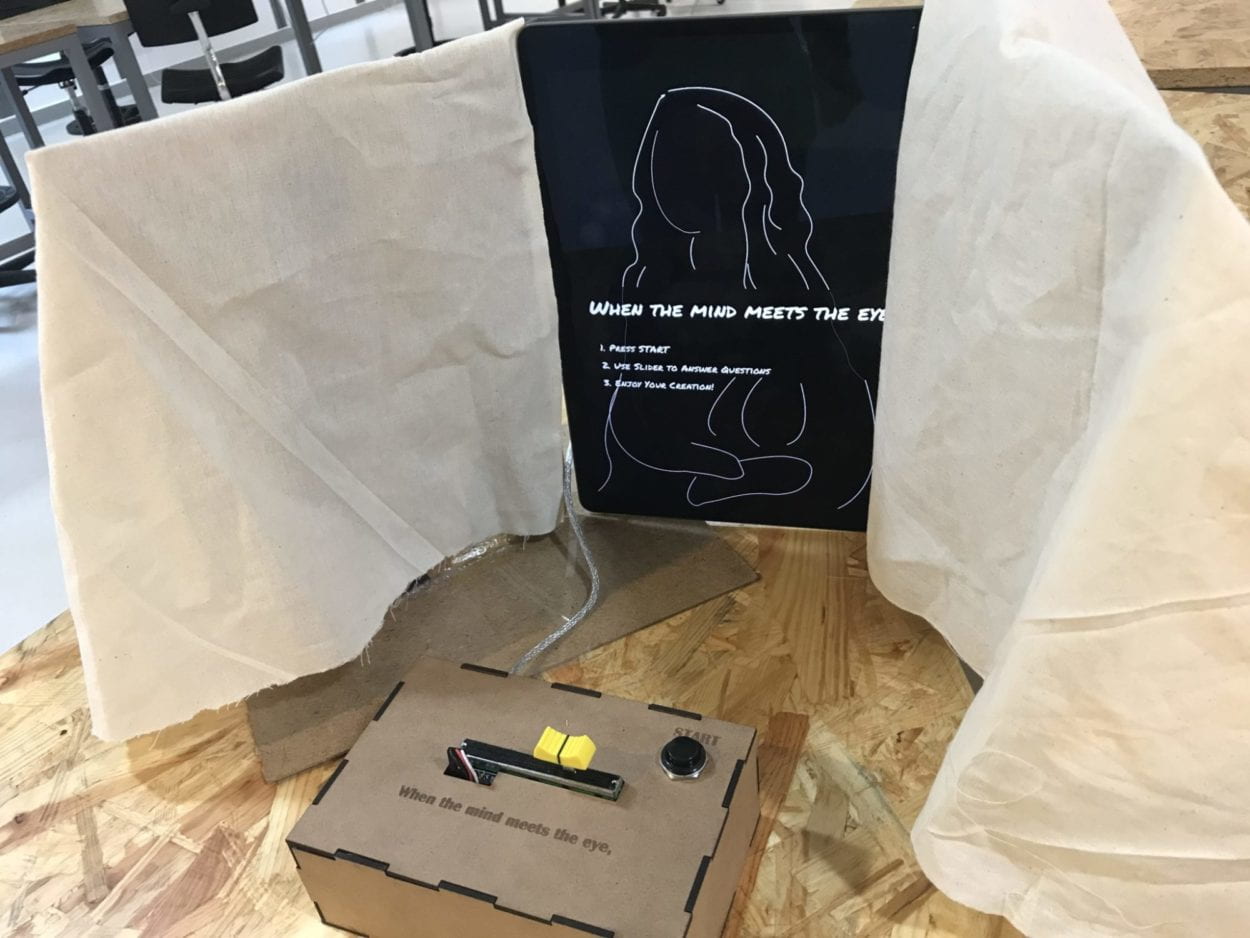
During the user testing session, what turned out the be successful was the simplistic aesthetics of the project and how we put our laptop in the vertical direction. On the starting page of the project and questions pages, users simply see a black background, with white outlines of a Mona Lisa painting and texts of the questions. Users only see the colorful image at the end of the interaction. Users interacted with the project found it aesthetically pleasing and funny to see the final image, especially the unlikely combination of Mona Lisa and emoji features. Our choice of putting the laptop in the vertical direction (thanks to Dave for the inspiration) and hiding the keyboard with a piece of fabric also came as surprising. This design choice reshapes the way we interact with computers and how we put computer screens into use.
However, we also learned many of the design flaws from user testing. First, our intension to design an interactive system involving art objects and an art audience did not come as we expected. Instead, most of the users interpreted our project as a personality test, because the questions we asked were very similar as BuzzFeed quizzes. When users see the Mona Lisa appeared at the end, they were confused and unable to draw the connection between the questions and the final customized Mona Lisa image. Users were also tempting to press the button after they pick the value on the potentiometer; and they told us that it would be good to see all the available options or knowing which option they pick on the screen. Based on users’ feedbacks, we made the following changes before our final presentation. 1) we revisited the initial design intention and decided that our questions would be more related to the experiences and feelings related to art, instead of general college life questions.

We changed the questions into: 1) How do you feel when you see the Mona Lisa? 2) What was your last experience at a museum? And 3) How often do you see yourself as an artist? The questions and the options are more directly related to the experiences of art and the stylistic choices of the Mona Lisa at the end. We also wrote a short description at the starting page, guiding users how to use the button and the potentiometer. In addition, we made six ellipses appeared all at the same time so that the users would know that they can choose from six different options.
On the presentation day, we also created a stand in symmetric position to the keyboard of my laptop, covering both the stand and my keyboard with pieces of white cloth. The users tested our final project told us that it was fun the interactive process was very clear and that it was interesting to see the last image. However, we also got valuable feedbacks about how the project can be improved. For one thing, a user suggested that we could have make the context of our project clearer, if we intended to put it in an art space. We can perhaps also alter the style of the Mona Lisa image at the end, such as using certain filters to make it become a Fauvist or Impressionist version of Mona Lisa.
CONCLUSIONS
I define interaction as a process in which one or more human actors engage in reciprocal exchange of information with other human beings, objects, systems, or the outer environment. I see human actors and experiences as essential to interaction, and I focus my definition on the feelings and emotions we feel before, during, and after the happening of a given interaction. Thus, the goal of our final project is to stimulate feelings and create a dialogue when an audience encounters a piece of art work. Our project, “When the mind meets the eye” align with my definition of interaction because we created an unconventional form of interacting with a laptop computer and with the painting we know so well, the Mona Lisa.
However, some of our project results did not align well with my definition. For instance, we were not able to rewrite the code and use a button to store the value from the potentiometer, making it very counterintuitive for the users to interact with our console. During user testing, one of the biggest setbacks we encountered was that the users were confused about our design concept. They could not draw the connection between the questions about college life and the final Mona Lisa image. This failure was quite revealing, because it propelled us to revisit our initial design intention and figured that those “personality test” questions did not serve the purpose of our interactive system. We rewrite our questions into something more related to our design intention and art. If we were to have more time, we would rewrite the code so that users can press the button to store the value for each question. Perhaps we can also redesign our console, so that users might be able to touch an art object to trigger some forms of interaction.
In general, our project creates a novel way of interacting with art objects. Users encounter our art creation not just through direct visual perception, but also tactile experience and different levels to contemplation. Hopefully, the project makes the audience rethink the dialogue with the art piece, the artist, and other audiences around; by answering those questions about art and observing seemingly unrelated styles. The interactive system is designed in such a way so that the audiences are not simply passive recipients of taken-for-granted messages from an artwork. Instead, we hope that our audiences are actively engaged in the interaction and seeing how emotions and feelings are communicated through art. They can actively construe meanings from a given art piece, shape and reshape what the interaction means to them. The next time when our audiences go to a museum, hopefully, they are able to wonder and contemplate more on the meanings and feelings behind the visual representation. They can use creativity to imagine the various meanings and interpretations behind a piece of art.
Appendixes
I. Processing code
// IMA NYU Shanghai
// Interaction Lab
// For receiving multiple values from Arduino to Processing
/*
* Based on the readStringUntil() example by Tom Igoe
* https://processing.org/reference/libraries/serial/Serial_readStringUntil_.html
*/
//File Titles
//Mouths: 1 “mouth-1.png”, 2 “mouth-2.png”, 3 “mouth-3.png”, 4 “mouth-4.png”, 5 “mouth-5.png”, 6 “mouth-6.png”
//Eyes: 1. “eyes-1.png” 2. “eyes-2.png”, 3. “eyes-3.png”, 4. “eyes-4.png”, 5. “eyes-5.png”, 6. “eyes-6.png”
//Accessories: 1. “feature-2.png”, 2. “feature-3.png”, 3. “feature-4.png”, 4. “f5.png”,
//SERIAL COMMUNICATION
import processing.serial.*;
Serial myPort;
String Mouths[] = {“mouth-1.png”, “mouth-2.png”, “mouth-3.png”, “mouth-4.png”, “mouth-5.png”, “mouth-6.png”};
String Eyes[] ={“eyes-1.png”, “eyes-2.png”, “eyes-3.png”, “eyes-4.png”, “eyes-5.png”, “eyes-6.png”};
String Features[] ={“feature-2.png”, “feature-3.png”, “feature-4.png”, “f5.png”, };
//QUESTIONS
String[] questions = {“How do you feel when you see the Mona Lisa?”, “What was your last experience at a museum?”, “How often do you see yourself as an artist?”};
int questionIndex = 0;
boolean intro = true;
boolean oneTime = false;
//boolean reset
//ANSWERS
int[] answers = new int[questions.length];
int answer = 0;
String wholemessage;
int startbutton;
//TIMER VARIABLE
int startTime = 0;
int timerLength = 12;
//QUESTIONAIRE SWITCH
boolean askingQuestions = false;
boolean creatingPicture = false;
//mona lisa background (defining variable)
PImage mona_start;
PImage mona_question;
PImage mona_final;
PImage mouth[] = new PImage[6];
PImage eyes[]= new PImage[6];
PImage features[]= new PImage [5];
//Font
PFont font;
//PShape mona;
//PShape eyes1;
int[] values = new int[2];
String[] list = new String[2];
float alpha1 = 0;
float alpha2 = 0;
float alpha3 = 0;
void setup() {
fullScreen();
//size(1440, 900);
//size(600, 600);
mona_start=loadImage(“mona_q.png”);
mona_question=loadImage(“mona_qq.png”);
mona_final=loadImage(“mona.png”);
//mona=loadShape(“artboard1.svg”);
myPort = new Serial(this, Serial.list()[1], 9600);
//[0]= ellipse (100,200,20,30);
//background(0);
//ellipse (100,200,20,30);
for (int i =0; i < Mouths.length; i++) {
mouth[i]=loadImage(Mouths[i]);
}
for (int i =0; i< Eyes.length; i++) {
eyes[i]=loadImage(Eyes[i]);
}
for (int i=0; i<Features.length; i++) {
features[i]=loadImage(Features[i]);
}
printArray(Serial.list());
/*font = createFont(“Nobile-Bold.ttf”,60);
textFont(font);*/
String[] fontList = PFont.list();
printArray(fontList);
font = createFont(“PermanentMarker-Regular.ttf”, 40);
textFont(font);
}
void draw() {
if (intro==true) {
background(0, 0, 0);
imageMode(CENTER);
image(mona_question, width/2, height/2, width, height);
pushMatrix();
translate(640,130);
rotate(HALF_PI);
textSize(60);
text(“When the mind meets the eye”, -90, -50);
textSize(50);
//text(“Press Start to Begin”, 30, 70);
textSize(30);
text(“1. Press START”, -70, 70);
text(“2. Use Slider to Answer Questions”, -70, 130);
text(“3. Enjoy Your Creation!”, -70, 190);
popMatrix();
}
//shape(mona, 50, 50, 50, 50);
//my laptop’s screen size
//text(“positioning placeholder”, 900,200);
//image(mona, 0, 0, 1560, 2600);
//image(name,x,y,width,height)
//shape(pshape name, x, y, width, height);
//println(mouseX, mouseY);
//testing location and size
//Uncomment these lines to test features (SAM)
//image(mouth[0-5], 980, 425, 200, 200);
//image(eyes[0-5],1145, 400, 200,200);
//image(features[0-5],50,50,50,50);
updateSerial();
//println(answer);
//}
if (startbutton == 0 && !askingQuestions && creatingPicture == false) {
startTimer(); //put this wherever it is you start asking questions
askingQuestions = true;
intro = false;
// start image here
imageMode(CENTER);
image(mona_start, width/2, height/2, width, height);
}
if (askingQuestions == true) {
// questions image here
/*for loop checking that all the questions in an array
titled questions is being iterated through. e.g array will look like:
[“whats your favorite number out of 6? XD”, “another question”, “anotha”]
so when we iterate through each question, we will start with the first question at index 0, then
start the timer and check if the timers complete. once its complete, we can then store the answer
in an array of equal length to the array titled questions. after that, the loop will move onto the
next question and the process will repeat. what you do with the array of answers is up to you afterwards*/
//Show questions[questionIndex]
// start image here
imageMode(CENTER);
image(mona_question, width/2, height/2, width, height);
pushMatrix();
translate(width/2, height/2);
rotate(HALF_PI);
textSize(36);
fill(255);
text(questions[questionIndex], 0, 0);
textAlign(CENTER);
printArray(answers);
popMatrix();
//if the timer is up
if (millis()/1000 – startTime > timerLength) {
//record answer:
answers[questionIndex] = answer;
//move to next question: questionIndex += 1
questionIndex += 1;
//restart the timer
startTimer();
}
drawTime();
ellipse(650, height * 1/7, 30, 30);
ellipse(650, height * 2/7, 30, 30);
ellipse(650, height * 3/7, 30, 30);
ellipse(650, height * 4/7, 30, 30);
ellipse(650, height * 5/7, 30, 30);
ellipse(650, height * 6/7, 30, 30);
textAlign(CENTER);
textSize(30);
if (values[0] == 0 ) {
fill(255,249,121);
ellipse(650, height * 1/7, 28, 28);
pushMatrix();
//ellipse(600, height * 1/7, 30, 30);
translate(580, height * 1/7);
rotate(HALF_PI);
//his codes
if(questionIndex == 0) {
fill(255);
text(“Irrelevant”, 0, 0);
} else if(questionIndex == 1) {
fill(255);
text(“Boring”, 0, 0);
} else {
fill(255);
text(“Never”, 0, 0);
}
popMatrix();
}
if (values[0] == 1) {
fill(255,249,121);
ellipse(650, height * 2/7, 28, 28);
pushMatrix();
translate(580, height * 2/7);
rotate(HALF_PI);
if(questionIndex == 0) {
fill(255);
text(“Overrated”, 0, 0);
} else if(questionIndex == 1) {
fill(255);
text(“Perplexed”, 0, 0);
} else {
fill(255);
text(“I’m No Picasso”, 0, 0);
}
popMatrix();
}
if (values[0] == 2) {
fill(255,249,121);
ellipse(650, height * 3/7, 28, 28);
pushMatrix();
translate(580, height * 3/7);
rotate (HALF_PI);
if(questionIndex == 0) {
fill(255);
text(“Ambiguous”, 0, 0);
} else if(questionIndex == 1) {
fill(255);
text(“Touchy Feely”, 0, 0);
} else {
fill(255);
text(“Sometimes Warhol”, 0, 0);
}
popMatrix();
}
if (values[0] == 3) {
fill(255,249,121);
ellipse(650, height * 4/7, 28, 28);
pushMatrix();
translate(580, height * 4/7);
rotate (HALF_PI);
if(questionIndex == 0) {
fill(255);
text(“Intrigued”, 0, 0);
} else if(questionIndex == 1) {
fill(255);
text(“Selfie Time!”, 0, 0);
} else {
fill(255);
text(“Weekend Van Gogh”, 0, 0);
}
popMatrix();
}
if (values[0] == 4) {
fill(255,249,121);
ellipse(650, height * 5/7, 28, 28);
pushMatrix();
translate(580, height * 5/7);
rotate (HALF_PI);
if(questionIndex == 0) {
fill(255);
text(“Fascinated”, 0, 0);
} else if(questionIndex == 1) {
fill(255);
text(“Mesmerizing”, 0, 0);
} else {
fill(255);
text(“Daily Monet”, 0, 0);
}
popMatrix();
}
if (values[0] == 5) {
fill(255,249,121);
ellipse(650, height * 6/7, 28, 28);
pushMatrix();
translate(580, height * 6/7);
rotate (HALF_PI);
if(questionIndex == 0) {
fill(255);
text(“Pure Ecstasy!”, 0, 0);
} else if(questionIndex == 1) {
fill(255);
text(“In Love”, 0, 0);
} else {
fill(255);
text(“I AM ART”, 0, 0);
}
popMatrix();
}
//SHOW TIMER / TRACK INPUT
//check that you’ve reached the end
if (questionIndex == questions.length) {
askingQuestions = false;
creatingPicture = true;
questionIndex = 0;
}
}
//PART AFTER ASKING QUESTIONS
//each question as an “if” statement, else if…. and then within each have a switch
//ex. case 1…… break;
if (creatingPicture==true) {
// final image
imageMode(CENTER);
image(mona_final, width/2, height/2, width, height);
pushMatrix();
float yOffset1 = sin(alpha1) * 5;
alpha1 += 1.6;
translate(0, yOffset1);
switch (answers[0]) {
case 0:
image(mouth[0], 1010, 375, 67, 130);
break;
case 1:
image(mouth[1], 1010, 375, 67, 130);
break;
case 2:
image(mouth[2], 1000, 375, 67, 130);
break;
case 3:
image(mouth[3], 1020, 405, 67, 130);
break;
case 4:
image(mouth[4], 1000, 375, 66, 150);
break;
case 5:
image(mouth[5], 1000, 375, 90, 150);
break;
default:
//image(mouth[0], 1010,375, 67,130);
break;
}
popMatrix();
pushMatrix();
float yOffset2 = sin(alpha2) * 7;
alpha2 += 1.2;
translate(0, yOffset2);
switch(answers[1]) {
case 0:
image(eyes[0], 1130, 370, 85, 200);
break;
case 1:
image(eyes[1], 1130, 370, 100, 250);
break;
case 2:
image(eyes[2], 1130, 370, 108, 230);
break;
case 3:
image(eyes[3], 1135, 370, 161, 230);
break;
case 4:
image (eyes[4], 1135, 370, 97, 230);
break;
case 5:
image (eyes[5], 1130, 370, 113, 200);
break;
default:
//image(eyes[0], 1130,370, 85,200);
break;
}
popMatrix();
pushMatrix();
float yOffset3 = sin(alpha3) * 6;
alpha3 += 1;
translate(0, yOffset3);
// image(mouth[answers[0]], 980, 425, 200, 200);
//image(eyes[answers[1]], 1100, 400, 200, 200);
switch(answers[2]) {
case 0:
image(features[0], 1197, 217, 119, 85);
break;
case 1:
image(features[1], 321, 500, 280, 280);
break;
case 2:
image(features[1], 321, 500, 280, 280);
break;
case 3:
image(features[2], 345, 518, 310, 281);
break;
case 4:
image(features[2], 345, 518, 310, 281);
break;
case 5:
image(features[3], 1282, 287, 216, 280);
break;
default:
//image(features[0], 1197,217,119,85);
break;
}
popMatrix();
}
if (startbutton == 0) {
startTimer(); //reset
intro = true;
creatingPicture=false;
}
}
void updateSerial() {
//sending start message to Arduino
while (myPort.available() > 0) {
wholemessage = myPort.readStringUntil(10); //10 is the ASCII code for ‘new-line’
if (wholemessage != null) {
//println(wholemessage);
values = int(split(trim(wholemessage), ‘,’));
for (int i = 0; i < values.length; i ++) {
//values[i] = int(list[i]);
}
}
}
startbutton= values[1];
answer= values[0];
printArray(values);
}
void drawTime() {
fill(255, 255, 255);
noStroke();
rect(width/6, 0, width/30, height * ((startTime + timerLength)- millis()/1000) / timerLength);
fill(255);
rectMode(CENTER);
//text((startTime + 10) – millis()/1000, width/2, 5*height/6);
rectMode(CORNER);
}
void startTimer() {
startTime = millis()/1000;
}
II. Arduino code
int sensor1 = A0;
int button = 9;
//int sensor2 = 9;
int startbuttonvalue = 0;
void setup() {
// put your setup code here, to run once:
Serial.begin(9600);
pinMode(button, INPUT_PULLUP);
//using this in order to not use a breadboard
//starts at 1 instead of 0
}
void loop() {
//while (Serial.available()) {
//Serial.read();
int sensor1Value = map(analogRead(sensor1), 0, 1023, 0, 5);
startbuttonvalue = digitalRead(button);
Serial.print(sensor1Value);
Serial.print(“,”);
Serial.print(startbuttonvalue);
Serial.println();
delay(20);
//}
}