CONTEXT AND SIGNIFICANCE
In the previous research, we defined interaction as a cyclic process where two actors alternately receive and respond to the message, which in computer terms are called: input, processing, and output. For the midterm project, I want to make something either entertaining or useful, which includes the process of interaction. The inspiration for my project comes from a video I watched a long time ago about a blooming mechanical tulip: https://youtu.be/NvRck1Xt7Oc. The blooming flower is beautiful (entertaining) as well as interactive, which includes the process of input (touch sensor), processing (code running) and output (flowers bursting). Inspired by this mechanical tulip, my partner and I decided to make a similar robotic flower and I found a manufacturing instructions:https://www.hackster.io/jiripraus/ever-blooming-mechanical-tulip-1b0323. However, during the manufacturing process, we found that the operating mechanism of the robotic flower was too complicated, which would take a long time to complete. Moreover, because the petals have a certain radian, we couldn’t use a 3D printer to print them. At the same time, the brass we have was not strong enough to make flower stems to support the petals. At the suggestion of professor Rudi, my partner and I decided to give up making the robotic flower as the midterm project after a fierce ideological struggle. This failure inspired me that I should have made a complete and feasible plan before doing the project rather than design and make it at the same time, which could easily cause problems.
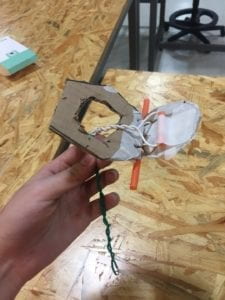
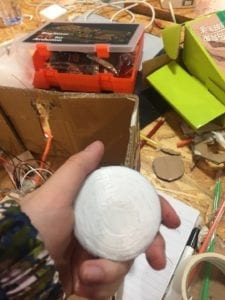
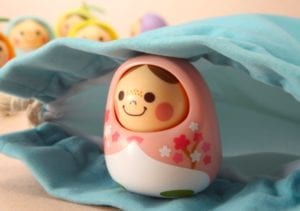
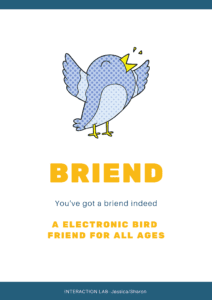
Fortunately, we have gained new inspiration from the mechanism of petal movement. In our process of trying to use servo to make petals move, Professor Rudi taught us to use straws to transform servo’s rotational motion into petal’s upward and downward motion. Inspired by this movement mechanism, my partner Jessica came up with the idea that we can make a robotic bird, which is entertaining, interactive and more practical to achieve. So the direction of our project changed to making a robotic bird. In addition to realizing the ornamental function, the robotic bird can also make lonely people have emotional resonance because it looks like a pet. It could be a good listener when users feel lonely or stressful. This project reminds me of my favorite toy when I was a child, which is called Unazukin. Unazukins are voice activated and react to voice, nodding and shaking their head. When people talk to the Unazukin, it can give “yes”(nodding) or “no”(shaking head) reaction. Similar to Unazukin, our project Brined is a healing commodity that helps relieve stress. But instead of nodding and shaking head, we tried to give the bird personality to enable people to achieve emotional resonance with it. When stroked by people, the cute bird would flap its wings up and down, and when hugged, it would chirp like a real bird. Briend is like your real friend. The project aims at kids from 5-10 years old because at that certain age they need a good listener for their thoughts which may be neglected by adults. Some lonely or stressful adults may also need Briend to hear their secrets which cannot be told to other people.
CONCEPTION AND DESIGN
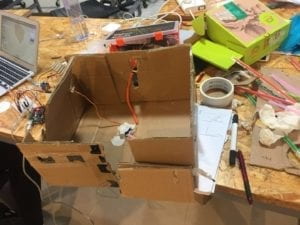
As I mentioned above, we hope that Briend could have as many emotional resonances as possible with users. To achieve this, we try to make Briend cute and realistic. We designed pictures of clouds, the sun, notes on the left and right sides of Briend to create an atmosphere in which birds fly in the sky. We decided to use paper of the same color as its body part to make the bird’s head, including the beak, and chose the blue feathers attached to the bird’s wings to make it more realistic. To give the wings weight sense, we decided to make the wing bracket out of strong brass, and then added feathers. Moreover, we use LEDs with different colors to make Briend more beautiful. In terms of function, we use the straw to fix the copper wires which are attached to the wings, so that the copper wires can be moved while its moving range is fixed. We originally wrote the code to make the buzzer play music (“City in the Sky”) after the user gives input message. But because we wanted to make the Briend more realistic, we finally gave up the song and tried to debug the buzzer to imitate the real bird sounds.
FABRICATION AND PRODUCTION
In the beginning, we worked on the basic function. Combined with the knowledge learned in class, we achieved the function of controlling LEDs and servo by the touch sensor.
Then we designed the appearance, measured the size we wanted and used laser cutting to manufacture the entity.
Next step was to use straws and copper wires to build the moving system. This step took us a lot of time. At first, we don’t know where to put the straws and how we can make them fixed to the box. After many attempts, we finally succeeded in achieving our goal: we folded the straw at right angles to move the wings up and down, and used both hot melt adhesive and transparent tape to enhance the stability of the straw.
After finishing the mechanism, we modified the code to make the wings move in proper speed. Then we did some paper cutting and made the head.
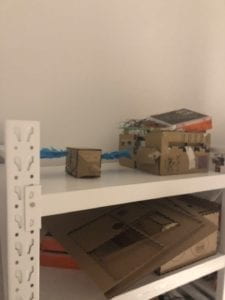
The production process has entered the next stage. In the process of User Testing, we got some helpful feedback and suggestions: 1. The LEDs inside the box is not obvious; 2. It doesn’t have much function; 3. The touch sensor is exposed on the box and needs to be beautified; 4. The body part of Brind doesn’t look like a bird. In order to solve these problems, we further optimized our project. Firstly, we drilled a few holes in the top of Briend to place the LED so that users could see the light change more clearly and they can receive obvious output besides the swinging wings. Secondly, we added an infrared distance sensor, which is attached to the back of the bird to control the buzzer, and we chose to use it to simulate bird sounds instead of playing music. When a user hugs a bird, it makes a chirp, of which meaning can be understood individually by the user, such as a sad or happy chirp. In this way, while increasing project interaction, we made Briend more like a real bird. Besides, we cover Briend’s body with some blue feathers, including covering the touch sensor. This step made Briend more realistic while beautifying the sensor. At the same time, the texture of feathers increases the comfort of users when they touch the sensor. In case some users don’t know how to do the input at all, we wrote “scratch me here” next to the touch sensor in tiny words to prompt users and add interest at the same time. In general, I think User Testing is beneficial to our project. It effectively improves our project’s interactivity, feasibility, learnability, comfortability and so on.
CONCLUSIONS
The goal of our project is to entertain people, especially kids or stressful people, as well as embody interaction. The two actors of this interaction process are the user and Briend. Touching the touch sensor and being closer to the bird are users’ input messages. Once receiving the message, Briend begins to process and quickly gives a specific reaction. Seeing the entertaining output, users may feel the emotional resonance and start a new round of interaction. As an entertainment project, Briend achieves interactive function and could catch people’s eyes at first. But sooner, because of the predictable responses, users may feel a little bit bored. If we have more time, we will make input produce a variety of outputs. These unpredictable outputs could surprise users and stimulate their input again. What’s more, we could make it more beautiful and easier to carry by changing the size of Briend to add the board at its back. From the failure of designing the robotic flower, I learned that it’s necessary to make practical and clear plans for each step. Therefore, before making Briend, we divided the project into multiple easy-to-achieve small goals and set tasks for each day. By doing this, I felt clear about each step I was doing and gained confidence as each step was completed. Through the project, I began to really understand the design process. Moreover, when faced problems, as a designer and creator, we should be patient as well as confident about our project. If we don’t believe what we do, how do users trust us? By doing the project, I became a designer from an ordinary user of interactive devices in my life. I began to realize the charm and significance of Interactive Media Art – a sense of achievement in creating new things as well as constantly improving, constantly learning, for better user experience. Even with small designs, designers have the power to change the world.
CODE
#include <Servo.h>
Servo myservo; // create servo object to control a servo
// twelve servo objects can be created on most boards
int pos = 0; // variable to store the servo position
void setup() {
pinMode(A0, INPUT);
pinMode(13, OUTPUT);
pinMode(12, OUTPUT);
pinMode(11, OUTPUT);
pinMode(10, OUTPUT);
pinMode(7, OUTPUT);
pinMode(8, OUTPUT);
pinMode(6, OUTPUT);
pinMode(2, OUTPUT);
pinMode(5, OUTPUT);
pinMode(4, OUTPUT);
pinMode(1, OUTPUT);
myservo.attach(9);
Serial.begin(9600);
}
void loop() {
Serial.println(analogRead(A0));
Serial.println(analogRead(A2));
if (analogRead(A0) > 100) {
digitalWrite(13, HIGH);
digitalWrite(12, HIGH);
digitalWrite(11, HIGH);
digitalWrite(10, HIGH);
digitalWrite(8, HIGH);
digitalWrite(6, HIGH);
digitalWrite(2, HIGH);
digitalWrite(5, HIGH);
digitalWrite(4, HIGH);
digitalWrite(1, HIGH);
for (pos = 0; pos <= 130; pos += 3) { // goes from 0 degrees to 180 degrees
// in steps of 1 degree
myservo.write(pos); // tell servo to go to position in variable ‘pos’
delay(10); // waits 15ms for the servo to reach the position
}
for (pos = 130; pos >= 0; pos -= 3) { // goes from 180 degrees to 0 degrees
myservo.write(pos); // tell servo to go to position in variable ‘pos’
delay(10);
}
} else {
digitalWrite(13, LOW);
digitalWrite(12, LOW);
digitalWrite(11, LOW);
digitalWrite(10, LOW);
digitalWrite(8, LOW);
digitalWrite(6, LOW);
digitalWrite(2, LOW);
digitalWrite(5, LOW);
digitalWrite(4, LOW);
digitalWrite(1, LOW);
//}
delay(100);
}
if(analogRead(A2) > 500){
digitalWrite(7, HIGH);
}else{
digitalWrite(7, LOW);
}
}